

Page 1

English version
English version
WWW.SWEEX.COM
Sweex 300K webcam
NB: Before connecting your USB camera, first install the CD-ROM.
Advantages
Easy to install – After inserting the CD-ROM the software installation is completed almost entirely automatically and next connect the Sweex USB
webcam to a USB port.
Live Video & Conference Ready – Use the Sweex USB webcam to chat with relatives, friends and acquaintances on the other side of the world.
Security Option – This option lets you know if there is any movement in a room, ideal for areas that need to be monitored.
Twain function – The Sweex US webcam is easy to use with photo editing programs that are ‘Twain Compatible’ such as Photoshop and Corel.
High Quality Capture Images – The Sweex USB webcam has the option to capture high quality images during a ‘Webcam Session’.
Manual Control – Brightness, Contrast, Gamma, Hue, Saturation, White Balance, Back light compensation and Auto Exposure can all be set manually.
Key Characteristics
• Support for VGA Sensor
• USB 1.1 Interface
• Multi Video, Output, RGB and I420
• Multi Output size 160x 120; 176 x 144; 320x 240; 352 x 288; 640 x 480
• VGA Mode: 15 frames per second, 30 fps @ CIF mode
• Small size 1/3” lens
• Focus adjustable from 30 mm to infinity
• Win 98se / Win ME / Win 2K / Win XP compatible
System Requirements
Pentium 233 or higher
Min. 32 MB internal memory
One free USB port
Min. 20 MB free space on hard disk
Win 98SE / Win ME / Win 2K / Win XP
Index
• Installation of USB Devices In General
• Starting the Installation under Win 2000 & Win XP
• Connecting the Webcam under Win 2000 & Win XP
• Starting the Installation under Win 98 & Win ME
• Connecting the Webcam under Win 98 & Win ME
• Testing the camera using the AMCap program
Installation of USB Devices In General
It is important to remember that when installing devices that use a USB port, the drivers and software must be installed before the USB device is
plugged into the computer. If not done in this order, the installation may fail and cause many problems before the installation can be repaired.
This is also the case with our USB webcam.
Starting Installation under Win 2000 & Win XP
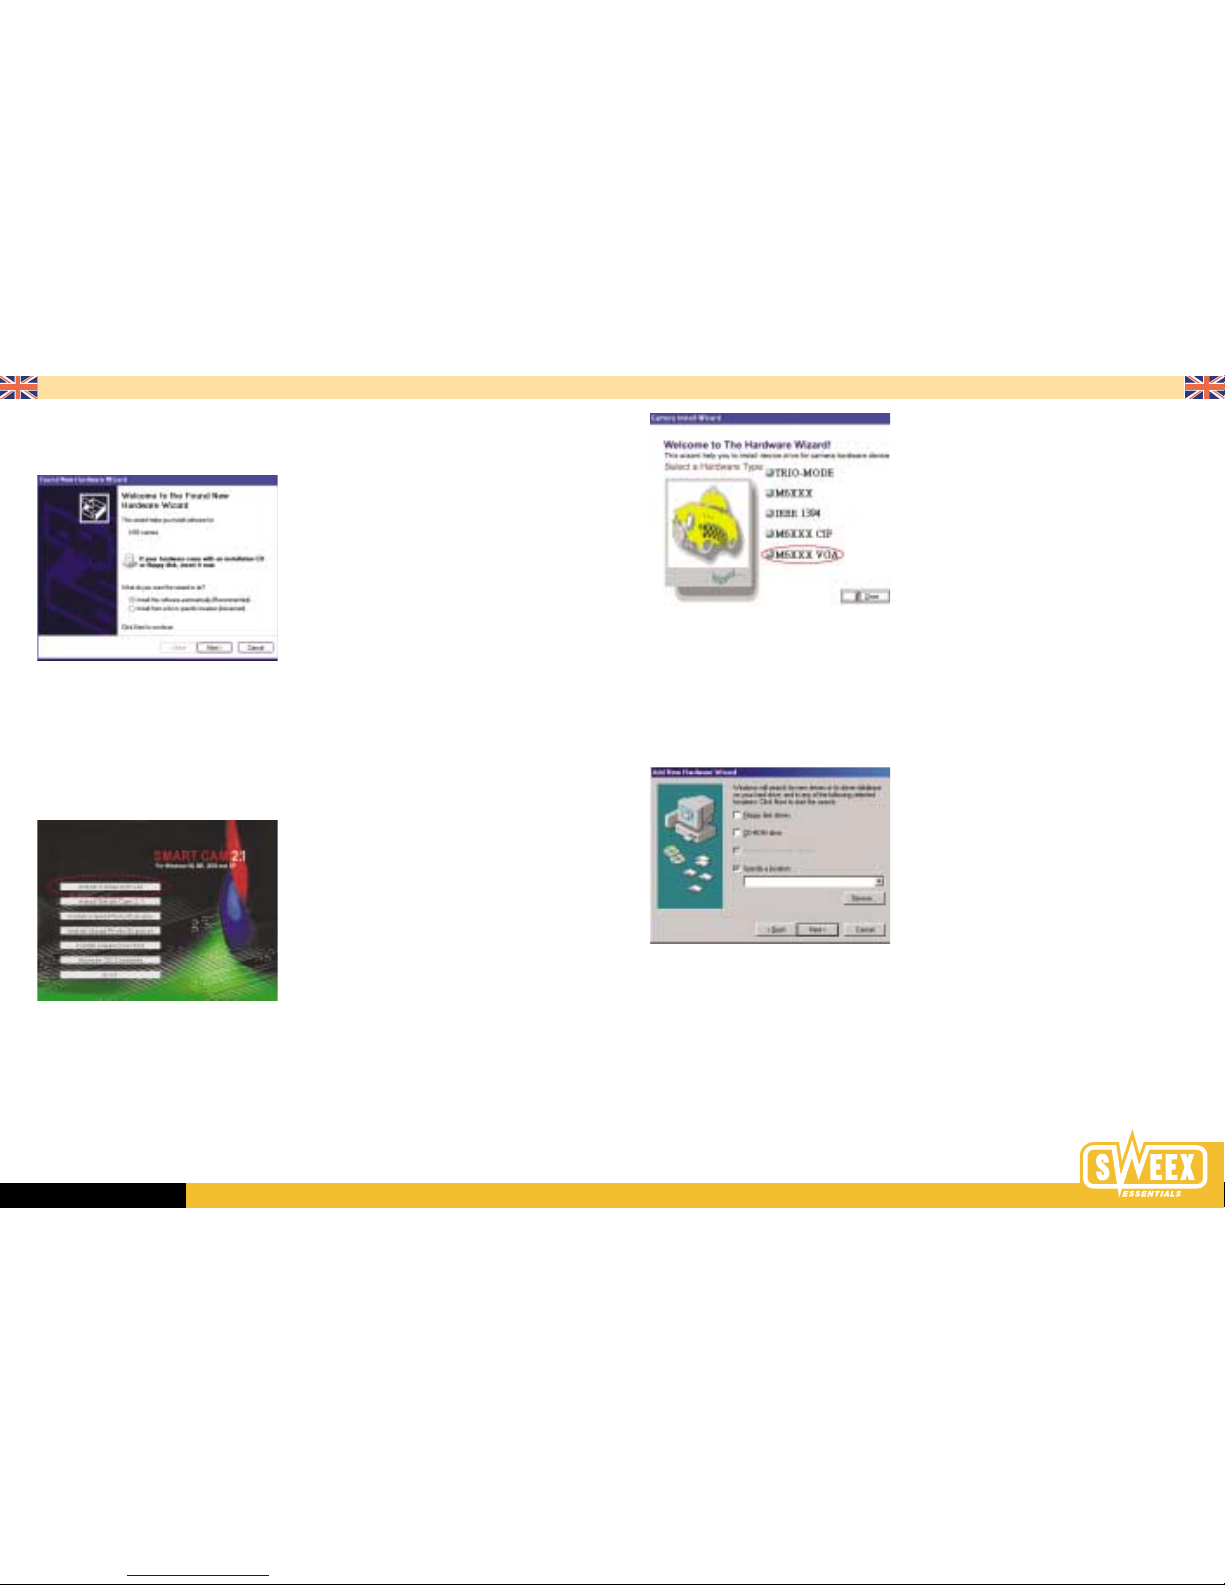
Insert the supplied CD-ROM in the CD-ROM drive and the CD will start automatically. The next screen will appear, ready for you to start installing the
Camera Driver. Select the option “Install Camera Driver”.
The splash screen of the installation CD
After selecting “Install Driver” the following screen is displayed. Select “M6XXX VGA type” to continue with the installation.
Select the following: M6XXX VGA
After selecting the correct device the Installshield will start up and you are prompted to click “Next” twice and then click “Install”. After the installation
click “Finish”. The driver is now installed correctly.
Page 2
After selecting the correct device the Installshield will start up and you are prompted to click “Next” twice and then “Install”. After the installation click
“Finish”. The driver is now installed correctly.
Connecting your USB Webcam (Win 98 & Win ME)
After connecting the Webcam you will need to locate the driver manually to complete the installation. First you will see the window below. Deselect all
options except: “Specify a location”. Next click the “Browse” button.
Deselect all options except “Specify a location” and click “Browse”.
English version
English version
WWW.SWEEX.COM
Connecting your USB Webcam (Win 2000 & WIN XP)
You can now connect your Webcam and the window below will appear. Everything is in the correct place (install the software automatically
(recommended) and click “Next” to continue with the installation. (The supplied CD-ROM of the Webcam must remain in your CD-ROM player!)
Windows will now start searching for the correct drivers. Leave the option “Detect Automatically” selected and click “Next”.
After a few seconds the installation will be completed and you can click “Finish”. Next it is time to test your webcam. Go to the end of this document
for further information on how to test the webcam.
Starting the Installation under Win 98 & Win ME
Insert the supplied CD-ROM in the CD-ROM drive and the CD will start automatically. The next screen will appear, ready for you to start installing the
Camera Driver. Select the option “Install Camera Driver”.
The splash screen of the installation CD
After selecting “Install Driver” the following screen is displayed. Select “M6XXX VGA type” to continue with the installation.
Page 3

English version
WWW.SWEEX.COM
You will need to find the location of the drivers manually for Windows. Select the directory on the CD-ROM:\drivers\HsVGA and click “OK”.
The drivers for Win 98, and Win ME can be found in HsVGA under drivers.
After you have clicked “OK”, you will return to the screen with the selection boxes. Click “Next”, followed by another “Next” and the installation will
begin. After 52% of the installation is completed the webcam will also need drivers from your Windows98 CD-ROM. Insert this into your CD-ROM player
when prompted. After installing the Win98 drivers the installation is completed and you can click “Finish”.
Testing the Webcam using the AMCAP program.
Go to Start -> Programs -> PC Camera (602a VGA) and select the AMCap program.
After AMCap has started up, you must first configure the program correctly to ensure you will be using a resolution of 640x480 pixels. You have
bought a 300K webcam, which means that the webcam (lens) hardware supports a resolution of 640x480 and there are no tricks used to convert a
resolution of 320x240 to 640x480 on your computer. The result is a much sharper and clearer display.
Go to Options -> Video Capture PIN and for Output Size enter resolution 640x480. Next click Apply -> OK.
Now it is time to carry out the test. Go to Options->Preview and a view from your webcam will be displayed.
If required you can adjust the colours, brightness and framerate in Amcap.
 Loading...