

Page 1
4. Set the kitchen sink into position being
careful that the overhang is uniform and
aligned to the cut-out.
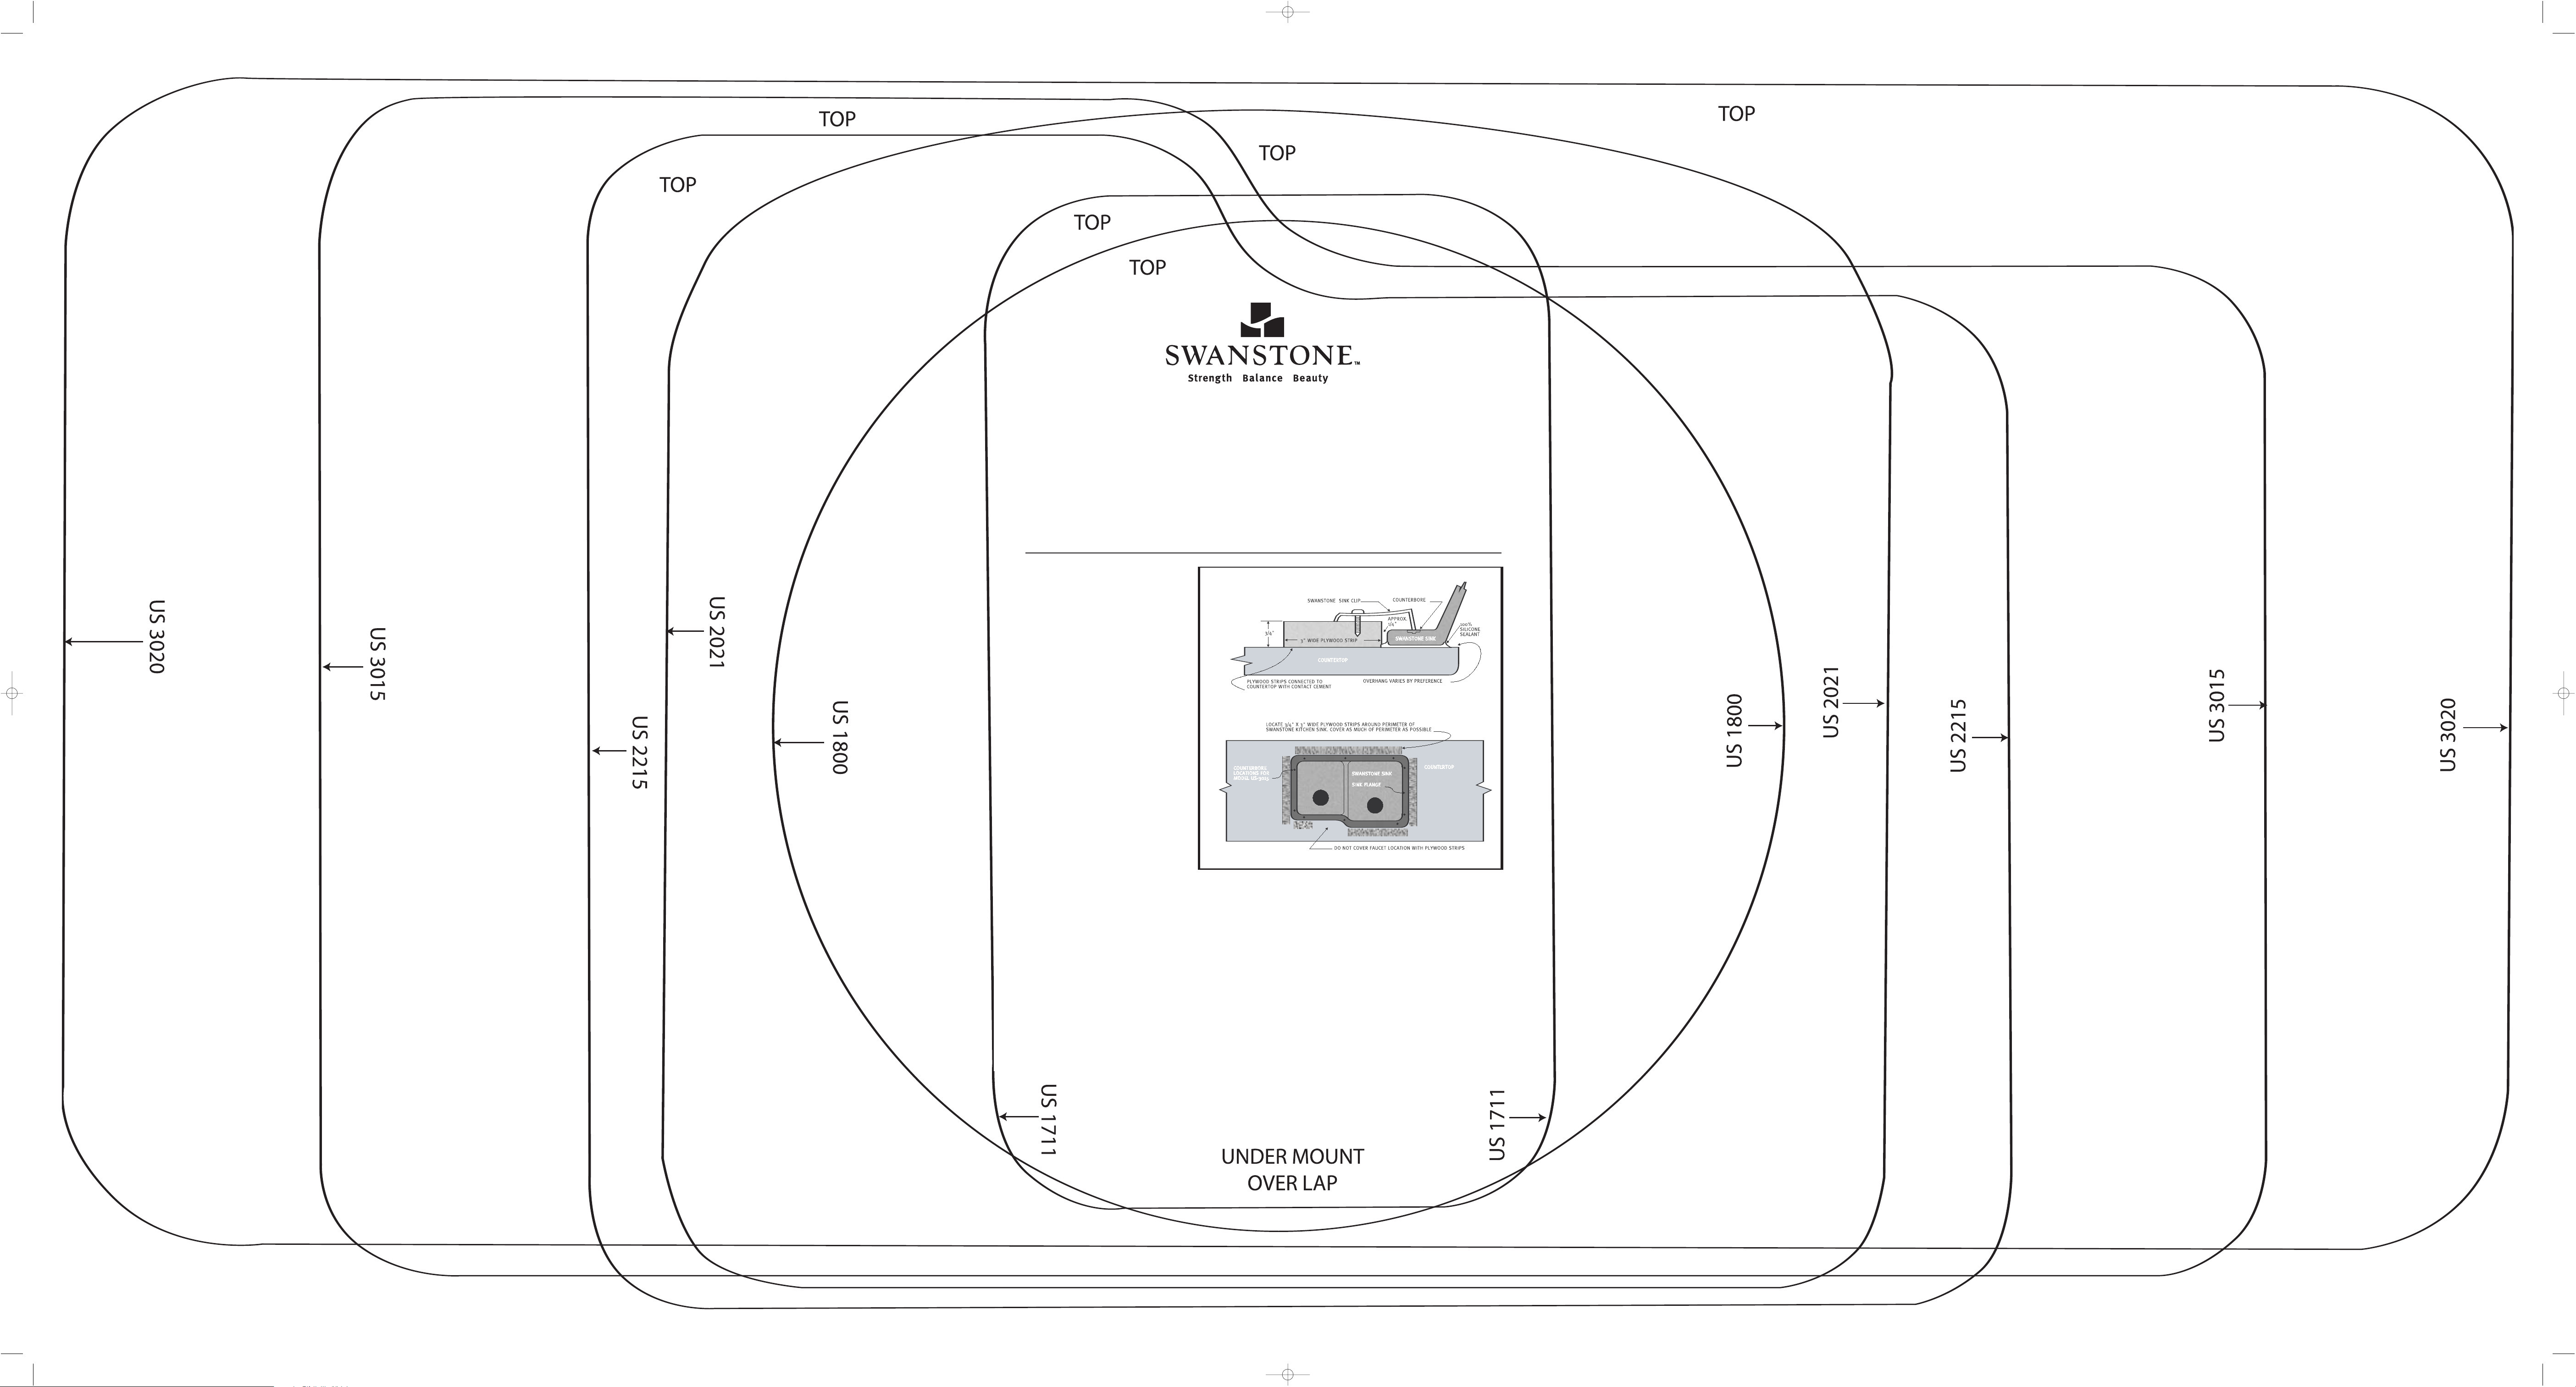
5. Cut 3” wide strips of 3/4” thick plywood
and trial fit around the perimeter of the
Swanstone kitchen sink (except where
faucet holes will be located). It is suggested
that a 1/4” space exist between the plywood
strips and the sink flange.
6. Join the plywood strips to the countertop surface with contact cement.
7. Remove the Swanstone sink and clean both the countertop and sink flange with denatured alcohol.
8. Apply a continuous bead of 100 percent silicone around the sink flange and set the sink into place.
9. Using the sink clamps and screws provided by Swan (1P3115-10), secure the Swanstone kitchen sink into place. A sink clip should be
positioned everywhere there is a counterbore located on the sink flange.
10. Lightly tighten screws so sink position can be verified.
11. Tighten screws securely. If desired, additional temporary clamps (not provided) can be used to pull the sink flange tightly to counter.
12. Use mineral spirits and a soft cloth to remove excess silicone that has been squeezed out by the mounting procedure. Be sure
that there is a consistent seal along the interior perimeter of the sink.
Working from the top of
the countertop
Working from the bottom of
the countertop
RECOMMENDED UNDERMOUNT/OVERLAP INSTALLATION
OF A SWANSTONE SOLID SURFACE KITCHEN SINK
The Swan Corporation will not be liable for damage of the countertop during or after installation. Prior to installation, inspect
all product for damage. Do not install damaged material or the
warranty will be null and void.
A Swanstone kitchen sink can be mechanically mounted to a
countertop surface other than Swanstone with 100% silicone
adhesive only. Mounting the Swanstone solid surface kitchen
sink to any solid surface other than Swanstone with a hard seam
will void the Swanstone warranty.
Supplied by Swan
• Kitchen sink
• Sink clips and screws
Material Required
• 100% silicone
• Mineral spirits
• Contact cement
• Denatured alcohol
• 3/4” plywood cut to 3” wide strips
• Plywood or Masonite material to fabricate a sink template.
1. Select the bowl template that applies to the
installation that you desire. Cut out the inside
of the template.
2. Position the template onto countertop at
the desired location. Sink position will be
determined by cabinet size, cabinet supporting
members and deck mounted fittings.
3. Cut sink hole into countertop per manufacturer’s recommendations. Finish sink hole as
desired with tools compatible with the manufacturer of the countertop.
FORM #IN2-10-07-2M
The Swan Corporation One City Centre Suite 2300 St. Louis, MO 63101 p(800) 325-7008 f(314) 231-8165
FORM #IN2-02-10-1M
33111_DA_Swan 9/20/10 11:06 AM Page 1
 Loading...