

Page 1

NEW
BARRIER FREE SHOWER FLOOR & RAMP
Installation Instructions
Barrier Free Shower Floor and Ramp
CROSS SECTION VIEW
ROUGH-IN DIMENSIONS
MODEL SIZE
ABCD
BF-3060 SHOWER FLOOR 30⬙ X 60⬙ 60-3/8⬙ 30-3/16⬙ 8⬙ 15⬙
BF-1260 RAMP 12⬙ X 60⬙ 60⬙ 12⬙ ——
Shower floor is available in either a right or left side drain.
INSTALLATION TIPS
A. Read instructions carefully and familiarize yourself with the parts.
B. Be certain the barrier free shower floor is the correct size and in good condition before beginning installation.
C. Make sure hole in sub-floor or slab is large enough to accommodate drain and will coincide with the hole in
the barrier free shower floor. Hole should be 6⬙ in diameter.
D. Make sure barrier free shower floor is level and all feet of the barrier free shower floor are making firm contact
with the sub-floor. It may be necessary to shim under the barrier free shower floor for best overall sub-floor
contact. For a more stable installation, it is suggested that the barrier free shower floor be nested in a bed or
mortar-type material (Quikrete). Improper installation will void the warranty.
E. Finished walls may be tiled-in over integral flanges of barrier free shower floor.
NOTE: If the barrier free shower floor installation calls for the barrier free shower floor ramp, it is essential that
the stainless steel clips be attached to the threshold of the barrier free shower floor prior to final fit. See the
reverse side of this sheet for the correct procedure for attaching these clips.
Page 2
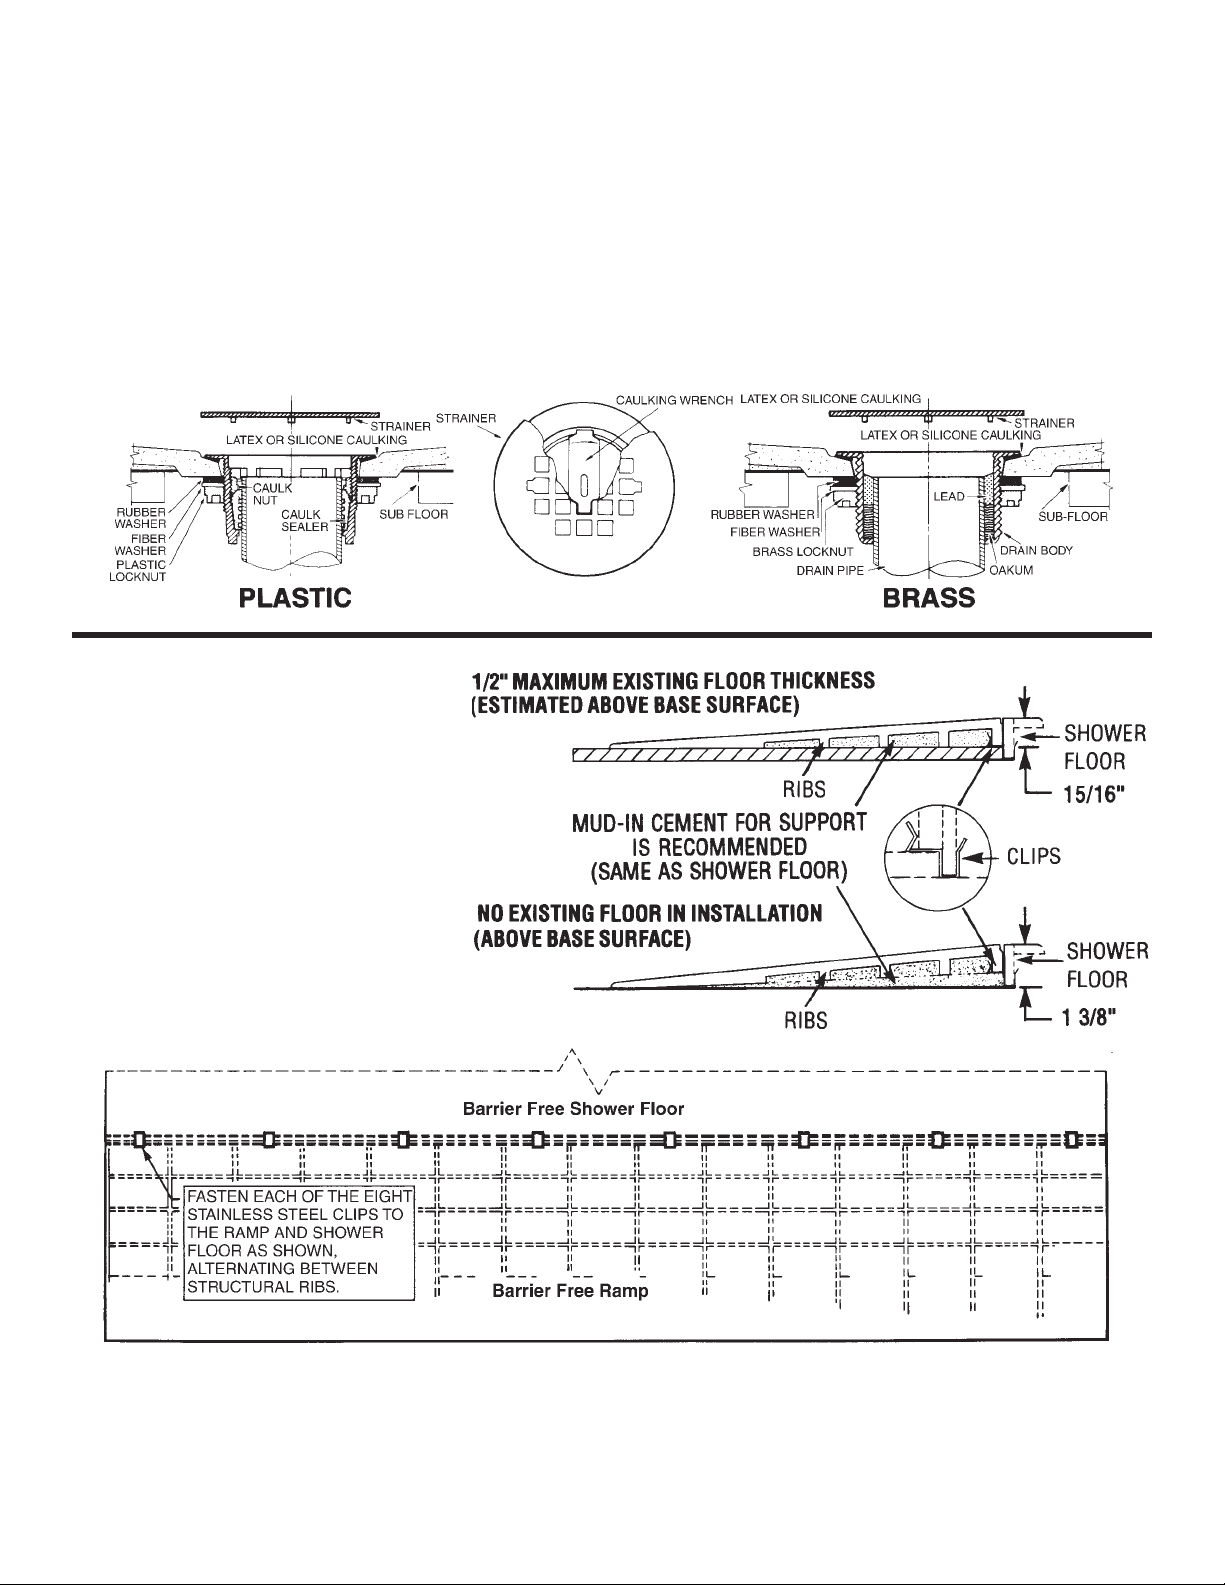
PLASTIC SELF-CAULKING TYPE DRAIN–Install drain to the shower floor. Make sure latex or silicone caulking (not
provided) is applied to the underside of drain body flanges and secure it as shown. Do not use oil base caulking or any
plastic type drain. May cause drain to break or distort.
FOR SELF-CAULKING (SPEEDY SEAL)–Using the caulking wrench provided, screw in caulking nut (clockwise) until it is
tight enough to compress sealer. Install strainer by snapping in the drain body.
BRASS CAULK-TYPE DRAIN–Install drain to the shower floor making sure latex or silicone caulking (not provided) is
applied to the underside of drain body flanges and secure it as shown. Lead drain to waste line and set shower floor on
sub-floor or slab making sure it is level and solid. Do not use nails, screws, clips, fasteners, or any type of anchor. This
design makes anchoring unnecessary. It will adjust to normal settling of building without damage.
FOR LEAD AND OAKUM CAULKING–Pack oakum (not provided) around drain pipe. Pour molten lead (not provided)
around drain pipe. Tamp lead carefully. Install strainer by snapping it in the drain body.
BARRIER FREE SHOWER FLOOR
SHOWER RAMP INSTALLATION
Note: If the installation of the barrier free
shower floor requires the attachment of
the barrier free shower floor ramp, it is
essential that the eight stainless steel
clips be attached to the threshold of the
barrier free shower floor prior to final fit. It
is equally important that these clips be
supported and are making firm contact
with the sub floor. It may be necessary to
shim under the barrier free shower floor
for best overall subfloor contact. It is suggested that the barrier free shower floor
ramp be nested in a bed of mortar type
material (Quickrete).
HOW TO CARE FOR YOUR SWANSTONE SHOWER FLOOR
Solid Swanstone is uniquely impervious throughout its entire thickness. And it maintains its beauty in the most active
environments, is easily repaired, and resists stress, thermal cracking, and peeling. Use standard household cleaning
agents. No surface coating to wear through. Same material throughout.
FORM #222-12-94-5M
 Loading...