

Page 1
Read ALL instructions carefully BEFORE starting your installation
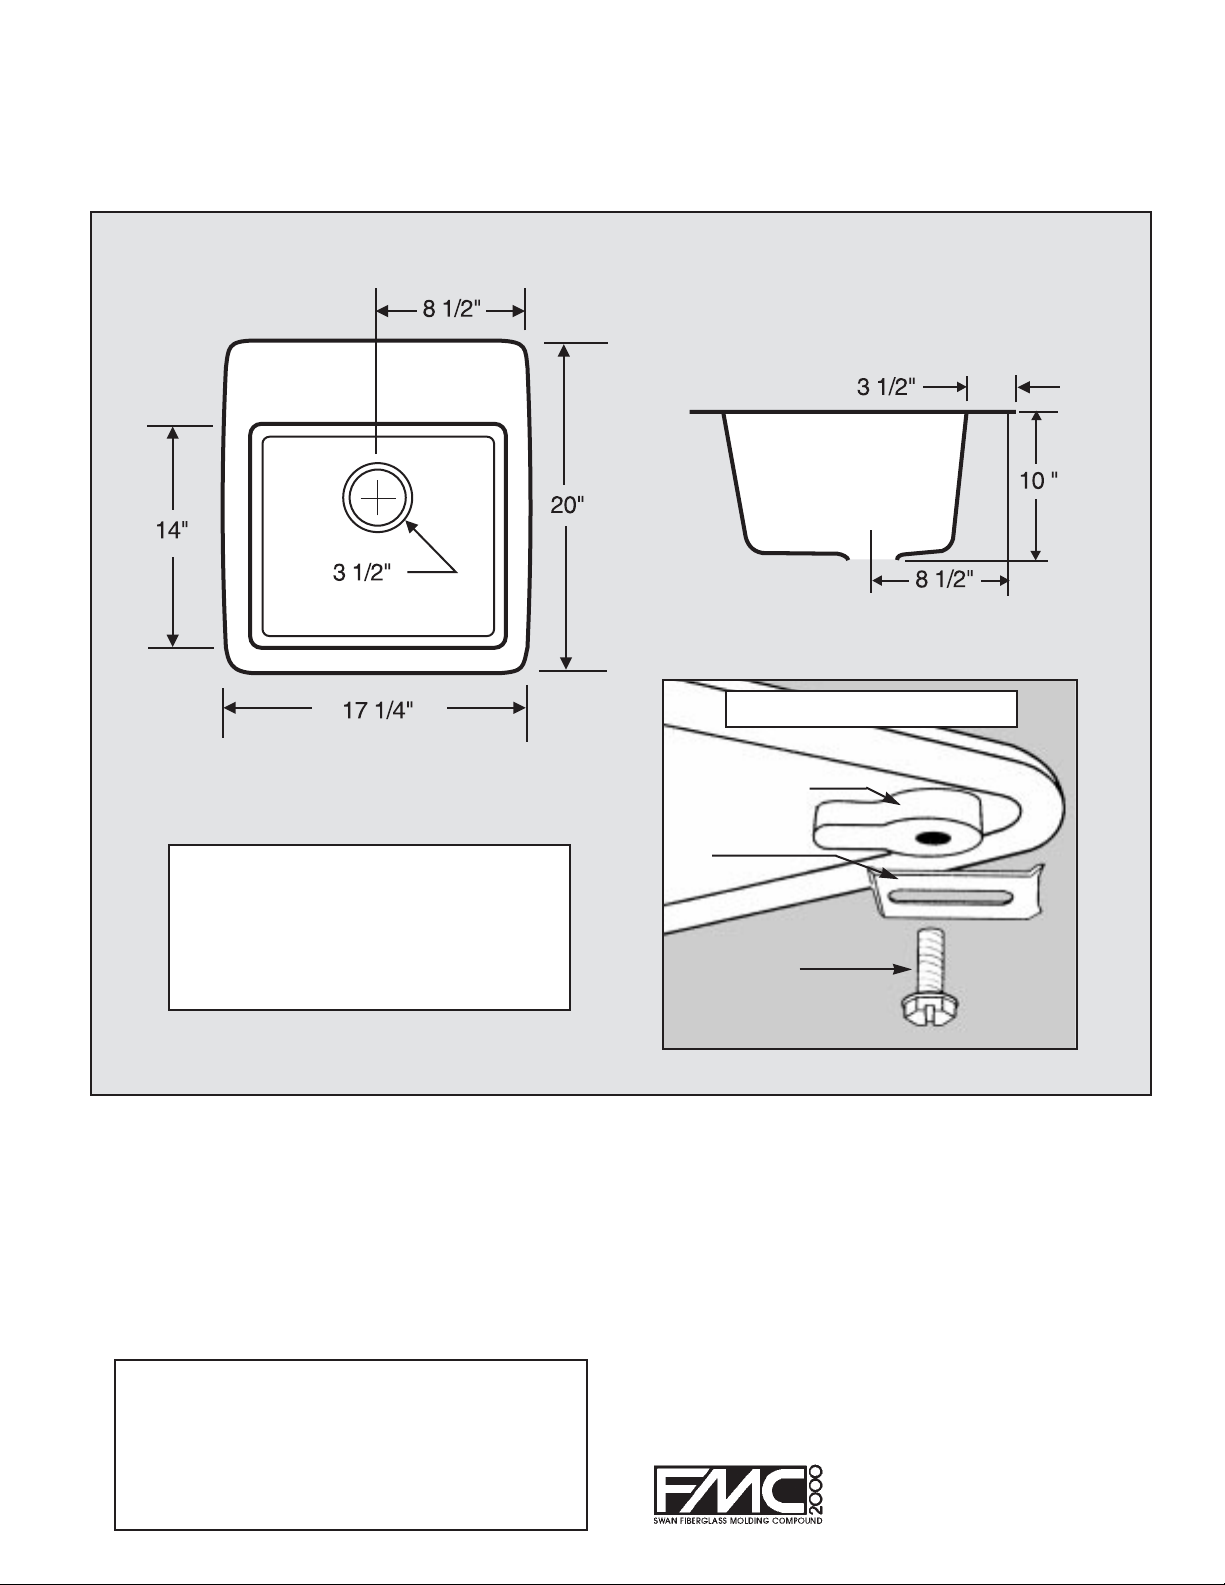
SELF-RIMMING DROP-IN TUB –– CAPACITY 8 GALLONS
1. Measure and cut counter hole for tub insertion 15 7/8” wide x
18
5
/8” long.Test fit tub. File an y areas which require widening.
2. After test fitting tub, remove from counter hole and install
faucet (not included) and drain assembly (not included).A
standard 3
1
/2”drain assembly is recommended.
NOTE
For easy installation of final supply line connections, it
is suggested that, if possible, plumbing connection to
faucet be made at this point. Plumbing connections to
hot an cold supply line can then be made after drop-in
tub is secured to counter top.
3. Caulk along edges of 157/8”x 185/8”counter hole with 1/8”
bead of silicone or latex caulk (not included).
4. Set sink into place and assemble (see Figure 1). Alternate
from one threaded bolt to another until all bolts are tight.
5. Some caulking residue may flow from under tub flange.This
residue can be wiped clean following instructions on silicone
or latex caulking tube.
6. Attach drain waste and faucet plumbing as required.
Installation Procedure for
MODEL DIT-S
SELF-RIMMING DROP-IN TUB
IMPORTANT
It is recommended that a standard
3
1
/2”drain assembly (not included)
be used to complete the installation
of the Swan DIT-S self-rimming
drop-in T ub.
Mounting Point
Clip
Threaded Bolt
Mounting Assembly Figure 1
FORM #662-10-97-5M
.125 Thickness
 Loading...