

Page 1
INSTALLATION GUIDE
The Path To Enjoyment Starts Here…
If this device does not work when you first
plug it in, do not take it back to the store.
Contact the Swann Helpdesk using one of the Toll-Free
numbers shown on the back cover of this booklet.
Most problems can be quickly and easily fixed with a
quick chat with one of our friendly technical staff.
(Toll-Free available in the US and Australia only)
Business Security System
9 Channel Digital Video Recorder
With Motion Detection & Audio
*Please refer to the DMR’s instruction manual for more detailed information.
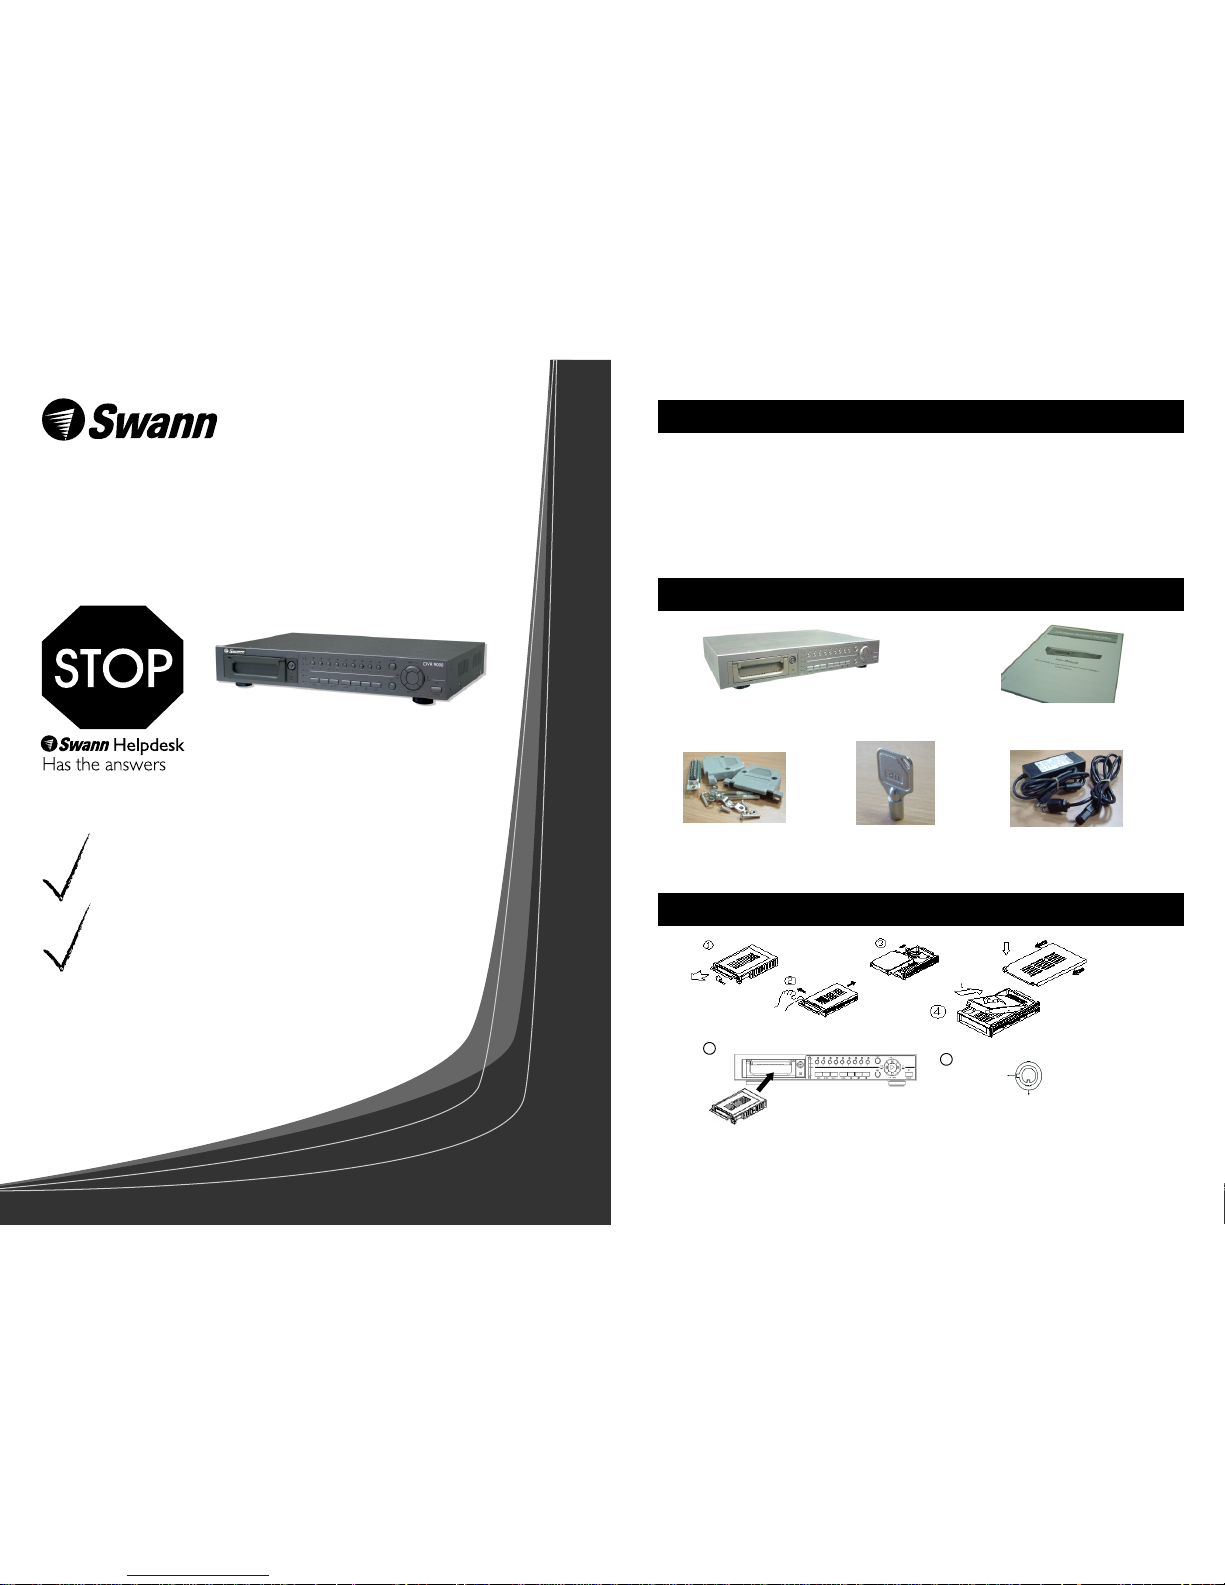
1. CHECK PACKAGE CONTENTS
2. INSTALL HDD
3. SITUATE AND CONNECT DMR
4. SYSTEM TIME SETUP
5. RECORD & PLAYBACK
Note: Wireless Networks (WiFi) may interfere with and/or experience interference caused by the transmitter
in this unit. Changing the receiver to another channel/frequency or setting the Wireless Network (i.e. Wireless
Access Point) to a frequency further away from the camera’s set frequency can alleviate this problem.
Consult the documentation of your Wireless LAN device for information on how to change the transmission
frequency. These cameras work with most wireless camera receivers that support 2414MHz, 2432MHz,
2450MHz and 2468MHz.
1. Make sure your package contains:
Digital Multiplex Recorder (with HDD cartridge)
User User
Accessories
Power Adapter and
CordManualManual
2 Keys
2. Install HDD:
5
6
A (locked)
B (unlocked)
(1)Remove the Cartridge Casing from the DMR
(2)Remove the Cover from the Cartridge Casing
(3)Connect the HDD into the Cartridge Casing
(4)Slide the top Cover over the Cartridge Casing
(5)Reinsert the Cartridge Casing into the DMR
(6)Lock the Cabinet
Page 2

3. Situate and connect DMR:
4. System Time setup:
Before using this unit, please setup the system time first
in order to process the functions correctly.
Press “Menu” button to enter menu list
Select “System” and choose date display
Press ”Up” or “Down” to choose the correct Date & Time,
and press press “Right” or “Left” to move digit location.
Press ”MENU” to exit and confirm current operation.
TITLE DISPLAY : ON
BAUD RATE : 9600
?
(SYSTEM)
AUDIO INPUT : 1
INT AUDIBLE ALARM : ON
EXT AUDIBLE ALARM : ON
MOTION AUDIBLE ALARM : ON
ALARM DURATION : 10 SEC
DWELL TIME : 02 SEC
MESSAGE LATCH : NO
TIME DISPLAY : Y/M/D
2003-JAN-02(THU) 17:37:09
NEW PASSWORD : XXXX
CLEAR HDD : MASTER
SYSTEM RESET : NO
REMOTE MODE : RS-232
REMOTE ID : 000
TITLE DISPLAY : ON
BAUD RATE : 9600BAUD RATE : 9600
?
(SYSTEM)
AUDIO INPUT : 1
INT AUDIBLE ALARM : ON
EXT AUDIBLE ALARM : ON
MOTION AUDIBLE ALARM : ON
ALARM DURATION : 10 SEC
DWELL TIME : 02 SEC
MESSAGE LATCH : NO
TIME DISPLAY : Y/M/D
2003-JAN-02(THU) 17:37:09
NEW PASSWORD : XXXX
CLEAR HDD : MASTER
SYSTEM RESET : NO
REMOTE MODE : RS-232
REMOTE ID : 000
??
(SYSTEM)
AUDIO INPUT : 1
INT AUDIBLE ALARM : ON
EXT AUDIBLE ALARM : ON
MOTION AUDIBLE ALARM : ON
ALARM DURATION : 10 SEC
DWELL TIME : 02 SEC
MESSAGE LATCH : NO
TIME DISPLAY : Y/M/D
2003-JAN-02(THU) 17:37:09
NEW PASSWORD : XXXX
CLEAR HDD : MASTER
SYSTEM RESET : NO
REMOTE MODE : RS-232
REMOTE ID : 000
(SYSTEM)(SYSTEM)
AUDIO INPUT : 1AUDIO INPUT : 1
INT AUDIBLE ALARM : ONINT AUDIBLE ALARM : ON
EXT AUDIBLE ALARM : ONEXT AUDIBLE ALARM : ON
MOTION AUDIBLE ALARM : ONMOTION AUDIBLE ALARM : ON
ALARM DURATION : 10 SECALARM DURATION : 10 SEC
DWELL TIME : 02 SECDWELL TIME : 02 SEC
MESSAGE LATCH : NOMESSAGE LATCH : NO
TIME DISPLAY : Y/M/DTIME DISPLAY : Y/M/D
2003-JAN-02(THU) 17:37:092003-JAN-02(THU) 17:37:09
NEW PASSWORD : XXXXNEW PASSWORD : XXXX
CLEAR HDD : MASTERCLEAR HDD : MASTER
SYSTEM RESET : NOSYSTEM RESET : NO
REMOTE MODE : RS-232REMOTE MODE : RS-232
REMOTE ID : 000REMOTE ID : 000
(MENU)
TIMER
RECORD
CAMERA
? SYSTEM
EVENT
There are 4 recording modes: Alarm, Timer and Manual Record.
1. ALARM RECORD
DMR is triggered by an alarm input. Indicated by the letter “A” and show diagram on
the triggered channel.
2. TIMER RECORD
When recording is scheduled by a Timer. Indicated by the letter “T”.
3. MANUAL RECORD
When recording is initiated by manually pressing the REC button. Indicated by the letter “M”.
4. MOTION TRIGGER RECORD
Recording is triggered by motion detection. Indicated by the letter “D” and show diagram
on the triggered channel.
Press “ PLAY ” button, the DMR will show the last recording.
1. FAST FORWARD (F.F. ) & FAST REWIND (F.R.)
You can increase the speed of Fast Forward and Rewind on the DMR.
In the Play mode, press ” ” once to get 2X speed forward and press twice to get
4X speed,… and the maximum speed can reach 32X.
Press ” ” once to get 1X speed rewind and press twice to get 2X speed, … and
the maximum speed can reach 32X.
2. SLOW FORWARD (S.F.) & SLOW REWIND (S.R.)
You can also slow down the speeds of Forward and Rewind on the DMR.
In the Play mode, press the SLOW button and you will enter Slow mode.
Press “ ” once to get 1/2X speed forward and press twice to get 1/4X speed,…
and the slowest speed can reach 1/32X.
Press ” ” once to get 1/2X speed rewind and press twice to get 1/4X speed, …
and the slowest speed can reach 1/32X.
3. PAUSE
It will let you pause the current image displayed on the screen.
4. STOP
Press “ STOP ” under any circumstance, it will return DMR to live monitoring mode.
5. IMAGE JOG DIAL
It will allow you to manually view video frame-by-frame, one image at a time.
While in PLAY mode, press “ PAUSE ”, it will pause the screen.
Press “ ” button to advance the frozen screen one image forward.
Press “ ” button to move back one image.
5. Record & Playback:
RecordRecord
2002 – JAN –01 01:02:03
A●OW
PlayPlay
NOTE:
1. When the HDD is full under O/W Recording mode, previous recorded files may be
overwritten without further warning notices.
2. If the HDDs’ capacity is only 5 GB left, it will buzz for 3 seconds; so as in 4GB, 3GB, 2GB
and 1GB. If the O/W Recording mode(NOTE 1) is on, it won’t have the warning buzzer.
Page 3

www.swann.com.au
Swann Tech Support
E-mail Support
International e-mail: tech@swann.com.au
(We usually reply on the next working day)
Telephone Support
USA: 877-274-3695 (Toll free Calls to Melbourne Australia)
International: +61 3 84124610 (Calls to Melbourne Australia)
Swann Tech Support operating hours:
9am - 5.30pm Mon to Fri Australian EST (UTC/GMT+10)
3pm - 11.30pm Sun to Thurs US Pacific Standard Time (UTC/GMT -8)
4pm - 12.30am Sun to Thurs US Mountain Standard Time (UTC/GMT -7)
5pm - 01.30am Sun to Thurs US Central Standard Time (UTC/GMT -6)
6pm - 02.30am Sun to Thurs US Eastern Standard Time (UTC/GMT -5)
Subtract one hour from local US time during Australian Daylight Saving period
(approx Last Sunday of October to last Sunday of March)
Add one hour to local time during Daylight Savings period in the USA when it
applies in your region
See http://www.worldtimeserver.com for information on different time zones
and the time in Melbourne Australia compared to your local time.
Swann Helpdesk Details
 Loading...