

Page 1
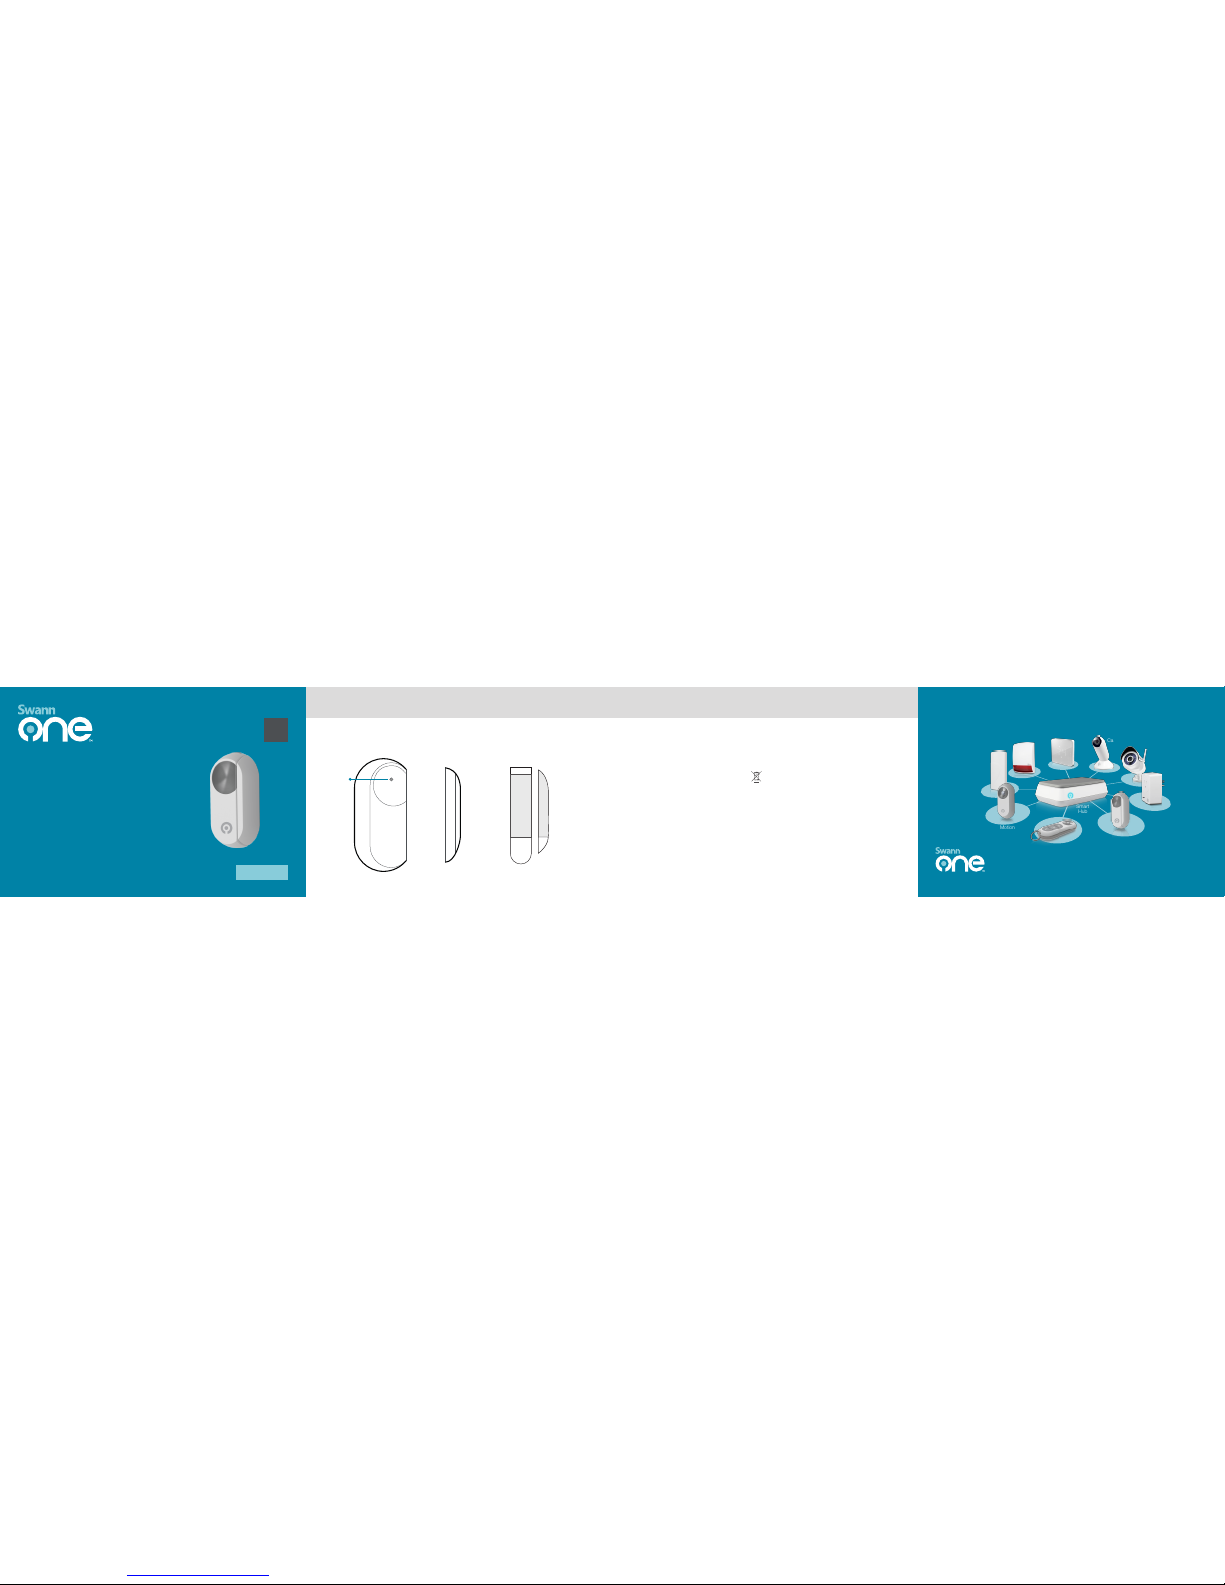
At a Glance
Thank you for choosing the SwannOne™ Window/Door Sensor. The SwannOne
Window/Door Sensor monitors the opening and closing of doors and windows, notifying
you when changes occur via the SwannOne system.
Magnet
3M Command™
Mounting Strips
Sensor
QSGWS271114E
Key Fob
Indoor
Camera
Outdoor
Camera
Smart Plug
Motion
Sensor
Door/Window
Sensor
Indoor
Siren
Outdoor Siren
Zen
Ther
mostat
Smart
Hub
Discover More SwannOne Smart Home Solutions
EN
Quick Start Guide
Read me first
Window / Door
Sensor
At a Glance Compliance Information
FCC Statement
This device complies with part 15 of the FCC Rules. Operation is subject to the following
two conditions: (1)This device may not cause harmful interference, and (2) This device
must accept any interference received, including interference that may cause undesired
operation.
Disposal and Recycling Information
Correct Disposal of this product. This marking indicated that this product should not be
disposed with other household wastes throughout the EU. To prevent possible harm to
the environment or human health from uncontrolled waste disposal, recycle it responsibly
to promote the sustainable reuse of material resources. To return your used device,
please use the return and collection systems or contact the retailer where the product
was purchased. They can take this product for environment safe recycling.
Battery Safety Information
CAUTION: RISK OF EXPLOSION IF BATTERY IS REPLACED BY AN INCORRECT
TYPE. DISPOSE OF USED BATTERIES ACCORDING TO THE INSTRUCTIONS.
Status
LED
© Swann Communications 2015
www.swannone.com
Page 2
AAA
AAA
AAA
AAA
AAA
AAA
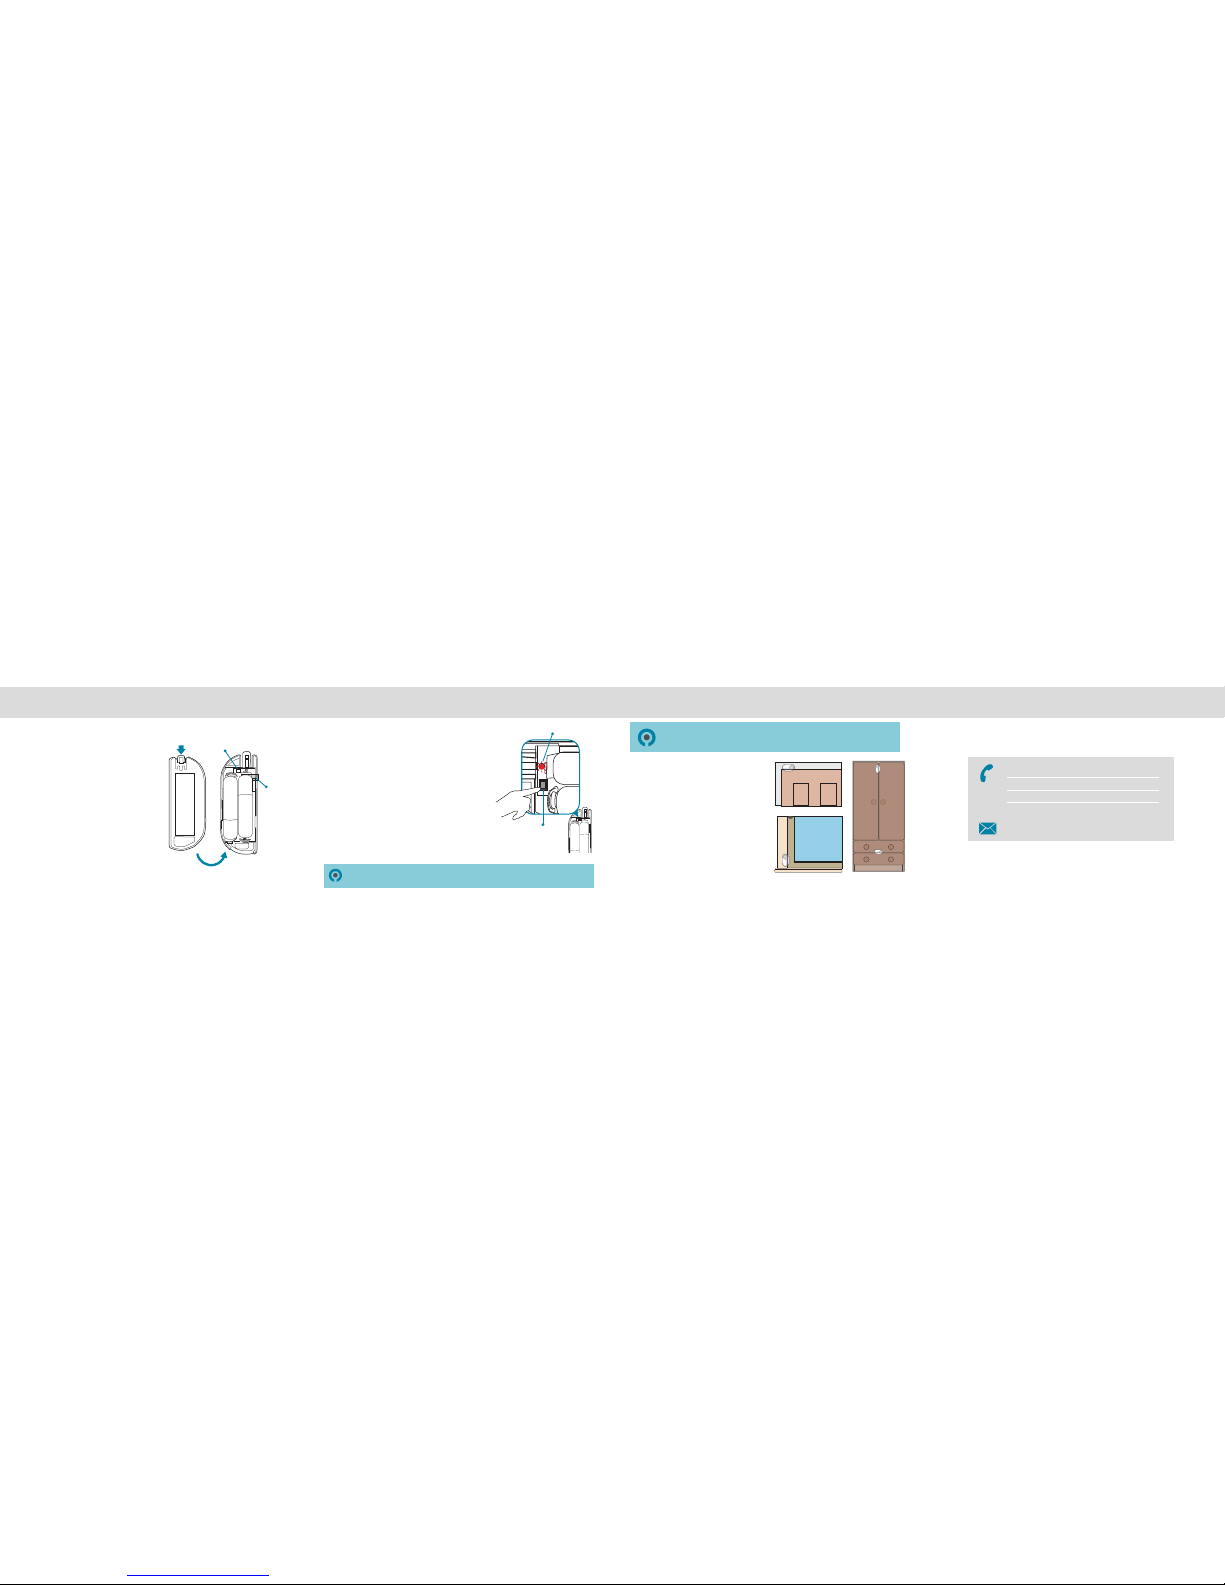
Activate Pair & Register Mount Need Help?
Plastic
Strip
Connect
Button
LED
1 Open the sensor by pushing back the
release catch on top. The front panel
should come off easily.
2 Remove the protective plastic strip to
engage the battery and activate the
sensor.
1 Log in to your SwannOne web dashboard at
home.swannone.com.
2 Select My Devices, and select add new from the
Entry Sensors menu.
3 Select Start Learn.
4 Press the Connect button on the sensor. The
LED blinks once. Once your sensor connects
with your hub, the LED will blink twice. The
on-screen "Entry Sensors currently registered"
counter will increment by 1.
5 Select Stop Learn, and complete the rest of the
setup by following the on-screen instructions.
Once complete, put the front panel back onto
the sensor until it clicks into place.
1 Before applying Command™ Strips,
clean the surface where the sensor and
magnet will be mounted, and make sure
it is dry.
2 Fit the sensor and magnet with
appropriate sized strips, and then press
the sensor and magnet firmly onto
surface for 30 seconds.
3 Test the sensor by opening and closing
the window/door. The Status LED biinks
whenever movement is detected. You
should also receive a status alert via the
SwannOne web dashboard and app on
your smartphone.
Get more information regarding the setup and use of your product on the web at
swannone.com, or contact our multi-lingual support team anytime via:
Take time to choose the location and test orientation of the sensor and magnet.
The sensor and magnet should ideally be positioned in a way that when the
window/door is closed, they are aligned side by side, within 5/16" from each other.
Placement Examples
support@swannone.com
USA & Canada 1800 627 2799
UK & Europe 0808 168 9031
Australia 1300 138 324
New Zealand 0400 479 266
Connect
Button
If the sensor is not connecting as expected, try performing a hard reset by
pressing and holding the Connect button until the status LED blinks rapidly.
SwannOne Warranty
Your SwannOne products are backed by a full 12 month guarantee from the date of
purchase. In the unlikely event of anything going wrong, you can have confidence that
your purchase is protected. Refer to swannone.com for terms and conditions.
Page 3

SWO-WDS2PA
Window/Door Sensor
Twin Pack
Detects open status of windows/doors & senses temperature,
notifying you when changes occur via the SwannOne
™
System
Compatible with
Detect Entry
Smartphone
Controllable
Temperature
Indication
Easy Setup Mobile Alerts
DETECT ENTRY
Detects open & closed status, with magnetic sensor on either
side of door & window frames
ALARM TRIGGERS
If the magnetic sensor is disrupted an audible alarm can be
triggered
^
& an alert is sent to your Smartphone
TEMPERATURE INDICATION
Measures & reports on the room temperature in your home
EASY SET UP
Fitted with a 3M Command™ strip & uses 2 x AAA batteries per
sensor (included) to enable easy installation & relocation.
No drilling, no holes!
MOBILE ALERTS
Receive alerts & status updates on your Smartphone when paired
with a SwannOne
™
Smart Hub
^ Requires purchase of SwannOne™ Smart Hub, Indoor &/or Outdoor Siren
Requires
SwannOne
™
Hub
Page 4

Technical Specifications
Protocol Zigbee HA 1.2
Dimensions 3.15 x 1.65 x 0.79” /
80 x 42 x 20mm
Weight 1.6oz / 45g
Batteries AAA x 2
Indoor/Outdoor Indoor
Note: Specifications are per sensor.
System Requirements
Internet Connection High-Speed
Wireless Network Wi-Fi b/g/n
Internet Browsers Internet Explorer 9+, Firefox,
Safari 7+, Chrome
Compatible Devices iPhone, iPad, iPod Touch,
Android devices, PC & Mac
computers
Operating Systems iOS 7 & later, Android 4.0 & later,
Microsoft
®
Windows® 7 & later,
Mac OS 10.7 & later
For more information about SwannOne visit:
swannone.com
In the box
SwannOne™ Window/Door Sensor x 2
Batteries AAA x 4
Quick Start Guide
Indoor Camera
with Audio
Outdoor Camera
with Audio
Indoor
Siren
Door/Window
Sensor
Motion Sensor
Smart Hub
Sound Alert -
Glass Break
Key Fob
Zen Thermostat
™
Smart Plug
Outdoor Siren
Stickers &
Accessories
x2
SWO-WDS2PA
The SwannOne App
The SwannOne app in conjunction
with the Smart Hub brings your
SwannOne Smart Home to life,
allowing you to monitor & control
your system from anywhere.
As the environment changes
and technology advances, your
SwannOne system will continually
be developed and enhanced and
you will from time to time receive
software updates which will allow
you to get even more out of your
SwannOne Smart Home.
24/7 Support
With SwannOne™ you really are in control & we’ll be right
there with you. Our multilingual support team are here
to answer any questions you may have, no matter how
simple or complex, 24/7. That’s our promise.
Customize right mix
of devices
Modem
Router
Requires browser interface for setup
Key Fob
Indoor
Camera
Outdoor
Camera
Smart Plug
Motion
Sensor
Door/Window
Sensor
Indoor
Siren
Outdoor Siren
Zen
Thermostat
™
Smart
Hub
Customizable to your needs
SwannOne grows with you. If
you decide to move, it can
easily move with you. If your
needs change – a bigger home
or the addition of a holiday
home perhaps, you can scale
up your system with a wide
range of accessories available.
 Loading...