

Page 1
8” LCD Monitor
Instruction Manual
SW248-LM8
SW248-LM8-10006-170309
Page 2

FCC WARNING STATEMENT
NOTE: This equipment has been tested and found to comply with the limits for
Class B digital device, pursuant to part 15 of the FCC Rules. These limits are
designed to provide reasonable protection against harmful interference in a
residential installation. This equipment generates, uses and can radiate radio
frequency energy and, if not installed and used in accordance with the
instructions, may cause harmful interference to radio or television reception,
which can be determined by turning the equipment off and on, the user is
encouraged to try to correct the interference by one or more of the following
measures:
- Reorient or relocate the receiving antenna.
- Increase the separation between the equipment and the receiver.
- Connect the equipment into an outlet on a circuit different from that to which
the receiver is connected.
- Consult the dealer or an experienced radio/TV technician for help.
Important Notice
All jurisdictions have specific laws and regulations regarding the use of
monitoring & recording devices. Before using any camera for any purpose, it
is the buyer’s responsibility to be a ware of all applicable laws and regulations
that prohibit or limit the use of cameras and to comply with the ap plicable la ws
and regulations. T he legalit y of watching p eople other tha n you chan ges from
country to country and even state to state. Contact your local government’s
privacy information body or your local Police for more information on what if
any restrictions you may face.
WARNING: Important notice about correct usage of the power adapter
The correct orientation for the enclosed power adapter is in a vertical or floor
mount position.
Precautions and Safety Instructions
• Read this manual carefully before using the Monitor
• Follow the instructions for proper and safe use of this product
• Keep the instructions in a safe place for future reference
• Use only the power adapter that is designed and supplied with this
product
• Do not use this device near water or other liquids
• Do not use solvents or alcohols to clean the unit, use a dry soft cloth,
or moisten cloth with diluted dish detergent only
• Ensure the vents on the sides and back of the unit are not covered
• Do not use near heat sources such as heaters, stoves, fireplaces
• If the product has been damaged do not attempt to repair it yourself -
contact Swann Technical Support for assistance
-i-
Page 3

Table of Contents
1. Before You Begin
2. Package Contents
3. Monitor Layout
4. Monitor Controls
5. Remote Control Layout
6. Monitor Connections
6.1 Connecting the Power Adapter
6.2 Connecting the AV Cable
7. Menu Operations
7.1 Picture Menu
7.2 Option Menu
7.3 Clock Menu
7.4 System Menu
8. Troubleshooting Guide
9. Technical Specifications
Warranty
Swann Technical Support
-ii-
1
2
3
4
5
6
7
9
10
11
12
Page 4
1. Before You Begin
Storage
1. Keep this product away from extreme hot or cold places. The
storage temperature ranges from -20
operating temperature is from 0
2. Do not use this product in or near moist environments such as
bathtubs, wash basins, kitchens, basements, swimming pools etc.
3. Do not expose the LCD display to high humidity, dust, oil or smoke
4. Do not throw or drop this product
5. Do not subject this device to strong vibrations, shock
6. Do not brush or scrub this product with abrasive objects
Maintenance
1. Disconnect all cables from the monitor before cleaning
2. Wipe the enclosure, screen and keys
moisten cloth with diluted dish detergent only
3. Do not use polishing cloth, abstergent, or other types of chemical
detergents with alcohol or benzene
1. Do not use this device while driving
2. Do not submerge this product in liquids or expose to rain
to 40
Warning!
to 60 and the
using a dry soft cloth, or
Special
• Do not attempt to repair or disassemble, there are no user
serviceable parts inside this device.
• Contact Swann Technical support if this monitor
malfunctions or fails to operate correctly
Notice
-1-
Page 5

2. Package Contents
• LCD Monitor
• Car Power Adapter
• Power Adapter
• Remote Control
• AAA Batteries for Remote Control
• A / V Cable
• Monitor Stand
• Instruction Manual
If any of the above accessories are damaged or missing, contact
Swann Communications for assistance.
-2-
Page 6

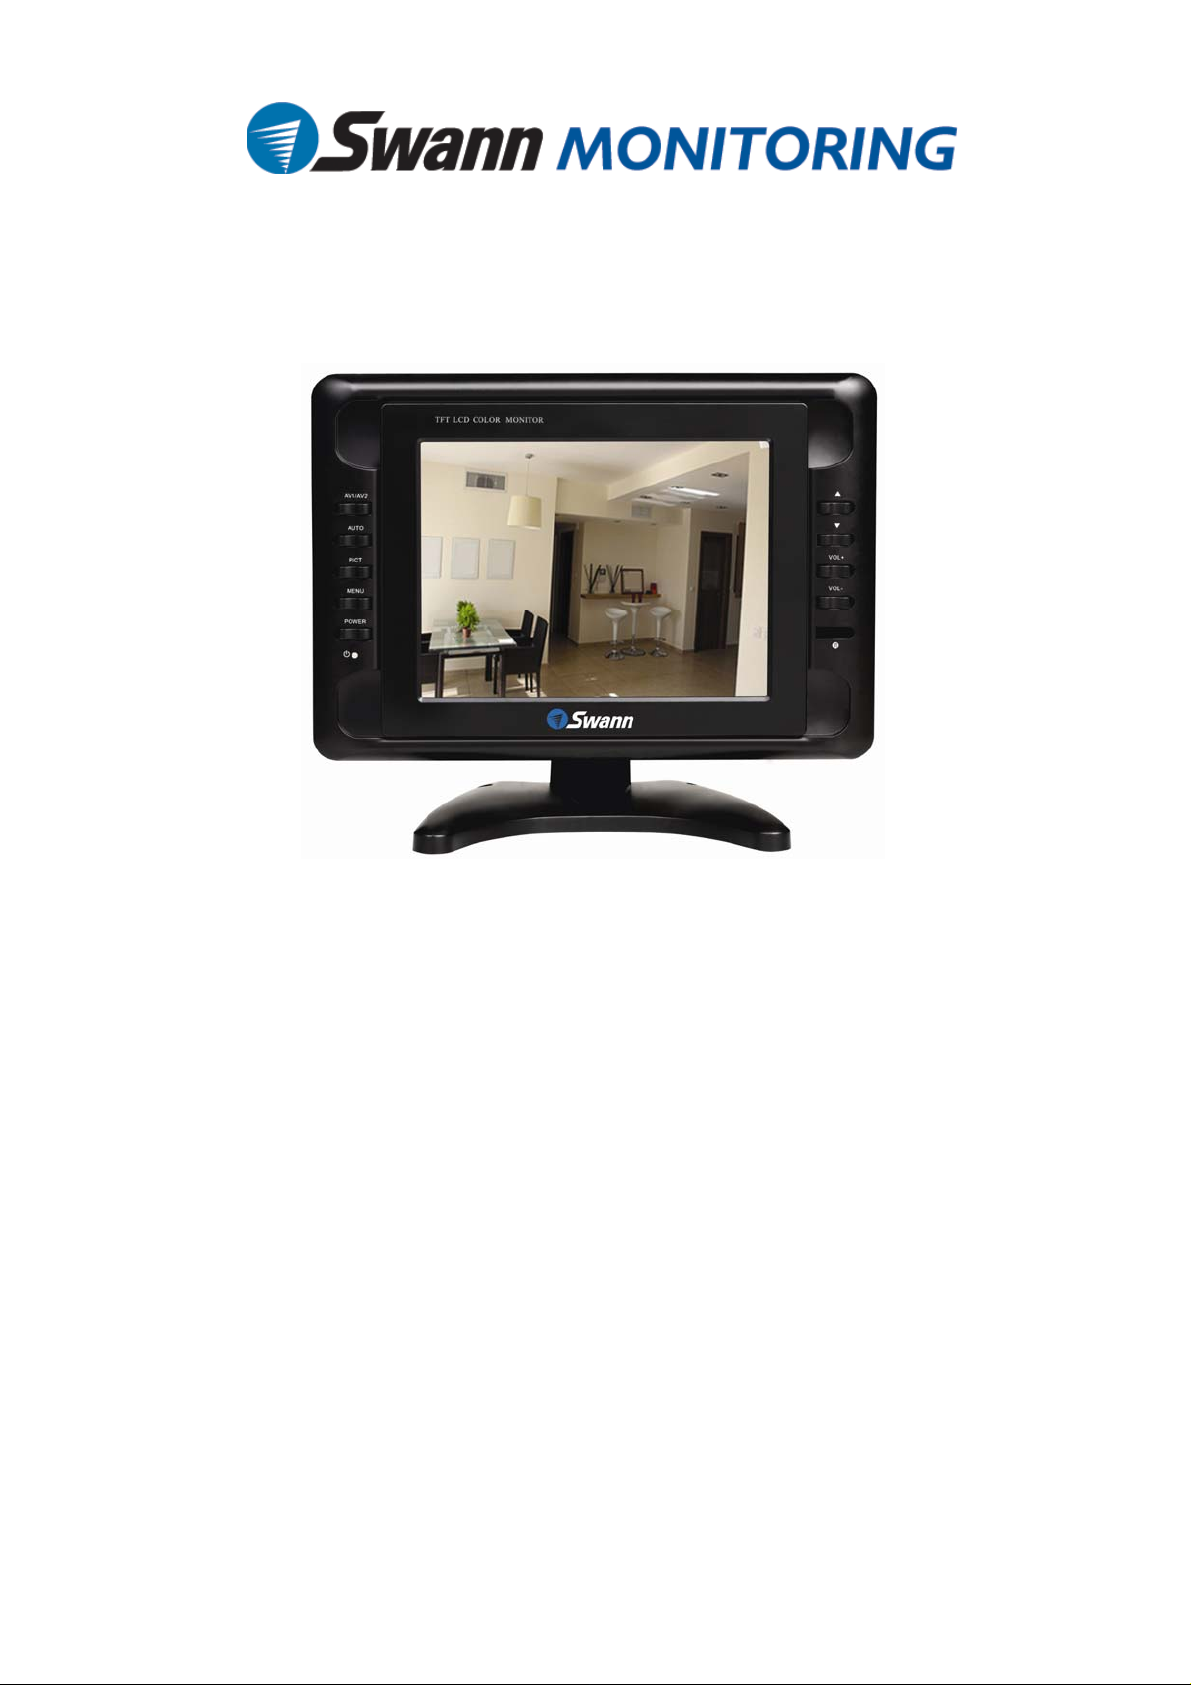
3. Monitor Layout
1. LCD Screen
2. AV1/AV2 Button
3. AUTO Button
4. PICT Button
5. MENU Button
6. POWER Button
7. UP Button
8. DOWN Button
9. VOL+ / Right
Button
10. VOL- / Left Button
11. IR Remote Sensor
12. Monitor Stand
13. Bracket
14. AV 2 in jack
15. AV 1 in jack
16. Headphone jack
17. DC Input
18. Speaker
-3-
Page 7

4. Monitor Controls
• AV1/AV2: Switches input from AV1 to AV2
• AUTO: Press to cycle between AV1 and AV2
inputs at 4, 6 or 8 seconds – push again to turn
off
•
• PICT: Choose from 5 image settings: Standard,
Soft, Vivid, Light and Personal
•
• MENU: Press to enter or exit the menu
• POWER: Press to turn monitor on/off
• ▲: Move selection up in Menu
• ▼: Move selection down in Menu
• VOL+: Increase Monitor volume or move
right in menu
• VOL-: Decrease the Monitor volume or
move left in the menu
-4-
Page 8

5. Remote Control Layout
POWER: Turn the monitor on/off
MUTE: Press to disable sound, press MUTE
again or press VOL to enable sound
▲: Move selection up
▼: Move selection down
◄/VOL-: Decrease volume / move left
►/VOL+: Increase volume / move right
MENU: Press to enter / exit the Menu
MODE: Change image settings from Standard,
Soft, Vivid, Light and Personal
CALL: Displays current AV channel
TIMER: Push to set Sleep Timer up 120 minutes
LANG: Sets the menu language (default English)
CALE: Press to set Calendar – date appears in Year – Month – Day
format. Use ▲▼ to change year and ◄► to change day
AV: Press to switch between AV1 and AV2
Press to flip image horizontally
Press to flip image vertically
-5-
Page 9

6. Monitor Connections
6.1 Connecting the Power Adapter:
Connect the Power Adapter plug
to the input on the side of the
monitor marked DC 12V. Plug the
other end of the adapter to a power
point or cigarette lighter if applicable
6.2 Connecting the AV Cable:
AV conversion cable
Insert the mini-jack end of the AV
Cable into the AV1 or AV2 port on
the Monitor. Connect the Yellow
RCA cable to the video source of
the AV device. Connect the Red
and White RCA cables to the Right
and Left audio source if applicable
-6-
Page 10

7. Menu Operation
Press MENU to display following options:
PICTURE
SYSTEM
OPTION CLOCK
PRESET
7.1 PICTURE – CONTRAST, BRIGHT, COLOR, SHARP, TINT
Press or to select the item and press ◄ or ► to adjust the value
Notice
The TINT option will appear on NTSC Monitors only
7.2 OPTION – LANGUAGE, CALENDAR, GAME
LANGUAGE, CALENDAR and GAME displays on the screen as below
description:
7.2.1 LANGUAGE
Press or to select Language and press ◄ or ► to change on
screen languages
7.2.2 CALENDAR
Press or to highlight Calendar and press ◄ or ► to adjust
Press or to change year and press ◄ or ► to change month
7.2.3 GAME – Push to enter Game Mode
-7-
Page 11

7.3 CLOCK
TIME – Set the current time
ON-TIME – Set time to turn monitor on
OFF-TIME – Set time to turn monitor off
ATTENTION – Set an alarm time / reminder to appear at a specified
time
Notice
If you wish to use the Timer features TIME must be set first. Times
appear in 24 hour clock format.
7.4 SYSTEM
COLOR-SYS – Choose the color format from AUTO, PAL, SECAM,
NTSC
BLUE BACK – Change the background to blue if no signal is detected
HORIZONTAL – Flip the image horizontally
VERTICAL – Flip the image vertically
-8-
Page 12

8. Troubleshooting Guide
If your monitor appears to be malfunctioning or is not responding
correctly, consult the Troubleshooting Guide below for possible
solutions before contacting Technical Support for repair.
Problem
No picture, no sound
No image from
source
No sound
Dark picture
Lines through image
B&W or rolling image
Upside down or
laterally inverted
picture
Check power connection from power
adapter or car adapter. Ensure the provided
power adapter is used and Monitor is not in
Standby mode.
Check monitor is set to correct AV Channel.
Confirm yellow AV cable is connected from
video output on the device to the yellow
video input on the monitor.
Press the VOL+ button to check levels.
Ensure headphone jack is not plugged into
monitor. Check RCA cables are connected
to Red/White Audio inputs on the monitor
AV Cable
Check monitor brightness and contrast
levels in Picture menu. Monitor is
operating in cold environment.
Keep away from microwaves, high voltage
lines, wireless devices that may cause
interference if possible.
Ensure the Monitor is set to the correct
region in the System > Color-Sys menu.
NTSC for N. America, PAL for Europe,
Australia
Adjust the Horizontal and Vertical settings
on the remote control or in System menu.
Possible Causes
-9-
Page 13

9. Technical Specifications
Product Code: SW248-LM8
Display Type: Color TFT-LCD
Video Format: NTSC, PAL, SECAM
Video Inputs: AV inputs x 2
Display Resolution: 800 x 600
Display Size: 8” Diagonal
Aspect Ratio: 4:3
Audio Inputs: L/R AV inputs x 2
Speakers: 4cm loudspeakers x 2
Audio Output: >0.3W x 2CH
Connections: 3.5mm headphone jack, 2 x AV inputs,
external power supply
Operating Power: DC 12V
Monitor Dimensions: 255mm x 185mm x 35mm
10.0” x 7.3” x 1.4”
Weight: 650g, 1.4lbs
-10-
Page 14

g
Swann Communications Limited Warranty
Terms and Conditions
Swann warrants this product against defects in workmanship and material for a
period of one (1) year from its original purchase date. You must present your
receipt as proof of date of purchase for warranty validation. Any unit which proves
defective during the stated period will be repaired without charge for parts or labour
or replaced at the sole discretion of Swann. The end user is responsible for all
freight charges incurred to send the product to Swann’s repair centers. The end
user is responsible for all shipping costs incurred when shipping from and to any
country other than the country of origin. The warranty does not cover any incidenta l,
accidental or consequential damages arising from the use of or the inabilit y to use
this product. Any costs associated with the fitting or removal of this product by a
tradesman or other person or any other costs associated with its use are the
responsibility of the end user. This warranty applies to the original purchaser of the
product only and is not transferable to any third party.
Unauthorized end user or third party modifications to any c o mpon ent or ev i denc e of
misuse or abuse of the device will render all warranties void.
Warnin
No user serviceable components exist in this device. Do not attempt to
dismantle or modify the monitor for risk of damage or electrical shock.
Maintenance and internal repairs of this device are to be carried out
by qualified professionals only.
-11-
Page 15

Swann Technical Support
Worldwide email support
tech@swannsecurity.com
UNITED STATES toll free
1-800-627-2799
(Su, 2pm-10pm US PT)
(M-Th, 6am-10pm US PT)
(F 6am-2pm US PT)
USA Exchange & Repairs
562-777-2551
(M-F, 9am-5pm US PT)
UK
AUSTRALIA toll free
1300 138 324
(M 9am-5pm AUS ET)
(Tu-F 1am-5pm AUS ET)
(Sa 1am-9am AUS ET)
New Zealand toll free
0800 479 266
NEW ZEALAND toll free
0800 479 266
020 3027 0979
(M-F 9am-5pm GMT)
International
+61 3 8412 4610
IRELAND
015 245 007
(M-F 9am-5pm GMT)
See http://www.worldtimeserver.com for information on different
time zones and the time in Melbourne Australia compare to your
local time.
-12-
Page 16

Swann Communications
2008©
SR247-LM8-10006-170309
 Loading...