

Page 1

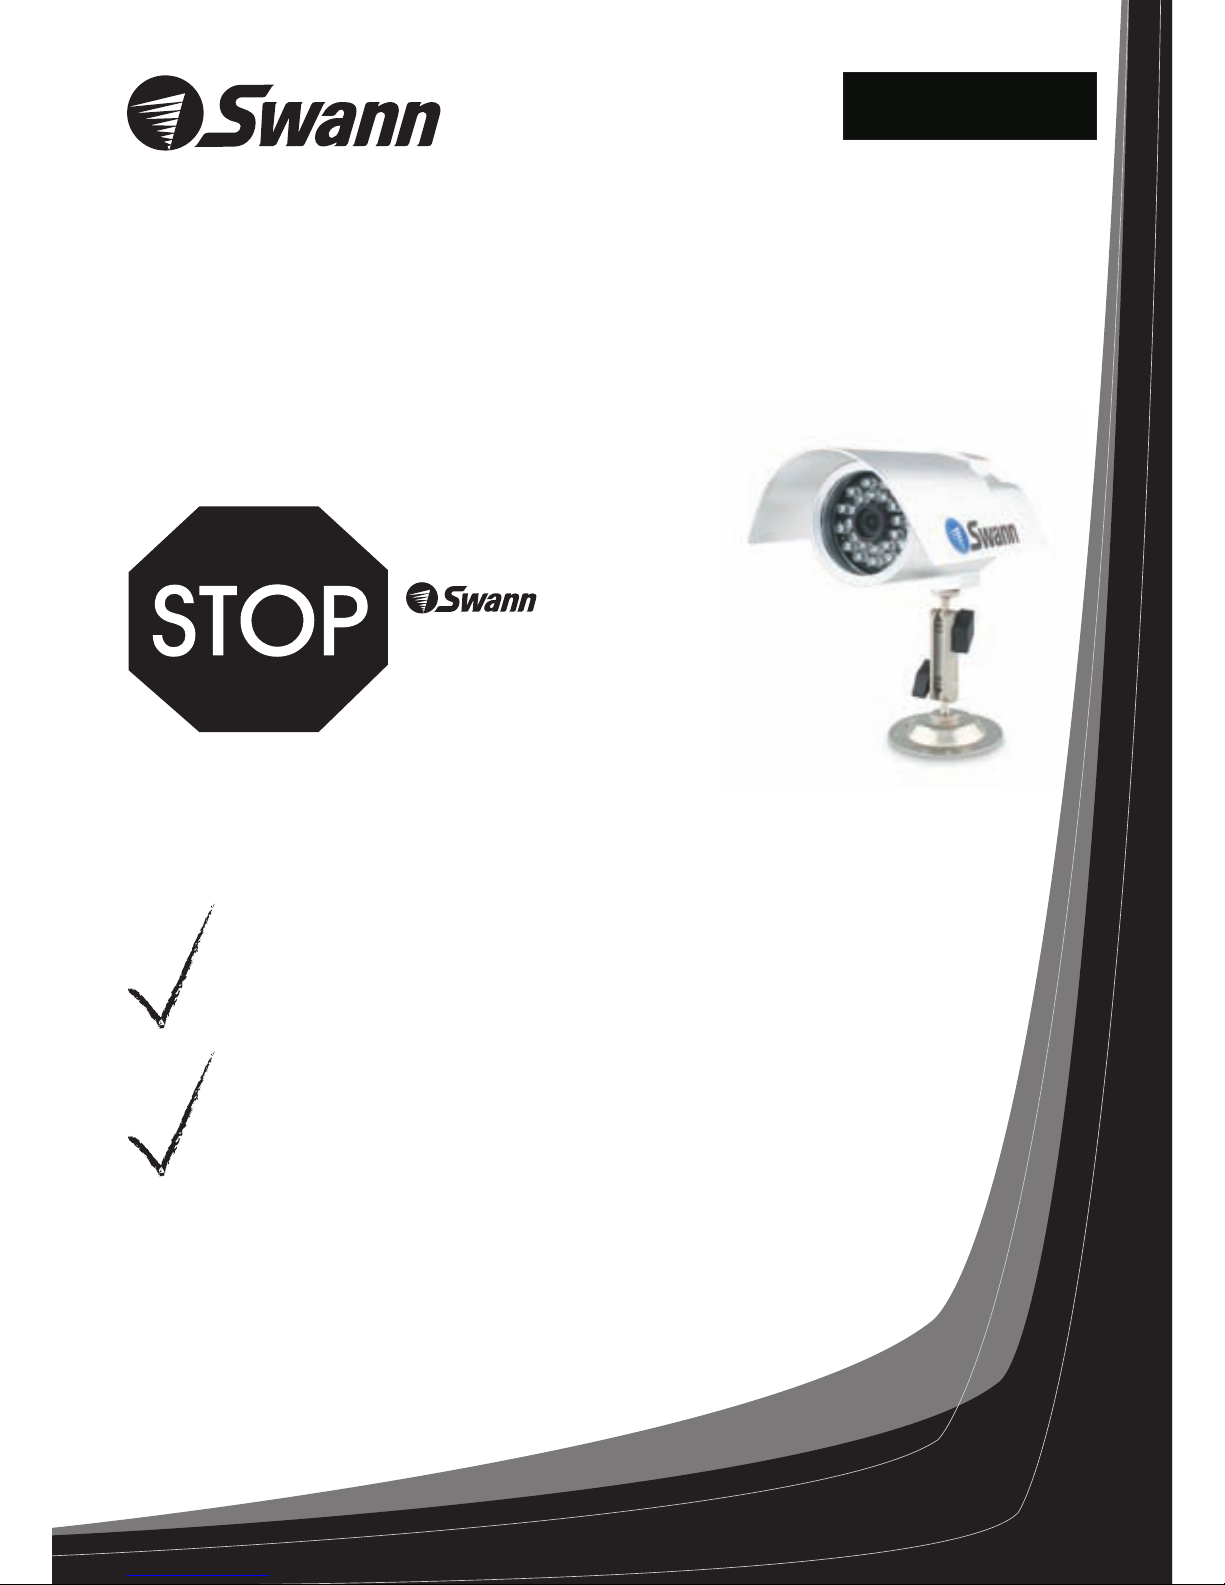
Maxi Day/Night Cam
Security Camera
If this device does not work when you first plug it in,
do not take it back to the store.
Contact the Swann Helpdesk using our fast e-mail service
or call us on one of the Toll-Free
numbers shown on the back cover of this booklet.
tech@swann.com.au
Most problems can be quickly and easily fixed with a simple
e-mail or a quick chat with one of our friendly technical staff.
(Toll-Free available in the US and Australia only)
Installation Guide
Weatherproof Day & Night Camera
English
Page 2

Introduction
Your package comes with
Connect the Maxi Day/Night Camera to your monitoring device
Installing the Camera Hood
Replacing or Changing the Camera Lens
Tips for Installing Your Camera
Important Information about this product
Tips for using your Swann Security Camera
Technical Specifications
Help Desk / Support Details
Warranty Information
2
2
3
4
4
5
6
6
7
Back Cover
Back Cover
2
2
3
4
4
5
6
6
7
Back Cover
Back Cover
The Maxi Day/Night Camera is a versatile Weatherproof CCD Security camera that includes 24
Infra-Red LEDs that give you the capability of viewing the images produced under most lighting
conditions, even at night. It can be used to provide your home or office with a clear picture that can
be easily displayed on a DVR, TV, VCR or Security Monitor.
The Maxi Day/Night camera is designed for best performance when used with Swann DVRs and
Security Monitors, but will just as easily work with your existing CCTV Equipment, TV, VCR or a
Computer with a video capture card. The camera can be used indoors or outdoors. The Maxi
Day/Night camera can be used for a variety of purposes including monitoring callers at the door or
keeping your car, yard, shop or children’s play area under observation.
INSTALLATION
• Maxi Day/Night Camera with fixed cable and Camera Hood
• Camera Stand
• BNC female to RCA male adapter
• 10m BNC Extension Cable with DC Connection
• Power Adaptor
• Security Stickers
• This Instruction Sheet
If any of these items are missing, please contact your retailer.
Contents
Introduction
Your package comes with…
2
Bild Sensor:
Bild Element:
Video System*:
Horisontell upplösning:
S/N Ratio:
Minimum Illumination:
Video Output:
Ström:
Operating Current:
Video kabelkontakt:
Infraröd LEDs:
Infraröd LED våglängd:
Maximum IR Illumination vidd:
IR aktivering:
Material hölje:
Mått:
*Observera att denna kamera levereras med lämpligt TV/video-system för försäljningslandet.
I länder som använder NTSC TV-standard levereras kameror som är byggda med NTSC standrad
och i länder som använder PAL TV-standard levereras kameror som är byggda med PAL standard.
Kameran kan inte byta från en standard till en annan.
Page 3
3
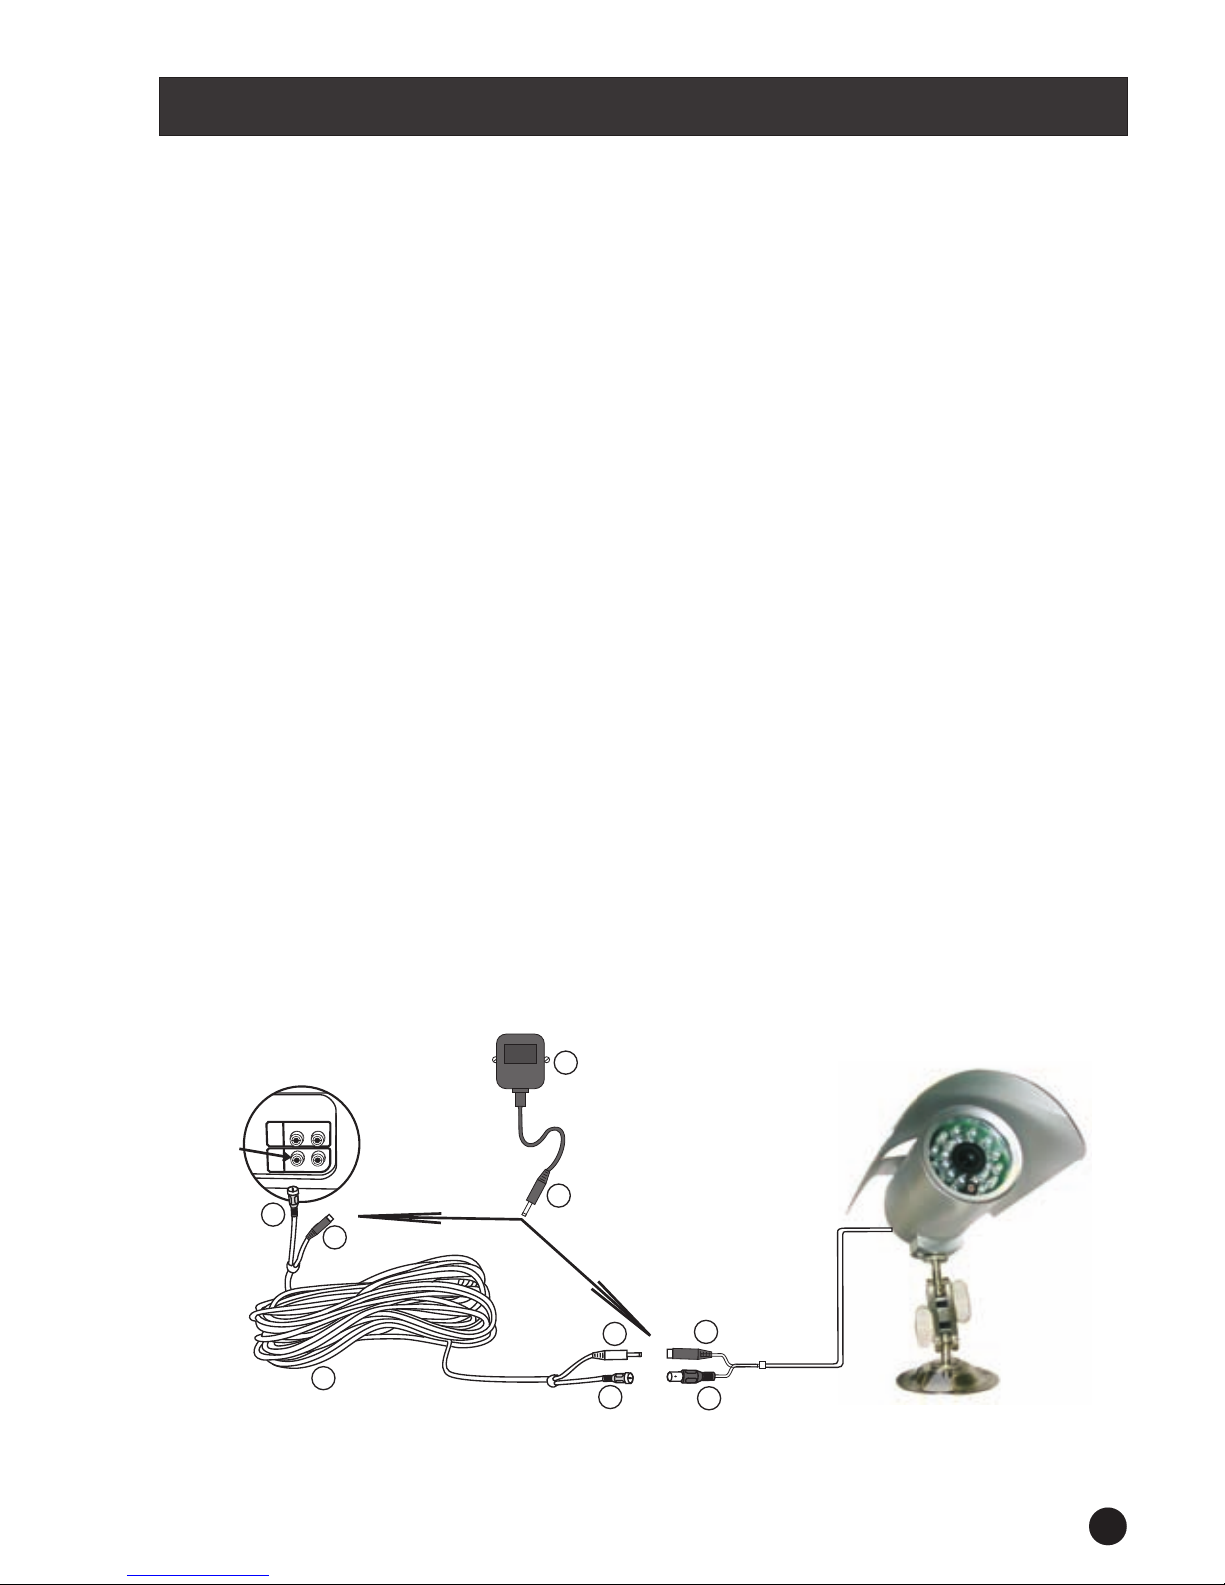
Connect the Maxi Day/Night Camera to your monitoring device
BNC Female
DVR, TV, VCR or MONITOR
OUT
IN
VIDEO
VIDEO
AUDIO
AUDIO
VIDEO IN
DC Jack
DC POWER
CONNECTOR
3c
2a
1b
POWER
ADAPTOR
2
DC Jack
1a
EXTENSION
CABLE
3
BNC Male
3b
BNC Male
3d
DC Plug
3a
These step by step instructions are provided for you to enable a quick and simple installation of
your camera. Please refer to the diagram below for component identification details.
Connect the BNC female connector on the Maxi Day/Night Camera (1b) to the
BNC male connector on the extension cable (3b)
Connect the BNC extension connector (3d) to the back of your DVR or monitoring
device. Note if you are connecting to a TV or VCR use the included BNC female to
RCA male adapter
Connect the DC Jack (1a) to the DC input on the Extension Cable (3a)
Connect the DC Power Connector (2a) on the Power Adapter to the Extension
Cable (3c)
Plug in the Power Adapter (2) to an available power outlet
Turn on your DVR or monitoring device and follow the manufacturers instructions
for viewing images. If you have an with RCA sockets you may need to
switch the to the channel to view the camera. To connect the camera to
your , you will need to turn the to the selection and turn your
onto the channel you would normally use to view a tape or movie on your .
This channel may be activated by a button on your remote that is marked L1 or L2
or possibly AV1 or AV2. Please read the for your or for more
information on using their
Step 1:
Step 2:
Step 3:
Step 4:
Step 5:
A/V TV
TV AV
VCR VCR A/V Input
TV VCR
instructions VCR TV
A/V inputs.
Step 6:
Page 4

4
Installing the Camera Hood
Replacing or Changing the Lens
Installing the Camera Hood
To fit the Camera Hood use a small Philips Head screwdriver to remove the two screws from
the top mounting block. Once these are removed, place the hood on top of the camera casing
with the slots over the screw holes in the casing. Place the mounting block on top of the hood,
then using the screwdriver screw the two screws back into the casing until the hood is
firmly secured.
Replacing or Changing the Lens:
First, make sure the camera hood has been removed, then follow these steps.
(A) Unscrew the front housing of the camera in an anti-clockwise direction
(B) Remove the rubber ring around the camera lens
(C) Carefully remove the LED circuit board from the housing and turn it to one side,
taking care of the wires that go from the underside of the circuit board into
the camera
(D) Unscrew the lens in a counter-clockwise direction and remove it completely
(E) Once the lens is removed, carefully screw the replacement lens (not included) in
a clockwise direction into the lens socket and adjust it for correct focus
(F) When the focus is correct, refit all of the components you have just removed
in reverse order. Reverse this procedure if you wish to refit the Standard lens
Note: The Maxi Day/Night Color Camera will automatically change to a black & white
image using the Infra-Red LEDs when available light is too low to support a clea
color picture.
1. Dörröppningar
5. Receptioner
Du bör placera dina kameror så att de täcker de områden som är mest utsatta
för risk. Se våra förslag nedan för några idéer:
Här bör du placera säkerhets stickers:
1. På ditt frontfönster.
2. På sidofönster
3. I närheten av entréer – dörrar och grindar
4. I närheten av en dummie-kamera som är
5. På frontdisken
6. På kassaapparaten
7. I närheten av en väl synlig kamera
Page 5
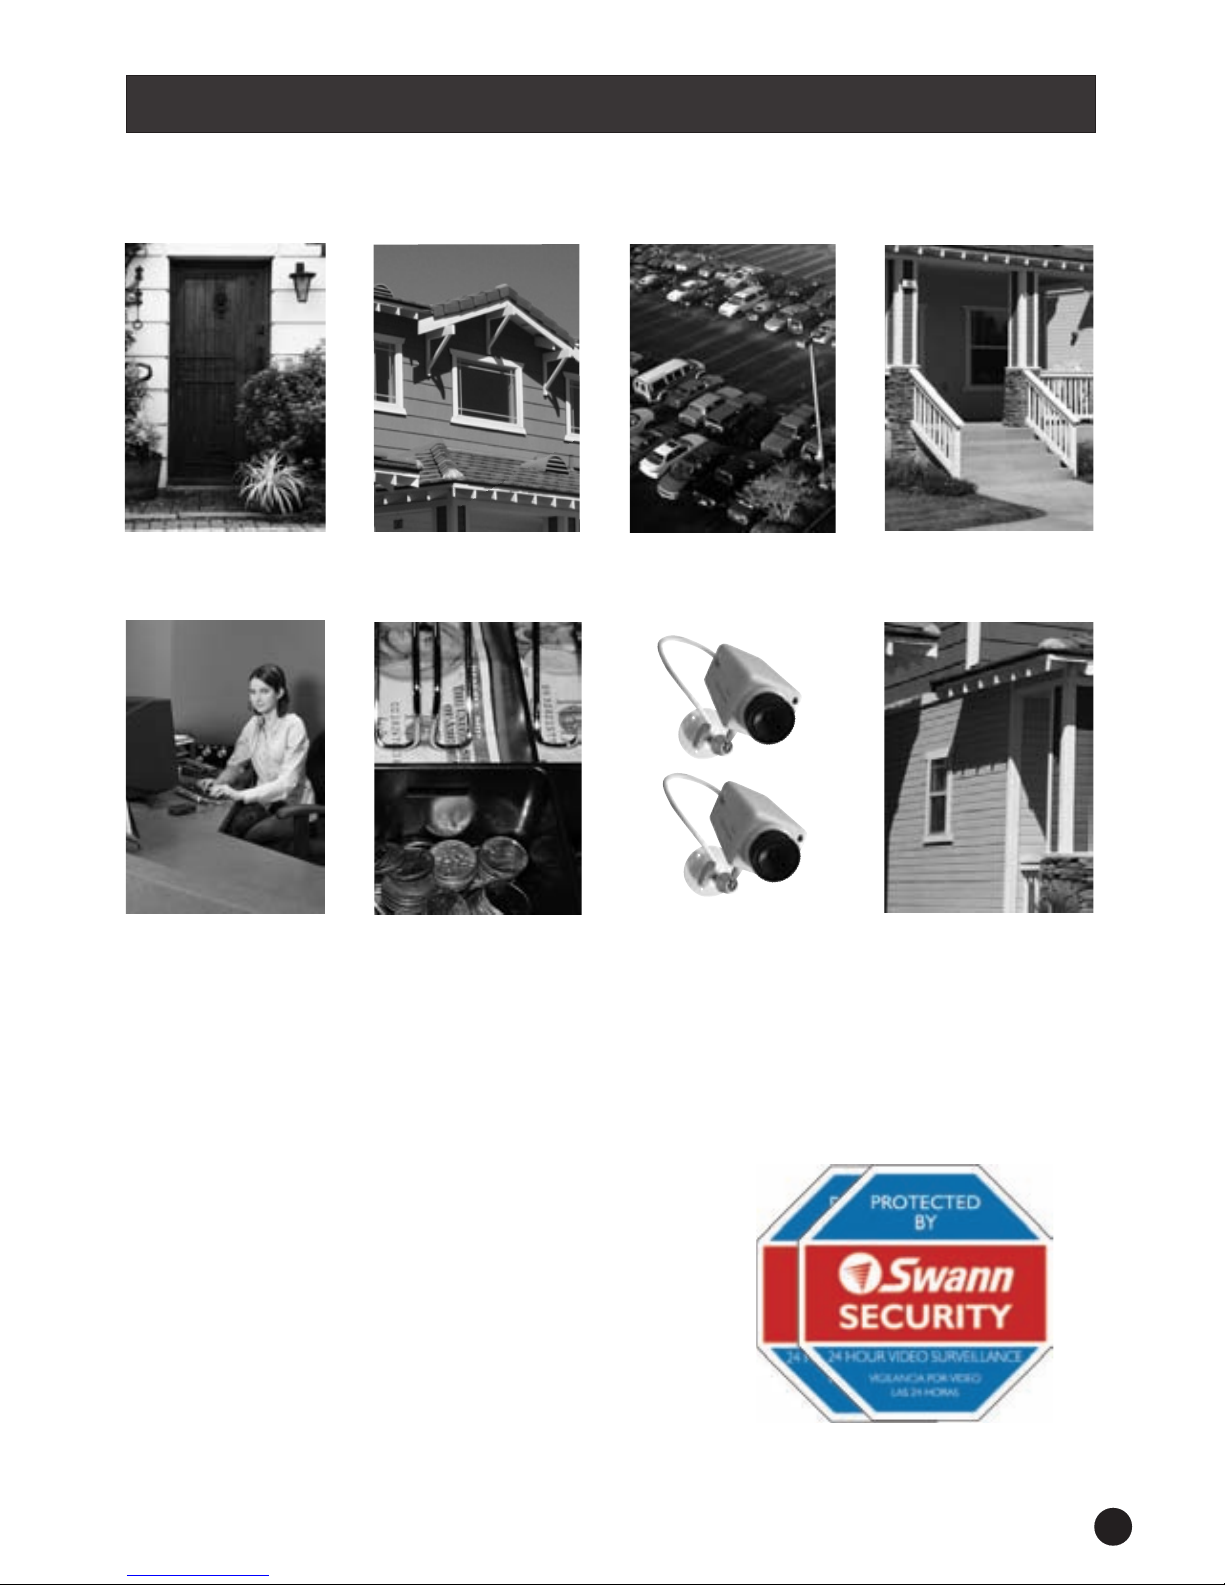
1. Doorways
5. Reception
areas
6. Cash
register
7. Mix
dummies
& real
cameras
8. Under eaves
2. Windows 3. Car Parks
4. Verandahs
You should position your cameras to cover the areas most exposed to risk.
See our suggestions below for some ideas:
Where to Place The Security Stickers:
1. On your front window
2. On side windows
3. Near entrance points - doors, gates
4. Next to a dummy camera mounted outside
5. On the front counter
6. On the cash register
7. Next to an obvious camera
5
Tips for Installing Your Camera
Page 6

6
!
!
!
!
!
!
Best Results are achieved when the camera is looking down on the subject area.
The hood can be used to stop sunlight entering the lens and causing the picture to wash out
during bright daylight.
Please test all devices before final installation as it is far easier to rectify problems at this stage.
To avoid the risk of damage to your product, use only the supplied power adaptors.
Areas with a bright background may caused degradation of the image. If possible position
your camera so that it doesn’t point towards a very bright light source.
Do not cut the DC power cable of the Camera to fit with another power source.
This may result in damage to the Camera & any unauthorised modifications will void
your warranty.
1. Deterrence is the best and most cost effective security method for:
- preventing criminal activity before it occurs is preferable to, and cheaper than,
cleaning up after it occurs
- the Swann Maxi Day/Night Camera is an example of cost effective security utilising
the 'art of deterrence' to outsmart thieves and criminals
2. Always place cameras high enough that they can't be closely inspected or easily accessed.
3. Position cameras and dummies where they can be easily seen for maximum deterrence.
4. Position a monitor where it can be seen but not touched.
5. If you have more than one camera use a monitor with channel switching function, a Quad
Processor or DVR with multiple views to show potential offenders the level of coverage you
have protecting your site.
6. Add extra Swann dummy cameras to give the impression of heightened security.
7. Purchase a Swann DVR to monitor and record activity on your cameras.
Depending on the settings used, DVRs can record for months.
8. Position a VCR with tapes or boxes close to your monitor for added effect,
implying there is a security video recorder even if there isn't one.
Important Information about this product
Tips for using your Swann Security camera
Page 7
Image Sensor:
Picture Element:
Video System*:
Horizontal Resolution:
S/N Ratio:
Minimum Illumination:
Video Output:
Power Supply:
Operating Current:
Video Cable Connector:
Infra-Red LEDs:
Infra-Red LED Wavelength:
Maximum IR Illumination Range:
IR Activation:
Housing Material:
Dimensions:
¼” SuperHAD CCD
PAL - 500 (H) x 582 (V)
NTSC - 510 (H) x 492 (V)
NTSC - USA & CANADA
PAL - AU, UK & EU
420 TV Lines
> 48db
0 Lux (IR LEDs on)
1.0v (P-P) @ 75ohm
12V DC
180mA - 280mA (IR On)
BNC female
24
850nm
66ft (20m)
Automatic from PE Cel
Auto On at Night
Auto Off during Day
Aluminium Alloy
4” (H) x 2¾” (W) x 6¾” (L)
99mm (H) x 71mm (W) x 169mm (L)
*Please note that this camera ships in the appropriate TV/Video system for the country of sale. In
countries using the NTSC TV standard for the camera will be built to the NTSC standard, and in
countries using PAL TV standard, the camera will be built to the PAL standard. The camera cannot
switched from one standard to the other.
Technical Specifications
7
NOTE:
All jurisdictions have specific laws and regulations relating to the use of
cameras. Before using any camera for any purpose, it is the buyer’s
responsibility to be aware of all applicable laws and regulations that
prohibit or limit the use of cameras and to comply with the applicable laws
and regulations.
The legality of watching people other than yourself changes from country
to country and even state to state. Contact your local government's
privacy information body or your local Police for more information on what
if any restrictions you may face.
Page 8
Swann warrants this product against defects in workmanship and material for a period of one
(1) year from it’s original purchase date. You must present your receipt as proof of date of
purchase for warranty validation. Any unit which proves defective during the stated period will
be repaired without charge for parts or labour or replaced at the sole discretion of Swann. The
repair or replacement will be warranted for either ninety days or the remainder of the original
one year warranty period, whichever is longer. The end user is responsible for all freight
charges incurred to send the to Swann’s repair centres.
shipping from and to any country other than the country of
origin. The warranty does not cover any incidental, accidental or consequential damages arising
from the use of or the inability to use this . Any costs associated with the fitting or
removal of this product by a tradesman or other person or any other costs associated with its
use are the responsibility of the end user. This warranty applies to the original purchaser of the
only and is not transferrable to any third party.
Unauthorised end user or third party modifications to any component or evidence of misuse or
abuse of the device will render all warranties void.
product The end user is responsible for
all shipping costs incurred when
product
product
Warranty Information
En130808
Help Desk / Support Details
FCC WARNING
STATEMENT
This device complies
with Part 15 of FCC Rules.
Operation is subject to the
following two conditions:
(1) This device may not
cause harmful interference
and (2) this device must
accept any interference
received, including
interference that may
cause undesired operation
WARNING: IMPORTANT
NOTICE ABOUT CORRECT
USE OF POWER ADAPTER
The correct orientation
for the enclosed power
adapter is in a vertical
or floor mount position.
L’orientation correcte pour
L’adapteur secteur fourni
est dans une position
verticale ou plancher-
monte.
La orientacion correcta para
el adaptador electrico incluido
es en posicion vertical o instalado
en el suelo.
Swann Technical Support
All Countries E-mail: tech@swann.com.au
1-800-627-2799
1-877-274-3695
(Su, 2pm-10pm US PT)
(M-Th, 6am-10pm US PT)
(F 6am-2pm US PT)
562-777-2551
(M-F, 9am-5pm US PT)
1300 138 324
(M 9am-5pm AUS ET)
(Tu-F 1am-5pm AUS ET)
(Sa 1am-9am AUS ET)
0800 479 266
+61 3 8412 4610
Telephone Helpdesk
UNITED STATES toll free
USA Exchange & Repairs
AUSTRALIA toll free
New Zealand toll free
International
See http://www.worldtimeserver.com for information on different time zones
and the time in Melbourne Australia compare to your local time.
www.swannsecurity.com
Maxi Dag/Natt Kamera
Övervakningskamera
Om enheten inte fungerar när kopplar inden för
första gangueen, gå inte tillbaka till butiken.
Installations Guide
Utomhus Dag och Natt kamera
Page 9
Maxi Day/Night Cam
Sikkerheds/overvågningskamera
Hvis produktet ikke virker første gang du sætter det til
– skal du ikke tage produktet tilbage til forhandleren.
Kontakt altid først Swann Kundecenter, ved enten at bruge vores
e-mail service på eller kontakt
os på et af gratis telefon nummer, på bagside af denne brochure.
swanneu@swannsecurity.com
De fleste problemer kan hurtigt og nemt blive løst med en
e-mail eller en hurtig snak med en af vores teknisk dygtige
medarbejder. (Gratis nummer gælder kun for USA
and Australien).
Installations Guide
Vandsikret dag/nat kameraa
Danish
Kundeservice
Har svarende
Page 10

Introduktion
Din pakke indeholder
Tilslut dit ”Maxi Day/Night” kamera til din monitor
Påsætning af metal hætte
Udskiftning eller ændring af linse
Tips til installation af dit kamera
Vigtig information om dette produkt
Tips – til brug ved Swann sikkerheds/overvågnings kamera
Tekniske specifikationer
Help Desk/ Kunde Support
Garanti information
2
2
3
4
4
5
6
6
7
Bagsiden
Bagsiden
2
2
3
4
4
5
6
6
7
Bagsiden
Bagsiden
”Maxi Day/Night” kamera er et alsidigt vandsikret CCD sikkerheds/overvågningskamera som
indeholder 24 infrarød LED's, som giver dig muligheden for at betragte billeder der er produceret
under dårlig belysning, selv om natten. Linsen kan bruges til at få et bedre billede fra dit hjem eller
dit kontor – til at afspille et klart billede på DVR, TV, VCR eller monitor.
For at få den bedste udnyttelse af ”Maxi Day/Night” kamera, er det optimalt at brug det sammen
med Swann DVR's eller monitor – men det kan også uden problemer bruges sammen med dit
nuværende CCTV udstyr - TV, VCR eller computer. Kameraet kan bruges både uden og inde.
”Maxi Day/Night” kamera har mange muligheder – som f.eks. overvågning af din hoveddør, din bil,
din båd, din forretning eller dine børns legeområde.
INSTALLATION
• ”Maxi Day/Night” kamera med fastgjorte kabler og kamera hætte
• Kamera holder
• BNC hunstik til RCA hanstik adapter
• 10M BNC forlænger kabel med DC forbindelse
• Strømforsyning
• Klistermærker med Logo
• Dette instruktionsblad
Hvis nogle af ovenstående ting mangler – kontakt da den forretning hvor du har købt dit Swann
sikkerheds/overvågningsudstyr.
Indhold
Introduktion
Din pakke indeholder
10
Bildesensor:
Bilde element:
Video System *:
Horisontal Oppløsning:
S / N Ratio:
Minimum belysning:
Video ut:
Strøm forsyning:
Operating Current:
Video Kabel kontakter:
Infrarødt LED:
Infrarødt LED Bølgelengde:
Maksimal IR belysnings område:
IR aktivering:
Kamera hus Material:
Mål:
* Vær oppmerksom på at dette kameraet sendes med det aktuelle TV / Video-systemet til landet
det sendes for salg. I land hvor det brukes NTSC-TV-standarden, vil kameraet bli bygget for NTSC-
standarden, og i land som bruker TV-standarden PAL, vil kameraet bli bygget i PAL-standarden.
Kameraet kan ikke slås fra en standard til den andre.
Page 11

11
Forbind dit ”Maxi Day/Night” kamera til dit monitoreringsudstyr
BNC hunstik
DVR, TV, VCR eller MONITOR
OUT
IN
VIDEO
VIDEO
AUDIO
AUDIO
VIDEO IND
DC stik
DC STRØMFORBINDER
3c
2a
1b
STRØMFORSYNING
2
DC stik
1a
FORLÆNGER KABEL
3
BNC hanstik
3b
BNC hanstik
3d
DC STIK
3a
Disse trin instruktioner giver dig muligheden for hurtigt og simpelt at installere af dit kamera.
Venligst se på medfølgende diagram, når installationen startes.
Forbind BNC hunstikket til ”Maxi Day/Night” kameraet (1b) og forbind derefter
BNC hanstikket til forlænger kablet (3b)
Forbind BNC forlænger kablet (3d) bag på din DVR eller andet monitoreringsudstyr.
Hvis du tilslutter kablet til et TV eller VCR, skal du bruge det inkluderet BNC
hunstik til RCA hanstik adapter.
Forbind DC stikket (1a) til DC input på forlænger kablet (3a)
Forbind DC strømstikket (2a) til strømforsyningen på forlænger kablet (3c)
Tilslut strømforsyningen til dit strømstik på væggen
Tænd for din DVR eller monitoreringsudstyr og følg leverandørens instruktioner i
henhold til at få et billede frem. Hvis du har med et RCA stik, er det
nødvendigt at står på for at kunne se billede fra kameraet. For at forbinde
kameraet til din - skal din stå på - og derefter skal TV'et
tændes, og du skal finde den kanal du normalt plejer at se video på. Denne kanal du
normalt finder den, via en knap på fjernbetjeningen der kan hedde L1 eller L2- den
kan også hedde AV1 eller AV2. Er du i tvivl, så kan du finde mere info på området I din
brugsanvisning til dit TV eller VCR.
Trin 1:
Trin 2:
Trin 3:
Trin 4:
Trin 5:
Trin 6:
A/V TV
TV'et AV
VCR VCR A/V Input
Page 12

12
Påsætning af metal hætte
Udskiftning eller ændring af linse
Påsætning af metal hætte
For at tilpasse kameraets hætte, brug en lille skruetrækker til at fjerne de 2 små skruer fra
toppen af monteringsblokken. Når disse er fjernet placer hætten på toppen af
monteringsblokken hen over skruehullerne på monteringsblokke. Placere monteringsblokken
på toppen af hætten ved brug af skruetrækker og de før nævnte skruer. Skru de 2 skruer
tilbage på plads indtil hætten er fastspændt.
Udskiftning eller ændring af linse:
Sikre dig at kamera hætte er taget af, dernæst følg nedenstående trin.
(A) Skru fronten af kameraet imod uret
(B) Fjern gummiringen rundt om kamera linsen
(C) Forsigtigt fjern LED panelet fra kameraet og drej det til den ene side – søg for
at ledningerne går fra undersiden af panelet hen til kameraet.
(D) Skru linsen med uret og fjern den.
(E) Når linsen er fjernet – kan du forsigtigt skrue den anden linse på (ikke inkluderet)
med uret. Juster for korrekt fokus.
(F) Når fokus er korrekt, samle derefter kameraet igen. Hvis du ønsker at
skifte tilbage til standard linsen, følg overstående trin.
Note: ”Maxi Day/Night” farvekameraet vil automatisk går over til sort/hvid billeder når
LED infrarød bruges. Dette vil kameraet automatisk gøre, når der er for lidt lyds til
et farvebillede.
1. Dør
5. Resepsjoner
Du bør plassere kameraer for å dekke områdene mest utsatt for risiko. Se våre
forslag nedenfor for noen ideer:
Hvor å plassere Sikkerhets klistremerker:
1. På forsiden vindu
2. På siden av vinduer
3. I nærheten av inngangspunkt - dører, porter
4. Ved siden av et dummy kamera montert utenfor
5. Foran på disken
6. På kassaapparat
7. Ved siden av et åpenbart kamera
Page 13

1. Ved indgangs
døre
5. Receptions
områder
6. Kasseapparatet
7. Mix dummies
med ægte kamera
8. Under
tagudhæng
2. Vinduer 3. Bil parkering
4. Verandaer
Du bør placere dit kamera, så det dækker det størst mulige område, som er i
risikozonen. Nedenstående er ideer til hvor det kan placeres:
Hvor skal klistermærkerne med logo sættes:1.
1. På dine vinduer
2. Ved siden af dine vinduer
3. Ved indgange – døre m.v.
4. Ved siden af dummy kamera monteret udenfor
5. På forsiden af disken
6. På kasseapparatet
7. Ved siden af et synligt ægte kamera
13
Tips til installation af dit kamera
Page 14

14
!
!
!
!
!
!
Det bedst resultat opnås kamera er fokuseret på et bestemt område.
Den medfølgende hætte kan bruges til at stoppe sollys, således at ikke billede ikke bliver alt
forlyst og svært at se.
Venligst test alle enheder før den endelige installation, dette gøres for nemmere at kunne rette
problemer, der kunne opstå undervejs.
For at undgå skader på dit produkt, brug kun den medfølgende strømforsyning.
Områder der er overbelyste kan give et dårligt billede. Hvis muligt sæt dit kamera,
således at det ikke filmer direkte ind i et overbelyst område.
Tilpas ikke DC strømkablet til passe til andre strømforsyninger. Det kan resultere i skade på dit
kamera. Garantien på produktet vil frafalde ved uautoriseret ændringer på produktet.
1. Afskrækkelse er den bedst og mest effektive sikkerhedsmetode for:
- Forhindre kriminel aktivitet inden det sker – og er billigere end at rytte op efter
eventuel indbrud eller hærværk.
- Swann ”Maxi Day/Night” kamera er et eksempel på en kost effektiv
sikkerhedsløsning – kunsten ”at afskrække” er at overliste tyve og andre kriminelle.
2. Placere altid kameraet så højt, at det ikke kan fjernes af ubudne gæster.
3. Placere altid kamera og eventuelle dummies således at de altid kan ses, for
maksimum afskrækkelse.
4. Placere din monitor, hvor den kan ses – men ikke røres.
5. Hvis du har mere end et kamera, anbefales det at bruge en monitor med flere kanaler,
quad processor eller DVR med multi fremvisning.
6. Tilføj ekstra dummy kamera for at give indtrykket af høj sikkerhed.
7. Køb et Swann DVR (SW-R-DVR4NET) for at monitorere og overvåg. Afhængig
af opsætning kan denne optage i flere måneder.
8. Placere en VCR med bånd eller andet ved din monitor for udvidet effektivitet –
dette indikere at der er en overvågning med optagelsen, selvom der ikke er.
Vigtig information om dette produkt
Tips til brug af dit Swann sikkerheds/overvågningskamera
VIDEO INN
Page 15

Image Sensor:
Picture Element:
Video System*:
Horisontal opløsning:
S/N Ratio:
Minimum Illumination:
Video Output:
Strømforsyning:
Strøm:
Video Kabel Forbinder:
Infrarød LED's:
Infrarød LED Bølgelængde:
Maksimum IR Illumination Vide:
IR:
Materiale:
Størrelse:
¼” SuperHAD CCD
PAL - 500 (H) x 582 (V)
NTSC - 510 (H) x 492 (V)
NTSC - USA & CANADA
PAL - AU, UK & EU
420 TV Lines
> 48db
0 Lux (IR LED's)
1.0v (P-P) @ 75ohm
12volts DC
180mA - 280mA (IR)
BNC Hunstik
24
850nm
20m
Automatisk fra PE
Auto om natten
Auto slukket om dagen
Aluminium
4” (H) x 2¾” (W) x 6¾” (L)
99mm (H) x 71mm (W) x 169mm (L)
* I lande med NTSC TV standard, vil kameraet have en indbygget NTSC standard, og I lande
hvor PAL er TV standard vil kameraet have en indbygget PAL standard. Kameraet kan skifte
mellem de 2 standarder.
Tekniske specifikationer
15
NOTE:Der forefindes i alle lande forskellige lovgivninger med specielle
love og regulativer for brug af overvågningskameraere. Det er
brugeren/køberen af et eller flere overvågningskameraeres ansvar at
overhold og forholde sig til de dertil gældende lovgivning og regulativer
indenfor området dette kan være lovgivning og regulativer om forbud eller
om begrænset brug. Overvejelser i forbindelse med overnstående bør
ske før opsætning og brug af overvågningskameraet.
Lovgivningen og regulativer om ovevågning af andre mennesker end en
selv diffencere sig fra land til land. Kontakt det lokale politi eller anden
offentlig virksomhed som har viden på området for yderlig information
omkring lovgivning og regulativer på området.
Page 16

Swann Communications garantere dette produkt imod produktionsfejl og fejl i materialet, for en
periode af 1. år, fra produktets oprindelige købsdato. Der skal fremvises kvittering som bevis for
købsdatoen, for at garantien træder i kraft. Alle produkter der viser sig at være defekte i
ovenstående periode vil blive repareret, uden beregning for reservedele og arbejdsløn – eller
produktet ombyttet af Swann. Reparationen eller ombytningen vil have en garanti enten på 90
dage eller det tilbageværende af den originale garanti – dette kommer an på hvilken periode,
der er længst. Slutbrugeren er ansvarlig for alle omkostninger i forbindelse med forsendelse til
Swann's reparations centre. Slutbrugerne er ansvarlig for alle forsendelses omkostninger i
forbindelse med forsendelse til alle lande, undtagen slutbrugens oprindelses land. Garantien
dækker ikke tilfældige, vilkårlige eller følgeskader, som følge af forkert brug af produkt eller
manglende evne til at bruge produktet korrekt. Alle omkostninger i forbindelse med montering
eller flytning af produktet af sælger eller anden person – samt alle andre omkostninger med
tilknytning til brugen af produktet, ligger hos slutbrugen. Denne garanti gælder kun for den
oprindelige køber af produktet, og kan ikke overføres til tredjepart.
Uautoriserede modificeringer af komponenter, bevis for misbrug eller forkert brug af produktet
– af slutbruger eller af tredjepart, vil betyde at garantien frafalder.
Garanti information
www.swannsecurity.com
En130808
Swann Teknisk Support
E-mail:
Telefon / Kundecenter
USA/De Forende Stater
USA Ombytning & Retuneringer
Australien
New Zealand
International
1-800-627-2799
1-877-274-3695
(Søndag, 14.00 - 22.00 amerikansk tid)
(Mandag -Torsdag, 06.00 - 22.00 amerikansk tid)
(Fredag 06.00 -14.00 amerikansk tid)
562-777-2551
Mandag - Fredag, 09.00 – 17.00 (amerikansk tid)
1300 138 324
(Mandag - fredag 09.00 – 17.00 australsk tid)
(Tirsdag - fredag 01.00 – 05.00 australsk tid)
(Lørdag 01.00 - 09.00 australisk tid)
0800 479 266
+61 3 8412 4610
For yderliger information om de forskellige tidzoner samt tidzonen I Australien
- i forhold til din lokale tidszone, gå til hjemmesiden:
eusupport@swannsecurity.com
http://www.worldtimeserver.com
Kundecenter / Support Detaljer
FCC Garanti
Produktet overholder
kapitel 15 I FCC
vedtægterne.
Funktionen er emnet I
følgende vilkår:
(1)Dette produkt må ikke
medvirke til skadelige
forstyrrelser og
(2)Dette produkt må
approbere enhver støj
inkluderet forstyrrelser,
som kan forårsage en
utilsigtet proces.
ADVARSEL: VIGITIG
INFORMATION OM KORREKT
AF STRØMFORSYNINGEN.
Den korrekte brug af den inkluderet
stømforsyningen er i en vertical
eller gulv monteret posistion.
L’orientation correcte pour
L’adapteur secteur fourni
est dans une position
verticale ou plancher-
monte.
La orientacion correcta para
el adaptador electrico incluido
es en posicion vertical o instalado
en el suelo.
Maxi Dag/Natt Kam
Sikkerhets Kamera
Hvis denne enheten ikke fungerer når du hr koplet
det til, ikke ta det med tilbake til butikken.
Installasjons Guide
Værbestandig Dag & Natt Kamera
Page 17

Maxi Dag/Natt Kam
Sikkerhets Kamera
Hvis denne enheten ikke fungerer når du hr koplet
det til, ikke ta det med tilbake til butikken.
Kontakt Swann kundeservice gjennom vår hurtige e-post
tjeneste eller ring oss på et av
de Toll gratis nummerene som står på baksiden av denne esken
swanneu@swannsecurity.com
De fleste prblemer kan hurtig og enkelt løses gjennom en
enkel epost séller en kart samtale med en av våre vennlige
teknikkere (Toll gratis tilgjengelig kun i USA og Australia )
Installasjons Guide
Værbestandig Dag & Natt Kamera
Norwegian
Kundeservice
Har svaret
Page 18

Innledning
Din pakken leveres med
Koble Maxi Dag / Natt kamera til overvåkings enhet
Installere kameraet hetten
Bytte eller endring av linse
Tips om hvordan du installerer kameraet
Viktig informasjon om dette produktet
Tips for bruk av Swann Security kamera
Tekniske spesifikasjoner
Help Desk / Support Detaljer
Garanti Informasjon
2
2
3
4
4
5
6
6
7
Bakside
Bakside
2
2
3
4
4
5
6
6
7
Bakside
Bakside
Maxi Dag / Natt kamera er et allsidig Værbestandig CCD Sikkerhets kamera som inkluderer 24
Infrarøde lysdioder som gir deg evnen til å vise bilder produsert under de fleste lysforhold, også om
natten. Det kan brukes til å gi ditt hjem eller kontor et klart bilde som lett kan vises på en DVR, TV,
VCR eller Sikkerhets Monitor.
Maxi Dag / Natt kameraet er designet for best mulig ytelse når den brukes med Swann DVRs og
sikkerhets skjermer, men vil like enkelt arbeide med ditt eksisterende CCTV utstyr, TV, videospiller
eller en datamaskin med et video opptaks kort. Kameraet kan brukes innendørs eller utendørs. Maxi
dag / natt kamera kan brukes til en rekke formål, inkludert overvåking av samtaler på døren eller
holde bilen, verksted, butikk eller lekeplass for barn under observasjon.
INSTALLATION
• Maxi Dag/Natt kamera med fast kabel og kamera Hette
• kamera fot
• Kamera Stativ
• BNC hun til RCA hann adapter
• 10m BNC Forlengelse Kabel med DC-tilkobling
• Strøm Adapter
• Sikkerhet klistremerke
• Dette instruksjons heftet
Hvis noen av disse tingene mangler, kontakt din forhandler.
Innhold
Introduksjon
Din pakke inneholder...
18
Image Sensor:
Picture Element:
Video System*:
Horisontal opløsning:
S/N Ratio:
Minimum Illumination:
Video Output:
Strømforsyning:
Strøm:
Video Kabel Forbinder:
Infrarød LED's:
Infrarød LED Bølgelængde:
Maksimum IR Illumination Vide:
IR:
Materiale:
Størrelse:
* I lande med NTSC TV standard, vil kameraet have en indbygget NTSC standard, og I lande
hvor PAL er TV standard vil kameraet have en indbygget PAL standard. Kameraet kan skifte
mellem de 2 standarder.
Page 19

19
Koble Maxi Dag / Natt kamera til overvåking enhet
BNC hun
DVR, TV, VCR eller monitor
OUT
IN
VIDEO
VIDEO
AUDIO
AUDIO
VIDEO INN
DC Jack
DC strømkontakten
3c
2a
1b
Strøminntak
2
DC Jack
1a
Forlengelse kabel
3
BNC han
3b
BNC han
3d
DC Plug
3a
Disse trinnvise instruksjoner er gitt for deg å muliggjøre en rask og enkel installasjon av
kameraet. Se diagrammet over for komponent identifikasjon detaljer
Koble BNC hun kontakten på Maxi Day / Night Camera (1b) til BNC
hann-kontakt på forlengelse kabel (3b)
Koble BNC forlengelse tilkobling (3D) til baksiden av DVR eller overvåknings
enheten. Merk hvis du kobler til en TV eller VCR, bruk inkludert BNC hun til RCA
han adapter
Koble DC Jack (1a) til DC-inngang på forlengelse kabel (3a)
Koble DC strømkontakt (2a) på strømforsyningen til forlengelse kabel (3c)
Plugge i strøm-adapter (2) til en tilgjengelig strømuttak
Slå på DVR eller overvåke enheten og følger produsentens instruksjoner for visning
av bilder. Hvis du har en A / V-TV med RCA tilgang kan det hende du må slå på TV'en
til AV-kanal for å vise kameraet. Hvis du vil koble kameraet til videoopptakeren, må
du slå på videoopptakeren til A / V Input utvalg og slå TVen på kanalen du normalt vil
bruke til å vise en tape eller film på din VCR. Denne kanalen kan aktiveres ved en
knapp på fjernkontrollen som er merket L1 eller L2 eller muligens AV1 og AV2.
Vennligst les instruksjonene for VCR eller TV for å få mer informasjon om å bruke
sine A / V-innganger.
Trinn 1:
Trinn 2:
Trinn 3:
Trinn 4:
Trinn 5:
Trinn 6:
Page 20

20
Installere Kamera Hette
Erstatt Eller Bytt Linsen
Installere Kamera Hette
For å plassere kamera hetten, bruk en liten Philips skrutrekker til å fjerne de to skruene fra
topp montering blokker. Når disse er fjernet, plasserer du kalesje på toppen av kameraet
foringsrør med spilleautomater over skruehullene i casing. Plasser montering blokk på
toppen av hette, og ved hjelp av skrutrekkeren skru på to skruer tilbake i casing før hette
er godt sikret.
Erstatt eller bytt linsen
Først må du kontrollere at kamera hetten har blitt fjernet, og deretter følger
du disse trinnene.
(A) Skru av fronten på kamera huset i en anti-klokken retning
(B) Fjern gummi ring rundt kameraets linse
(C) Nøye fjerne LED krets kort fra kamera huset og vrir den til en side, tar vare
på ledninger som går fra undersiden av krets kortet i kameraet
(D) Skru linsen med klokken retning og fjerne det helt
(E) Når linsen er fjernet, nøye skru på ny linse (ikke inkludert) i en ”med”
klokken retning inn i linse holderen og tilpasse den til riktig fokus
(F) Når fokuset er riktig, sett alle komponentene du har fjernet, tilbake I omvendt
rekkefølge. Motsatt denne fremgangsmåten hvis du ønsker å reparere
Standard linsen
Merk: Maxi Day / Night Color Camera vil automatisk skifte til et svart-hvitt bilde ved hjelp av
infra-røde lysdioder når det tilgjengelige lyset er for lavt til å støtte en klar farge bildet.
1. Ved indgangs
5. Receptions
Du bør placere dit kamera, så det dækker det størst mulige område, som er i
risikozonen. Nedenstående er ideer til hvor det kan placeres:
Hvor skal klistermærkerne med logo sættes:1.
1. På dine vinduer
2. Ved siden af dine vinduer
3. Ved indgange – døre m.v.
4. Ved siden af dummy kamera monteret udenfor
5. På forsiden af disken
6. På kasseapparatet
7. Ved siden af et synligt ægte kamera
Page 21

1. Dør
innganger
5. Resepsjoner
6. Kasseapparat
7. Miks dummies
og ekte
kameraer
8. Under
takskjegg
2. Vinduer 3. Parkerings
plasser
4. Verandaer
Du bør plassere kameraer for å dekke områdene mest utsatt for risiko. Se våre
forslag nedenfor for noen ideer:
Hvor å plassere Sikkerhets klistremerker:
1. På forsiden vindu
2. På siden av vinduer
3. I nærheten av inngangspunkt - dører, porter
4. Ved siden av et dummy kamera montert utenfor
5. Foran på disken
6. På kassaapparat
7. Ved siden av et åpenbart kamera
21
Tips For å Installere Kameraet Ditt
Page 22

22
!
!
!
!
!
!
Beste resultatene er oppnådd når kameraet ser ned på fagområde.
Hetten kan brukes til å stoppe sollys inn i linsen som kan forårsake at bildet blir vasket ut
under lyse dagslys.
Du må teste alle enheter før endelige installasjonen, det vil da være langt enklere å rette opp
problemer på dette stadiet.
For å unngå risiko for skade på produktet, bruk kun den medfølgende strøm adapteren.
Områder med en lys bakgrunn kan forårsake degradering av bildet. Bør det hvis det er mulig
å flytte kameraet slik at det ikke peker mot en svært belyst lyskilde.
Ikke kutt DC strømkabelen av kameraet til å passe med en annen strømkilde. Dette kan
resultere i skade på kameraet og uautorisert modifikasjon vil ugyldiggjøre garantien din.
1. Avskrekking er den beste og mest kostnadseffektive sikkerhets metoden for:
- Forebygge kriminell aktivitet før det oppstår, og billigere enn å rydde opp etter
at det oppstår
- Swann Maxi Dag / Natt kamera er et eksempel på kostnadseffektiv sikkerhet bruk av
"kunst av avskrekking" for å lure tyven og kriminelle
2. Alltid plasser kameraer høyt nok til at de ikke kan nøye kontrolleres eller
være lett tilgjengelige.
3. Plasser kameraer og dummies hvor de lett kan bli sett for maksimal avskrekking.
4. Plasser en skjerm hvor den kan sees, men ikke berøres.
5. Hvis du har mer enn ett kamera, bruk en skjerm med kanal bytter funksjon, en
Quad-prosessor eller DVR med flere visninger for å vise potensielle lovbrytere hvilket nivå
av dekning du har overvåket.
6. Legg til ekstra Swann dummy kameraer for å gi inntrykk av økt sikkerhet.
7. Kjøp et Swann DVR (produkt kode SW-R-DVR4NET) for å overvåke og registrer
aktiviteten på kameraer. Avhengig av innstillingene som brukes, DVRs kan spille inn
i flere måneder.
8. Plasser en videospiller med kassetter eller bokser nær skjermen for ekstra effekt, slik at
man tror det er en sikkerhet video opptaker selv om det ikke er én.
Viktig informasjon om dette produktet
Tips for bruk av Swann Security kamera
DVR, TV, VCR eller MONITOR
VIDEO IND
Page 23

Bildesensor:
Bilde element:
Video System *:
Horisontal Oppløsning:
S / N Ratio:
Minimum belysning:
Video ut:
Strøm forsyning:
Operating Current:
Video Kabel kontakter:
Infrarødt LED:
Infrarødt LED Bølgelengde:
Maksimal IR belysnings område:
IR aktivering:
Kamera hus Material:
Mål:
¼” SuperHAD CCD
PAL - 500 (H) x 582 (V)
NTSC - 510 (H) x 492 (V)
NTSC - USA og Canada
PAL - AU, UK & EU
420 TV-linjer
> 48db
0 Lux (IR lysdioder)
1.0v (P-P) @ 75ohm
12volts DC
180mA - 280mA (IR)
BNC hunn
24
850nm
66ft (20m)
Automatisk fra PE Cel
Auto på natt
Auto av dag
Aluminiumlegering
4” (H) x 2¾” (W) x 6¾” (L)
99mm (H) x 71mm (W) x 169mm (L)
* Vær oppmerksom på at dette kameraet sendes med det aktuelle TV / Video-systemet til landet
det sendes for salg. I land hvor det brukes NTSC-TV-standarden, vil kameraet bli bygget for NTSCstandarden, og i land som bruker TV-standarden PAL, vil kameraet bli bygget i PAL-standarden.
Kameraet kan ikke slås fra en standard til den andre.
Tekniske spesifikasjoner
23
NOTER:
Det finnes i alle lande forskellige lovgivninger med spesielle lov og
reguleringer for bruk av overvågningskameraere. Det er
brukeren/kjøperens ansvar å sette seg inn i reglene som forbyr og som
setter grenser ved bruk av kameraer og forholde seg til de gjeldene
lovgivningene og regulereringene. Det er kjøpers ansvar å sette seg
inn i dette.
Lovgivningen og reguleringer om ovevåkning av andre mennesker enn
segselv er forskjellig fra land til land. Kontakt det lokale politi eller annen
offentlig virksomhet som har kompetanse på området for ytterligere
informasjon rundt lovgivning og reguleringer på området.
Page 24

SWANN Communications har 1 års garanti fra original kjøps dato og den dekker arbeid og
deler. Du må vise kvittering som bevis for kjøpsdato. SWANN produkter som blir defekt
innenfor denne perioden vil bli reparert gratis, dette gjelder for deler, arbeid eller byttet til en
ny enhet. Reparasjonen eller produkt byttet har får 90 dagers ny granati tid eller den vil vare ut
resten av den originale garanti perioden, avhengig av den perioden som er lengst. Sluttbrukeren
må betale frakten til SWANN sitt reparasjon senter. Sluttbrukeren må også eventuelt dekke frakt
kostnadene som gjelder for sendinger ut av landet. Garantien dekker ikke: ulykker, tilfeldig eller
konsekvent feilbruk av utstyret. Alle kostnader som gjelder montering og brukerhjelp fra 3.part
leverandør skal dekkes av sluttbrukeren. Garantien gjelder KUN for den originale kjøperen av
produktet og vil ikke bli overført videre til en 3. part.
Uautorisert sluttbruker eller 3. parts modifikasjoner på komponenter eller bevist missbruk av
produktet vil gjøre garantien ugyldig.
Garanti Informasjon
www.swannsecurity.com
En130808
Kundeservice Detaljer
FCC ADVARSEL
MELDING
Produktet overholder
kapitel 15 I FCC
reglemanget. Funksjonen
er emnet i følgende vilkår:
(1)Dette produktet må
ikke medvirke til skadelige
forstyrrelser og produktet
må håndtere støy den
utsettes for, inkludert
forstyrrelser som kan
fororsake uønskede
resultater
ADVARSEL: VIKTIG
INFORMASJON OM KORREKT
BRUK AV STRØMFORSYNINGEN
Den korrekte bruken av denne er inkludert
strømforsyningen er i en vertikal eller
gulv montert posisjon.
L’orientation correcte pour
L’adapteur secteur fourni
est dans une position
verticale ou plancher-
monte.
La orientacion correcta para
el adaptador electrico incluido
es en posicion vertical o instalado
en el suelo.
Swann Teknisk support
E-post : eusupport@swannsecurity.com
1-800-627-2799
1-877-274-3695
(Sun, 2pm-10pm US PT)
(Mon-Thurs, 6am-10pm US PT)
(Fri, 6am-2pm US PT)
562-777-2551
(Mon-Fri, 9am-5pm US PT)
1300 138 324
(Mon-Fri, 9am-5pm Aus ET)
(Tues-Fri, 1am-5pm Aus ET)
(Sat, 1am-9am Aus ET)
0800 479 266
+61 3 8412 4610
Telefon Kundeservice
UNITED STATES toll gratis
USA Exchange & Returns
AUSTRALIA toll gratis
New Zealand toll gratis
Internasjonalt
Se på for informasjon om de ulike tids sonene og hva som er lokal tid
i Melbourne Australia for å sammenligne din lokale tid
http://www.worldtimeserver.com
Maxi Day/Night Cam
Sikkerheds/overvågningskamera
Hvis produktet ikke virker første gang du sætter det til
– skal du ikke tage produktet tilbage til forhandleren.
Installations Guide
Vandsikret dag/nat kameraa
Page 25

Maxi Dag/Natt Kamera
Övervakningskamera
Om enheten inte fungerar när kopplar inden för
första gangueen, gå inte tillbaka till butiken.
Kontakta Swann helpdesk genoma att använda vår snabba
e-mail service eller ring oss på
ett av de avgiftsfria numren du finner bak på omslaget av
denna folder.
eusupport@swannsecurity.com
De flesta problemen kan lösas snabbt och enkelt med
ett simpelt e-mail eller telefonsamtal med en av våra
trevliga tekniker. (Avgiftsfritt endast i USA och Australien)
Installations Guide
Utomhus Dag och Natt kamera
Swedish
Helpdesk
Har Svaren
Page 26

Introduktion
Ditt paket levereras med…
Anslut Maxi Dag/Natt kameran till din övervakningsenhet
Montera kamerakåpan
Omplacera eller ändra linsen
Tips för installation av din kamera
Viktig information om denna produkt
Hjälp för användning av din Swann övervakningskamera
Teknisk information
Kundtjänst / Support
Garanti information
2
2
3
4
4
5
6
6
7
Baksida
Baksida
2
2
3
4
4
5
6
6
7
Baksida
Baksida
Maxi Dag/Natt kameran är en mångsidig utomhus CCG övervakningskamera som har 24 infraröda
LEDs som ger dig möjlighet att se bilder som tagits under de flesta ljusförhållanden, till och med
under natten. Den kan användas för att enkelt visa en klar bild på ditt hem eller kontor via en DVR,
TV, video eller övervaknings monitor.
Maxi Dag/Natt kameran är utformad för bästa prestanda när den används med Swann DVRs och
övervaknings monitorer, men fungerar lika enkelt med din befintliga CCTV utrustning, TV, video
eller dator. Kameran kan användas inomhus eller utomhus. Maxi Dag/Natt kan användas I en
rad olika syften såsom övervakning av porttelefonen, bilen, trädgården, butiken eller barnen
på lekplatsen.
INSTALLATION
• Maxi Dag/Natt kamera med fast kabel och kamera kåpa
• Kamera hållare
• BNC hona till RCA han-adapter
• 10m BNC förlängningskabel med DC anslutning
• Nätadapter
• Säkerhets stickers
• Denna instruktionsbok
Om något av ovan saknas, vänligen kontakta din återförsäljare.
Innehåll
Introduktion
Ditt paket levereras med …
26
Image Sensor:
Picture Element:
Video System*:
Horizontal Resolution:
S/N Ratio:
Minimum Illumination:
Video Output:
Power Supply:
Operating Current:
Video Cable Connector:
Infra-Red LEDs:
Infra-Red LED Wavelength:
Maximum IR Illumination Range:
IR Activation:
Housing Material:
Dimensions:
*Please note that this camera ships in the appropriate TV/Video system for the country of sale. In
countries using the NTSC TV standard for the camera will be built to the NTSC standard, and in
countries using PAL TV standard, the camera will be built to the PAL standard. The camera cannot
switched from one standard to the other.
Page 27

27
Anslut Maxi Dag/Natt kameran till din övervakningsenhet
BNC hona
DVR, TV, videobandspelare
eller övervakningsenhet
OUT
IN
VIDEO
VIDEO
AUDIO
AUDIO
Video in
DC Jack
DC plug
3c
2a
1b
DC ström kontakt
2
DC Jack
1a
Strömadapter
3
BNC hane
3b
BNC hane
3d
DC Plug
3a
Dessa steg-för-steg instruktioner ger dig möjlighet att göra en snabb och enkel installation av
din kamera. Fyll i det diagram på sidan för komponent identifieringsuppgifter.
Anslut BNC hon-kontakten på Maxi Dag/Natt Kameran (1b) till BNC
han-kontakten på förlängningskabeln (3b)
Anslut BNC förlängnings kontakt (3d) till baksidan av din DVR eller
övervakningsenhet. Notera om du ansluter till en TV eller videobandspelare använd
den inkluderade BNC honan till RCA han-adaptern.
Anslut DC Jack (1a) till DC ingången på förlängningskabeln (3a)
Anslut DC ström kontakten (2a) på strömadaptern till förlängningskabeln (3c)
Koppla in strömadaptern (2) till lämpligt strömuttag.
Starta din DVR eller övervakningsenhet och följ tillverkarens instruktioner för visning
av bilder. Om du har en A/V TV med RCA uttag kan du behöva slå över din TV till AVkanalen för att se kameran. För att ansluta kameran till din videobandspelare måste du
välja A/V ingången på videon och välja den kanal på din TV som du normalt använder
när du visar ett band eller en film på videobandspelaren.
Denna kanal aktiveras oftast genom en knapp på din fjärrkontroll som heter L1 eller
L2, eller möjligtvis AV1 eller AV2. Läs anvisningarna för din videobandspelare eller TV
för mer information om hur du använder deras A/V ingångar.
Steg 1:
Steg 2:
Steg 3:
Steg 4:
Steg 5:
Steg 6:
Page 28

28
Montera kamerakåpan
Byta ut eller ändra linsen
Montera kamerakåpan
Använd en Philips huvud-skruvmejsel för att ta bort de två skruvarna från moterings blocket
för att sedan anpassa kamera kåpan. När dessa är bortplockade placerar du kåpan ovanpå
kamerans hölje med facken under de skruvhål som finns i höljet. Placera monteringsblocket
ovanpå kåpan och sedan skruvar du fast de två skruvarna igen i höljet till kåpan är
ordentligt fäst.
Byta ut eller ändra linsen:
Börja med att kontrollera att kamerakåpan har tagits bort, följ sedan dessa steg.
(A) Skruva av främre kamera-höljet i motsols riktning.
(B) Ta bort gummiringen som sitter runt kamerans lins
(C) Ta försiktigt bort lampornas kretskort från höljet och vänd den till ena sidan,
var försiktig med de ledningar som går från undersidan av kretskortet till kameran.
(D) Skruva av linsen i motsols riktning och ta bort den helt.
(E) När linsen är bortplockad, skruva försiktigt i ersättningslinsen medsols och justera
den till rätt fokus.
(F) När fokus är rätt inställt, sätt tillbaka alla delarna som du precis tagit bort I
omvänd ordning.
Noter: Maxi Dag/Natt Färg-kamera slår automatiskt över till svart/vit bild med hjälp av de
infraröda lamporna när ljuset är för dåligt för att visa en klar färgbild.
1. Doorways
5. Reception
You should position your cameras to cover the areas most exposed to risk.
See our suggestions below for some ideas:
Where to Place The Security Stickers:
1. On your front window
2. On side windows
3. Near entrance points - doors, gates
4. Next to a dummy camera mounted outside
5. On the front counter
6. On the cash register
7. Next to an obvious camera
Page 29

1. Dörröppningar
5. Receptioner
6. Kassaapparater
7. Blanda
dummies och
riktiga kameror
8. Under
takfötter
2. Fönster 3. Parkeringar
4. Verandor
Du bör placera dina kameror så att de täcker de områden som är mest utsatta
för risk. Se våra förslag nedan för några idéer:
Här bör du placera säkerhets stickers:
1. På ditt frontfönster.
2. På sidofönster
3. I närheten av entréer – dörrar och grindar
4. I närheten av en dummie-kamera som är
monterad utomhus
5. På frontdisken
6. På kassaapparaten
7. I närheten av en väl synlig kamera
29
Tips för installation av din kamera
Page 30

30
!
!
!
!
!
!
Bästa resultatet uppnås när kameran ser ner på det valda området.
Kåpan kan användas för att skydda linsen från sol, vilket i annat fall kan leda till dålig bild
en solig dag.
Testa alla enheter innan slutlig installation eftersom det är mycket lättare att rätta till
problemen i detta skede.
För att undvika risken för skada på din produkt, använd endast medföljande adaptrar.
Områden med mycket ljus bakgrund kan påverka bildens kvalitet. Om möjligt placera
kameran så den inte är riktad mot en stark ljuskälla.
Klipp ej av kamerans DC-kabel för att få den att passa med en annan strömkälla. Detta kan
resultera i skador på kamera och andra obehöriga modifieringar gör att garantin upphör gälla.
1. Avskräckning är den bästa och mest kostnadseffektiva säkerhetsmetoden för :
- att förhindra brottsligverksamhet och är dessutom billigare än att städa upp efter
att den förekommit
- Swann Maxi Dag/Natt kamera är ett exempel på kostnadseffektiv säkerhet
”konsten att avskräcka” för mindre smarta tjuvar och brottslingar
2. Placera alltid kamerorna högt så att de inte är lättillgängliga och kan inspekteras för nära.
3. Placera kameror och dummies där de lätt kan ses för maximal avskräckning.
4. Placera bildskärmen där den kan ses men inte röras.
5. Om du har mer än en kamera använd en bildskärm med switch-funktion, Quad- processor
eller DVR med fler vyer.
6. Montera extra Swann dummy kameror för att de intrycket av förhöjd säkerhet.
7. Köp en DVR (produktkod SW-R-DVR4NET) för att övervaka och spela in verksamhet från
dina kameror. Beroende på vilka inställningar som används kan en DVR spela in flera månader.
8. Placera en videobandspelare nära intill din bildskärm för extra effekt, vilket innebär att det
finns en övervakningsvideobandspelare även om det inte är en.
Viktig information om denna produkt
Tips för användning av din Swann övervakningskamera
Page 31

Bild Sensor:
Bild Element:
Video System*:
Horisontell upplösning:
S/N Ratio:
Minimum Illumination:
Video Output:
Ström:
Operating Current:
Video kabelkontakt:
Infraröd LEDs:
Infraröd LED våglängd:
Maximum IR Illumination vidd:
IR aktivering:
Material hölje:
Mått:
¼” SuperHAD CCD
PAL - 500 (H) x 582 (V)
NTSC - 510 (H) x 492 (V)
NTSC - USA & CANADA
PAL - AU, UK & EU
420 TV linjer
> 48db
0 Lux (IR LEDs on)
1.0v (P-P) @ 75ohm
12volts DC
180mA - 280mA (IR On)
BNC hona
24
850nm
66ft (20m)
Automatisk från PE Cel
Auto On at Night
Auto Off during Day
Aluminium Alloy
4” (H) x 2¾” (W) x 6¾” (L)
99mm (H) x 71mm (W) x 169mm (L)
*Observera att denna kamera levereras med lämpligt TV/video-system för försäljningslandet.
I länder som använder NTSC TV-standard levereras kameror som är byggda med NTSC standrad
och i länder som använder PAL TV-standard levereras kameror som är byggda med PAL standard.
Kameran kan inte byta från en standard till en annan.
Teknisk Specifikationer
31
Notera:
Alla rättsväsen har speciella lagar som reglerar användandet av kameror.
Innan ni använder en kamera för alla ändamål, är det köparens skyldighet
att känna till de regler och lagar som förbjuder eller hindrar användandet
av kameror och åtlyda dessa.
Lagarna kring att titta på människor, andra än dig själv, varierar från land
till land. Kontakta länstyrelsen för att få mer information om vilka regler
som gäller.
Page 32

Maxi Day/Night Cam
Security Camera
If this device does not work when you first plug it in,
do not take it back to the store.
Installation Guide
Weatherproof Day & Night Camera
Swann Communication lämnar garanti mot fel på material och konstuktionsfel under en period
av 12 månader från inköpsdatumet. Man måste kunna verifiera inköpsdatumet med ett kvitto
för att åberopa garanti. Varje enhet som visar sig felaktig under den avtalade perioden blir
reparerad utan kostnad för delar eller arbete, eller utbytt, endast med Swanns medgivande.
Reparationen eller den utbytta enheten har en garanti på antingen 90 dagar eller enligt
kvarvarande 12-månaders garanti, vilket som är längst. Slutanvändaren ansvarar för alla
fraktkostnader i samband med inskickandet till Swanns servicepartner.Slutanvändaren ansvarar
för all fraktkostnad som uppstår vid skeppande mellan länder och ursprungslandet. Garantin
täcker ingen kostnad, som härör sig från att inte utrustningen fungerat som den ska eller pga
dess användning. All kostnad i samband med montering eller nedmontering eller annan kostnad
som användandet medförs är slutanvändarens ansvar. Denna garanti gäller för det första inköpet
endast och kan inte överföras till tredje person.
Modifiering av oaktoriserad slutanvändare eller tredje part på någon komponent eller genom
felaktikt användande medför att garantin upphör.
Garanti Information
www.swannsecurity.com
En130808
Help Desk / Support Detaljer
FCC Earning
Denna utrustning uppfyller
avd. 15 i FCC reglement.
Användande är underställt
följande två villkor:
(1) denna enhet orsakar
inte skadlig störning och
(2) denna enhet måste
acceptera al lev.
Mottagen störning,
inclusive störning
som orsakar oönskad
funktion.
VARNING: VIKTIGT ANG
ANVÄNDANDET AV
STRÖM ADAPTERN.
Den correcta placeringen för den
medföljande adaptern är i en vertikal
eller golvmonterad position.
L’orientation correcte pour
L’adapteur secteur fourni
est dans une position
verticale ou plancher-
monte.
La orientacion correcta para
el adaptador electrico incluido
es en posicion vertical o instalado
en el suelo.
Swann teknisk support
E-mail :
1-800-627-2799
1-877-274-3695
(sön, 14,00-22,00 US PT)
(mån-tors, 06,00-22,00 US PT)
(fre, 06,00-14,00 US PT)
562-777-2551
(mån-fre, 09,00-17,00 US PT)
1300 138 324
(mån, 09,00-17,00 Aus ET)
(tis-fre, 01,00-17,00 Aus ET)
(lör, 01,00-09,00 Aus ET)
0800 479 266
+61 3 8412 4610
Telefon helpdesk
USA avgiftsfritt
USA utbyte och returer
AUSTRALIEN avgiftsfritt
NEW ZEELAND avgiftsfritt
Internationellt
Se http://www.worldtimeserver.com för information om olika tidzoner och tiden i
Melbourn Australien jämfört med din lokala tid.
eusupport@swannsecurity.com
 Loading...