

Page 1

IP-3G ConnectCam™ 3000
Quick Installation Guide
ENGLISH
www.swannsecurity.com
Page 2

- 1 -
1
Getting Started
Package Contents
Check the items contained in the package carefully. You should
have the following items. Once any item contained is damaged or
missing, contact the authorized dealer of your locale.
5 One Pan-Tilt MPEG4/MJPEG Network Camera
5 One AC Power Adapter
5 One External Antenna (for wireless model)
5 One Wall Mount Kit
5 One GPIO Connector
5 One Ethernet Cable (RJ-45 type)
5 One Installation CD-ROM
5 One Quick Installation Gu ide
System Requirement
Networking
LAN: 10Base-T Ethernet or 100Base-TX Fast Ethernet
WLAN: IEEE 802.11b/g (for wireless model)
Accessing the Camera using Web Bro wser
Platform: Microsoft® Windows® 2000/XP/Vista
CPU: Intel Pentium III 800MHz or above
RAM: 512MB
Resolution: 800x600 or above
User Interface: Microsoft® Internet Explorer 6.0 or above
Mozilla Firefox 2.00 or above
Apple Safari 2 or above
Page 3
- 2 -
2
Setting Up the Camera
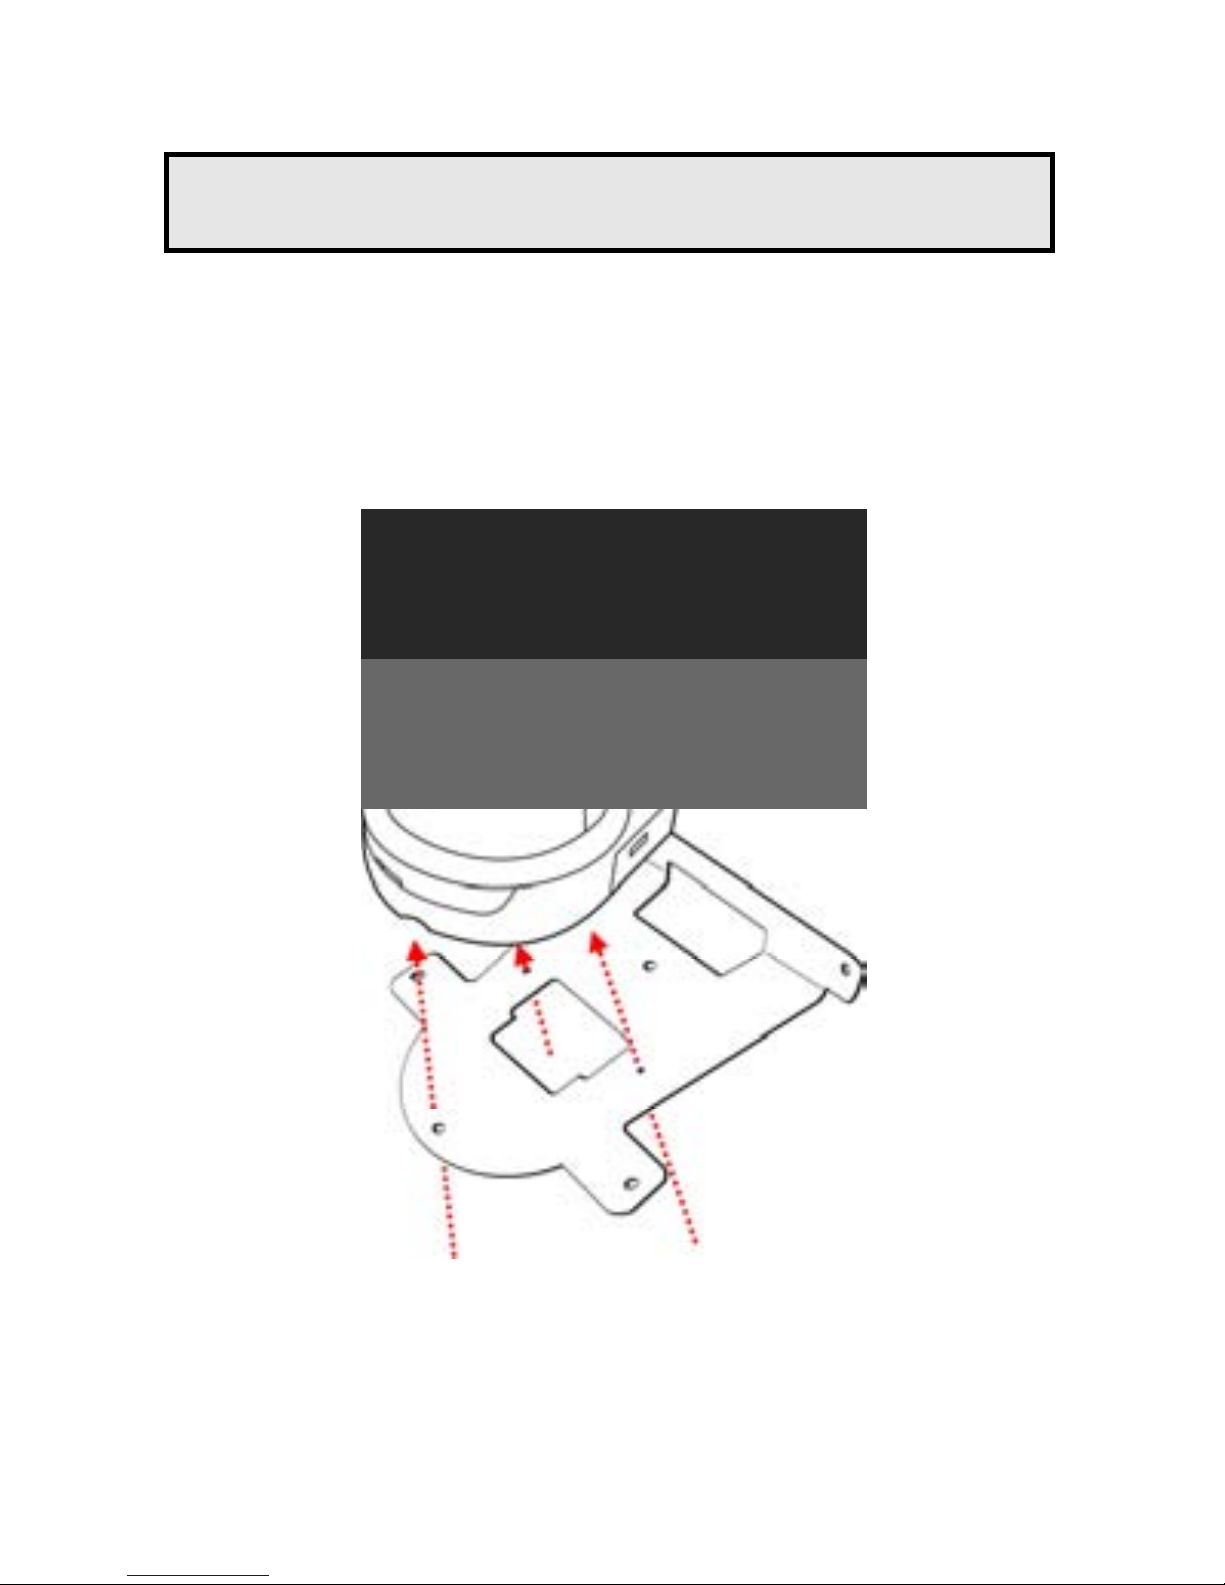
Installing the Wall Mount Kit
The camera comes with a Wall Mount Kit, which allows you to
place your camera anywhere by mounting the camera through the
three screw holes located in the base of the Wall Mount Kit.
Wall Mount Kit
Screw
Screw
Screw
Page 4
- 3 -
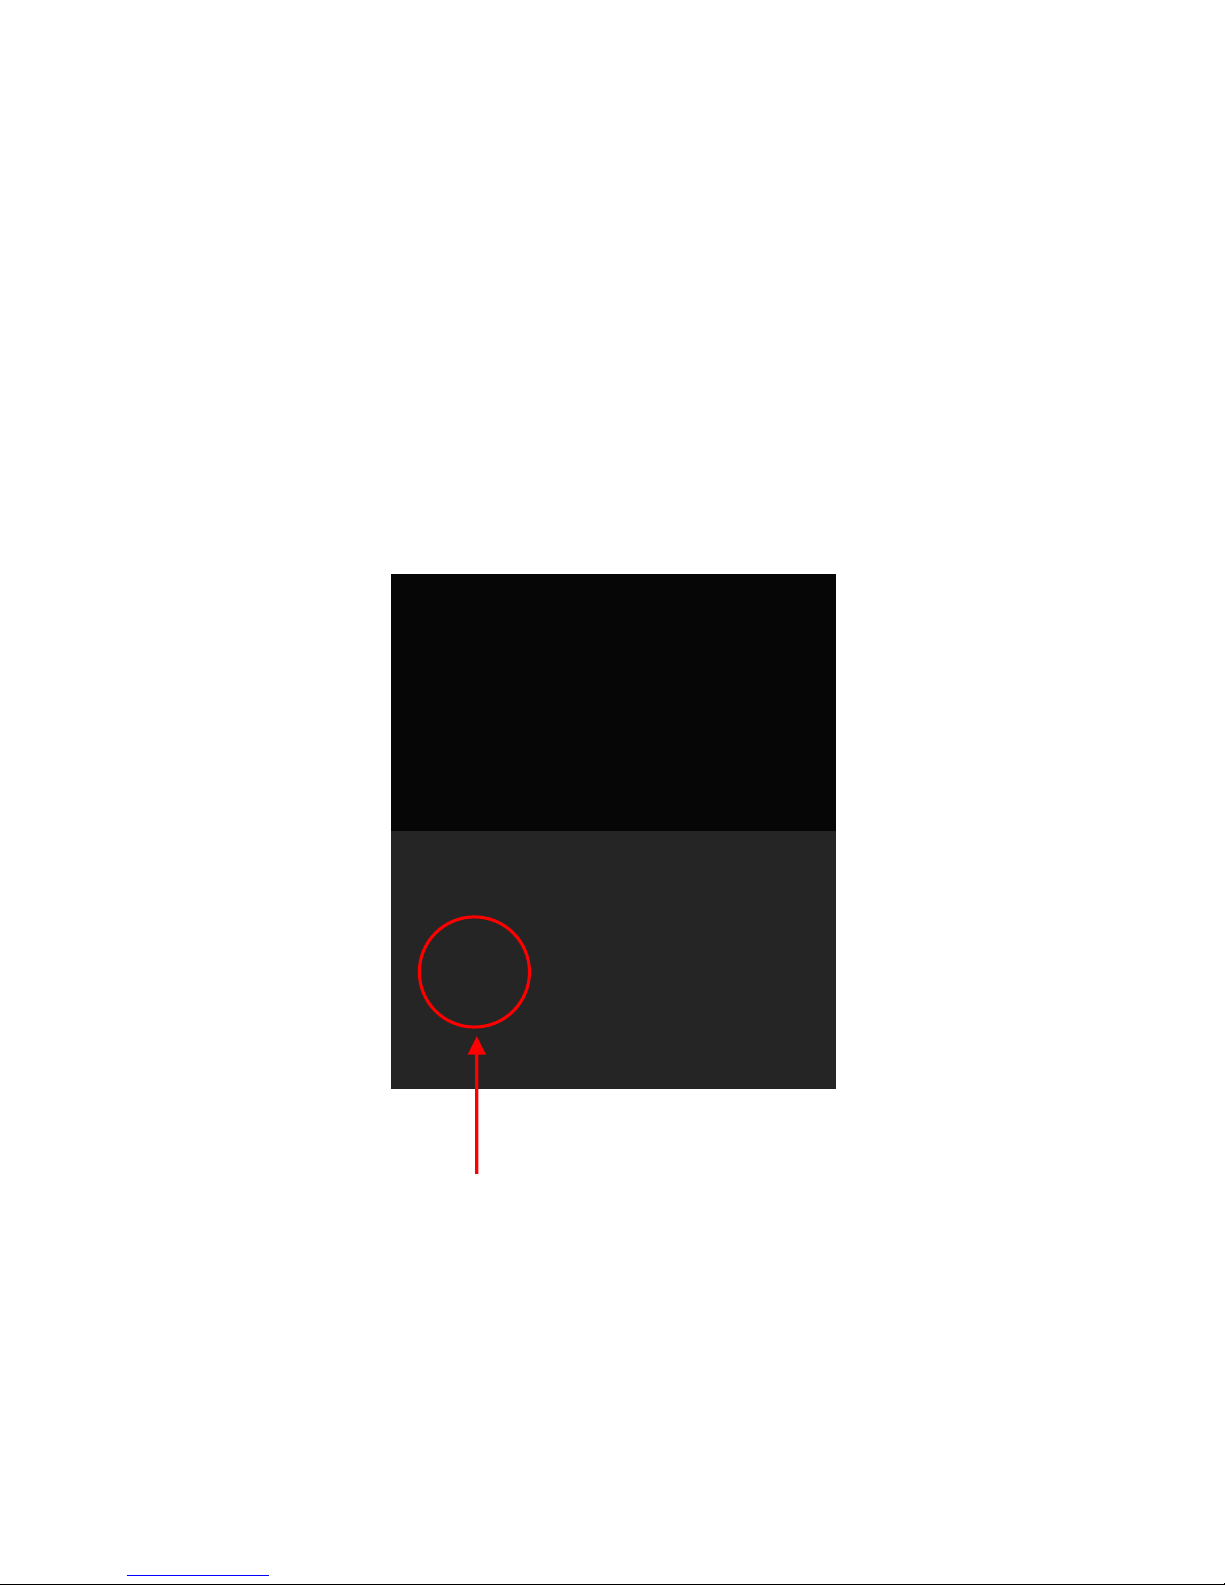
Connecting the Camera to LAN
Use the provided Ethernet cable to connect the camera to your
local area network (LAN).
When you connect the AC power adapter, the camera is powered
on automatically. You can verify the power status from the Power
LED on the front panel of the camera.
Once connected, the Link LED starts flashing green light and the
camera is on standby and ready for use now.
Connecting the Ethernet Cable
Page 5
- 4 -
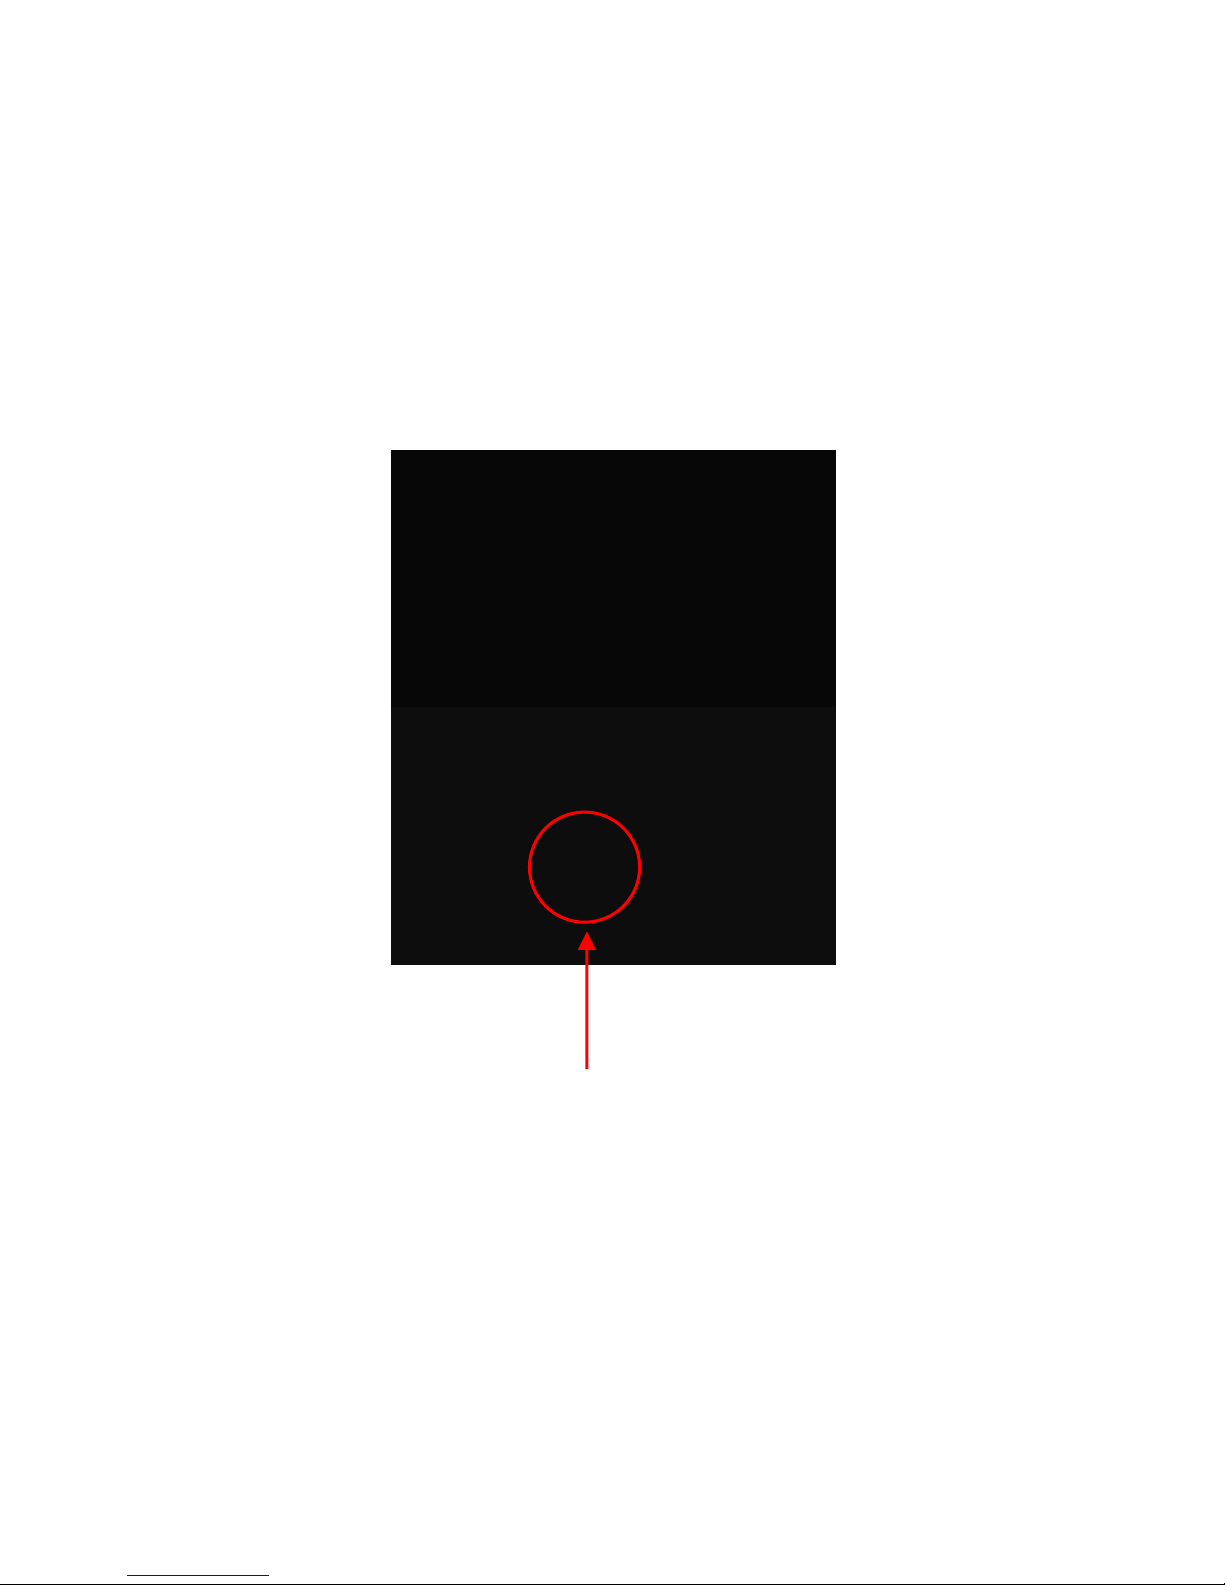
Connecting the Camera to WLAN
If you use a wireless network in your application environment, you
need to attach the included external antenna to the camera.
When the camera is powered on, the camera will automatically
search any access point with “default” SSID.
NOTE If the camera cannot to your wireless network,
you need to install the camera in LAN and proceed
with WLAN settings.
Connecting the External Antenna
Page 6
- 5 -
3
Accessing the Camera
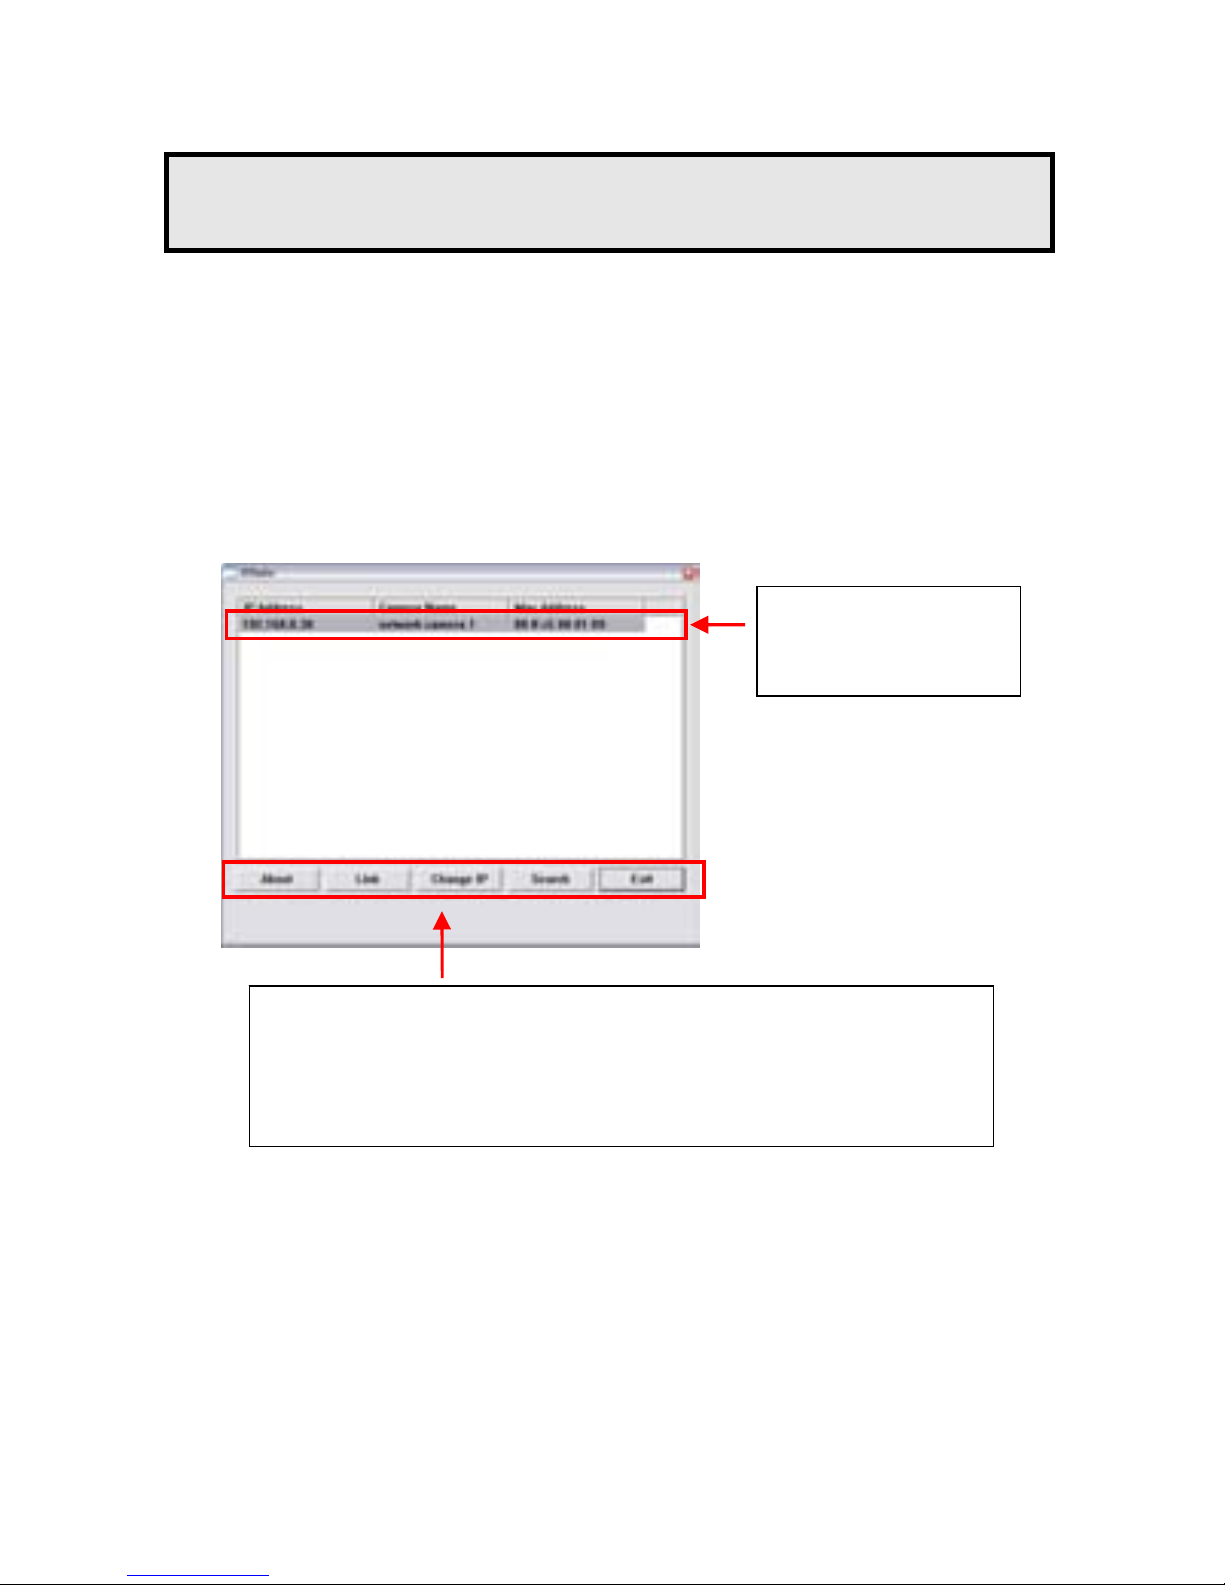
Using IPFinder
1. Insert the Installation CD-ROM into your computer’s CD-ROM
drive to initiate the Auto-Run program.
2. Click the IPFinder item to launch the utility. The control panel
will appear as below.
3. Once you get the IP address of the camera, launch the Web
browser or UltraView to access your camera.
TIP The Installation CD-ROM provides a setup program that
allows you to install IPFinder on your computer. To install
IPFinder, click Install Software then select IPFinder on
the Auto-Run screen.
Display the connected
camera(s).
Double click to link the
Camera.
Click About to get the Version information of IPFinder.
Click Link to connect the selected camera.
Click Change IP to modify the IP address of the selected camera.
Click Search to find the IP address of the connected camera(s).
Click Exit to close the utility.
Page 7
- 6 -
Accessing to the Camera
1. Connect your camera to the network (or the PC directly).
2. Since the default configuration of the camera is DHCP mode
enabled, you are recommended to launch IPFinder to search
the IP address that is assigned to the camera by the DHCP
server, and then click Link to access the camera via the
Web browser.
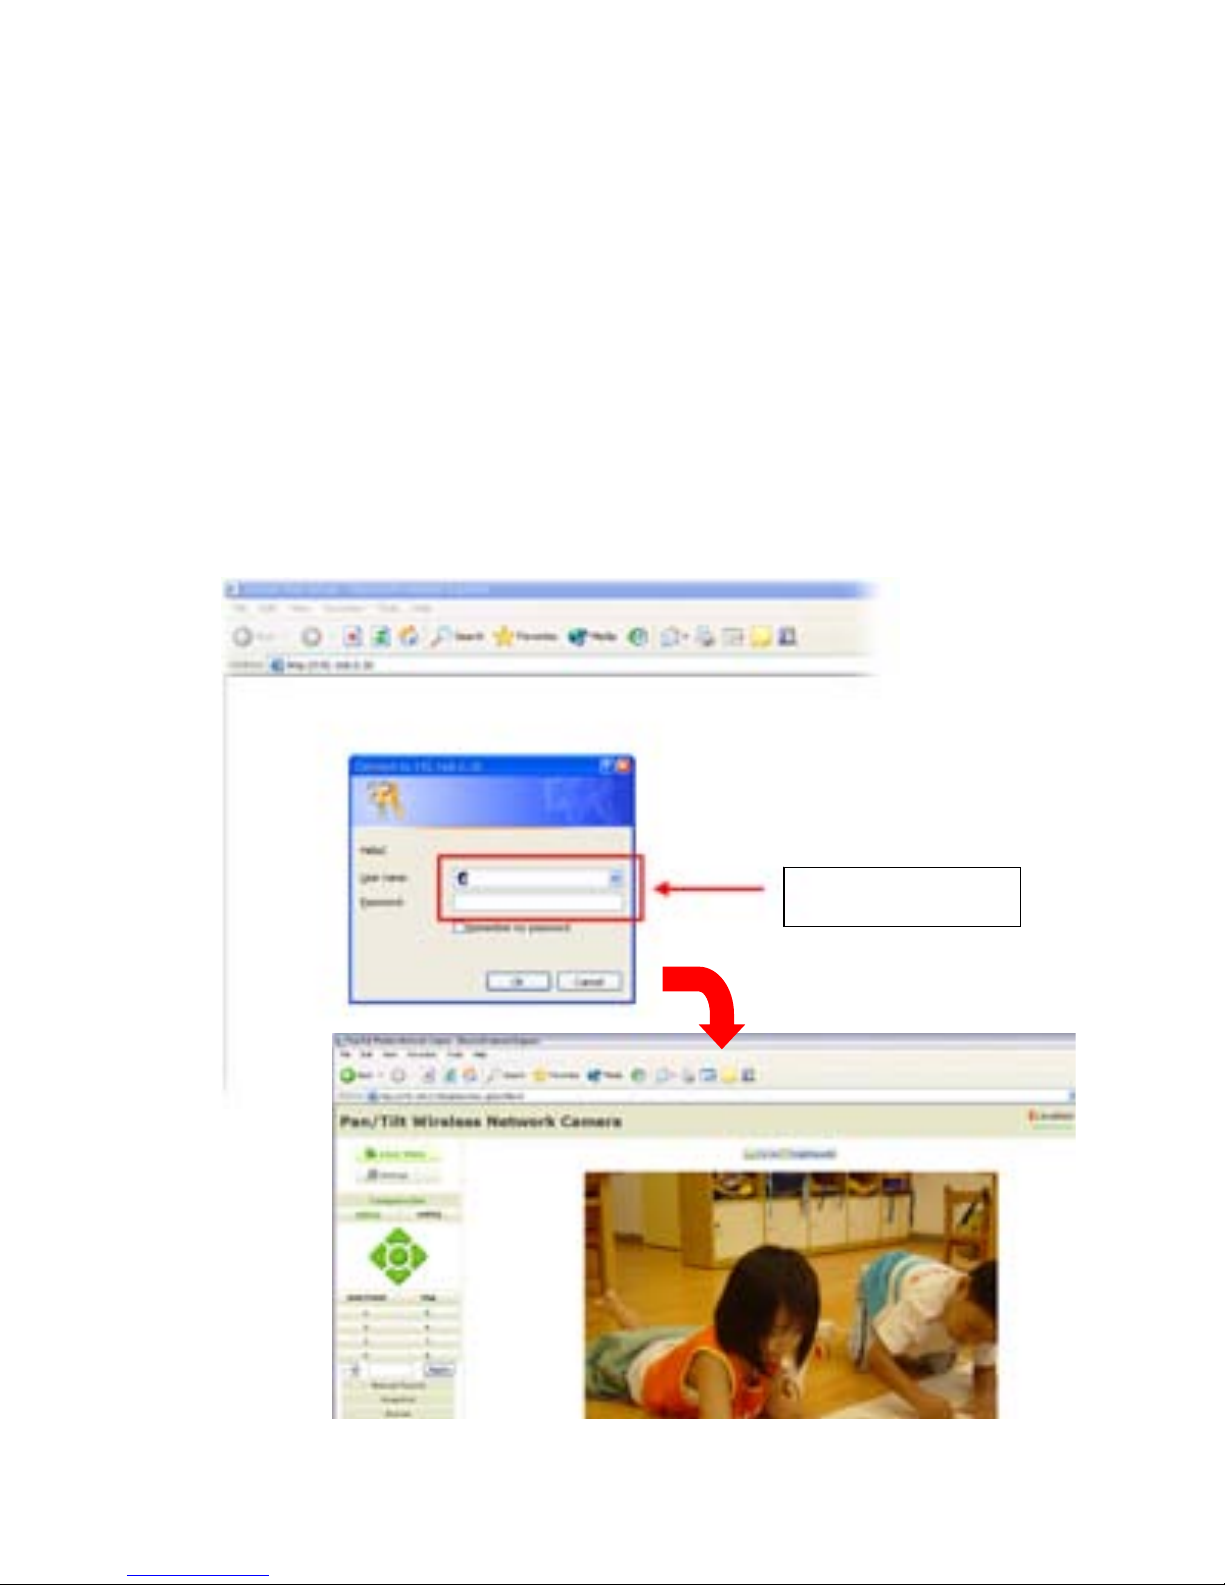
3. When the login window appears, enter the default User name
(admin) and password (admin) and press OK to access to the
main screen of the camera’s Web Configuration.
Enter the User name
and Password.
Page 8
- 7 -
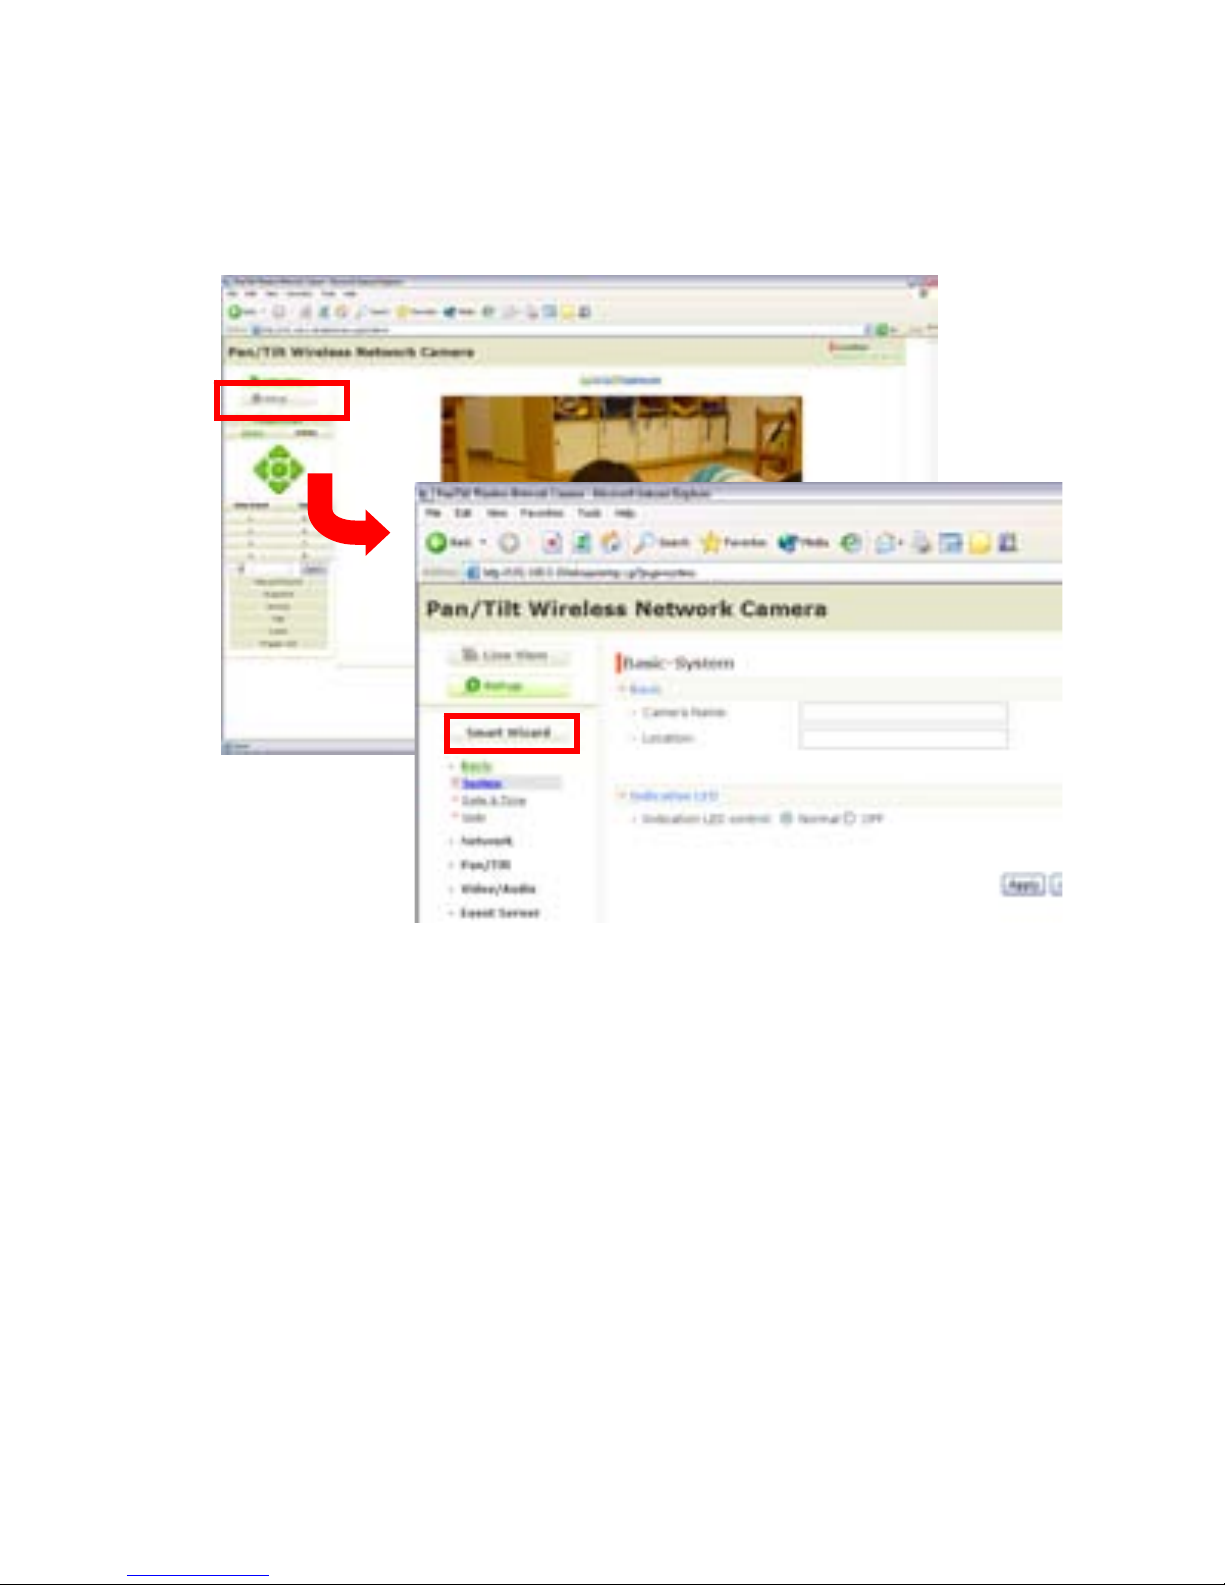
4. Click Setup and then Smart Wizard to set up your camera
quickly. The Smart Wizard will guide you through the
necessary settings with detailed instructions on each step.
Page 9

- 8 -
4
Tips
For more information, please refer to the Advanced Installation
Guide on the provided Installation CD-ROM.
For details of operating UltraView, please refer to the Software
User Guide on the provided Installation CD-ROM.
FCC WARNING STATEMENT
This device complies with Part 15 of FCC Rules.
Operation is subject to the following two conditions:
(1) This device may not cause harmful interference, and
(2) This device must accept any interference received,
including interference that may cause
undesired operation
Important Notice
All jurisdictions have specific laws and regulations regarding the
use of cameras. Before using any camera for any purpose, it is
the buyer’s responsibility to be aware of all applicable laws and
regulations that prohibit or limit the use of cameras and to comply
with the applicable laws and regulations. The legality of watching
people other than you changes from country to country and even
state to state. Contact your local government’s privacy
information body or your local Police for more information on what
if any restrictions you may face.
Important notice about correct usage of the power adapter
The correct orientation for the enclosed power adapter is in a
vertical or floor mount position.
Page 10

IP-3G ConnectCam™ 3000
Snabbstartsguide
SWEDISH
www.swannsecurity.com
Page 11

- 1 -
1
Komma igång
Paketet innehåller
Kontrollera innehållet i förpackningen noggrant. Du bör ha
följande produkter. Om någon av produkterna är skadade eller
saknas, kontakta din lokala återförsäljare.
5 En Pan-Tilt MPEG4/MJPEG Nätverkskamera
5 En AC Strömadapter
5 En extern antenn (till trådlös modell)
5 Ett väggmonteringskit
5 En GPIO kontakt
5 En ethernet kabel (RJ-45)
5 En installations CD-ROM
5 En Snabbstartsguide
Systemkrav
Nätverk
LAN: 10Base –T Ethernet eller 100Base TX snabb Ethernet
WLAN: IEEE 802.11b/g (till trådlös modell)
Använda kameran med hjälp av web browser
Platform: Microsoft® Windows® 2000/XP/Vista
CPU: Inter Pentium III 800 MHz eller mer
RAM: 512MB
Resolution: 800x600 eller mer
Användar
gränssnitt: Microsoft® Internet Explorer 6.0 eller nyare
Mozilla Firefox 2.00 eller nyare
Apple Safari 2 eller nyare
Page 12

- 2 -
2
Installera Kameran
Installera väggmonteringskitet
Kameran levereras med ett väggmonteringskit, som gör att du
kan placera kameran var du vill genom att fästa kameran i de tre
skruvhål som sitter i botten av väggmonteringskitet.
Vägg
monteringskit
Skruv
Skruv
Skruv
Page 13

- 3 -
Ansluta kameran till LAN
Använd den medföljande Ethernet-kabeln för att ansluta kameran
till ditt lokala nätverk (LAN).
När du ansluter nätadaptern komm er kameran automatiskt att
startas. Du kan kontrollera strömmen genom Power-l ampan på
framsidan av kameran.
När strömmen är ansluten kommer lysdi oden att blinka grön och
kameran är i vänteläge och klar för omedelbar använ dning.
A
nsluta Ethernet-kabel
Page 14

- 4 -
Ansluta kameran till WLAN
Om du använder trådlöst nätverk måste du använda den
medföljande antennen till din kamera.
När kameran är påslagen kommer den automatiskt att söka efter
en kopplingspunkt med ”default” SSID.
Notera Om kameran inte kan ansluta till det trådlösa
nätverket måste du fysiskt installera kameran till ditt
LAN och fortsätta med WLAN-inställningarna.
Om du använder trådlöst nätverk
måste du använda den
Page 15

- 5 -
3
Hitta Kameran
Använda IP Finder
1. Sätt in installations-CD-skivan i datorns CD-ROM-enhet att
för att inleda Auto-run programmet.
2. Klicka på IP Finder ikonen för att starta verktyget.
Kontrollpanelen visas som nedan.
3. När du få IP-adressen för kameran, starta webbläsaren eller
Ultra View för att komma åt kameran.
TIPS Installations-CD: n innehåller ett installationsprogram som
gör att du kan installera IP Finder på din dator. För att
installera IP Finder, klicka på Install software välj sedan
IP Finder på Auto-Run skärmen.
Visa ansluten kamera
Dubbelklicka för att koppla
kameran.
Klicka på About för att få information om IP Finder.
Klicka på Link för att ansluta vald kamera.
Klicka på Change IP för att ändra IP-adressen för vald kamera.
Klicka på Search för att hitta IP-adressen till den anslutna kameran.
Klicka på Exit för att avsluta verktyget.
Page 16

- 6 -
Åtkomst till kameran
1. Anslut din kamera till nätverket (eller direkt till din PC).
2. Eftersom standardkonfigurationen av kameran är DHCP-
funktionen, rekommenderas du att starta IPFinder för att söka
på IP-adress som är tilldelad kameran av DHCP-servern
och klicka sedan på Link för att komma åt kameran
via webbläsaren.
3. När inloggningsfönstret visas, ange standard Användarnamn
(administratör) och lösenord (admin) och tryck på OK för att
få tillgång till huvudskärmen i kamerans Web Configuration.
Ange användarnamn
och lösenord.
Page 17

- 7 -
4. Klicka på Setup och sedan Smart Wizard för att installera
din kamera. Smart Wizard guidar dig genom nödvändiga
inställningar med hjälp av detaljerade instruktioner för
varje steg.
Page 18

- 8 -
4
Tips Och Teknisk Support
För mer information hänvisar vi till Advanced Installation Guide på
den medföljande installations-CD-ROM.
För mer information om Ultra View hänvisar vi till Software User
Guide på medföljande installations-CD-ROM.
FCC Earning
Denna utrustning uppfyller avd. 15 i FCC reglement.
Användande är underställt följande två villkor:
(1) Denna enhet orsakar inte skadlig störning och.
(2) Denna enhet måste acceptera al lev. Mottagen störning,
inclusive störning som orsakar oönskad funktion.
Notera
Alla rättsväsen har speciella lagar som reglerar användandet av
kameror. Innan ni använder en kamera för alla ändamål, är det
köparens skyldighet att känna till de regler och laga r som
förbjuder eller hindrar användandet av kameror och åtlyda dessa.
Lagarna kring att titta på människor, andra än dig själv, varierar
från land till land. Kontakta länstyrelsen för att få mer information
om vilka regler som gäller.
Varning: Viktigt ang användandet av ström adaptern.
Den correcta placeringen för den medföl jande adaptern är i en
vertikal eller golvmonterad position.
Page 19

IP-3G ConnectCam™ 3000
Hurtig Installations Guide
DANISH
www.swannsecurity.com
Page 20

- 1 -
1
At få Startet
Pakkens Indhold
Kontroller at pakkens indhold. Du skal have følgende ting i
pakken. Hvis nogle dele af indholdet er beskadiget eller mangl er,
kontakt den forhandler hvor du har købt dit Swann udstyr.
5 Et Pan-Tilt MPEG4/MJPEG netværkskamera
5 En AC strømforsyning
5 En ekstern antenne (for trådløs model)
5 En vægmonteringkit
5 Et GPIO stik
5 Et Ethernet-kabel (RJ-45-typen)
5 En Installations-Cd-Rom
5 Hurtig Installations Guide
Systemkrav
Netværk
LAN: 10Base-T Ethernet eller 100Base-TX Fast Ethernet
WLAN: IEEE 802.11b /g (for trådløse model)
Adgang til det kamera ved bruge af Web Browser
Platform: Microsoft® Windows® 2000/XP/Vista
CPU: Intel Pentium III 800 eller derover
RAM: 512MB
Opløsning: 800x600 eller derover
Bruger
Interface: Microsoft ® Internet Explorer 6.0
eller derover
Mozilla Firefox 2.00 eller over
Apple Safari 2 eller derover
Page 21

- 2 -
2
Setting Up Kameraet
Installation af Vægmonteringkit
Kameraet leveres med et vægmonteringkit, som giver dig
mulighed for at placere dit kamera overalt, ved at monteringer dit
kamera gennem de tre skruehuller placeret i bunden af
vægmonteriOngkit.
Vægmonteringkit
Skruer
Skruer
Skruer
Page 22

- 3 -
Tilslutning af Kameraet til LAN
Anvend det medfølgende Ethernet-kabel til at forbinde kameraet
til dit lokale netværk (LAN).
Når du tilslutter AC strømforsyningen, tænder kameraet
automatisk. Du kan kontrollere strømmens status fra Power LED
på frontpanelet af kameraet.
Når kameraet er tilsluttet, begynder Link LED at blinke grønt lys,
og kameraet er på standby og er nu klar til brug.
Tilslutning af Ethernet-kabel
Page 23

- 4 -
Tilslutning af kameraet til WLAN
Hvis du bruger et trådløst netværk i opsætningen, skal du bruge
den medfølgende eksterne antenne til kameraet.
Når kameraet er tændt, vil kameraet automatisk søge enhver
adgangspunkt med "default" SSID.
BEMÆRK Hvis kameraet ikke kan tilsluttes til dit trådløse
netværk, er du nødt til fysisk at installere
kameraet til LAN og fortsætte med
WLAN-indstillinger.
Tilslutning af ekstern antenne
Page 24

- 5 -
3
Adgang til dit Kamera
Bruger IP-Finder
1. Indsæt Installations-cd-rom'en i computerens cd-rom-drev.
Cd’en opstarter selv programmet.
2. Klik på IP-Finder punkt for at starte. Kontrolpanelet vises
som nedenfor.
3. Når du får IP-adressen på kameraet, skal du starte
webbrowseren eller Ultra View for at få adgang til dit kamera.
TIP Installations cd’eren har et opsætningsprogram, der giver
dig mulighed for at installere IP-Finder på din computer.
For at installere IP-Finder, skal du klikke på Install Software
derefter vælge IP Finder på Auto-Run skærmen.
Vis tilsluttet kameraet.
Dobbelt klik for at
kunne forbinde kameraet.
Klik på About at få Version oplysninger af IP-Finder.
Klik på Link for at forbinde til det valgte kameraet.
Klik på Change IP for at ændre IP-adressen på det valgte kamera.
Klik på Search for at finde IP-adressen på den tilsluttede kamera.
Klik på Exit for at lukke programmet.
Page 25

- 6 -
Adgang til kameraet
1. Tilslut dit kamera til nettet (eller pc'en direkte).
2. Da standard opsætningen af kameraet er DHCP-mode
aktiveret, anbefales det at bruge IP-Finder, for at søge
IP-adressen - som er tildelt til kameraet som DHCP serv er,
og klik derefter på Link, for at få adgang til kameraet
via webbrowseren.
3. Når login vinduet vises, skal du indtaste standard Brugernavn
(admin) og password (admin), og tryk på OK for at få adgang
til kameraets web konfiguration.
Indtastning af dit
brugernavn og
password.
Page 26

- 7 -
4. Klik på Setup og derefter Smart Wizard for at oprette dit
kamera med et par enkle trin. Smart Wizard vil guide dig
gennem de nødvendige indstillinger med detaljerede
instruktioner i hvert trin.
Page 27

- 8 -
4
Tips Og Teknisk Support
For mere information, se venligst Avanceret Installation Guide
som er på installations cd’en.
For nærmere oplysninger om Ultra View, henvises du til software
brugervejledning som medfølger.
FCC Garanti
Produktet overholder kapitel 15 i FCC vedtægterne.
Funktionen er emnet i følgende vilkår:
(1) Dette produkt må ikke medvirke til skadelige
forstyrrelser og.
(2) Dette produkt må approbere enhver støj
inkluderet forstyrrelser, som kan forårsage en
utilsigtet proces.
Note
Der forefindes i alle lande forskellige lovgivninger med specielle
love og regulativer for brug af overvågningskameraere. Det er
brugeren/køberen af et eller flere overvågningskameraeres
ansvar at overhold og forholde sig til de dertil gældende
lovgivning og regulativer indenfor området dette kan være
lovgivning og regulativer om forbud eller om begrænset brug.
Overvejelser i forbindelse med overnstående bør ske før
opsætning og brug af overvågningskameraet.
Lovgivningen og regulativer om ovevågning af andre mennesker
end en selv diffencere sig fra land til land. Kontakt det lokale politi
eller anden offentlig virksomhed som har viden på området for
yderlig information omkring lovgivning og regulativer på området.
Advarsel: Vigitig Information Om Korrekt Af
Strømforsyningen
Den korrekte brug af den inkluderet stømforsyningen er i en
vertical eller gulv monteret posistion.
Page 28

IP-3G ConnectCam™ 3000
Hurtig Installasjons Guide
NORWEGIAN
www.swannsecurity.com
Page 29

- 1 -
1
Komme i Gang
Pakkens innhold
Kontroller elementene som inngår i pakken nøye. Du bør ha
følgende elementer. Når enhver inneholdt objektet er skadet eller
mangler, kan du kontakte autorisert forhandler.
5 Et Pan-Tilt MPEG4/MJPEG nettverk Kamera
5 EN AC Strømadapter
5 En ekstern antenne (for trådløs modell)
5 Et veggfeste Kit
5 En GPIO kontakt
5 En Ethernet kabel (RJ-45 type)
5 En installasjons-CD-ROM
5 En hurtig installasjons guide
Systemkrav
Nettverk
LAN: 10Base-T Ethernet eller 100Base-TX Fast Ethernet
WLAN: IEEE 802.11b / g (for trådløs modell)
Komme i kontakt med Kamera ved å bruke
Web Browser
Plattform: Microsoft® Windows® 2000/XP/Vista
CPU: Intel Pentium III 800 MHz eller nyere
RAM: 512MB
Oppløsning: 800x600 eller høyere
Bruker
grensesnitt: Microsoft ® Internet Explorer 6.0 eller nyere
Mozilla Firefox 2.00 eller nyere
Apple Safari 2 eller nyere
Page 30

- 2 -
2
Sette opp Kameraet
Installere veggfeste Kit
Kameraet leveres med et veggfeste Kit, som gir deg muligheten til
å plassere kameraet hvor som helst ved å montere kameraet
gjennom de tre skruehull som er lokalisert i bunnen av
Veggfeste Kit.
Veggfeste Kit
Skrue
Skrue
Skrue
Page 31

- 3 -
Koble kameraet til LAN
Bruk den medfølgende Ethernet-kabel til å koble kameraet til ditt
lokalnettverk (LAN).
Når du kobler til AC strømadapter, vil kameraet slå seg på
automatisk. Du kan kontrollere Strøm status fra Strøm LED lyset
på frontpanelet på kameraet.
Når koblet til, Link LED begynner å blinke grønt lys og kameraet
er i ventemodus og klar til bruk nå.
Koble Ethernet-kabel
Page 32

- 4 -
Koble kameraet til WLAN
Hvis du bruker et trådløst nettverk i ditt område, må du feste
inkludert ekstern antenne til kameraet.
Når kameraet er slått på, kameraet vil automatisk søke
tilgangspunkt med "standard" SSID.
MERK Hvis kameraet ikke kan koble til det trådløse
nettverket ditt, må du fysisk installerer kamera til
lokalnettet, og fortsett med WLAN-innstillingene.
Koble til den eksterne antennen
Page 33

- 5 -
3
Koble til Kameraet
Bruk av IP-Finder
1. Sett inn installasjons-CD-ROMen i datamaskinens CD-ROM-
stasjonen for å initiere Auto-Kjør programmet.
2. Klikk IP Finder element for å starte verktøyet. Kontrollpanelet
vises som nedenfor.
3. Når du mottar IP-adressen til kameraet, starter du en
nettleser eller Ultra View for å få tilgang til kameraet.
TIPS Installasjons-CD-ROMen inneholder et
installasjonsprogram som gjør at du kan installere IP Finder
på din datamaskin. For å installere IP Finder, klikker du
Installer programvaren og deretter velger IP Finder på
Auto-Run skjermen.
Viser det tilkoblete
kameraet (er).
Dobbeltklikk for å koble
til kameraet.
Klikk About for å få versjons informasjonen av IPFinder.
Klikk Link for å koble den valgte kameraet.
Klikk Change IP for å endre IP-adressen til det valgte kameraet.
Klikk Search for å finne IP-adressen til det tilkoblete kameraet (er).
Klikk Exit for å lukke verktøyet.
Page 34

- 6 -
Koble til kameraet
1. Koble kameraet til nettverket (eller PC, direkte).
2. Siden standardkonfigurasjonen av kameraet er DHCP-modus
er aktivert, blir du anbefalt å starte IPFinder å søke IPadressen som er tilordnet til kameraet av DHCP-serveren, og
klikk deretter Link for å få tilgang til kameraet via nettleser.
3. Når påloggingsvinduet vises, angi standard brukernavn
(admin) og passord (admin) og trykk OK for å få tilgang til
hovedskjermbildet av kameraets Web-konfigurasjon.
Angi brukernavn
og passord.
Page 35

- 7 -
4. Klikk Setup og deretter Smart Wizard til å sette opp
kameraet iløpet av noen få enkle trinn. Smart Wizard guider
deg gjennom de nødvendige innstillingene med detaljerte
instruksjoner for hvert trinn.
Page 36

- 8 -
4
Tips Og Teknisk Støtte
For mer informasjon, kan du gå til Advanced Installation Guide på
den vedlagte installasjons-CDen.
For detaljer om hvordan bruke Ultra View, henvises det til
Software Brukerhåndbok på den vedlagte installasjons-CDen.
FCC ADVARSEL MELDING
Produktet overholder kapitel 15 i FCC reglemanget
Funksjonen er emnet i følgende vilkår:
(1) Dette produktet må ikke medvirke til skadelige
forstyrrelser og.
(2) Produktet må håndtere støy den utsettes for, inkludert
forstyrrelser som kan fororsake uønskede resultater.
Noter
Det finnes i alle lande forskellige lovgivninger med spesielle lov
og reguleringer for bruk av overvågningskameraere. Det er
brukeren/kjøperens ansvar å sette se g inn i reglene som forbyr og
som setter grenser ved bruk av kameraer og forholde seg til de
gjeldene lovgivningene og regulereringene. Det er kjøpers ansvar
å sette seg inn i dette.
Lovgivningen og reguleringer om ovevåkning av andre
mennesker enn segselv er forskjellig fra land til land. Kontakt det
lokale politi eller annen offentlig virksomhet som har kompetanse
på området for ytterligere informasjon rundt lovgivning og
reguleringer på området.
Advarsel: Viktig Informasjon Om Korrekt Bruk Av
Strømforsyningen
Den korrekte bruken av denne er inkludert strømfor syningen er i
en vertikal eller gulv montert posisjon.
 Loading...