

Swann RedAlert/BlueAlert SW242-WDB, RedAlert, BlueAlert Installation Manual
RedAlert™ / BlueAlert™
If this device does not work when you first plug it
in, do not take it back to the store.
Contact the Swann Helpdesk using our fast e-mail service
tech@swann.com.au or call us on one of the Toll-Free
numbers shown on the back cover of this booklet.
Most problems can be quickly and easily fixed with a simple
e-mail or a quick chat with one of our friendly technical staff.
(Toll-Free available in the US and Australia only)
Installation Guide
Movement Video Recorder
Single Channel Digital Security Recorder
English

RedAlert/BlueAlert Digital Video Recorder
Table of Contents
2
Table of Contents
Package Contents
RedAlert/BlueAlert Features
Using the SD Card Slot
Changing the Wireless Camera Channel on the DVR
Changing Cameras and Viewing 2 Cameras PIP (Picture-in-Picture)
Motion Detection Setup
Choosing Video or Photo Recording
TV Mode and Picture Quality Settings
Advanced Motion Detection Setup
Viewing and Deleting Saved Images
Changing Folders
Connecting additional wireless cameras
Achieving the best wireless signal
RedAlert/BlueAlert Specifications
Tips and Shortcuts
Troubleshooting Wireless Camera Images
2
2
3
3
3
4
4
5
7
8
11
12
13
13
13
15
14
RedAlert/BlueAlert DVR Specifications
1 Video Output
1 Video Input
Wireless Channel Frequencies: 2414, 2432, 2450 & 2468MHz
Built in 4 CH Wireless Receiver (DVR records only 1 camera at a time)
Power Supply: 5V DC
Preset to NTSC or PAL Depending on Region (manually adjustable)
16MB internal memory
Output Format - AVI, JPEG
Maximum SD Capacity - 2GB
Recording Modes: Motion Detection
Recording Format: AVI Video 10s
Recording Resolution: JPEG 640 X 480
Package Contents
- RedAlert/BlueAlert DVR
- Antenna
- DVR Power Supply
- Instruction Manual
- Easy Setup Guide
- Video Out Cable
- Video In Cable
- BNC to RCA adapter
- SD Card (Optional)
3
RedAlert/BlueAlert Features
-Motion recording including adjustable sensitivity settings to prevent false triggers
-Manually record 10 second video clips or snap individual photos
-Option for wired or wireless camera
-Built-in 4 channel wireless camera receiver (records 1 wired or wireless camera at a time)
-Video and pictures can be recorded to SD cards for easy transfer to a computer
-Small design allows you to place DVR in discreet location to prevent tampering
Changing the Wireless Camera Channel on Your DVR
To change wireless channels on your DVR, push the SET button on the front casing. The
light indicates the current wireless channel i.e. CH1, CH2, CH3, CH4. Push the display
button (DISP) to change views between your wired and wireless cameras.
If onboard memory or SD memory is full, the DVR will automatically overwrite the oldest
images or video first ensuring the DVR keeps recording.
RedAlert/BlueAlert Digital Video Recorder RedAlert/BlueAlert Digital Video Recorder
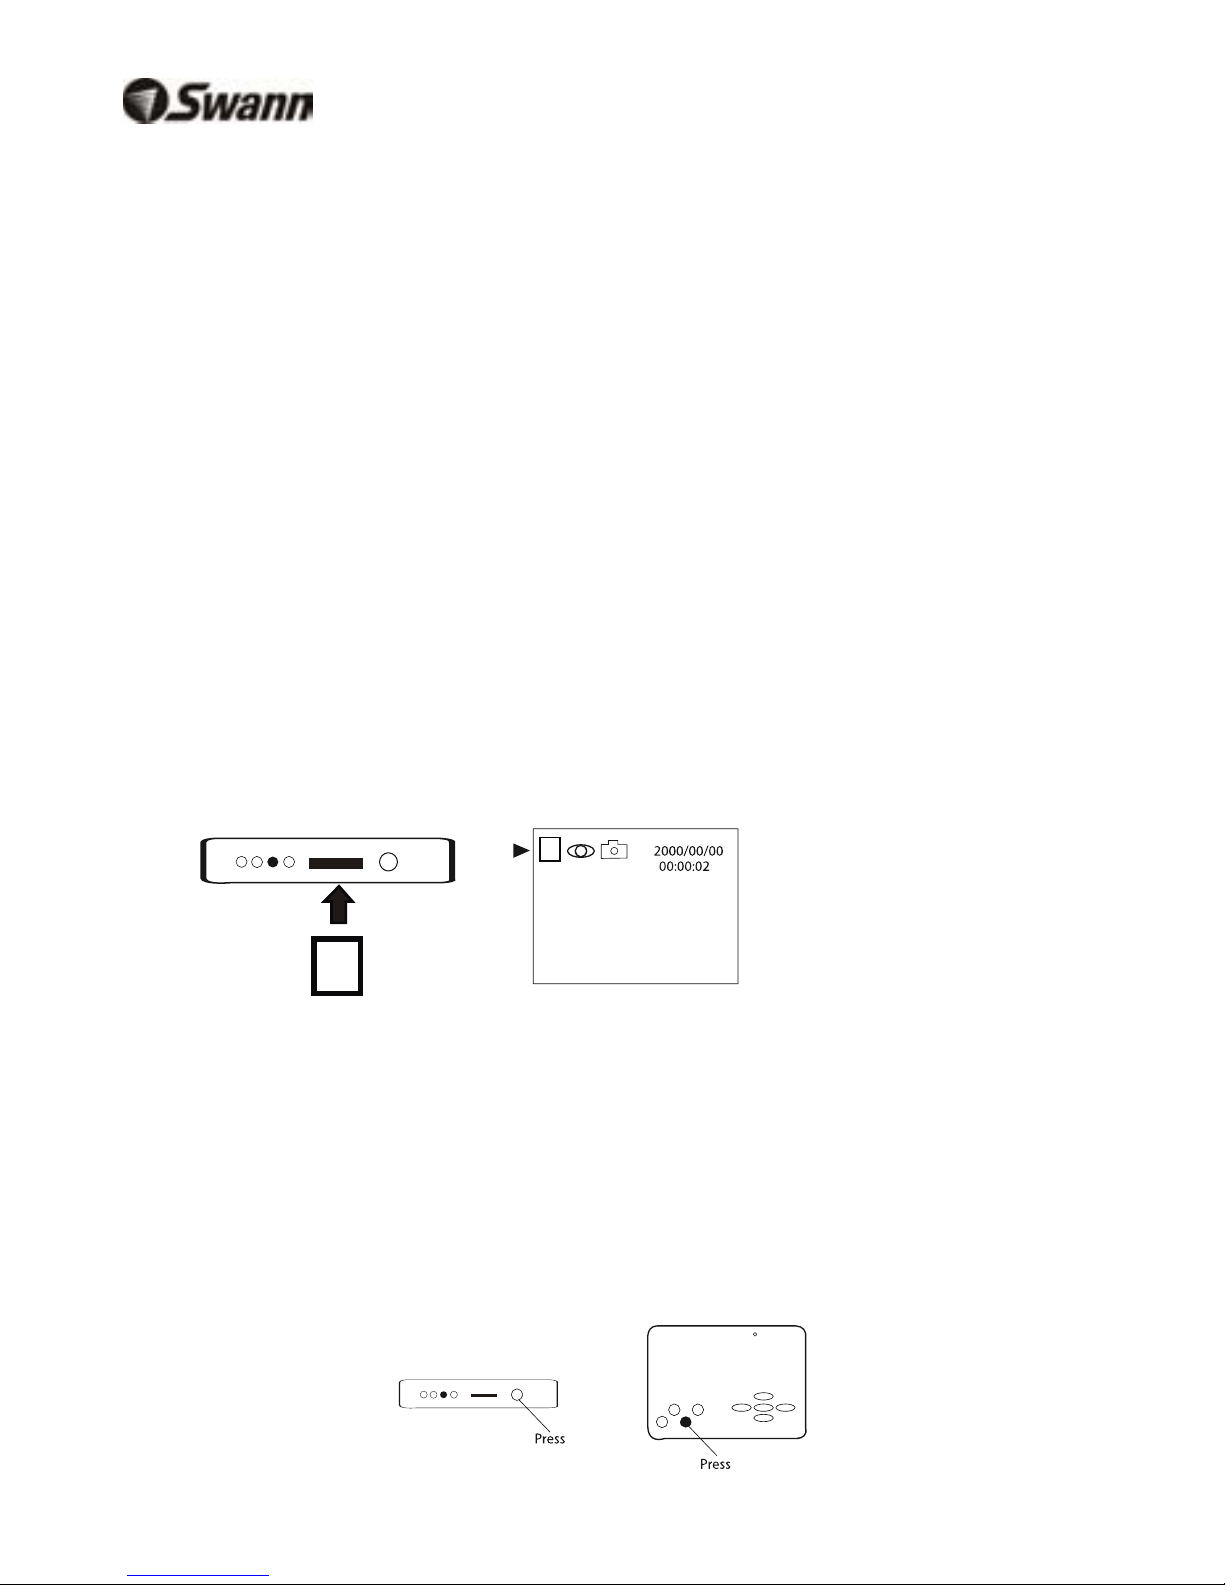
Using the SD Card Slot
Insert an SD card with label facing up into the RedAlert/BlueAlert DVR. The DVR accepts
SD cards up to 2GB. Once the card is inserted the DVR will save recordings to the SD
card. You can playback images on a monitor directly from the RedAlert/BlueAlert or insert
the card into a card reader on your computer to view recordings. Recordings are saved as
AVI for videos and JPEG for still images.
The RedAlert/BlueAlert has 16MB of onboard memory installed. This storage will allow you
to familiarize yourself with the DVR and its features. The onboard memory is not intended
as a permanent solution for storing your images and videos. The onboard memory cannot
be transferred or backed up onto an SD card.
Note: When an SD card is
inserted, an icon appears
showing it is detected by the
RedAlert/BlueAlert. All
images will now be recorded
to the SD card.
SDSD
SDSD
RedAlert/BlueAlert Digital Video Recorder RedAlert/BlueAlert Digital Video Recorder
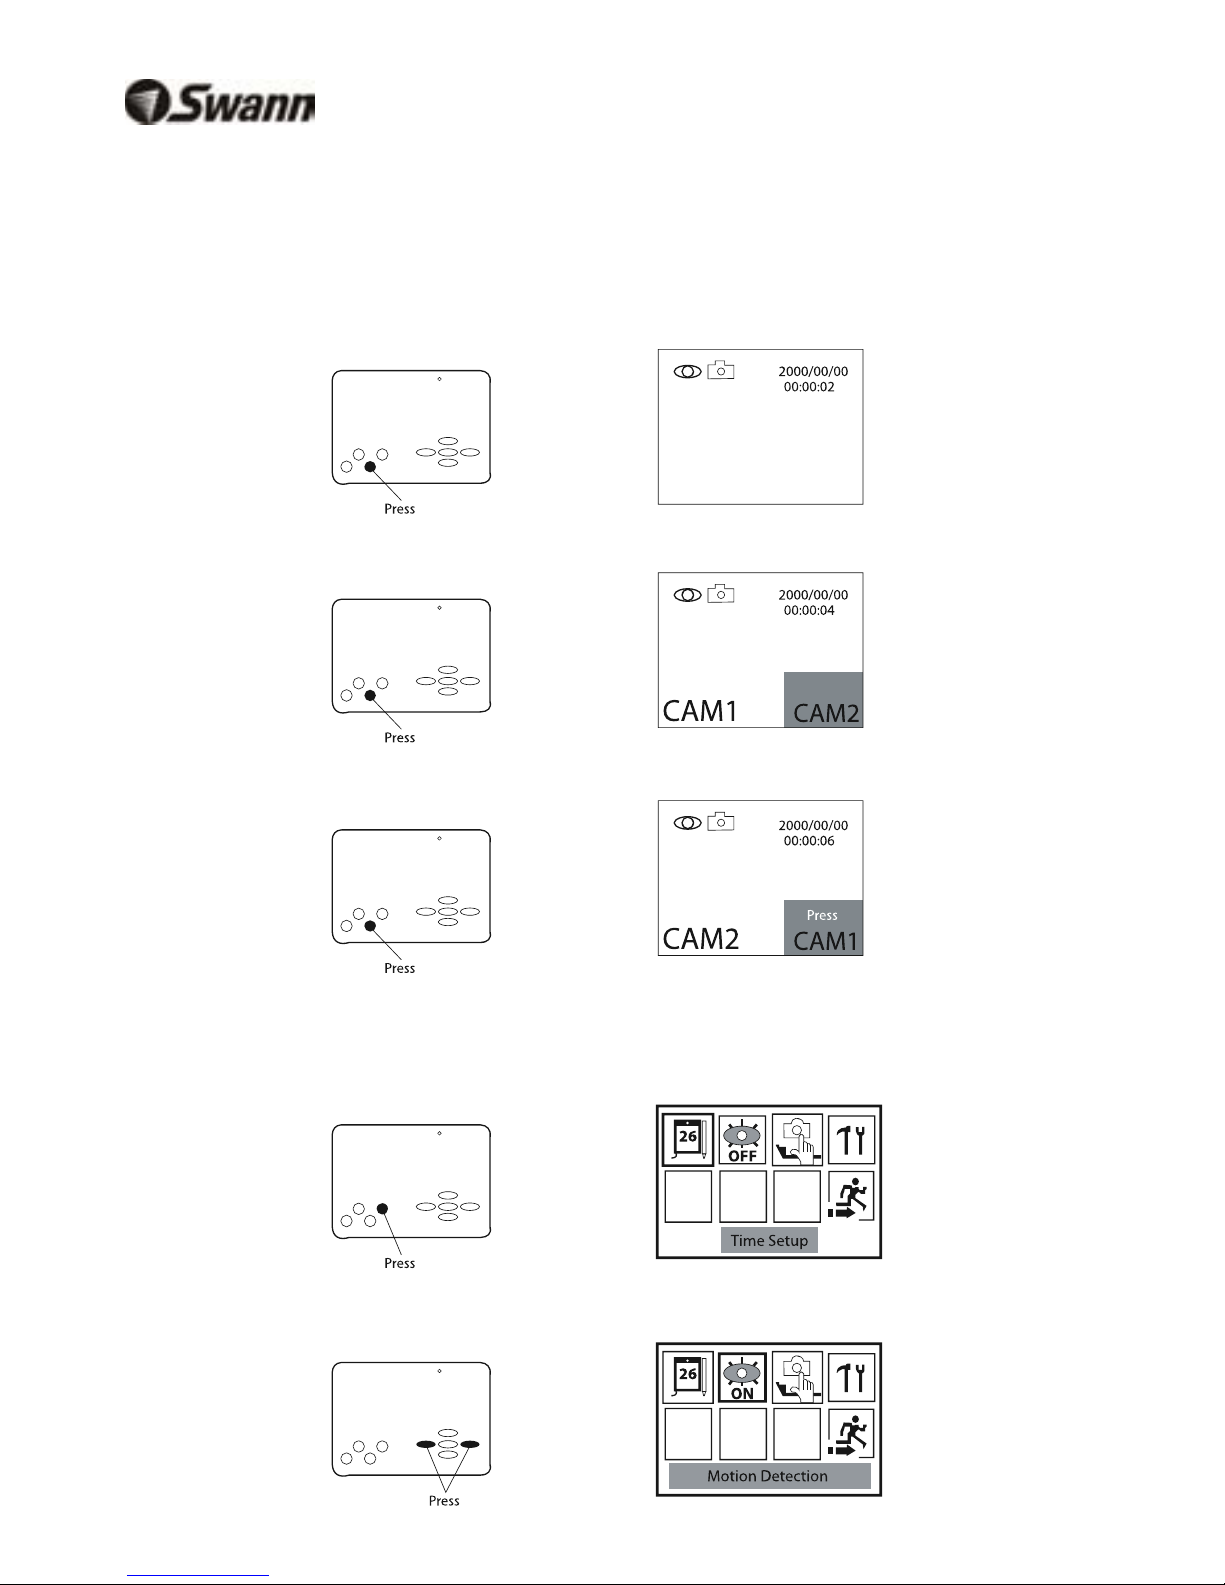
Changing Cameras and Viewing 2 Cameras PIP (Picture-in-Picture)
The RedAlert/BlueAlert DVR can display a wired and wireless camera in PIP mode. Note
when viewing PIP only the main full screen image will be recorded.
To switch cameras and view PIP
1. Press the Display button once to switch camera views between your wired and wireless
cameras.
Tips and Shortcuts
The RedAlert/BlueAlert unit has 16MB of memory installed for viewing saved images on
your monitor only. For additional storage an SD card is strongly recommended. The unit
will accept standard SD cards up to 2GB in size.
Transfer your images from the SD card to your computer via a card reader (not included).
Video files are saved as AVI files and photos are saved as JPEG files which can be read by
the most computers.
The DVR can record 1 camera at a time, i.e. 1 wired camera or 1 wireless camera.
If motion detection does not appear to detect your subject, lower the sensitivity or Target
Value as described on page 8 and try expanding the region of motion or bounding box size
as described on page 6.
Use the Up Arrow to quickly turn motion detection on or off when viewing a live image.
Use the Down Arrow to switch between photo and video recording when viewing a live
image.
Consult the Easy Setup Guide for information on camera connections.
For assistance with this product contact Swann Technical Support on 1-800-627-2799 in
USA or 1300 13 8324 in Australia. Alternatively, email us at tech@swann.com.au
2. Press the Display button again to view both cameras in PIP mode.
3. Press the Display button again to swap camera views.
Motion Detection Setup
1. Press the Menu button to enter menu interface.
2. Press Left/Right to highlight the Motion Detection On/Off option.
4
Connecting additional wireless cameras (not included)
The RedAlert/BlueAlert DVR is capable of receiving up to 4 wireless cameras. Note only
the displayed camera can be recorded. The DVR operates on the following frequencies:
CH1 - 2414MHz, CH2 - 2432MHz, CH3 - 2450MHz, CH4 - 2468MHz.
Push the Set button on the front of the RedAlert/BlueAlert to change wireless camera
channels. The light indicators show the active wireless channel. Push the display button
(DISP) to switch between wired and wireless camera mode.
Achieving the best wireless signal
Depending on local conditions wireless signals may vary. A clear line of sight from the DVR
to the camera will achieve the best image. Walls, metals and other wireless devices may
impact the quality of an image. If too much interference occurs on any channel, move the
camera or DVR to another location or change camera channels.
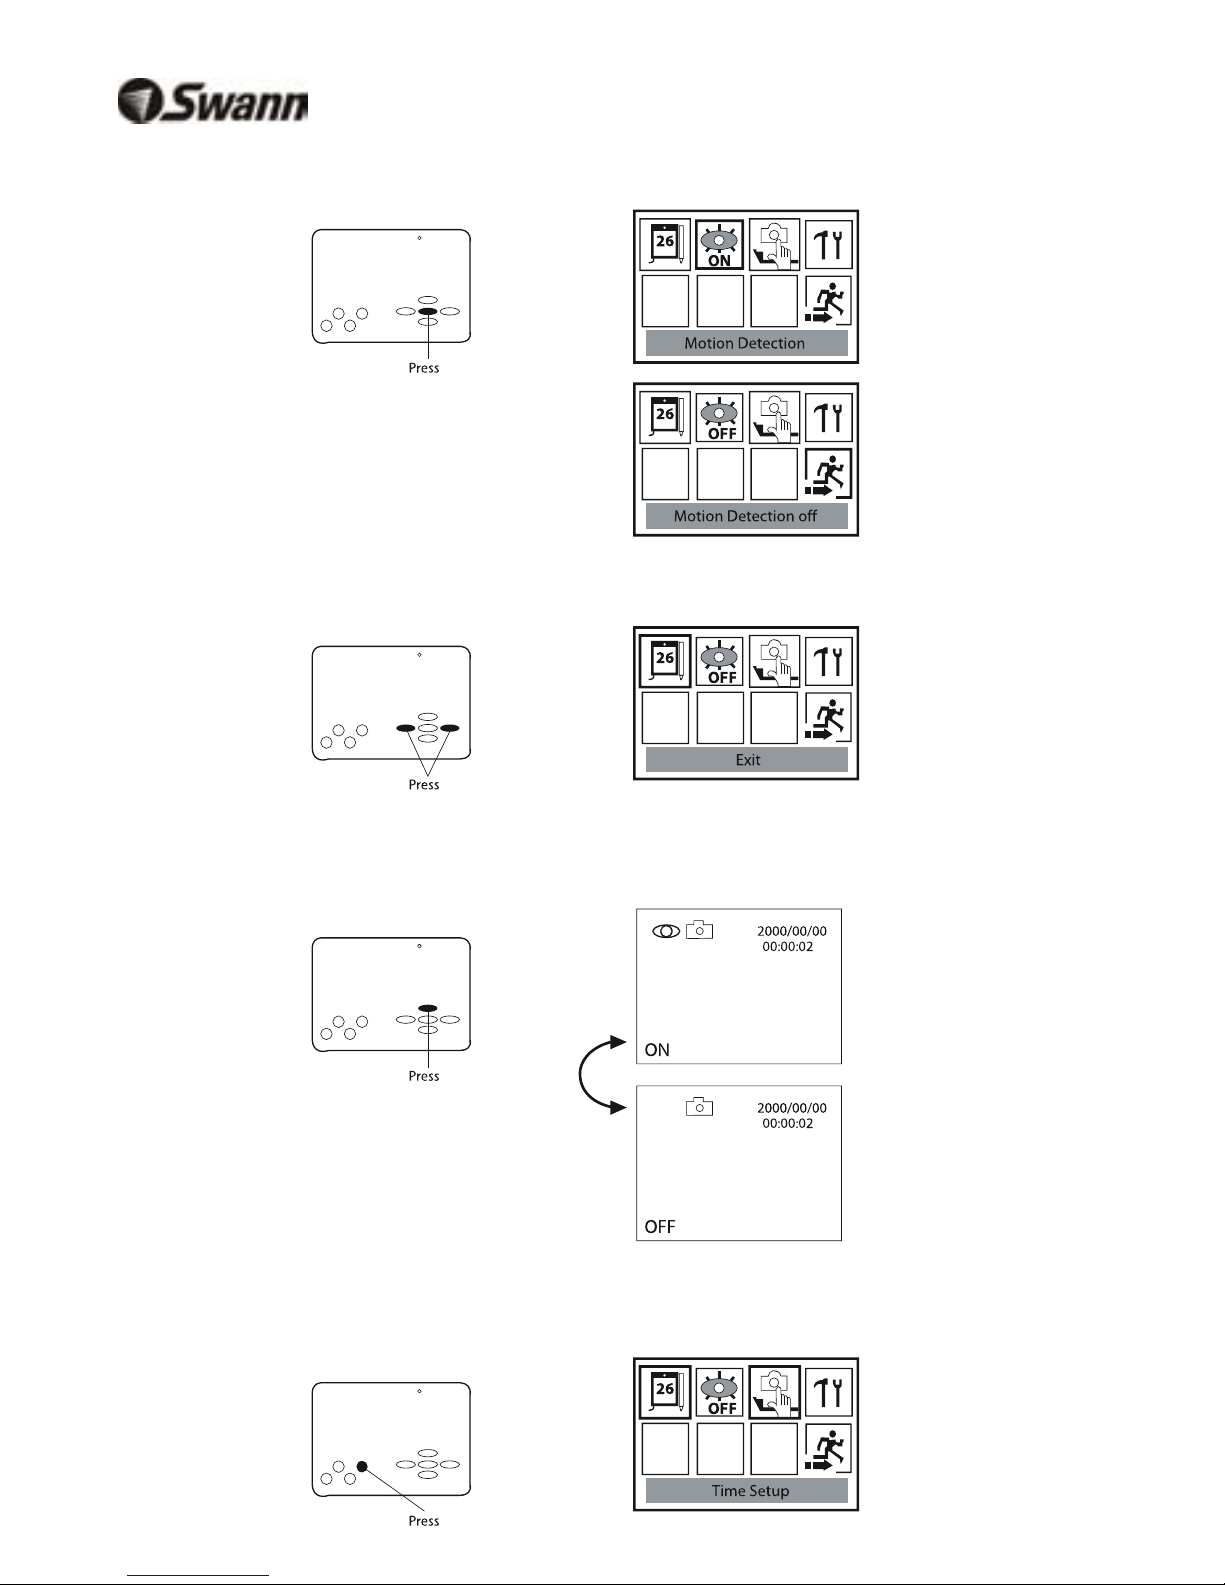
3. Press OK to toggle Motion Detection ON or OFF.
4. Press the Left/Right buttons to highlight Exit and then press OK to exit the menu.
SHORTCUT: When viewing your camera press the UP arrow to quickly toggle Motion
Detection ON/OFF.
Choosing Video or Photo Recording
1. Press the Menu button to enter menu interface.
RedAlert/BlueAlert Digital Video Recorder
5
 Loading...