

Page 1
INSTALLATION INSTRUCTIONS CONTINUED
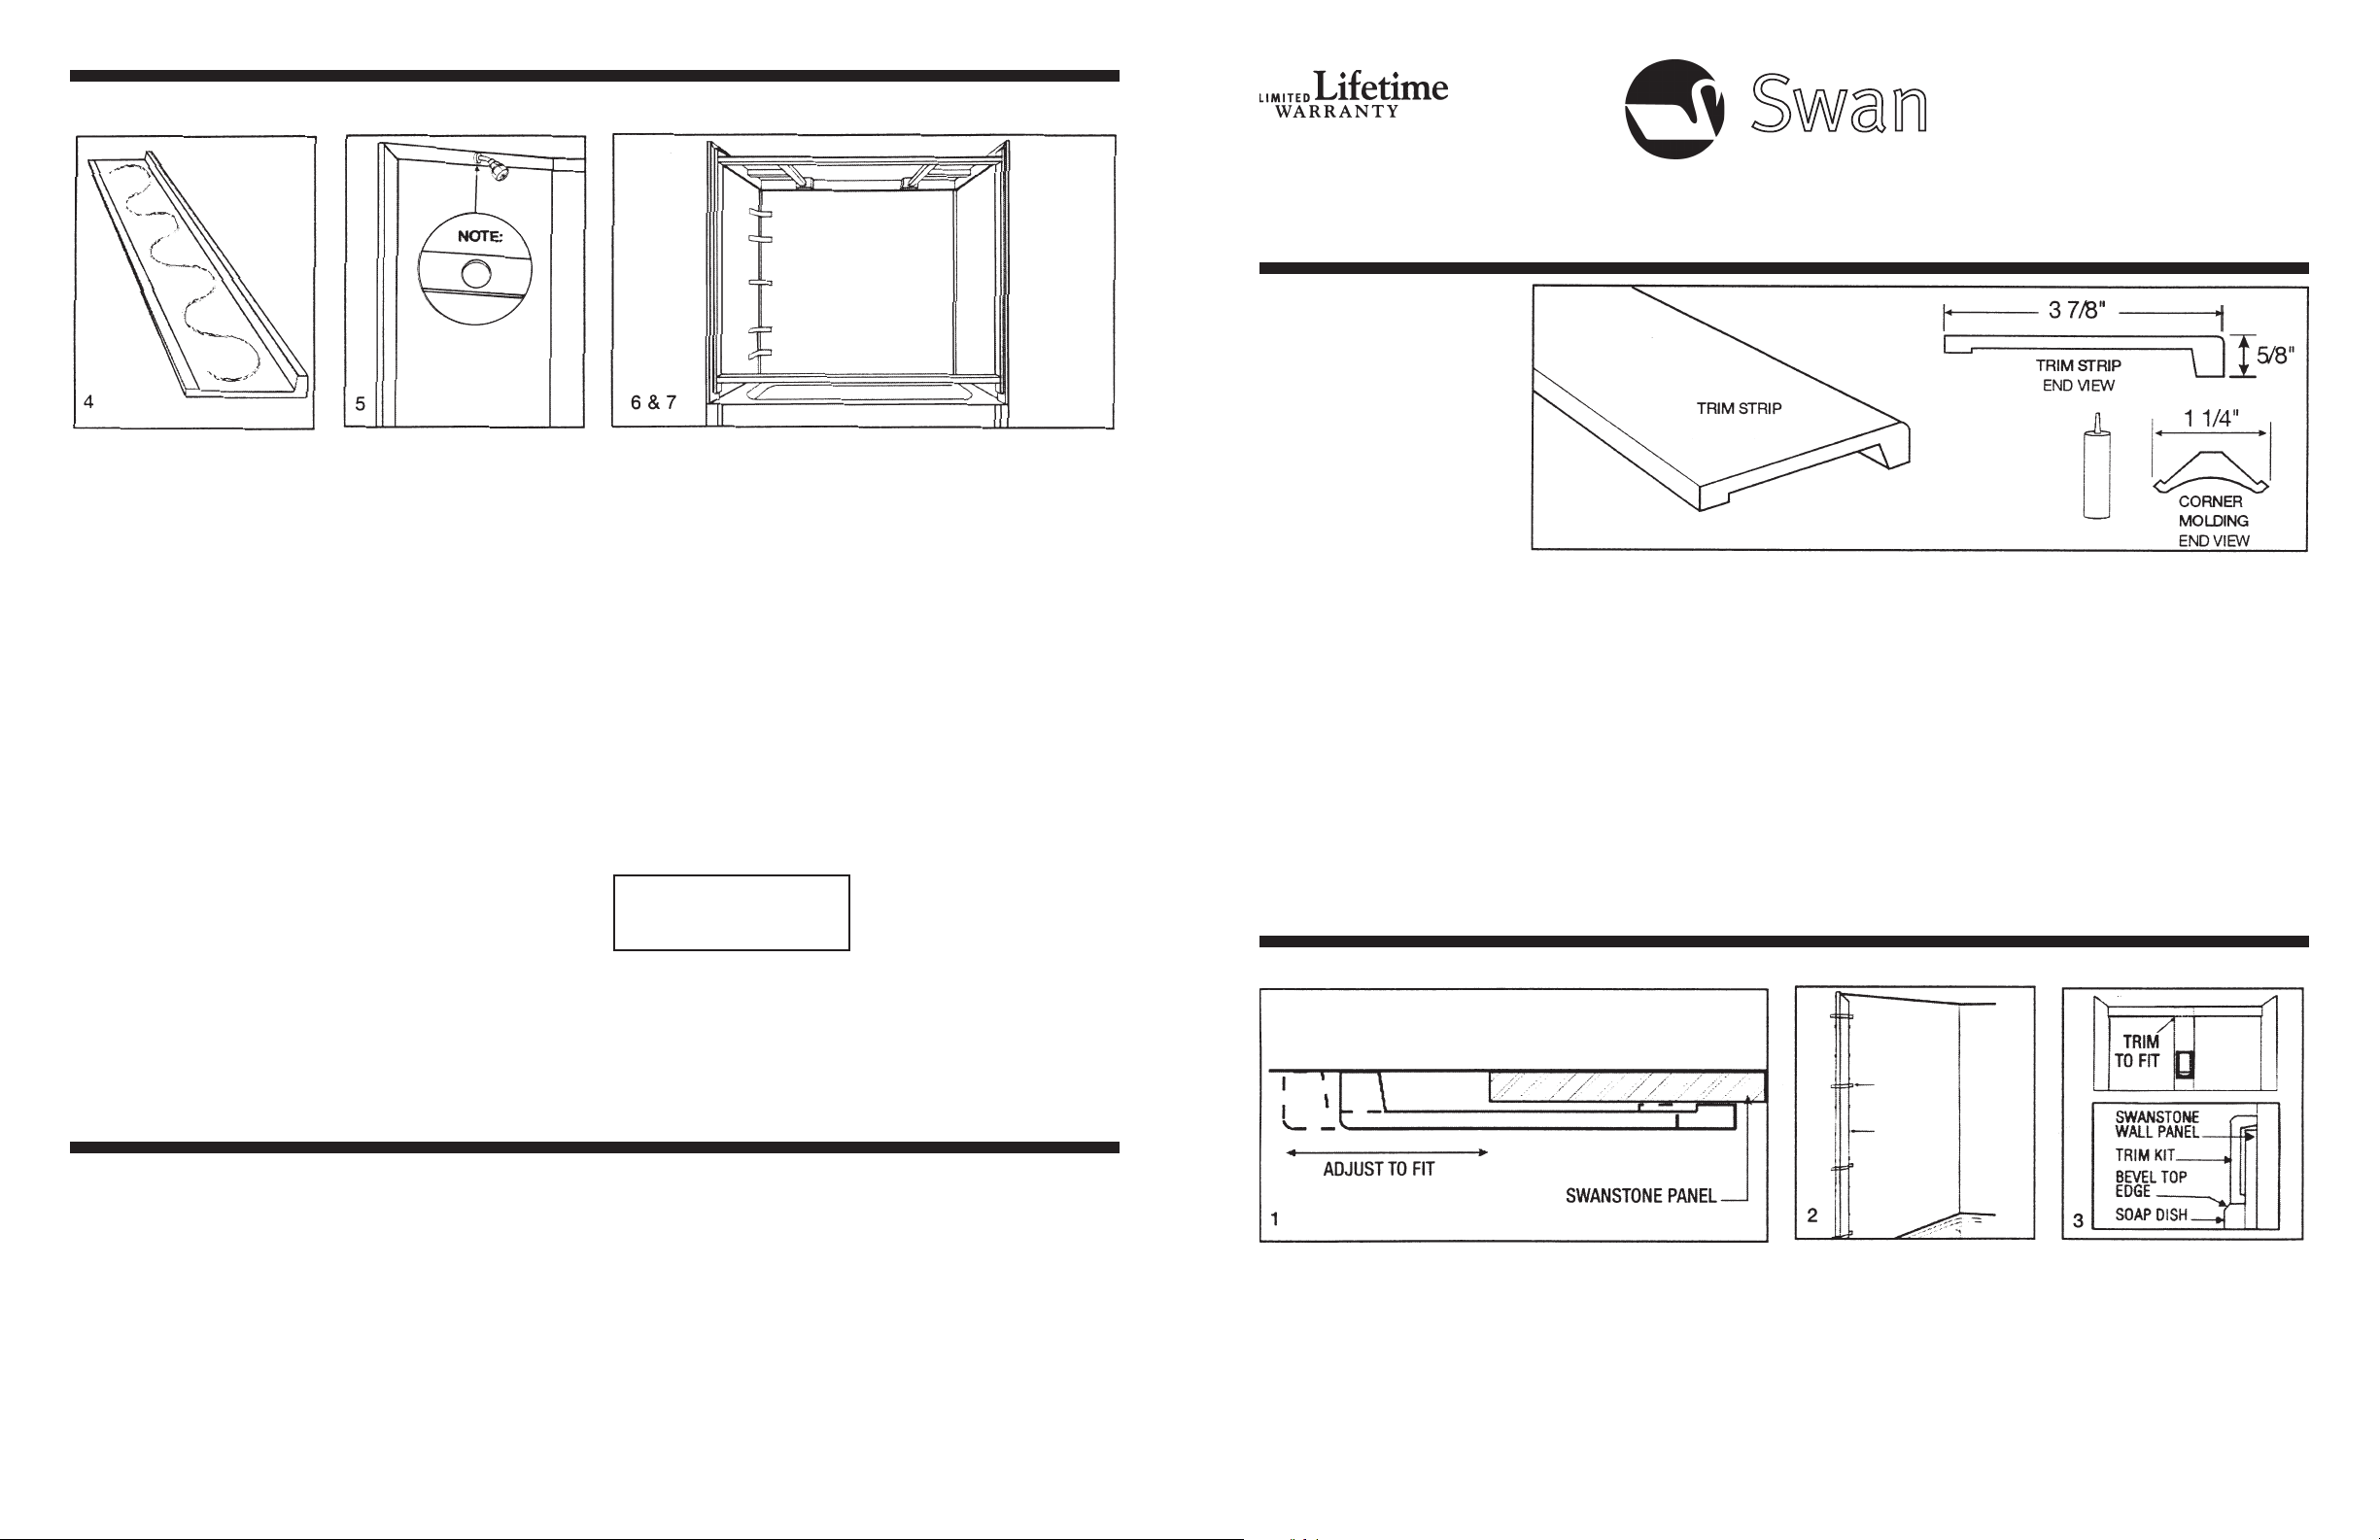
4. BACK WALL HORIZONTAL TRIM STRIP
Transfer measurement from the
back wall onto either one of the
two remaining trim strips. Using
the proper cutting tools (see
“Cutting and Routing Tools”)
trim as needed. Following the
pattern illustrated, run a 1/8”
bead of adhesive along the entire length of the trim strip. Final
fit by setting into position.
5. SIDE WALLS HORIZONTAL TRIM STRIPS
Transfer measurements from
the side walls onto the remaining trim strip. Using the proper
cutting tools (see “Cutting and
Routing Tools”) trim as needed.
Follow the adhesive pattern in
step #4 and final fit trim strips
into place.
NOTE
It may be necessary to cut
one of he side wall trim strips
to allow for the location of the
shower arm. Measure and locate the position of the desired
cut. Use router, spade bit, twist
drill, or hole saw only. DO NOT
USE AUGER BITS. Cut hole
1/2” larger than the diameter of
the pipe. Drill from the finished
side of the panel.
6. FINAL FIT
You are now ready to final fit
the vertical trim strip. Repeat
the adhesive pattern used in
both steps #4 and #5. Using
the “tick” marks from step #2,
position the vertical trim strips
into place.
NOTE
To promote contact until adhesive sets, use temporary
bracing and allow adhesive
to cure overnight. Temporary
bracing may be constructed
and wedged into position as
illustrated by using lengths of 1
x 2’s, 2 x 2’s, 1 x 3’s. Lumber
should be cut as needed.
POSITIVELY NO
HAMMERING OR NAILING
IS TO BE DONE.
7. CORNER MOLDING
Locate the placement of the
corner moldings and measure
the vertical areas of the corner
seam. Trim corner molding to
desired length and trial fit. If installing corner moldings around
an SS-7211 Swanstone soap
shelf, multiple measurements
and cuts will be required.
Apply a 3/16” bead of adhesive (included in kit) along the
corner seam where the corner
molding is to be placed. Press
corner molding firmly into position. Immediately remove any
excess adhesive with a damp
cloth. Temporarily secure corner molding to the wall with
masking tape. Allow adhesive
to cure overnight.
CAULKING
Following instructions on the
caulking tube ... apply a bead of
caulk along the bottom and to
edge of the back and side walls.
Also make caulk applications to
all vertical seams and edges.
T H E R E I N F O R C E D S O L I D S U R F A C E
Installation Procedure for
TK-6072 & TK-105 Wall Panel Trim Kits
An adjustable trim kit unit
will accommodate 30” to 32”
bathtub depths. Designed to
fit over Swanstone Model SS
bathtub panels or Model SS
shower panels only.
INCLUDED IN CARTON:
TK-6072
Four 3-7/8” x 74” trim strips
and two 1-1/4” x 7/8” x 72”
corner moldings designed
to fit Swanstone 60” and 72”
high x 5’ wide (or smaller)
bathtub and shower wall panel
systems.
TK-105
Two 3-7/8” x 105” trim strips,
two 3-7/8” x 74” trim strips and
two 1-1/4” x 7/8” x 96” corner
moldings. All are designed
to fit Swanstone 96” high x 5’
wide (or smaller) shower wall
panel systems including 96”
NEO walls.
NOTE
All Trim Kits include one 11
oz. tube of color coordinated
silicone.
TRIAL FIT BEFORE YOU START
TOOLS REQUIRED TO
INSTALL
Tools needed are a carbide
tip saber saw, drill, ruler, level,
masking tape, and caulking
gun. For best results and
extended tool life, we recommend professional or industrial
rated power tools. All routing
and cutting tools should have a
minimum rating of 10 AMPS.
CUTTING AND ROUTING TOOLS
Dependent on the type of cut
or edge detail required, one or
more of the following tools may
be required.
Swan
CORPORATION
• Circularsaw:Minimum40-
tooth carbide blade (triple
chip grind, 60-tooth will give
a smooth, clean cut)
• Portablepower plane with
carbide blades or cutter
heads.
• Saber saw (straight up/
down blade travel). Fine
plywood carbide blade or
blade with no tooth overhang (14 teeth per inch)
• Mitersaw
Masking Tape
CAULK
IMPORTANT
If you are installing the TK-6072
bathtub wall panel trim kit over
a Swanstone SS-60 bathtub
wall panel unit, trimming of the
center soap dish panel will be
required. You must follow the
procedure shown in step #3.
CLEANING
Clean your Swanstone bathtub panels as you would any other fine bath fixture, using normal household detergents and cleansers. Just
wiping the wall surfaces quickly removes watermarks and residues. Occasional scrubbing with household abrasive cleansers ensures
that the original luster is maintained, similar to tile and other permanent type bath fixture materials.
REPAIRING
Use 400 grit sandpaper to remove scratches and gouges in the surface. A Scotchbright pad can be used to blend in the area.
The Swan Corporation
St. Louis, MO 63101
FORM #528-6-14-1M
1. VERTICAL TRIM STRIP
Select any two of the trim strips. A 45o mitered cut is recommended
for seaming the vertical and horizontal strips. The outside, or long,
measurement of the vertical trim strip should be approximately
7/8” greater than the vertical measurement of the wall panel. Set
each vertical trim strip into position. The most desirable placement will line up the front edge of the trim strip with the front edge
of the bathtub or shower floor. Trial fit all pieces before final application.
“Tick” Marks
2. VERTICAL FIT
For a proper vertical fit, check
with a level. Temporarily secure
trim strip to the wall with masking tape. Mark the location of
the vertical trim strips with “tick”
marks. These “tick” marks will
be used for final fit.
3. IMPORTANT
If you are installing the TK-6072
bathtub wall panel trim kit over a
Swanstone SS-60 bathtub wall
panel unit, it will be necessary to
trim the center soap dish panel.
Using the proper cutting tools
(see Cutting and Routing Tools),
measure and trim as needed.
(continued)
 Loading...