

Page 1

User Manual
Profile
Brand name:iSWAG
FCC ID:O55PROFILE
Please read the following guidelines before using your new iSWAG Profile phone. Utmost compliance with the
following is highly recommended for your safety. Non-compliance may pose danger to you and your mobile
phone, and may be illegal.
The iSWAG Profile is packed with features to satisfy your needs such as Phonebook, Music Player, Video
Player, Digital Camera, among others. It is Wi-Fi and Bluetooth capable and also meets the GSM/GPRS
technical criteria. It is certified by both local and international authorities.
iSWAG reserves the right to modify technical specifications without prior notice. Some content in this manual,
i.e. software, images, accessories and more, may vary from that in the actual device. Please refer to your unit
for accuracy.
This guide aims to help you get started on your new iSWAG phone. Aside from the last two parts of this guide i.e.
Section 6 - Important Safety Precautions and Section 7 - Troubleshooting, you will find the following icons
periodically present to help you make better use of your device.
1
Page 2

Æ - indicat
e
t
s
e
s sequence of processes
- presen
- show
s additional notes on a topic or alt
further cautionary measures
rnative options for a feature
to prevent damage to your mobile phone
2
Page 3
1. Getting Started
o
o
h
a
e
h
h
u
c
a
d
e
e
e
g
o
s
o
h
d
m
o
n
p
y
l
y
a
s
g
y
s
p
g
y
s
Switch your Mobile Phone
To switch your mobile ph
animation appears on the
properly.
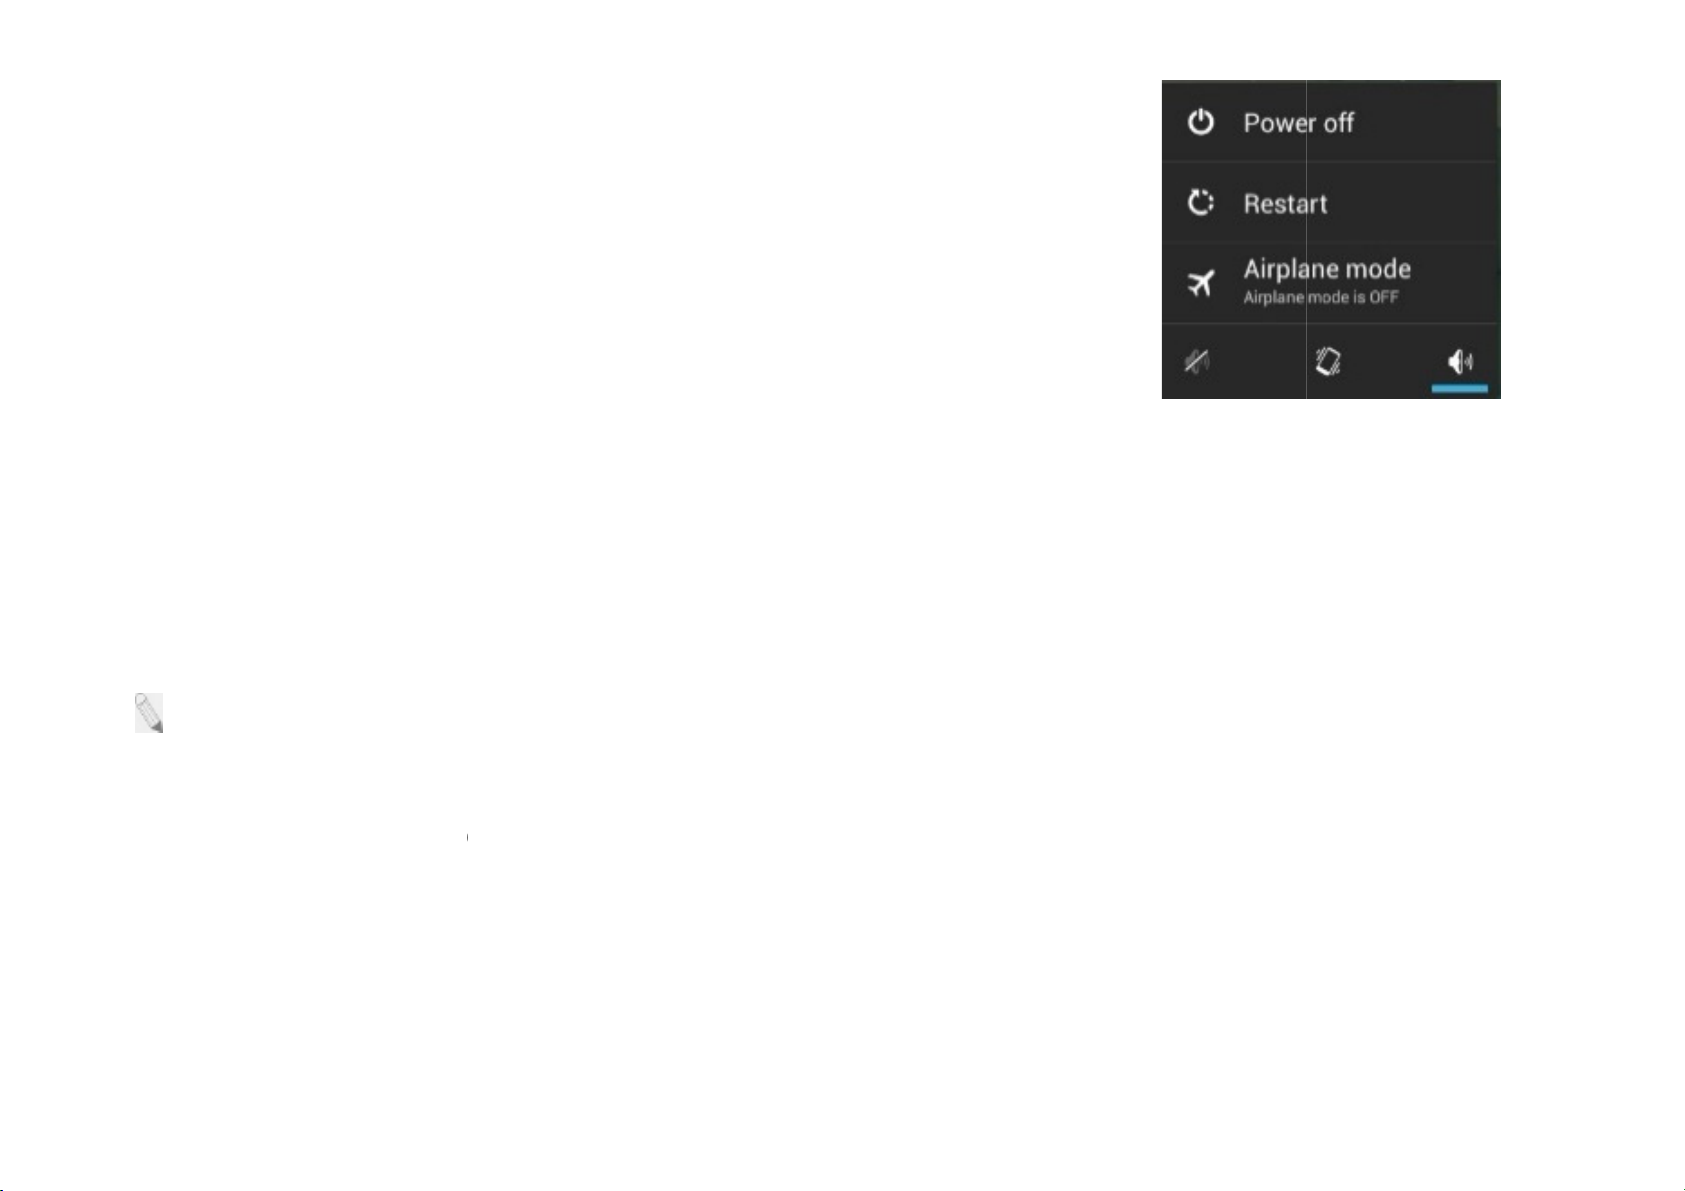
To switch OFF, press and h
Tap
Power Off Æ OK
Install / Remove the SIM C
Make sure to switch off th
battery. To install / remove t
1.
2.
3.
4.
: If the screen displays th
Snap open t
Carefully ins
down and in
Carefully ret
To remove,
and t
ON / OFF
ne ON, press and hold the P
screen. Make sure the battery i
ld the Power Key until a window p
e phone will shut down.
rd and Battery
device and disconnect from cha
e SIM card and battery, perform t
e phone’s back cover and pull out
ert the SIM card into the SIM car
proper alignment with the phone’s
rn the battery into its slot and put t
arefully slide the card out of the sl
t the SIM card is locked
permane
wer Key until an
charged inserted
ps up.
r
er before installing and removin
e following:
the batter
slot, making sure that the card’
etal contacts.
e cover back on.
t.
tly, please consult your network o
.
the SIM card and
gold plate is facing
erator.
Install / Remove the Memo
The Memory Card is a han
remove the memory card, p
1.
2.
3.
4.
Tap and hold
Snap open th
Remove batt
Carefully inse
proper ali
ry Card
mobile storage device that ex
rform the following:
the Power Ke
phone’s back cover.
ry.
rt the Memor
nm
ent with the phone’s metal contact
to shut off the mobi
Card into its slot, m
ands the mobile phone’s storage
e phone.
ke sure that the card’s gold plate i
.
3
capacit
facing down and in
. To install /
Page 4

5.
S
h
6.
Return battery
To remove, ca
y.
arefully slide the card out of the slot
t.
: It is vital that you restart
Charge the Battery
1.
2.
The batter
stops flashin
: Do not for
: Only use iSWAG appro
Plug the charg
Connect the s
y indicator icon wi
g, disconnect th
get to unplug
ger into the electrical outlet.
oved charger and other accessories
: You can use the phone
Off state, a charging indicato
or will appear on the screen.
Switch to Sleep Mode / Wa
ake Up
The Sleep Mode suspends y
also goes into Sleep Mode b
by itself when the display automatica
t your phone for it to identify with th
mall end of the charger connector in
ll flash until charging is finished. W
When charging is complete, i.e. the b
e phone from the charger.
the charger from the electrical outl
s.
while charging, but charging time
your device to a low power consum
mption state in order to prolong batt
e newl
y inserted memory card.
nto the mobile phone’s charging slo
e
et after charging.
ma
y increase. When charging the
ally turns off after a certain period o
ot.
battery charging icon
handset in its Power
tery life. Your device
of time, depending on
display settings.
y to s
Lightly press Power Ke
Press the Power Key to Wak
switch to Sleep Mode.
ke Up / activate your screen display
To configure sleep settings, g
: Switching the Phone to
go to
Settings Æ Display Æ Slee
leep Mode is a way to lock your p
4
y.
ep Æ choose time
one.
Page 5

Screen Lock
o
n
y
s
m
u
g
u
gh
e
S
d
o
t
h
o
p
e
d
g
t
M
t
r
y
g
r
ng
m
e
e
K
t
You can lock your screen f
sleep.
1.
2.
Go to
Setti
Touch the t
You can choose among the
Slide
Face Unlock
Pattern
provides no protection,
lets you unlock
lets you draw a si
Unlock.
PIN
requires four or more n
Password
requires four or
password.
: A stron
password is
symbols.
Unlock Your Phone
r additional security. After you se
s ÆSecurity Æ Screen lock.
pe of lock you want and follow the
e lock options:
but lets you get to the Home scree
our tablet by looking at it. This is
ple pattern with your finger to un
mbers. Longer PINs tend to be mo
more letters or numbers. This is t
sually eight or more characters l
a lock, the screen is locked afte
onscreen instructions.
n quickl
.
he least secure lock option.
lock the tablet. This is sli
htly mo
re secure.
e most secure option, as long as
, and is composed of alphabu
the display goes to
e secure than Face
ou create a strong
eric characters and
Drag the icon to the ri
: To set Screen Lock patt
t, depending on your screen lock
rn, go to
Menu Æ Settings Æ S
attern.
curity Æ Screen Lock Æ choos
from options.
Security Codes
The mobile phone and the
any of the codes mentione
phone’s settings for these
ÆChoose which card to l
IM card support several passwor
below, type in the correct code a
codes,
o to
Menu [ ] Æ Se
ck ÆLock SIM CardÆ enter SI
s in order to prevent misuse. Wh
nd then confirm by tapping the O
tings [ ]Æ Security Æ Set
PIN Æ OK
n prompted to enter
key. To access the
up SIM card lock
5
Page 6

Personal Identification Number (PIN)
Local network service providers furnish each SIM card with a unique set of codes including the PIN, PIN2 and PUK. If
the PIN is incorrectly entered for three successive times, the SIM card will be locked.
To unlock the SIM card, you need to enter the PUK or the Personal Unlocking Key.
For further information regarding PIN, PUK and SIM Lock, contact your network service provider.
Basic Troubleshooting for locked SIM card
-Enter the correct PUK. You will then be prompted to enter a new PIN.
-Type in the new PIN Æ OK.
-Re-type the new PIN Æ OK.
PUK
The PUK (Personal Unlocking Key) code is required in order to modify a blocked PIN. This code usually comes with
the SIM card upon purchase. Otherwise, contact your local service provider.
: If you enter the wrong PUK code for 10 consecutive times, the SIM card will become invalid.
:
6
Page 7

Functions of Capacitive Keys
Menu Key – opens a folder, app or feature; displays further options for a running or ongoing application. Tap and
hold the Home Key to view recently browsed/accessed/used applications
Home Key – returns to the main screen in one touch
Back Key – makes the screen go back one level
Up/Down Keys – turns the volume up or down
Power/Lock Key – switches the phone on or off; locks/unlocks or sleeps/wakes your phone
Touch Control
Your phone is receptive to the following finger gestures:
TAP – selects or launches an item or an app i.e. selecting from the menu, entering characters or text in a field.
TAP & HOLD - activates widgets and offers further options to an application. tap& hold an item on the screen by
touching it and not lifting your finger until an action occurs.
DRAG - tap & hold an item and then, without lifting your finger, move your finger on the screen to reposition it on the
screen.
SWIPE OR SLIDE - lets you scroll the screen up, down, left or right. It is also used when unlocking the screen. Lightly
and quickly touch and slide your finger across the screen without pausing to avoid dragging an item instead.
DOUBLE-TAP - lets you zoom in or out a screen Tap quickly twice on a webpage, map, or other screen to zoom.
PINCH - lets you zoom in or out a screen by placing two fingers on the screen at once and pinching them together (to
zoom out) or spreading them apart (to zoom in).
7
Page 8
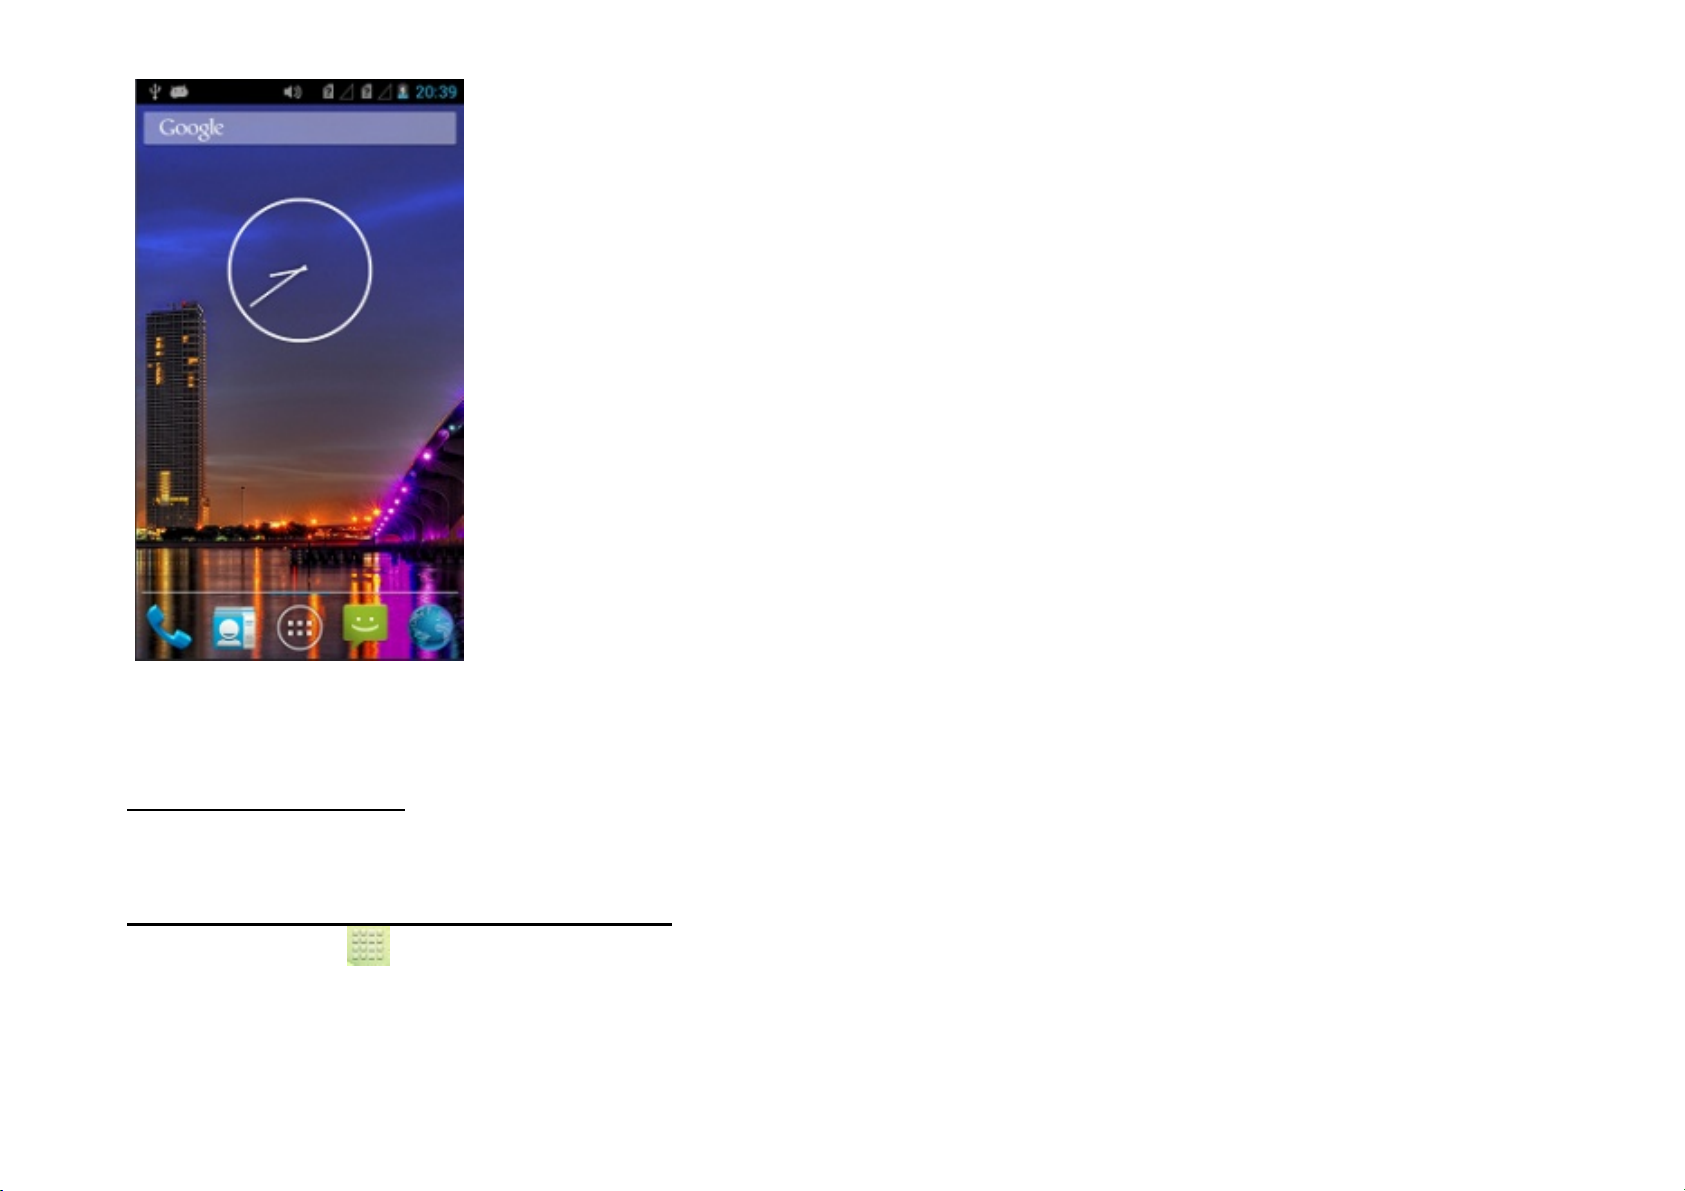
The Home Screen
To move between Home screens, swipe left or right.
Change the Wallpaper:
Tap and hold any clear part of the Screen Æ Choose a wallpaper from Gallery, Live Wallpapers and Wallpapers.
Add Apps and Widgets to Your Home Screen
Tap Home Key Æ
Tap and hold chosen application/widget to add to the Home Screen.
Drag towards desired position.
Release hold when the Main Screen appears in the background.
8
Page 9
Remove Items from Your Home Screen
Tap Home Key to return to the Home Screen.
Tap and hold the item to be removed and drag it towards the [X Remove] icon at the top of the screen.
Auto-Rotate Screen
With the Auto-Rotate Screen turned on, you will be able to view items on the screen vertically or horizontally,
depending on how you hold your phone. Please note that not all screens are covered by the Auto-Rotate Screen
feature.
To turn the Auto-Rotate Screen feature on/off, go to Menu Æ Settings Æ Display Æ Auto-Rotate Screen Æ
(uncheck)
You may also drag down the Notifications panel, tap ÆAuto-rotation to activate or deactivate auto-rotate function.
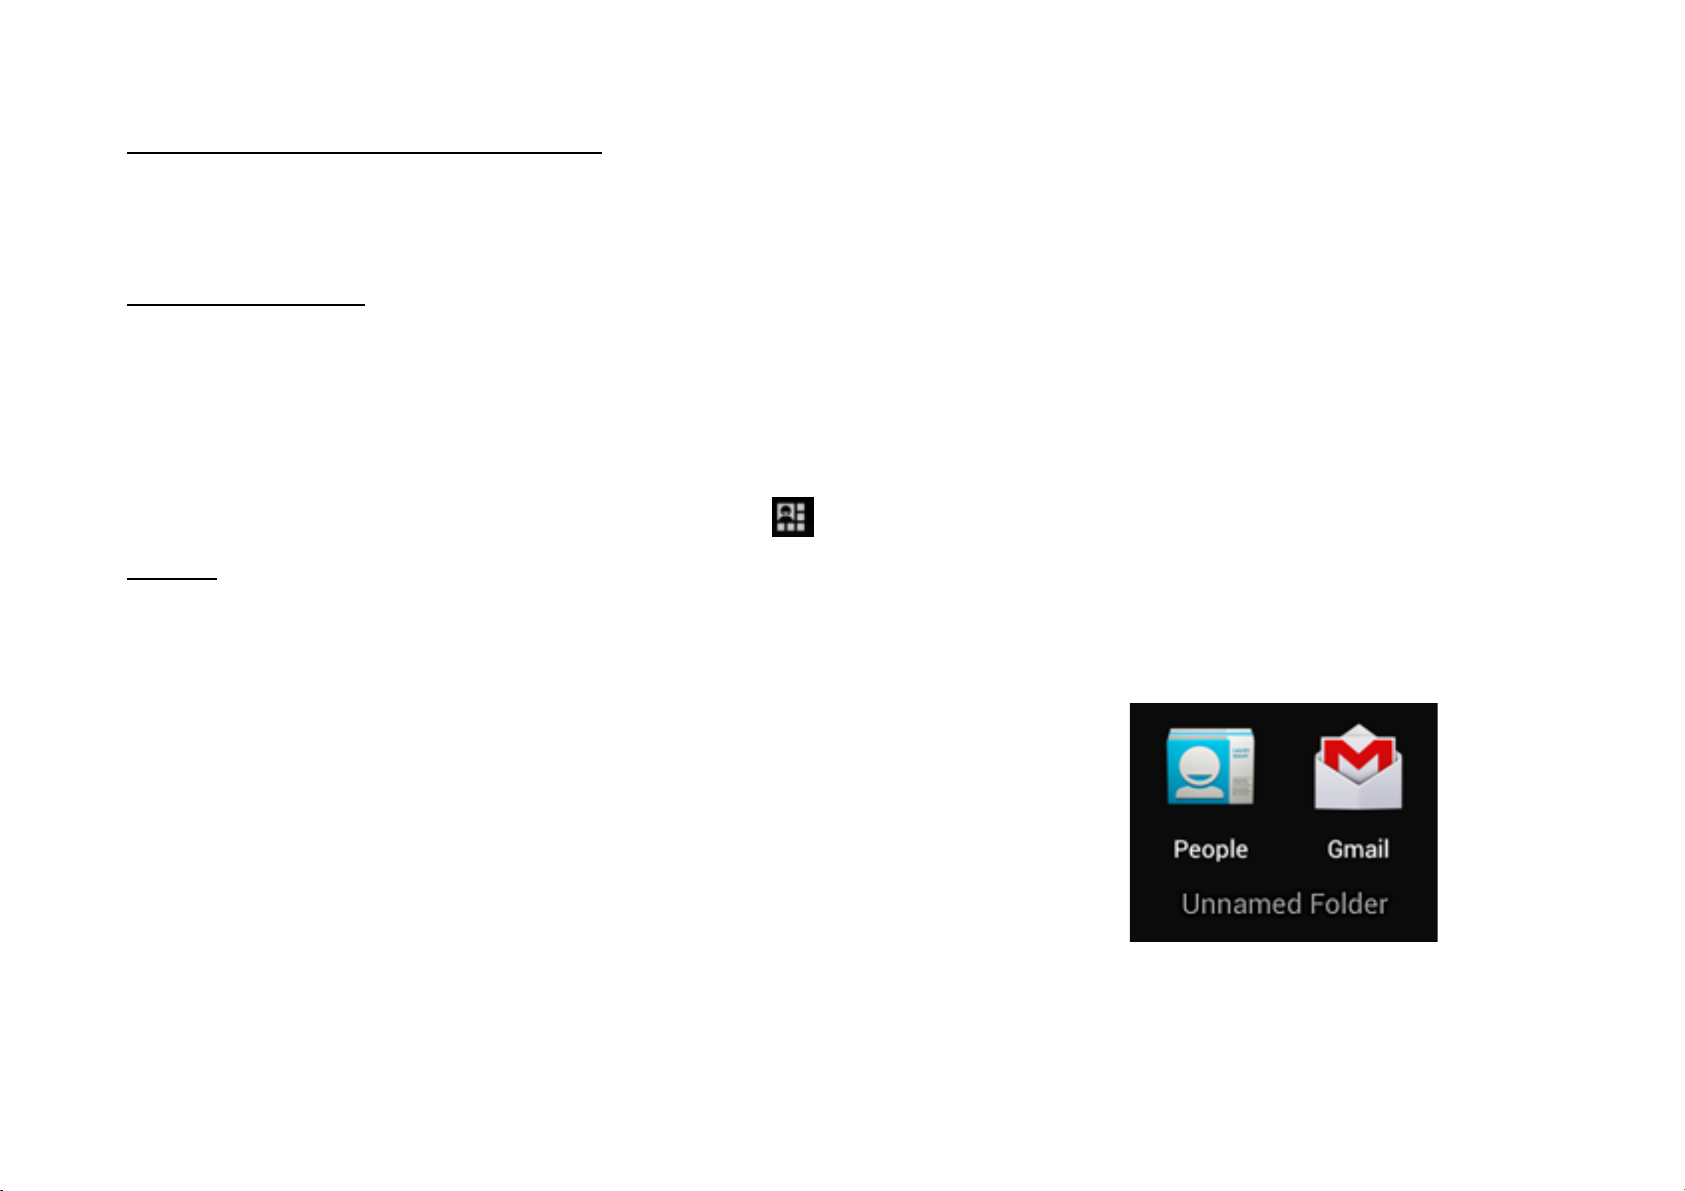
Folders
This allows you to organize your applications in folders on the Home Screen. To make a new folder on your Home
screen, tap and hold and drag apps to the Home Screen, and stack them on top of another. They will automatically be
grouped into a folder.
To name folder on Home screen
1. Touch the folder icon on Home screen to open
2. Touch the folder’s title bar to show the name field.
3. Edit the folder’s name and tap Done after renaming.
To remove move applications out of a folder back to the Home Screen
Touch and hold the item in a folder, and then drag it out of the folder.
Using the Home Screen even when locked
9
Page 10
While the screen is locked, you may assign several quick access items on the Home Screen by swiping the screen
down.
Swipe left/right to gain quick access. To add items, tap + and choose from list.
Voice Search
Your phone operates via voice command. Search items in your phone or on the Internet simply by speaking. Tap
on any screen that it is visible and follow prompt before speaking.For texting/typing using speech, go to Messaging on
page 15.
You may also go to Æ to access voice search.
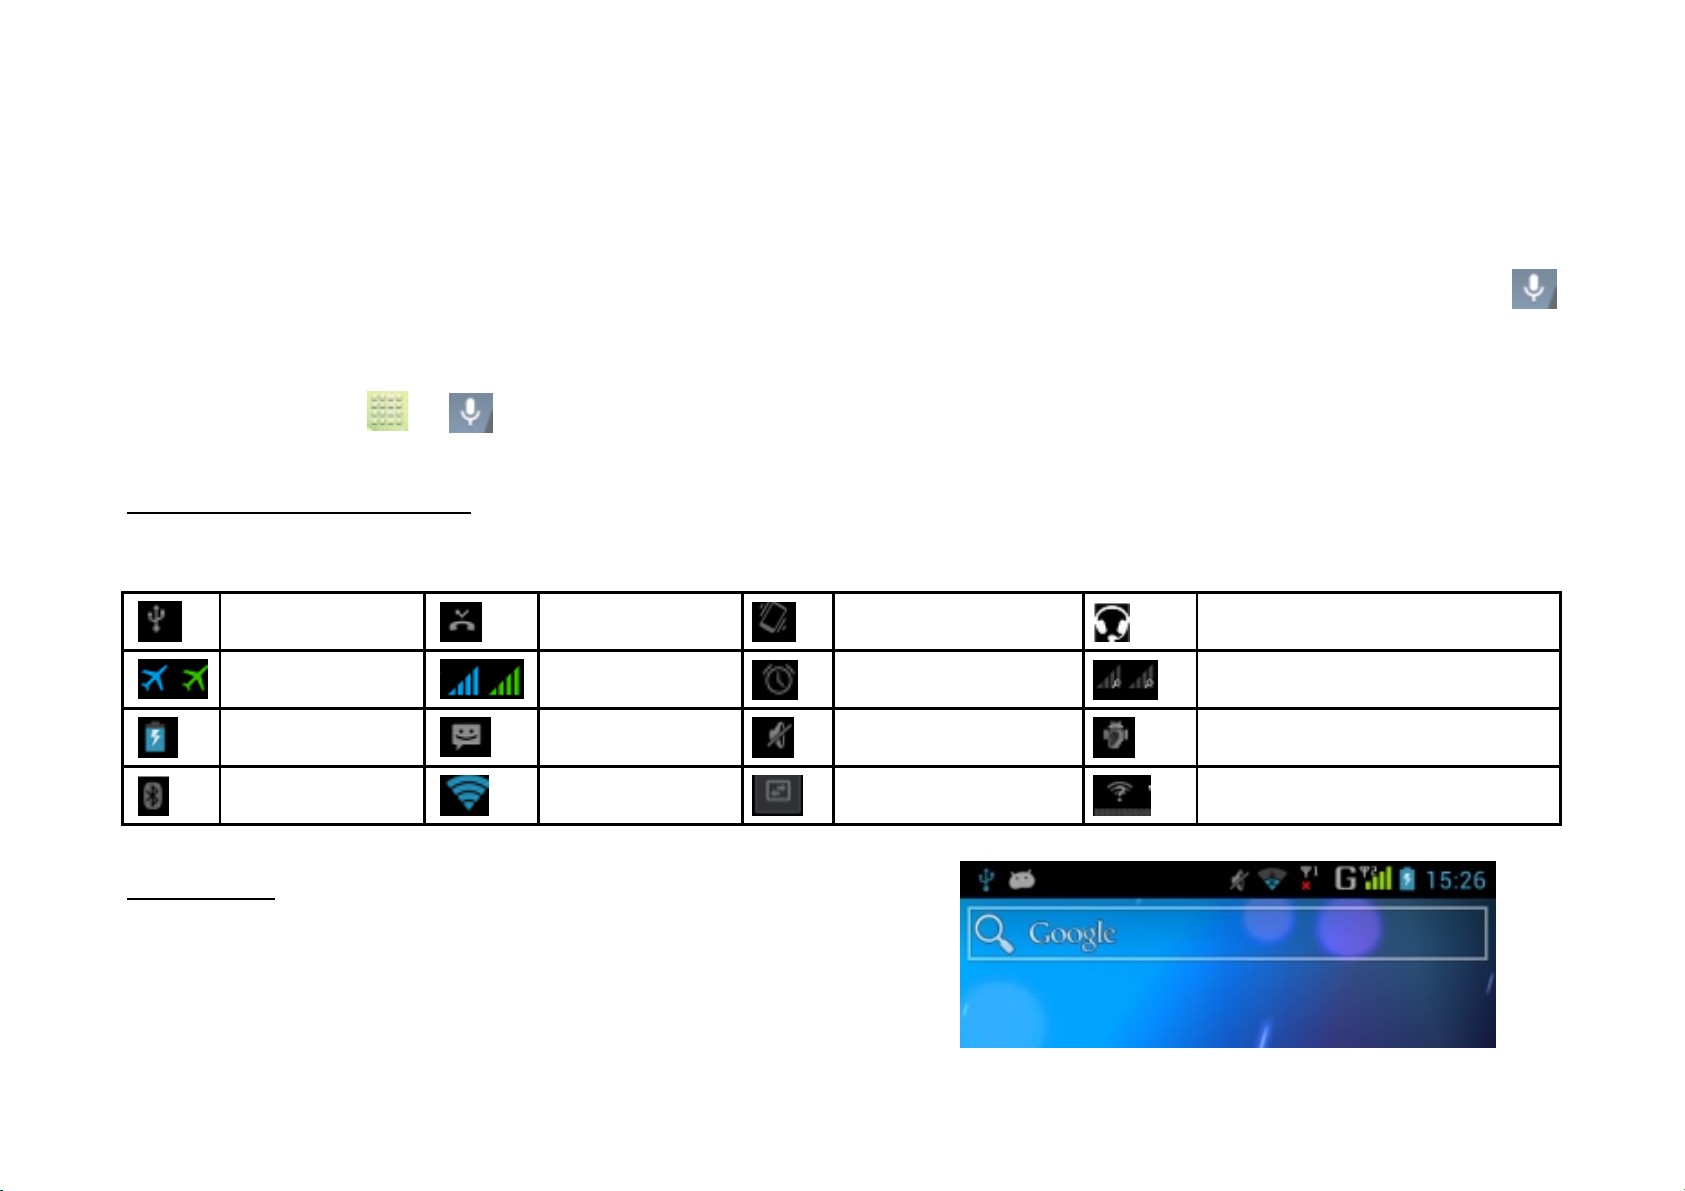
Status and Notification Icons
To view your phone’s notifications, simply swipe the notifications bar downwards. Below are the possible status icons
you will encounter and their meanings:
USB connected
Airplane mode
Battery charge
Bluetooth icon
Missed call
Signal strength
New message
Wi-Fi network
Meeting mode
Alarm set
Silent mode
Data Conn. off
Earphone insert
Signal searching
USB debugging connected
New Wi-Fi network detected
Notifications
The Notifications panel letsyouview notices, warnings and any
new updates in your phone.
To open the Notifications panel
Found on the top part of the screen, swipe the notifications panel (alsoknown as the status bar) downwards.
10
Page 11
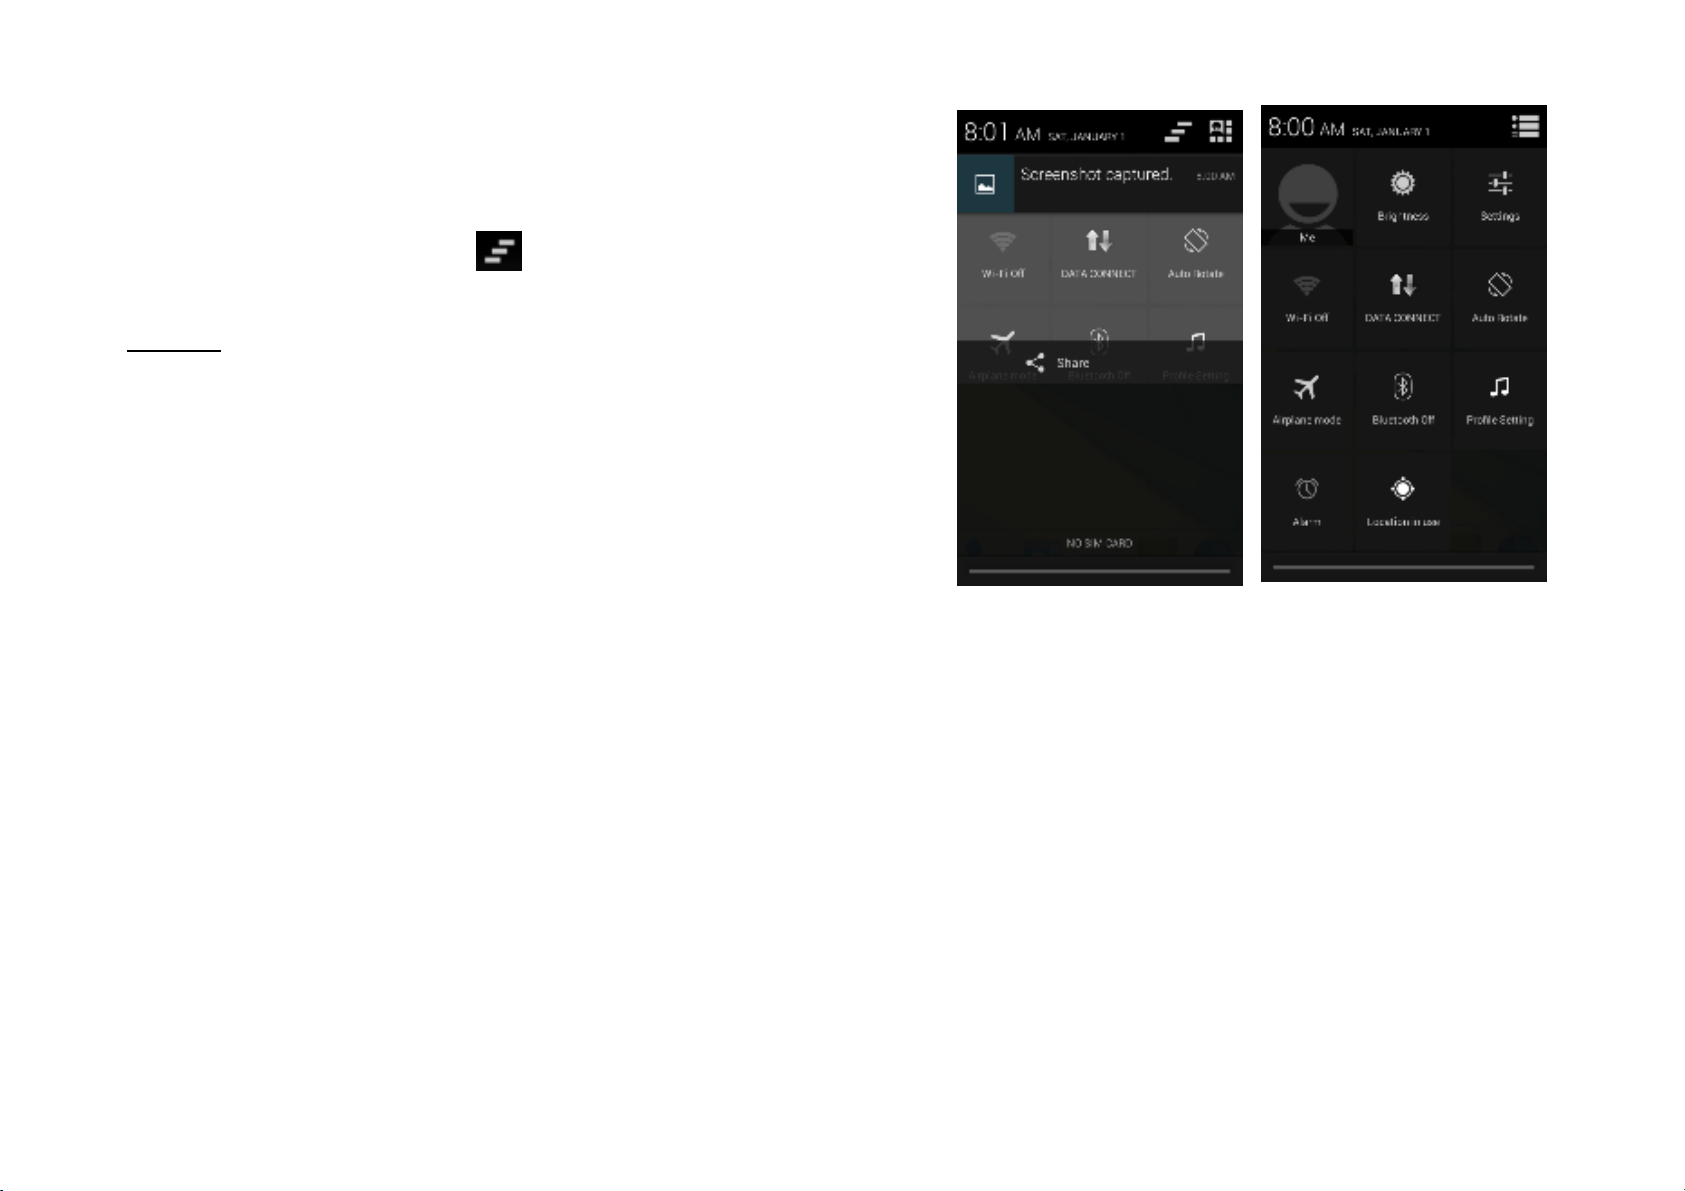
Swipe upwards to close.
To open a running application from the Notifications panel
From the Notifications panel, touch the icon for the running
application to open it.
To dismiss notifications, tap
Toolkits
ToolKits quickly start applications such as Bluetooth, WLAN and
so on.
• Using two fingers, swipe the Notifications panel
downwards.
• Tap a ToolKit to enable or disable.
11
Page 12
3. Basic Functions
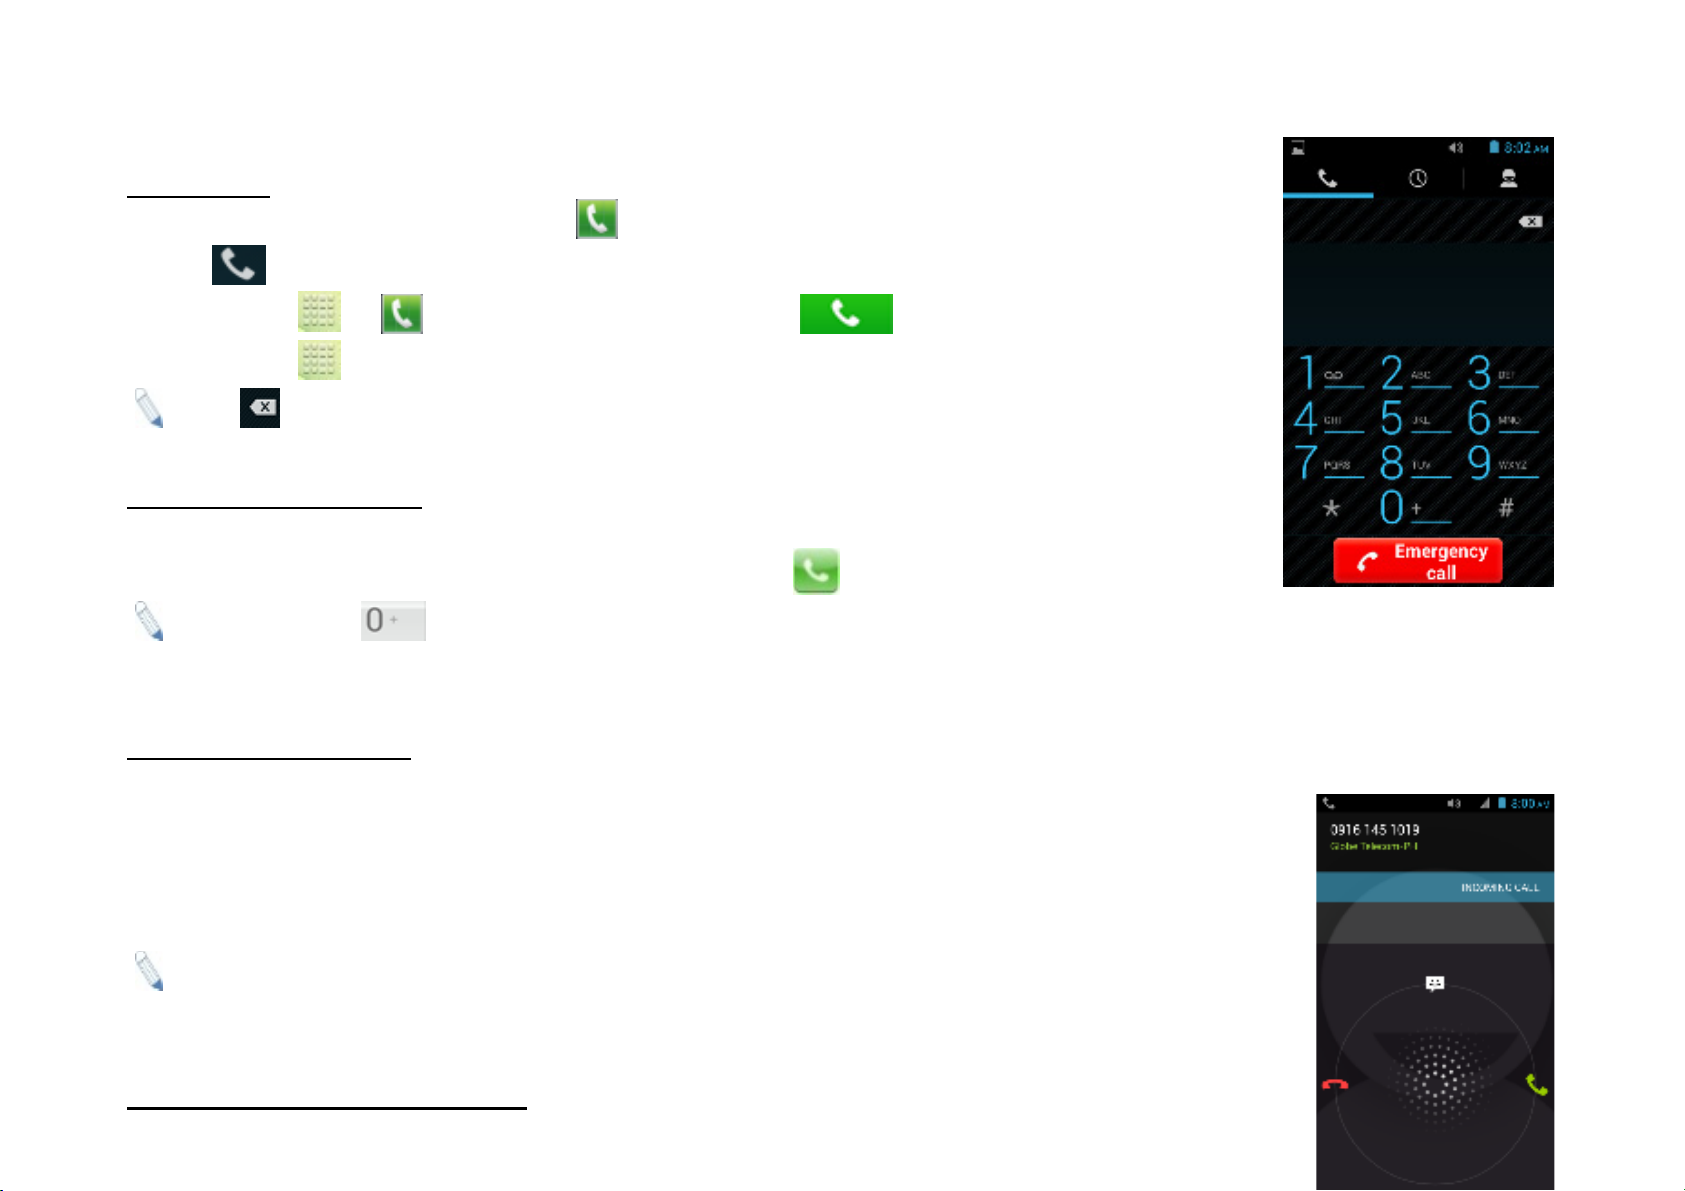
Make and Answer Calls
Make a Call
Option 1: On the Home Screen tap Æ choose the Phone tab Æ enter phone number
Ætap .
Option 2: Tap ÆÆ enter phone number Ætap .
Option 3: Tap ÆContactsÆ tap name of selected contact
: Tap to erase incorrect digits.
Dial an International Call
For international calls, type (+) followed by the country code and then the complete number.
(+) (Country Code) (complete phone number) then tap
: Tap and hold to type "+" and then type the country code, the area code and the telephone number. Then
tap the telephone icon to connect.
Dial an Emergency Call
This phone operates using radio signals, wireless and landline networks, but cannot guarantee
connection in all locations at all conditions. It is not advisable to rely solely on wireless phones
to make emergency calls. To make an emergency call:
1. Switch your phone on.
2. Dial emergency number and tap Call.
: Some networks may require that a valid SIM card is properly inserted in the phone before
making an emergency call. Emergency numbers vary in every country. Emergency calls may
not work in all locations due to network and interference issues.
Answer / Reject an Incoming Call
12
Page 13
When you receive an incoming call, a notification message appears on the screen.
To accept call, drag towards
To reject, drag towards
Drag towards to send a message instead.
Adjust the Volume
During a call, press the Side Keys to adjust the volume.
Options During a Call
- Launch/Hide Dial Pad
- Turn speakerphone on/off
- Mute
- Put a call on hold
- add current call’s details to contacts.
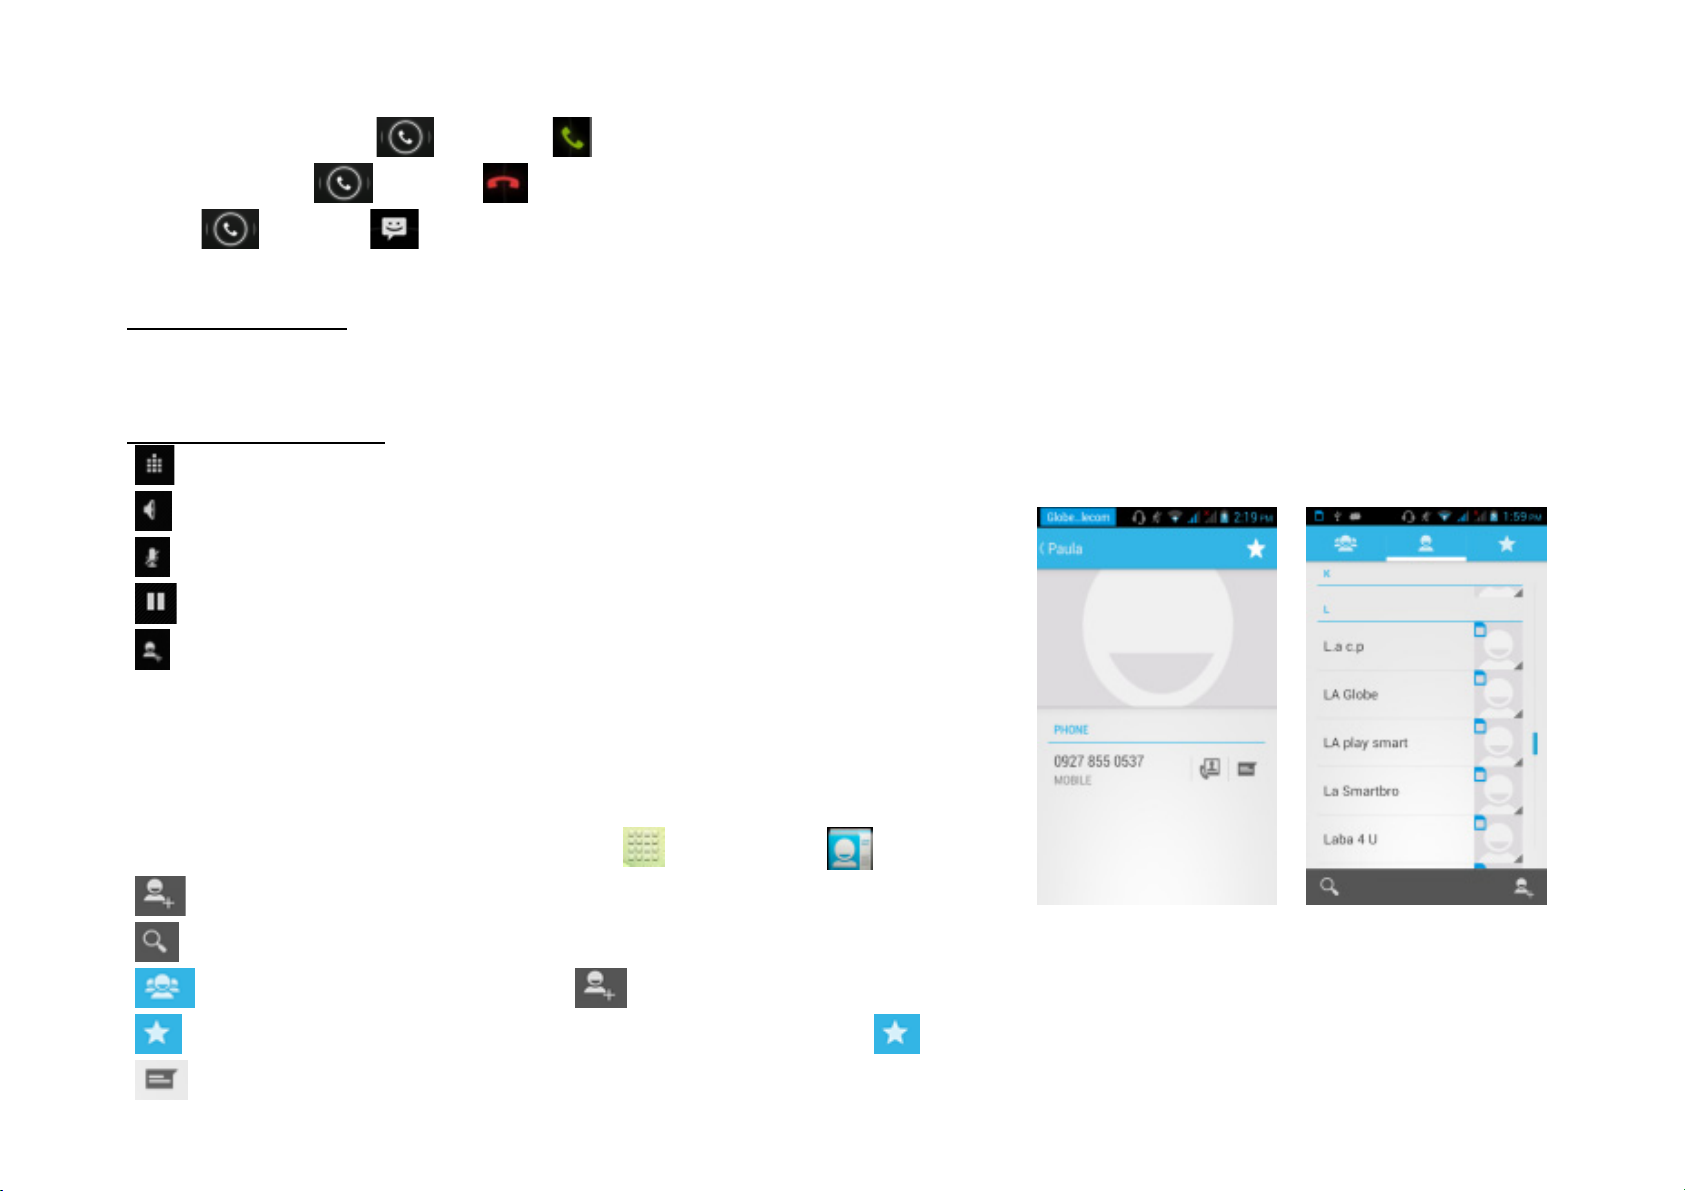
Manage Contacts
You can add contacts on your phone and synchronize them with the
contacts in your Google account or other accounts that support contact
syncing. To manage your contacts, go to ÆContacts [ ].
- Create contact. Choose storage Æ fill out fields Æ tap Done.
- Search. Type name or number of contact you wish to find ÆNext.
- Groups. To add a group, tap Æ type group name Æ insert group members ÆDone.
- Favorites. To add contacts to Favorites, tap contact Æ (on the upper right corner of the screen.)
- Send message
13
Page 14

ge
s
h
t
s
a
g
n
d
u
r
g
d
a
v
x
M
s
a
p
o
y
s
z
a
e
e
l
y
w
e
Messaging
To create and send messa
¾ Tap the new mes
¾ In TO field, type t
¾ Type message in
¾ Tap to insert
¾ Tap to send.
: To send MMS, add an
automatically be sent as an
is reverted back to bein
se
Message Threads
Instead of inbox, outbox an
exchanged with the same n
had with a certain number o
from home screen, tap
age icon at the bottom left p
e recipient’s phone number OR ta
he Type message field using the
mileys, etc.
ttachment to the text message b
MMS. Likewise, if the user remove
t as SMS.
sent folders, your phone organi
mber are grouped into a convers
a group.
rt of the screen.
to search contacts.
n screen keyboard.
tapping and the SMS will
the attachment, the message
es all your messages into “thread
tion-like folder. Tap a thread to vi
s,” where messages
w all messages you
Delete a thread / message
To erase a messa
e tap an
To erase an entire thread, t
- remo
You can speak to enter text
1.
2.
3.
Touch a te
Touch the
When you
hold a specific message Æ Delet
p and hold a thread Æ select conv
e select
in most places that you can enter t
t field, or a location in text you’ve a
icrophone key on the onscreen ke
ee the microphone image, speak
14
.
ersation/s to erase
Æ
tap
xt with the onscreen keyboard.
ready entered in a text field.
board.
hat you want to type.
- select all
Page 15

4.
a
r
p
t
A
t
a
e
A
t
c
g
yo
u
t
y
Say “comm
,” “period,” “question mark,” “excla
mation mark,” or “colon” to enter p
nctuation.
Capture and View Photo o
This mobile phone is equip
like. To capture images, go
Capturing an Image
im the phone at the subjec
Tap to capture panarom
Tap to access capture s
Capturing a Video
On Camera mode, tap
im the phone at the subjec
Video
ed with a di
o
Æ
ital camera that lets
.
, then tap to take a shot. Slide
.
ttings.
.
u take photos and videos whenev
o the left to view recent captures.
er and wherever
ou
To start/stop recording, sele
- switch to front camera
- launch settings.
Connect to the Internet
Connect to a wireless netwo
t.
.
rk to browse Internet.
15
Page 16

Swipe down Notifications
p
y
r
w
s
m
b
o
e
t
Y
t
d
h
c
a
H
c
g
anel
ÆÆ
ÆÆ
Tap Wi-Fi to display availabl
:If network connection is
and ma
prompt you to ente
.
e networks.
successful, the icon will app
a password before access. Enter
4. Main Menu
The Main Menu displays all
icon [ ] from the Home Sc
the applications your phone has.
reen.
Bro
To
Tap
ser
urf the Internet on your phone, go
the address bar Ætype in desire
: To change the homepage, tap
ar on the status bar.Some Wi-Fi n
he correct security password and t
ou may access the Main menu by
o
URL Æ GO
Æ
Æ
Settings Æ General Æ Set
.
etworks are secured
p “Connect.”
tappin
omepage Æchoose
on the Menu
fro
options.
Tap
Tap
To
To
Calculator
This mobile phone is equipp
to access more functions, suc
to view all active browsers.
ookmark a page, tap
pen new tab, tap +
ed a calculator to facilitate simple
Æ
16
as bookmarks, history and others
omputations using the 4 basic fun
tions. To access, go
Page 17

to Æ . Tap on the Calculator’s interface and an advanced panel will pop up for more complex calculations.
Enter the numbers using on-screen keyboard and choose the desired operation. Tap for corrections and to get
the output.
Calendar
The Calendar application shows the current date/month, and lets you organize your schedule
by allowing you to add, edit, delete and view events. You may also add appointments and
notes as reminders. Go to Æ . Tap for options.
Camera
Please see “Capture and View Photo or Video”.
Cherry Fun Club
This contains the latest trends, news and other entertaining information. Go to Æ . Tap for updates and
options. Charges apply.
Clock
This function shows the current time and date, and gives you access to the alarm clock. Go to Æ
Tap to edit alarms. Tap to lanch the world clock. Tap to launch settings and night mode. Tap for
stopwatch. Tap for timer.
Contacts
This menu refers to the directory where all the contacts are stored in alphabetical order. You can view, edit, delete,
send messages and perform various other functions on each contact in your phonebook. The People menu allows you
17
Page 18

to store, locate and view your saved contacts. Aside from these, People also allows you to copy, edit and delete a
contact. Go to Æ .
: You can also send SMS / MMS or call a contact directly from People, as well as store several details (e-mail,
pictures, phone numbers, etc.) for each contact if saved in the phone’s memory.
For related information, see ‘Manage Contacts’ on page 11.
To import contacts from email to phone or the other way around
Go to Æ .
Tap Æ Import/Export.
Select where to import and export ÆNext
Mark contacts to import/export ÆCopy.
: You may choose “Select All” if you are trying to import/export all your contacts
Downloads
This lets you view a list of downloaded files and apps stored in the internal storage, and those currently being
downloaded. To manage Downloads, go to Æ .
Email
Send and receive e-mails on your phone. Tap Æ Æ set up an account by entering an
existing email address and password.
eWarranty
Please refer to page 37 for information on the Cherry eWarranty.
18
Page 19

R
s
-
: adjus
File Manager
ger
o
d
y
y
s
d
h
h
f
FM
To li
The File Mana
phone and Mem
Storage / SD Car
- New folder
- Search item
- displa
: You ma
optio
also
adio
ten to the radio, go to Æ .
switch to loudspeaker - view
- play/stop FM radio / -
/
lets you view, open and manage t
ry card. Go to ÆÆ c
.
ns
press and hold a folder or file for
channel list
earch the channel list
e data saved in your
oose from Phone
urther options.
/
- fine tune channel
-
display options: Search channels,
Connect headset for the FM ra
Record, Exit FM Radio
io to work.Press side keys to
t volume.
Gallery
19
Page 20

To view captured images, recorded video clips, and downloaded images, go to Æ .Click on a thumbnail to
launch an album.
Tap and hold an image to share (via MMS, Bluetooth, Google+, Email, Gmail or Facebook), delete or view details. You
can also tap to share photo.
Tap to edit photo. Tap to display other options.
Gmail
Gmail is Google's web-based email service that allows you to compose, send and receive messages on your phone.
Depending on your synchronization settings, Google Mail on your device is automatically synchronized with your
Google Mail account on the web. To access this, go to Æ .
Google
This launches the Google search option. Type anything on the search bar using the on screen keyboard or tap and
speak search. Tap to search.
Google+
Google+ is a social networking service that allows its users to connect with friends and acquaintances. To access this
through your phone two, Tap Æ
Google Settings
This allows you to manage your Google accounts and location settings, manage web history.
Hangouts
20
Page 21

Google Hangouts is Google's instant messaging program that allows you to chat with other Google Hangout users.
You must have a Goggle account to be able to access this. To sign in, go to Æ Æ Sign in or sign up.
Local
Google Local helps you discover nearby hangout spots that suit your taste. Quickly search for Restaurants, Cafes,
Bars and other spots, while on the go. Local also makes it easy to quickly rate the locations you visit. By rating places
you'll get recommendations based on those that you like and recommendations from your friends. To access this go to
Æ Æ choose from categories
Maps
This function allows you to view or find your current location, get directions and other information regarding different
places. Go to Æ .
To zoom in, double-tap a location.
To scroll, swipe the screen up, down, left or right with your fingertips.
Tap an icon to display information regarding a location.
Messaging
This menu allows you to read, compose, send and receive messages. The screen icon
displayed in standby mode refers to received and unread messages. Tap from the Home
Screen to access.
Music
Use the Music to play music and audio files. Go to Æ .
The songs are categorized into tabs: Artists, Albums and Songs. To create a playlist, press &
hold chosen song Æ Add to Playlist.
21
Page 22

- displays playlist
- shuffles tracks
- repeats playback
/ - plays previous or next track
/ - play/pause song
Navigation
This function allows you to locate a destination and get driving, walking or public transport (if available) directions. To
access this, go to Æ . Enter your current destination (or any starting point) and the place you wish to locate (end
point). Choose from the three modes of navigation: driving, walking, or public transport. Tap Get Directions and a
detailed route will then be available, how far it is from the start point, and the estimated time to get there.
: Do not manipulate this application while driving. Traffic data may not be real-time and walking routes
may be missing sidewalks or pedestrian paths. Please observe traffic rules and regulations.
News and Weather
This application lets you view recent location’s weather situation and lets you be updated with your local news.To
access, Go to Æ
Phone
The Phone menu has three tabs. The Dialer, Call Log and Contacts tabs. To access this, tap on the
Home Screen.
The Dial tab directs you to the dial pad where you can make calls. Please refer to “Make A Call” on page 10 for related
information.
22
Page 23

The Call Log tab gives you access to your phone’s call history. To view this, tap the Call Log tab at the top part of the
screen, and your call logs will be listed. Go to .Touch number to call and view call details.
Æ Missed call
Æ Received call
Æ Outgoing call
Æ send message
Æ view contact details
To clear log, tap Æ Delete Æ select call to be deleted ÆÆ OK
For further settings, tap Æ Settings Æ (Voice call, Video Call, Fixed Dialing Numbers, Minute Reminder, Quick
responses)
Play Store
Play store allows you to find and download applications and fun games for your device. Charges may apply.
Settings
Please refer to “Settings” on page 24
SIM ToolKit (STK)
The features of your STK are offered by your service provider. If your SIM card supports the
STK feature, you will see the STK menu. You may contact your network service provider for
more information regarding the STK. To access, tap Æ .
Sound Recorder
23
Page 24

Record sound and other audio files on your phone by going to → . Tap to start recording and press to
stop recording. To play the recently recorded sound, press ►. After playback, you may opt to discard or save the
recorded file.
Video Player
This displays and lets you view all video files stored in your phone and in your Memory Card. To access, tap Æ
Ætap a video to Play.
To Pause/Play, just tap on the video.
Tap ÆStop to stop playback.
Tap to share on Facebook, Messaging, Bluetooth, Google+, Email and Gmail.
Tap to view full screen.
Software Update
The Software Update checks the latest firmware package suitable for your phone and performs an update. To update,
go to ÆÆ Yes Æ Continue.
Youtube
Youtube is a video streaming site which lets you view other user-posted videos and even post your own.
24
Page 25

5. Settings
Under Wireless & Networks:
Wi-Fi
This allows you to switch your phone’s Wi-Fi ON or OFF. Check the status by looking at the in the status bar.
Bluetooth
Switch the Bluetooth function ON so you may establish wireless connection with other compatible devices with the
Bluetooth technology. The Bluetooth may be used to send and receive different kinds of files. With the Bluetooth
technology you may establish wireless connection with a compatible PC to enhance communication.
Bluetooth is a short-range wireless communication technology. Phones or other devices with Bluetooth capabilities can
exchange information wirelessly within a distance of about 10 meters. The Bluetooth devices must be paired before the
communication is performed.
Tap Æ
Click next to the Bluetooth menu to turn it on,
When Bluetooth is on, the icon will appear in the status bar.
Tap Bluetooth. Your phone will show all visible Bluetooth devices in range.
Tap the device you want to pair with and operate according to the message prompt.
When the owner of the device to be paired accept the connection, the pairing is completed.
TIPS: Tap your device name to make your phone discoverable if other devices try to pair with your phone.
25
Page 26

GPS
Slide and pull down menu on the main interface, you can see the message notice and choose whether to turn on or off
WIFI, Bluetooth, GPS, off-line mode. In the data connection, the current SIM is available to make data connection of
GPRS. Slide it around you can see the options of profile for your convenience.
Data Usage
This lets you monitor your data usage per month.
Switch ON the mobile data usage function so you can monitor your mobile usage per month. You may also opt to set a
limit on your mobile data usage.
: Your phone’s calculations may differ from the accounting of your mobile network service provider. It is not
advisable to rely solely on the phone’s calculations.
Airplane Mode
It is also known as the “Flight Mode,” which is advisable when riding aircrafts. This function, when turned ON, disables
all wireless connection to any network. However, with the airplane mode, you can make use other functions of your
device such as playing music, watching videos and capturing images and videos.
VPN
This allows you to set up and manage Virtual Private Networks (VPNs). Tap Add VPN to set up a VPN connection via
the following settings:
• Add PPTP VPN: Set up a connection to a VPN with Point-to-Point tunneling protocol.
• Add L2TP VPN: Set up a connection to a VPN with Layer 2 tunneling protocol.
• Add L2TP/IPSec PSK VPN: Set up a connection to a VPN with pre-shared key-based Layer 2/IPsec tunneling
protocol.
• Add L2TP/IPSec CRT VPN: Set up a connection to a VPN with Certificate-based Layer 2/IPsec tunneling protocol.
: You must set a lock screen pattern before you can use credential storage. To set up a lock screen pattern,
settings, go to ÆÆ Security Æ Screen Lock Æ choose lock method.
26
Page 27

t
a
y
g
e
g
y
s
y
o
s
a
y
z
e
g
c
n
s
y
c
e
o
d
r
t
a
g
g
e
n
s
g
Tethering and Portable Ho
Tethering is a method for co
such as this one. It will sh
apply, and you cannot use
Tethering and Portable Hots
: For further information,
Disable the Wi-Fi Hotspot
Tap ÆÆ More ÆT
Mobile Networks
The Mobile Networks Settin
ou enable or disable acces
Call Settings
This lets
ou control the foll
spot
nnectin
a computer or other devi
re your phone’s connection, maki
our phone’s W-Fi capability when
pot.
o to Tethering and Portable Hot
thering & portable hotspot Æ u
s lets you control the settings of
over mobile networks and conne
wing Settings:
es to the Internet via an Internet-c
it a WLAN hotspot; however, n
it is workin
as a hotspot. Go to
pot Æ Help.
n-tick the Portable Wi-Fi hotspot
our subscriptions, and data settin
t or disconnect to data services wh
pable mobile phone,
etwork char
es may
ÆÆ More Æ
check box.
s as well. It also lets
n roaming.
Quick responses- message
Feedback- you may choose
that you may use to respond imm
to enable vibration when a call is c
diately
nnected
Flip to Silent- option to mute
Floating Button- you may en
ble when phone process was hid
en
Under the Device category:
Profile Settings
This menu lets
ou customi
is equipped with multiple us
e your phone’s settings to suit you
r profiles that you can customize
27
activities, lifestyle and environme
ones for incoming calls, message
t. The mobile phone
. The ISWAG Profile
Page 28

is equipped with four (4) p
r
go
y
c
i
a
o
g
s
S
o
u
A
(
a
y
s
y
e
y
’
e
p
s
e
e
m
a
g
s
h
w
r
p
t
g
y
y
e-set profile options: General, Sil
nt, Vibration and Outdoor. Tap a
profile to change its
settings. To access these,
Display
In this sub-menu,
ou can
auto-rotate screen activation
: Please note that there
mode, tap and hold any cle
To change, just follow the pr
Storage
View and mana
e the data
Total Space and Available
amount you have used to st
Un-mount SD Card: Un-mo
when the device is on.
vailable Space: The amou
to ÆÆ Profiles. You ma
hange the settings for the phone
, brightness, clock display, font siz
s another way to customize your
r part of the Home screen and a
mpt on the screen.
torage of your device:
pace: Lists the amount of space
re photos, videos, music, and oth
nts the microSD card from your d
nt of internal phone storage used
add a new profile by tappin
s lock screen notifications, scene
, landscape launcher and sleep se
hone’s appearance i.e. change t
eries of options on changing the
on the microSD card installed in
r files.
vice so that you can format the ca
by the operating system, its com
, theme. Wallpaper,
s.
ttin
e wallpaper. On idle
allpaper will appear.
our device and the
d or safely remove it
onents, applications
including those you downlo
ded), and their permanent and te
porary data.
Battery
This sub-menu displa
s the
tatus of your battery’s power. To
ccess this, go to ÆÆ Bat
ery
Apps
This sub-menu enables
ou
to view and manage all the installe
d, running and saved applications i
n the phone memor
and SD card.
28
Page 29

UnderPersonal category:
r
a
p
y
yo
o
g
o
c
c
Æ
e
a
s
n
u
e
e
s
o
e
y
y
g
Location Access
The device uses the Global
location information. Furthe
service to estimate your loc
your location to speed up
access this, go to Æ
Security
This allows
ou to protect
being able to access the ph
Screen Lock
Please refer to “Lockin
/Unl
Disabling Screen Unlock Se
If you have created an unlo
Tap ÆÆ Security
Positioning System satellite and al
more, through the Wi-fi& mobile
tion faster. Anonymous location d
rocess when searching for places
Æ Location
ur device from unauthorized user
ne.
ck your Phone”.
urity
k pattern, PIN or password, you ca
Screen lock.
lows apps that have asked your p
network location, it lets apps u
ta will be collected and sent to G
using GPS and improving Googl
by setting the PIN code or enterin
disable it.
rmission to use your
e Google’s location
ogle. It can also use
search results. To
a password before
Draw the screen unlock patt
rn or enter your PIN/ password yo
have created if required.
Tap None.
Encrypt Phone
This requires a numeric PIN
: Encryption takes an hou
or password to decrypt your phon
r to accomplish. For more info, tap
each time you switch it ON.
ÆÆ Security Æ Encr
pt
our phone.
Set up SIM Card Lock
29
Page 30

This prevents unauthorized individuals from using your SIM card. The SIM Card lock feature requires user to enter PIN
to use phone. To activate ÆÆ Set up SIM card Lock Æ tick Lock SIM Card
Protect Your Phone with a PIN or Password
Create a PIN or Password
Tap ÆÆ Security Æ Screen lock.
Tap PIN or Password.
Enter desired PIN or Password Æ Continue Æ Re-enter PIN or Password Æ OK
Make Passwords Visible
When typing passwords, characters typed in usually appear in masked characters such as (*) With this option, you will
be able to see what letters/numbers/symbols you type when entering a password.
Language & Input
Use the Language & Keyboard settings to select the language for the text on your device and for configuring the
onscreen keyboard. You may also add words to your personal dictionary. To access this, go to ÆÆ
Language and Input. It also lets you activate/deactivate the spell checker, Android keyboard and Google voice typing.
It also lets you manage settings for the voice search, text-to-speech output and the pointer speed.
Backup & Reset
If activated, this sub-menu allows you to back-up your data, WLAN passwords and other settings to Google servers.
The Factory Data Reset erases all data in your phone’s internal storage including your accounts, system and app data,
downloaded apps.
To access this, go to ÆÆ Backup & Reset Æ Factory Data Reset ÆReset Phone Æ Erase Everything
Accounts
The Accounts sub-menu allows you to add corporate, e-mail, Facebook, Twitter and Google accounts,synchronize
30
Page 31

them with your phone, send and receive data anytime, either automatically or manually.To access this, go to Æ
Æ Accounts.
Under the System Category:
Date & Time
This lets you choose whether to automatically update your phone’s date and time or otherwise.You may also
automatically synchronize your phone’s date and time according to your time zone.
In this sub-menu, you may also set the date, time, time zone, time and format. To access this go to ÆÆ Date
& Time.
Accessibility
You can use the Accessibility settings to configure any plug-ins you have installed on your device. To access this, go to
ÆÆ Accessibility. You may enable or disable the following services on your phone by marking/unmarking
the following options’ checkbox:
• Auto Reboot
• Large Text
• Power button ends call – end a call by pressing the Power Key once.
• Auto-rotate screen
• Text to Speech output
• Touch and hold delay
• Enhance web accessibility
31
Page 32

Developer Options
This lets you view your Development Device ID and enable or disable the debug mode when USB is connected. Other
options include:
USB Debugging
Stay awake
Allowmocklocations
– proceeds to debug mode when USB is connected
– the screen will not be put to sleep mode while charging
– lets you use a different location regardless of your actual whereabouts.
About Phone
This allows you to view system information including system & software updates, status, legal information, model
number, Android version, baseband version, kernel version, build number and custom build version. Tap ÆÆ
About Phone.
32
Page 33

6. Important Safety Pr
e
q
o
gu
y
d
d
e
r
o
y
e
a
m
n
o
t
y
n
e
t
p
o
e
s
n
m
y
e
s
p
u
a
a
a
g
c
m
e
cautions
This mobile phone meets
harmless human exposure t
Kindly read the following
highly recommended for you
Non-compliance ma
General Precautions
•
•
•
•
•
Use only authorize
accessories may ca
Do not put the batt
circuit damage or fi
Do not use the mob
Do not store the ph
Keep the phone out
pose
uality standards set by national
radio waves.
idelines before using your wireles
r safet
anger to you and your mobile pho
accessories and batteries by th
use battery leaks, overheating, rup
ry, phone and charger in a highe.
ile phone near flammable and expl
ne in areas with high temperature
of children’s reach.
.
authorities and complies with saf
phone. Utmost compliance with
e, and may be illegal.
manufacturer. The use of incom
ure or fire. This may also nullify yo
ressure container or microwave,
sive materials. Doing such may c
s this can cause extensive dama
ty requirements on
these precautions is
atible batteries and
r warranty.
s this may result in
use explosion or fire.
e to the handset.
Do not use
safety rules and traffic regul
If you are with a pace
as it may interfere with its fu
Phone
•
DO turn off your m
handsets in prohibi
medical equipment.
our phon
while driving. Keep your hands fr
tions to avoid unfortunate incident
aker, make sure to use your pho
ction. Consult your physician for
bile phone inside aircrafts, hospital
ed areas is dangerous as it ma
33
e when operating a moving a vehi
.
e at least 20 centimeters away fro
ore information.
s and other locations where its us
cause interference in the operat
le and observe road
the medical device
is restricted. Use of
ion of electrical and
Page 34

• DO keep your mobile phone away from moisture. Contact with water or any liquid may cause the phone to
malfunction and overheat.
• DON’T disassemble or remodel your phone as this may cause permanent and irreparable damage. This may
also void your mobile phone’s warranty.
• DON’T use sharp or pointed objects in pressing you phone’s keys as this can cause damage.
• DON’T use your handset if you notice any damage (e.g. broken antenna) as this may cause injury to the user.
Battery
• Each
iSWAG handset is equipped with a rechargeable battery. Use only authorized iSWAG batteries and
accessories.
• For better performance and longer battery life, initial charging of at least four (4) hours is recommended when
using the mobile phone for the first time.
• The optimum performance of a new battery is achieved only after two or three complete charge and discharge
cycles. Overcharging, however, may affect battery life.
• Do not use a damaged battery or charger. If battery life becomes noticeably shorter than usual, it is
recommended to replace it with a new one.
• While charging, keep the mobile phone out of children’s reach.
• Store the battery in a cool and dry place away from direct sunlight, dust and water.
• Avoid exposing batteries to extreme temperature (below -10°C
or above 50°C ).
• Unplug the charger from the electrical outlet when not in use.
• Avoid using the charger in a wet environment. If the charger comes in contact with water or any form of liquid,
immediately unplug it from the outlet to reduce the risk of overheating, charger malfunction, electric shock or
fire.
• Be careful with the disposal of spent batteries. Avoid throwing them in a fire, as this may cause explosion. It is
recommended to abide by local environmental laws and guidelines on proper waste disposal.
34
Page 35

• Do not short-circuit the batteries (i.e. when metal objects such as coins, are directly connected to the metal
side of the battery) as this will damage your phone. It is advisable to handle spare batteries with extra care.
Cleaning and Maintenance
• The handset, battery and charger are not water-resistant and should always be kept dry. Avoid using them in
excessively moist areas.
• Use a soft, dry cloth to clean the handset, battery and charger.
• Do not use alcohol, thinner, benzene or other solvents to clean the handset.
• Avoid charging the mobile phone through a dirty outlet as this causes poor electrical contact and results in
power lost and charging failure.
7. Troubleshooting
Below is a list of common problems that may occur when using your mobile phone. Before running to a Cherry Service
Center, you may want to troubleshoot the issues first in order to save time and energy.
For better performance, it is recommended to always fully charge your battery.
Avoid storing too much data in the phone as this may affect its performance.
1. Phone does not switch on
• Press and hold the end key until image appears on the display.
• Check the battery charge level.
• Remove and insert the battery, and switch your phone on again.
2. Phone does not respond for several minutes
• Press and hold the end key.
• Remove and insert the battery, and switch your phone on again.
3. The phone switches off by itself
35
Page 36

•
y
c
b
t
G
g
n
o
a
y
n
y
a
c
S
t
e
t
o
u
y
c
m
y
e
a
e
c
o
v
e
y
g
Check if the ke
pad is locked when left unused.
•
4.
•
•
•
•
: The char
5.
•
•
6.
•
•
•
Check the batte
The battery won’t
Make sure the
Make sure that
Use only ISWA
Double check if
er can be con
Standby time is to
Standby time h
our phone off i
In some cases,
Cannot connect to
Move to an are
Contact your lo
Try to manually
charge level.
r
harge
attery is not fully drained.
he battery is inserted correctly.
approved batteries and chargers.
the charger connector is properly
ected only after the battery is inse
short
s something to do with the syste
a weak signal area.
ou might need to replace the batt
a network
with better coverage.
al network service provider.
select a network.
onnected to the mobile phone or n
rted.
settings of your local network ser
ry.
t.
ice provider. Switch
7.
•
•
•
8.
•
•
•
SIM Error
Make sure that
Make sure that
Check the cov
weak signal. Yo
Cannot make calls
Make sure that
Use the full nati
When abroad,
IM card is properly inserted in its i
he chip in the SIM card is not dam
rage of your local network servic
ntended spot.
ed or the SIM card is not scratch
provider if you appear to be out
d.
of covera
e or have
u may opt to move near a window.
he number you dialed is correct an
d the dial ke
has been pressed.
nal area code.
se country-specific international ac
36
ess codes
Page 37

9. Cannot receive calls
• Make sure that your phone is connected to a network (Check if the network is busy or invalid).
• Check the Call Diverts settings.
• Check the Incoming Call Barring settings.
10. The caller’s number is not displayed
• Contact your local network service provider as the caller might have withheld his or her number.
11. Entries cannot be made in Phonebook.
• Check if the Phonebook is full. If so, you may have to delete some records in order to accommodate new
ones.
12. The caller cannot leave a voicemail message
• Contact your local network service provider
• Make sure that the voice mail number you have saved is correct.
• If the network is busy, try again after a few minutes.
13. Messages cannot be sent/received
• You may have to delete some old or saved messages, as the message capacity of the phone is limited.
• Contact your local network service provider and verify your service center number.
14. PIN is entered incorrectly three times
• Enter the PUK code (PIN Unlock Code). This code usually comes with the SIM card upon purchase.
Otherwise, contact your local service provider.
Thank you for using iSWAG Profile. For further questions and concerns, please do not hesitate to contact us
or your local iSWAG Service Center. For information about our iSWAG Service Center contact details, please
visit our website at http://swagtek.com/
37
Page 38

The iSWAG eWarranty is an innovative service that replaces the traditional warranty card.
All iSWAG phone owners are entitled to the iSWAG eWarranty. One simply has to register as soon as he or she gets
hold of the phone. The five easy steps are illustrated in the following pages.
(Please make sure the phone has a valid SIM card with at least P5.00 credits to activate the service.)
STEP 1
Read the message carefully. Choose NEXT to proceed, or CANCEL to defer.
Note: If left deferred for over three (3) days, the user will have to activate the eWarranty manually.
STEP 2
Leave the Frontliner Code field blank, unless a code is provided by a iSWAG authorized distributor.
The Phone Model is automatically indicated in the field
Select Options Æ Save.
Note: The user may also opt to have the iSWAG eWarranty activated upon purchase for more convenience.
STEP 3
A Cherry Zone welcome message will appear upon successful registration. Select NEXT to proceed.
STEP 4
Carefully read the terms and conditions of the iSWAG eWarranty.
Select AGREE to proceed to the next step.
Note: If user opts to reject, activation will not proceed, but the iSWAG eWarranty is still available for manual
activation anytime.
STEP 5
Accomplish the iSWAG eWarranty form.
Select Options Æ Save/ Submit.
The user will receive a confirmation message if the registration is successful.
Note: P2.50 will be deducted from the user’s regular balance upon successful registration.
38
Page 39

TERMS AND CONDITIONS OF WARRANTY
1. iSWAG provides a one year free warranty of service for phones and tablets, and six months
warranty to all accessories (battery, charger, headset) from the date of purchase.
2. The warranty does not cover:
a) Units with damage caused by mishandling (eg. Broken LCD, Liquid Damage etc),
incorrect usage, or from natural disasters.
b) Unauthorized repair, alteration, and modification of the product, other than authorized
iSWAG Service Center Personnel.
The above terms and conditions are for general reference only and are subject to change by iSWAG without
prior notice.
39
Page 40

FCC RF EXPOSURE INFORMATION:
WARNING!! Read this information before using your phone
In August 1986 the Federal Communications Commission (FCC) of the United States with its action in Report and
Outer FCC 96-326 adopted an updated safety standard for human exposure to radio frequency (RF) electromagnetic
energy emitted by FCC regulated transmitters. Those guidelines are consistent with the safety standard previously set
by both U.S. and international standards bodies. The design of this phone complies with the FCC guidelines and these
international standards. Use only the supplied or an approved antenna. Unauthorized antennas modifications, or
attachments could impair call quality, damage the phone, or result in violation of FCC regulations. Do not use the
phone with a damaged antenna. If a damaged antenna comes into contact with the skin, a minor burn may result.
Please contact your local dealer for replacement antenna.
BODY-WORN OPERATION:
This device was tested for typical body-worn operations with the back of the phone kept 0.5cm from the body. To
comply with FCC RF exposure requirements, a minimum separation distance of 0.5cm must be maintained between
the user's body and the back of the phone, including the antenna, whether extended or retracted. Third-party belt-clips,
holsters and similar accessories containing metallic components shall not be used. Body-worn accessories
that cannot maintain 0.5cm separation distance between the user’s body and the back of the phone, and have not
been tested for typical body-worn operations may not comply with FCC RF exposure limits and should be avoided.
For more information about RF exposure, please visit the FCC website at www.fcc.gov
Your wireless handheld portable telephone is a low power radio transmitter and receiver. When it is ON, it receives and
also sends out radio frequency (RF) signals. In August, 1996, the Federal Communications Commissions (FCC)
adopted RF exposure guidelines with safety levels for hand-held wireless phones. Those guidelines are consistent with
the safety standards previously set by both U.S. and international standards bodies:
<ANSIC95.1> (1992) / <NCRP Report 86> (1986) / <ICIMIRP> (1996)
40
Page 41

Those standards were based on comprehensive and periodic evaluations of the relevant scientific literature. For
example, over 120 scientists, engineers, and physicians from universities, government health agencies, and industry
reviewed the available body of research to develop the ANSI Standard (C95.1). Nevertheless, we recommend that you
use a hands-free kit with your phone (such as an earpiece or headset) to avoid potential exposure to RF energy. The
design of your phone complies with the FCC guidelines (and those standards).
Use only the supplied or an approved replacement antenna. Unauthorized antennas, modifications, or attachments
could damage the phone and may violate FCC regulations.
NORMAL POSITION:
Hold the phone as you would any other telephone with the antenna pointed up and over your shoulder.
TIPS ON EFFICIENT OPERATION:
For your phone to operate most efficiently:
• Extend your antenna fully.
• Do not touch the antenna unnecessarily when the phone is in use. Contact with the antenna affects call quality and
may cause the phone to operate at a higher power level than otherwise needed.
RF Exposure Information:
FCC RF Exposure requirements: The highest SAR value reported under this standard during product certification for
use next to the body with the minimum separation distance of 0.5cm is 1.389W/kg; next to the head is 0.573W/kg. This
transmitter must not be collocated or operating in conjunction with any other antenna or transmitter.
This device complies with part 15 of the FCC rules. Operation is subject to the following two conditions:
(1) this device may not cause harmful interference, and
(2) this device must accept any interference received, including interference that may cause undesired operation.
41
Page 42

NOTE: The manufacturer is not responsible for any radio or TV interference caused by unauthorized modifications to
this equipment. Such modifications could void the user’s authority to operate the equipment.
NOTE: This equipment has been tested and found to comply with the limits for a Class B digital device, pursuant to
part 15 of the FCC Rules. These limits are designed to provide reasonable protection against harmful interference in a
residential installation. This equipment generates uses and can radiate radio frequency energy and, if not installed and
used in accordance with the instructions, may cause harmful interference to radio communications. However, there is
no guarantee that interference will not occur in a particular installation. If this equipment does cause harmful
interference to radio or television reception, which can be determined by turning the equipment off and on, the user is
encouraged to try to correct the interference by one or more of the following measures:
- Reorient or relocate the receiving antenna.
- Increase the separation between the equipment and receiver.
-Connect the equipment into an outlet on a circuit different from that to which the receiver is connected.
-Consult the dealer or an experienced radio/TV technician for help
Do not use the device with the environment which below minimum -10℃ or over maximum 50℃, the device may
not work.
Changes or modifications to this unit not expressly approved by the party responsible for compliance could void the
user’s authority to operate the equipment.
42
 Loading...