

35
Picture 4.8-1
Set unlock PIN code
1. Click setting application in main interface.
2. Click security.
3. Click screen lock.
4. Choose PIN in text setting area.
5. Enter new PIN code(numbers) and click continue.
6. Enter new PIN code again and click confirm.
Set unlock password
1.Click setting application in main interface.
2.Click safe.
3.Click screen locked.
4.Set password in text setting area.
5.Set new password(letters and numbers) and then click continue.
6.Enter the password again and the click confirm.
4.8-2 Location service
Click setting, select Location, as Picture 4.8-2
Picture 4.8-2
36
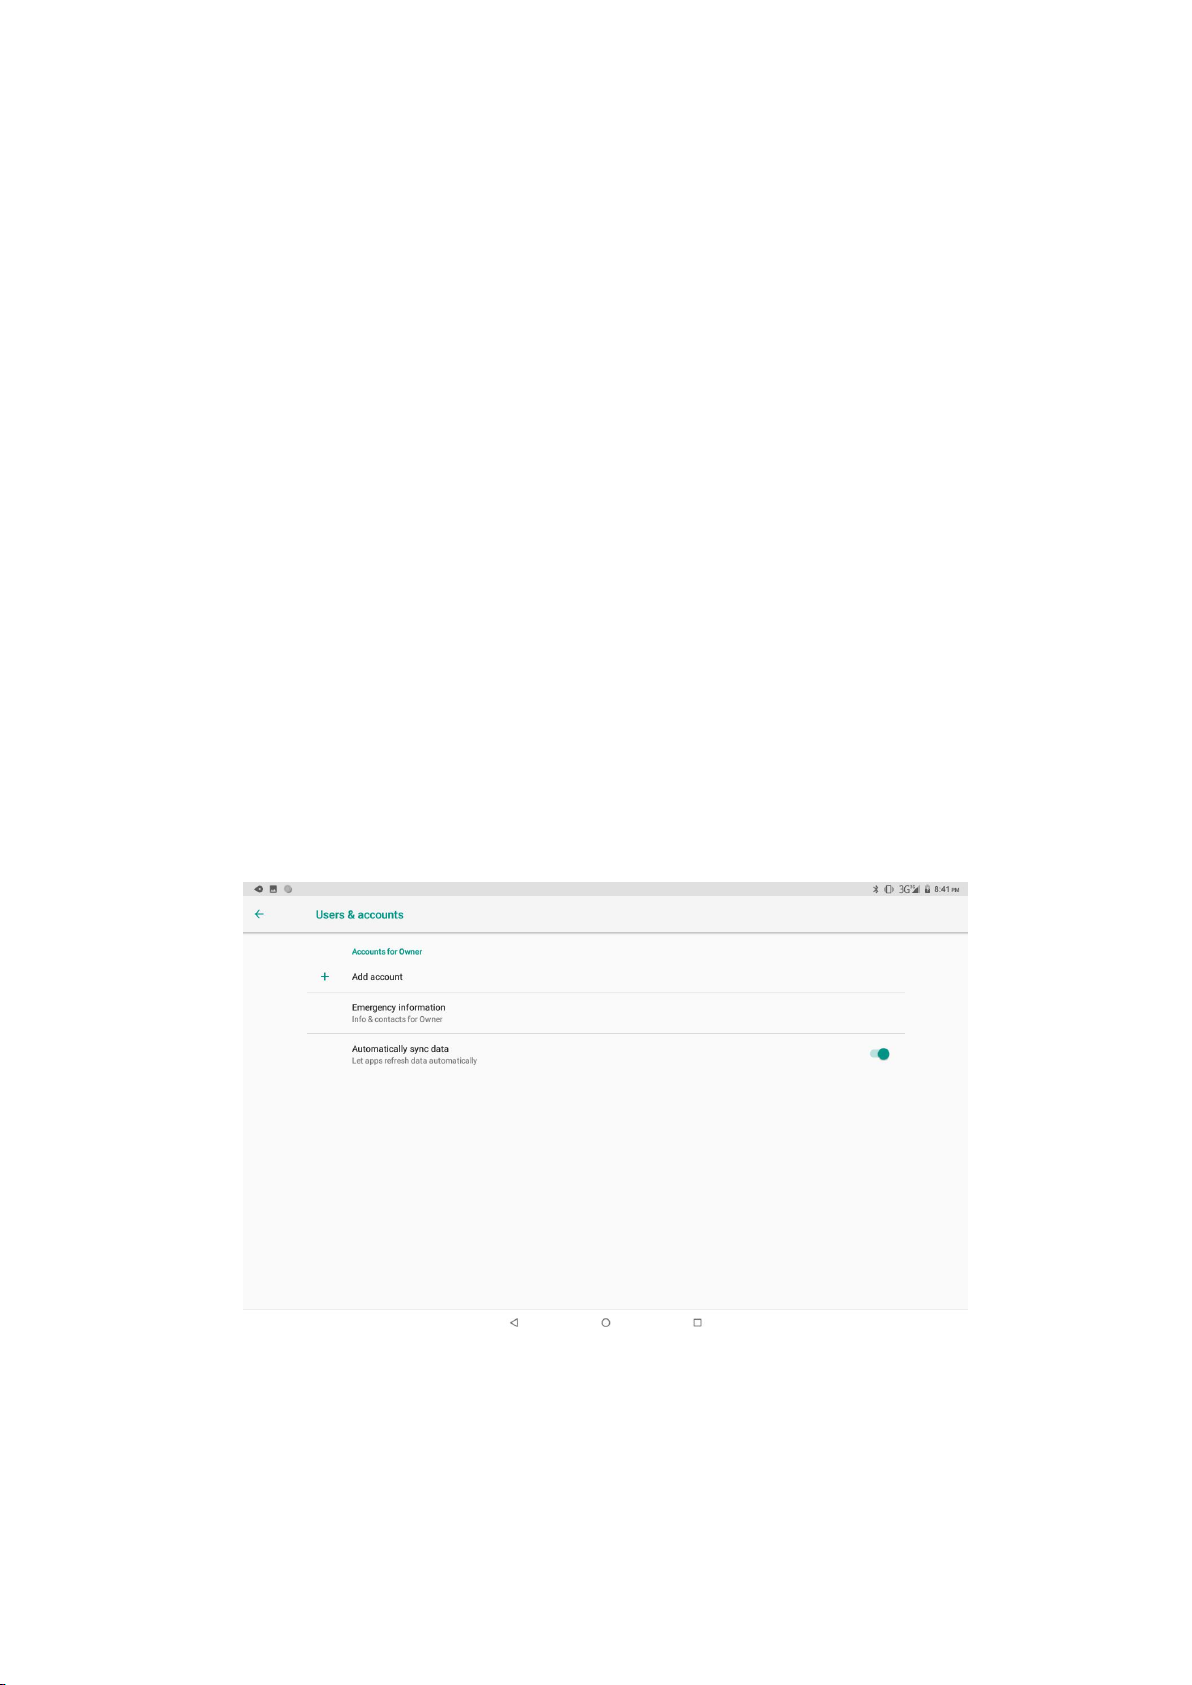
4.9 Users & accounts
1. Select setting application
2. Open account and sync, as Picture 4.9-1
Picture 4.9-1
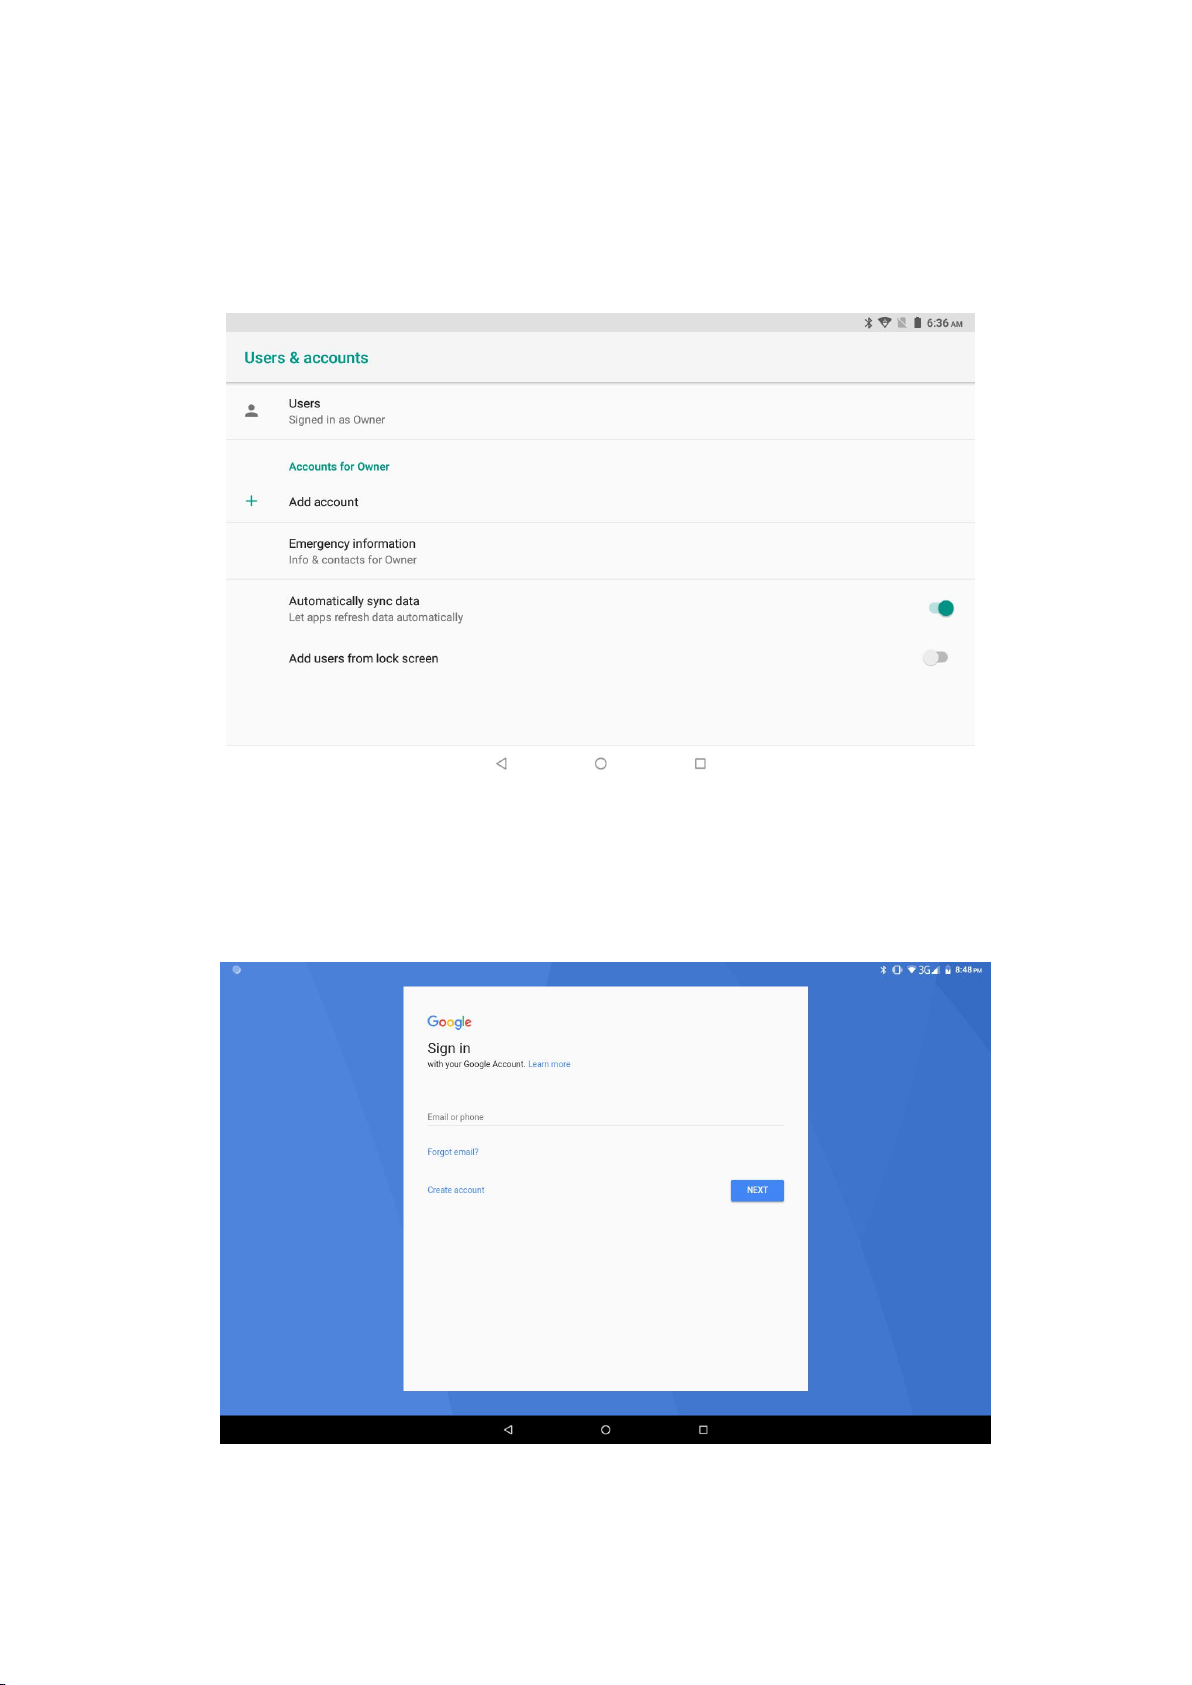
3. Click add an account, as Picture 4.9-2
Picture 4.9-2
37
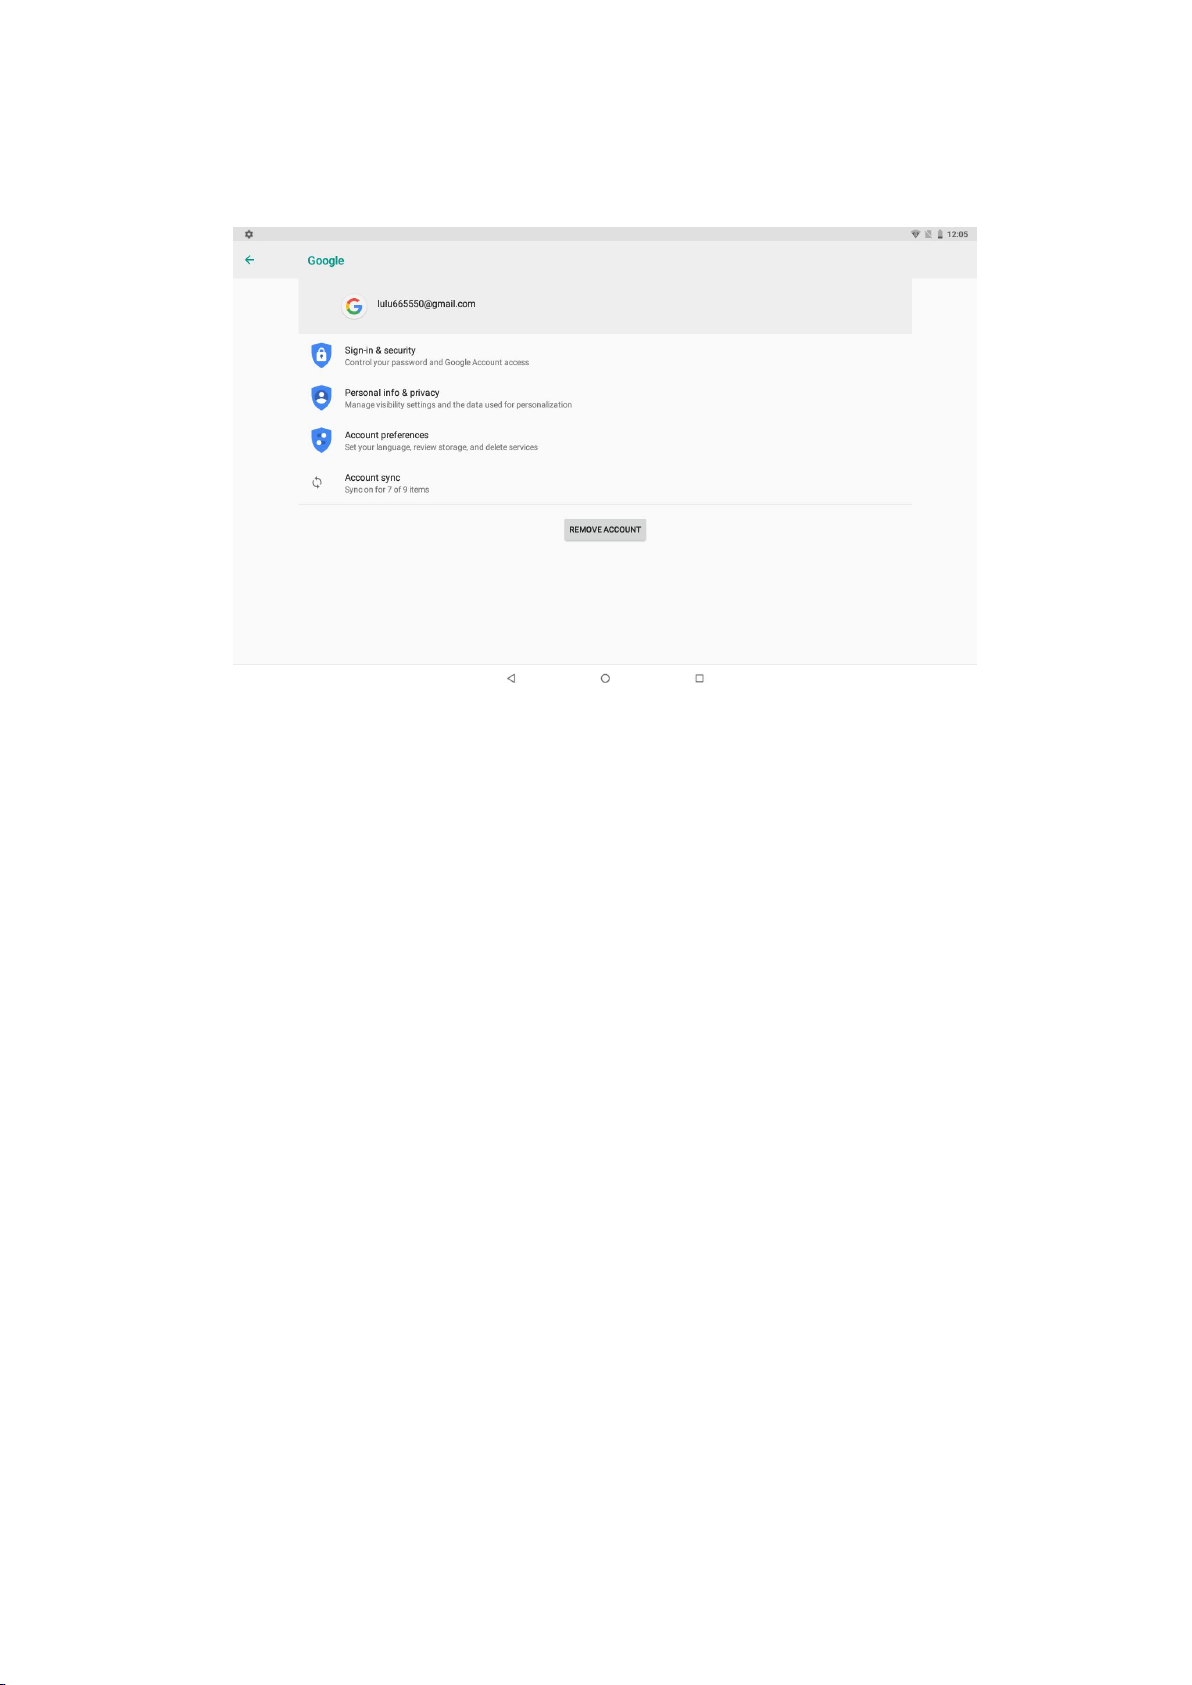
4. After successfully load, it will open the sync function, as Picture 4.9-3
Picture 4.9-3
4.10 Accessibility
4.10-1. Font size
Click it to make system font large size
4.10-2. Click power button to end calls
When Click call, press “power” button, call will end but not hold.
4.10-3. Touch and hold delay
Click touch and hold delay to increase time, as Picture 4.10-1

38
Picture 4.10-1
4.10-4 Install webpage script
It will allow you install webpage scrip when you open system,, but it will increase the risk
when you are browsing webpage.
4.11 System
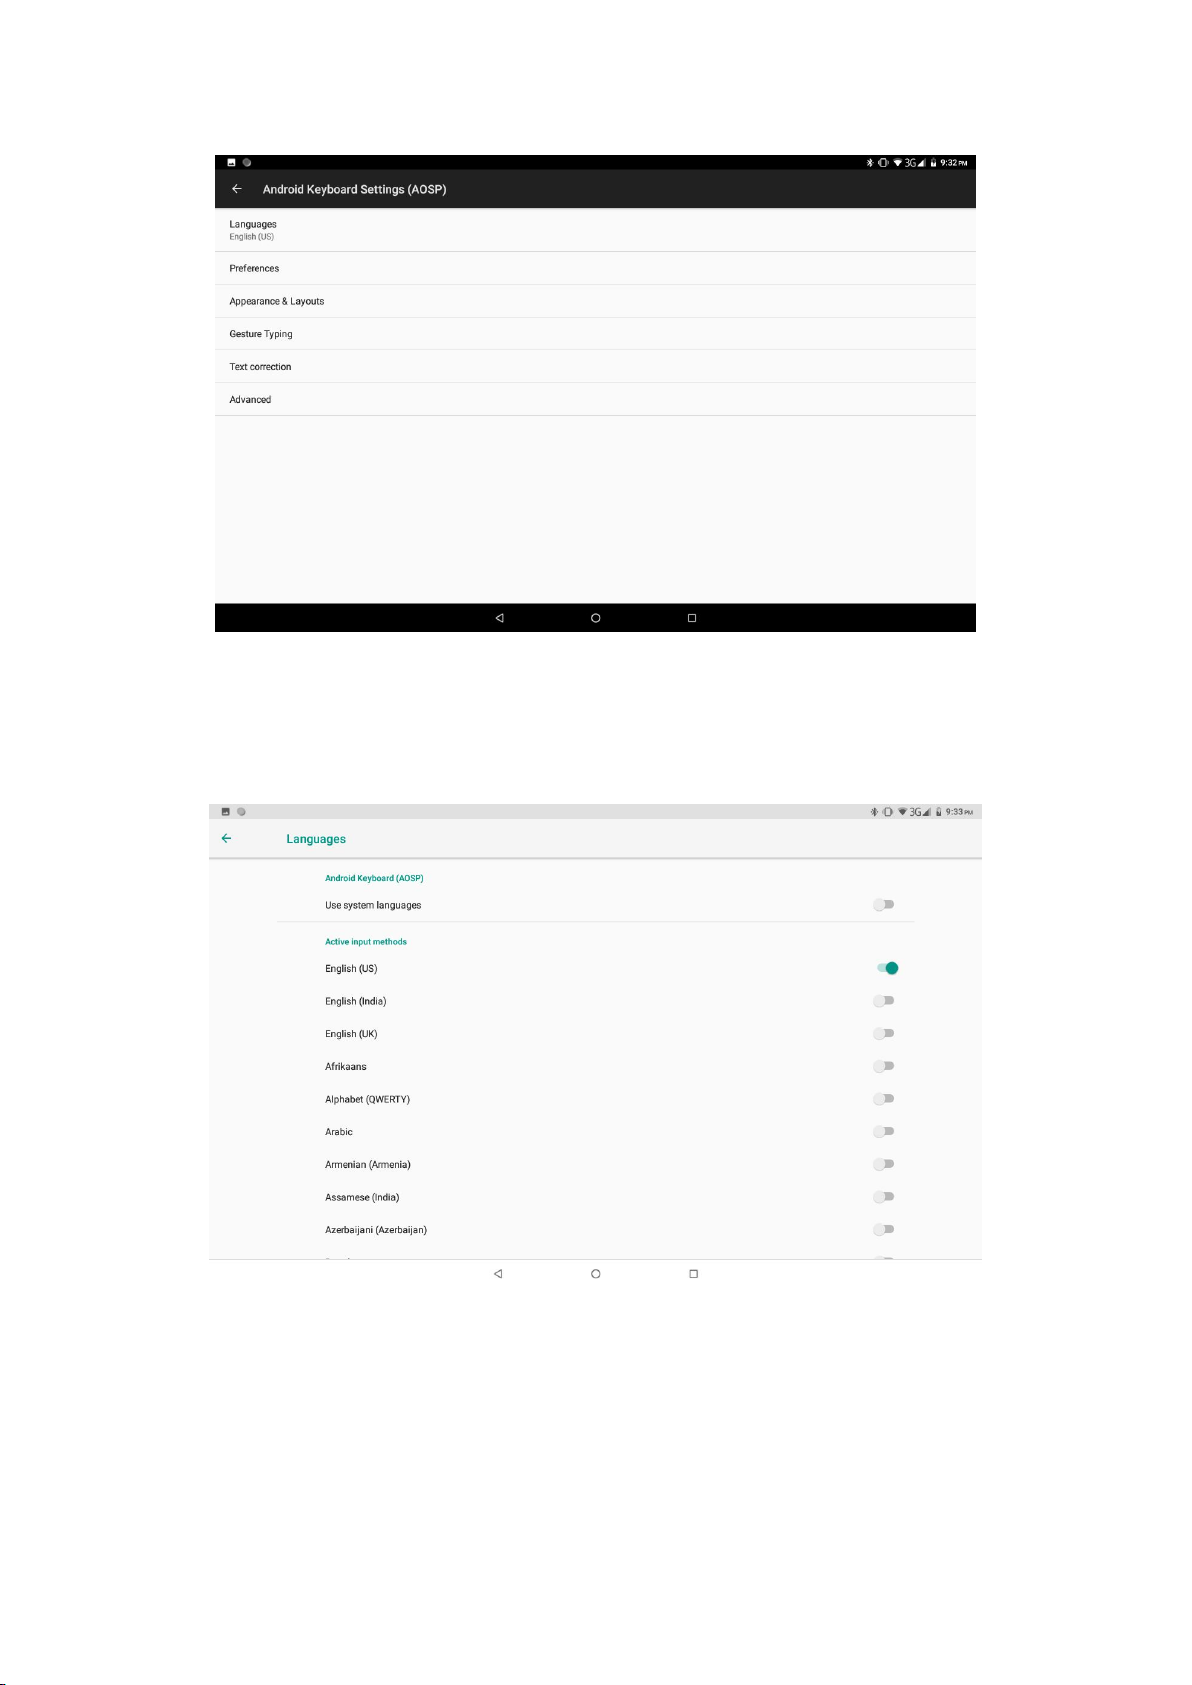
4.11-1 Language and Input Method
Click setting, select language and input method, choose language , then click Add a
language, select the language you want to add from the language list, as Picture
4.11-2.Back to language preferences page , you can drag the language you want to set to the
first to switch language.
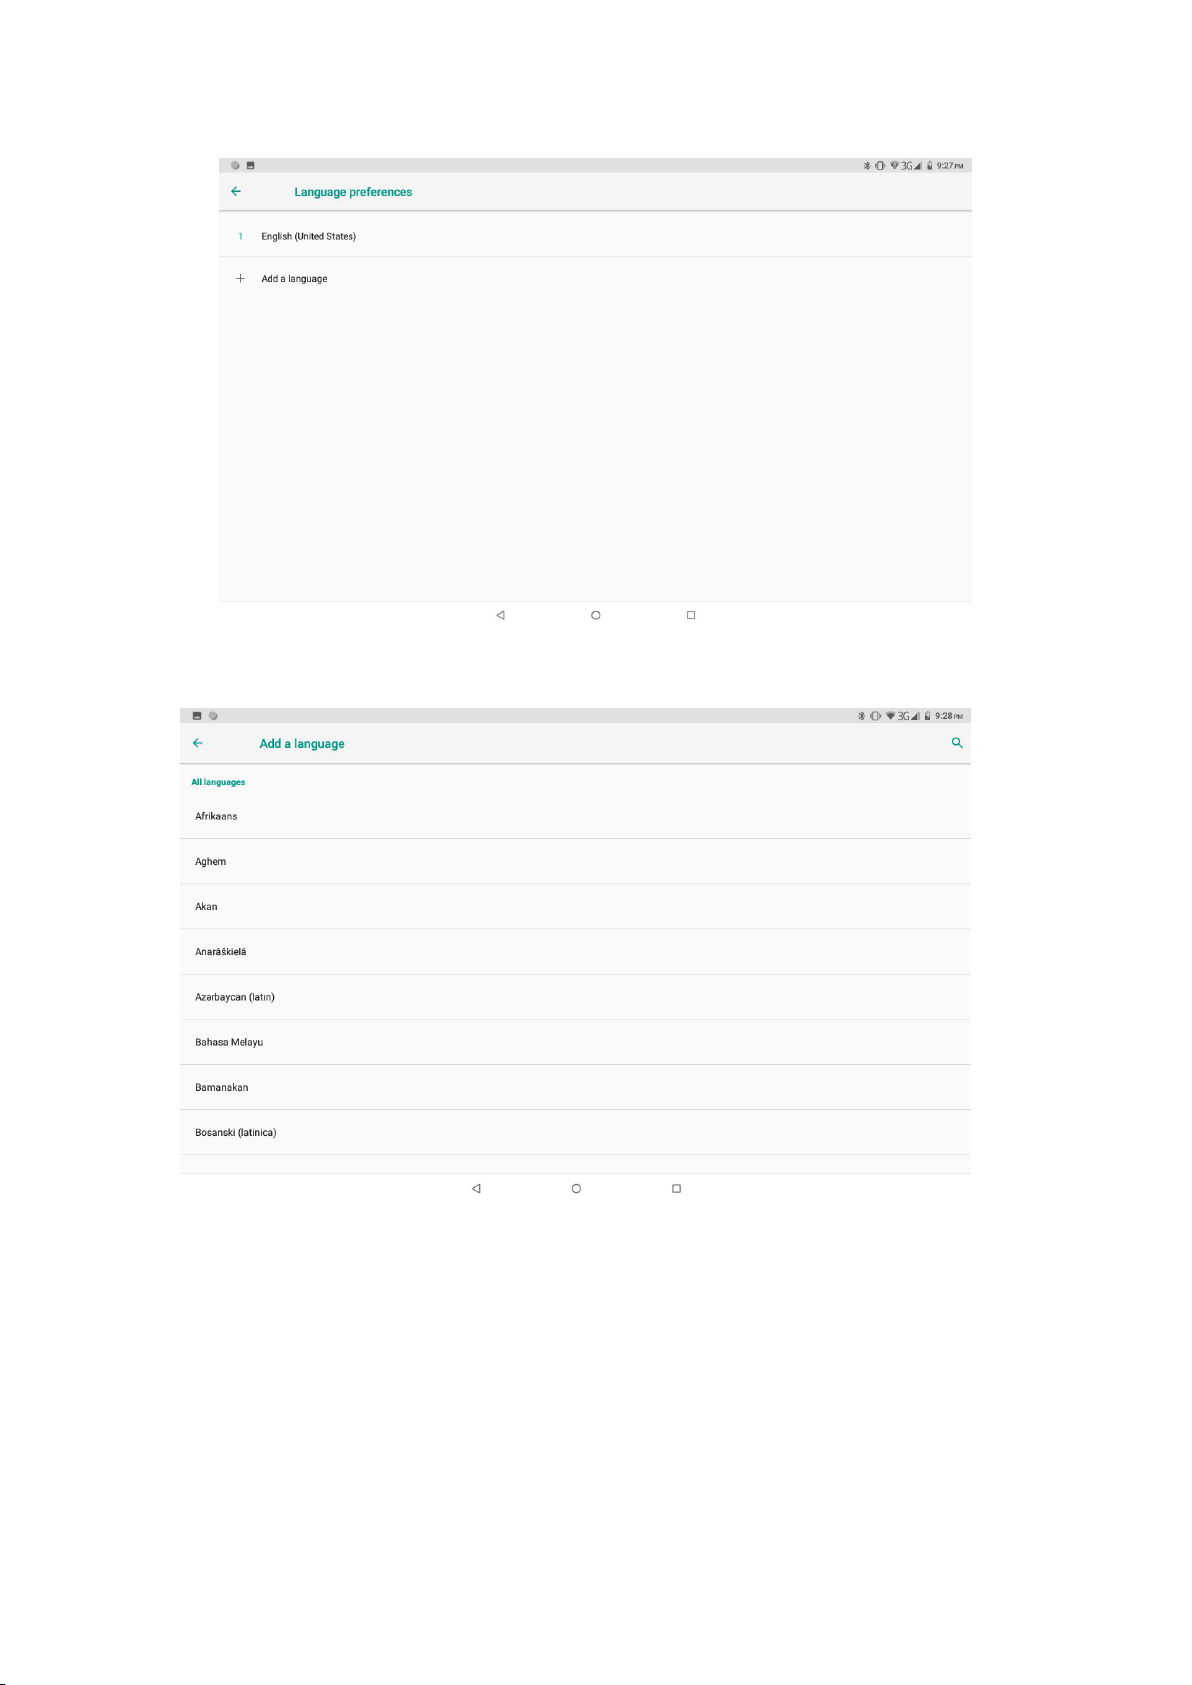
Picture 4.11-1
Picture 4.11-2
Click setting, choose language and input, choose Google keyboard setting,
TM
click
input language, as Picture 4.11-3(Android is a trademark of Google LLC. Oreo is a
trademark of Mondelez International,Inc.Group)
39
40
Picture 4.11-3
Choose the language you want to change in the language list, as Picture 4.11-4
Picture 4.11-4
4.11-2 Gestures
Jump to camera
Operate it to open and close of this app as Picture 4.11-5

41
Picture 4.11-5
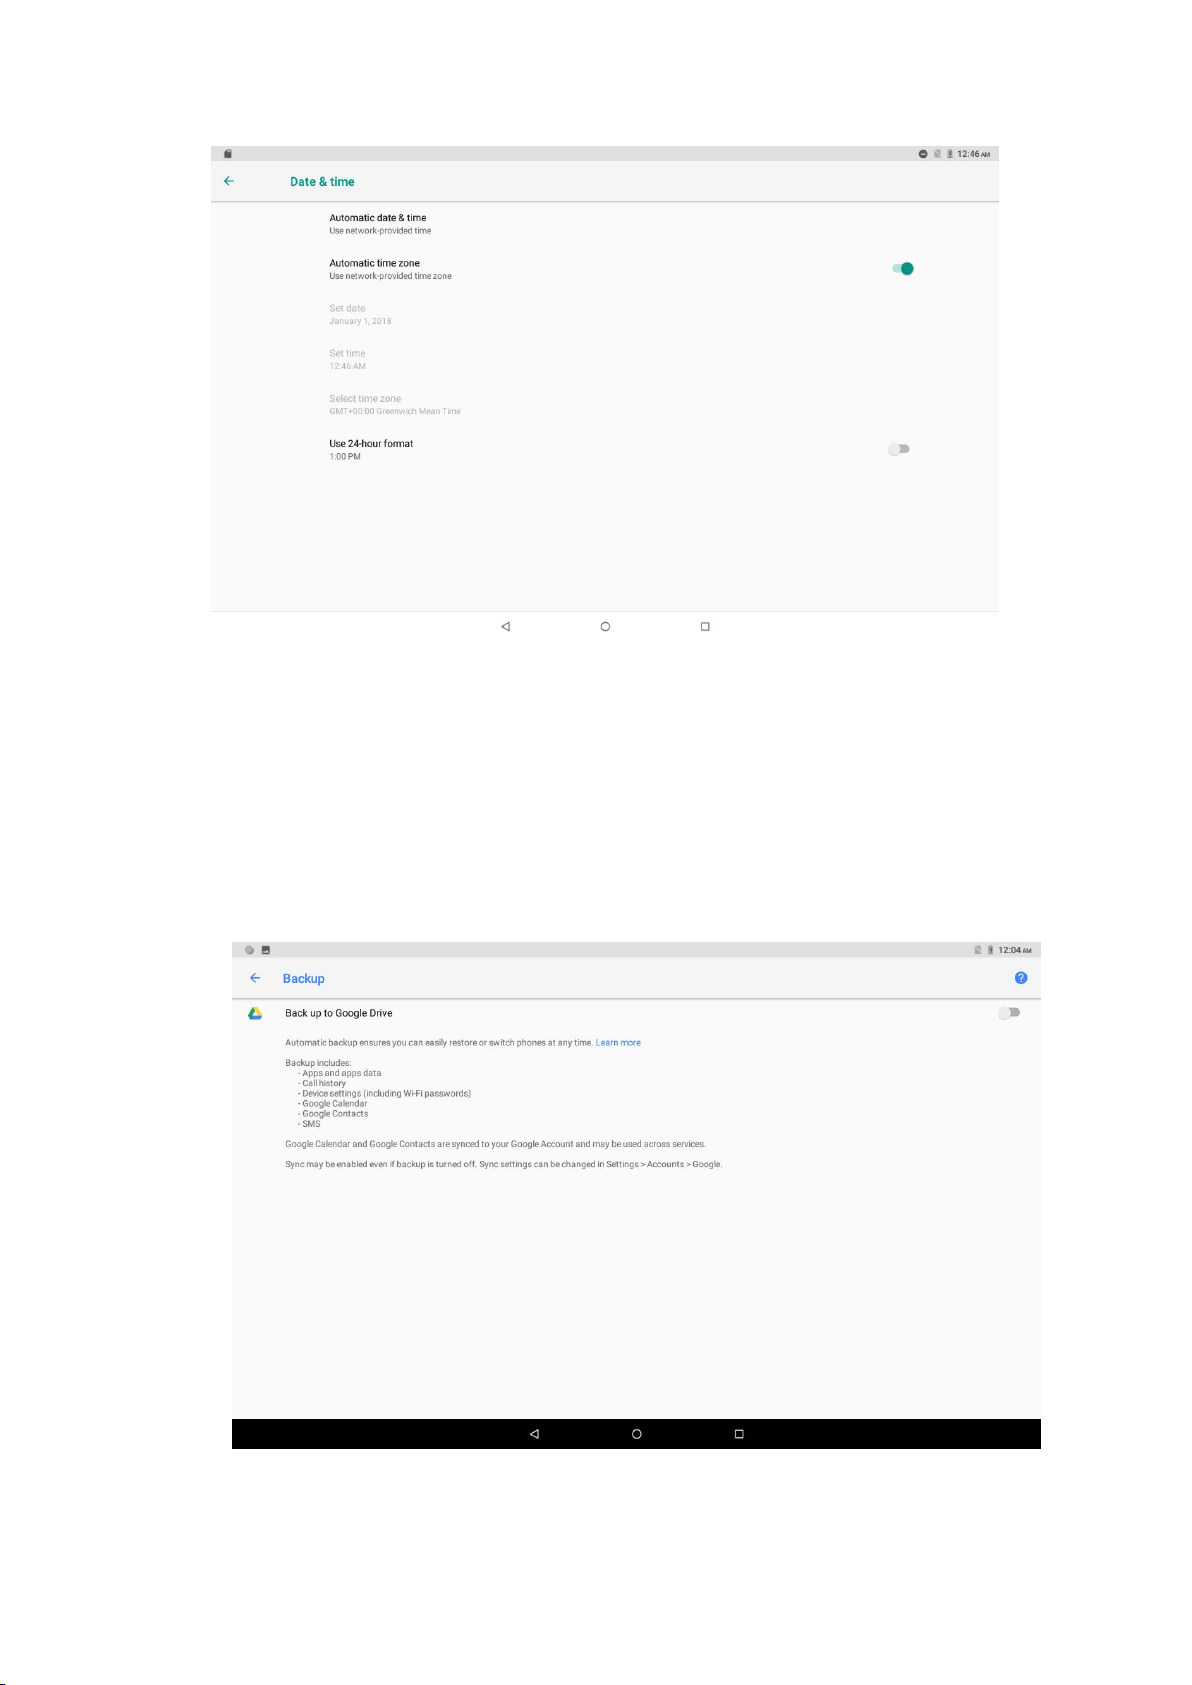
4.11-3 Date and Time
According to the preset, system will voluntarily apply the date, zone, and time provided by
internet. as Picture 4.11-6
Manual set date, time and zone
1. Click Setting application procedure.
2. Slide down the screen, then click date and time.
3. Turn off “auto setting of date and time”.
4. Turn off “auto setting zone’.
5. Click Zone Selecting, then choose the zone lists. Slide down the list to view more
zones.
6. Click Set date, then click upper or down button to adjust date, month, and year, click
setting when you finish selection.
7. Click Set Time, then click upper or down button to adjust hour and minute, click AM
or PM to change morning or afternoon ( there is no such selection when you se 24-hour
format). Click Setting to finish.
8. Click 24-hour format, switch between 12-hour or 24-hour format, the time format you
choose will be used on the alarm clock.
9. Click date format setting, then choose the time format you want to show on MID.
42
Picture 4.11-6
Note: If you use the time internet provided, you will not able to set the date, time and time zone.
4.11-4 backup
Connect WIFI and login your google account, choose backup my data, system will
backup your data into google server. as Picture 4.11-7
Picture 4.11-7
43
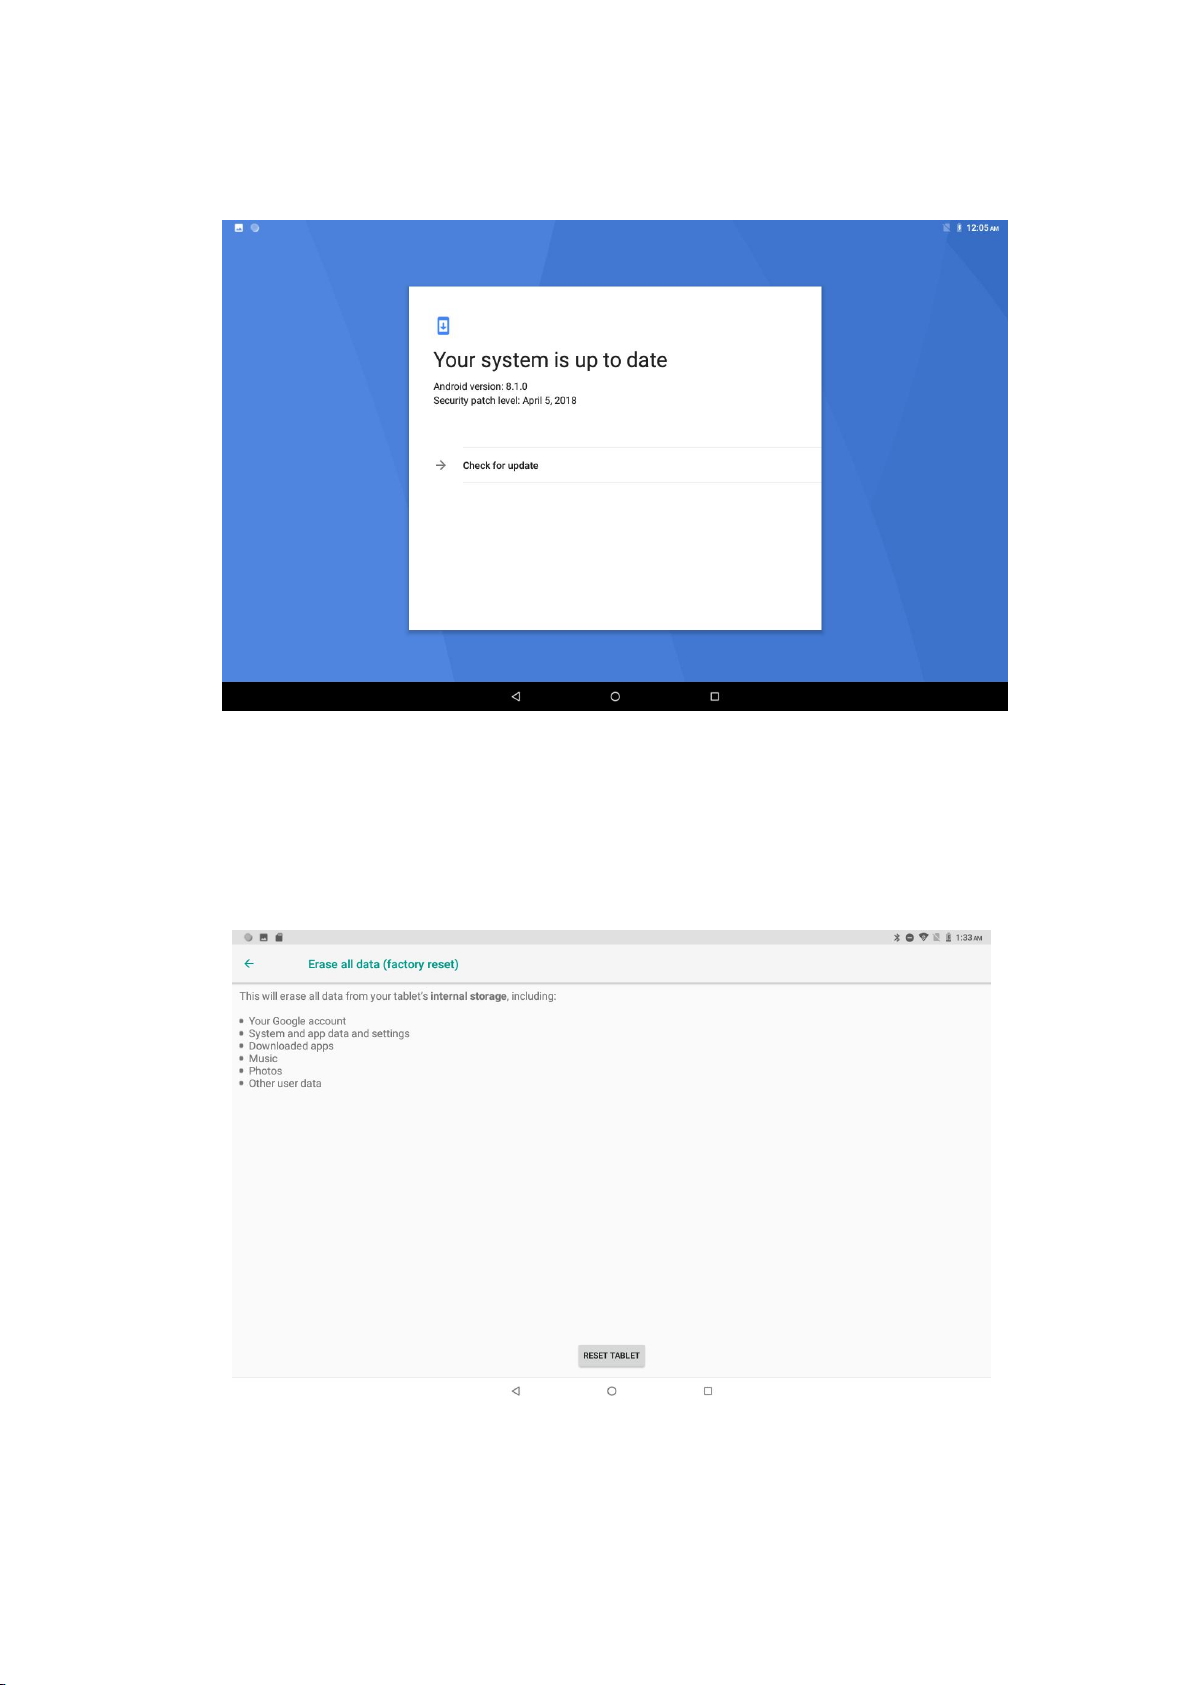
4.11-5 System update
Check to see if the system is up-to-date ,as Picture 4.11-8
Picture 4.11-8
4.11-6 Reset options
If you need to recovery factory reset, please click reset, as Picture 4.11-9, if you need to
formulate NAND, please click reset tablet.
Picture 4.11-9

44
4.11-7 Engineer Selection
1. USB debugging
After opening USB bugging, you can use some software to read MID software, but when
USB debugging is turned on, USB storage needs to manual adjust.
2.Stay awake
If you open stay awake, it will never auto sleep when your MID is charging.
3.Pointer Location
If you open pointer location, it will display touch vertical and horizontal direction.
4. Show taps
If you open display touch screen operation, it will display touch operation on the screen. It
is suggested to use with same direction as pointer location.
5. Show surface updates
If you open screen refresh, it will display related area when the area is refreshing.
6. Show CPU usage
After open CUP usage, in the right top of MID will show CPU usage situation. as Picture
4.11-10
Picture 4.11-10
4.11-8 About Tablet
Check MID state
1.Check Setting application.
2.Click about tablet, check state message, model, Android version, version No and so on.
1. Click state message, check battery status, battery level, SIM status, IMEI
information, IP address and so on.

45
5 Multi-Media
5.1 Music
Enter into music player: in menu or desktop click music icon to enter into music player,
click the music you want to play, as Picture 5.1-1:
Picture 5.1-1
Picture 5.1-2
Album
Pause/play
Next song
Previous song
Artist
Song name
Random play
Single/sequential
cycle

46
Drag the progress bar to adjust play progress.
Operation of music player button as Picture 5.1-2
5.2 Photo Gallery
Photo gallery application can auto search photos and video files in SD card, and photo
gallery will classify these photos and videos in folder. You can apply photo gallery to
view and edit photos, set the photos as wallpaper and watch the video.
View pictures
1. Click gallery application in main interface.
2. Enter into gallery, click the folder you want to view.
3. Click the picture you want to view, the system will play it in full screen mode
automatically.
4. The pictures can be zoom in and zoom out, put two fingers on the screen, the
separate the fingers(gather up the fingers, the picture will be zoom in) or
double click the screen.
Note: when you browse the pictures, slide left or right to view more pictures.
Edit and set pictures
When check the pictures in full screen mode, click menu key to display menu
selection, you can choose the selection you need to edit and setting pictures.
Slide Show
1. Open a picture, use virtual key to click menu key, display menu selection.
2. Click slide show, it will auto loop play
Crop
1. Click menu key to display menu selection.
2. Then click crop, click and drag related area to adjust the cropper.
3. Click cropper and drag it inside and outside to adjust the image.
4. After adjust the size you want, click crop.
5. If you wish to give up to crop, click cancel to return to picture browse.
Edit
1. Click menu key, display the menu selection.
2. Click edit.
3. Adjust the brightness, style, color, ant alias setting in selection.

47
4. Click save.
5. If you want to give up edit, click return key, click not to return to picture
browse.
5.3 Camera
In the main interface or desktop, click camera application procedure , enter into camera
Operation of camera ,Switch camera: choose Menu key, click switch front/back
camera, as Picture 5.3-1.
Picture 5.3-1
5.4 FM Radio
Click in the main interface or desktop to enter into FM radio interface:
Radio button operation instruction as Picture 5.4-1:
Next channel
normalCamera
mode
Face beauty
mode
Panoramic
mode
Sub menu
camera shooting
Flash on/off mode
View the pictures
and videos
Click it to take
pictures
Gesture capture
Auto capture when
smile is detected
HDR capturing
48

Picture 5.4-1
Save channels: Click button in the main interface to save the channel,
and the channel will be saved in channels list.
Note: You need to insert earphone as antenna when using FM radio, If no
antenna, your MID can’t search any frequency band.
Previous
channel
Current
frequency
Exit FM
Next channel

49
6 Communication Function
6.1 Phone
1. Click Phone application procedure
2.Operate as Picture 6.1-1
Picture 6.1-1
6.2 Text Message
1 Enter into main menu, choose application procedure.
2 Click “Edit new message” as Picture 6.2-1
Display
phone
numbers
Dial phone
numbers

50
Picture 6.2-1
6.3 Contact List
Click Contact list in the main interface, enter into the contact list as Picture 6.3-1
Picture 6.3-1
Search contact: click button, enter into search function
Add contact: click button, enter into add contact interface.
Directly input
phone number
Add receiver
Send
message
Menu(discard,insert
text and settings)

51
7 Internet
7.1 Browser
In case of Wi-Fi or mobile internet is connected well (Please refer to Chapter 4.1 for wireless and
internet setting), click IE browser in the main menu or desktop to enter the IE interface, as
Picture 7.1-1
Picture 7.1-1
Click address bar to input the website, click start, enter into related webpage, then you can browse
the website information, as Picture 7.1-2 and you can click the menu you can refresh ,save to
bookmarks, share page, bookmarks, history and setting the webpage.
Address
column
menu
Save bookmark

52
Picture7.1-2
7.2 Email
Email application procedure contains email setting guide, you can add the external POP3 OR
IMAP email account of normal web email service provider (For instance, Yahoo, Gmail, Hotmail
and 163),as Picture 7.2-1
Picture 7.2-1
a. Email Setting

53
1. After you click the sending email icon , you can see the email setting guide,
which can help you to set.
2. Input your email address and password.
3. Click “Next step” button, choose your email type is POP3 or IMAP.
4. Click “Next Step” button to check whether the email box servicer can receive or
send emails
5. Input the email account and display the email subject, and click finish.
6. If the email box is available, you will enter into your mail box automatically.
b. Delete the email account
You can delete stetted POP3 or IMAP email account from your MID.
Click 。
1. Enter into your mail box.
2. Press Menu key.
3. Click Account
4. Press the account you want to delete.
5. Click confirm to remove.
c. Send E-mail
1. Click to display your mail box.
2. Click the inbox, it will refresh the new emails automatically; click it to read new
email.
3. Press Menu key. Menus will popup.
4. Click Edit to enter into new email editing interface.
5. Input the receiver’s email address.
6. Input the subject and email content.
7. If you want to add attachment, click menu key, the menu popup.
8. Click “Attach file” (photo, music, video, contacts).
9. Click “send” to send the email out.

54
Picture 7.2-2
8 other characteristics
8.1 SmartTextSelection
Automatically detect the function that applies it to the corresponding application. If you
click on the address of a restaurant sent to you by a friend, Google will know what you want
and automatically use the map to start the route. Telephone numbers, e-mail addresses, etc. can
also be done as Picture 8.3-1
Click it and
Add
attachment

55
Picture 8.1-1
8.2 Auto-Fill
For the most frequently used applications on the user's device, it will help the user to log in
quickly without having to fill in the account name and password every time.
For example, when users use a new device, they can extract saved account names and
passwords from Chrome. After the selection, the auto-fill function can be performed locally. It
is suitable for most applications that you may use.
9 Other Application Procedures
9.1 Clock
Click Clock procedure, enter into below interface as Picture 9.1-1.
There are clock, picture, music and homepage buttons.

56
Picture 9.1-1
9.2 Calculator
1. Click.
2. Enter into the basic board of calculator.
3. Soft touch the numbers or operator in calulator to calculate.
Pictuer9.2-1
Set alarm

57
9.3 File Manager
File manager will copy, cut, delete, rename the documents or the folder in the TF card, it also will
share the files, install apk etc as Picture 9.3-1
In the main menu or desktop, click the document manager icon to enter into documents
manager.
Picture9.3-1
a、Copy, cut, delete, rename the files and folder: choose the file or folder, long press the file or
folder to enter into the interface as Picture 9.3-2, you can operate the file or folder.
ROM
External
SD card

58
Picture9.3-2
b、Paste the copy or cut file: choose the file you want to paste, icon to enter into Picture 9.3-3,
Picture9.3-3
C. Share file:choose any file, long press it, it will popup “share”, choose the share way you want
in the list(Picture 9.3-4)
Picture 9.3-4

59
d、Install apk file:Choose the file suffixed .apk in the file manager, you can install the third part
software as reminder.
e、Build new folder: Choose the menu you want to build the file, click icon in right top,
choose new folder, you can build new folder as reminder.
10 Recorder
In the main interface or desktop, click recorder icon to enter into record interface, click
record key to start record. Click Stop key to stop recording. Click Play key
to play the recorded sound. The system will auto remind you to use or abandon this record, please
choose it manually.
Play the record: choose the video player to play the recorded sound, choose the recorded sound in
the source manager, and click it to play.
Picture10.4-1

60
11 Installation of Procedures
11.1 Installation
Install the third party application procedure
1. Click “file manager” application procedure; choose the application procedure
you need to install.
2. Hold the application procedure you need to install.
3. It popup install, click install apk.
4. Finish the installation as guide, it will operate.
Note: The third party procedure searched from internet to use on the system are all suffixed
with .apk.
11.2 Uninstall
Uninstall application procedure
1. Click setting icon in main interface.
2. Click apps, list all the application procedures installed in the system.
3. Click the APK you want to uninstall, click uninstall.
4. Click confirm to finish uninstallation.
Skill: The procedure manager installed by system has many convenient methods to uninstall
after opening procedure manager, click uninstall, it will list all the application procedures
installed by system.
12 Troubles Shooting
1. The first startup of MID is slow
After the MID system upgraded, the first startup need to install the pre-installed
application software, the lead time is around 2-3 minutes, the startup afterwards
will be much quicker.
2. MID can’t connect Wi-Fi

61
Make sure the wireless router of internet service can work in normal.
Ensure the MID and wireless router in certain distance, and no wall or other
barrier between them.
Ensure the user name and password both correct.
3. MID feels hot
When many application procedures are used in meanwhile, or the brightness of
screen open to the lightest or under charging, MID may feel fever. It is normal.
4. Email can’t be set or Registration of application procedure.
Ensure your internet is well connected.
Make sure your email setting way is correct.
Keep your system time and local time consistent.
5. The system is abnormal and can’t work.
When you install some third party application procedure, it may cause abnormal
work, you can press Reset key(next to power port) to reset the system.
6. The webpage can’t be opened
Please keep the distance between from route to MID in effective range.
Please restart WIFI and try again.
7. MID works terribly slow sometimes
It is normal phenomenon. Please turn off some application you don’t need
in advanced task management, or uninstall some third party application to release more system
resource.

FCC Statement
1. This device complies with Part 15 of the FCC Rules. Operation is subject to the following two
conditions:
(1) This device may not cause harmful interference.
(2) This device must accept any interference received, including interference that may cause
undesired operation.
2. Changes or modifications not expressly approved by the party responsible for compliance could
void the user's authority to operate the equipment.
NOTE:
This equipment has been tested and found to comply with the limits for a Class B digital device,
pursuant to Part 15 of the FCC Rules. These limits are designed to provide reasonable protection
against harmful interference in a residential installation.
This equipment generates uses and can radiate radio frequency energy and, if not installed and used
in accordance with the instructions, may cause harmful interference to radio communications.
However, there is no guarantee that interference will not occur in a particular installation. If this
equipment does cause harmful interference to radio or television reception, which can be determined
by turning the equipment off and on, the user is encouraged to try to correct the interference by one
or more of the following measures:
Reorient or relocate the receiving antenna.
Increase the separation between the equipment and receiver.
Connect the equipment into an outlet on a circuit different from that to which the receiver is
connected.
Consult the dealer or an experienced radio/TV technician for help.
SAR Information Statement
Your wireless phone is a radio transmitter and receiver. It is designed and manufactured not to
exceed the emission limits for exposure to radiofrequency (RF) energy set by the Federal
Communications Commission of the U.S. Government. These limits are part of comprehensive
guidelines and establish permitted levels of RF energy for the general population. The guidelines
are based on standards that were developed by independent scientific organizations through
periodic and thorough evaluation of scientific studies. The standards include a substantial safety
margin designed to assure the safety of all persons, regardless of age and health. The exposure
standard for wireless mobile phones employs a unit of measurement known as the Specific
Absorption Rate, or SAR. The SAR limit set by the FCC is 1.6 W/kg. * Tests for SAR are
conducted with the phone transmitting at its highest certified power level in all tested frequency
bands. Although the SAR is determined at the highest certified power level, the actual SAR level
of the phone while operating can be well below the maximum value. This is because the phone is
designed to operate at multiple power levels so as to use only the power required to reach the
network. In general, the closer you are to a wireless base station antenna, the lower the power
output. Before a phone model is available for sale to the public, it must be tested and certified to
the FCC that it does not exceed the limit established by the government adopted requirement for
safe exposure. The tests are performed in positions and locations (e.g., at the ear and worn on the
body) as required by the FCC for each model. The highest SAR value for this model phone when
tested for use at the ear is 0.199W/Kg and when worn on the body, as described in this user guide,
is 1.062W/Kg(Body-worn measurements differ among phone models, depending upon available
accessories and FCC requirements). While there may be differences between the SAR levels of
various phones and at various positions, they all meet the government requirement for safe
exposure. The FCC has granted an Equipment Authorization for this model phone with all
reported SAR levels evaluated as in compliance with the FCC RFexposure guidelines. SAR
information on this model phone is on file with the FCC and can be found under the Display Grant
section of http://www.fcc.gov/ oet/fccid after searching on
FCC ID:
O55704918 Additional information on Specific Absorption Rates (SAR) can be found on

the Cellular Telecommunications Industry Asso-ciation (CTIA) web-site at http://www.wowcom.com. * In the United States and Canada, the SAR limit for mobile phones used by the public
is 1.6 watts/kg (W/kg) averaged over one gram of tissue. The standard incorporates a sub-stantial
margin of safety to give additional protection for the public and to account for any variations in
measurements.
Body-worn Operation
This device was tested for typical body-worn operations. To comply with RF exposure requirements,
a minimum separation distance of 15mm must be maintained between the user’s body and the
handset, including the antenna. Third-party belt-clips, holsters, and similar accessories used by this
device should not contain any metallic components. Body-worn accessories that do not meet these
requirements may not comply with RF exposure requirements and should be avoided. Use only the
supplied or an approved antenna.
 Loading...