

Page 1
User Manual
Statements, Disclosures and Precautions 3
Getting to Know Your ISWAG T1 Table t
Switching Your Tablet On/Off 5
Touch Screen 5
Using a Micro SD Card 6
Getting Started 6
Charging Y our Device 7
Desktop 9
Lock Screen 9
Installed Applications 10
Desktop Menu 11
Managing Applications 11
Clock 13
Installing Software Online 14
Browser 16
Calendar 16
Camera 17
Calculator 18
Sound Recorder 18
Email 18
File Manager 21
Wi-Fi and BT 22
Music 22
Video Player 24
Settings 24
FAQ 29
Device Specifications 30
Battery management 31
Important safety instructions and certifications 32
5
2
Page 2

Statements, disclosures an d precautions
Thank you for purchasing t his innovative tablet from ISWAG. We
invite you to read the instructions contained in this user manual so
you can configure and utilize all the functions of your new tablet.
For additional information y ou can visit us at: iswagmobile.com
Warnings and Precautions
− Please do not disasse mobile; this is a highly precise electronic
−Avoid any heavy impact or collision with this product
− Avoid using this product in the following conditions: high or low
− If cleaning is necessary, only use a so ft moist cotton cloth to
chemical cleaning solutions.
− Avoid placing this pro duct near any liquids in case there is
−
− Please only use permitted batteries, chargers, and
− Please follow therele vant local environmental regulations to deal
If the product becomes faulty at any point, Unonuass umes
product.
temperatures, moist or dusty environments, strong magnetic
fields, and/or long term exposure to sunlight.
wipe the outer shell of the product. Do not use any other
accidental spillage on to or into the product
Excess
use of headphones at high volume may
perm anent hearing impairment.
accessories with this product; use of any other type s will
violate the warranty re gulations and may be dangerous.
with obsolete products and accessories.
no responsibility for any loss of data/music/video and/o r any
other files. Please follow the user manual for stan dard
operation and timely backups.
cause
Statements and Disclo sures
−Specifications are subject to change without notice.
− While the utmost care has been taken in producing this manual
neither iswag, nor any other affiliated company,
3
Page 3

assume responsibility for any mistakes or errors contained in
this document.
− Screen captures presented in this manual are for reference
purposes, actual Screens may vary.
− iswag and the swag logo are registered trademarks of Swagtek,
Inc. Other trademarks are the property of their respective
owners.
− Alwa ys remember to back-up important data; we assum e no
responsibility for any e rrors with this pro duct
− Please read the op erating
accessories
unex pected damage. Warranty cannot be honored if the
supplied
with the pro duct to avoid any
instructio ns
carefully. Use the
product is used with in compatible acces sories.
−Altho ugh the latest version of Android available at the time of
the products
specifications, iswag assumes no
perfo rmance of the Android
and/or any errors/soft ware bugs/software failures.
−There may be slight discrepancies be tween pictures/da ta in
this manual and the actual product. The actual product is
accurate.
− We cannot be responsible for any act of downloading illegal
software and/or anything else that is considered illegal.
− iswag cannot supp ort the Android Operating System or offer any
support for any Android based software that the user may
download, install, or purchase.
manufacturing
is compatible
software
with
responsibility
suppliedbyG oogle
tablet
fo r the
4
Page 4

Switching Your Tablet On/O ff
To switch on: press and ho ld the power switch for 3 seconds and
wait for sta rtup.
To switch off: press and hold the power sw itch for 3 secon ds →
click Powe r off → click OK.
Lock/unloc k screen: briefly press the power switch to lock/u nlock
the screen.
Forced shout down: if the device is not respo nding, press and hold
the power switch for 7 seco nds to force a shu t-down.
Warning: a forced shut-dow n may cause unexpected errors i n the
system!
Touch Screen
The touch screen is easy and convenient to use. You can use the
touch screen in the followin g methods:
Single click: briefly tap the screen with your finger.
5
Page 5

Click and hold: click the screen with your finger and hold for about
2 seconds.
Drag: click a certain icon on the screen and hold, then move your
finger, the icon will move accordingly.
To avoid damaging the screen, never put anything on it.
Using a Micro SD Card
Your devic e supports up to a 32GB storage card. Locate the slot
labeled T- Flash on your tablet to access the Micro SD slot.
Insert the card into the card slot, and push it in with your finger until
a “click” is heard. Now the card is ready for u se.
Removing Micro SD card
First, close all programs or files on the card. Click Settin gs →
Storage → Remove SD car d → OK. Then press the card with your
finger, and simply remove it when it is ejected .
Avoid inserting and removing the card repeatedly in a short time,
this may cause damage to the card. We suggest you use name
brand card s to ensure compatibility.
Getting Started
Reminder icons
These reminder icons appear in the information bar along the top of
the screen to provide information as to the status of your tab let.
6
Page 6
New email
USB connected
Return button
Display
Charge
Airplane Mode on
USB connected
Downloading
Home button
Wi-Fi connected
Buttons: Descriptions and Functions
Power button
Volume +(up)
Volume - (down)
HOME button Click from any screen to return to the
Long press: turn o n/shut down
Short press: sleep/wake up
In crease the volume
Decrease the volume
main screen
Click from any screen to return to the
Back button
Setting button
Menu button
Charging the device
previous screen
Click to display the menu interface
Display recently browsed history
The device is equipped with a built-in battery which must be
charged before using for the first time. It is recommended to
charge the battery for minimum of 1 0 hours for the first time.
7
Page 7

You may use the device w hile it is charging, but this may pr olong
the chargi ng time.
Only use the authorized cha rger provided with the unit (input:
AC110〜240V 50/60Hz; output: DC5V/1). iswag is not
responsible for damages caused by using an unauthorized
charging device or other un authorized accessories.
To charge device: connect one end of the AC adaptor to the power
outlet and the other end to the Micro USB port on the device
(under normal conditions it may take about 5 hours to fully charge
the device).
The battery icon will roll during charging, and when it is full
(it will stop rolling), please disconnect the AC adaptor.
Starting the device
Press and hold the power switch for 3 seconds and wait for system
startup.
Wi-Fi settings
We suggest you configure your Wi-Fi network before using your
new tablet, as many functions require it to work normally.
1. Click Settings→ Wireless and Network
2. Switch the Wi-Fi on. The device will search for and list all
available Wi-Fi networks. If an icon is displayed, you need
to enter the correct password to connect to that Wi-Fi
network.
8
Page 8
3. Click the desired Wi-Fi network → Enter the password (if any) →
Click Connect.
4. Click Return to return to the desktop.
If the Wi-Fi network is set as hidden it will not be discovered
automatic ally. In this case you need to click Add Wi-Fi Network
and enter the necessary information manuall y.
5. The Tablet with bluetooth 3.0 version. It can connect your phone
or other Bluetooth products.
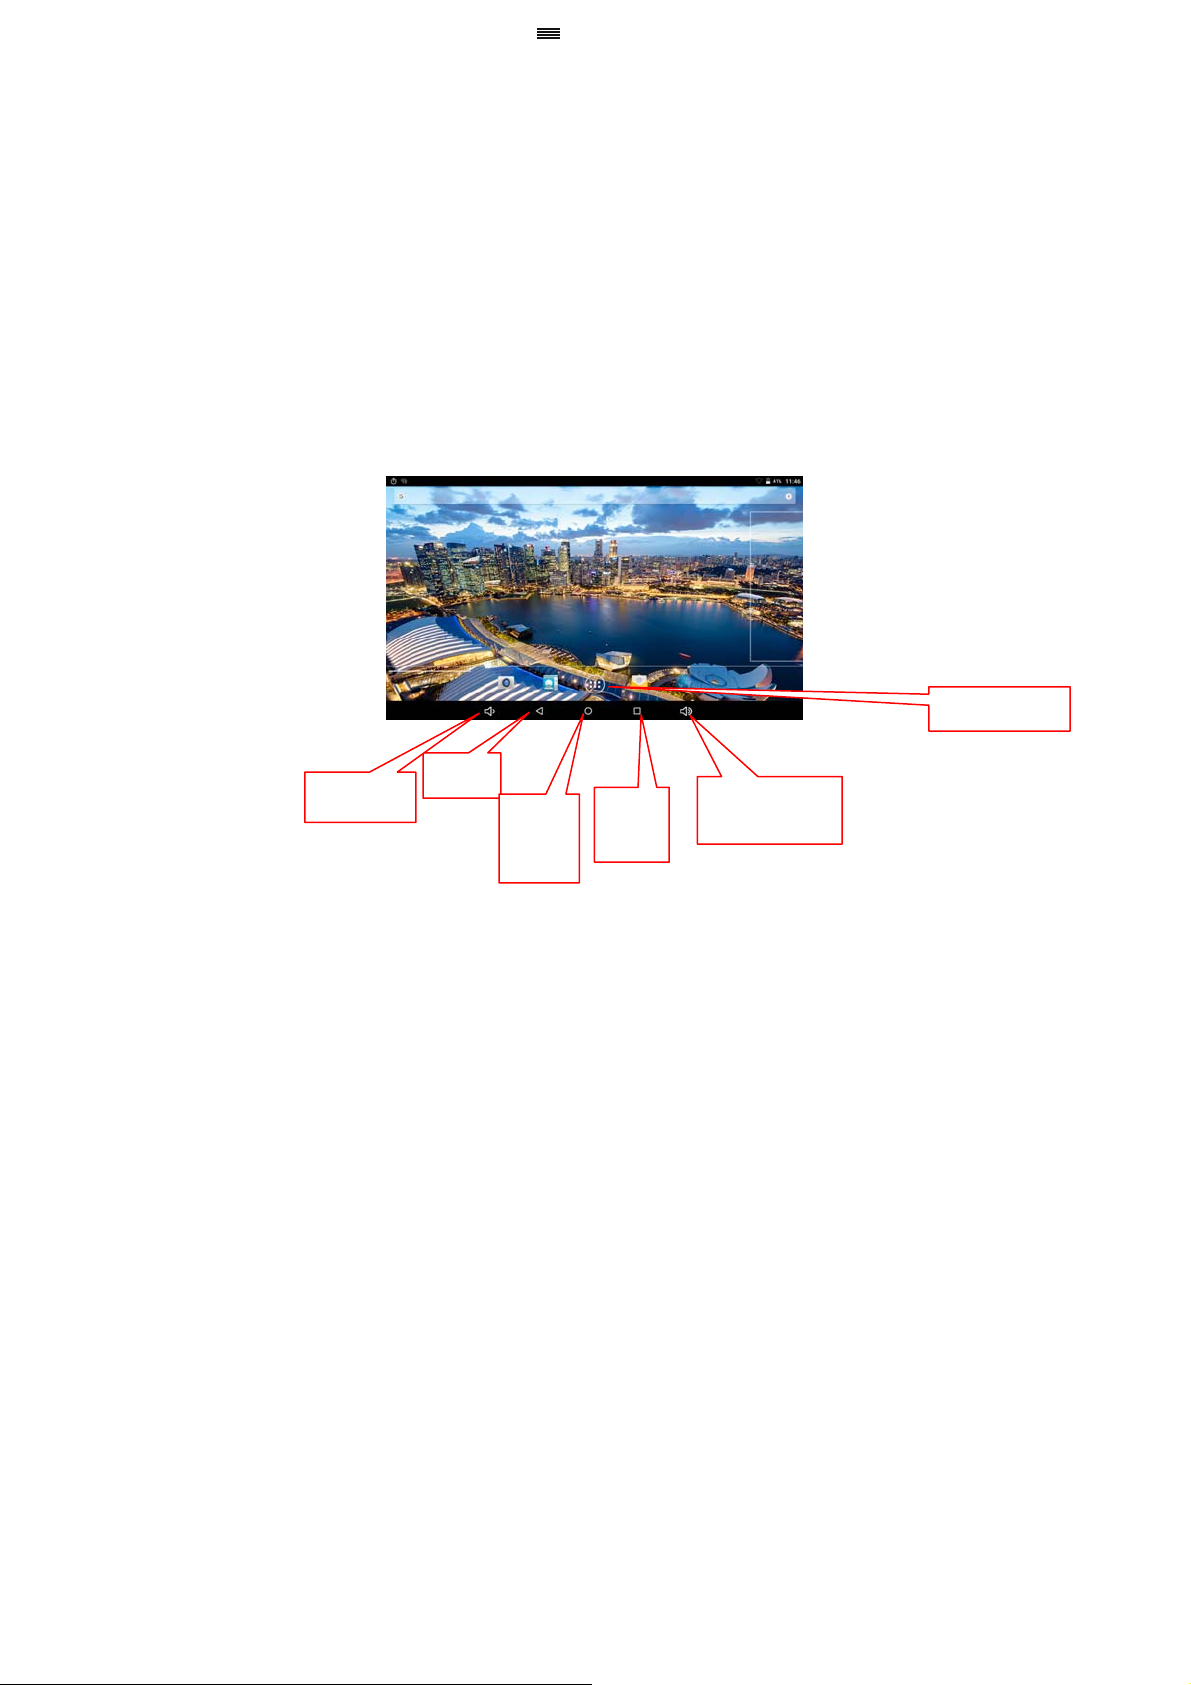
Desktop
Speak -
back
home
view
Speaker +
Click any icon to open the document or run the application.
Click and drag the icon to move it to another location on the
screen. Lock Screen
You can set auto lock Screen or lock screen manually by pressing
the power button. The lock screen interface is as follows:
9
main
Page 9

Slide to the right to unlock the
screen. Slide to the left to unlock
and enter the camera.
Installed Applications
Play Store Download applications easily and
Photo album View your picture s.
Email
Send and receive emails via your email
HD video Play and manage your videos.
player
Calculator For arithmetic operations.
Browser Connect to and explore the Internet.
Sound
Record and play- back sounds.
Recorder
Calendar Calendar for setting schedules and
Settings Personalize your tablet’s settings.
Clock View current time and set alarm clock.
conveniently.
address.
agendas.
10
Page 10
Search Google search tools.
File manager View and manage your files and
Downloaded History of downloaded files.
files
Camera Take photos of your favorite moments.
Music Play and manage your music files.
applications. Install Android applications
and backup files o n SD card.
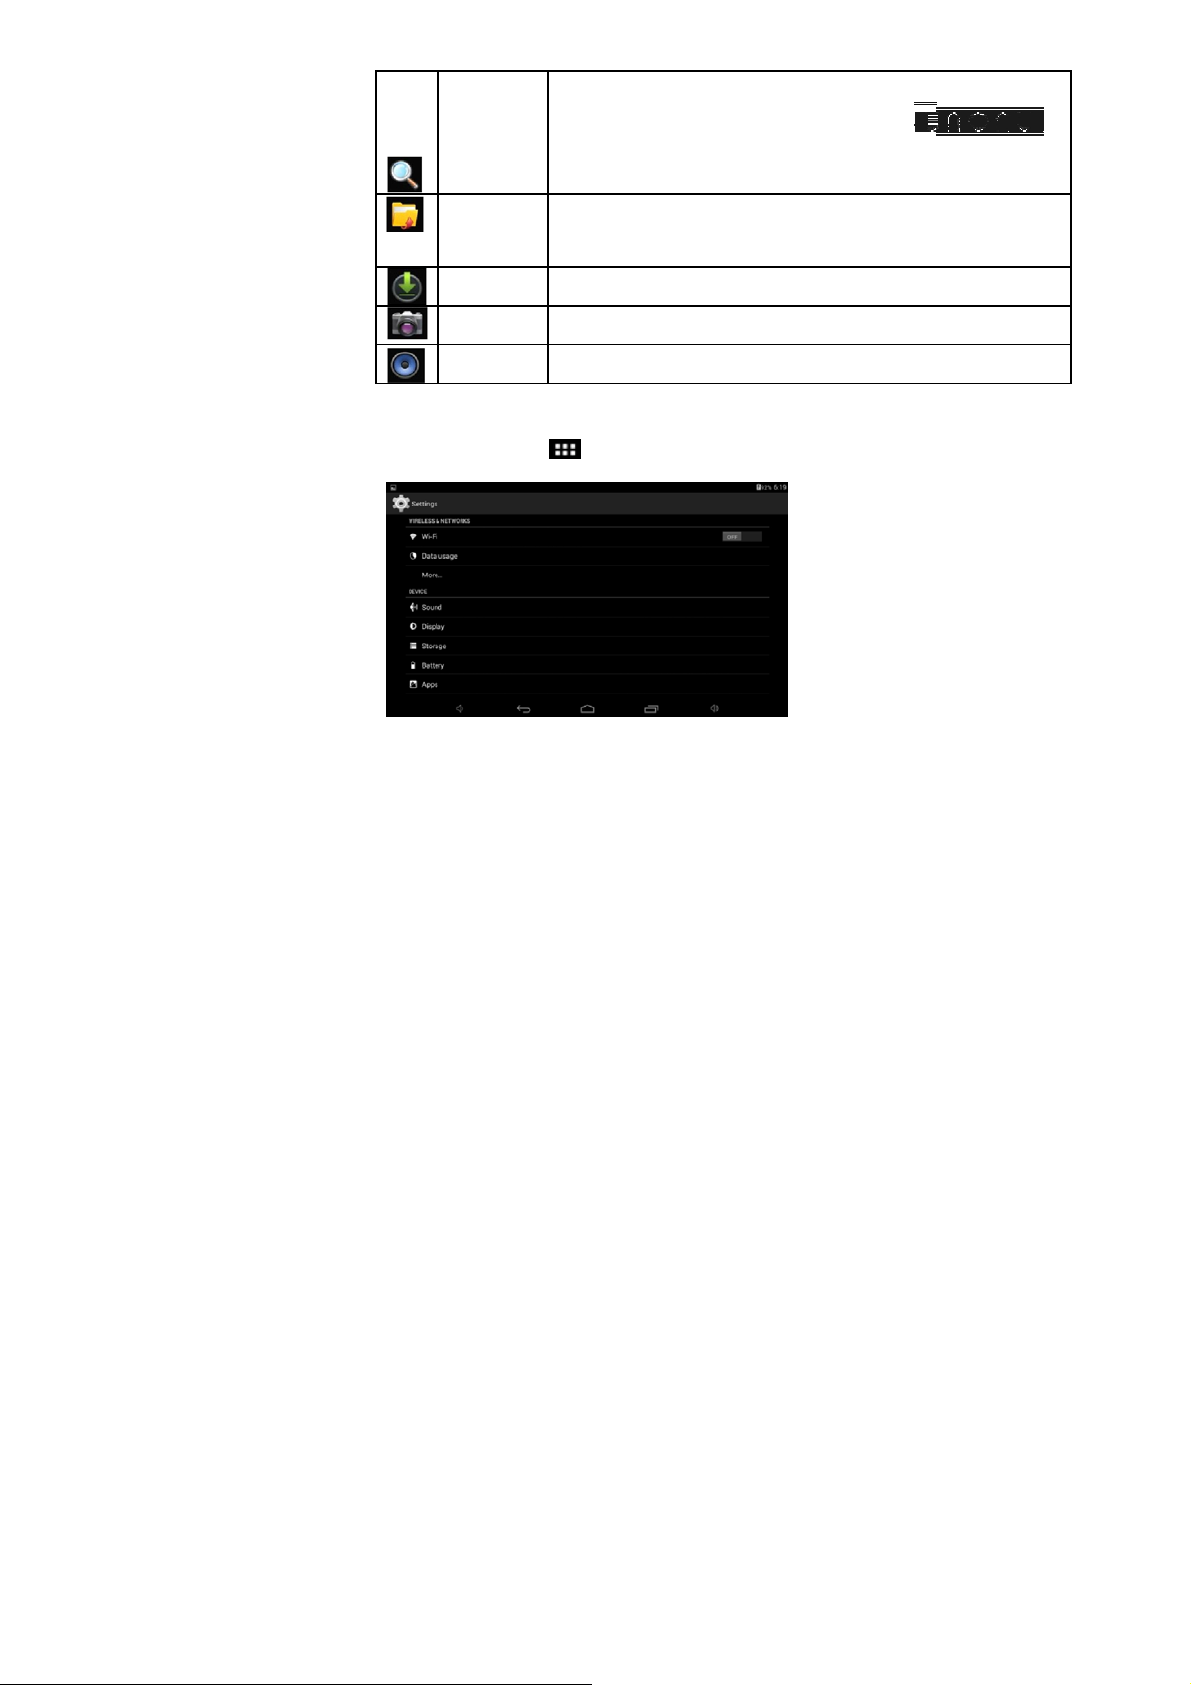
Desktop Menu
On the desktop, click icon to display me nu functions.
You can s elect your desired wallpaper from the images available.
Managing Applications
Installing
You can find many interesting and free Android applications
through the internet. Simply open the browser and search for
11
Page 11
“Android Applications”.
Your purchased or downloaded Android applications can be
quickly and simply installed through the File Manager.
1. Copy the .apkfile you want to install to the SD card or USB
disk → insert the card o r connect the USB disk to the device.
2. Click the File Manager icon
3. Click
containing .apk files.
4. Select an .apk file → In stall.
Now t he application is installed and the a pplication
icon will ap pear on the applications screen.
5. Click Open to run the application, or click Complete to retu rn
to the File Browser interface.
Downloading applications from the internet
or and find the folders
.
You can conveniently download and install Android applications
from the in ternet to your dev ice.
1. Click Browser icon to connect to the internet.
2.
Enter the URL
want t o install.
3.
After the
the downloaded file ( in the
Click to open → Install.
and
click the link of the application you
application
has
downloaded,
Downloaded
press
Files
and hold
screen) →
Uninstalling an application
You can easily uninstall Android applications.
12
Page 12

1. Click →Settings→Applications→Manage Applications.
2. Click the application you want to uninstall → Uninstall.
3. Click OK to uninstall the application.
Clock
Click Clock icon to view the current date and time.
Alarm clock
The device supports more than one alarm clock at the same time.
When the icon appears in the status bar on the top of the
screen, it means at least one alarm clock is activated.
Add alarm clock
1. Clic k Clock icon .
2. Double click Set alarm
3. S et your desired alarm.
4. Click Activate alarm clock.
5. Click Complete.
clock.
clock→+
Add
a larm
Stop the alarm clock
When the set timeisreached, a
showing the name of the alarm. If you want the clock
to
alarm again 10 minutes later,
window
you can
and repeat. Click Can cel to stop the alarm clock.
Activate the snooze feature
Use this function when the alarm is activated but you want to
stop it temporarily without deleting it.
1. In the alarm clock interface, select the alarm clock you
want to activate.
2. Click Reactivate.
13
will
Pop up
click Pause
Page 13

Edit the alarm clock
Click Clock icon →Click .
1. C lick the alarm clock you want to edit → Edit the
alarm clock.
Delete the alarm clock
1. C lick Clock icon →Click .
2. C lick the alarm clock you want to delete.
3. C lick to delete the alarm clock.
Click to return to desktop.
Installing Software Online
There are many applications available for download from the
Google Play website. You can easily and quickly download them
onto your device.
Downloading applications
1. Click the Google Play icon .
If this is the first time you use this function, the system
ask you to register and login. If you don’t
registered
a Go ogle account. If you already have a Google
account, simply click Login and enter your ac count
information, click Login a gain to login.
2.
You
the
account, you need to click Register to
can select applications from the Top Rated or from
Featured
list. You
can
also
search
for the application
you want by entering a specific name in the search box.
3. Click a n application → Download.
4. When downloading completes, click Install.
14
will
have
establish
a
Page 14

5. Click Open to run the application, o r click Complete to
return to Google Play.
Record
When downloading completes, click
installed
application or view other users’ comments. You can also un-install
application s.
Menu function
application.
You can submit your comments to
Record to
manage
Click to display the menu functions for Google Play.
Personal folder
Click to vie w personal information. You can change your pass
word, change e mail address and save your pass word. Click the
Login icon at the top right corner of the personal f older to logout of
your account.
About
Display the version and support information f or Google Play.
15
the
the
Page 15

Browser
You can onnect to the internet through the browser. Click the
Browsericon on the desktop to open the browser.
Calendar
Click the Calendar icon .
If this is t he first time you use the calendar function, you need to
create an Exchange account. Enter your email address and
password, click Next, and follow the instructions to complete the
account configuration. Now you are ready to use the Calendar.
Adding a new activity or event
16
Page 16

1. From the calendar interface, click the date you want to add an
activity.
2. Select the time of the activity → enter the details of the activity
3. Click Complete.
4. Click icon
in the field provided.
to select your desired calendar interface.
The date with agenda is displayed in grey.
Camera
Click Camera icon.
Menu function
1. Press the Menu button to bring up the menu list, which
includes: Switch to vide o / Switch to cam era and My
2. albu m/My video.
3. From the camera interface, click My album to view your photos.
4. From the video recording interface, click My video to vie w the
video list.
Taking a photo
1. From the camera interface, click to take a photo.
2. The photo will be saved automatically.
3. Click the thumbnail
photo s.
4. Click Return to return to camera.
5. Click
to exit came ra and return to t he desktop.
to enter My album to view full size
Recording a video
1. Click to switch to video mode to record videos.
17
Page 17

2. Click to start rec ording, click to stop.
3. There corded video will be saved automa tically.
4. Click the thumbnail
5. Clic k Return to return to camera.
6. Click
7. Click
to switch back to camera interface.
to exit cam era and return to t he desktop.
to play the video.
Calculator
1. Click the Calcula tor icon.
2. Click the numbers and operators to make operations.
3. Click Clear to clear the entry one by o ne, or click and hold
Clear to clear all entries .
Sound Recorder
1. Click t he Sound Recorder icon .
2. Click the
3. When recording is co mplete, click the icon to stop
record ing.
4. Click the Play icon to play therecorded sound.
icon to s tart recording.
Email
The email application suppo rts POP3 and SM TP
accounts. Creating a new email account
You can set-up one or mor e email accounts that you want to use
on the device.
1. Click the Email icon .
2. In the Your account inte rface, click Next.
18
Page 18

3. Click Email address opt ion → Enter your email address.
4. In the Password option → Enter your email password.
5. Click complete.
6. Manu al setting (option al): the server will automatically select
an email provider (such as gmail.com) according to the email
address you have enter ed. However, if you need to change
the server settings, you ca n click Manual settings and make
the necessary changes. Click Next.
7. Optional: enter account name.
8. Enter the signature → Click Complete.
After com pleting the set-up process, if you cannot connect to your
email acc ount, please confirm with your e mail provider whether
there sever supports (POP) and (SMTP) protocols.
Inbox
1. Click the Email icon .
2. If only one email account is configured, that account will be
opened directly.
3. If there are multiple accounts they will all be listed.
4. Click the email account you want to open → Click Inbox.
Open an email
1. From the Inbox interface, click an email to open it.
2. If there is an attachment, click Open to activate the
corresponding application, or click Save to save it to a Micro
SD card.
3. If you want to reply, click Reply or Reply all.
a. Enter thereply you w ant to send.
b. Cli k Send to send the email. If you save it as a draft, the
message will be saved but not sent; if you don’t save it or
sen d it, it will be discarded.
4. Click Cancel to cancel a n email immediately.
19
Page 19

Compose an email
1. From the Inbox interface, click →Compose your email.
2. Click Send to option to enter the address of the recipient.
3. If you wish to cc or bcc others, click the icon
bcc, then enter the corresponding email addresses.
4. In the title bar of the email, enter the subject of your email.
5. Click Compose email option to enter your message.
6. If sending an attachment with your message, click
attachment.
7. W hen completed, click
→Send.
→ Add cc and
→ Add
Edit email account
1. Click the Email icon .
2. From the Inbox interface, click →Account setting.
3. Edit your email account settings.
4. Click to return t o the Inbox interface.
Delete an email account
If you ha e more than one account, and you have delete d the
default account, then the next account on the list will become the
default.
1. Click the Email icon .
2. From the Inbox interface, click →Account.
3. Click and hold the account you want to delete.
4. In the pop up Account option window, click Delete account.
5. Click Ok to confirm to delete.
20
Page 20

Set default email account
You should always have a default email account. If you have more than
one account, you can s elect which one will be the default.
1. Click the Email icon .
2. From the Inbox interface, click
3. Clic k and select the default account.
→Account setting.
If the default account is deleted, the next account on the list will
become the default.
File Manager
Click File Browser icon to view the files contained n all
storage mediums including: internal storage, Micro SD card and
USB disk. You can also quickly and easily install Android
application s onto the device.
Functions of the File Manager icons are as follow:
Previous folder
View
Multi select
Send email
UDISK1 USB disk
SDCARD1 Micro SD card
Previous folder
Copy files between a PC and your device
You can use the File Brow ser to copy files between a PC and the
21
Page 21

external/internal storage mediums. When copying files to your
device, you have the option of copying to the Micro SD card or
USB disk.
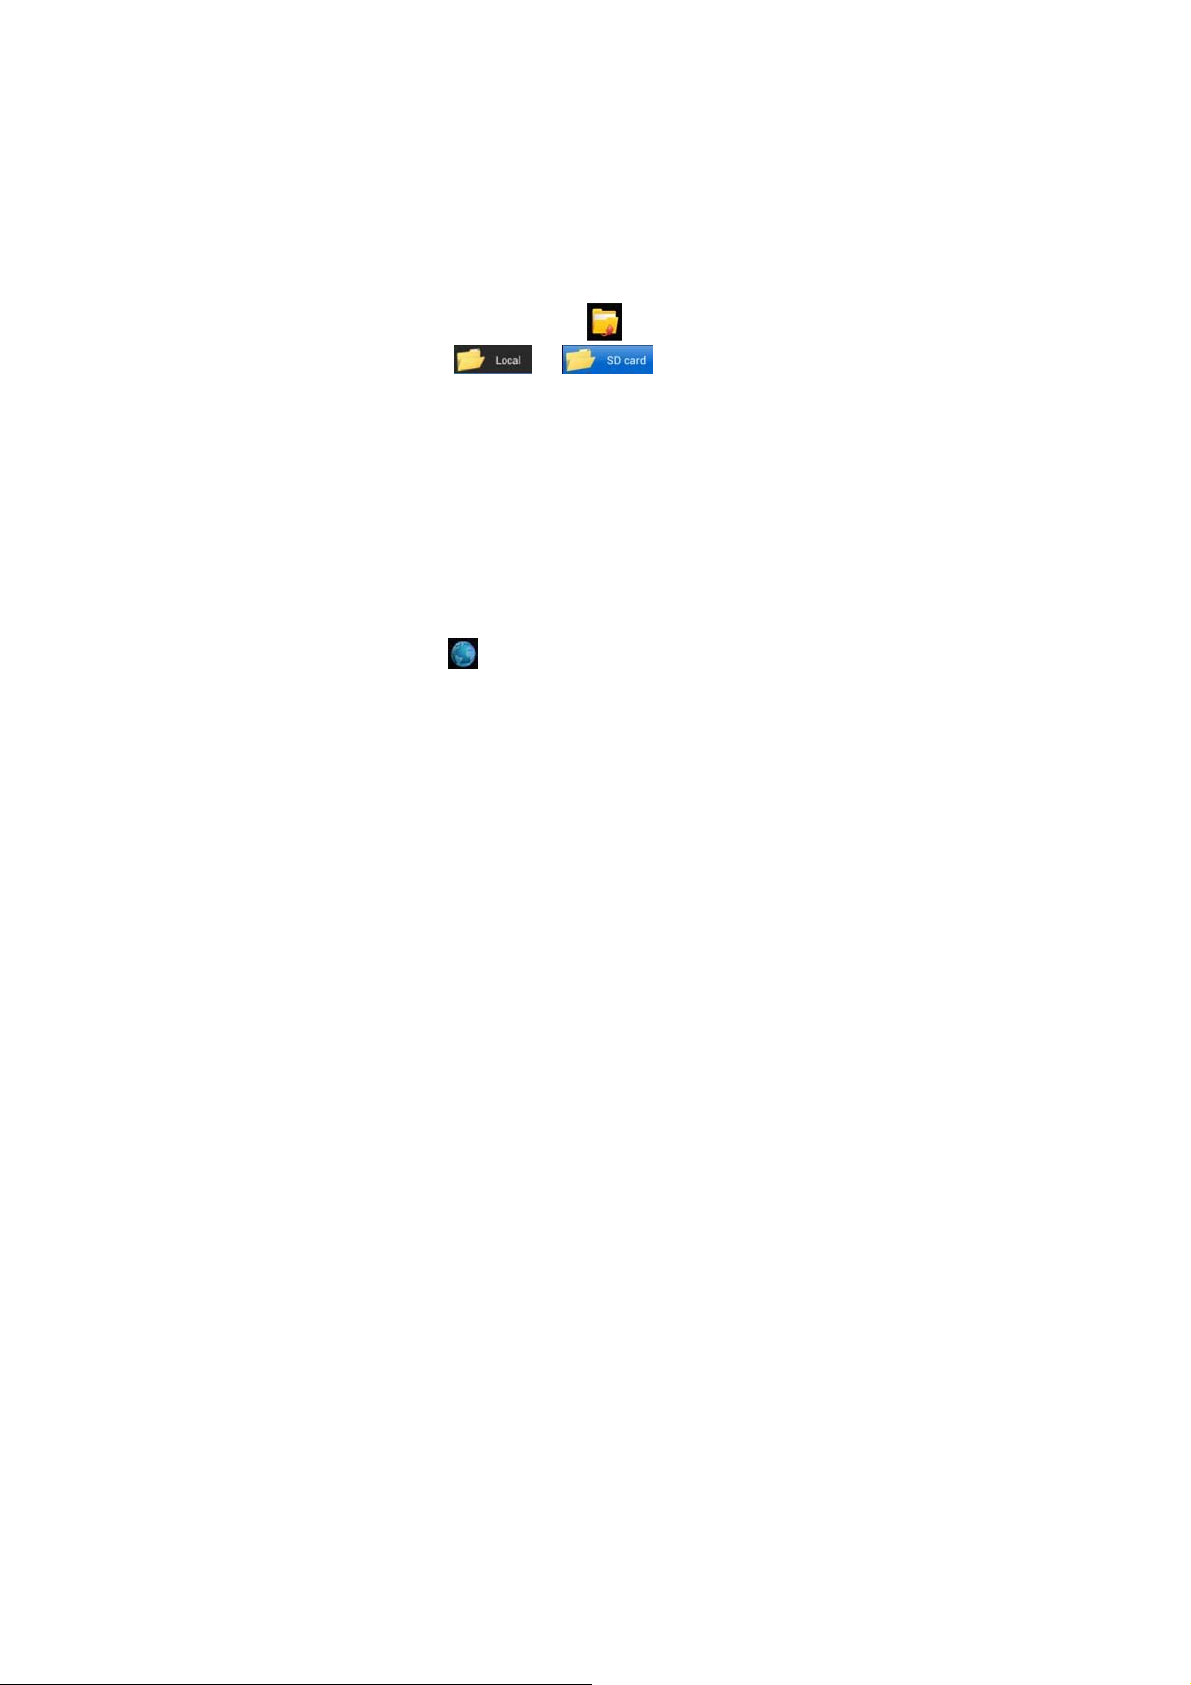
The folder name of the internal storage medium is “Local”, the
name of the storage card is “sd card”, and the name of the USB
disk is “udisk”.
The following example shows you how to copy a file to the device
from a Micro SD card or U SB disk. You can use the same method
to copy files from the device to the Micro SD card or USB disk.
After, you can connect you r storage medium to your PC and copy
the files to the desired folder.
1. Click or to display the files
contained on the storage medium.
2. Click and hold the file or folder you want to copy →
click Copy.
3. Click i on
click the folder you want to copy to →click Paste.
to return to internal storage medium →
Delete a file
Select the file or folder you want to delete → click Delete → click
OK to delete.
Wi-Fi
This allows you to switch your tablet’s Wi-Fi ON or OFF. Check
the status by looking at the
in the status bar.
Music
The music player supports : MP1, MP2,MP3, WMA, OGG, APE,
22
Page 22

FLAC, WA V, AC3, AAC, AM R, DTS, RA, M4 A formats.
Playing your music
1. Click My music icon .
2. Select the track you want to play from:
All/Alb um/Artist/Album/ Track/Playlist/Now playing.
3. Click to play the desire d track.
4. To return to the previous screen while playing a track, click
to return to the desktop.
Click the track in the list to enter Music Player. The Music Player
interface i the following:
From this interface, you can access operations such as Search,
Play/Pause, Next track/Previous track, Re peat all and Random
play.
Functions in the p lay list
New play list
1. Click setting, and click Add play list
2. Enter t he name of the play list.
3. Click OK.
23
Page 23

Rename or delete the play list
Click and hold the play lists → click Rename or Delete.
New track
Click and hold the track you want to add to play list, → click “Add to
play list”.
Delete trak
Click and hold the track you want to delete → clic k Delete.
Video Player
The video player supports: AVI, MOV, MP4, A SF, WMV, RM,
RMVB, 3GP, M4A, MPG, FLV, Flash Player.
Supported picture formats: JPG, JPEG, BMP and PNG.
1.
Click t he Video Player icon .
2.
Select the video or picture you want to play from
All/Co ntent/My favorite/ Personal list.
3.
Click on the screen to adjust the video (including volume,
pause/play, brightnes s, etc.).
4. Click t he picture to preview or play in slid e.
5. Click
to return to list.
Settings
Wireless
and networks
Wi-Fi Enable Wi-Fi.
Wi-Fi Setting
Mobil e network Set roaming, network,
Mute mode Mu te except media and
AP N option.
alarm clock.
24
Page 24

Volume Adjust volume of me dia,
Sound
Notification Select desired
ringtone notification ringtone.
Operation tone Tone played when
Screen lock Tone played when
promote tone
Display
Brightness Click and move slider
Auto rotate W hen selected, the
screen screen will switch
G-sensor Use the different
coordinate co ordinate system
system mo de, which is
Animation Whether or not to
Screen timeout Adjust the time before
Use w ireless Use wireless network to
network view location in
alarm clock and
notification. Click and
move the slider
, then click OK.
selecting on screen.
locking/unlocking
screen.
to adjust brightness of
the screen and click OK
to confirm.
between Portrait an d
Landscape according to
the direction of the
device.
necessary under certain
conditions.
display in animation in
the operation
screen lock.
25
Page 25

Set screen lock Use picture, PIN or
Location and
security password
Visible The password is visible.
Select device Add or delete device
manager manager.
Use security Allow applications
credential access to security and
Install from TF Ins tall encrypted
card certificate from SD card.
Set password Set or change credential
Location and
security
Clear storage Clear all credentials and
Unknown source Allow installing
Applications
Manage Manage and delete
application installed application s.
Service in Vie w and control the
process services in process.
Storage status Vie w the space
Development Set application
Account and
synchronization
Back ground Set whether or not t he
data applications will
applications (such as
Go ogle Maps).
password to lock screen.
other credentials.
password.
rest the password.
applications supplied by
electronic market.
occupation of the
application.
development option s.
synchronize, send and
receive data from time to
time.
26
Page 26

synchronization
Auto
Auto data
synchronization of t he
application.
Privacy
Back up my data Back up the application
data, Wi-Fi password
and other settings to
Go ogle server.
Auto recovery W hen an application is
reinstalled, the system
will recover the back -up
settings or other data.
Restore factory Click to clear all data on
settings the device. Click Re set
the
device to, or click
to cancel and
return to the previous
screen.
W arning: the following
data will be deleted from
th device:
~ Google account.
~ Data and settings of
the
system and
applications.
~All downloaded
applications.
The following data w ill
not be deleted:
~ System software and
p reinstalled
applications.
27
Page 27

~ Files on the Micro SD
ca rd, such as music and
photos.
Storage
Language and
input/output example examples.
Total capacit y, Diplay when an SD
free space ca rd or USB disk is
inserted.
Remove SD W hen a TF card or USB
card/ USB disk disk is inserted, click
Remove SD card/U SB
disk to remove them .
Form at SD Format (clear) TF
card/ USB disk ca rd/USB disk.
Select language Select language
according to your
location.
Personal Add words to the user
dictionary dictionary.
Android keypad Screen keypad setting.
Listening Play short voice
Preferred engine Set the voice
combination engine for
switching between text
and voice.
Voice speed Play speed after the
texts are converted into
voice.
Pico TTS Pico TT S setting.
Auto Use the network value,
i.e . to synchronize with
28
Page 28

Set date Set date.
Date and time
Set time Set time.
Select time zone
Use 2 4-hour Select 24-hour time
time system system or
Select date Select date format.
format
About the device
FAQ
the network time.
Select time zone.
12-hour time system .
Vie w status, battery
status, legal information,
mo del, Android version,
kernel version and
version number, loc k.
Android
Q: What is the Android version that comes preloaded o n my
device?
A: Android 6.0 KitKat
Basic function of the device
Q: Do I need to charge the device before use?
A: Yes. You need to charge the battery for at least 4 hours, but you
can operate the device while it is charging. When charging,
always use the AC adaptor.
Email
Q: Can I use my own email account to send and receive emails?
A: The device supports POP3 and SMTP accounts. The device
may not support some free email accounts. Please consult your
e mail provider for details.
29
Page 29

Storage ca rd
Q: What storage card does the device support?
A: Micro S D card up to 32G B.
Music
Q: What audio formats doe s the device support?
A: MP2, MP3, WAV, AAC, WMA
Q: How can I add music to the device?
A: You can copy the audio files from your PC to the Micro SD card
or USB disk then copy them to the device through the File Browser.
Pictures
Q: What picture formats does the device support?
A:JPG, JPEG, BMP and PN G.
Q: How can I add pictures to the device?
A: You c an copy pictures from your PC to the Micro SD card or
USB disk then copy them to the device through the File Browser.
Video
Q:What video formats does the device support?
A: MP4/M PEG/H264 plus other formats.
Q: Can I play YouTube videos on my device ?
A: Yes. You can click the YouTube icon to play videos.
Q:How ca n I add videos to the device?
A: You can copy the vide o files from your PC to the Micro SD
card or USB disk, then copy them t o the device through
the File Browser.
Wi-Fi
Q: Do I need an external Wi-Fi device to connect to the Intern et?
A: No. T he device has built in Wi-Fi connectivity.
ISWAG T1 S pecifi cation s
30
Page 30

Pr ocessor Quad-Core 1.0 GHz
Operating System Android 6.0 KitKat
Me mory 8GB (ROM) + 1GB (RAM)
External Memory Micro SD slot ( max. 32GB)
Dis play 7” Tou ch screen
1024X600 Resolution
Cameras 5MP + 1.3MP
Wi-Fi/BT Wi-Fi (802.11 b /g/n)/BT3.0
Connectors Micro USB
3.5mm audio
Mu ltimedia FM Radio
Speaker & microphone
Audio & Video p layer
Photo viewer
Sensors G-sensor(3-axis )
Battery 2000mAh Li-ion
Specifications are subject to change without notice.
Battery management
We suggest you charge t he battery for at least 4 hours before
using your device.
Many times the useful life of the battery can be extended by
following these simple tips:
0 Use the device at least on every week.
0 Fully charge the battery on a regular basis.
31
Page 31

● Never keep the battery discharged f or a long period of
time.
● Keep the device and the battery away from heat.
Charging the battery
Your device comes with a Micro USB port for charging.
To charge device: connect one end of the AC adaptor to the power
outlet and the other end to the Micro USB port on the device (it
may take about 5 hours to fully charge the device). You can use the
device while it’s charging.
The battery icon will display the status in the status bar.
Important safety instruction
Please follow the following safety instructions while using the
device to a void risk of fire, electric shock or injury:
0 Keep the product away from rain and humidity.
0 Keep the product away from direct sunlight and heat.
●
Protect
cord, do
protect the connectors of the power cord.
● Please
Using other adaptors ma y cause damage.
● Never disassemble or try to repair the device.
needs
the power cord. When connecting the power
not step on it or place anythin g on it. Use care to
only use the approved AC
servicing visit ISWAGmobile.com for support
adaptor
for charging.
If your device
information.
Cleaning the device
Clean the screen with care . To clean finger prints or dust o n the
screen, w e suggest you us e a soft cloth (like a camera lens cloth).
Do not use any rough cloths or harsh chemicals.
32
Page 32

r
For additional information you can reference the full user’s manual
contained in the unit itself or you can visit us at
www.iswagmobile.com.
For support contact information visit our web site
iswagmobile.com
For detailed warranty information visit our web site
iswagmob le.com
.
.
Made in CHINA
Any Changes or
approved by the party responsible fo
compliance could void the user's authority to
operate the equipment.
modifications not expressly
This de vice complies with part 15 of the FCC
Rules. Operation is subject to t he following
two conditions: (1) This device may not cause
harmful interference, and (2) t his device must
accept any interference received, including
interference that may cause undesired
operation.
This equipment complies with FCC radiation
exposure limits set forth for an uncontrolled
environment .
This transmitter must not be co-located or
operating in conjunction with any other
antenna a or transmitter.
Note: This equipment has been tested and
found t o comply with the limits for a Class B
33
Page 33

digital device, pursuant to part 1 5 of the
FCC Rules. These limits are designed to
provide reason able protection against harmful
interference in a residential installation. This
equipment generates, uses and can radiate
radio frequency energy and, if not installed and
used in accordance with the instructions, may
cause harmful interference to radio
communications. However, there is no
guarantee that interference will not occur in a
particular installation. If this equipment does
cause harmful interference to radio or
television reception, which can be determined by
turning the equipment off an d on, the use r is
encouraged to try to correct t he interference by
one or more of t he following measures:
—Reorient or relocate the receiving antenna.
—Increase the separation between the
equipment and receiver.
—Connect the equipment into a n outlet on a
34
Page 34

circuit different from that to which the receiver
is connected.
—Consult the dealer or an experienced
radio/TV technician for help.
 Loading...