

Page 1
TM
QuickStartGuide
English
Android5.0,Lollipop
Page 2

Copyright © 2016 Google Inc. All rights reserved.
Edition 1.5a
Google, Android, Gmail, Google Maps, Chrome, Chromecast, Android Wear, Nexus,
Google Play, YouTube, Google+, and other trademarks are property of Google Inc. A
list of Google trademarks is available at http://www.google.
com/permissions/trademark/our-trademarks.html. All other marks and trademarks
are properties of their respective owners.
This book introduces Android 5.0, Lollipop for Nexus and Google Play edition devices.
Its content may differ in some details from some of the products described or the
software that runs on them. All information provided here is subject to change
without notice.
For best results, make sure you’re running the latest Android system update. To find
your device’s version number or check for the latest system update, go to Settings
> System > About phone or About tablet and look for Android version or System
updates.
If you don’t have a Nexus or Google Play edition phone or tablet and are running
Android 5.0 on some other device, some details of the system as described in this
book may vary.
For comprehensive online help and support, including details about Nexus and Google
Play edition hardware running the software described in this book and links to
information about other Android devices, visit support. google.com/android.
Table of contents
1 Welcome to Android 1
About Android 5.0, Lollipop 1
Android Auto 2
Android TV 2
Android Wear 3
Set up your device 3
ANDROID QUICK START GUIDE ii
Page 3

Make yourself at home 4
Send an SMS (text message) from your phone 5
Make a phone call 5
Make a video call 6
Send an email 7
Status bar 7
Quick Settings 8
Manage battery life 9
Get around 10
Nexus navigation buttons 10
Google Play edition navigation buttons 11
Menus 11
Organize your Home screens 11
Touch & type 13
Help & support 14
Android version & updates 14
2 Essentials 16
Google Now 16
How it works 17
Try it 17
What you can ask Google to do for you 18
Turn “Ok Google” on or off 19
Display 19
Sound and notification 20
Manage accounts on your device 22
Add an account 22
Remove an account 23
Share your device with other users 24
ANDROID QUICK START GUIDE iii
Page 4

Switch users 25
Remove a user 25
Guest user 25
Security 26
Smart Lock 27
Screen pinning 27
Protect against harmful apps 28
Android Device Manager 29
Android Beam 29
Tap & pay 30
Printing 30
Chromecast 31
File storage 32
Screenshots 33
3 Use the keyboard 34
Enter & edit text 34
Use next-word suggestions 37
Gesture Typing 38
Keyboard dictionaries 39
Type by speaking 39
4 Try some apps 41
All Apps 41
Gmail 42
Google Play 45
Camera 46
Photos 49
ANDROID QUICK START GUIDE iv
Page 5

Contacts 49
Messenger 50
Hangouts 53
Calendar 53
5 Settings 55
6 Accessibility 57
ANDROID QUICK START GUIDE v
Page 6

1 Welcome to Android
About Android 5.0, Lollipop
Android 5.0, Lollipop is the latest version of Android, the operating
system that powers not just phones and tablets, but also wearables, TVs,
and even cars.
This guide introduces the Android 5.0 software available on Nexus and
Google Play edition mobile devices. For hardware details for these
devices, such as how to insert a SIM card, specs, and so on,
visitsupport.google.com/android. There, you can find comprehensive
information about all types of Android phones and tablets, including
more details about Nexus and Google Play edition devices and other
versions of Android.
If you’re switching to Android from iOS, see http://www.android.
com/switch for useful tips on moving your music and more onto your
new device.
Android 5.0 features a bold and bright new design, 3D graphics support
that are as good as on a desktop computer, and great new features that
make your phone work for you:
• Add guest users and other users without providing them access to
your email, contacts, and whatever else you don’t want to share.
• Set priorities for notifications and see them when your phone is
locked.
ANDROID QUICK START GUIDE WELCOME TO ANDROID 1
Page 7

• Easier ways to manage battery usage, including a battery saver
feature to extend battery life.
• More ways to secure your phone.
Android Auto
Android Auto will be supported by most major car manufacturers
starting with 2015 models. It allows you to plug in your phone to display
your music, contacts, and messages on the car’s built-in screen. With a
simplified interface, integrated steering wheel controls, and powerful
new voice actions, it’s designed to minimize distraction so you can stay
focused on the road. It’s easy to get where you’re going with free voiceguided navigation via Google Maps, live traffic information, lane
guidance, and more.
For more information, visit android.com/auto.
Android TV
Nexus Player (currently available on Google Play) a nd other settop boxes
and TVs coming on the market in 2015 let you watch all your Google Play
movies & TV content using Android TV. The Android TV Re mote Control
app supports voice search and an on-screen keyboard, giving you full
control of your TV from your phone or tablet. You can also browse
personalized content recommendations from Google Play, YouTube, and
your apps. Or use voice search to quickly find what you want: say “Back
to the Future,” “Oscar nominated movies from 2006” or “Brad Pitt
movies,” and let Android TV do the work.
For more information, visit play.google.com/store/devices.
ANDROID QUICK START GUIDE WELCOME TO ANDROID 2
Page 8

Android Wear
Android Wear watches from LG, Motorola, Sony, and other
manufacturers connect your phone to your wrist. Pause, play, and skip
music tracks or quickly respond to text messages using only your watch.
Android Wear organizes your information, suggests what you need, and
shows it to you before you even ask. Get messages from your friends,
meeting notifications, and weather updates at a glance.
For more information, visit play.google.com/store/devices.
Set up your device
When you first turn on your phone or tablet, you’ll see a Welcome
screen. Choose the language you want and touch the arrow to continue.
IMPORTANT: To complete the setup process, it’s best to have a WiFi connection.
When prompted, sign in with your Google Account or create one at that
time. Signing in lets you immediately access everything associated with
your Google Account, like Gmail. If you prefer, you can skip this step and
create an account later.
TIP: If you have another Android device, Tap & Go lets you quickly
set up a new device just by tapping it to your other one. Any
Google Accounts and apps that were already backed up will
automatically be copied over to the new device.
ANDROID QUICK START GUIDE WELCOME TO ANDROID 3
Page 9
An email address that you use for any of the following counts as a Google
Account:
• Gmail
• YouTube
• Google Play
• Google Apps
• AdWords
• Any other Google product
Signing in with a Google Account helps you get up and running quickly.
When you sign in, you can easily get all the apps you’ve purchased on
Google Play onto your new device. All the email, contacts, calendar
events, and other data associated with that account are automatically
synced with your device.
For example, if you change a friend’s phone number on your phone, that
change also appears on your tablet and on any computers where you’re
signed in to your Google Account.
If you have multiple Google Accounts, you can add others later from
Settings > Personal > Accounts. You can also add guest users
in Settings > Device > Users.
Make yourself at home
After you finish setting up your device, the Home screen appears for the
first time. Here, you can add app icons and widgets (an “ata -glance” view
of an app’s most important information) to your Home scree ns to easily
find them.
• To move between Home screens, swipe left or right.
ANDROID QUICK START GUIDE WELCOME TO ANDROID 4
Page 10
• To see notifications, swipe down from the top of the screen with one
finger.
• To open Quick Settings—frequently used settings—swipe down from
the top of the screen twice with one finger or once with two fingers.
See “Quick Settings” on page 7.
• To open Settings, swipe down from the top of any screen with two
fingers or swipe twice with one finger, then touch in the top right.
• From the Home screen, touch Google at the top of the screen, or say
“Ok Google” to search and start telling Google what to do.
Send an SMS (text message) from your phone
To send an SMS from your Nexus 6 phone:
1. Touch Messenger on your Home screen.
2. Touch to create a new message.
3. At the top of the screen, enter a phone number or selec t a contact,
then touch . Type your message, then touch .
For Nexus 4 and 5, you can get the Messenger app on Google Play. You
can also use the default SMS app that comes on the phone—Hangouts
on Nexus 5, the Messaging app on Nexus 4.
To change your default messaging app, go to Settings > Wireless &
networks > More > Default SMS app.
Make a phone call
Using a Nexus or Google Play edition phone, you can
place calls from the Phone app, the Contacts app, or
ANDROID QUICK START GUIDE WELCOME TO ANDROID 5
Page 11
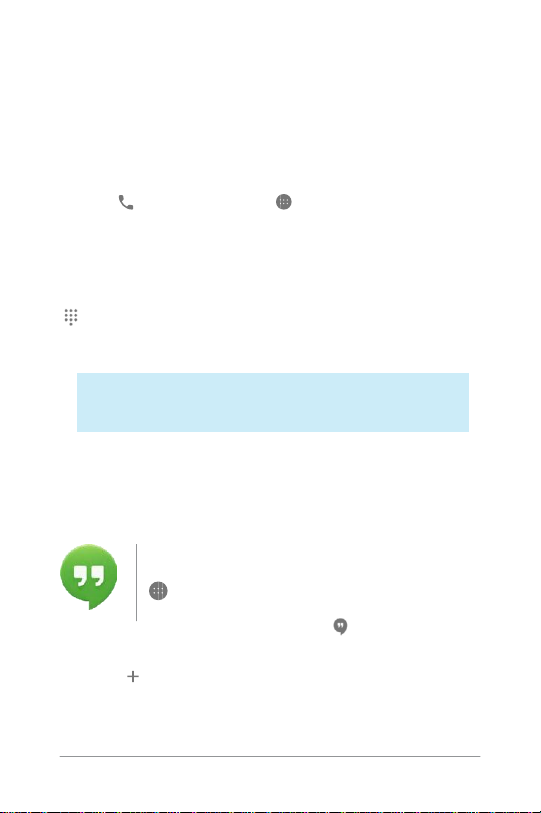
Tostartavideocall:
1 . Touch
other apps or widgets that display contact information. Wherever you
see a phone number, you can usually touch it to dial.
To place a call to one of your contacts:
1. Touch Phone on a Home or All Apps screen.
2. To choose someone to call, scroll or search. If the keypad is in the
way, touch the Back button to lower it.
3. To place a call, touch the contact’s name.
To view recent calls, touch the Recents tab. To use the keypad, touch the
keypad.
TIP: On Nexus 4 and Nexus 5 only, Caller ID by Google identifies
inbound and outbound numbers, even for callers not saved as
contacts in the Contacts app.
For more details, visitUse your phone.
Make a video call
you send and receive video calls. To
open it, touch Hangouts on a Home
or All Apps screen.
The Hangouts app lets
ANDROID QUICK START GUIDE WELCOME TO ANDROID 6
Page 12

typing a name, email address, or phone number. Matching names and
numbers from your contacts appear as you type.
2. Choose a name, then touch Video at the top of the screen.
To adjust notification preferences and other settings, touch Menu >
Settings.
For more details, visitHangouts help.
Add at the top of the main Hangouts screen and start
Send an email
Use the Gmail app to read and write email from your
Gmail or other email addresses.
2. If you already signed into a Gmail account during setup, your email will
be synced to your device. Otherwise, add an email address now.
Gmail on a Home or All Apps screen.
Status bar
The status bar is at the very top of the screen. On the right, you can see
the Wi-Fi and mobile signal strength, how much battery power is left,
and the time. On the left, you can see which apps have sent you
notifications. See “Sound & notification” on page 19.
ANDROID QUICK START GUIDE WELCOME TO ANDROID 7
Page 13
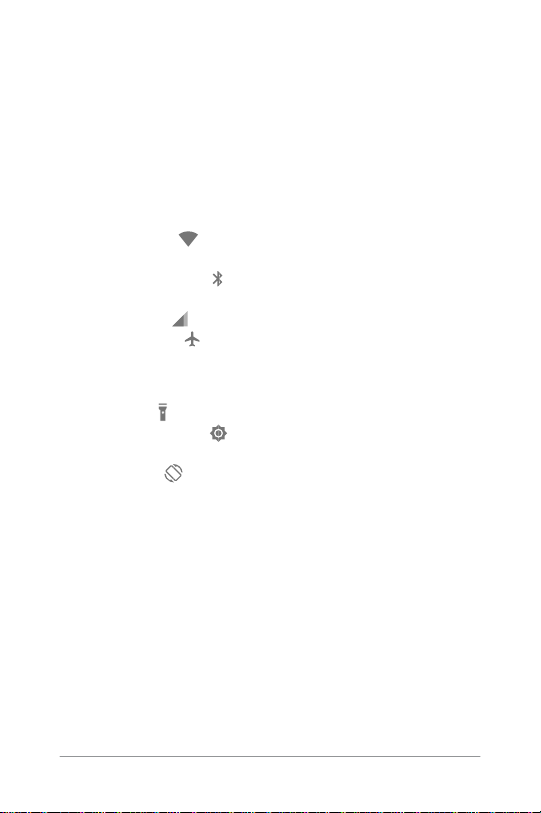
Quick Settings
Use Quick Settings to easily get to frequently used settings, like turning
on airplane mode. To open Quick Settings, swipe down from the top of
the screen with two fingers or twice with one finger. To change a setting,
just touch the icon:
• Wi-Fi network: Turn Wi-Fi on or off. To open Wi-Fi settings,
touch the Wi-Fi network name.
• Bluetooth settings: Turn Bluetooth on or off. To open Bluetooth
settings, touch the word “Bluetooth”.
• Cellular data: See cellular usage data and turn it on or off.
• Airplane mode: Turn airplane mode on or off. Airplane mode
means your phone won’t connect to Wi-Fi or a cell signal, even if one
is available.
• Flashlight: Turn the flashlight on or off.
• Display brightness: Slide to lower or increase the brightness of
your screen.
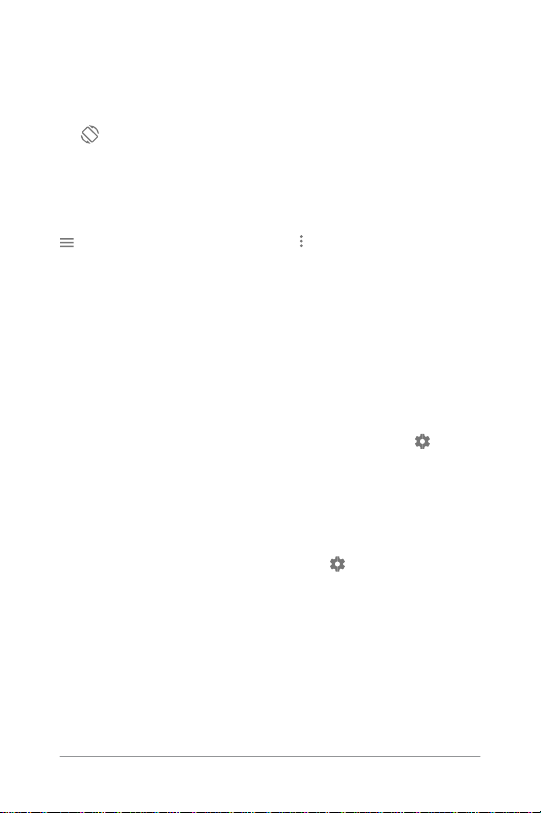
• Auto-rotate: Lock your device’s orientation in portrait or
landscape mode.
On a Nexus 5, Quick Settings look like this:
ANDROID QUICK START GUIDE WELCOME TO ANDROID 8
Page 14
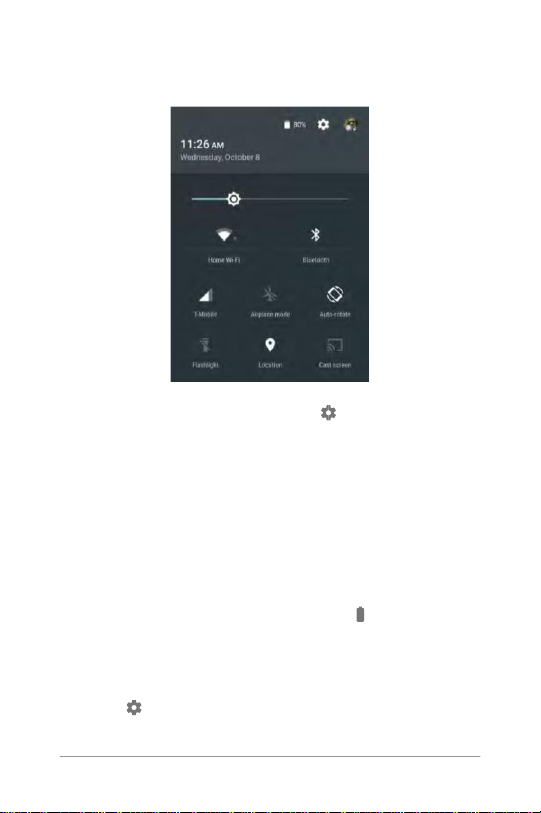
OpenthemainSettingsappbytouching
Settings
inthetop
right.
You can also turn Auto Rotate on or off from Quick Settings, to lock or
unlock automatic screen rotation.
Manage battery life
The status bar shows how much battery you have left, but you can also
see the exact percentage and approximate time of battery life remaining.
Swipe down from the top of the screen, then touch Battery.
Your Android device’s battery is built to get you through your day. When
you’re running low, Android’s battery saver conserves your battery
power so you can still make calls and send SMS (text) messages. To turn
it on, go to Settings > Battery > Battery saver. For more information,
visit Manage battery life.
ANDROID QUICK START GUIDE WELCOME TO ANDROID 9
Page 15
Overview
Back Opensthepreviousscreenyouwereworkingin,even
ifitwasinadifferentapp.Onceyoubackuptothe
Homescreen,youcan’tgobackanyfurther.
Home
OpensthecentralHomescreen. ToopenGoogleNow,
swipeup.
Get around
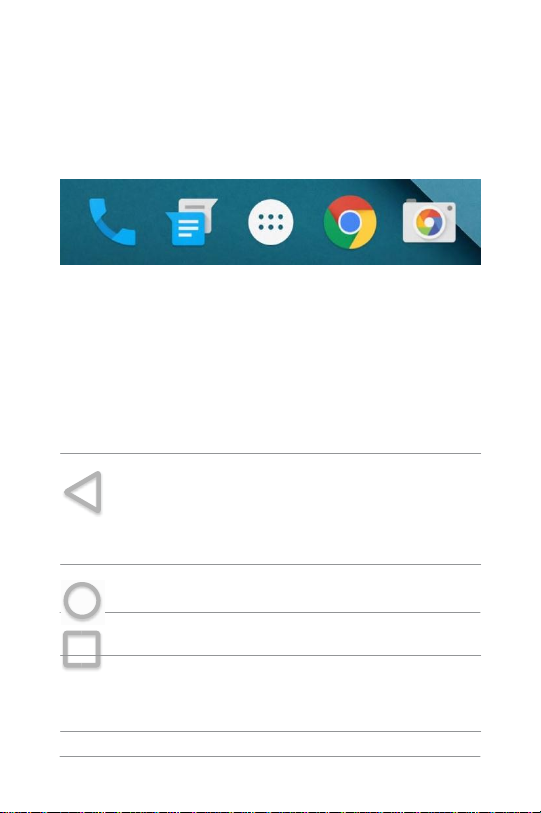
At the bottom of every Home screen you’ll find the Favorites tray:
another quick way to get to your apps.
To open an app, touch it. To drag an app in or out of the Favorites tray or
anywhere else on a Home screen, touch & hold it, then move it with your
finger where you want it.
Nexus navigation buttons
At the bottom of most phone or tablet screens, no matter what you’re
doing, you’ll always find the navigation bar with three buttons. On Nexus,
it looks like this:
Opens a list of thumbnail images of screens you’ve worked
with recently. To open one, touch it. To remove a screen
from the list, swipe it left or right or touch on the X.
ANDROID QUICK START GUIDE WELCOME TO ANDROID 10
Page 16

Some apps hide these buttons temporarily, or fade them to small dots in
the same position. To bring them back, touch the dots, touch the screen
in the middle, or swipe up from the bottom.
Google Play edition navigation buttons
Some Google Play edition devices have two or three buttons just below
the screen. These could be physical buttons or buttons that only appear
when you touch below the screen.
• Menu: This button opens options depending on the screen you’re on.
• Home: Opens Home. If you’re viewing a left or right Home screen, it
opens the main Home screen. If you have set up Google Now, you can
also touch & hold this button to open Google Now.
• Back: Opens the previous screen you were working in, even if it was
in a different app. Once you back up to the Home screen, you can’t go
back any further in your history.
Menus
Many screens in Apps and in Settings include a Menu icon at the top
right of the screen. Touch it to explore additional options, including Help
and Settings.
Organize your Home screens
On Nexus 5, 6, and 9:
• To change your wallpaper, add a widget, adjust Search settings, or
change screen order, touch & hold the background of any Home
screen.
ANDROID QUICK START GUIDE WELCOME TO ANDROID 11
Page 17
• You can have any number of Home screens to the right. To add a new
screen, swipe to the rightmost screen and drag an app or widget to
the right edge.
• The screen to the left of the main Home screen is reserved for Google
Now, and is available only when Google Now is turned on.
• To create a folder, slide one icon quickly on top of another.
• To name or rename a folder, open it and touch its name.
To change the wallpaper:
1. Touch & hold the background, then touch Wallpapers.
2. Swipe right to left to choose a wallpaper image. Or choose a n image
from your Photos, Downloads or Drive.
To add an app icon to a Home screen:
1. Go to the Home screen where you want to place the app.
2. Touch All Apps.
3. Swipe from right to left, if necessary, to find the app you want.
4. Touch & hold the app until the Home screen appears, slide it into
place, and lift your finger.
To add a widget:
1. Touch & hold the background, then touch Widgets. On Nexus 4, 7, or
10, open All Apps > Widgets.
2. Swipe right to choose a widget, which provides a quick view or way to
access information on your home screen, like a larger size clock or a
view of information in your Google Play library.
To move an app or widget to another position:
1. Touch & hold the icon.
2. Slide your finger to the new position.
ANDROID QUICK START GUIDE WELCOME TO ANDROID 12
Page 18

To move between Home screens, slide toward the edge of the screen.
To bump another icon out of the way, slide slowly into it.
3. Lift your finger.
Touch & type
To select or activate something, touch it.
To type something, such as a name, password, or search terms, just
touch where you want to type. A keyboard pops up that lets you type
into the field.
Other common gestures include:
• Touch & hold. To select an item, touch & hold it by not lifting your
finger until something happens. This is how you access accent and
other special characters on the keyboard. Slide your finger to the
accented letter you need.
• Touch, hold, & drag. Touch & hold an item for a moment and then,
without lifting your finger, move your finger on the screen until you
reach the target position. You can move apps around on the Home
screen.
• Swipe or slide. Quickly move your finger across the surface of the
screen, without pausing when you first touch (so you don’t drag
something instead). Slide a Home screen left or right to view the
other Home screens.
• Double-tap. Tap quickly twice on a map or image to zoom in and out.
• Scale. In some apps (such as Maps, Chrome, and Photos), you can
scale by placing two or more fingers on the screen at once and
pinching them together (to enlarge scale) or spreading them apart (to
reduce it).
• Rotate the screen. The orientation of most screens rotates with your
device as you turn it. To keep your screen lock ed in Portrait mode,
ANDROID QUICK START GUIDE WELCOME TO ANDROID 13
Page 19
swipe down with two fingers from the top of any screen and touch
Portrait/Auto-Rotate in Quick Settings.
Help & support
For most Google apps, you can get to help and support from the
Menu. Other apps include a Menu icon that you can touch.
This book introduces just a few of the key features and apps that come
with Android 5.0. For more details about Android software and apps,
Nexus and Google Play edition devices available onGoogle Play, and all
forms of support, visit:
• support.google.com/nexus
• support.google.com/playedition
Google also welcomes feedback from you about your Nexus or Google
Play edition device. It’s easy to send your feedback. Just go to Settings
> About phone (or About tablet) > Send feedback about this device.
Android version & updates
To check your version number or get the latest system update for a
Nexus or Google Play edition phone, first go to Settings > System >
About phone or About tablet. Then look for these labels:
• System updates. Touch to check whether you have any pending
system updates.
• Android version. Look partway down the list for this heading and the
number just below it.
ANDROID QUICK START GUIDE WELCOME TO ANDROID 14
Page 20

If you don’t have a Nexus or Google Play edition phone or tablet and are
running Android 5.0 on some other device, some details of the system as
described in this book may vary.
For comprehensive online help and support, including details about
Nexus and Google Play edition hardware running the software described
in this book and links to information about other Android devices,
visitsupport.google.com/android.
ANDROID QUICK START GUIDE WELCOME TO ANDROID 15
Page 21

2 Essentials
Google Now
Google Now is about getting you just the right information, at just the
right time. It tells you today’s weather before you start your day, how
much traffic to expect before you leave for work, and even your favorite
team’s score while they’re playing.
For example, here’s a Google Now card that appears when you’re about
to start your commute:
After you start using Google Now, you don’t need to do anything else. If
you like, you can fine-tune some settings, but Google Now doesn’t need
any elaborate setup.
ANDROID QUICK START GUIDE ESSENTIALS 16
Page 22

How it works
To know when to show information you’ll find useful, Google Now uses
contextual data from your device and from other Google products, plus
data from third-party products that you allow Google Now to access. For
example, if you have an appointment in Google Calendar that includes an
address, Google Now can check traffic and suggest when to leave.
When you decide to use Google Now, you’re also turning on Location
Reporting and Location History:
• Location Reporting allows Google to periodically store and use your
device’s most recent location data in connection with your Google
Account. Location Reporting is a per-device setting.
• Location History allows Google to store a history of your location
data from all devices where you’re logged into your Google Account
and have turned on Location Reporting.
You can control how Google Now uses your current location. To view the
relevant settings, go to Settings > Personal > Location. When location
services are turned on for your account on a given device, certain apps
can use them to give you more relevant information, such as nearby
restaurants or commute traffic.
To learn more about how Google Now uses your location and other
information, visit About Google Now.
Try it
You have a chance to turn on Google Now when you first set up your
device. You can also turn it on or off at any time:
1. Touch & hold any empty space on your Home screen.
2. Go to Settings > Google Now.
ANDROID QUICK START GUIDE ESSENTIALS 17
Page 23

To open Google Now on Nexus 5, 6, and 9, swipe up from the Home
button. Updates appear in the form of Google Now cards.
When you don’t need a card anymore, swipe it from left to right. Swiping
from right to left returns you to the main Home screen.
When you want to see more cards, touch More at the bottom of the
screen.
To adjust the way certain cards get updated:
• Manage reminders: From the Menu at the top left of the screen,
touch Reminders.
• Request updates for your sports teams, stocks, and more: From the
Menu, touch Customize.
• Customize other updates: At the top right of each card, touch the
three dots.
For more details, visit About Google Now. For a complete list of cards
available, visitgoogle.com/now.
What you can ask Google to do for you
When you use Google Now, you can speak to your device to search, get
directions, and create reminders. For example, say “Ok Google, do I need
an umbrella tomorrow?” to see if there’s rain in the weather forecast.
To see other examples of what you can say, visit “Ok Google” and voice
search. You can say most of these examples in English, French, German,
Italian, Japanese, Korean, Russian, Spanish, and Brazilian Portuguese, but
some examples aren’t available in every language.
If you want to say “Ok Google” in languages other than English, you also
need to change the main language on your device. Visit Change your
language on Google.
ANDROID QUICK START GUIDE ESSENTIALS 18
Page 24

Turn “Ok Google” on or off
You can start a search or task by saying “Ok Google.” To turn it off or on,
open Google Now or the Google app and touch Menu > Settings > Voice
> OK Google detection.
Display
Change the display settings on your device by following these steps:
1. Go to Settings > Device > Display.
2. Choose from the following settings. Some of these settings may vary
by your device and version of Android. All can affect battery li fe. See
“Manage battery life” on page 8 for more information.
• Brightness level: Move the slider to set the brightness level on
your device.
• Adaptive brightness: Turn on adaptive brightness to automatically
optimize the brightness level on your device based on the
available light around you. Adaptive brightness is on by default.
You can still adjust your brightness when needed.
• Sleep: Change how long it takes for your device’s screen to go
black when you’re not using it. Learn more about Sleep Settings.
• Daydream: Set up screensavers that display photos, colorful
backgrounds, and more when your device is charging or docked.
Learn more about using Daydream.
• Ambient display (Nexus 6 only): Turn on ambient display if you
want your phone to wake up when you pick it up or when a
notification arrives.
ANDROID QUICK START GUIDE ESSENTIALS 19
Page 25

Sound & notification
You can change the sound and notification settings on your device by
going to Settings> Device > Sound & notification.
Notifications alert you to the arrival of new messages, ca lendar events,
and alarms, as well as ongoing events, such as downloads:
• Interruptions. Prioritize sound notifications so they don’t interrupt
you. Touch the settings to turn phone call and message interruptions
on or off. If you turn Messages notification s on, touch Calls/messages
from to specify from whom you accept notifications (Anyone, Starred
contacts or Contacts Only). In Downtime, select which days and
times you allow for sound notifications.
• When device is locked. Manage whether notifications can be seen
when your phone is locked, and whether sensitive content in a
notification can be seen. Sensitive content includes things like the
title of a song you downloaded, who sent you an email, or the details
of a calendar event. For more information, visit the Help Center.
• App Notifications. Modify the notification settings individually for
apps such as Gmail. The setting under When device is locked will
always take precedence over the setting for an individual app.
• Notification access. See which apps can access your notifications.
When a notification arrives, its icon appears at the top of the screen.
Icons for pending notifications appear on the left, and system icons
showing things like the Wi-Fi signal, mobile carrier signal, or battery
strength are on the right:
ANDROID QUICK START GUIDE ESSENTIALS 20
Page 26

Notifi cations
Wi-Fisignal
Mobilesignal
strength
Battery
Certain notifications can be expanded to show more information, such as
email previews or calendar events. The one at the top is always
expanded when possible. To expand a notification, position one finger
inside it and swipe down slowly.
To open the related app, touch the notification icon on the left. Some
notifications also allow you to take specific actions by touching icons
within the notification. For example, Calendar notifications allow you to
Snooze (remind you later) or send email to other guests.
When you’re finished with a notification, swipe it away. To dismiss all
notifications, touch Dismiss at the very bottom of the notifications list.
ANDROID QUICK START GUIDE ESSENTIALS 21
TIP: Wi-Fi and mobile signal strength are indicated at the top of the
screen by white bars. To see whether the selected Wi -Fi network
has a full Internet connection, openQuick Settings by swiping down
with two fingers from the top of the screen.
In Quick Settings only, white bars in the Wi-Fi or mobile signal
indicators indicate the signal strength of a normal Internet
connection.
Page 27

Manage accounts on your device
You can add accounts so that information associated with that account
automatically syncs with your device. You’ll need to set up an account on
your device if you want to get email or get apps on Google Play.
You can also add multiple users for your device, like if several people
share a tablet. Adding users is different from adding accounts. Each user
has separate settings and can’t access the accounts of other users,
whereas a single user can have multiple accounts and switch between
them anytime they’re signed in. Make sure you’re signed in as the
correct user before adding or removing any account information.
Add an account
1. Go to Settings > Personal > Accounts. Touch “Add account.”
2. Touch the type of account you want to add. You may be able to
choose from choices like “Google,” “Personal (IMAP),” or “Personal
(POP3).” If you’re not sure whether to choose IMAP
ANDROID QUICK START GUIDE ESSENTIALS 22
Page 28

or POP3, try IMAP first. Many email services use IMAP. Learn more
about the differences between IMAP and POP3.
i. Choose “Google” if you want to add your Google Account. When
you sign in with a Google Account, all the email, contacts,
calendar events, and other data associated with that account are
automatically synced with your device.
ii. Follow the on-screen instructions to add the account.
To change the settings of any of the accounts you added, follow these
steps:
1. Go to Settings > Personal > Accounts.
2. Select your account. If you’re using a Google Account, touch Google
and then your account.
Remove an account
When you remove an account that you’ve added to your device,
everything associated with that account, including email, contacts, and
settings is also deleted. You can’t remove the account you used to
initially set up your device.
To remove an account from your device, follow these steps:
1. Check to see if the account you want to remove is the account you
used to set up your device.
• If it’s not, go to step 2 and follow the instructions.
• If it is, reset your device to its factory settings instead of following
the steps below. This erases all of the data from your device and
you’ll need a Google Account to set up your device again. Learn
how to do a factory data reset on your Nexus device or Google
Play edition device.
ANDROID QUICK START GUIDE ESSENTIALS 23
Page 29

2. Open the Settings menu on your device.
3. Under “Accounts,” touch the name of the account you want to
remove. If you’re using a Google Account, touch Google and then the
account.
• When you sign out of your Google Account, all the email, contacts,
Calendar events, and other data associated with that account will
no longer automatically sync with your device.
4. Touch Menu in the top right corner of the screen.
5. Touch Remove account.
Share your device with other users
You can easily share your device with family and friends by creating a
separate user for each person. Each person has their own space on the
device for custom Home screens, accounts, apps, settings, and more.
You must be the device owner to add users.
To add a new user, follow these steps:
1. Go to Settings > Device > Users.
2. Touch Add user, then touch OK.
i. If you’re with the new user: Touch “Set up now” and you’ll be
taken to the lock screen. Select the new user, unlock the screen,
and allow them to set up their Google Account and other details.
ii. If the new user isn’t around: Touch “Not now.” A “New user” will
appear in the list. The next time you’re with the user, go back to
the user list and select “New user” or click the user image on the
lock screen.
After a user is set up, when you go to the lock screen, you’ll see a second
user profile picture or avatar in the status bar. To choose a user, touch
ANDROID QUICK START GUIDE ESSENTIALS 24
Page 30

the picture and unlock the screen. Each user can set their own screen
lock.
Switch users
To switch users, swipe down from the top of any screen twice to open
Quick Settings. Touch the image of the current user in the top right
corner of the screen, then touch another user’s image.
Remove a user
The device’s owner can delete any user that they added:
1. Go
then touch Remove user.
Other users can only delete their own space.
1. Go
device.
to Settings > Device > Users.
2. Touch Settings next to the user’s name,
to Settings > Device > Users.
2. Touch Menu > Delete username from this
Guest user
If someone wants to temporarily use your device, but they don’t need to
be set up as a regular user, they can use it as a guest. Guest users don’t
have access to your mail, your apps, or any content on your device that’s
tied to your account, like photos or downloaded files. You must be the
device’s owner to add a guest.
1. Go to Settings > Device > Users.
2. Touch Guest.
ANDROID QUICK START GUIDE ESSENTIALS 25
Page 31

When your guest is finished using your device, you can switch back to
another user.
To switch to another user: Swipe down from the top of any screen, and
then touch the bar at the top to open Quick Settings. T o choose another
user, touch the image in the top right corner of the screen, then touch
another user’s image.
Security
If a lock is set for your screen, the screen goes dark and locks when the
display goes to sleep or if you press the Power button.
You can set locks of different strengths using Screen
Lock settings:
1. Go to Settings > Personal > Security >
Screen lock.
2. Touch the type of lock you’d like to use.
Even when your screen is locked, you can perform certain activities.
• Quick Settings: Slide down from the top of the screen to open Quick
Settings without entering your password.
• Camera: Slide from right to left to open the Camera.
• Access Dialer: Slide from left to right to make a phone call.
(First you have to enter your password.)
• Emergency Calls: Slide from left to right to make an emergency
phone call without having to enter your password.
If you have a device that’s set up for more than one user, you may need
to touch your image at the bottom of the screen to see your own locked
screen.
ANDROID QUICK START GUIDE ESSENTIALS 26
Page 32

For more information, visitCustomize the screen lock.
Smart Lock
You can turn on Smart Lock to keep your device unlocked when it’s clear
that you have it with you—for example, when it’s connected to your
Bluetooth watch or when it recognizes your face.
Trusted devices and face matching
You can set your device to stay unlocked while connected to a Bluetooth
device—like a watch, fitness tracker, headset, or car speaker system. You
can also set your device to unlock when it touches an NFC tag.
You can also have your device unlock when it recognizes your face. After
setting a trusted face, every time you turn on your device, it will search
for your face and unlock if it recognizes you. Keep in mind that someone
who looks similar to you could unlock your phone.
Note: Face matching doesn’t store any photos of you. Data used to
recognize your face is only stored on your device and is not accessible by
apps or backed up on Google servers.
For more information on how to use these features, see Trusted devices
and face matching.
Screen pinning
You can enable your device to only show a certain app’s screen using
screen pinning. Screen pinning can be handy if you want to play a game
without accidentally minimizing the app if you touch the Home button.
Some apps may ask you if you want to use screen pinning.
ANDROID QUICK START GUIDE ESSENTIALS 27
Page 33

When a screen is unpinned, you can choose to return to the screen
where you enter your password or PIN.
To pin a screen:
1. Go to Settings > Security > Screen pinning and turn screen pinning
on.
2. Open an app.
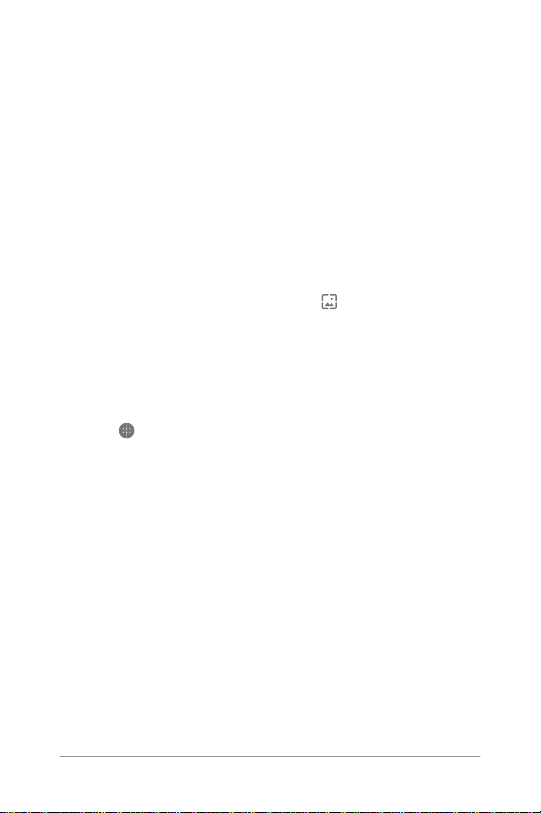
3. Touch Overview on your device. Swipe up the first screen on the
bottom to bring it into view.
4. Touch the pin. Here, you can select an option to return to the lock
screen after a screen is unpinned.
5. To exit from the pinned screen, touch and hold and
at the same time.
Protect against harmful apps
Apps from Google Play are always verified by Google to protect you and
your device from harm. By default, your device doesn’t allow the
installation of apps from sources other than Google Play.
If you choose to allow the installation of apps from unknown sources and
install apps from sources other than Google Play, it’s more likely that
apps will be installed that could harm you or your device.
If you allow the installation of apps from unknown sources, the Verify
Apps feature protects you when installing apps outside of Google Play
by continually checking your device to make sure that all apps installed
are behaving in a safe manner, even after installation.
ANDROID QUICK START GUIDE ESSENTIALS 28
Page 34

For more information or to change the default behavior, visit
Prohttps://support.google.com/nexus/answer/2812853tect against
harmful apps.
Android Device Manager
If you lose your phone or tablet, the Android Device Manager can help
you find its approximate location, make it ring, lock it, or erase its data.
These options are turned on by default. To view or change them, open
the Google Settings app (found in All Apps) and touch
Android Device Manager.
If you lose your device, go toAndroid Device Manager and follow the
instructions.
Android Beam
You can instantly send, or beam, a web page, a video, or other content
from your screen to another device by bringing the devices together
(typically back to back). In some apps, you can also start a beam from the
Share menu.
Before you begin: Make sure both devices are unlocked, support
Near Field Communication (NFC), and have both NFC and Android Beam
turned on. To check, go to Settings > Wireless & networks > More.
Also, make sure you know where the NFC area is on the back of both
devices.
1. Open a screen that contains something you’d like to s hare, such as a
webpage, YouTube video, or place page in Maps.
ANDROID QUICK START GUIDE ESSENTIALS 29
Page 35

2. Move the back of your device toward the back of the other device.
When the devices connect, you hear a sound, the image on your
screen reduces in size, and you see the message Touch to beam.
3. Touch your screen anywhere. The other device displays the
transferred content. Or, if the necessary app isn’t installed, Google
Play opens to a screen where your friend can dow nload
the app.
To turn on NFC, go to Settings > Wireless & networks >
More > NFC.
To turn on Android Beam, go to Settings > Wireless
& networks > More > Android Beam
Tap & pay
When NFC is turned on, you can use the Tap & pay feature to pay for
items just by touching your phone to a reader at a register. To manage
your Tap & pay apps:
1. Go to Settings > Device > Tap & pay.
2. Touch an app to make it your default payment app.
If your device doesn’t have a payment app, such as Google Wallet, search
Google Play for “payment apps.”
For more information, visit Tap & pay with your device.
Printing
With Android 5.0, you can preview and print the content of certain
screens (such as web pages displayed in Chrome) to a printer on the
same Wi-Fi network as your Android device.
ANDROID QUICK START GUIDE ESSENTIALS 30
Page 36

Before you can print, you need a printing service installed on your device.
To check what services are currently available, go to Settings > System
> Printing.
From here, you can open each available service to turn it on or off, check
which printers it makes available, add new printers, and adjust the
service’s settings.
To print a document, such as a webpage in Chrome:
1. Touch Menu > Print.
2. In the dialog that appears, adjust settings such as printer, copies,
orientation, and so on.
3. Touch Print.
Chromecast
Chromecast is a small device that plugs into the back of your TV. It allows
you to send videos and music straight from your phone or tablet to your
TV. You can use Chromecast with apps like:
• YouTube
• Netflix
• Google Play Movies & TV
• Google Play Music
• Hulu Plus
To see more apps, visit chromecast.com/apps.
When using Chromecast, make sure your phone or tablet is using the
same Wi-Fi network as your Chromecast, and that Chromecast is
selected as your TV’s source input.
To display content from your phone or tablet on your TV:
ANDROID QUICK START GUIDE ESSENTIALS 31
Page 37

1. Open the video or music in one of the apps listed above.
2. Touch Cast.
3. Play the content as usual to stream it to your TV.
For more information, seeCast from apps to your TV.
File storage
Android 5.0 makes it easy to store and browse through pictures, videos,
and other files on your device and attach them to an email, Hangout
message, and so on. You can also use stored images as your Home
screen wallpaper.
For example, to attach an image to an email you’re composing, touch the
Paper Clip in the top right and choose to either Attach file or Insert
from Drive to select stored images in your Drive folder.
From here, you can view any of these sources:
• Recent shows you the photos or videos you’ve taken or opened most
recently.
• Drive lets you attach any files stored in Google Drive.
• Images displays any photos, videos, or other images on your device.
• Downloads includes most files (excluding Play content) you’ve
downloaded from emails or the Web
• Photos lets you browse all the images and videos that are on your
device or have been uploaded to your Google account.
Use the Downloads app to view, reopen, or delete files
you download from Gmail or other sources (excluding
Google Play books, videos, magazines, and othe r media.)
In the Downloads app:
ANDROID QUICK START GUIDE ESSENTIALS 32
Page 38

TIP: To easily share your screenshot via Gmail, Google+, and more,
select your screenshot in Photos and touch Share at the
bottom. Touch Edit to modify. Touch to delete.
For Google Play edition devices, touch Share.
• Touch an item to open it.
• In your list of downloads, touch & hold an item to select it.
Touch Share and choose a sharing method from the list.
Google Play streams purchases and rentals via the Internet. So the
purchases and rentals don’t always occupy storage space when you play
them. Although you can download content in Google Play apps to access
offline, Google Play content never appears in Downloads.
Touch to delete.
Screenshots
To take a screenshot from Nexus or Google Play edition devices:
1. Make sure the image you want to capture is displayed on the screen.
2. Press the Power and Volume down buttons simultaneously.
The screenshot is automatically saved in your Photos.
ANDROID QUICK START GUIDE ESSENTIALS 33
Page 39

TIP: To select a keyboard language other than English, go to
Settings, Personal > Language & input. For more details, visit the
Keyboard help.
3 Use the keyboard
Enter & edit text
Use the onscreen keyboard to enter text. Here’s what it looks like on a
Nexus phone:
Keyboards on tablets work in a similar way. To make the keyboard go
away, touch the Back button below it.
Some apps open the keyboard automatically. In others, you first need to
touch where you want to type.
ANDROID QUICK START GUIDE USE THE KEYBOARD 34
Page 40

Basic editing
Change where
you want to
type
Touch the cursor, then touch and drag the tab
that appears below it to the new position.
Select text
Touch and hold or double-tap within the text.
The nearest word highlights, with a tab at each
end of the selection. Drag the tabs to change the
selection.
Delete text Touch the Delete key to delete the characters
before the cursor or selected text.
Type capital To switch to capital letters for one letter, letters
touch the Shift key once.
You can also touch and hold the Shift key
while you type or you can touch the Shift key
and slide to another key.
When you release the key, the lowercase letters
reappear.
Turn caps Double-tap or touch and hold the Shift lock on
key so that it changes to. Touch the Shift key again to
return to lowercase.
Change word If you want to quickly change the
capitalizacapitalization tion of a word you’ve already typed,
you can select it and touch the Shift key.
ANDROID QUICK START GUIDE USE THE KEYBOARD 35
Page 41

Type a symbol
or character
To switch to symbol keys for one word, touch the
symbol key ?123once.
You can also touch and hold the symbol key
?123while you type or you can touch thesymbol
key ?123and slide to another key. When you release
the key, the letter keys reappear.
View more
symbols and
characters
Touch and hold symbols or characters to get
accented characters or additional symbols.
.
You’ll have the option to select the capitalized word
or the word in all capital letters.
Cut, copy, Select the text you want to cut or copy. Then paste
touch the Cut button or Copy button .
To paste, touch the space where you want to paste
your text and then touch Paste. If you want to replace other text with the
text you copied, highlight the text, then touch the
Paste button
Emoji
Use Google Keyboard to choose from a variety of small, colorf ul images
used to express emotion (known as emoji) to add some fun to your
messages.
Depending on your device, you may need to touch and hold the Return
key and then slide your finger to the happy face to display emoji. On a
tablet, just touch the emoji symbol at the lower right.
ANDROID QUICK START GUIDE USE THE KEYBOARD 36
Page 42

You’ll see a panel like this. To move between categories, swipe left or
right or touch the symbols in the top row. To type an emoji, touch it:
Use next-word suggestions
1. Touch the location where you want to input text.
2. Start typing out a word. When the word you want is displayed in a list
above the keyboard, touch it.
3. Continue to touch words unless the one you want doesn’t appear. If
so, type it.
Android continues to suggest words as you type.
To change your keyboard and input methods, go to
Settings > Personal > Language & input.
To turn next-word suggestions on or off, go to Settings >
Personal > Language & input > Keyboard & input
methods > Google Keyboard > Text correction > Next-
word suggestions.
ANDROID QUICK START GUIDE USE THE KEYBOARD 37
Page 43

Gesture Typing
Gesture Typing works best for English. Quality varies for other languages,
and some don’t support it yet. To input a word using Gesture Typing:
1. Touch the location where you want to type to open the keyboard.
2. Slide your finger slowly across the letters of the word you want to
input.
3. Release your finger when the word you want is displayed in the
floating preview or the middle of the suggestion strip. To select one
of the other words in the suggestion strip, touch it.
If the word you want isn’t shown while using Gesture Typing, you can
type it out manually. If you gesture a word and want to change it, touch
the word to see other choices in the suggestion s trip.
TIP: If there are letters you want to emphasize, like repeated letters,
such as the “e” in sleep, pause over the “e” slightly longer before
moving on to the next letter.
Use Gesture Typing without the space bar
When you use Gesture Typing, there’s no need to use the space bar —
just continue to slide your finger across the letters you want to input,
then lift your finger to start the next word.
To change Gesture Typing settings, go to Settings >
Language & input > Keyboard & input methods >
Google Keyboard> Gesture Typing.
ANDROID QUICK START GUIDE USE THE KEYBOARD 38
Page 44

Keyboard dictionaries
To manage keyboard dictionaries, go to Settings > Personal >
Language & input.
Personal dictionary
You can add your own words to your personal dictionary so that your
device remembers them. To add a word or phrase, including an optional
shortcut, go to Settings > Personal > Language & input > Google
Keyboard > Text Correction >Personal dictionary and the language of
the dictionary you want to modify, then choose Add and type in the
word. When you use the optional shortcut when typing, your word or
phrase appears as an option in the suggested words above the keyboard.
Add-on dictionaries
1. Go to Settings > Personal > Language & input > Google Keyboard >
Text Correction > Add-on dictionaries.
2. You’ll see dictionaries for other languages that you can download to
your device.
3. Touch the dictionary you want, then Install.
Type by speaking
You can speak to enter text in most places where you can enter text with
the onscreen keyboard.
1. Touch a text field, or a location in the text you’ve already entered in a
text field.
2. Touch the Microphone key on the onscreen keyboard.
3. When you see the microphone image, speak what you want to type.
ANDROID QUICK START GUIDE USE THE KEYBOARD 39
Page 45

In some languages, you can also enter punctuation by speaking it, like
“comma,” “period,” “question mark,” “exclamation mark,” or
“exclamation point.” Supported languages include English, French, Italian,
German, Spanish, and Russian.
To improve processing of your voice input, Google may record a few
seconds of background noise in temporary memory at any time. This
recording remains on the device only temporarily and is not sent to
Google.
To change your speech settings, go to Settings >
Personal > Language & input.
ANDROID QUICK START GUIDE USE THE KEYBOARD 40
Page 46

4 Try some apps
All Apps
To see all your apps, touch All Apps in the Favorites
tray on any Home screen.
This is where you can see all your apps, including those
that come with your phone and those you downloaded
Home screens.
From All Apps, you can:
• Move between screens. Swipe left or right.
• Open an app. Touch its icon.
• Place an app icon on a Home screen. Touch & hold the app icon, slide
your finger, and lift your finger to drop the icon into your desired
Home screen.
• Browse widgets. Touch the Widgets tab at the top of any All Apps
screen.
• Get more apps. Touch Google Play in the list of app icons.
To remove an app icon from the Home screen without removing it
permanently from your device, touch & hold it, slide your finger toward
the top of the screen, and drop the app over Remove.
on Google Play. You can move app icons to any of your
ANDROID QUICK START GUIDE TRY SOME APPS 41
Page 47

To view info about an app from an All Apps screen, touch & hold it, slide
your finger toward the top of the screen, and drop the app o ver App
Info.
TIP: Some apps can harm you or your device. However, you don’t
need to purchase anti-virus software for Nexus or Google Play
edition devices. Google can verify apps to help pre vent harmful
software from being installed.
For more details, visitProtect against harmful apps.
Use the Gmail app to read and write email from any
mobile device. To open it, touch Gmail on a Home or
All Apps screen.
Gmail isn’t just about email. You can use your Gmail account to sign in to
all Google apps and services, including these and many
more:
• Google Now, for getting the information you need at just the right
time
• Calendar
• People, for keeping track of your contacts • Google Drive, for
working with documents
While you’re reading a message:
ANDROID QUICK START GUIDE TRY SOME APPS 42
Page 48

• Touch the icons along the top of the screen to archive, throw away,
and mark as read. Touch to mark a message as unread. Look under
the Menu to move, change labels, mute, print and do other actions
to the email.
• Swipe left or right to read the previous or next conversation.
Organize your conversations: From the Inbox, touch & hold a
conversation to select it. Then use the icons and menu along the top of
the screen to manage the selected messages.
To change your settings, add an account, o r get help, touch the menu
icon or button.
No matter where you are in Gmail, you can always get back to the Inbox
by touching the Back button at the top of the screen.
From the Inbox, touch Menu to open the drawer that reveals available
accounts, labels, and so on.
For more information, visitGmail help.
TIP: You can access your email from other accounts, like Microsoft
Exchange, in Gmail by adding the account in Gmail Settings.
To add a non-Gmail email account to Gmail:
1. Go to Settings > Personal > Accounts > Add account.
2. Touch the type of account you want to add. You may be able to
choose from choices like “Google,” “Personal,” or “Work.”
3. Choose “Google” if you want to add your Google Account. When you
sign in with a Google Account, all the email, contacts, Calendar events,
ANDROID QUICK START GUIDE TRY SOME APPS 43
Page 49

GooglePlay
and other data associated with that account are automatically synced
with your device.
4. Follow the on-screen instructions to add the account.
To change the settings of any of the accounts you added, follow these
steps:
1. Open the Settings menu on your device.
2. Under “Personal,” touch “Accounts” and select your account. If
you’re using a Google account, touch Google and
then your account.
If you purchased content on Google Play in the past, you’ll automatically
have access to this content on any Android device — just make sure
you’re signed in using the same account that you used to purchase it. To
check:
1. Open the Google Play app.
2. Touch Menu at the top left.
From here, you can view the current account or switch to another, view
your purchased apps, check your wish list, and so on.
ANDROID QUICK START GUIDE TRY SOME APPS 44
your favorite apps & games, movies & TV shows,
Google Play brings together all
books, music, and news & magazines in one place,
so you can reach it from any of your devices.
To open the Google Play app, touch Google
Play.
Page 50

To set preferences, clear your search history, and turn on user controls,
go to Menu > Settings. For example, to filter apps based on maturity
level or require a PIN for purchases, touch Content filtering or Require
authentication for purchases.
To find your content, open any of the Google Play apps from the All
Apps screen and touch Menu.
Google Play support
For more details about Google Play, including phone and email support
options, visitsupport.google.com/googleplay.
ANDROID QUICK START GUIDE TRY SOME APPS 45
Page 51

Camera
The Camera app lets you take photos, panoramic photos,
videos, and immersive 360-degree photo sphere shots,
including what’s above and below
you.
To open Camera:
• From the the lock screen, swipe from right to left.
• From the Home screen, touch Camera.
The first time you open Camera, you may be asked if you want it to
remember photo locations. This allows you, for example, to pinpoint
the location of a particular photo with Google Maps.
When you open Camera, you can choose from five different camera
modes. To see the modes, swipe left to right.
The Camera icon indicates Camera mode. To take a picture:
1. Frame your subject and watch for the focus ring.
To focus on a different part of the image, touch it. To zoom in, pinch
two fingers outwards. To zoom out, pinch two fingers inwards.
2. When the focus ring brackets disappear, touch the shutter button,
which is the camera button.
3. To see the image you just took, swipe from right to left.
To see stored photos, touch Photos in the top right.
When viewing
to modify photos and to delete.
stored photos, touch to share, Edit
Keep swiping to see other images in Photos.
To change to a different mode, swipe left to right to show the list of
camera modes:
ANDROID QUICK START GUIDE TRY SOME APPS 46
Page 52

Photo
Sphere
To capture a 360-degree or wide angle shot, pan or
tilt until the circle in the center of the screen moves
over a blue dot and records that portion of the
image. Keep moving over the dots until you’re
finished, then touch the check mark at the bottom of
the screen.
ANDROID QUICK START GUIDE TRY SOME APPS 47
Page 53

Panorama
Touch Panorama to begin taking a panoramic photo.
Find your starting point, and touch the shutter to take
the first picture in the panorama.
To take the subsequent pictures, slowly swivel the
phone in place to move the target icon over each gray
dot until the dot turns blue.
Keep hovering over the dots until all of them are blue
and your image is complete. Then touch the check
mark at the bottom of the screen.
Lens Blur
Touch Lens Blur, then slowly raise the device
following the arrow.
Camera
Touch Camera to take regular pictures.
Video
To start recording a video, touch the video button.
Touch it again to stop.
touch the circle with the three dots at the bottom right of the framed
image.
TIP: HDR+ on Nexus 5 and 6 automatically snaps a rapid burst of
photos and combines them to give you the best possible single shot.
To turn on HDR+, touch the … at the lower right of the shutter and
select HDR+.
To change settings for each mode such as flash, exposure, and so on,
ANDROID QUICK START GUIDE TRY SOME APPS 48
Page 54

For more details, visitCamera help.
Photos
The Photos app gives you instant access to all your
photos and videos associated with any Google Account
set up on your phone or tablet. To open it, touch Photos.
To open Photos from the:
• Camera app. Swipe from right to left.
• All Apps screen. Touch Photos.
When you’re signed into your device with your Google Account, the
Photos app makes it easy to auto-backup all the photos and videos you
take, organize them, and share with friends.
You can also browse, search, crop, edit, and tag photos, and create
albums and movies.
Touch Menu to:
• Switch to or from Google+.
• Organize and edit your photos and videos.
• Create and browse albums.
• Explore Auto Awesome animations, panoramas, or merged group
shots created for you automatically.
• Browse photos of yourself.
For more details, visitPhotos help.
Contacts
ANDROID QUICK START GUIDE TRY SOME APPS 49
Page 55

The Contacts app gives you quick access to everyone
you want to reach. To open it, touch the Contacts icon
on a Home or All Apps screen.
When you first turn on your device and sign into a Google Account,
existing contacts from that account are synced with your Contacts app.
After that, your contacts stay in sync automatically on your different
devices or a Web browser.
If you use Exchange, you can also sync that contact information with
Contacts.
All your Contacts information is available from Gmail, Google Talk, and
other apps. As you add contacts from different sources, they’re synced
automatically across all the places you need them.
When you open the Contacts app, you can:
• View all contacts or favorites. Choose from the top of the screen.
• Add a contact. Touch Add Contact.
• Read details. Touch a name to see details for a contact or group.
• Share the contact or place a frequently used contact on the Home
screen. Touch Menu.
• Edit details. While viewing a contact, touch Edit at the top of the
screen to edit the contact’s information.
• Change your settings. While viewing the main list screen, touch
Menu to import or export contacts, choose display options and add
or edit accounts.
For more information, visit Contacts help.
Messenger
ANDROID QUICK START GUIDE TRY SOME APPS 50
Page 56

The Messenger app for sending SMS/text messages is
available for devices running Android Lollipop, 5.0 or
higher.
To read and respond to messages, follow these steps:
1. When you receive a new message, you’ll get a notification on your
device and a new message icon will appear in your notification
panel.
2. To open and read the message, touch the new message notification
in the notifications panel.
3. To respond to a message, touch the Send message box and type your
message.
4. To send, touch Send.
To create and send a text message, follow these steps:
1. Go to All Appsand touch Messenger.
2. In the main Messenger screen, touch .
3. Enter a name from your contacts or a mobile phone number in the To
field. To send a group text message, touch the group icon in the
To field and touch additional contacts or enter additional mobile
phone numbers. .
• Below the To field, you can choose from your frequent contacts by
touching Frequents or your list of contacts by touching All
contacts.
• If you’re sending a group message, make sure you turn on group
messaging in Messenger setting.
• If you choose to enter a name or mobile number in the Tofield,
matching contacts appear as you type, if any exist among your
contacts. You can touch a suggested recipient or continue
entering the phone number.
ANDROID QUICK START GUIDE TRY SOME APPS 51
Page 57

4. To write your message, touch the Send message box and type your
message. Learn more about using Google Keyboard and emoji. See
“Use the keyboard” on page 34.
5. If you touch the Back button while composing a message, it’s saved
as a draft in Messenger. Touch the conversation to resume
composing it.
6. To send, touch Send.
You can manage your messages, conversations, notifications, and
contacts right from Messenger home screen. You can also change your
sound, notification, and other settings.
Delete messages
1. Open a conversation in Messenger.
2. Touch and hold the message you wish to delete.
3. When the “Message options” box appears, touch Delete.
Delete conversations
1. While viewing your list of conversations in Messenger, touch and hold
a conversation to select it.
2. To delete the conversation, touch Trash in the top right corner of
the screen.
Manage conversations
From the Messenger home screen, touch and hold a conversation or a
selection of conversations to take any of these actions:
• Archive. Touch Archive to store the conversation.
• Delete. Touch to delete the conversation from the Messenger app.
• Turn notifications on or off. Touch Notificationto turn
notifications on or off for the conversation.
ANDROID QUICK START GUIDE TRY SOME APPS 52
Page 58

• Add contact. Touch Add contact to add the conversation’s contact
to your list of contacts.
For more information, visit Messenger help.
Hangouts
With Hangouts, you can make video calls to anyone with
a Google Account. You can share photos and your
is also your default messaging app.
For more information about using Hangouts, visit Hangouts help.
location with others. On some Nexus devices, Hangouts
Calendar
Use the Calendar app to view and edit your schedule. To
open it, touch Calendar on a Home or All Apps screen.
When you first set up your Android device, you have a chance to
configure it to use a Google Account (such as Gmail). The first time you
open the Calendar app on your phone or tablet, it displays any existing
calendar events from that Google Account on the web.
As you edit events, they’re synced automatically across all the places you
need them.
To change the Calendar view, touch the Menu and choose Schedule,
Day, or Week from the top of the screen.
ANDROID QUICK START GUIDE TRY SOME APPS 53
Page 59

From any of these views, you can:
• Read or edit event details. Touch an event to view its details.
• Manage events and calendars. Touch icons across the top of the
screen or the menu to search or create events, return to today, or
adjust settings.
To email everyone who is invited to an event, you have two options:
• Open the event from the Calendar app at any time and touch Email
guests. You have a list of quick responses or you can write your own.
• When a notification of the event arrives just before the meeting
starts, swipe down the notification shade. Then swipe using one
finger to expand the notification if necessary, and touch Email guests.
For more information, visitCalendar help.
ANDROID QUICK START GUIDE TRY SOME APPS 54
Page 60

5 Settings
Settings controls the core Android settings for networks,
hardware, location, security, language, accounts, etc.
access frequently, such as Wi-Fi or brightness, is through Quick Settings.
See “Quick Settings” on page 7.
You can control many other settings for your device and account by
swiping down from the top of the screen twice and touching
. These are the main types of device or account settings available.
Click the links to see related help articles.
• Wireless & networks. Wi-Fi, Bluetooth, data usage, Android Beam,
and related settings.
• Device. Sound, battery, sleep, and other display settings.
• Location.
• Language.
• Sync.
• Backup/reset options.
• Accounts.
• Security. Passwords and certificates, screen lock, encryption, and app
installation sources.
• System. Date, time,accessibility, and device information.
The fastest way to adjust system settings that you
55
Page 61

ANDROID QUICK START GUIDE SETTINGS
Most apps also include their own settings, typically available from the
menu on the upper left side of the app, or from the
Menu > Settings. On Google Play edition devices, settings may be in
the Menu button.
Some useful settings are also available from the Google
Settings app.
The Google Settings app let you adjust adjust
preferences for commonly used Google apps and
services in one place, including Google+, Location,
Search, and the Android Device Manager.
To open Google Settings, touch the All Apps.
From here, you can also:
• Control how interest-based Google ads are displayed in non-Google
apps.
• Under Connected apps, you can view all the apps that have access to
your Google Account information, including the type of access
granted to each app.
56
Page 62

ANDROID QUICK START GUIDE SETTINGS
6 Accessibility
To use the accessibility options, open Settings > System >
Accessibility.
To view detailed information about setting up these options, visitAndroid
Accessibility. Options for people with visual impairments include the
following:
Captions: You can turn on captions for your device and specify the
language, text size, and style. For some apps, you have to turn on the
captions in the app itself.
TalkBack is a screen reader from Google that comes with your Android
phone. It uses spoken feedback to describe events, such as notifications,
and the results of your actions, such as opening an app. When TalkBack
is on, you have to double-tap in order to select something. TalkBack
settings let you control the nature of TalkBack speech, feedback, and
touch exploration (Explore by touch).
Explore by touch is a system feature that works with TalkBack, allowing
you to touch your device’s screen and hear what’s under your finger via
spoken feedback. It is helpful to people with low or no vision. In TalkBack
settings, you can change the settings of Explore by touch, like managing
57
Page 63

gestures and how lists are scrolled.
ANDROID QUICK START GUIDE ACCESSIBILITY
Display and sound accessibility options include increasing the text size,
changing the speed at which text is spoken, color inversion, color
correction, and high contrast text.
If you have low vision and don’t plan to use Explore by Touch,
visitsupport.google.com/android to see Help content formatted for
sighted users. You can make reading and navigating this material easier
by increasing the text size – just open Chrome, go to Menu > Settings >
Accessibility, and drag the slider to adjust the text size.
You can also try magnification gestures, which allow you to zoom in and
out, as well as temporarily magnify what’s under your finger. To try
magnification gestures, go to Settings > Accessibility > Magnification
gestures.
58
Page 64

FCC Warning
This device complies with part 15 of the FCC Rules. Operation is subject to the
following two conditions: (1) This device may not cause harmful interference, and (2)
this device must accept any interference received, including interference that may
cause undesired operation.
Any Changes or modifications not expressly approved by the party responsible for
compliance could void the user's authority to operate the equipment.
Note: This equipment has been tested and found to comply with the limits for a Class
B digital device, pursuant to part 15 of the FCC Rules. These limits are designed to
provide reasonable protection against harmful interference in a residential installation.
This equipment generates uses and can radiate radio frequency energy and, if not
installed and used in accordance with the instructions, may cause harmful
interference to radio communications. However, there is no guarantee that
interference will not occur in a particular installation. If this equipment does cause
harmful interference to radio or television reception, which can be determined by
turning the equipment off and on, the user is encouraged to try to correct the
interference by one or more of the following measures:
-Reorient or relocate the receiving antenna.
-Increase the separation between the equipment and receiver.
-Connect the equipment into an outlet on a circuit different from that to
which the receiver is connected.
59
Page 65

-Consult the dealer or an experienced radio/TV technician for help.
Specific Absorption Rate (SAR) information:
This 5.5 inch smart phone meets the government's requirements for exposure to radio
waves. The guidelines are based on standards that were developed by independent
scientific organizations through periodic and thorough evaluation of scientific studies.
The standards include a substantial safety margin designed to assure the safety of all
persons regardless of age or health.
FCC RF Exposure Information and Statement
The SAR limit of USA (FCC) is 1.6 W/kg averaged over one gram of tissue. Device
types: X5.5T(FCC ID: O55552316) has also been tested against this SAR limit. The
highest SAR value reported under this standard during product certification for use at
the ear is 0.095W/kg and when properly worn on the body is 0.265W/kg. This device
was tested for typical body-worn operations with the back of the handset kept 1cm
from the body. To maintain compliance with FCC RF exposure requirements, use
accessories that maintain a 1cm separation distance between the user's body and the
back of the handset. The use of belt clips, holsters and similar accessories should not
contain metallic components in its assembly. The use of accessories that do not
satisfy these requirements may not comply with FCC RF exposure requirements, and
should be avoided.
60
Page 66

Body-worn Operation
This device was tested for typical body-worn operations. To comply with RF exposure
requirements, a minimum separation distance of 1cm must be maintained between
the user’s body and the handset, including the antenna. Third-party belt-clips, holsters,
and similar accessories used by this device should not contain any metallic
components. Body-worn accessories that do not meet these requirements may not
comply with RF exposure requirements and should be avoided. Use only the supplied
or an approved antenna.
61
 Loading...