

Page 1
You will need a medium size phillips screwdriver.
Step 1 Unpack the sprayer
Remove the sprayer and components from the box.
Unscrew the sprayer lid and remove the spare parts
bag. Open the bag and take out the four screws and
one nut as well as the spray nozzle. Seal the bag and
keep the spare parts in a safe place.
Swagman Sprayer 8Ltr Assembly Guide
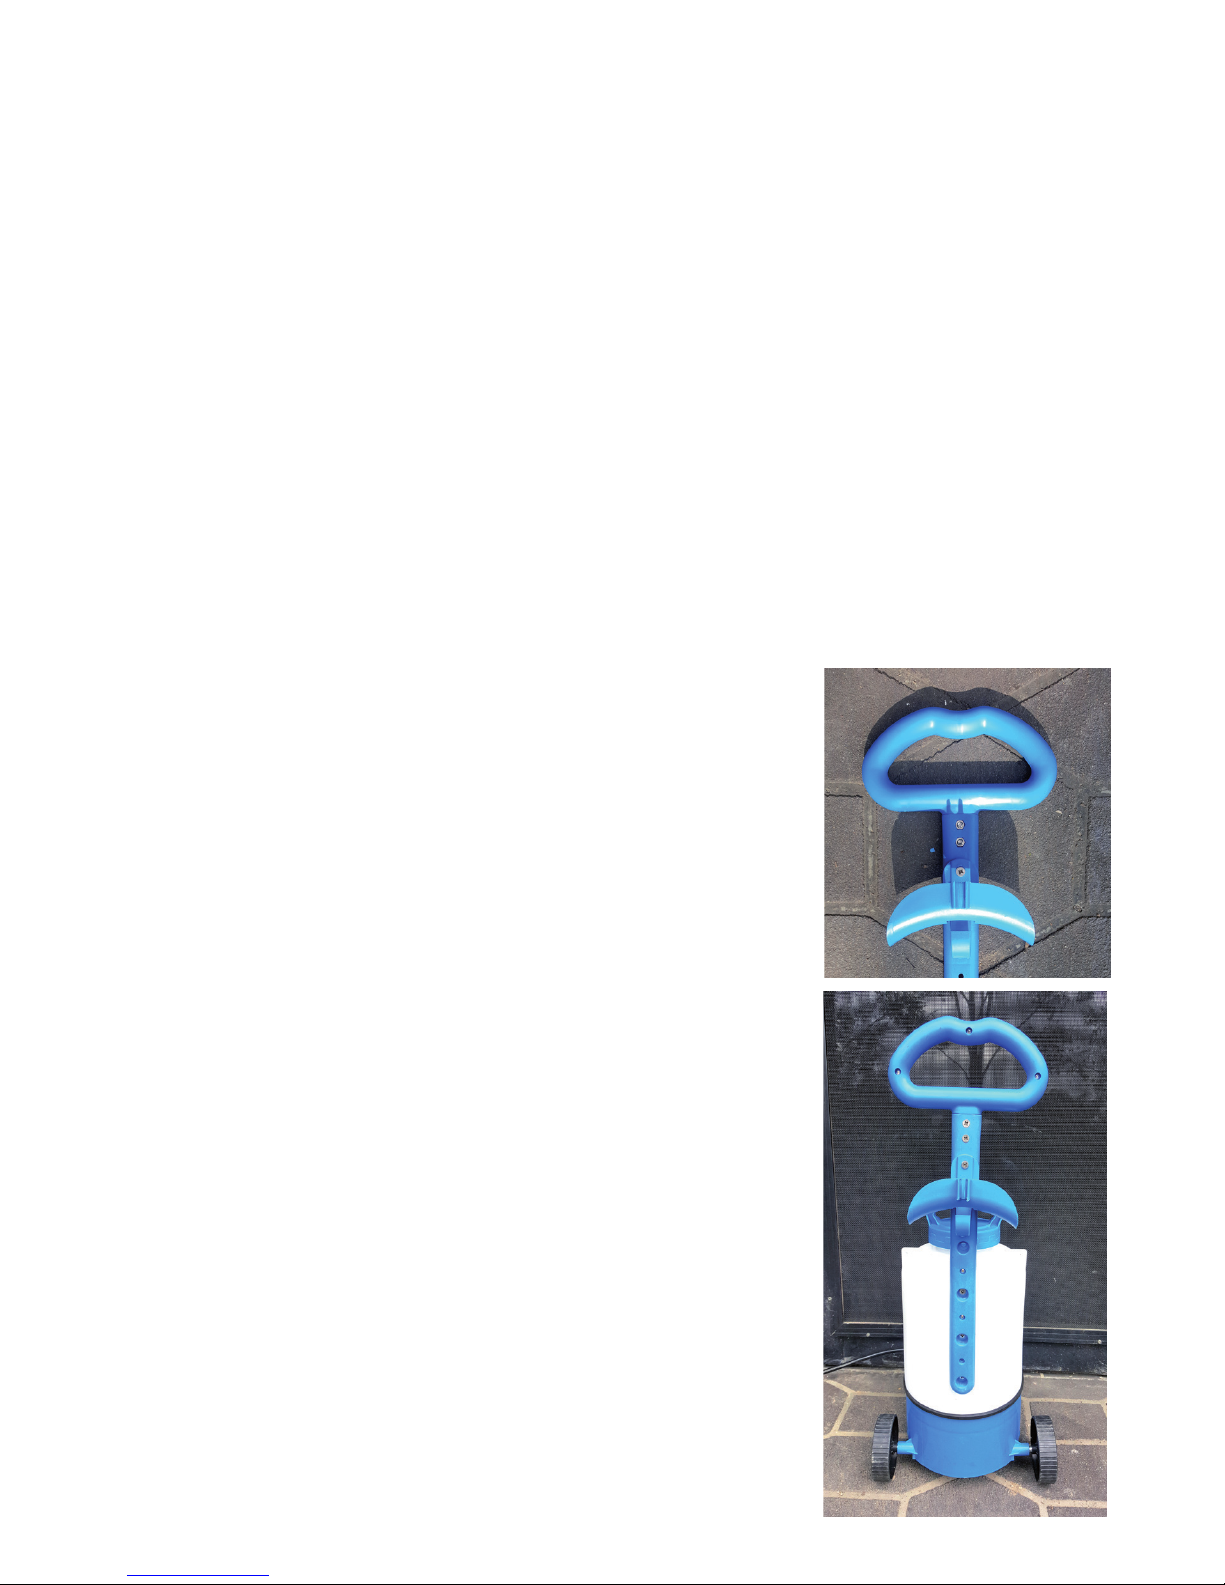
Step 2 Assemble the handle
Position the hose holder /lance x as shown. Attach
using the third screw hole from the top of the handle,
using the long screw and nut.
Step 3 Attach the handle to the sprayer
Position the handle on the back of the tank as shown.
Line up the screw holes and attach using the 3 short
screws.
NOTE You can position the handle higher if required
and attach with 2 screws.
Page 2
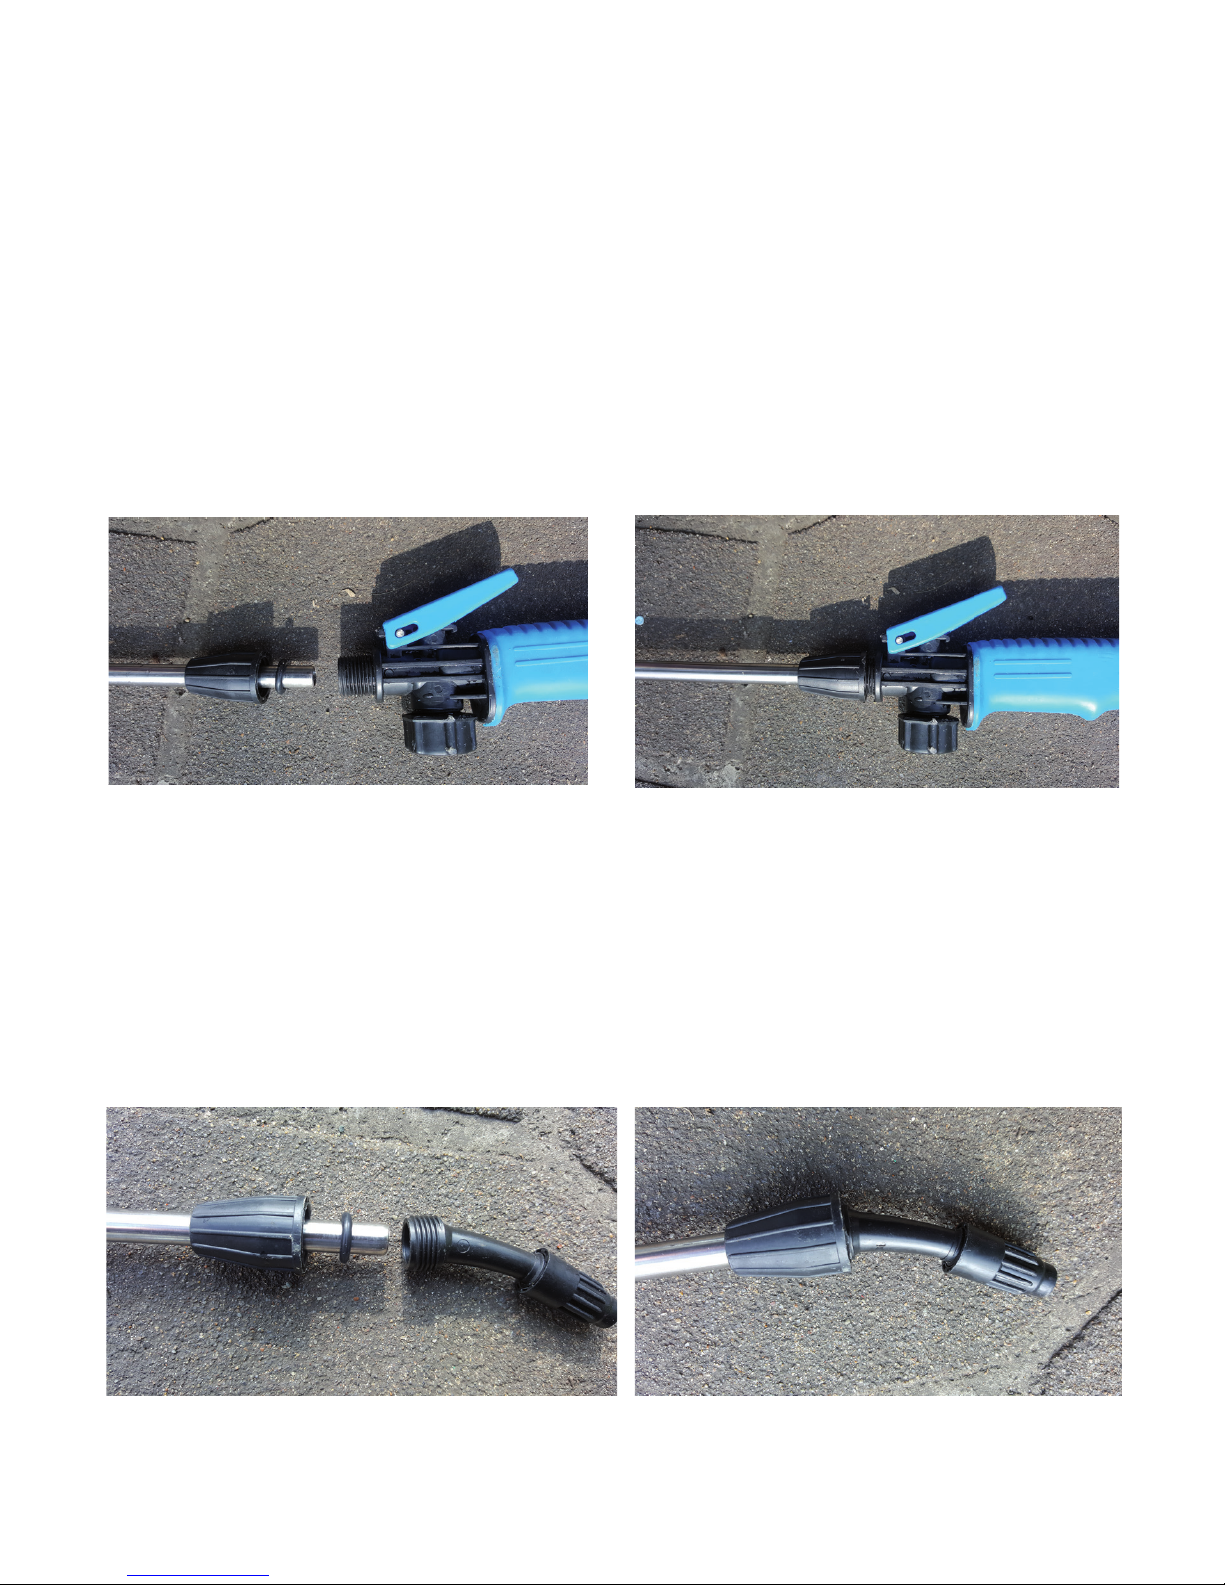
Step 4 Attach the lance to the handpiece
At each end of the lance is a conical ferrule with an O ring which sits up inside the ferrule when it is screwed onto a tting.
Position one end of the lance into the handpiece as shown, and secure by
screwing the ferrule, checking rst that the O ring is in position. Hand tighten
rmly but do not over tighten.
Step 5 Attach the spray nozzle to the lance
Position the spray nozzle on the other end of the lance as shown and secure
by screwing the ferrule, checking rst that the O ring is in position. Hand
tighten rmly but do not over tighten.
 Loading...