

165mm+-2
122mm+-2
This manual can guide you to use this camera
with proper operation and correct setting.
Please read it carefully and optimize the
performance in accordance with your
preference.
User ManualUser Manual
XR4040854
1. :XR4040854 2. 3. 80P ,
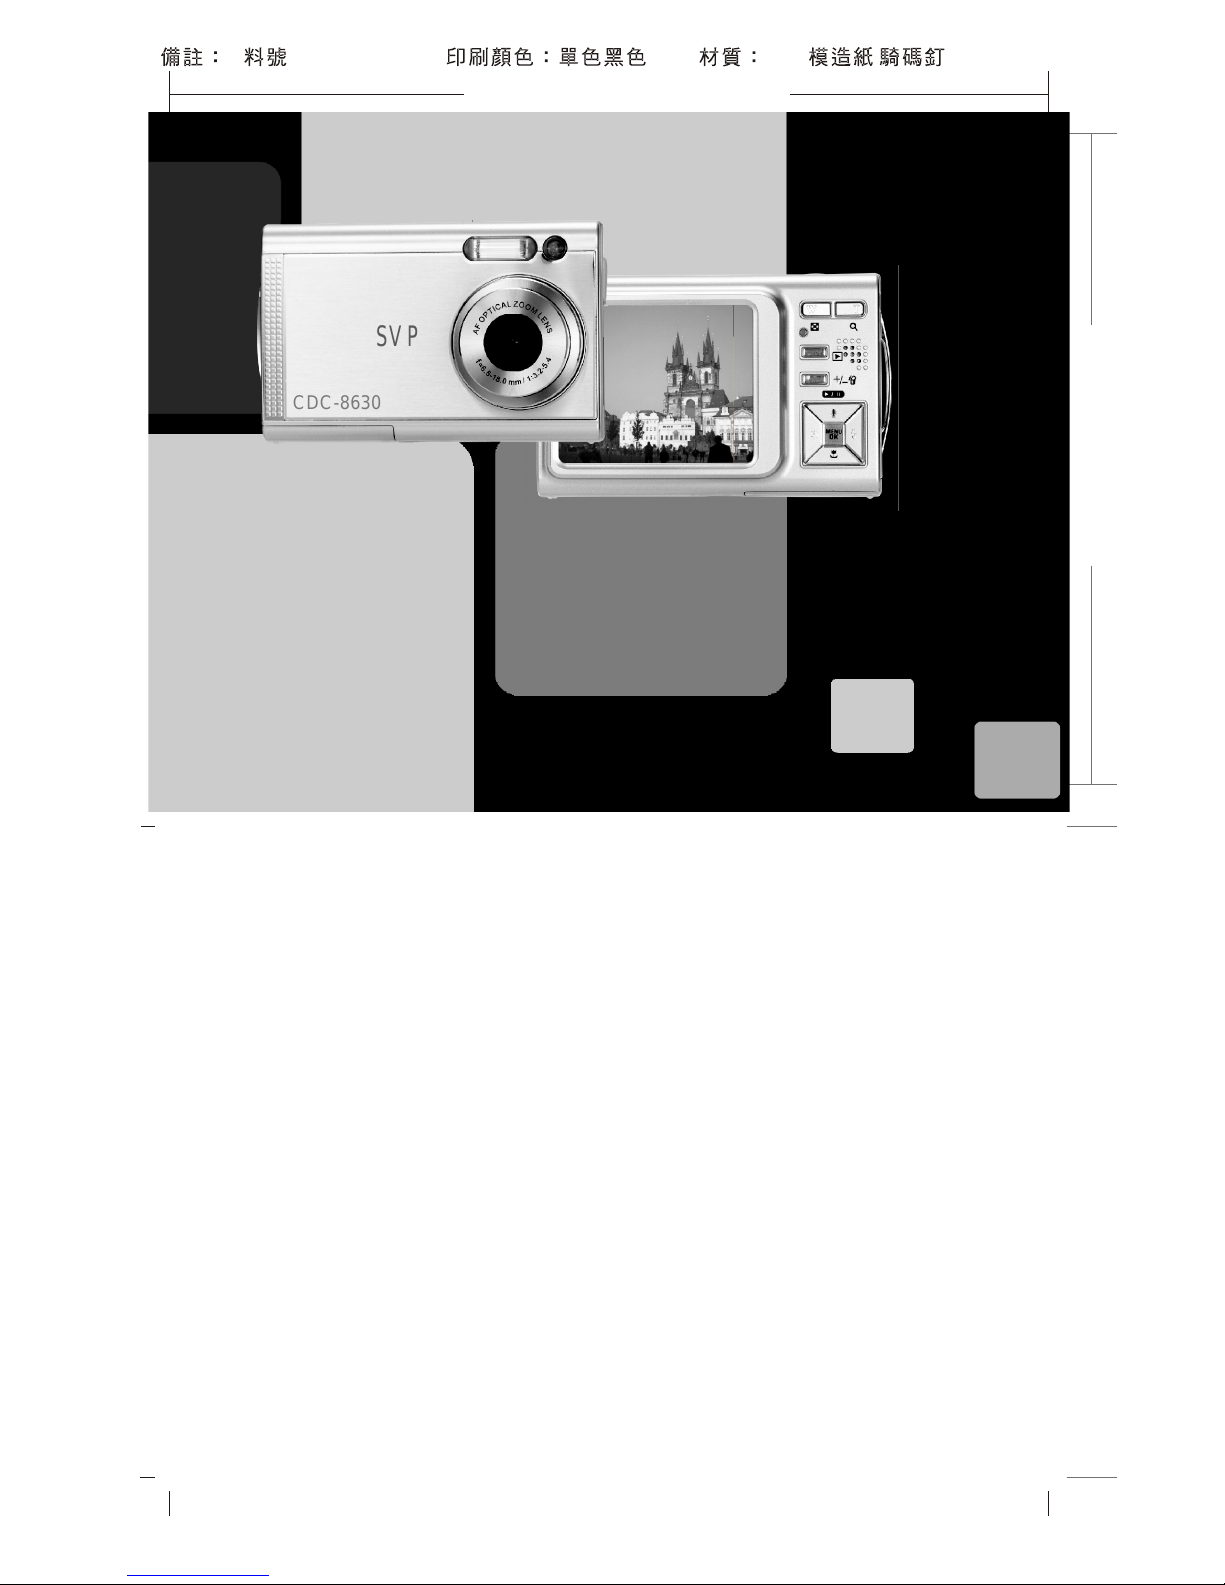
SVP
CDC-8630
165mm+-2
122mm+-2
3
2
Table Of Contents
Cautions
Cautions ---------------------------------------------------------------------------------- 03
Overall Introduction ------------------------------------------------------------------ 04
Accessories -------------------------------------------------------------------------- 04
External View ----------------------------------------------------------------------- 05
Key Function Button -------------------------------------------------------------- 05
Icon Display -------------------------------------------------------------------------- 06
Getting Ready ---------------------------------------------------------------------- 07
Turn On or Off the Camera ------------------------------------------------------- 07
Loading the Batteries --------------------------------------------------------------- 07
Inserting or Removing an SD Card --------------------------------------------- 08
Attaching the Wrist Strap ---------------------------------------------------------- 08
Basic Photography ------------------------------------------------------------------ 09
Advanced Functionality Settings ------------------------------------------------ 11
Under Image Shooting Mode ( ) -------------------------------------------- 11
TELE / WIDE Button ----------------------------------------------------------- 11
Macro Mode -------------------------------------------------------------------- 12
Flash Mode ---------------------------------------------------------------------- 12
Self-timer Mode ---------------------------------------------------------------- 13
Voice Memo Mode ------------------------------------------------------------ 13
Exposure / Delete Button ----------------------------------------------------- 14
Image Size Setting ------------------------------------------------------------- 15
Image Quality Setting ---------------------------------------------------------- 15
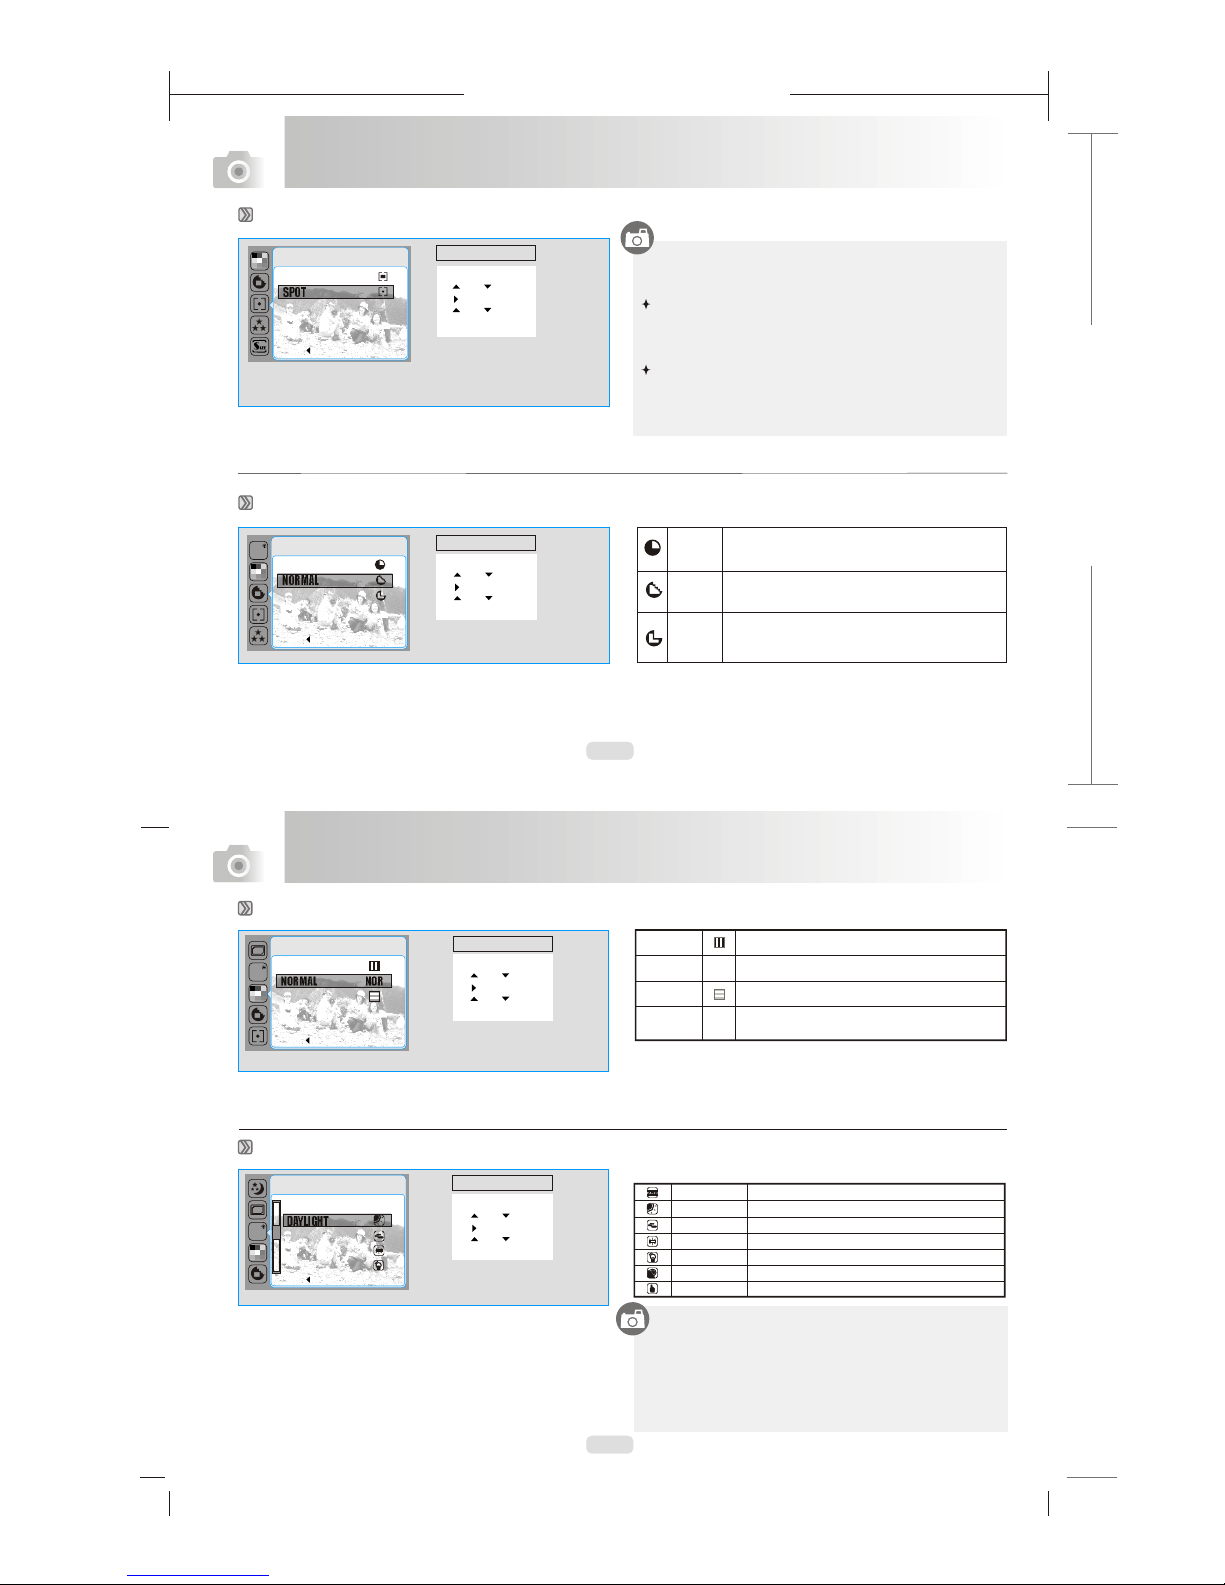
Metering Setting ----------------------------------------------------------------- 16
Sharpness Setting -------------------------------------------------------------- 16
Effect Setting -------------------------------------------------------------------- 17
White Balance Setting --------------------------------------------------------- 17
Photo Frame Setting ----------------------------------------------------------- 18
Night Scene Setting ------------------------------------------------------------ 19
Histogram --------------------------------------------------------------------------19
Continuous Shooting- ----------------------------------------------------------- 20
SETUP------------------------------------------------------------------------------ 20
Under Playback Mode ( ) ----------------------------------------------------- 21
Playback of a Still Image ------------------------------------------------------ 21
Playback of a Movie Clip ------------------------------------------------------ 21
Thumbnail Display (Small Images) ------------------------------------------ 22
Exploring an Image ------------------------------------------------------------- 22
Displaying Image Information ------------------------------------------------ 23
Starting a Slide Show --------------------------------------------------------- 23
Do not try to disassemble the camera by yourself, which may damage the camera or cause electric shock.
Do not fire the flash in a close distance (less than 1 meter); it may hurt your eyes.
Keep the camera away from the reach of children or animals to prevent them from swallowing the batteries or small accessories.
Stop using the camera if any kind of liquid or foreign object enter the camera. If it happens, power off the camera and contact with
your dealer for further help.
Do not operate this camera with wet hands; it may cause electric shock.
The camera may be damaged in an environment of high temperature.
Do not use different types of batteries or new and used batteries at the same time.
To avoid electricity leakage, please remove the batteries if the camera is not in use for a long period.
It is normal that the temperature of the camera body rises if the camera works for a long time.
SETUP ---------------------------------------------------------------- 27
Under Digital Music Player Mode( ) ------------------------------------- 38
Under Voice Recording Mode( )------------------------------------------- 37
Setting LCD (ICON)-------------------------------------------------------- 36
Printer Connection (PictBridge Mode)------------------------------------- 42
TV Connection ------------------------------------------------------------------- 47
PC Connection ------------------------------------------------------------------ 48
Appendix ------------------------------------------------------------------------- 59
Setup Settings ( SETUP ) ------------------------------------------------------- 30
165mm+-2
122mm+-2
5
4
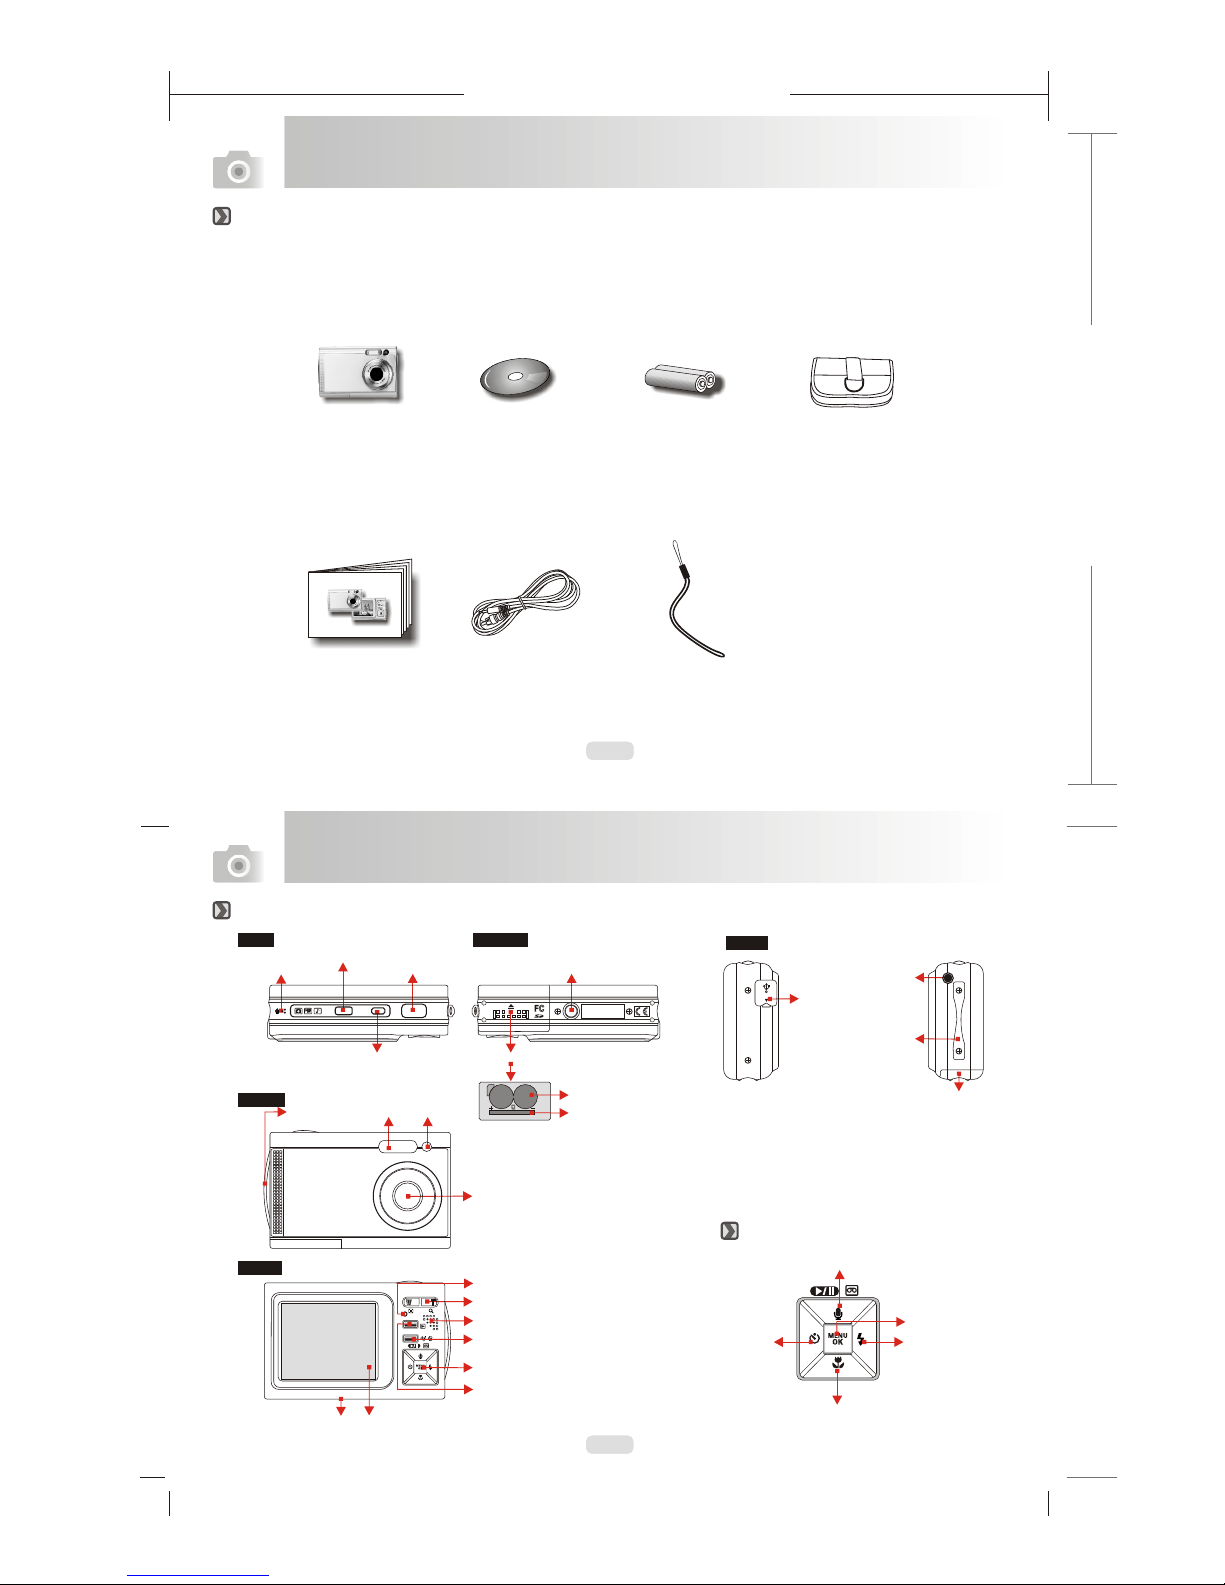
Overall Introduction
Digital Camera Camera Driver 2 x AA Batteries Camera Pouch
& Software
User Manual / USB / Video Cable Wrist Strap
Quick Start Guide
Accessories
Overall Introduction
Side
Top Bottom
Front
Back
External View
Key Function Button
Flash
LTPS LCD Montior
Key Function Button
Strap Eyelet
LED
Tele / Wide Button
Shutter Button
Power Button
Microphone
Strap Eyelet
USB/Video
Connector
Voice Memo / Play / Pause / Up Button
Flash / Right
Button
Macro / Down Button
Self- timer /
Left Button
OK / Menu
Button
Lens
Battery/SD
Chamber Cover
Memory Card Slot
Battery Chamber
Playback Button
Mode Button
Earphone Jack
VIDEO OUT
Tripod socket
OPEN
Battery / SD chamber cover
Speaker
Exposure/Delete Button
Tripod socket
POWERMODE
LED indicator
SVP
CDC-8630
SVP
CDC-8630
SVP
CDC-8630
165mm+-2
122mm+-2
6
7
Icon Introduction
Getting Ready
Icon Display
Turn On or Off the Camera
Press down the "POWER" button to turn on the camera.
Repeat the way above to turn off the camera.
Loading the Batteries
Battery Status
( )Battery Full
( )Battery Half
Drained
( )Battery Drained
Working Mode
( )Image ModeShooting
( )Night Scene Mode
( )Photo Frame Mode
( )Movie Clip Mode
( )Voice Recording
Mode
1
2
Flash Mode
(
)
Auto Flash
(
)
Auto Flash with
Red-eye Reduction
( )Slow Sync
(
)
Fill-in Flash
( )Flash Off
4
Self-timer
( )10 Seconds
( ) 2 Seconds
( ) Double
2S
5
( )Playback Mode
Memory Card
( )
( )Internal Memory
White Balance
( )Auto
( )Daylight
( )Cloudy
( )Fluorescent
( )Tungsten
( )Sunset
( )Custom
12
13
Quality
( )Super Fine
( )Fine
( )Normal
15
( ) Voice Memo
Focus Range
( ) Macro
Metering
( )Spot
( )Multi
Exposure 0.5( )
6
11
Digital
Zoom
( ) 5.0X
Zoom In / Out
Indicator
18
Available Shots( 7 )
17
5
1
2
4
5
6
8
17
3
10
20
11
12
13
14
15
16
7
9
Size
( )2848x2136
( )2560x1920
( )2304x1728
( )2048x1536
( )1600x1200
16
( )3328x2496
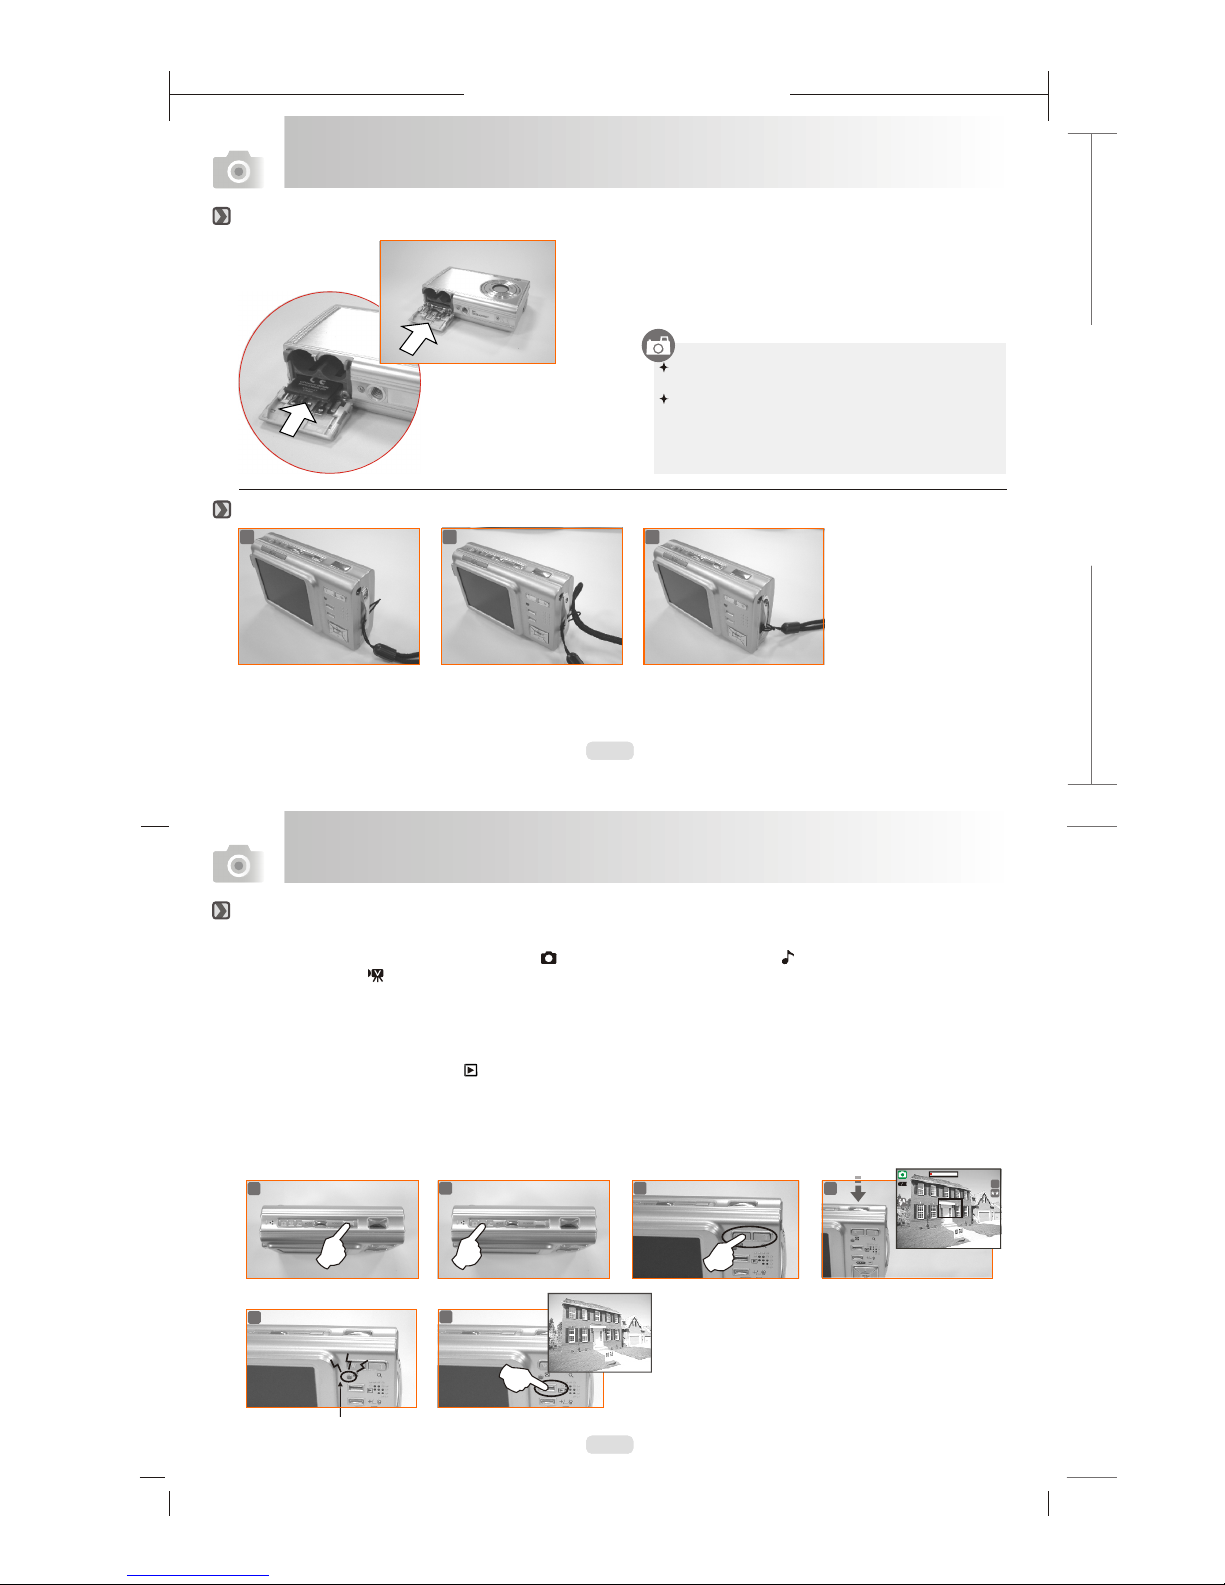
1. Power off the camera.
2. Slide out Battery Chamber Cover to open it.
3. Load 2 AA batteries into the battery chamber following
the polarity indications.
4. Close the Battery Chamber Cover.
The below symbols on the LCD Monitor are the indication of
the battery status.
( ):Battery power is full.
( ):Battery power is half drained. Have new batteries ready.
( ):Battery power is drained. Replace with new batteries.
2 pcs of AA alkaline / Ni-MH batteries are strongly
recommended for normal operation.
The power of batteries may run off if the batteries are kept
inside the camera for a long time without using. Please
remove the batteries when the camera is not in use.
Do not use manganese batteries which they cannot supply
sufficient power to support the operation of the camera.
Batteries may not work normally under 0 C or over 40 C .
It's normal that the temperature of the camera rises after
used for a long period.
+
Positive
-
Negative
2626
NOR
( ) Black & White
( ) Normal
( ) Sepia
( ) RGB
EFFECT
R
G
B
8M
X1.2X1.2
07 : 03 AM
2006/01/31
07 : 03 AM
2006/01/31
1
Continuous Shooting
( )Single
( )Continuous
3
1
7
8
( )
Han d Shake
078 560 256 349078 560 256 349
Sharpness
( )Soft
( )Normal
( )Vivid
14
18
19
20
19
( ) AUTO adjust
( ) ISO=100
( ) ISO=200
( ) ISO=400
ISO
9
10
Histogram( )
HISTOGRAM
100
AUTO
200
400
MODE
POWER
INT
SVP
165mm+-2
122mm+-2
8
9
165mm+-2
122mm+-2
Formatting a brand new SD card is strongly recommended
for first use.
Getting Ready
Getting Ready
Attaching the Wrist Strap
Inserting or Removing an SD Card
1.Power off the camera.
2.Open the Battery Chamber Cover.
3.Insert the SD card into the card slot and press it down
until a click sound happens. (Press down the inserted
SD card again to get it out once a click sound happens.)
4.Close the Battery Chamber Cover.
The image(s) can be stored either in built-in flash memory
or in memorycard. When the memory card is inserted, the
images willbe stored in the memory cardrather than the
built-in flash memory.On the other hand, the images will be
stored in thebuilt-in flashmemory when a memory card is
not inserted.
Basic Photography
3
2
1
1. Press down the POWER button to turn on the camera.
3. Use TELE/WIDE Buttonto zoom in and zoom out.
4. Press the shutter button half way to do the focusing and then press the shutter button fully down to capture an image.
5. The LED Indicator starts blinking right after the Shutter Button is released. Once the LED Indicator stops blinking, you are
ready to take another shot.
6.
Or you can press Playback Button ( ) to review the images or movie clips you just took.
2. Set the Mode Button at Image Shooting Mode ( ) for still image, Digital Music Player ( ) for digiatal music playing and
Movie Clip Mode ( ) for video recording.
Blinking
6
4
1
2
5
100-0021
3
2626
8M
SVP
CDC-8630
CDC-8630
165mm+-2
122mm+-2
10
11
A message of "Low Light!" appearing on the LCD Monitor is a warning to remind you to go to the Flash Mode and select Auto Flash
or Fill-in flash to get more light sources so as to compose a superior quality image.
In such cases shown as follows, please release the shutter button, then try to re-compose the shot and focus again because the Auto Focus
function may be difficult to use with.
The subject is far away from the photographer or in the dark.
The subject is viewed through a piece of glass or window.
A fast-moving or a flashing subject is passing through.
The subject has a reflection attribute like a mirror, a luminous body, or a lustrous subject.
Do not touch the lens when it is in use.
Getting Ready
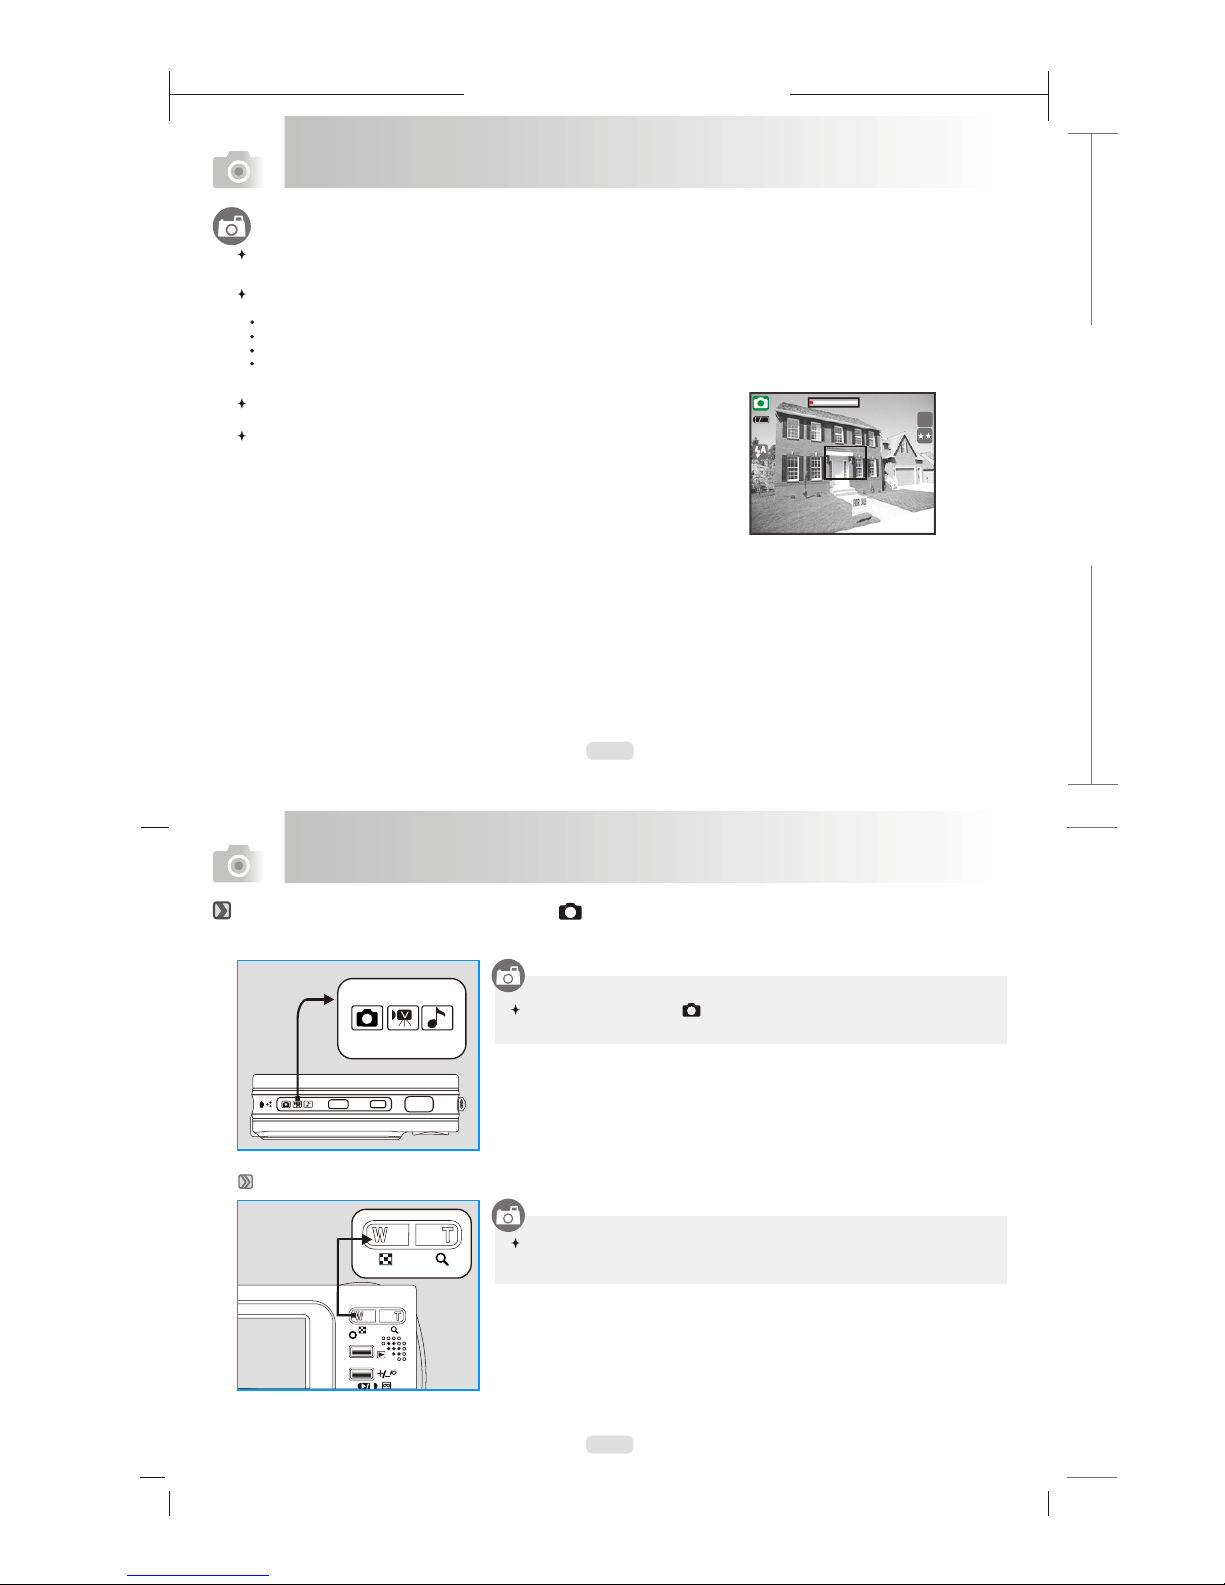
Press the Mode Button at ( ).
Advanced Functionality Settings
Under Image Shooting Mode ( )
TELE / WIDE Button
Regarding any advanced functionality settings, please refer to the next section - Advanced Functionality Settings. Note that press the MENU Button to enter the advanced
settings and please press down the MENU Button again anytime if you would like to exit
the setting.
The zoom bar, appearing on the top side of the LCD monitor shows the current
digital zoom status.
2626
8M
X1.2X1.2
POWERMODE
165mm+-2
122mm+-2
12
13
Advanced Functionality Settings
Advanced Functionality Settings
In Image Shooting Mode:
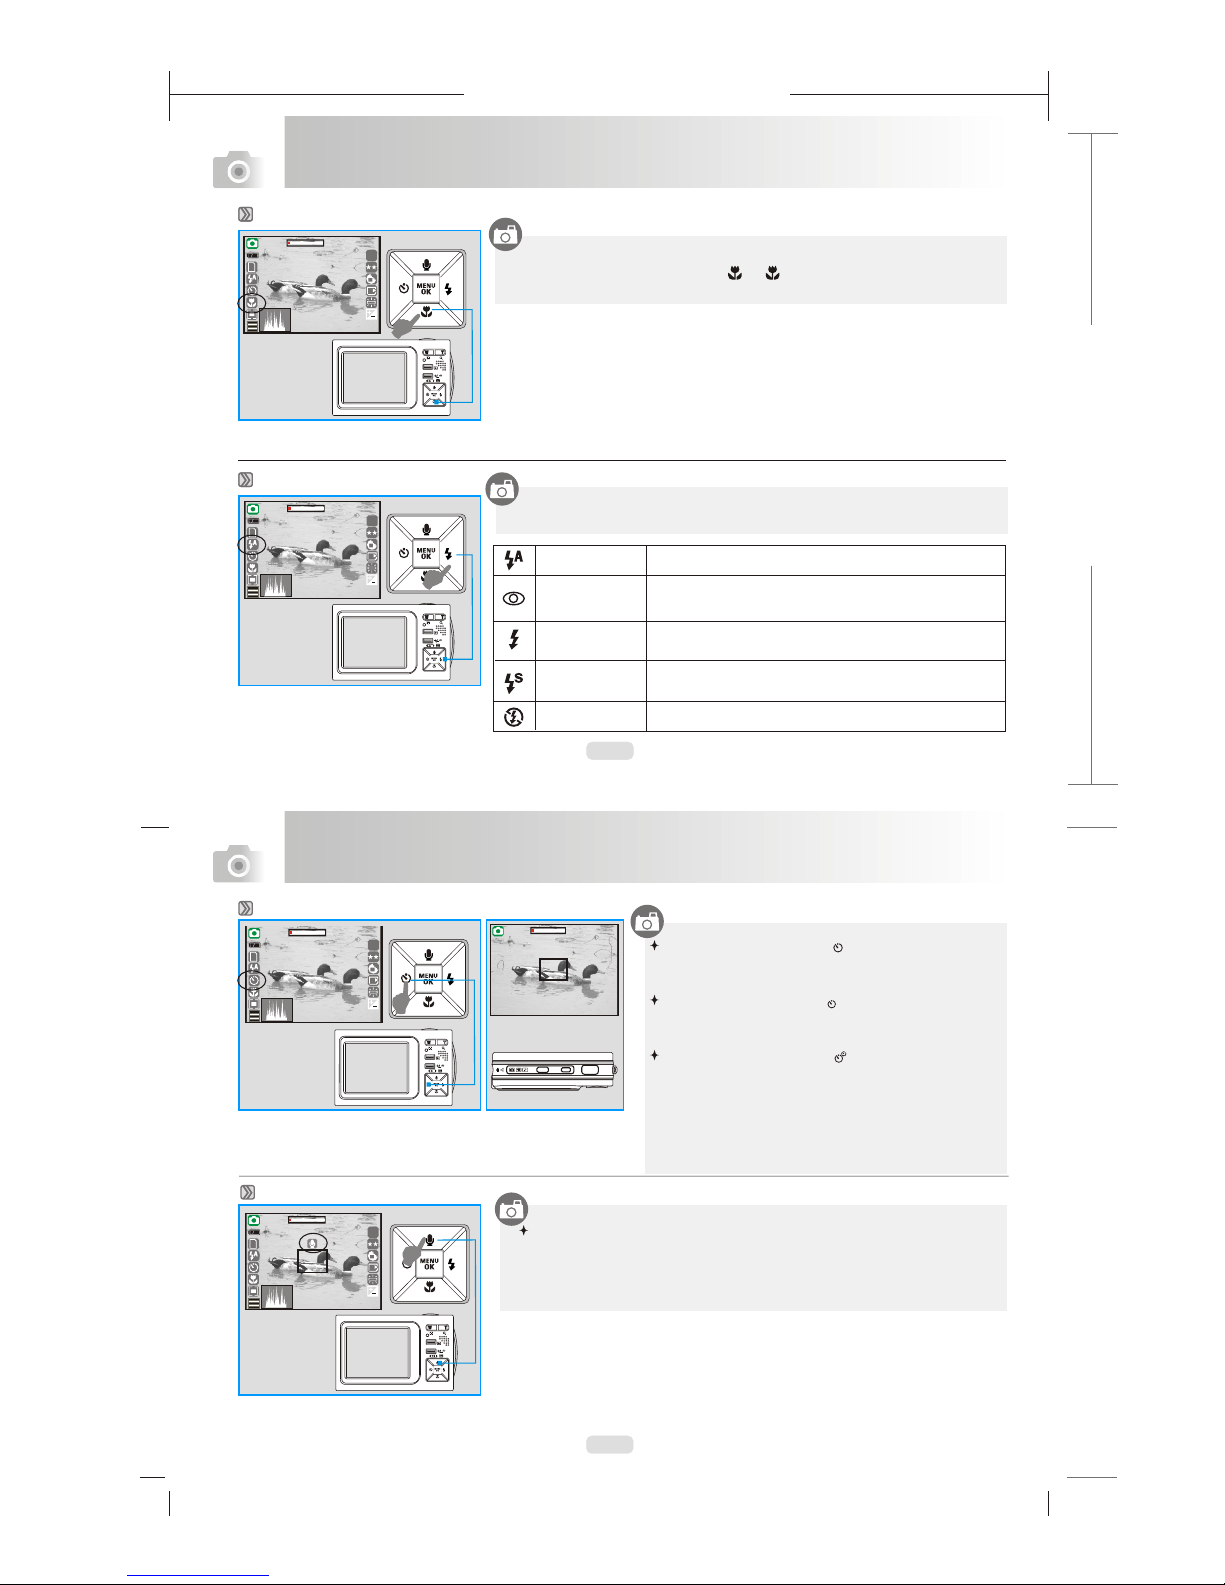
1. When the Voice Memo Button is pressed down, the Voice Memo icon will
show up on the LCD.
2. Press down the Shutter Button to take a picture.
3. Then you can record a voice right after the image is taken.
4. While recording, you can press Shutter Button to stop recording.
Voice Memo Mode
Macro Mode
Self-timer Mode
Auto Flash
Auto Flash with
Red-eye
Reduction
Slow Sync
Fill-in Flash
Flash Off
The flash fires automatically as required under shooting mode.
To avoid the subject's eyes appear red in the picture, use this
mode can effectively minimize the likelihood of the red-eye
effect.
The flash will fire and the camera will set the shutter speed at
a proper speed.
This m
ircumstances.
ode will enable the flash to fire in any
c
The mode will disable the flash to fire in any circumstances.
Flash Mode
By pressing down the Flash/Right Button you may select different flash
options as follows:
When you take a shot of a very close-up of
Macro icon ( ). ( ) will appear on the LCD screen for
notice.
object within the distance of 10 cm ,
set the Macro Button at
2626
8M
X1.2X1.2
1
078 560 256 349078 560 256 349
2626
8M
X1.2X1.2
07 : 03 AM
2006/01/31
07 : 03 AM
2006/01/31
1
078 560 256 349078 560 256 349
2626
8M
X1.2X1.2
07 : 03 AM
2006/01/31
07 : 03 AM
2006/01/31
1
078 560 256 349078 560 256 349
2626
8M
X1.2X1.2
07 : 03 AM
2006/01/31
07 : 03 AM
2006/01/31
1
078 560 256 349078 560 256 349
99
POWERMODE
With the 10 sec. Self-timer ( ):
The image will be taken after an interval of 10 seconds
once the Shutter Button is released.
( )
( )
With the 2 sec. Self-timer :
The image will be taken after an interval of 2 seconds once
the Shutter Button is released.
With the Double self-timer :
The image will be taken twice once the Shutter Button is
released. The first image will be taken after an interval of
10 seconds. The second one will be taken after an interval
of 2 seconds continuously right after the first .
Note:
The self-timer function will be disable once the continuous
shooting function is activated.
shooting
2S
165mm+-2
122mm+-2
14
15
2626
8M
4SEC4SEC
Advanced Functionality Settings
Advanced Functionality Settings
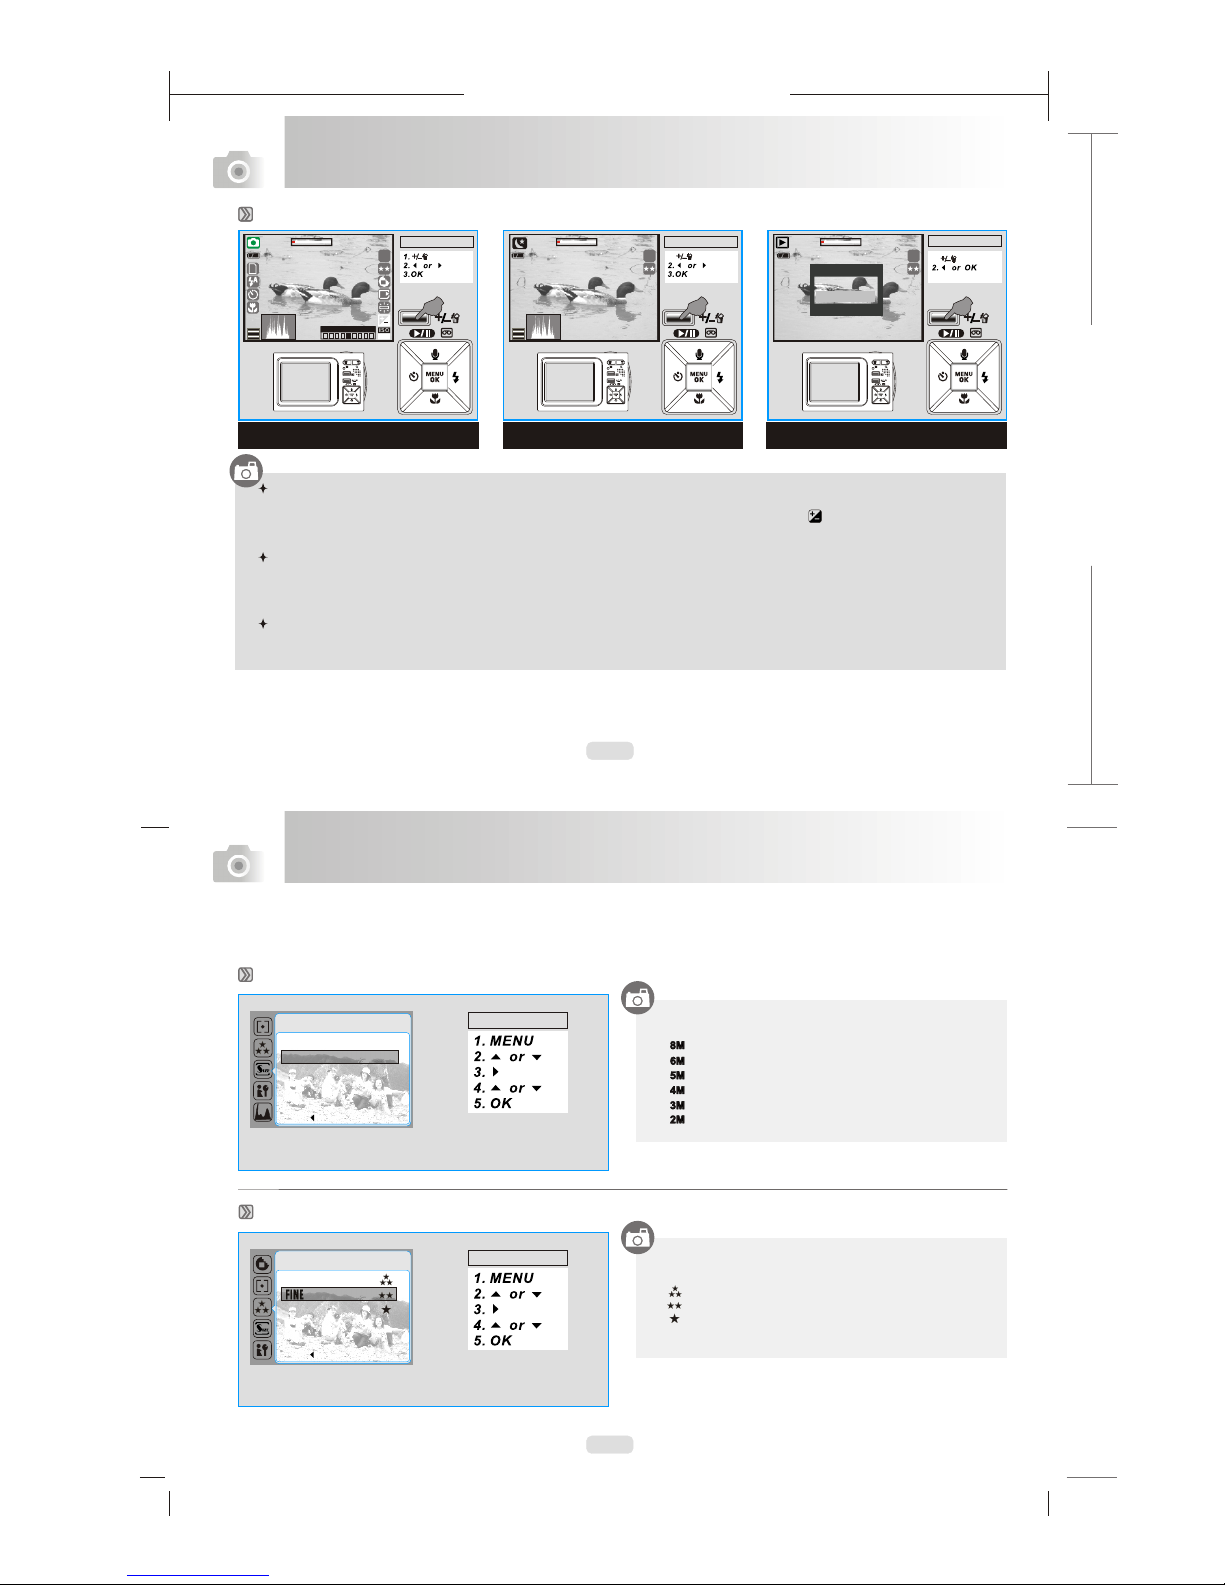
Image Size Setting
Exposure / Delete Button
In Image Shooting Mode:
By pressing down the Delete / +/- button, you can easily adjust the value of the exposure compensation, which is ranged from
-2.0EV to +2.0EV (at 0.5EV increment), and you can see the exposure compensation icon ( ) showing on the right, bottom
on the LCD. By press the Up & Down Button you can choose the ISO values and press OK Button to confirm.
In Night Mode under Shooting Mode:
You can adjust the value of the long-time shutter, including 8, 4, 2, 1, 1/2, 1/4, 1/8 Sec, Auto by pressing
Flash/Right & Self-timer/Left Button. By pressing the Up & Down Button you can choose the aperture and press OK Button
to confirm.
In Playback Mode:
Deleting the single image can be done by pressing down this button and OK Button.
If you would like to delete all images, please refer to page . 24
The Image size options are provided as follows:
Image Quality Setting (Default: Fine)
The image quality options are provided as follows:
( ) Super Fine
( ) Fine
( ) Normal
( )2848x2136
( )2560x1920
( )2304x1728
( )2048x1536
( )1600x1200
( )3328x2496
SIZE
BACK : SET :OK
Shooting Mode
Night Mode Playback Mode
Operation Steps
1.
Operation Steps
1.
Operation Steps
DEL ONE
Operation Steps
S. FINE
FINE
NORMAL
BACK : SET :OK
QUALITY
Operation Steps
Press Menu/OK Button to enter the settings.
2626
8M
X1.2X1.2
1
078 560 256 349078 560 256 349
2626
8M
4SEC4SEC
078 560 256 349078 560 256 349
CONFIRM: OK
DELETE
CANCEL
-2 -1 0 + 1 +2
3328 x 2496 8M
2848 x 2136 6M
2560 X 1920 5M
2304 X 1728 4M
2408 X 1536 3M
165mm+-2
122mm+-2
16
17
Advanced Functionality Settings
Advanced Functionality Settings
You can select the most appropriate white balance setting
for a given shooting environment by "Custom" setting.
1. Choose the CUSTOM setting.
2. Put a sheet of white paper in front of the camera, and
then press the shutter button.(Note that the LCD shows
only white area)
3. The Custom value will be recorded and this value will be
applied for image shooting.
Metering Setting (Default: MULTI )
Effect Setting (Default: Normal)
Sharpness Setting (Default: NORMAL)
White Balance Setting (Default: AUTO)
Operation Steps
1. MENU
2. or
3.
4. or
5.OK
AUTO AWB
DAYLIGHT
CLOUDY
FLUORESCENT
TUNGSTEN
W. BALANCE
BACK : SET :OK
Operation Steps
1. MENU
2. or
3.
4. or
5.OK
EFFECT
B & W
NORMAL NOR
SEPIA
RGB
BACK : SET :OK
Operation Steps
1. MENU
2. or
3.
4. or
5.OK
SOFT
NORMAL
VIVID
This effect can make the edge of the captured
image look smoother, which is suitable for image
editing on PC.
This effect can make the edge of the captured
image look sharp, which is suitable for printing out.
This effect can make the edge of the captured
image look much sharper yet may cause more
noises.
SOFT
NORMAL
VIVID
SHARPNESS
BACK : SET :OK
With Metering Setting, you can get more superior exposure
condition and take a picture with brightness.
Multi Metering:
Spot Metering:
If the subject is against the light source or has little
contrast, you can use this function to have the subject be
brighter.
Operation Steps
1. MENU
2. Or
3.
4. or
5.OK
METERING
MULTI
SPOT
BACK : SET :OK
The White Balance options are provided as follows:
Exposure will be evaluated according to the average of the
available light sources in the image area. This is suitable
for general use.
Auto Adjusting the white balance automatically
Daylight Under the strong light environment
Sunset Under the sunset light environment
Fluorescent Under the fluorescent light environment
Tungsten Under the tungsten light environment
Cloudy Under the cloudy light environment
Custom Under uncertain light environment
NOR
Normal No effect is added to the picture.
B&W Turn the image into black and white.
Sepia Turn the image into yellowish brown.
RGB
This setting allows you to adjust the value
of RGB by yourself.
R
G
B
R
G
B
WB
WB
WB
165mm+-2
122mm+-2
18
19
Advanced Functionality Settings
Advanced Functionality Settings
Advanced Functionality Settings
BACK : SET :OK
BACK : SET :OK
ON
PHOTOFRAME
OFF
BACK : SET :OK
BACK : SET :OK
ON
NIGHT SCENE
OFF
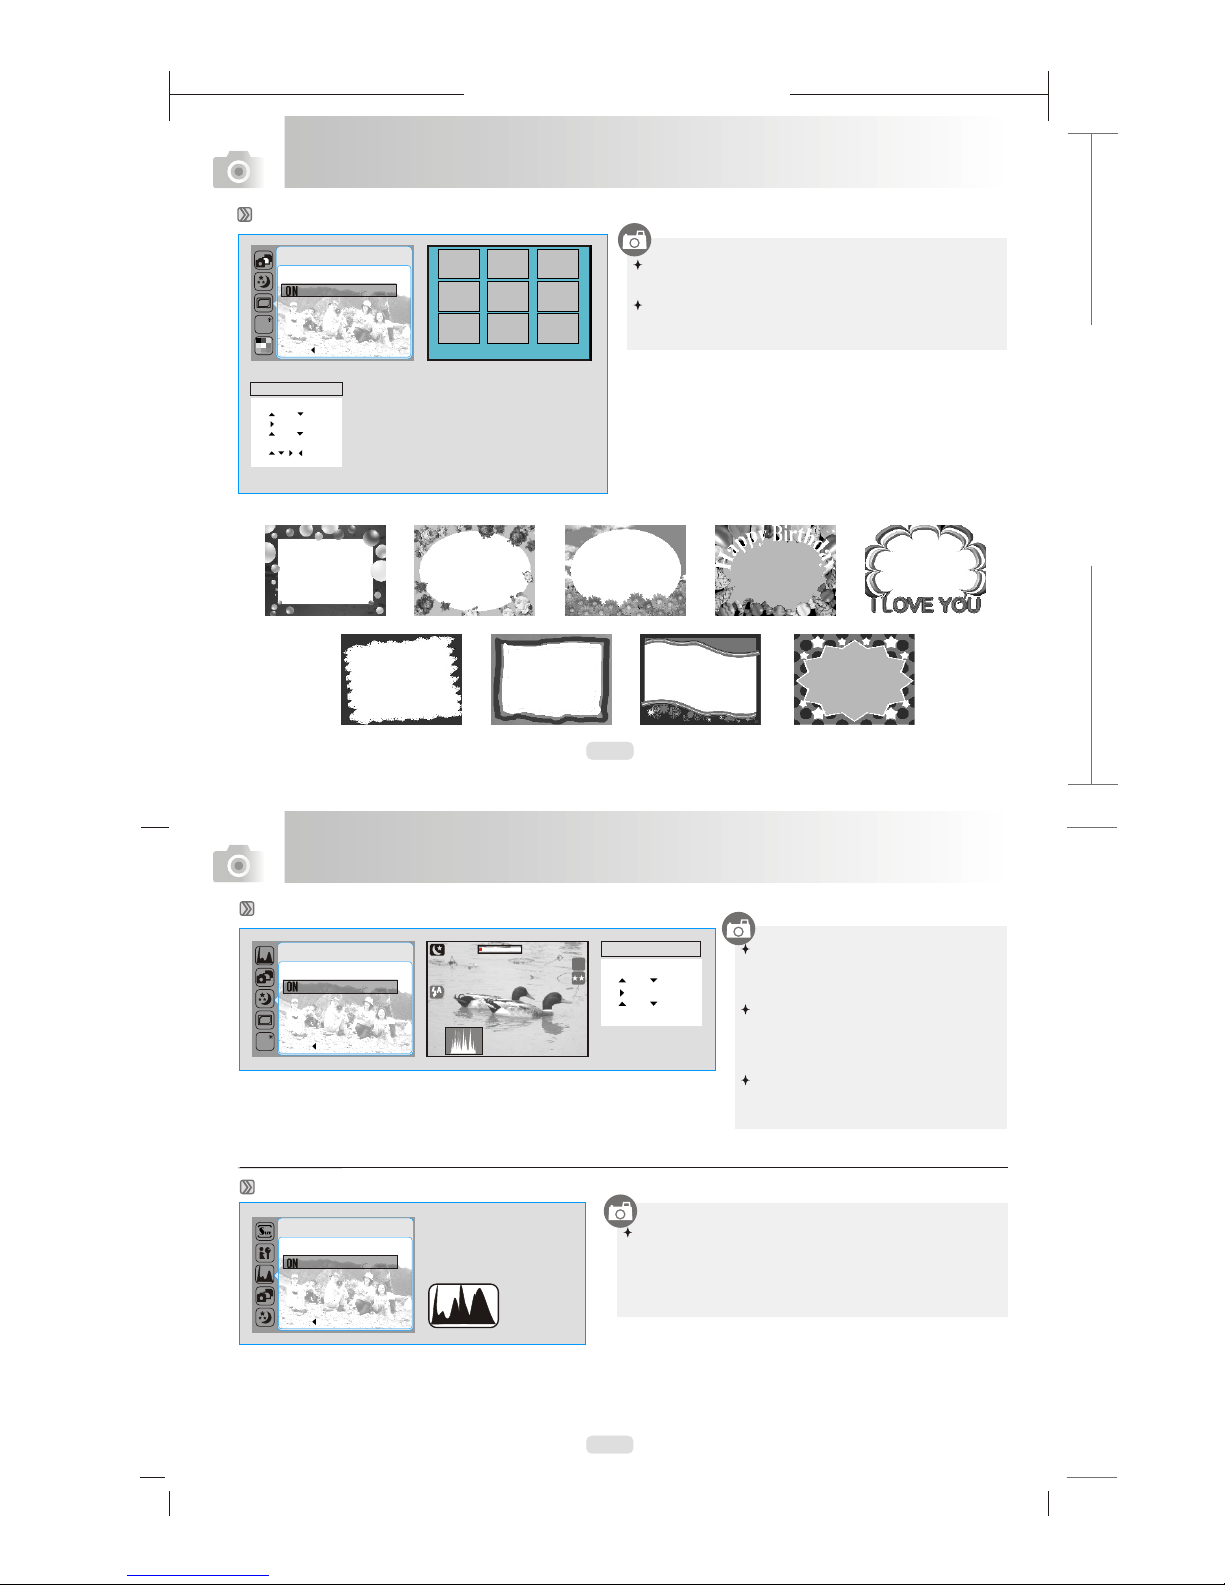
Frame 1 Frame 2 Frame 3
Frame 4 Frame 5 Frame 6
Frame 7 Frame 8 Frame 9
Operation Steps
1. MENU
2. or
3.
4. or
5. OK
6.
7. OK
Photo Frame Setting (Default: OFF)
1. 2. 3. 4. 5.
6. 7. 8. 9.
You can put the selected photo frame to the image you
capture.
Cancel the Photo Frame function after use if you prefer
the next image not to be with Photo Frame.
Night Scene Setting (Default: OFF)
Histogram (Default: OFF)
Operation Steps
1. MENU
2. or
3.
4. or
5.OK
You may adjust the shutter speed with
the LEFT / RIGHT Button after pressing
down the Exposure / Delete Button.
You may adjust the aperture with the UP/
DOWN Button after pressing down the
Exposure/Delete Button.
Cancel the Night Scene setting after use
if you prefer the next image not to be
with Night Scene function.
BACK : SET :OK
BACK : SET :OK
ON
HISTOGRAM
OFF
WB
WB
Histogram shows the distribution of tones in the image. The
horizontal axis corresponds to pixel brightness, with dark
tones to the left and bright tones to the right. T he vertical axis
shows the number of pixels of each brightness in the image.
2626
8M
07 : 03 AM
2006/01/31
07 : 03 AM
2006/01/31
078 560 256 349078 560 256 349
165mm+-2
122mm+-2
20
21
Advanced Functionality Settings
Advanced Functionality Settings
SETUP Settings
Under Playback Mode ( )
Playback of a Still Image
Please press Playback Button to view the images
Press the Right or Left Button to go to or back to the next or
last image.
The icon ( ) still image comes
with a voice memo.
taken.
shows up when viewing
Press Playback Button to play the movie clips.
Press the Up Button to play or pause the movie clip and you
can press Right/Left Button to rewind or fast forward the
movie you just played on.
The icon ( ) on the left of the LCD represents a Movie
clip, not a still image.
Note
Playback of a Movie Clip
Note
Operation Steps
1. Playback
Button
2. or
1. Playback
Button
2. or
1. Playback
Button
2. or
Please refer to page 30.
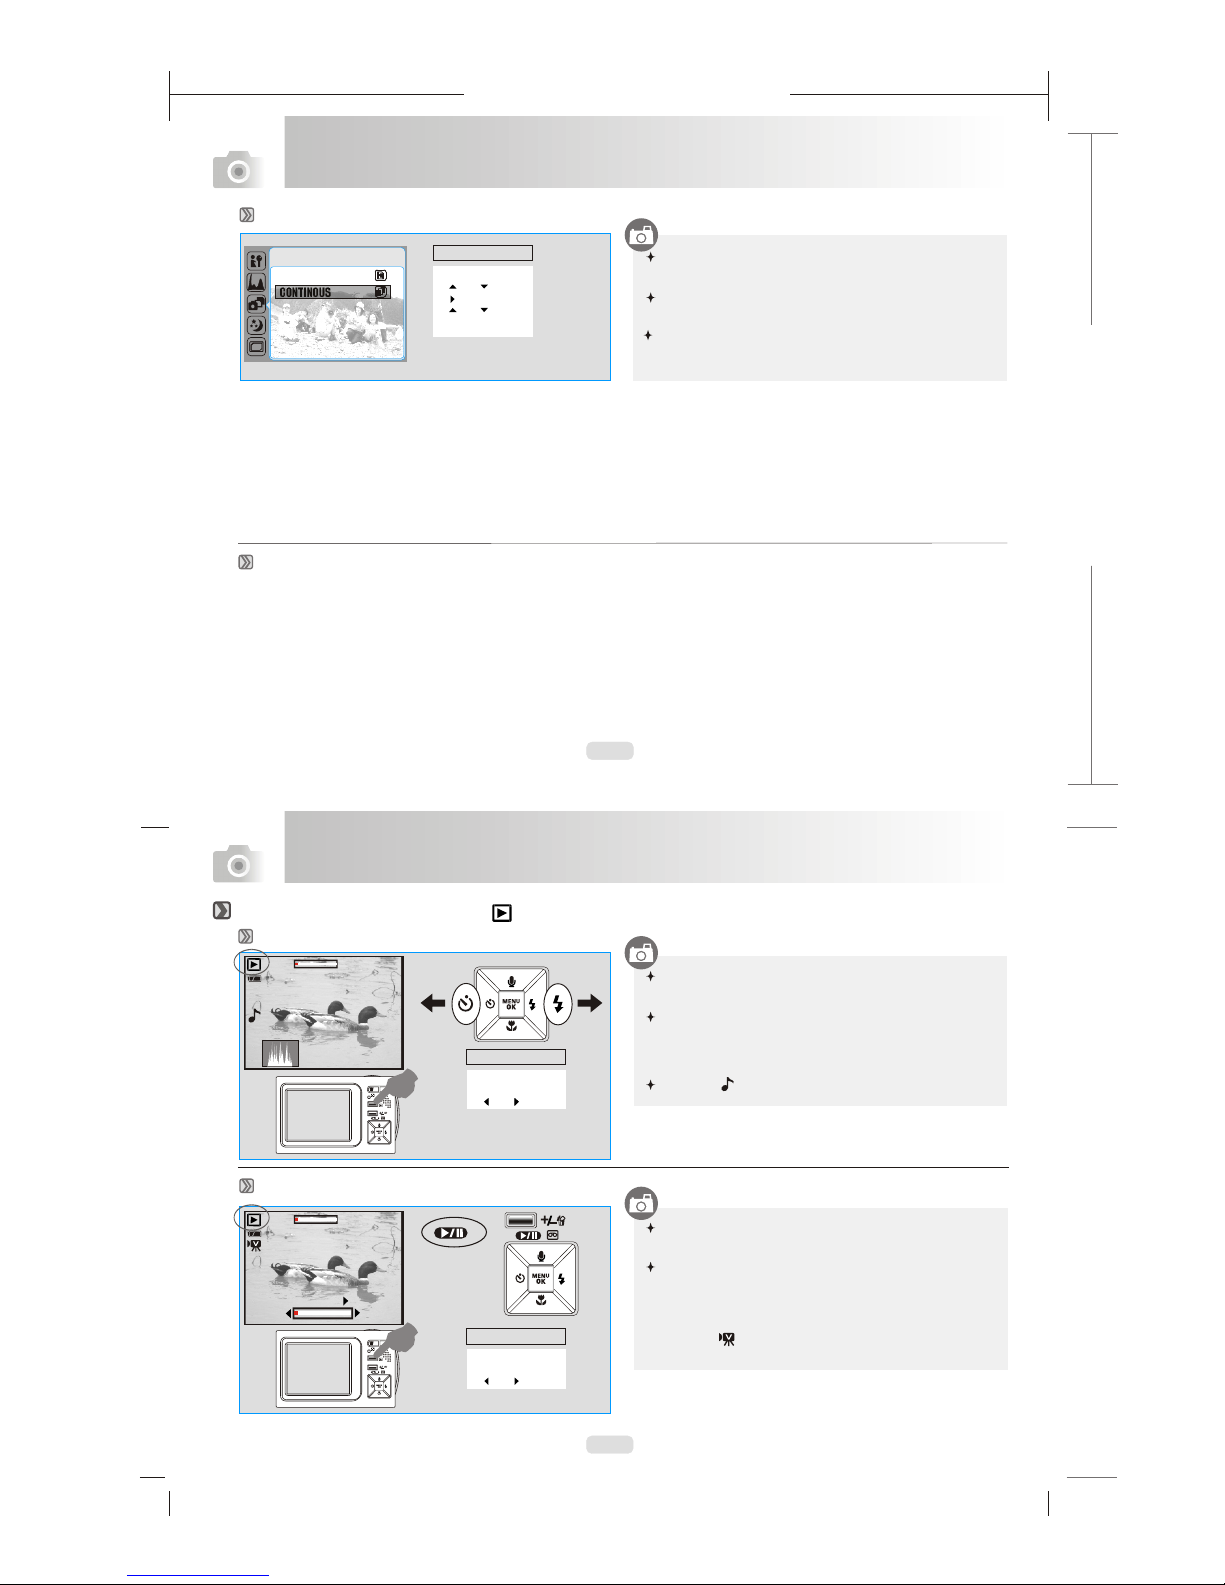
Continuous Shooting Setting
SHOOTING
Operation Steps
1. MENU
2. or
3.
4. or
5.OK
This function allows you to take pictures continuously once
the shutter button is released
Numbers of the pictures are based on the available
memory you have.
Note that the continuous shooting function will be disable
once the photo frame function is activated.
SINGLE
CONTINOUS
Operation Steps
2626
X1.2X1.2
07 : 03 AM
2006/01/31
07 : 03 AM
2006/01/31
078 560 256 349078 560 256 349
2626
X1.2X1.2
PAUSE
REW
FF
1. Playback
Button
2. or

165mm+-2
122mm+-2
22
23
Advanced Functionality Settings
Thumbnail Display (Small Images)
You can press Playback Button longer
press it again to return.
to see the related
information of the image and
Advanced Functionality Settings
Displaying Image Information
Exploring an Image
1.Thumbnail Display is a conveniant tool for you to find the image you took from the display. You can press WIDE Button to have
Thumbnail Display.
2.Press down the TELE Button and you can see the enlargement of the image.
3.You can see a square icon like ( ) showing the times of the enlargement and the current location of the image.
4.Use the TELE/WIDE Button to zoom in or to zoom out.
5.Use the UP/DOWN/LEFT/RIGHT Button to locate the position you o review.
Note : In this step, you can also trim the size of the picture by pressing down the OK/Menu Button.
6.Press down the WIDE Button to return to the original Playback Mode.
would like t
Starting a Slide Show (Default: OFF)
SIZE : 2848X2136
F NO : F4.5
EXP. TIME : 1/7S
ISO : 100
FLASH : OFF
DATE : 2005/02/11
START OFF
INTERVAL 1 SEC
REPEAT OFF
SLIDE
MOVE : CHANGE:
Operation Steps
X 1.6
X 1.6
Press down MENU/OK Button to enter the following Settings.
With this function, you can have the images played like a
slide show with a selected time interval and select to repeat
it or not. (Interval : from 1 Sec. to 5 Sec.)
1
2
100-0021100-0021
11 22 33
44 55
100-0021100-0021100-0021100-0021100-0021100-0021
100-0021100-0021
165mm+-2
122mm+-2
24
25
This option allows you to put the print quantity (MAX. 30 pcs) on your memory card.
Note: You cannot see the "PRINT" function on the LCD Monitor if a memory card is not inserted.
Setting Image Protection
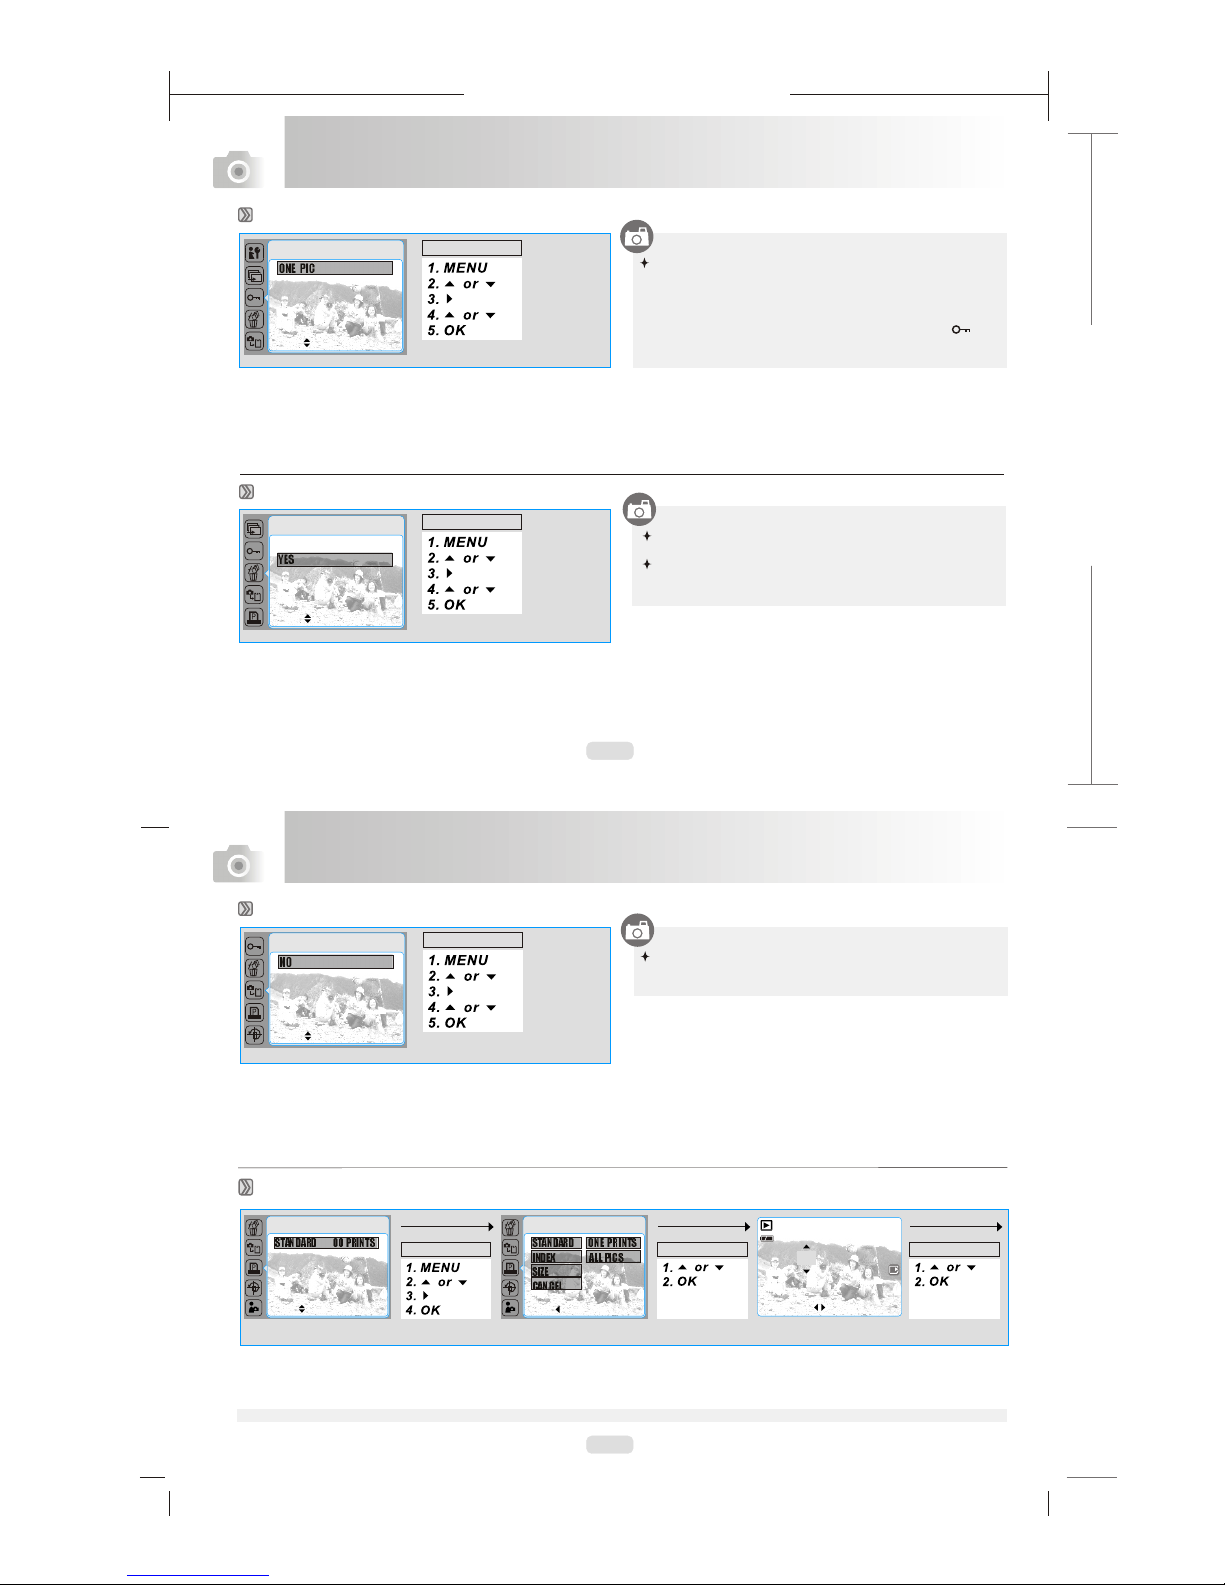
ONE PIC
ALL PICS
PROTECT
MOVE : SET: OK
Advanced Functionality Settings
Advanced Functionality Settings
Deleting all Images
NO
YES
DELETE ALL
MOVE : SET: OK
Copy to Card
NO
YES
COPY TO CARD
MOVE : SET: OK
This function allows you to put all images stored in the
internal memory into the memory card.
DPOF -STANDARD
STANDARD 00 PRINTS
INDEX NO
SIZE DEFAULT
CANCEL NO
DPOF
MOVE : SET: OK
Operation Steps
Operation Steps
Operation Steps
MOVEPIC. : SET: OK
00 PRINTS
EXIT: SH1
Operation Steps
Operation Steps Operation Steps
This function allows you to prevent your specific images
from being deleted if the "LOCK" under "PROTECT" list is
selected. Conversely, you can select "UNLOCK" to cancel
the protection.
Once you set up to "LOCK" the image. it will show ( ) lock
icon at the left side of LCD monitor.
You can delete all images once with this function.
If you would like to delete a single image, please refer
to Page 14.
[ONE PIC] - specifies the number of copies for a selected image and you can press LEFT/RIGHT Button to go to next image.
[ALL PICS] - specifies the number of copies for all pictures apart from movie clips and voice recording files.
STANDARD ONE PRINTS
INDEX ALL PICS
SIZE DEFAULT
CANCEL NO
DPOF
BACK : SET: OK
100-0021100-0021

165mm+-2
122mm+-2
26
27
Advanced Functionality Settings
Advanced Functionality Settings
DPOF - INDEX
This option allows you to put the number of copies for index prints and print out all images as thumbnail display.
[YES] - you can print out the index prints for all images.
DPOF - SIZE
This option allows you to set up the printout paper size including 3X5, 4X6, 5X7, 8X10 and DEFAULT based on the setting of
your printer.
DPOF - CANCEL
This option allows you to cancel all settings above including STANDARD, INDEX, SIZE.
Rotating an Image
ROTATE
With this setting, you can rotate the image with different
degree including right 90, left 90, 180, Horizontal, Vertical.
Operation Steps
O
LEFT90
O
RIGHT90
O
180
HORIZONTAL
VERTICAL
MOVE : SET: OK
Selecting a START-UP Image
S. IMAGE
This function allows you to select the image you took as
your start-up image if YES. (Please refer to pa .)ge 34
Operation Steps
NO
YES
MOVE : SET: OK
SETUP Setting
Please refer to page 30.
NOTE
The rotate function can only be used when the resolution is
set at less than 6 mega pixels (2848x 2136).

165mm+-2
122mm+-2
28
29
Advanced Functionality Settings
Advanced Functionality Settings
Under Movie Clip Mode ( )
Video Size Setting (Default: 320 X240)
SIZE
WB
BACK : SET :OK
640x480
320x240
The video size options are provided as follows:
640x480
320x240
Video Frame Rate Setting
The image frame rate options are provided as follows:
30 FPS
15 FPS
30 FPS
15 FPS
BACK : SET :OK
Operation Steps
FRAME RATE
You can select the most appropriate white balance setting for a
given shooting environment by "Custom" setting.
1. Choose the CUSTOM setting.
2. Put a sheet of white paper in front of the camera, and then
press the shutter button.(Note:make sure that the LCD
shows on ly white area)
3. The Custom value will be recorded and this value will be
applied for image shooting.
Video Effect Setting (Default: Normal)
Video White Balance Setting (Default: AUTO)
The White Balance options are provided as follows:
WB
Operation Steps
NOR
Normal No effect is added to the video.
B&W Turn the video into black and white.
Sepia Turn the video into yellowish brown.
Auto Adjusting the white balance automatically
Daylight Under the strong light environment
Sunset Under the sunset light environment
Fluorescent Under the fluorescent light environment
Tungsten Under the tungsten light environment
Cloudy Under the cloudy light environment
Custom Under uncertain light environment
15
FPS
30
FPS
AUTO AWB
DAYLIGHT
CLOUDY
FLUORESCENT
TUNGSTEN
WHITE BALANCE
BACK : SET :OK
EFFECT
B & W
NORMAL NOR
SEPIA
BACK : SET :OK
Operation Steps
Operation Steps
WB
WB

165mm+-2
122mm+-2
30
31
Advanced Functionality Settings
Advanced Functionality Settings
Setup Settings ( SET UP )
Setting FILE (Default: Reset)
Setting LANGUAGE
Setting FORMAT(Default: NO)
Setting PWR SAVE
Setting DATE TYPE
If RESET is selected, the next file name will be set from
0001 even after formatting, deleting all, or inserting a new
memory card.
If SERIES is selected, the file name will directly follow the
latest stored file name instead.
You can start the SETUP settings in
any working mode by pressing down
the MENU Button and Up / Down
Button.
This setting allows you to name the files.
Press Left/Right Button to move the arrow to the item you want to adjust.
1. Move to the third line to select the DAY TYPE first. There are 4 options :
D/M/Y, M/D/Y, Y/M/D and OFF. (D=Date, M=Month, Y=Year)
2. After choosing the DATE TYPE. you can press Left Button to move back to
the first item and press UP/Down Button to adjust the number for each item.
1. English 2.
5. Spanish 6. Italian 7.
Japanese 3. French 4. German
Turkish 8. Russian
9. Thai 10. Portuguese 11. Simplified Chinese
12. Traditional Chinese 13. Dutch
Operation Steps
1.MENU
2. or
3.
4. or
5.
6. or
7. OK
The camera will be automatically off once having
been operated for the time interval you set. This
setting helps avoid some unnecessary power
consumption when the camera is not in use.
This function allows you to
format the memory card
easily .
Operation Steps
1.MENU
2. or
3.
4. or
5. OK
Operation Steps
1.MENU
2. or
3.
4. or
5. OK
Operation Steps
1.MENU
2. or
3.
4. or
5. OK
SETUP
BACK : SET : OK
FILE CANCEL
PWR SAVE 1 MIN
LANGUAGE 3 MIN
FORMAT 5 MIN
DATE TYPE 1 0 MIN
SETUP
BACK : SET : OK
~
FILE ENGLISH
PWR SAVE
LANGUAGE FRAN AIS
FORMAT DEUTSCH
DATE TYPE ESPA OL
C
N
SETUP
BACK : SET : OK
FILE
PWR SAVE
LANGUAGE NO
FORMAT YES
DATE TYPE
SETUP
BACK : SET : OK
FILE
PWR SAVE
LANGUAGE
FORMAT
DATE TYPE
05 / 02 / 01
12:45
Y / M / D
Operation Steps
1.MENU
2. or
3.
4. or
5.
6. or
7. OK
Note:
1. FILE
2. PWR SAVE
3. LANGUAGE
4. FORMAT
9. Q. VIEW
10. RESET
11. S. SOUND
12. S. IMAGE
5. DATE TYPE
6. IMPRINT
7. SOUND
8. VIDEO
13. USB
14. GAME
15. LCD
SETUP
MOVE : CHANGE :
FILE SERIES
PWR SAVE CANCEL
LANGUAGE ENGLISH
FORMAT NO
DATE TYPE 05/02/01
SETUP
BACK : SET : OK
FILE RESET
PWR SAVE SERIES
LANGUAGE
FORMAT
DATE TYPE

165mm+-2
122mm+-2
32
33
Advanced Functionality Settings
Advanced Functionality Settings
Setting IMPRINT(Default: Off)
Setting VIDEO(Default: NTSC)
Setting QUICK VIEW(Default: 1 Second)
Setting RESET(Default: No)
Setting START-UP SOUND(Default: ON)
Setting SOUND
This option allows you to
print out the images with date.
Operation Steps
1.MENU
2. or
3.
4. or
5. OK
You can choose to have the
sound when operating by
choosing "ON".
Operation Steps
1.MENU
2. or
3.
4. or
5. OK
BACK : SET : OK
SETUP
PWR SAVE
LANGUAGE
FORMAT
DATE TYPE
IMPRINT ON
OF
BACK : SET : OK
SETUP
LANGUAGE
FORMAT
DATE TYPE
IMPRINT OFF
SOUND ON
NTSC: U.S.A, Canada, Japan, South Korea, Taiwan, Mexico.
PAL : Australia, Austria, Belgium, China, Denmark, Finland, Germany,
U.K., Holland, Italy, Kuwait, Malaysia, New Zealand, Singapore,
Spain, Sweden, Switzerland, Thailand, Norway.
If Q. View is on, you can view the image you just captured on the LCD monitor.
[OFF]: You cannot view the picture you just take in the LCD monitor.
[1 ~ 3 sec] : The captured image is briefly displayed during the selected time.
This option provides the function of recalling all default values
except the Date, Time, Language, and Video Out.
You can have Start-Up sound by choosing "ON".
If you don't require the Start-Up sound, please choose "OFF".
Operation Steps
1.MENU
2. or
3.
4. or
5. OK
Operation Steps
1.MENU
2. or
3.
4. or
5. OK
Operation Steps
1.MENU
2. or
3.
4. or
5. OK
Operation Steps
1.MENU
2. or
3.
4. or
5. OK
BACK : SET : OK
BACK : SET : OK
BACK : SET : OK
SETUP
FORMAT
DATE TYPE
IMPRINT
SOUND NTSC
VIDEO PAL
SETUP
IMPRINT
SOUND
VIDEO
Q. VIEW
RESET
NO
YES
SETUP
SOUND
VIDEO
Q. VIEW
RESET
S. SOUND
OFF
ON
BACK : SET : OK
SETUP
IMPRINT
SOUND OFF
VIDEO 1 SEC
Q. VIEW
RESET
3 SEC
5 SEC
165mm+-2
122mm+-2
34
35
Advanced Functionality Settings
Advanced Functionality Settings
Setting START-UP IMAGE
SETUP
BACK : SET : OK
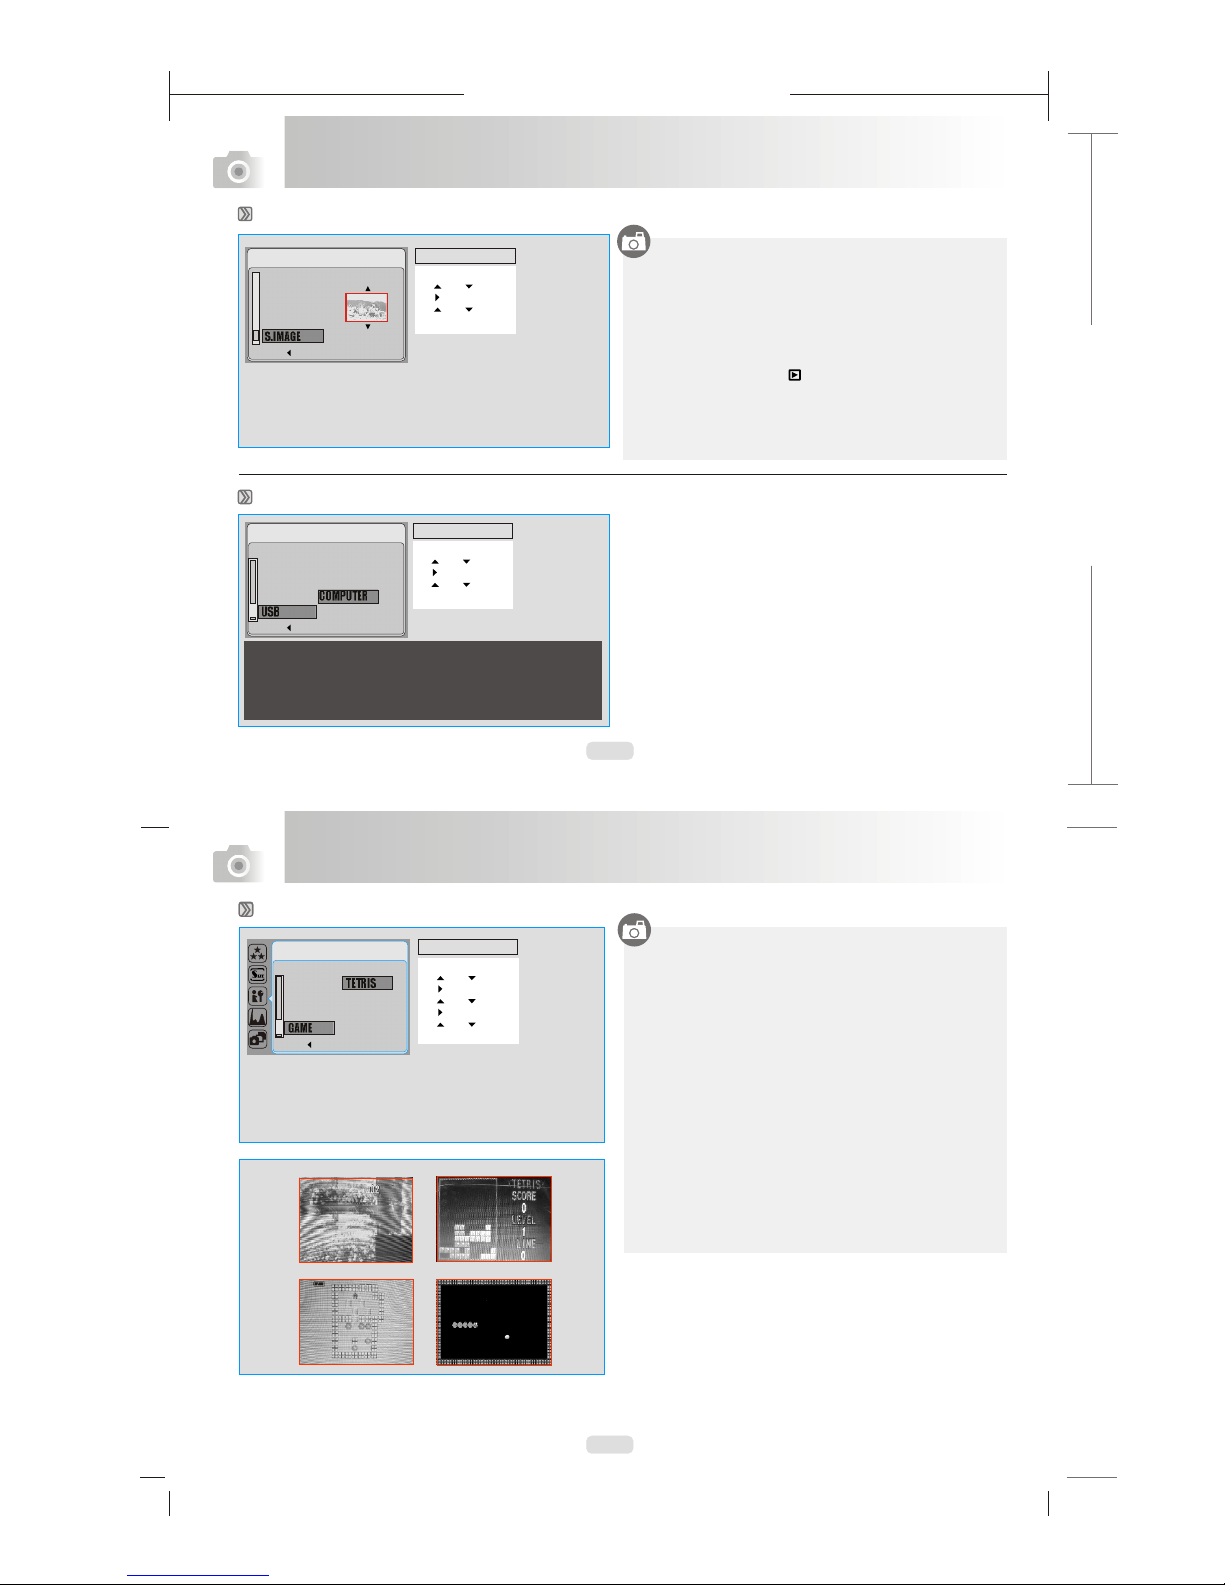
How to Play Games
GAME 1
GAME 2
GAME 4
6
01
GAME 3
There are 2 Start-Up images available. Or you can
choose "OFF" not to have the Start-Up image.
The camera also reserves the space for one "User Image".
You can set up the "User Image as the Start-Up image by
the procedures below:
1. Enter Playback Mode ( ).
2. Choose S. IMAGE.
3. Choose YES.
Now this image will be set as the Start-Up user image
successfully.
Operation Steps
1.MENU
2. or
3.
4. or
5. OK
1. JIGSAW PUZZLE
UP, DOWN, RIGHT, LEFT Buttons -- to manipulate
DELETE Button -- to show the original picture
MENU/OK Button -- to escape from the game
2.TETRIS
MENU/OK
MENU/OK
4.SNAKE
UP, DOWN, RIGHT, LEFT Buttons - to manipulate
MENU/OK Button -- to escape from the game
RIGHT/ LEFT - to manipulate the direction of the falling brick
UP Button - to rotating the brick
DOWN Button -- to speeding up brick to fall
Button -- to escape from the game
3.SOKO
TELE - to select the game level
UP, DOWN, RIGHT, LEFT Buttons - to manipulate
DELETE Button -- to undo the last movement
Button -- to escape from the game
Setting USB
SETUP
BACK : SET : OK
Q. VIEW
RESET
S. SOUND
S. IMAGE COMPUTER
USB PRINTER
With the connection of the printer for PictBridge function, you have to
select the option of printer for correct driver support.
VIDEO
Q. VIEW
RESET
S.SOUND
S.IMAGE
Operation Steps
1.MENU
2. or
3.
4. or
5. OK
Operation Steps
1.MENU
2. or
3.
4. or
5.
6. or
7. OK
1. JIGSAW PUZZLE
2. TETRIS
3. SOKO
4. SNAKE
BACK : SET : OK
SETUP
RESET J. PUZZLE
S. SOUND TETRIS
S. IMAGE SOKO
USB SNAKE
GAME

165mm+-2
122mm+-2
36
37
Advanced Functionality Settings
Setting LCD ( ICONS )
Choose "FULL ICONS" to show all the icons of the settings.
Choose "SIMPLE ICONS" to show only the basic icons of the
setting, including Working Mode, Battery Status, Zoom Bar and
Available Shots.
Under Voice Recording Mode ( )
Advanced Functionality Settings
1. Under the Image Shooting Mode ( ), you can press twice of
Vocie Memo ( ) Button to enter the Voice Recording Mode ( ).
2. Press the Shutter Button to start the voice recording.
Press the Shutter Button again to stop the voice recording.
3. Press the Up Button to pause the voice recording.
Press the Up Button again to continue the voice recording.
4. Press the Playback Button ( ) and press the Up Button to
play the voice recording. Press the Up Button again to pause
playing the voice recording.
00 : 08 : 0100 : 08 : 01
START:SH1START:SH1
BACK : SET : OK
SETUP
S. SOUND
S. IMAGE
USB
GAME FULL ICONS
LCD SIMPLE ICONS

165mm+-2
122mm+-2
38
39
1 / 1
DCIM
MP3
1
2
POWERMODE
Advanced Functionality Settings
How To Download The Digital Music To The Camera
1. Connect the Camera with the computer with the USB/Video cable.
2. Copy the digital music files to the "Removal Disk" (when the camera is connected to the computer the computer will create a
new disk called "Removal Disk").
Under Digital Music Player Mode ( )
How To Play The Digital Music
1. Set the Mode Button on Digital Music Player Mode ( ).
2. Choose the folder where you posted the digital music files on.
3. Choose the music file you would like to play and press the OK/Menu Button. You can press the Menu/OK Button again to stop
playing.
4. The music will come out from the built-in speaker if no earphone is used. If you prefer to play the music through an earphone,
please have the earphone connected to the Earphone Jack ( ).
How To Delete The Digital Music From The Camera
1. You can press Delete Button to delete musical file.
2. If you want to delete the folders, you have to connect with computer by USB/Video cable to delete folders in the Removal Disk.
Volume Adjustment
Use TELE/WIDE Button to adjust the music volume.
Skip To Next Song or To The Previous Song
1. Press Right Button to skip to the next song.
2. Press Left Button to go back to the previous song.
Advanced Functionality Settings
Pausing The Playing Of The Music
Press Up Button to pause the playing and press the Up Button again
can continue the playing.

165mm+-2
122mm+-2
40
41
Advanced Functionality Settings
Choose "USB Mass Storage Device" and click on
"Stop" button.
Advanced Functionality Settings
1
2
Click on "OK" button to confirm to remove the USB
Mass Storage Device.
Click on "OK" button to complete the whole procedure.
After this step, the digital audio files are successfully
stored in your camera.
3
4
Click on the "Unplug or Eject Hardware" icon.
Showing the Lyrics,While Playing The Music
You can download the lyric file (only supports .Irc format) and copy it to the "Removal Disk" of your cameraor SD memory card.
The file name of song and lyric should be the same, so that you can see the lyric on LCD antomatically matching with the music
you're playing.
NOTE
When your operating system is Windows 2000, you will need to remove the USB Mass Storage Device first or the digital music files
will not be stored in your camera correctly. To remove the USB Mass Storage Driver, please follow the procedures below.
First please download the digital music files from the computer to your camera (refer to page 38). Then follow the procedures
shown on page 41.

165mm+-2
122mm+-2
42
43
Connecting the Camera to a PictBridge-supported Printer
Operation Steps
1. MENU
2. or
3.
4. or
5.OK
Images
ONE PIC
ALL PICS
BACK : SET :OK
Printer Connection (PictBridge Mode)
Printer Connection (PictBridge Mode)
1. Have both of the camera and the printer power on.
2. Press the MENU Button to go to SETUP Mode.
3. Go to USB and select PRINTER for printer connection.
4. Use the supplied USB cable to connect the camera to the PictBridge-supported printer as shown above.
Select pictures to print
[SELECT]: The PictBridge function will be applied only to the picture currently displayed.
[ALL PICS]: The PictBridge function will be applied to all pictures.
MOVE PIC: SET: OK
00 PRINTS
Setting the Number of Copies to Print
1.Select [SELECT] or [ALL PICS]. A screen where you can set the number of copies to print will appear as shown above.
2. Press the Up/Down Button to select the number of prints. Maximum 30 prints.
3. Use the Left/Right Button to select another picture and select the number of prints for another picture.
4. After setting the number of prints, press the OK Button to save.
5. Press the Shutter Button to return to the menu without setting the number of prints.
If the printer you have supports the interface of PictBridge, then you can have your camera connected
with the printer by the supplied USB cable to have the stored images print out directly.
EXIT:SH1
PB

165mm+-2
122mm+-2
44
45
Operation Steps
1. MENU
2. or
3.
4. or
5.OK
AUTO SET
NO
YES
BACK : SET :OK
CUSTOM SET
SIZE
LAYOUT
TYPE
QUALITY
BACK : SET :OK
Operation Steps
1. MENU
2. or
3.
4. or
5.OK
DPOF Print
No
Yes
BACK : SET :OK
Operation Steps
1. MENU
2. or
3.
4. or
5.OK
PRINT
STANDARD
INDEX
BACK : SET :OK
AUTO SET
Printer Connection (PictBridge Mode)
Printer Connection (PictBridge Mode)
DPOF PRINT
[YES]: All values in the [CUSTOM SET] are
automatically changed.
[NO]: [CUSTOM SET] values are kept.
CUSTOM SET
Printing Pictures
[STANDARD]: Print the pictures stored in the memory card
in set numbers. rinted on one piece
of paper.
Each picture will be p
[INDEX]: Print multiple images on one sheet of paper.
Please press down OK Button to stop printing.
You can select the Paper Size, Print Format, Paper Type,
Print Quality, Date Print, and File Name Print menus for
printed pictures.
Operation Steps
1. MENU
2. or
3.
4. or
5.
OK
6.
7.
or
This allows you to directly print the files with DPOF
information.
Setting the size of the printing paper
Setting the number of pictures to be printed
on a sheet of paper
Setting the type of the printing paper
Setting the quality of the picture to be printed
Setting whether to print the date
Setting whether to print the file name
SIZE
LAYOUT
TYPE
QUALITY
DATE
FILE NAME
[YES]: Directly print the file with the DPOF information
[NO] : Cancel the printing
Depending on the manufacturer and printer model, some
menus may not be available.
a printer without supporting
the DPOF, the menu is still displayed but the function is
not available.
If the camera is connected to

165mm+-2
122mm+-2
46
47
Operation Steps
1. MENU
2. or
3.
4. or
5.OK
RESET
NO
YES
BACK : SET :OK
Reset
Printer Connection (PictBridge Mode)
TV Connection
Connect the USB/Video connector of the camera to video input ports of the TV set with the supplied Video/USB Cable.
Press down the LEFT or RIGHT direction Button to go to the next or last image for TV reviewing.
This function allows you to initialize user-changed
configurations.
[YES]: All print and image settings will be reset back to
the default.
[NO]: Settings will not be reset.
All default printer settings are based on the those of the
printer manufacturer.
Turn on the TV and switch the TV/Video switch to A/V mode.
Power on the camera and then switch to the Playback Mode.

165mm+-2
122mm+-2
48
49
PC Connection
PC Connection
Installing the Camera's Driver
Under Microsoft Windows 98SE
1 3
2
4
5
Computer / Notebook Connection
Computer
When the USB/Video Cable is in connection with the computer while the camera is on, the camera will automatically go to the
PC Mode from any working mode and turn off TFT LCD monitor.
In this Mode, you can download images to your computer .
How to Connect with a Computer

165mm+-2
122mm+-2
50
51
PC Connection
PC Connection
Under Microsoft Windows
2000
If the auto run program fails under certain situation, please go
to the Start Menu, click "Run" and key in "CD-ROMDrive:\
AutoRun.exe" and then click "OK" Button.
Having DirectX 8.0 or later already, the computer will skip the
installation procedure from step 2 above and go to the
following window directly. Please complete the driver
installation with a "OK" Click.
Under Microsoft Windows ME / XP
Under Mac 9.X or later
Note
Note
Note
1 3
2
4
If the computer h X 8.0 or later
already, the installation procedure will skip above step 4 and
go to the following window directly completing the driver
installation.
as been installed with Direct
The camera's driver is not required under Windows ME and Windows XP. Please
go to page 52 for installing of Ulead Photo Explorer or go to page 57 for downloading
the stored image(s) onto the PC. Please click "OK", if the below window prompts.
This camera, supporting only Mac 9.X or later versions, does not require any driver installation. Please refer to Page 48
for installing of Ulead Photo Explorer or Page 54 for downloading the stored images onto the PC.

165mm+-2
122mm+-2
52
53
PC Connection
Under Windows Operating System (Windows 98SE/2000/ME/XP)
Installing Ulead Photo Explorer
1
PC Connection
8.5
8.5
3
2
8.5
8.5
8.5
8.5
8.5
8.5
4 6
5
8.5
8.5
8.5
8.5
8.5
8.5
8.5
8.5
8.5
8.5
8.5
8.5
7 9
8
10 11 12

165mm+-2
122mm+-2
54
55
Step :
Turn on the computer.
Step :
Insert the CD into the CD-ROM
Drive. The computer will
create an icon named "Driver
CD" on the desktop.
Step :
Double clicks on the icon and
choose the language you
prefer by double clicking on
one of the folders below.
1
2
3
PEX 2.0: English
PEX 2.0F: French
PEX 2.0G: German
PEX 2.0I: Italian
PEX 2.0J: Japanese
PEX 2.0P: Portuguese
PEX 2.0S: Spanish
Under Macintosh Operating System (Mac 9.X or later)
Step :
Select PEX2.0 Installer to
install.
4
Step :
Press Continue for the
next step.
5
Step :
6
Step :
7
Step :
Select the folder you just
installed, and press Choose
for the next step.
8
Step :
PEX2.0 will now start to
install.
9
PC Connection
PC Connection
A welcome screen will jump
out. Please press Continue
for the next step.
Please read through the
contract.
If you agree with the
contract, please press
Agree.
If not, please press
Disagree, and installation
will be cancelled
simultaneously.
8.5
8.5
8.5
8.5
13 14

165mm+-2
122mm+-2
56
57
Note
If a warning window shows up please visit Apple's official web-site http://kbase.info.
apple.com to download the latest version of CarbonLib.
a.Key in "CarbonLib" in the search bar and click "Search" button.
b.Download the latest version of CarbonLib.
c.Reboot the computer.
d.Go to the desktop and double click on the icon "Ulead Photo Explorer" to start Ulead
Photo Explorer.
Step :
Installation completed, please
press Quit to exit.
10
PC Connection
PC Connection
Under Windows Operating System (Windows 98SE/2000/ME/XP)
Downloading the Image(s)
Downloading Image(s) From Removable Disk
1. Turn on the PC.
2. Switch on the camera.
Downloading Image(s) Through Ulead Photo Explorer
1. Connect the camera to the PC by USB cable under any working mode. Please make sure
the USB cable is well connected to both the PC and camera.
2. Start Ulead Photo Explorer 8.5 SE Basic.
3. Click "File \Download From Memory Card" to get the stored image(s).
3. Connect the camera to the PC by USB cable under any working mode. Please make sure
the USB cable is well connected to both the PC and camera.
4. When the USB cable is connected to the PC, there will be a new hard disk named
Removable Disk showing on the computer.
5. The stored "image(s) can be found in" Removable Disk\Dcim\100media .
6. View the image with a double-clicks.

165mm+-2
122mm+-2
58
59
Under Macintosh Operating System (Mac 9.X or later)
Downloading Image(s) From Removable Disk
1. Turn on the PC.
2. Switch on the camera.
D ownloading I mage(s) T hrough U lead P hoto E xplorer
1. Turn on both the PC and switch on the camera. Connect the camera to the PC by USB
table and a new disk such as "Unlabeled" will be created automatically.
2. Start with Ulead Photo Explorer 8.5 SE Basic. The stored image(s) can be found in the
folder of DCIM \ 100MEDIA \. Please view the image(s) with double-clicks.
Error Message Table
CARD FULL
MEMORY FULL
CARD LOCKED
(ICON BLINKING)
LOCK
NO IMAGE
FILE ERROR
MEMORY ERROR
CARD ERROR
LOW BATTERY !
(ICON BLINKING)
There is insufficient card memory capacity
for storing an image.
There is insufficient internal memory capacity
for storing an image.
The SD card is under protection.
The Image can not be deleted under protection.
There is no image stored in the memory card or
built-in flash memory.
File format error.
Memory is damaged or fails.
Card is damaged or fails.
Battery power is drained.
Delete the stored image(s) in the memory
card or insert a new memory card.
Delete the stored image(s) in the flash memory.
Set the card protection switch at nonprotection position.
Unlock the protected image.
Please take pictures or record movie clips.
Insert a new SD/MMC card or format the media.
Format the media.
Insert a new SD/MMC card
Insert new batteries.
Messages Causes Solutions
The environment is too dark in Flash off or "Night Scene''.
The environment is too dark in Flash off or "Night Scene''.
Appendix
LOW LIGHT!
HAND SHAKE ICON
Set the flash mode at Auto Flash or Fill-in Flash.
Avoid shake.
Set the flash mode at Auto Flash or Fill -in Flash.
NO PAPER!
Paper has run out.
Please put more paper in the paper tray of the
Printer.
PC Connection
3. Connect the camera to the PC by USB cable under any working mode. Please make sure
the USB cable is well connected to both the PC and camera.
4. When the USB cable is connected to the PC, there will be a new icon named "untitled" showing on
the computer.
5. Double click on the icon.
6. The stored image(s) can be found in the folder of DCIM \ 100MEDIA \.
7. View the image(s) with double-clicks.

165mm+-2
122mm+-2
60
61
Appendix
Specifications
Appendix
The software mentionedin this manual is furnished under a License Agreement which isincluded with the product. This
Agreement specifies the permitted and prohibited uses of the product.
ICI Library 1991-1992 C-Cube Microsystems.Ulead Systems, Inc. And the Ulead logo are trademarks of Ulead Systems, Inc. All
other product names and any registered and unregisteredtrademarks mentioned in this manual are for identification purposes
only and remain the exclusive property of their respective owners.
Registered users are entitled to Ulead technical support. This Web site has valuable up-to-date information about Photo Explorer,
other Ulead products, and free downloads. Visit our Web site at www.ulead.com, or send an e-mail at support@ulead.com.tw.
Headquarters:Ulead Systems, Inc.
Http://www.ulead.com.tw
E-mail: info@ulead.com.tw
Japan:Ulead Systems, Inc.
Http://www.ulead.co.jp
E-mail: info@ulead.co.jp
Europe:Ulead Systems GmbH
http://www.ulead.de
http://www.ulead.co.uk
http://www.ulead.co.uk/fr
E-mail: info@ulead.de
Technical supports
About Ulead Photo Explorer
Software license
Licenses and trademarks
North & South America: Ulead Systems, Inc.
Http://www.ulead.com
E-mail: info@ulead.com
Asia-Pacific:Ulead System, Inc.
Http://www.asiapac.ulead.com
E-mail: info@asiapac.ulead.com
China: Ulead Systems, Inc.
Http://www.ulead.com.cn
E-mail: info@ulead.com.cn
"Specifications and product design are subject to change without any notice for further improvement"
Power Mac G3 or later
Mac OS 9.2 -10.3
Minimum 64MB RAM
110MB of available hard-disk space
USB port, CD-ROM Driver
QuickTime 6.0 or above for Movie Clip
Interface
For Windows
For Macintosh
PC with processor better than MMX Pentium 233MHz
(XP : Pentium II 300MHz)
Windows 2000/ME/XP
Minimum 32MB RAM (XP: 128MB)
140MB of available hard-disk space
USB port,CD-ROM Driver
800x600pixels, 16-bit color display compatible monitor
Digital output connector: USB 2.0 high speed
Other interface: MIC-in, Speaker, AV out
(Use same connector as USB),
3.5mm stereo headphones
Power Source
2 pcs of AA alkaine / 2 pcs of Ni-MH
Dimensions (WxHxD)
106.5 x 55 x 25.5 mm ( Body: 25.5 mm,with Lens 28.5mm)
Weight
Approx. 140 g (without batteries and card)
Software
Camera Driver
Mass Storage Driver for Windows98SE(Window 2000/
ME/XP, Mac OS 9.2 or above is compatible.)
Application
Ulead Photo Explorer 8.5 SE Basic / Explorer 2
(MAC version)
System Requirements
Specifications
No
+
_
Modes: Single image, Continuous Shooting
Max. 30 fps for 320x240 with normal light level
Size Support:640x480,320x240 MPEG4 video with
audio ( Quality support: 30 and 15 fps) Recording time
is based on memory capacity.
Photo Frame
Self-timer
Voice Record
9 Frame Options
2 sec., 10 sec., Double with LED Indicator
Yes, WAV format
Image
Sensor
Type
Effective Pixels
Total Pixels
1/2.5" CCD
Approx. 6.186 Mega pixels
Approx. 6.369 Mega pixels
Lens
Focal Length
F No.
Digital Zoom
f= 6.55 mm,Tele:18.07mm(35mm Film Equivelant: 39~108.5mm)
LCD Display
2.5" LTPS LCD
Optical Viewfinder
Viewfinder
Auto Focus with 2.8X Optical Zoom
Macro mode: 10-50cm, Normal: 50cm to infinity
Focusing
Type
Range
Mechanical shutter and Electrical shutter
Shutter
Type
Speed
Normal:2 sec. -1/1000 sec. Night Scene:8 sec.-1/1000 sec.
Exposure
Control
Compensation
ISO Equivalent
Programmed AE
2EV (0.5EV / steps)
Auto, 100, 200, 400
Auto/Auto&Red-eye Reduction/Slow sync/Fill-in/off
0.2 ~ 2.5m, Wide mode (Recharging time:approx.:7 sec.)
Flash
Modes
Range
Auto/Daylight/Cloudy/Fluorescent/Tungsten/
Sunset/Custom
White Balance
Shooting
Effect
Sharpness
Metering
Still Image
Live View
Movie Clip
B/W, Normal, Sepia, RGB custom
Soft, Normal, Vivid
MULTI, SPOT
Storage
Media
Internal Memory: 32MB Flash Memory
External Memory: Supports SD/MMC Card
File Format
Still Image: JPEG EXIF2.2, DCF1.1, DPOF1.2,
Movie Clip: MP4(MPEG 4), ASF, AVI(for Xvid)
Image Size
[8.0M]:3328x2496 via interpolation,[6M]: 2848 x2136,
[5M]:2560x1920, [4M]:2304x1728. [3M]:2048x1536
[2M]: 1600x1200 pixels
Digital Music Player
Capture Mode:5x, Play Mode:5-8x (Based on different
image size setting)
PictBridge (Direct Printing)
Yes
Wide:F3.2, Tele: F5.4
Speaker
Yes
Image Play
Single Image / Movie Play / Thumbnails / Slide Show
Supports Editing functions
Trimming, Rotation (on the smaller image size)
Supports Gaming
Yes
Yes
MP3 Player Function
Yes, file format supports MP3

165mm+-2
122mm+-2
62
63
Appendix
Things you can do in Ulead Photo Explorer 8.5 SE Basic
Appendix
Here's an overview of what you can do in Ulead Photo Explorer. Refer to the chapters in this user guide for more details.
Acquire images from digital cameras, scanners, or memory card readers.
(picture 1)
Adjust images
Make adjustments to images, such as straighten, rotate, crop, balance
color, remove red eye, etc. Image adjustments can be applied to
multiple images at one time.
Capture and trim video
Capture video clips from DV camcorders, PC cameras, WebCams,
motion cameras or capture boards. Later, you can trim, convert and
optimize video clips.
Acquire images
(picture 2)
(picture 3)
picture 1
picture 2
picture 3
Browse thumbnails
Ulead Photo Explorer displays files as thumbnails, allowing you to visually browse
through images and media files. (picture 4)
Preview images and other media
Instantly preview images, video and audio files in Photo Explorer without actually
opening them. (picture 5)
View images
Display images in larger views by switching to Viewer mode or opening
images in Ulead Instant Viewer. (picture 6)
picture 4
picture 5
picture 6

165mm+-2
122mm+-2
64
65
Print images in various layouts
Output single-image prints, greeting cards, or print images in different photo sizes.
You can also print an index sheet of thumbnails for your image collection. (picture 7)
Create slideshows
Assemble images, video and audio files into a multimedia slideshow. Apply cool
transition effects to your slideshow. (picture 8)
Output Web thumbnails and Web slideshows
Create Web photo albums and Web slideshows ready to be
uploaded to the Internet. (picture 9)
Share on the Internet
To share selected images on the Web, upload them to iMira.com,
Ulead's free image sharing Web site. (picture 10)
picture 7
picture 8
picture 9
picture 10
Memo
Appendix

165mm+-2
122mm+-2
66
Memo
 Loading...