

Page 1

CLEARVU5 QUICK START GUIDE
STEP 1: Camera Installation
Follow these instructions for the installation
of each camera. The 60ft video/power wire
has two connections: one for video out, and
one for power.
1. Screw the mounting bracket into the camera’s
mounting hole, turning it clockwise.
2. Mount the camera in the desired location no
more than 60 feet from the TV/Monitor/VCR
DVR unless you have purchased additional
wiring. You may wall mount or desk mount
these cameras.
3. Adjust cameras to the desired viewing
angles.
4. Plug the 4 PIN DIN female connection
on the camera into the 4 PIN DIN male
connection on the 60ft video/power wire.
5. Match the two arrows on top of both
connecting cables.
6. Plug the camera’s power supply into the
power jack located on the 60ft video/power
wire.
7. Plug the camera’s power adapter into an AC
outlet.
NOTE: The CV67 does not support audio.
For more information on your SVAT product please visit: www.svat.com
Page 2
CLEARVU5 QUICK START GUIDE
STEP 2: Monitor Installation
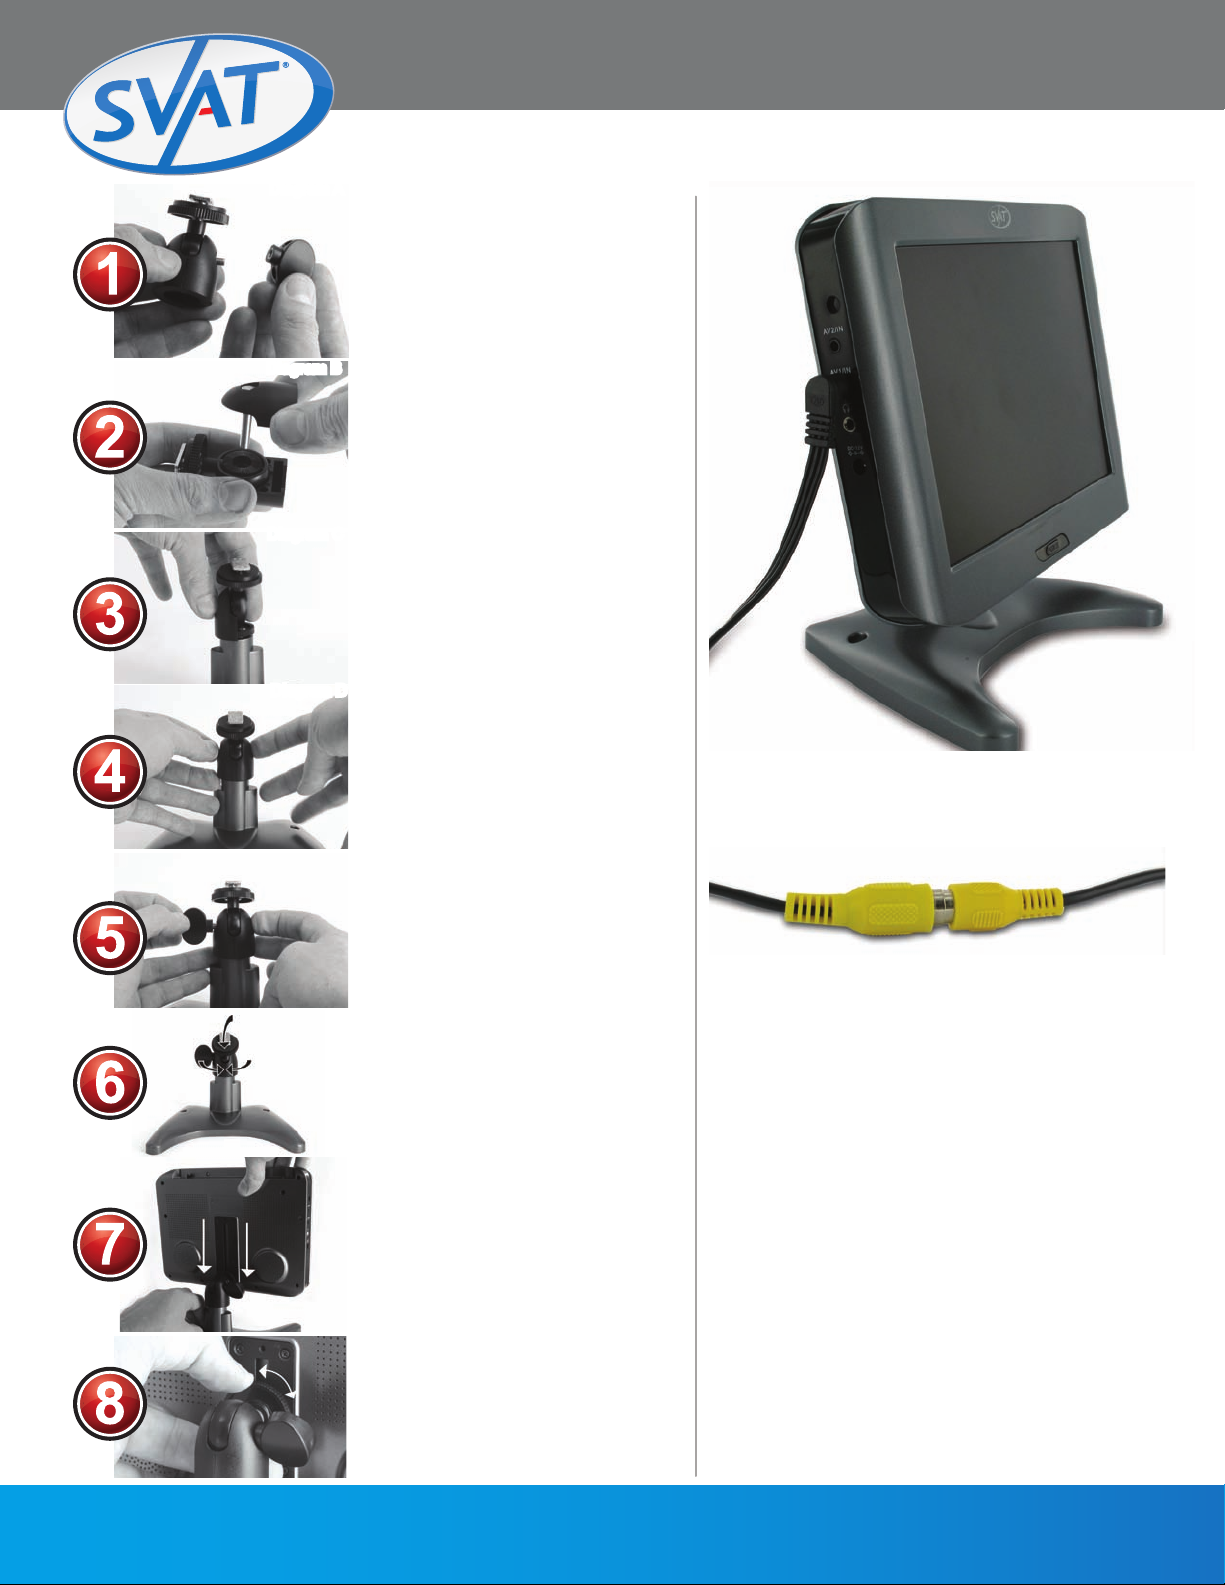
Diagram A
Diagram B
Diagram C
Diagram D
1. Hold the adjustment head as
shown in Diagram A. Remove
the wingnut (part 1) by turning
it counter-clockwise. Make
sure you hold the adjustment
head tightly while moving the
wingnut.
2. Holding the adjustment head
on its side as shown in Diagram
B, lift part 2 (including the
screw)
3. Holding parts 3 and 4 securely
as shown in Diagram C, connect
part 3 and 4 to the top of the
mount stand.
4. While continuing to hold parts
3 and 4 securely, insert part 2
(including screw) into parts 3
and 4 as shown in Diagram D.
9. Plug the “3.5mm to RCA (female) wire”
into the AV1/IN port on the monitor.
5.
While holding the adjustment
head as shown, thread the
wingnut onto the screw by
turning the wingnut clockwise.
6.
If you need to adjust the
mounting plate or adjustment
head, loosen the wingnut
slightly, adjust, and retighten.
7. If necessary, loosen the
mounting plate knob by
turning counter-clockwise.
Slide the mounting plate into
the monitor’s mounting rail as
shown.
8. Secure the mounting plate
to the monitor by turning
the mounting plate knob
clockwise.
10.Plug the camera’s RCA output plug into the
video input (yellow) end of the “3.5mm to
RCA male wire.”
11.Repeat steps 1 and 2 for connecting a
second camera to the AV2/IN port on the
monitor.
NOTE: Please review the manuals
for the included camera and monitor
which can be found in their respective
packages.
For more information on your SVAT product please visit: www.svat.com
 Loading...