

Page 1
SVAT ELECTRONICS
no w yo u ca n se e
Color Quad
Video System
COMPLETE SYSTEM
Instruction Manual
Model #
CVQ1000
www.svat.com
Page 2

SVAT ELECTRONICS
no w yo u ca n se e
CVQ1000 www.svat.com
Page 3
SVAT ELECTRONICS
no w yo u ca n se e
PRODUCT W
PRODUCT W
ARRANTY
ARRANTY
& REGISTRA
& REGISTRA
TION
TION
Please visit our website at www.svat.com to apply for your
products warranty registration.
The warranty registration for is located under the support tab on the SVAT website.
We take quality very seriously. This is why all of our products come with a one year warranty from the
original purchase date against defects in workmanship and materials.
If you have warranty or support issues please contact us using any of the following methods:
SVAT Electronics USA SVAT Electronics Canada Phone: 866.946.7828
2315 Whirlpool St., Unit 333 4080 Montrose Road Fax: 888.771.1701
NIagara Falls, New York Niagara Falls, ON Email: support@svat.com
USA 14305 Canada L2H 1J9 Website: www.svat.com
Warranty Terms
1. SVAT products are guaranteed for a period of one year from the date of purchase against defects in
workmanship and materials. This warranty is limited to the repair, replacement or refund of the purchase price
at SVAT's option.
2. When service is required, the warranty is validated by the submission of a fully completed warranty card.
3. This warranty becomes void if the product shows evidence of having been misused, mishandled or tampered
with contrary to the applicable instruction manual.
4. Routine cleaning, normal cosmetic and mechanical wear and tear are not covered under the terms of this
warranty.
5. The warranty expressly provided for herein is the sole warranty provided in connection with the product itself
and no other warranty, expressed or implied is provided. SVAT assumes no responsibilities for any other
claims not specifically mentioned in this warranty.
6. This warranty does not cover the shipping cost, insurance or any other incidental charges.
7. You MUSTcall SVAT before sending any product back for repair. You will be given a Return Authorization
number. When returning the product for warranty service, please pack it carefully in the original box with all
supplied accessories, and enclose your original receipt or copy, and a brief explanation of the problem
(include RA #).
8. This warranty is valid only in Canada and the U.S.A.
9. This warranty card cannot be re-issued.
CAUTION
RISK OF ELECTRIC SHOCK, DO NOT OPEN
TO REDUCE THE RISK OF ELECTRIC SHOCK, DO NOT REMOVE THE COVER (BACK).
NO USER SERVICEABLE PARTS INSIDE. REFER SERVICING TO
QUALIFIED SERVICE PERSONNEL.
Graphic Symbol Explanation:
The lightning flash with arrowhead symbol, within an equilateral triangle, is intended to
alert the user to the presence of uninsulated “dangerous voltage” within the product’s
enclosure that may be of sufficient magnitude to constitute a risk of electric shock to
persons.
The exclamation point within an equilateral triangle is intended to alert the user to the
presence of important operating maintenance (servicing) instructions in the literature
accompanying the appliance.
WARNING: TO PREVENT FIRE OR SHOCK HAZARDS, DO NOT EXPOSE THIS UNIT
TO RAIN OR MOISTURE
CVQ1000 www.svat.com
Page 4
SVAT ELECTRONICS
no w yo u ca n se e
ABLE OF CONTENTS
TTABLE OF CONTENTS
WHAT IS INCLUDED ............................................................1
WHAT IS COMPATIBLE........................................................1
SAFETY WARNINGS............................................................2
SYSTEM FEATURES............................................................2
PARTS OF THE SYSTEM ....................................................3
INSTALLATION......................................................................4
FUNCTIONS..........................................................................5
MENU SETUP..................................................................6 - 7
SPECIFICATIONS............................................................8 - 9
WHA
WHA
WHA
WHA
The CVQ1000 is compatible with TVs, VCRs, DVRs, and computers.
CVQ1000
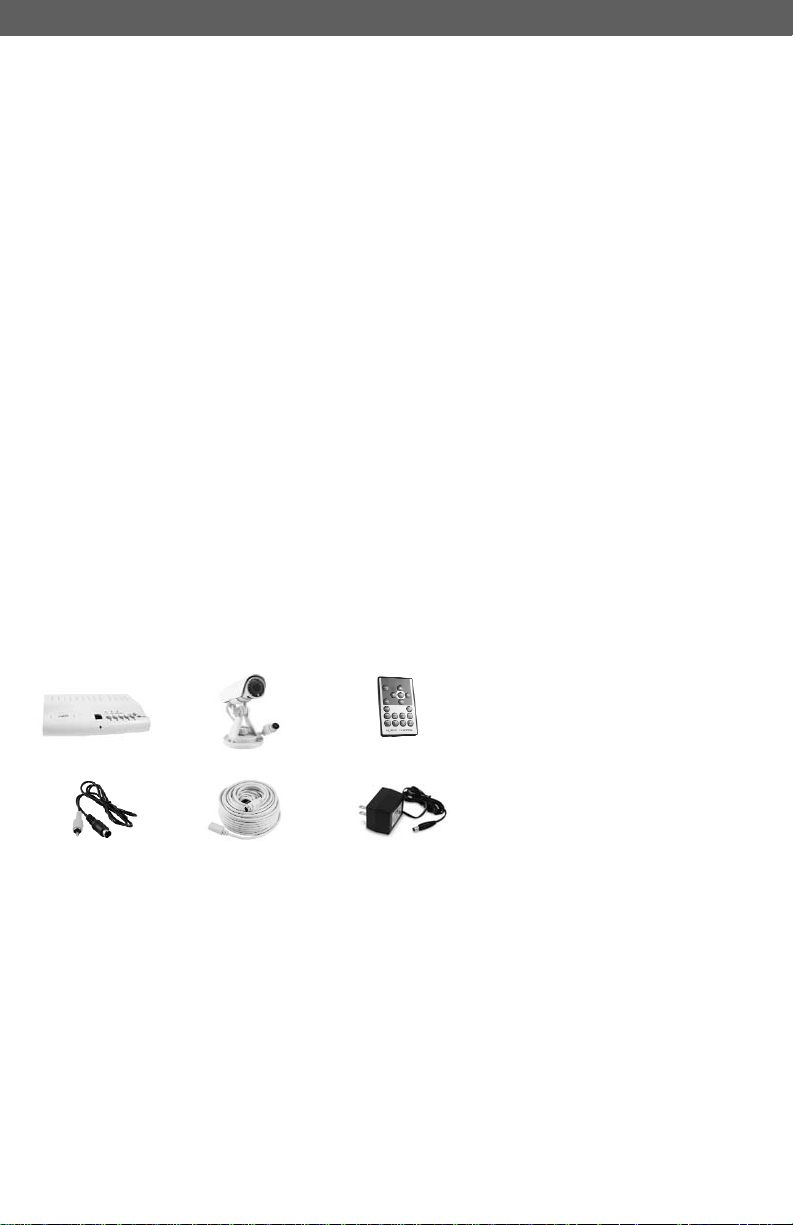
T IS INCLUDED
T IS INCLUDED
1 Quad Switcher
4PIN DIN to RCA
(male) Wire
T IS COMPAA
T IS COMP
4 Color Cameras
4 60' Extension
Wires
1 Power Adapter
TIBLE
TIBLE
Remote Control
- 2 Window Warning Stickers
- Mounting Hardware
- 1 Year Warranty
- Instruction Manual
- Online/Toll Free Tech Support
1
Page 5

SVAT ELECTRONICS
no w yo u ca n se e
IMPORT
IMPORT
Please read this booklet carefully before installing or using these units.
WARNING ~ These units should ONLY be opened by an authorized technician if service
is required.
SAFETY
SAFETY
For correct and safe operation of this system, it is essential that installers, end-users and
service technicians should follow all safety procedures outlined in this manual. Specific
Warning and Caution statements (and/or symbols) are marked on the units where needed.
ARNING
WWARNING
"WARNING" indicates a situation where failure to follow proper procedures can cause
personal injury. "CAUTION" indicates a situation where failure to follow proper
procedures can cause damage to the equipment.
SYSTEM FEA
SYSTEM FEA
A. Connects up to 4 Cameras
B. High Resolution
ANT!
ANT!
PRECAUTIONS
PRECAUTIONS
AND CAUTION STAA
AND CAUTION ST
TURES
TURES
Adjustable Brightness, Contrast, Saturation, Hue and Sharpness
860X525 60Hz for NTSC
860X625 50Hz for PAL
TEMENTS
TEMENTS
C. Various Display Modes
QUAD Mode, Full Screen Mode, PIP Screen Mode, 1 PIP Screen Mode,
2 PIP Screen Mode, Auto Sequence Mode
D. High Performance Freeze Function
Flicker Free Image Captured
E. High Performance Zoom Function
Selectable Zoom Area
F. Various Overlay Information
Camera Title, Real Time and Date, Alarm/Loss/Motion Message
G. Provide Various Event Input
Video Loss Detection, Motion Detection, 60 Event Report, Built-in Buzzer
H. Power Jack Connection
DC 12V/1A, 2.1mm Jack, Center is positive.
CVQ1000
2
Page 6

ARTS OF THE SYSTEM
PPARTS OF THE SYSTEM
PARTS OF THE CAMERA
A. Mounting Bracket
B. IR LED
C. Camera Din Connector
D. Camera Lens
PARTS OF THE SWITCHER
1. Power LED.
2. Zoom LED.
3. Freeze / Auto scan LED.
4. Ok / Enter Button.
5. Freeze / Auto Scan Button.
6. Infrared Receiver.
7. Camera 1 Button.
8. Camera 2 Button.
9. Camera 3 Button.
10. Camera 4 Button.
11. Quad / Menu / ESC
12. Output Jack to Monitor or TV Video Input
13. Camera Connector
14. Camera Connector
15. Camera Connector
16. Camera Connector
17. Adapter Jack
SVAT ELECTRONICS
no w yo u ca n se e
PARTS OF THE REMOTE
1. Menu
2. Freeze
3. Zoom
4. Auto
5. Quad. Mode
6. PIP 2
7. PIP 1
8. Separate Camera
9. Camera 1
10. Camera 2
11. Camera 3
12. Camera 4
13. Enter
14. Move Up
15. Move Left
16. Move Down
17. Move Right
CVQ1000
3
Page 7

SVAT ELECTRONICS
no w yo u ca n se e
INST
INST
CAMERA INSTALLATION & ADJUSTMENT
1. Install or mount the camera at the desired location. Do not place camera in a location
2. The cable supplied has one end with a DIN connector (Male) and the opposite end
3. The camera body could be adjusted up and down by loosening screw Aand
4. The camera body can be rotated around the mounting bracket “D” by adjusting
SWITCHER INSTALLATION
1. Connect the adapter to the adapter jack (DC IN) and plug it into a wall outlet.
2. Connect the DIN plug to the output jack, connect the RCA end to your TV or monitor.
3. Connect the DIN jack to the camera DIN plug.
4. After connecting all the cameras; power on the system, the power indication LED will
ALLA
ALLA
subject to direct sunlight or bright light.
with a DIN connector (Female). Insert the DIN plug into the cameras DIN connection.
tightening up at desired angle B.
screw “C” for any direction (360 degree).
light up and indicate camera number on channel display LED.
TION
TION
CVQ1000
4
Page 8

SVAT ELECTRONICS
no w yo u ca n se e
FUNCTIONS
FUNCTIONS
SWITCHER FUNCTIONS
When each button is pressed, the corresponding LED above the button will be ON.
1. Press button FREEZE / AUTO for 3 second to get the sequential displays of channel 1,
channel 2, channel 3, channel 4, and Quad respectively and proceed in cycle. Or
press the button less than 1 second to freeze the picture on the display, press again
to unfreeze.
2. Press MENU button for 3 second to enter SETUP MENU. This button can also be
used as EXIT.
3. Press button (C1) to get full screen display for Channel 1. This button can also be
used to move the cursor up/left while setting the menu.
4. Press button (C2) to get full screen display for Channel 2. This button can also be
used to move the cursor down/right while setting the menu.
5. Press button (C3) to get full screen display for Channel 3. This button can also be
used to increase the setup value or move the cursor left while setting the menu.
6. Press button (C4) to get full screen display for Channel 4. This button can also be
used to decrease the setup value or move cursor in right direction while setting
the menu.
REMOTE CONTROL FUNCTIONS
1. MENU Button:
Please see menu setup section.
2. FREEZE Button:
Press any channel to get full screen display, and then press FREEZE to freeze the
picture. Press FREEZE again to unfreeze.
3. ZOOM Button:
Press ZOOM button to achieve zoom in display.
Press buttons to choose zoom area.
Press Zoom button again to achieve zoom in display.
Press buttons to get full area display or press ZOOM to re-choose zoom area
4. AUTO Button:
Press AUTO to get the sequential displays of channel 1, channel 2, channel 3,
channel 4, and Quad respectively and proceed in cycle. Make sure that each
channel is activated while setting auto sequence in the menu.
5. QUAD Button:
Press QUAD button while in full screen mode display to display pictures in quad.
6/7. PIP Button:
Press PIP button to get PIP (picture in picture display). Channel 1 is the default for
Full screen, and Channel 2 is the default for Sub-screen.
8. Separate Cameras Button:
Press to view 2 cameras at same time
9. Camera 1 Button:
Press to view full screen of camera 1
10.Camera 2 Button:
Press to view full screen of camera 2
11. Camera 3 Button:
Press to view full screen of camera 3
12.Camera 4 Button:
Press to view full screen of camera 4
CVQ1000
5
Page 9

MENU SETUP
MENU SETUP
PRESS MENU TO SETUP THE MENU AT
ANY MODE.
1. How to set the menu:
- Press MENU to enter main menu.
- Press buttons to move the
highlighted section and choose the
desired section. Press OK to enter the
desired section. To exit, press MENU
button again.
A.SYSTEM SETUP
- Date / Time: Press to move the
cursor to the desired setting. Press
to adjust the setting.
- System Format: Choose PAL / NTSC
- Key lock: To enable / disable button on
the system box.
- Factory reset: To reset to factory
default setting.
- To exit, press MENU button again.
SVAT ELECTRONICS
no w yo u ca n se e
B.DISPLAY SETUP
- Display on screen: To display title / date
/ time on the screen by check the box
beside. To disable by un-checking
the box.
- Screen position: To adjust camera
viewing area by adjusting X (horizontal)
and Y (vertical). Border color: To
change the color or camera's border. To
exit, press MENU button again.
C. AUTO SEQUENCE
- To enable or disable auto sequence
function. Each channel can be set to
ON or OFF. The switching time can be
set from 1sec to 99sec..
- To exit, press MENU button again.
CVQ1000
6
Page 10

D. CAMERA SETUP:
- Camera 1: Press to switch
desired camera.
- Title: Press to move the cursor,
and press to adjust character.
- Press to adjust Brightness,
Contrast, Saturation, Hue and Sharpness.
- To exit, press MENU button again.
E. MOTION SETUP:
- Camera 1: Choose desired camera.
- Detection Time: To enable / disable
detection of the cameras.
- Masking area: To disable an area
you wish not to detect.
- To exit, press MENU button again.
SVAT ELECTRONICS
no w yo u ca n se e
F. EVENT SETUP & EVENT REPORT:
- Loss: If any camera loses its signal, the
time of signal loss will be recorded in
Event report.
- Motion: If motion is detected in front of
camera, the time of motion detection will
be recorded in Event report.
- Buzzer hold time: Enables or disables
buzzer function and can be set from
OFF to 99 sec..
- Report hold time: Enables or disables
the report function and can be set from
OFF to 99 sec.
- 6 pages of "EVENT REPORT" are
available in this system.
- Report can be deleted by choosing
"YES" on LIST CLEAR section.
- To exit, press MENU button again.
- Press any button except "OK" on the
switch box to clear the alarm noise.
- Alarm / Alarm Polarity: To enable the
Power-On alarm, all 4 alarm checks
should be ticked together with Alarm
Polarity set to "High".
CVQ1000
7
Page 11

SVAT ELECTRONICS
no w yo u ca n se e
SPECIFICA
SPECIFICA
TIONS
TIONS
INDOOR SWITCHER
Video Format ..................................................NTSC / PAL
Video Loss......................................................Auto Detection
Video Inputs ..................................................4CH Pin Din
Video Display Output......................................1CH Pin Din
Live Viewing ..................................................Quad, PIP, Single Screen
Live Resolution ..............................................860 x 525
Live Frame Rate ............................................N/A
Motion Detection ............................................Yes
Event Search Mode........................................By Time, Date, Event
OSD and System Menu Display ..................Yes
OSD Language Display ................................English
Time and Date Stamp Display........................Yes
LED Indicators ................................................Power, Zoom, Freeze/Auto
Housing Material ............................................ABS Plastic
Housing Color ................................................Stone Grey
Power Input....................................................DC 12V 1A
Power Adapter Input ......................................AC 100 ~ 240V
Cooling ..........................................................No
Operating Temperature ..................................41°F ~ 104°F
Operating Humidity ........................................80%
Dimensions ....................................................0.9" x 0.8" x 0.2"
Weight ............................................................0.7lbs (without adapter)
OUTDOOR CAMERA
Camera Type..................................................Bullet
Image Sensor ................................................1/3" CMOS Color
Resolution ......................................................330 TV Lines
Outdoor Use ..................................................Yes
IP Rating ........................................................IP44
Focal Length ..................................................6mm
Focus Type ....................................................Fixed
Night Vision....................................................Yes
CVQ1000
8
Page 12

Number of IR LEDs and Range ....................11, up to 10ft
IR LED Control ..............................................Automatic, CDS Sensor
Min. Illumination ............................................0 lux
IR Wavelength ................................................850nm
Video Output ..................................................1CH RCA Composite
TV System ......................................................NTSC
Microphone ....................................................No
Motion Detection ............................................No
Viewing Angle ................................................53 Degrees
Electronic Shutter ..........................................1/60 ~ 1/15000 sec
BLC ................................................................N/A
AGC................................................................N/A
ELC ................................................................N/A
Line Lock........................................................N/A
Iris Control......................................................N/A
White Balance................................................Yes
Sun Shield......................................................Yes
IR Cut Filter....................................................Yes
Housing Material ............................................ABS Plastic
Housing Color ................................................Stone Grey
Signal/Noise Ratio ..........................................>48dB
Camera Bracket ............................................Yes
Operating Temperature ..................................-14°F ~ 122°F
Operating Humidity ........................................95%
Camera Power Input ......................................7.5V 300mA
Power Adapter Input ......................................120V 60Hz
LED Power Indicator ......................................No
Dimensions ....................................................4.1" x 3.4" x 2.2"
Weight ............................................................0.2lbs
SVAT ELECTRONICS
no w yo u ca n se e
CVQ1000
9
Page 13

SVAT ELECTRONICS
no w yo u ca n se e
T SUPPORTS CRIME ST
SVSVAAT SUPPORTS CRIME ST
Crime Stoppers programs are operated as non-profit charities and are managed by a
volunteer board of directors who raise funds and pay rewards to individuals who
anonymously call with information that helps solve crime.
Rewards are paid for tips that lead to the arrest and indictment of people charged with
felony offenses, and to date Crime Stoppers statistics show a conviction rate of
approximately 95%.
To receive more information about Crime Stoppers or to make a charitable donation
please fill in the fields on the back of this page, cut on the dotted line and mail in.
HERE
PLACE
POSTAGE
OPPERS
OPPERS
P.O. Box 614
Arlington, Texas
U.S.A 76004-0614
CRIME STOPPERS INTERNATIONAL
CVQ1000 www.svat.com
Page 14

SVAT ELECTRONICS
no w yo u ca n se e
T SUPPORTS CRIME ST
SVSVAAT SUPPORTS CRIME ST
OPPERS
OPPERS
To receive more information about Crime Stoppers or to make a charitable donation
please fill in the fields below, cut on the dotted line and mail in.
NAME:_____________________________________________ PHONE:_____________________________________
ADDRESS:_________________________________________ CITY:________________________________________
PROV/STATE:__________________ COUNTRY:_____________________ POSTAL/ZIP CODE:__________________
E-MAIL ADDRESS:_________________________________________________________________________________
Charitable donations can be made to “CSI” by returning this card in an envelope with your check or money order to
the address on the other side.
Crime Stoppers International is an organization of community based civilian Crime Stoppers
programs, which assist police in solving crime. You can find more information about
Crime Stoppers at www.c-s-i.org
Local Crime Stoppers programs are partnerships between the public, media and local policing
organizations. Each program is run by a citizen board, whose purpose is to advertise a local
telephone number, which anonymous persons can call with information regarding a crime. Callers
(tipsters) may be eligible for a cash reward for their information.
If your community does not have a Crime Stoppers program and would like information about
starting one, return this card with the following information.
CRIME STOPPERS INTERNATIONAL
THANK YOU
Amount $__________________
CVQ1000 www.svat.com
Page 15

SVAT ELECTRONICS
no w yo u ca n se e
CVQ1000 www.svat.com
Page 16

SVAT ELECTRONICS
no w yo u ca n se e
www
www
Disclaimer
SVAT does not endorse any of SVAT products for any illegal
activities. SVAT is not responsible or liable in any way
shape or form for any damage, vandalism, theft or any
other action that may occur while a SVAT product is in use
by the purchaser.
.svat.com
.svat.com
Model #
CVQ1000
www.svat.com
 Loading...