

Page 1
SURESHADE
PO Box 51294
Philadelphia, PA 19115
Tel: 1-877-333-8323
International: 215-673-2307
www.sureshade.com
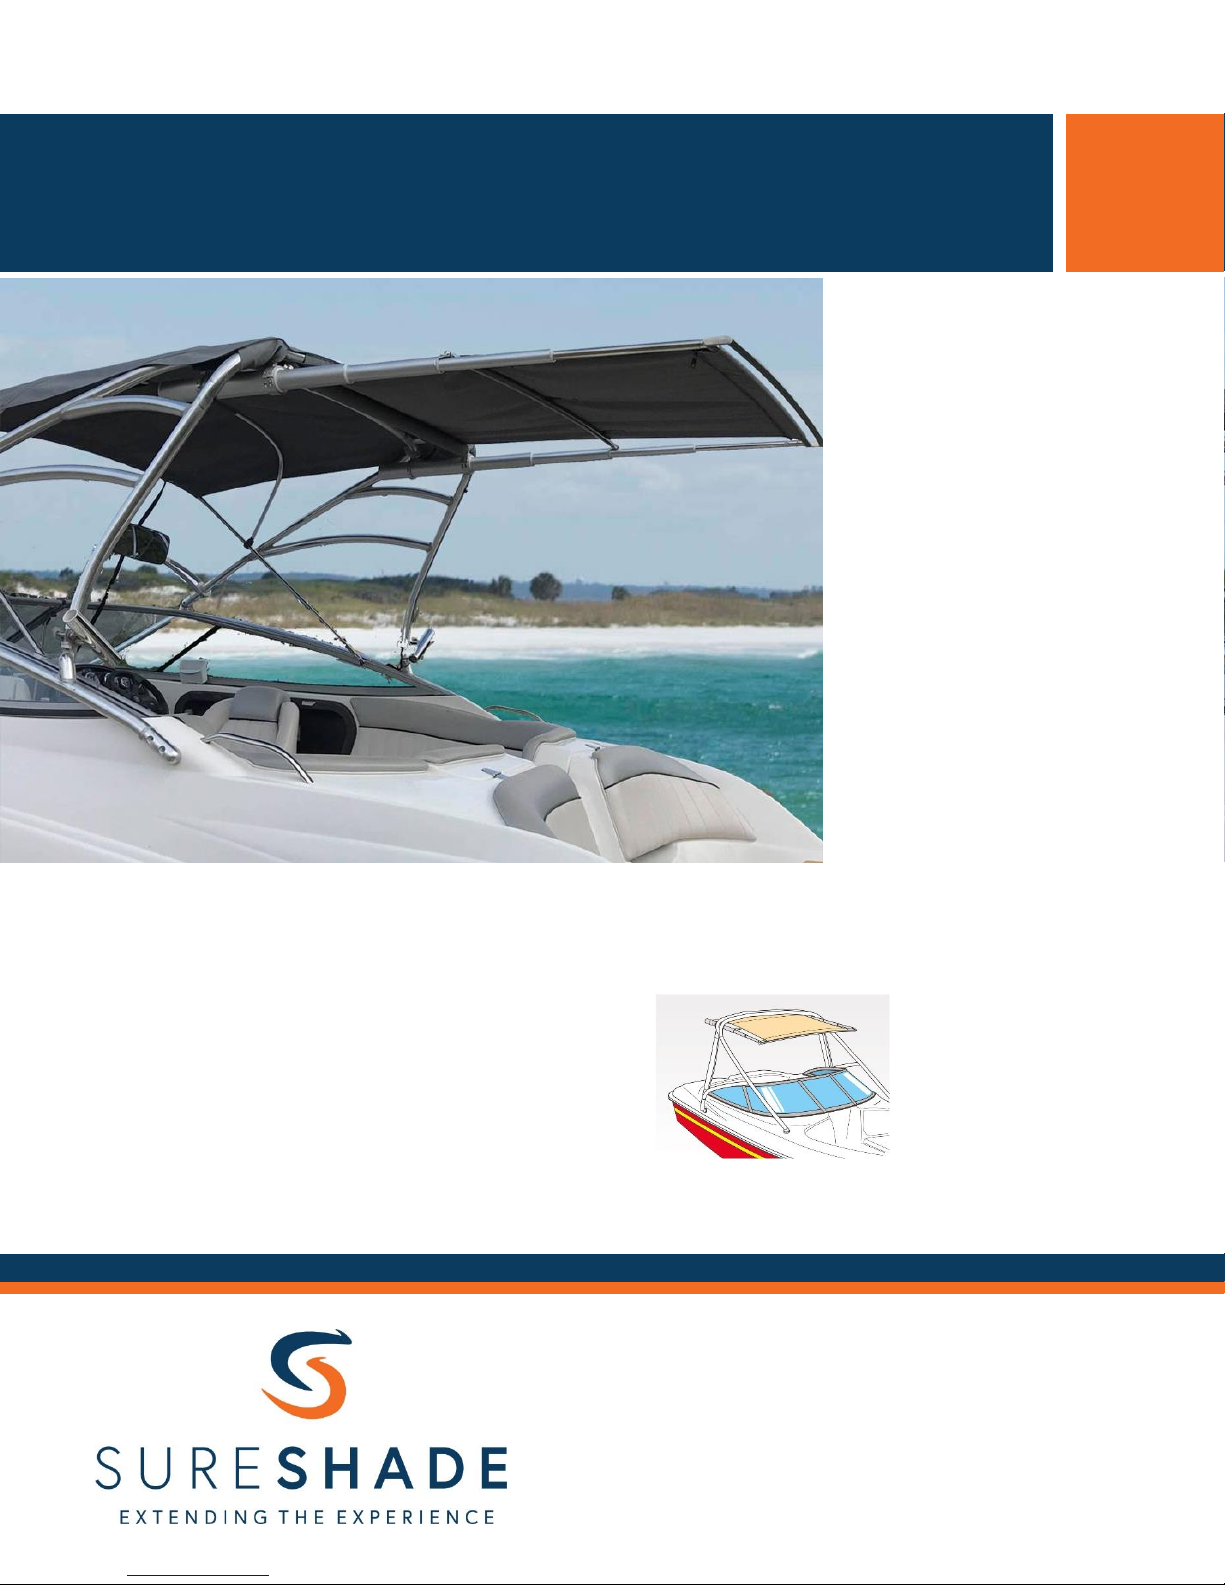
The following instructions detail how to properly install
SureShade RTX on a tower or hardtop for DIY or
aftermarket installations.
SureShade RTX Pull-Out Shade can also be installed
aftermarket on a hardtop, arch, tower or T-Top.
Installation instructions will vary per application.
Page 1 of 4
TOOLS & SUPPLIES:
• SureShade RTX
• Tape measure
• Drill motor and 3/8-inch bit
• Adjustable wrench
• Allen wrenches (1/8 and
3/16 inches)
• Phillips screwdriver
• Marine sealant
Approximate Time: 3 hours
Illustrations provided
by Tim Barker - Boating Magazine
RTXINSTALL-HARDTOP-0518
RTX Pull-Out Shade
General Installation Instructions
S U R E S H A D E T E C H N I C A L D O C U M E N T A T I O N
Page 2
SureShade RTX
– General Installation Instructions
Page 2 of 4
Mounting Brackets
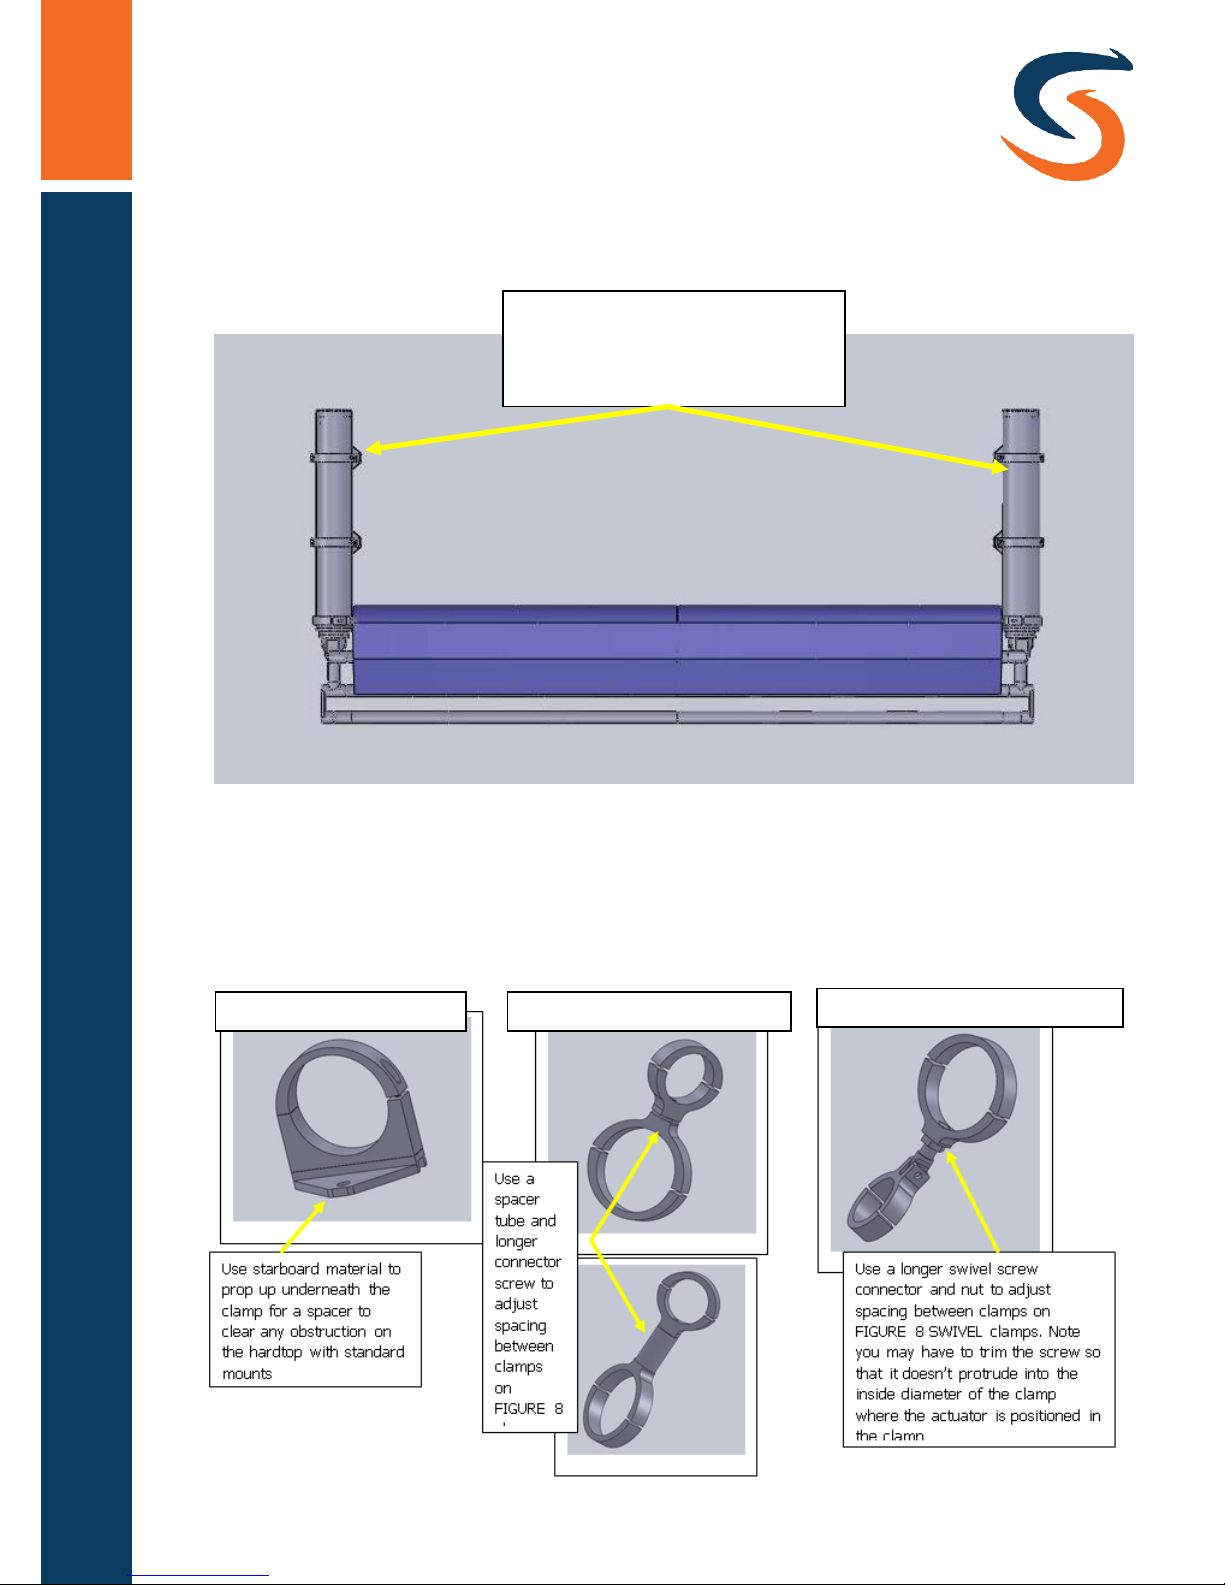
There are 3 types of mounting clamp configurations shown below
here in figures 1a thru 1c
Most important part of the
installation is to make sure the
actuators are installed parallel to
each other at the specified width
Fig 1a – standard mount Fig 1b – FIGURE 8 clamp
Fig 1c – FIGURE 8 SWIVEL clamp
Installing RTX
Page 3
SureShade RTX
– General Installation Instructions
Page 3 of 4
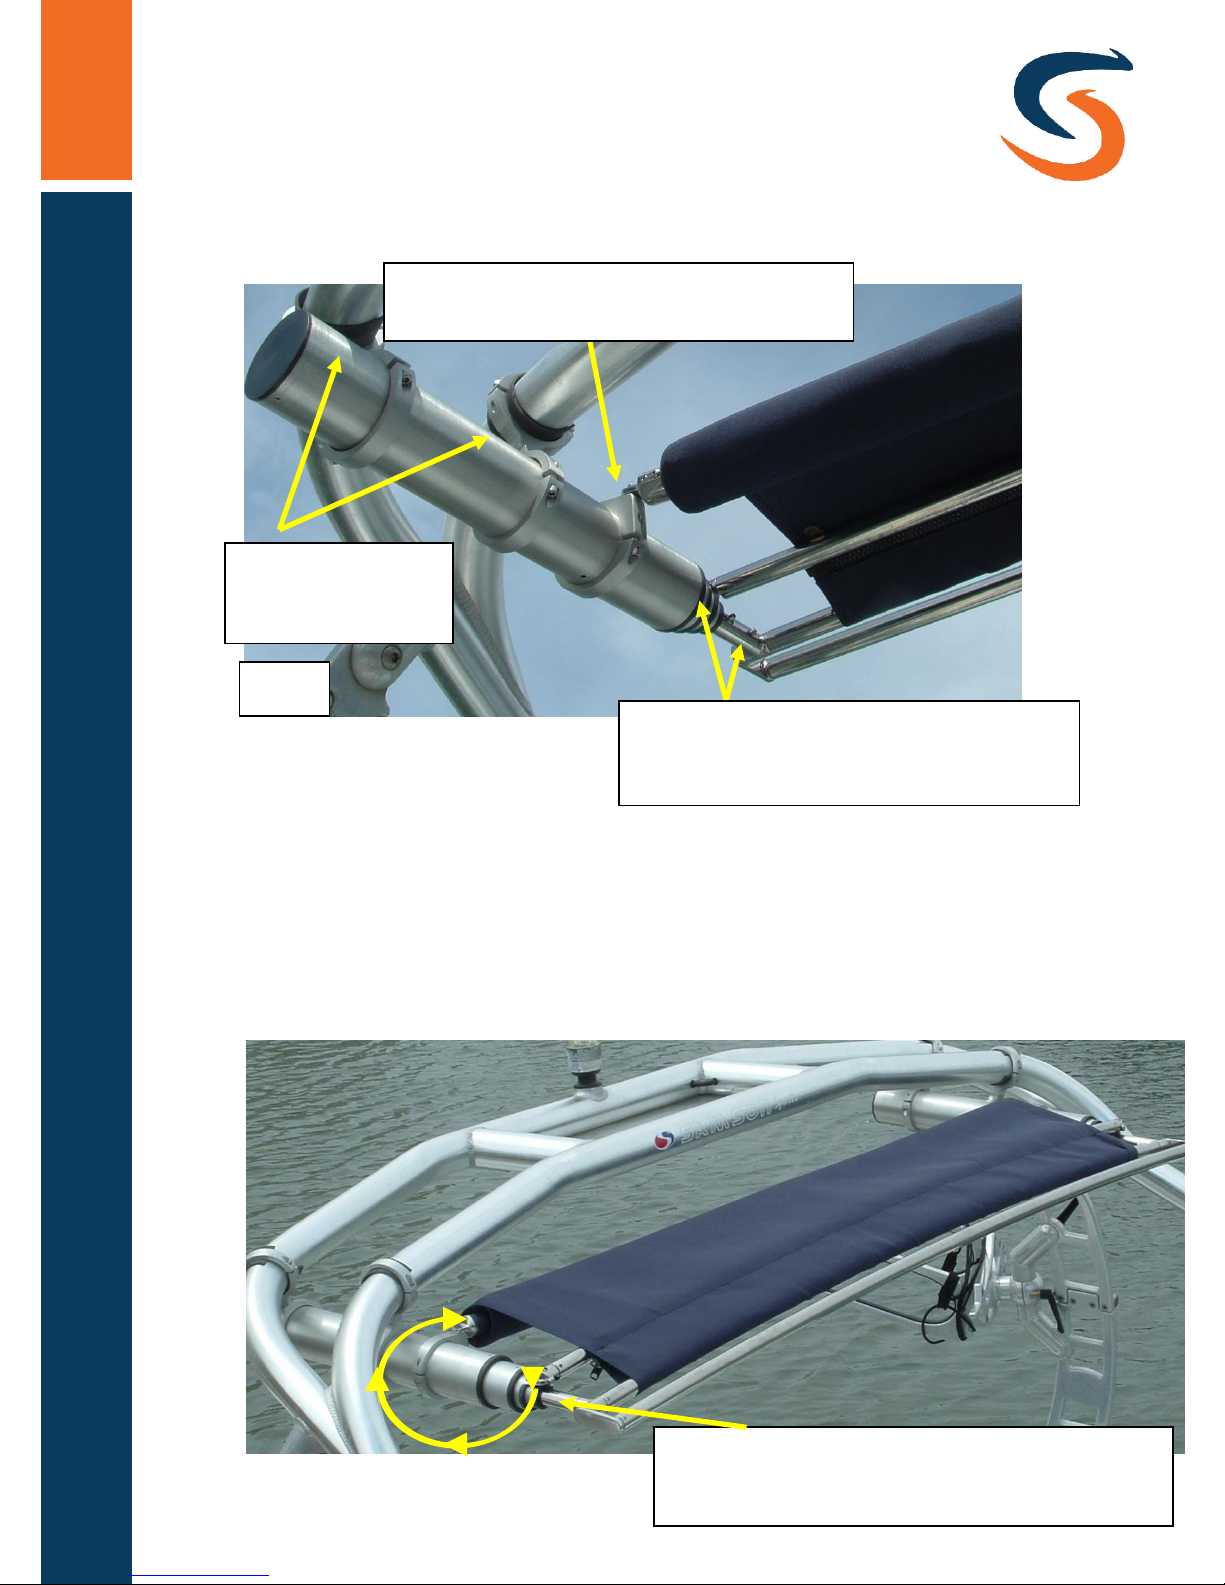
Tower Mounting Shown in Fig 2 and 3
Rotate the roller clamp to line up the roller
mounting screws with the clamp
Adjust Fig 8 clamps to
make actuators
parallel to each other
You may need to rotate the actuator in the
clamps in order to get the mid crossbar and pull
bar connecting screws to line up
Fig 2
To preload the roller with tension, rotate the canvas
with the roller in the direction shown a few revolutions
as needed before attaching to the pull bar.
Notes for operation:
Pull/push evenly from the center of the pull bar to extend/retract the shade so the
framework doesn’t rack side to side during movement.
Depending on how much tension is on the canvas roller, in order to release the locking
pins you may have to push up and outward on the crossbar to release the tension on
the first locking pin.
Page 4
SureShade RTX
– General Installation Instructions
Page 4 of 4
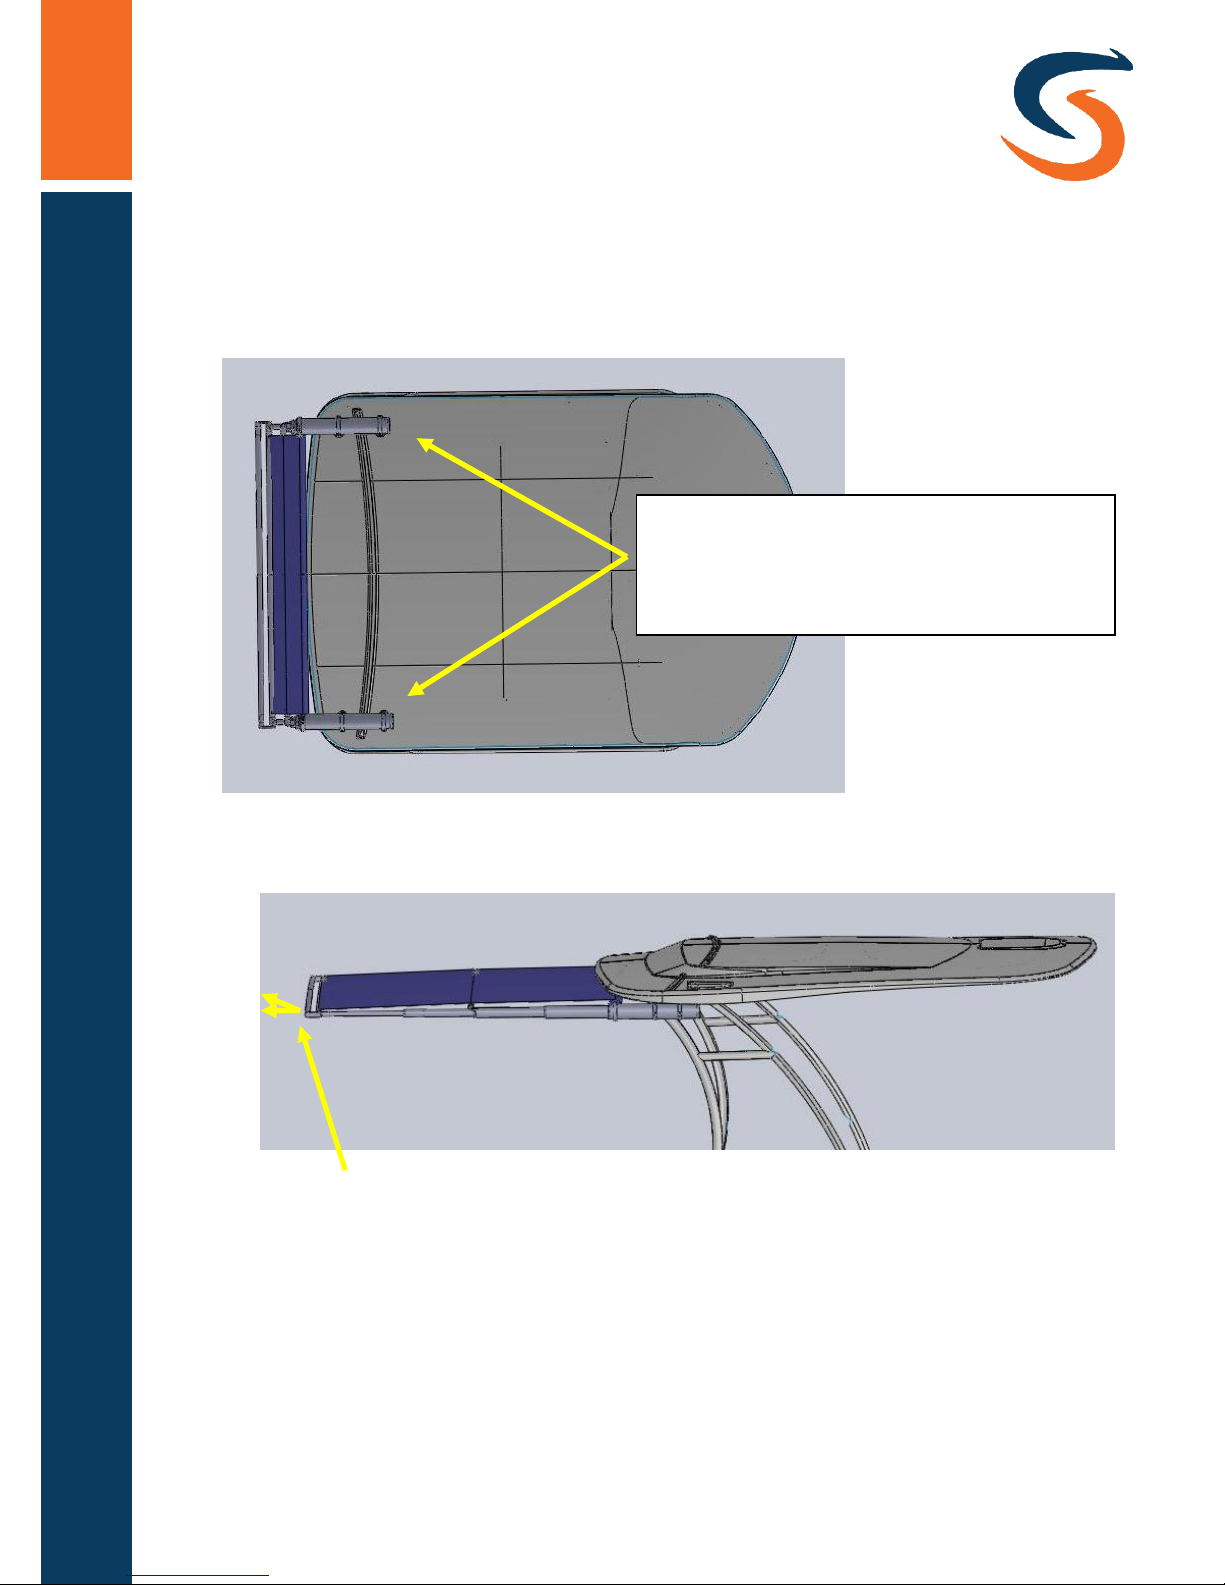
Hardtop Mounting Shown Below
Position actuators properly by specified width and
parallel to each other on the hardtop surface,
mark you mounting positions, drill thru the
hardtop for thru bolting, attach crossbars and
roller as described in Fig 2 and 3.
Operation of RTX system:
Extension
Center yourself in the middle of the push bar for even pressure
Lift up and out (as shown) on push bar when extending to reduce friction and for easier movement
Extend until all locking pins are engaged
Retraction
To release the first stage locking pins, relieve pressure on the pins
Release the first stage locking on one side at a time
Relieve pressure on the pins by lifting the framework up and pushing out (as shown) as if you
are extending the framework and release the locking pin, repeat on other side actuator
Center yourself in the middle of the push bar for even pressure
Lift up and push in bar when retracting to reduce friction and for easier movement until fully retracted
If you push too much on one side there is the chance of getting the framework stuck, if this occurs,
start over by extending the shade and then proceed with the retraction instructions again
© 2018 Rodan Enterprises LLC t/a SureShade
 Loading...