

Page 1

0.56 " Digital Red LED Automobile
Thermometer Panel Meter
User’s Guide
© 2004-2009 Sure Electronics Inc. ME-SP330 & ME-SP331 & ME-SP332 & ME-SP333_Ver1.0
Page 2

0.56" DIGITAL RED LED AUTOMOBILE
THERMOMETER PANEL METER
USER’S GUIDE
Table of Contents
Chapter 1. Overview ..........................................................................................................1
1.1 Overview..............................................................................................................1
1.2 Main Features...................................................................................................... 2
Chapter 2. Specification Characteristics.........................................................................3
2.1 Specification Characteristics.............................................................................3
Chapter 3. Features ...........................................................................................................4
3.1 Adapted to the Ambient Brightness..................................................................4
3.2 Slowly Adjust the Brightness of Diode............................................................. 6
Chapter 4. How to Use a Thermometer............................................................................7
4.1 Connection with Power Supply and Thermo Probe......................................... 7
4.2 Display Mode Settings........................................................................................7
4.2.1 Display in ℉&℃.................................................................................................... 7
4.2.2 Select Display Temperature from CH1 or CH2.............................................. 8
Chapter 5. Mechanical Drawing....................................................................................110
Chapter 6. Contact Us ...................................................................................................121
© 2004-2009 Sure Electronics Inc.
ME-SP330 & ME-SP331 & ME-SP332 & ME-SP333_Ver1.0_Page i
Page 3

0.56" Digital Red LED Automobile Thermometer Panel Meter
NOTES:
Product Version : Ver 1.0
Document Version : Ver 1.0
ME-SP330 & ME-SP331 & ME-SP332 & ME-SP333_Ver1.0_Page ii
© 2004-2009 Sure Electronics Inc
Page 4
1.1 Overview
0.56" DIGITAL RED LED AUTOMOBILE
THERMOMETER PANEL METER
USER’S GUIDE
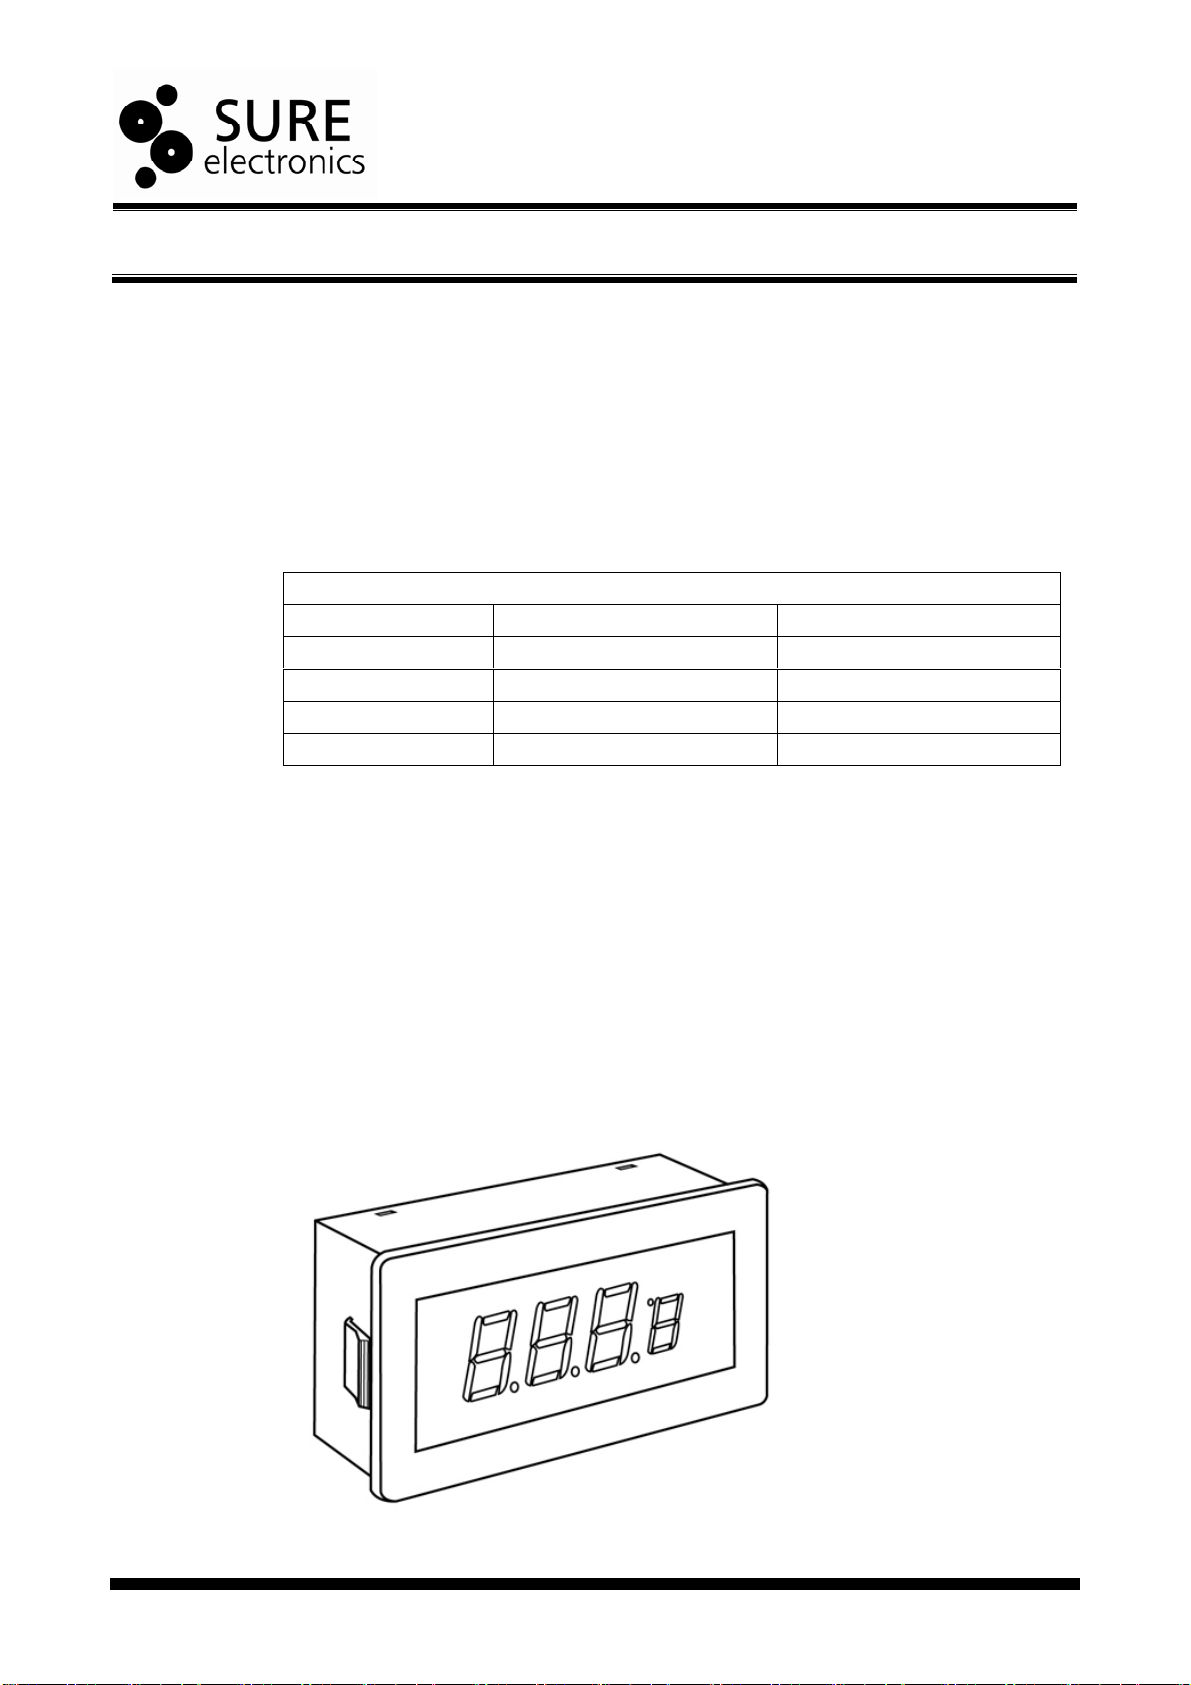
Chapter 1. Overview
Thanks for using the thermometer of ME-SP33X series by Sure Electronics. Please read
this manual carefully prior to the installation of thermometer.
Thermometers of ME-SP33X series are the first LED-based self-made type. Aside from
the features such as simplicity, self-adaptation to ambient brightness inherited from
panel meter of ME-SP03X series, flexibility is the most impressive feature which
provides 4 different versions that can suit the needs of global buyers.
TABLE 1-1 MEMBERS OF ME-SP33X SERIES
ME-SP33X SERIES
Thermometers equipped with built-in sensor , su ch as ME-SP330 and ME-SP332, can be
used to measure temperature in household families, offices, PC rooms and vehicles.
While external probe can help you extend your application range to some harsh
environment, such as to measure the water temperature of vehicles, air-conditioners,
refrigerators, water-heaters or the temperature of computer cases since the external
probe itself is water-proof.
As listed in the above table, ME-SP330 and ME-SP331 are equipped with a single
built-in sensor and an external probe respectively. While ME-SP332 and ME-SP333 can
measure temperature of two different applications since both of them are equipped with
dual sensors.
FIGURE 1-1 PRODUCT DIAGRAM
S/N CH1 CH2
ME-SP330 - Built-in sensor
ME-SP331 External Probe ME-SP332 External Probe Built-in sensor
ME-SP333 External Probe
External Probe
© 2004-2009 Sure Electronics Inc.
ME-SP330 & ME-SP331 & ME-SP332 & ME-SP333_Ver1.0_Page 1
Page 5
0.56" Digital Red LED Automobile Thermometer Panel Meter
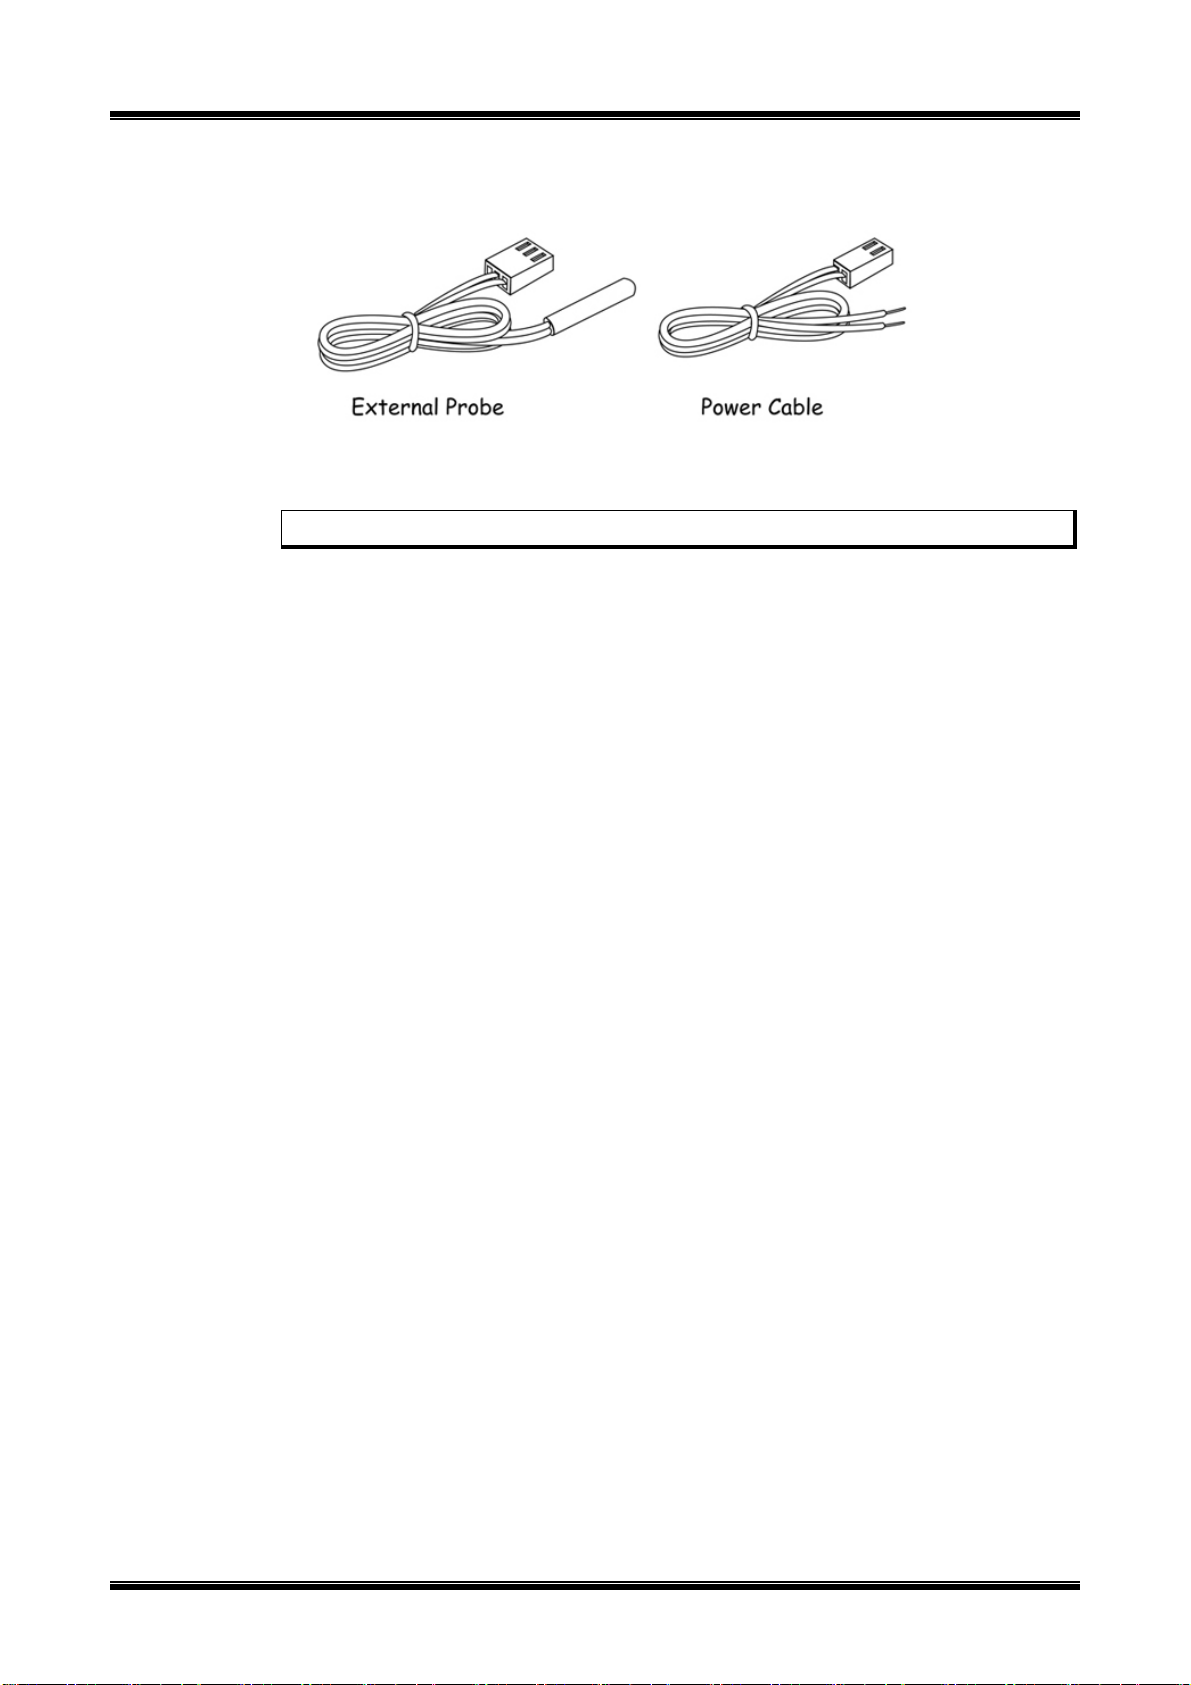
FIGURE 1-2 ACCESSORIES
Note: All diagrams or schematics in this manual are for reference only.
1.2 Main Features
1. °C/°F selectable
2. Internal sensor or external thermo probe or a combination of both are provided
3. By the change of ambient brightness, thermometer will alternately display temp in
°C and °F
4. Self adapted to ambient brightness, not dazzling in night time since the brightness
can be adjusted automatically.
5. Large (0.56”/14.2mm) easy-to-read red LED display
6. Miniature housing
7. Ideal for automotive, industrial applications
8. -10 to +60 ℃ operating temperature range
9. Over 90% components are SMT based, which are reli able and environment-frien dly
10. UL and CE-certified compound AWG22 cables are used, low voltage drop
ME-SP330 & ME-SP331 & ME-SP332 & ME-SP333_Ver1.0_Page 2
© 2004-2009 Sure Electronics Inc
Page 6

0.56" DIGITAL RED LED AUTOMOBILE
Chapter 2. Specification Characteristics
2.1 Specification Characteristics
Power Supply Requirements Min. Typ. Max. Units
Supply Voltage
ME-SP33X 8.5 12 26 V
Supply Current ( @ VCC = 12V )
Full Sunlight - 36 - mA
Total Darkness - 13 - mA
Performance
Temperature Range
Internal Sensor 32(0) - 140(60) °F (°C)
External Probe -31(-24) - 257(125) °F (°C)
Display Resolution
-9.9°F (°C) to 99.9°F (°C) - 0.1 - °F (°C)
Other range - 1 - °F (°C)
Accuracy 0°C to 60°C
External 0 ±1.0 ±1.5 °C
Internal 0 ±2.0 ±4.0 °C
Responding Rate: - 0.5 - S
Display
Display Type and Size
Digit Display 3 digit, 0.56”/14.2 mm high LED
°F & °C Display 1 digit, 0.39”/9.9 mm high LED
Over-range Indication or no signal input
ME-SP33X “OL”
Physical/Environmental
Operating Temperature -10 - 60 °C
Storage Temperature -40 - 75 °C
Humidity 0 - 85 %RH
Note: The allowed input range of power supply is DC 8.5-26V, a higher voltage may
burn out the thermometer.
THERMOMETER PANEL METER
USER’S GUIDE
© 2004-2009 Sure Electronics Inc.
ME-SP330 & ME-SP331 & ME-SP332 & ME-SP333_Ver1.0_Page 3
Page 7

0.56" DIGITAL RED LED AUTOMOBILE
THERMOMETER PANEL METER
Chapter 3. Features
The brightness of the diode varies with the change of ambient brightness and won’t be
too dazzling in night time.
3.1 Adapted to the Ambient Brightness
1. The brightness of diode will reach its topmost when the panel meter is in a room
under direct sunlight exposure.
USER’S GUIDE
2. The brightness of the diode is comparatively high when the panel meter is placed in
a room, around which the environment is similar to dawn, nightfall or cloudy
weather.
ME-SP330 & ME-SP331 & ME-SP332 & ME-SP333_Ver1.0_Page 4
© 2004-2009 Sure Electronics Inc.
Page 8

0.56" Digital Red LED Automobile Thermometer Panel Meter
3. The brightness of the diode is the darkest when the panel meter in placed in an
environment of almost no light from outside.
© 2004-2009 Sure Electronics Inc.
ME-SP330 & ME-SP331 & ME-SP332 & ME-SP333_Ver1.0_Page 5
Page 9

3.2 Slowly Adjust the Brightness of Diode
Features
When the ambient environment of panel meter is shifted from light to dark or dark to light,
the brightness of diode will be gradually changed and whole process will la st for 1
seconds. The adjustment of brightness is smooth and it won’t make people feel abrupt.
ME-SP330 & ME-SP331 & ME-SP332 & ME-SP333_Ver1.0_Page 6
© 2004-2009 Sure Electronics Inc
Page 10

0.56" DIGITAL RED LED AUTOMOBILE
THERMOMETER PANEL METER
Chapter 4. How to Use a Thermometer
4.1 Connection with Power Supply and Thermo Probe
FIGURE 4-1 CONNECTION SCHEMATIC
USER’S GUIDE
Note:
1. “VCC (+)” and ”GND (-)” shall be connected with the positive (+) and negative (-)
of DC power supply ranging from 8.5-26V.
2. Pay more attention to polarity when hooking up, otherwise thermometer will be
burnt out.
3. When an external probe (no matter a 2-pin or 3-pin version) is to be connected
with the pin header of thermometer, always leave the pin “+5V” disconnected.
4.2 Display Mode Settings
4.2.1 Display in ℉&℃
Thermometer can display temperature in ℉or℃, which can be set by K1 and K2 of DIP
switch.
K1 K2 Func.
OFF OFF
ON OFF
OFF ON
ON ON No function
Notes:
1. By setting K1 and K2, thermometer can alternately display temperature in ℉ and
℃.
Display in℃
Display in ℉
Alternate display with the change of ambient brightness(℉/℃)
© 2004-2009 Sure Electronics Inc.
ME-SP330 & ME-SP331 & ME-SP332 & ME-SP333_Ver1.0_Page 7
Page 11

How to Use a Thermometer
2. See following for steps of how to make the thermometer change its display from
C(F)to F(C) with the change of ambient brightness C(F)to F(C):
① Expose thermometer under intense light source (luminance intensity >=1000
Lux).
② Cover thermometer with something to avoid being exposed under intense light
(luminance intensity<=60Lux).
③ Thermometer will start to change the current display from ℃(℉) to ℉(℃) if
you repeat the above steps twice.
Application example:
You will need a flashlight to toss light directly on thermometer when ambient luminance
intensity is less than 60 Lux and normally you will need to repeat the on & off action
twice. You can also use flashlight even when the ambient luminance intensity exceeds
60 Lux, when you switch off the flashlight, cover your thermometer with your hands so
that the luminance intensity can fall short of 60 Lux.
4.2.2 Select Display Temperature from CH1 or CH2
Thermometer allows you to select displaying temperature reading from CH1 or CH2,
which can be achieved by setting k3 and k4 of DIP switch.
K3 K4 Func.
OFF OFF Display temp reading of CH2
ON OFF Display temp reading of CH1
OFF ON Alternate displaying automatically ( CH1 / CH2)
ON ON
Notes:
1. Set K3 and K4 to OFF in terms of ME-SP330.
ME-SP330 & ME-SP331 & ME-SP332 & ME-SP333_Ver1.0_Page 8
Alternate display with the change of ambient brightness(CH1 / CH2)
© 2004-2009 Sure Electronics Inc
Page 12

0.56" Digital Red LED Automobile Thermometer Panel Meter
2. Set K3 and K4 to ON and OFF respectively in terms of ME-SP331.
3. In terms of ME-SP332 and ME-SP333, thermometer can alternately display
temperature of CH1 or CH2 by setting K3 and K4.
4. Thermometer will display temperature reading of CH2 if it were selected to do so.
5. Thermometer will display temperature reading of CH1 if it were selected to do so.
6. When you select to display temperature readings of both CH1 and CH2
automatically and alternately, thermometer will do so.
Details are as follows:
① Time interval for each change in between CH1 and CH2 is 4 seconds.
② The displaying of CH1 and CH2 denotes the temperature displaying thereafter.
CH1 means temperature reading from CH1 will be displayed and CH2 means
temperature reading from CH2 will be displayed.
7. When Alternate display with the change of ambient brightness is selected, you can
have thermometer display temperature readings of CH1 and CH2 alternately by
changing the ambient brightness.
Detailed steps are as follows:
① Expose thermometer under intense light (make luminance intensity >=1000
Lux).
② Cover thermometer with something to avoid intense light (make luminance
intensity <=60 Lux).
③ Repeat the above steps four times and thermometer will change the current
display from CH1 (CH2) to CH2 (CH1).
④ It takes approximately 9 seconds before the next prompt(CH1/CH2) can be
displayed when the thermometer is in use. The display of CH1(CH2) denotes
the display of temperature readings from CH1(CH2).
Application example: refer to 4.2.1
© 2004-2009 Sure Electronics Inc.
ME-SP330 & ME-SP331 & ME-SP332 & ME-SP333_Ver1.0_Page 9
Page 13

Page 14

0.56" DIGITAL RED LED AUTOMOBILE
Chapter 5. Mechanical Drawing
FIGURE 5-1 MECHANICAL DRAWING
THERMOMETER PANEL METER
USER’S GUIDE
ME-SP330 & ME-SP331 & ME-SP332 & ME-SP333_Ver1.0_Page 10
© 2004-2009 Sure Electronics Inc.
Page 15

0.56" DIGITAL RED LED AUTOMOBILE
THERMOMETER PANEL METER
USER’S GUIDE
Chapter 6. Contact Us
Sure Electronics Co., Ltd.
5F, Zone A,
Qinhuai Technology Innovation Center
105-2 DaMing Rd (ZIP:210022)
Nanjing
P.R.China
Tel: +86-13601408832 (For technical questions only)
+86-25-66606340 (English service, from GMT1-10AM)
Fax: +86-25- 66606341-866
Website: www.sure-electronics.com
www.sure-electronics.net
© 2004-2009 Sure Electronics Inc.
ME-SP330 & ME-SP331 & ME-SP332 & ME-SP333_Ver1.0_Page 11
 Loading...