

Page 1
Tel: +44 (0)1884 675801 | www.supertramp.co.uk | [email protected]
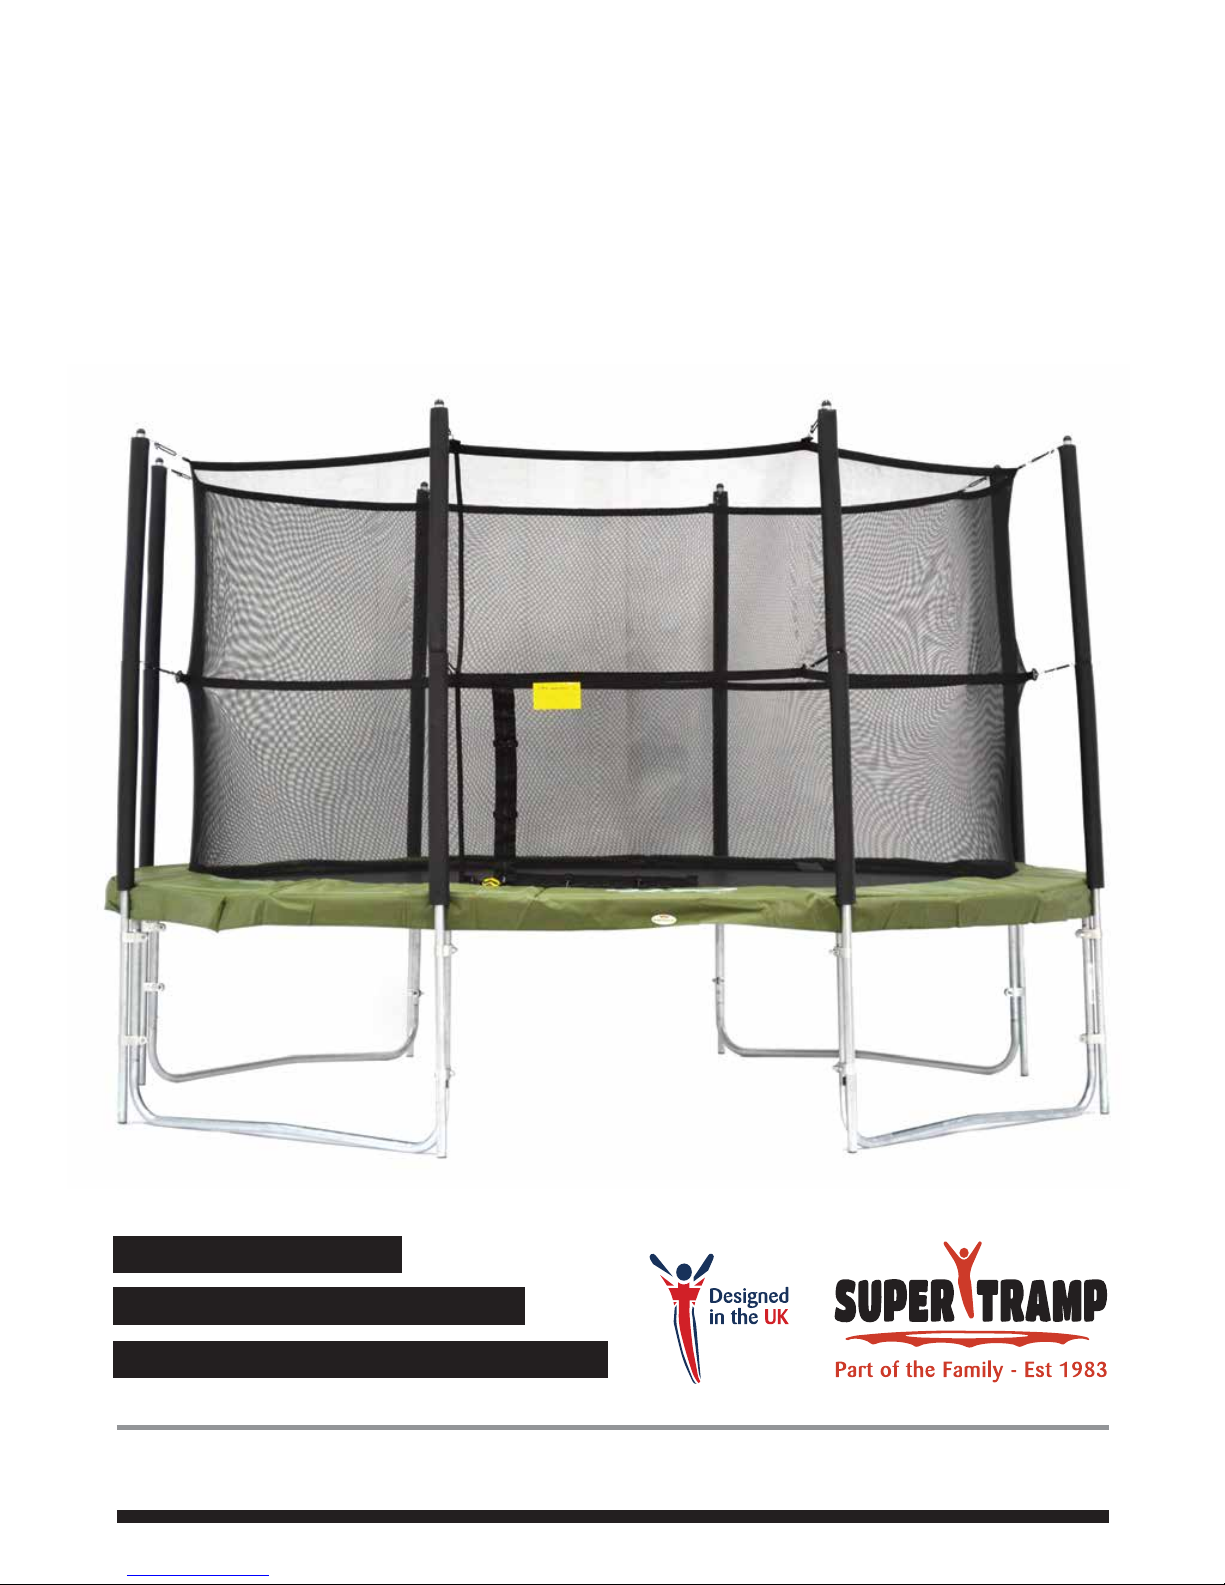
Adult assembly required
Read User Guide before assembling
Please keep this guide for further reference
ESN NET
USER GUIDE
Page 2
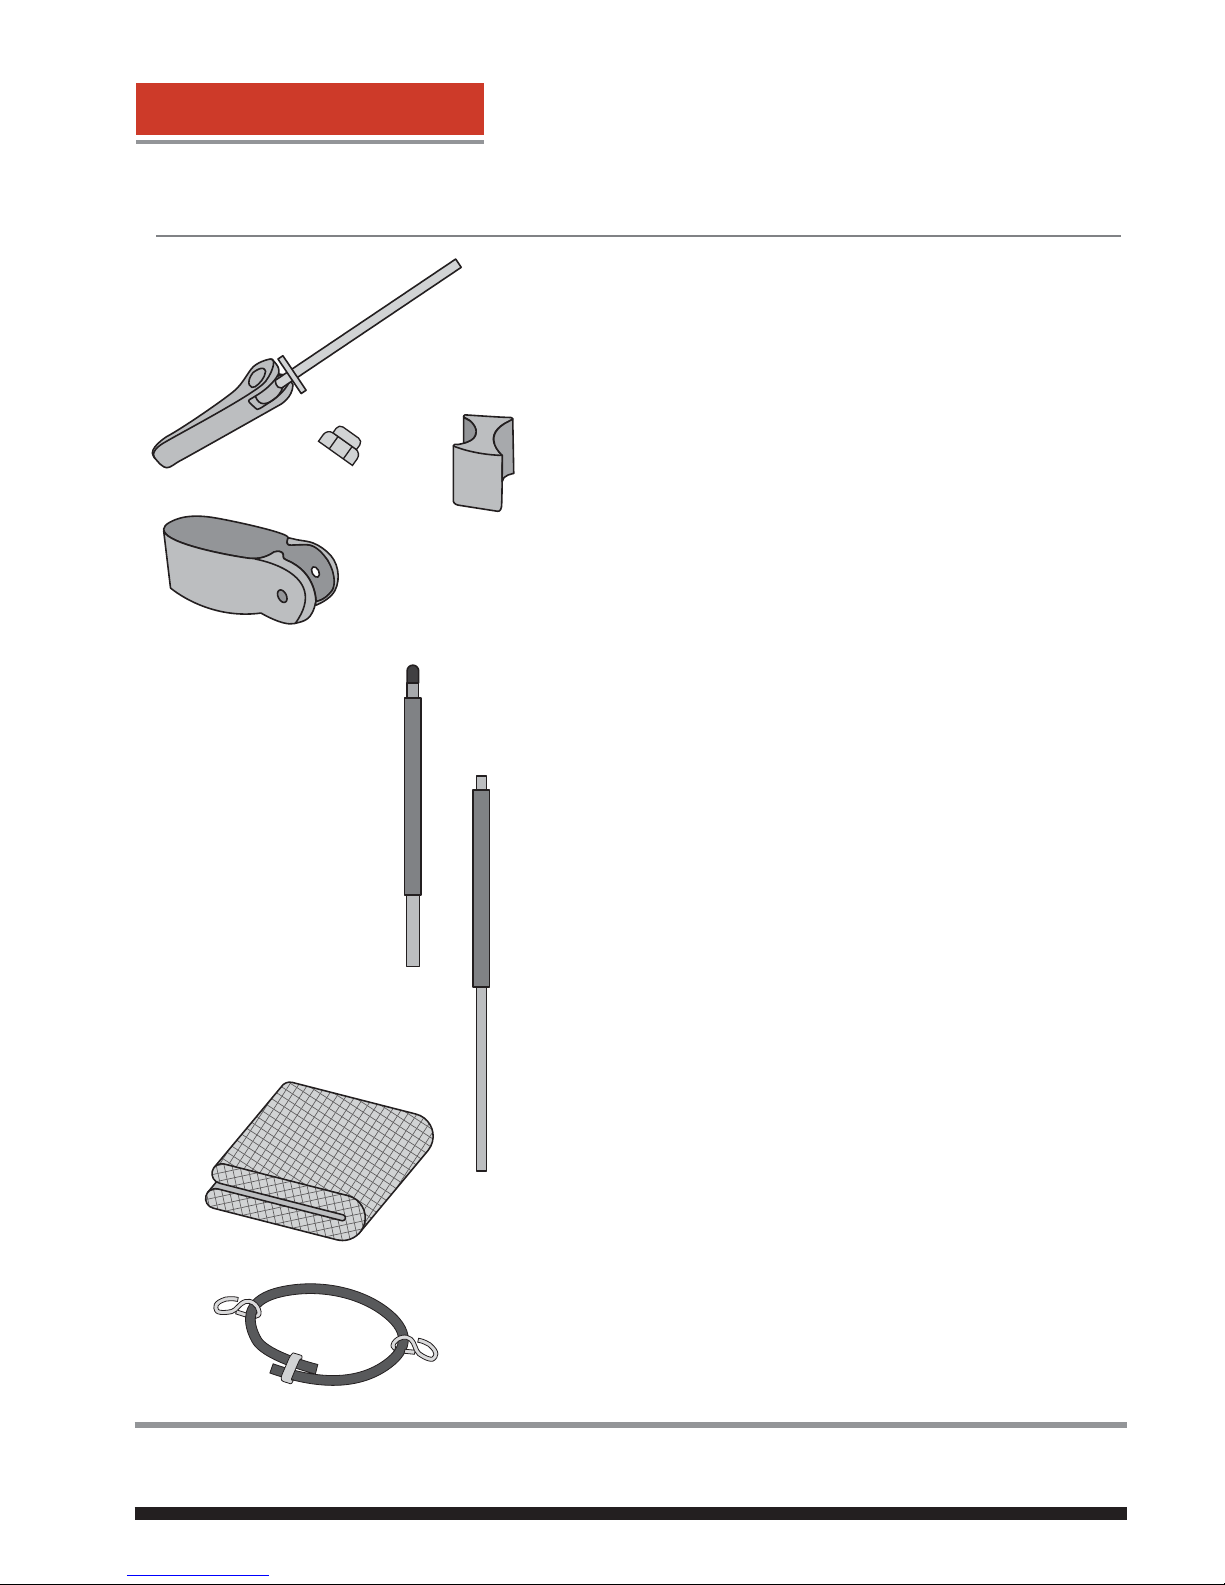
Spacer
Clamp
Bolt
Quick release fastener
Bouncer Parts List
Part Image Description
Clamp Kit
Top Pole with
Foam and Top Cap
16
of each part
Bottom Pole with
Foam
8
Enclosure Net 1
Bungee Loops with
Q-Hook
16
Tel: +44 (0)1884 675801 | www.supertramp.co.uk | [email protected]
Number
8
Page 3
Fixing the enclosure poles to the frame
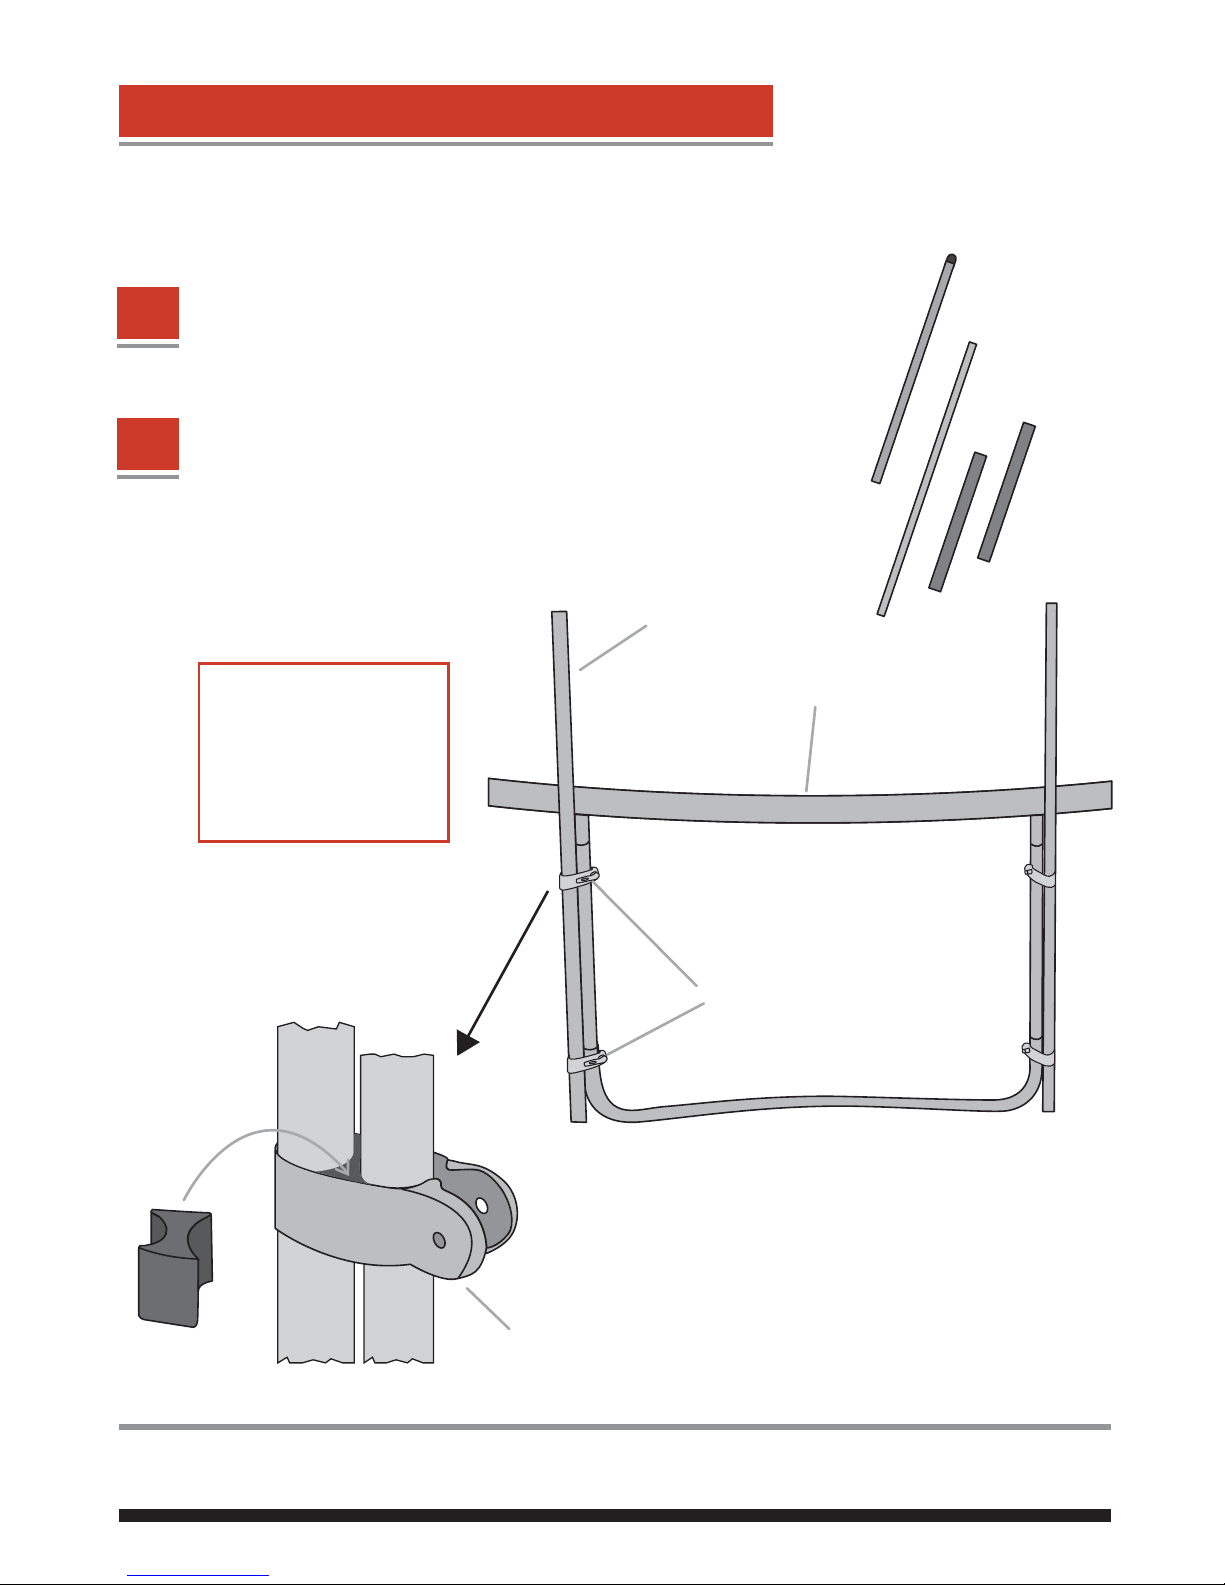
Before you start: Please remove the frame pads
Tel: +44 (0)1884 675801 | www.supertramp.co.uk | [email protected]
1
Start by removing the foam from the bottom enclosure poles.
STEP
2
Next, begin to fix each bottom pole to the corresponding trampoline
leg using the clamps provided.
Ensure that there is a black rubber spacer positioned between the pole
and the trampoline leg.
Next, make sure the clamp opening is positioned
facing the inside of the leg.
STEP
Rubber
Spacer
Quick release
clamp
Note: there should be two
clamps per pole; one
positioned around ~30cm
from the trampoline frame
and the other around
~30cm from the ground.
Bottom Pole
Top rail
Clamps
Page 4
3
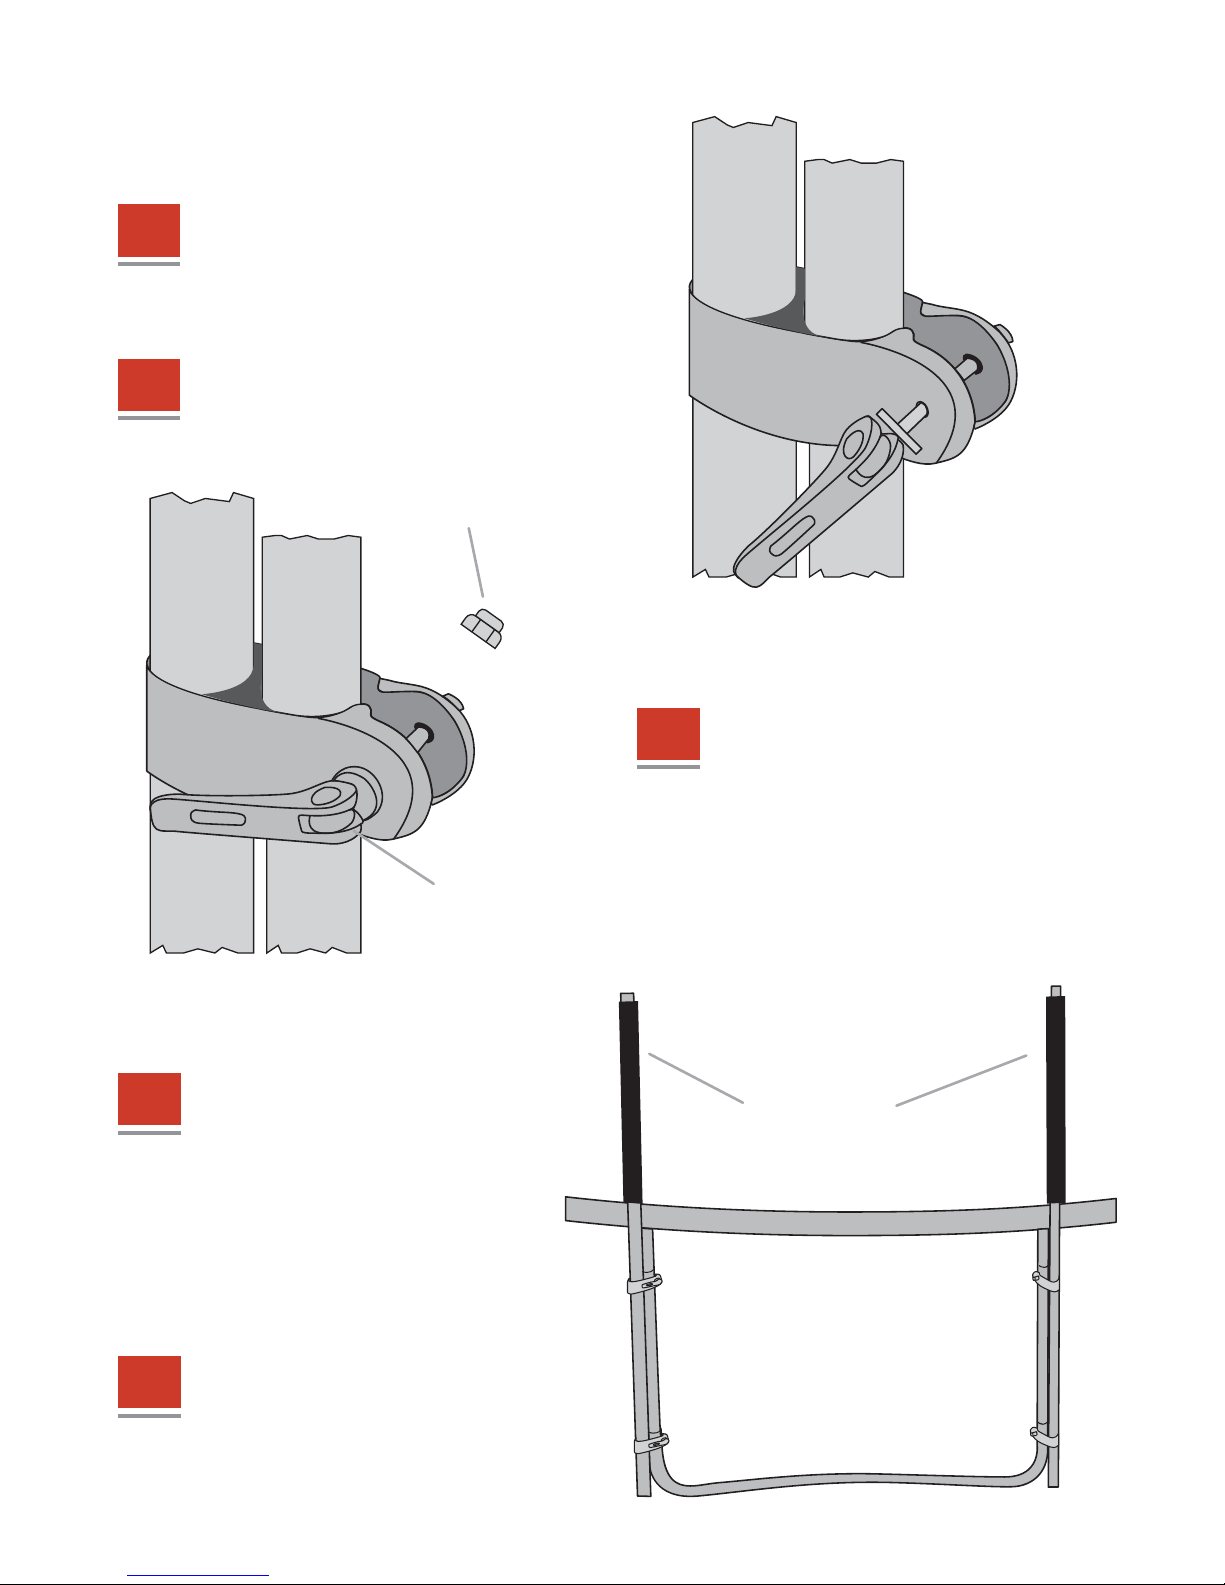
Thread the quick-release fastener through the
two holes in the clamp and squeeze the clamp
together as tightly as you can.
STEP
5
Next, use the handle on the quick-release
fastener to tighten the clamp together so that
the pole is fixed to the leg securely.
STEP
4
Secure the quick-release fastener by screwing
the bolt on by hand.
STEP
6
Continue this process pole by pole,
ensuring there are two clamps per
pole.
Make sure the clamps are secured
tightly so the poles do not wobble
and the rubber spacers are fixed in
place.
STEP
7
Finish by sliding the foams back over
the poles. Now take each top pole section and fit
onto the corresponding bottom pole section.
Note that there will be an overhang of foam from
the bottom poles so you will need to angle the
top pole section to fit into there.
STEP
Replace Foams
Quick release
fastener
Bolt
Page 5
1
STEP
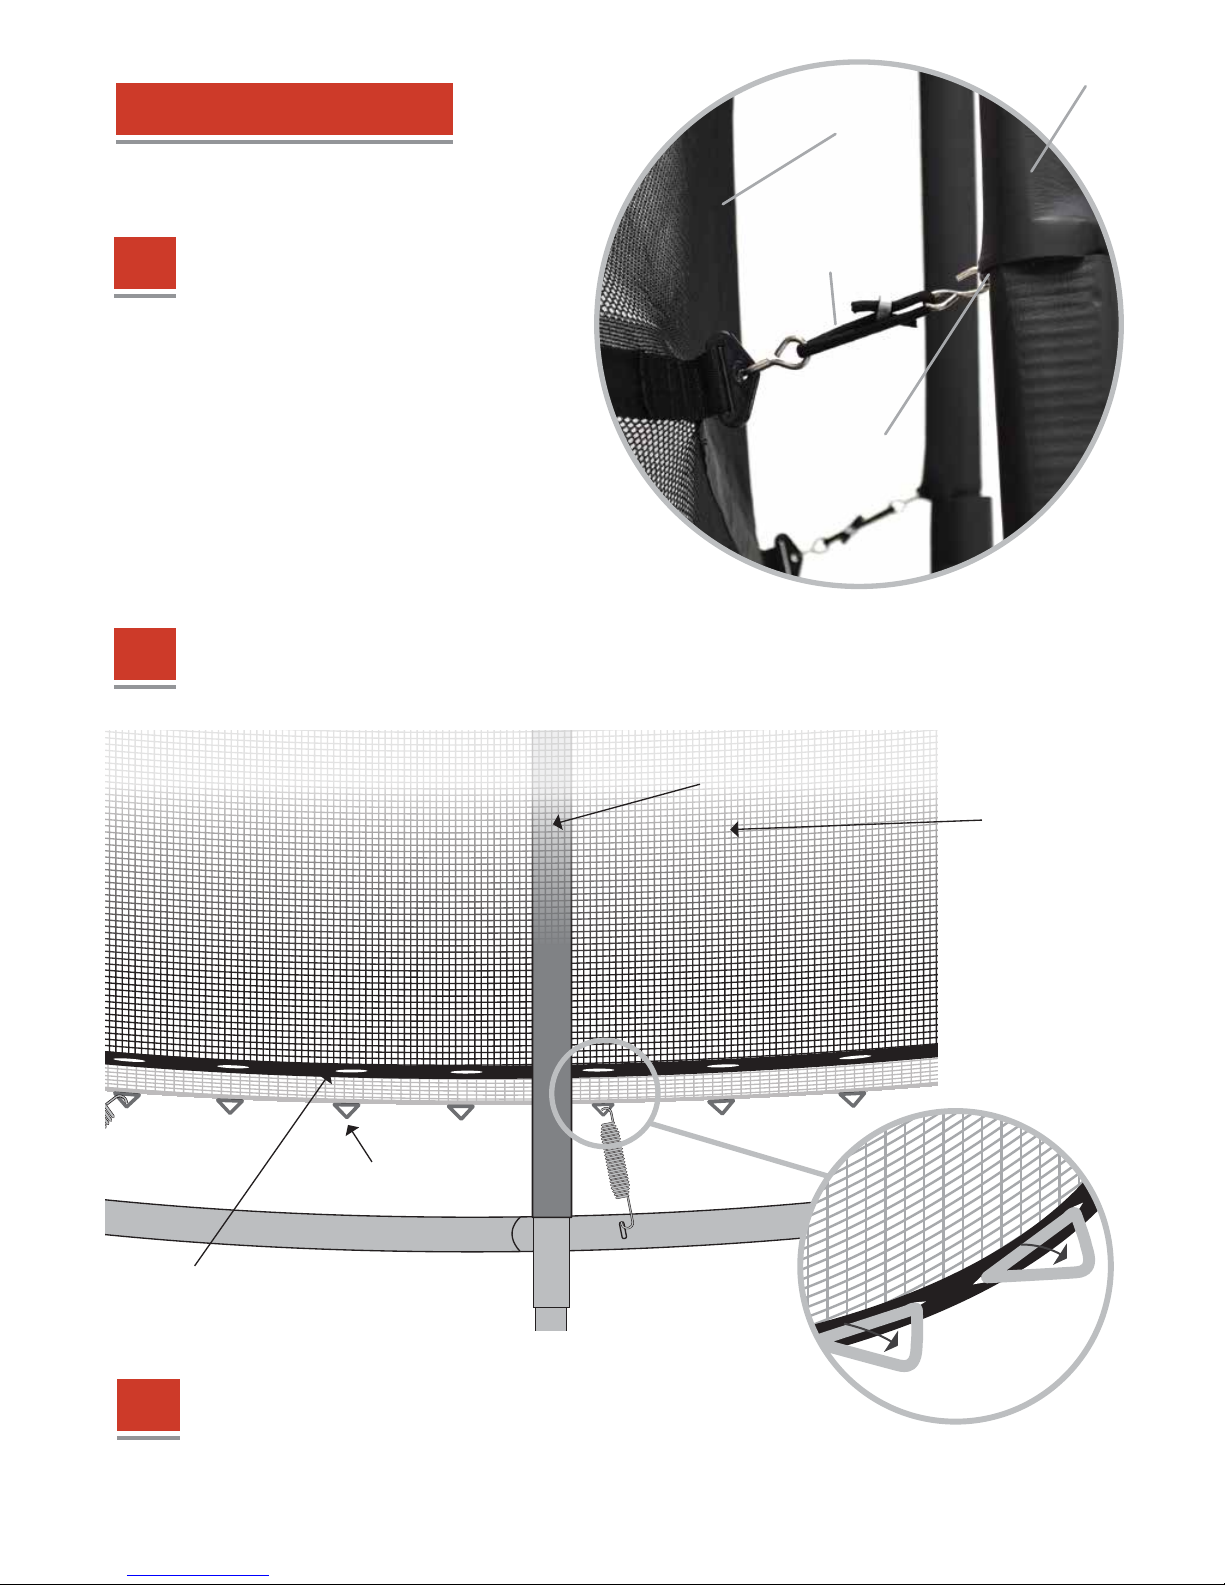
Begin by laying the net out on top of the
trampoline bed.
Find the middle seam on the net and
proceed to attach eight bungee loops
with Q-hook to the clips on the net.
1a). Next, attach the bungees on the net
to the middle eyebolts on the enclosure
poles. Please make sure that the net does
not twist during this process.
2
STEP
You should now find that the net is hanging from the middle of the poles.
Along the bottom hem of the net you should see small slots (holes).
Each one of these slots corresponds to a steel triangle on the bed. There are the same number of each.
Make sure they line up before attaching the net to the bed.
Attaching the net
Elasticated bungee
with Q hooks
Top Pole
Eyelebolt
Enclosure
Net
3
Find a spring to the right of each enclosure pole. Remove the spring
temporarily from the frame and from the steel triangle on the bed.
Slot the net over the triangular anchor of the bed using the
corresponding spring slot (count to make sure the anchor and slot align
otherwise the net will twist). Once attached, hook the spring back onto
the bed anchor and into the frame as before.
STEP
Enclosure
Net
Slots in the hem of the net
Steel triangles
attatched to bed.
Pole
Page 6
1
STEP
2
STEP
5
STEP
4
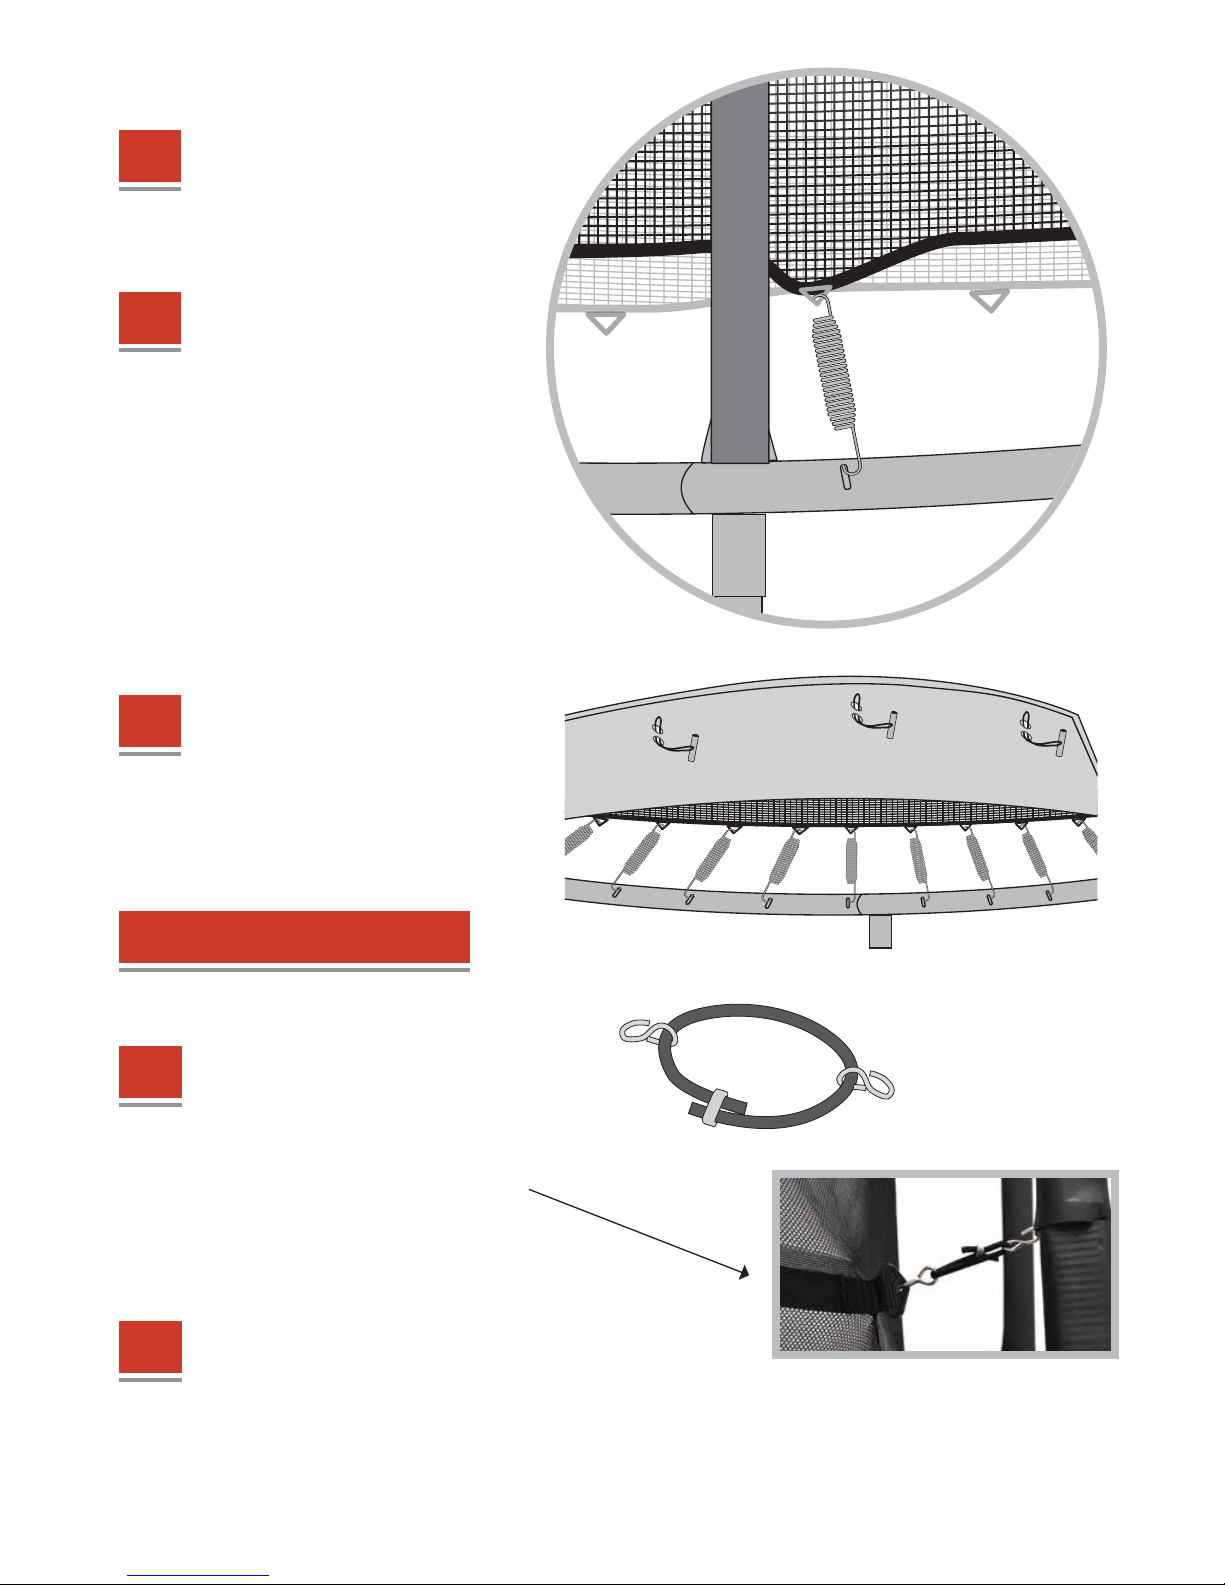
Continue this process around the
trampoline frame until the net is fully
fitted to the steel triangles on the bed.
If you twist the net during this
stage by fitting the incorrect slot
to the steel triangle, it will
continue to twist as you work
your way around the frame and
will not line up properly when
you have finished.
This can result in the entrance
becoming misaligned which can
negatively impact the function of
the zip and lead to damage.
STEP
6
Re-fit the frame pads as before with
the net laying on top of the bed.
With the frame pads now fitted, use the 16
bungee loops with Q hook to connect the
net to the steel enclosure poles.
Start by doing this at the middle-point of
the poles as they can be attatched whilst
standing on the ground.
Once completed, remove your footwear and enter the
trampoline through the door of the enclosure. Now you
can finish attaching the bungee loops to the net at the
top of the poles.
All 16 bungees should now be attached and the
enclosure fully assembled.
STEP
Completing the net
Page 7

CONGRATULATIONS!
Your
is now assembled and ready for use.
Enclosure Net
Plastic clip at the top of the enclosure.
Do not bounce in footwear. Instead, use grip
socks. You can buy these from us in a variety of
sizes!
Don’t forget to pick up a Ground
Anchor Kit for those windy days.
Page 8

Tel: +44 (0)1884 675801 | www.supertramp.co.uk | [email protected]
Thank you for purchasing a Super Tramp product
We hope you found this guide helpful.
www.supertramp.co.uk
Follow Us On Social Media!
Visit our website for our full range of
trampolines, spare parts and accessories
@supertramptrampolines
@supertrampuk
 Loading...