

Page 1
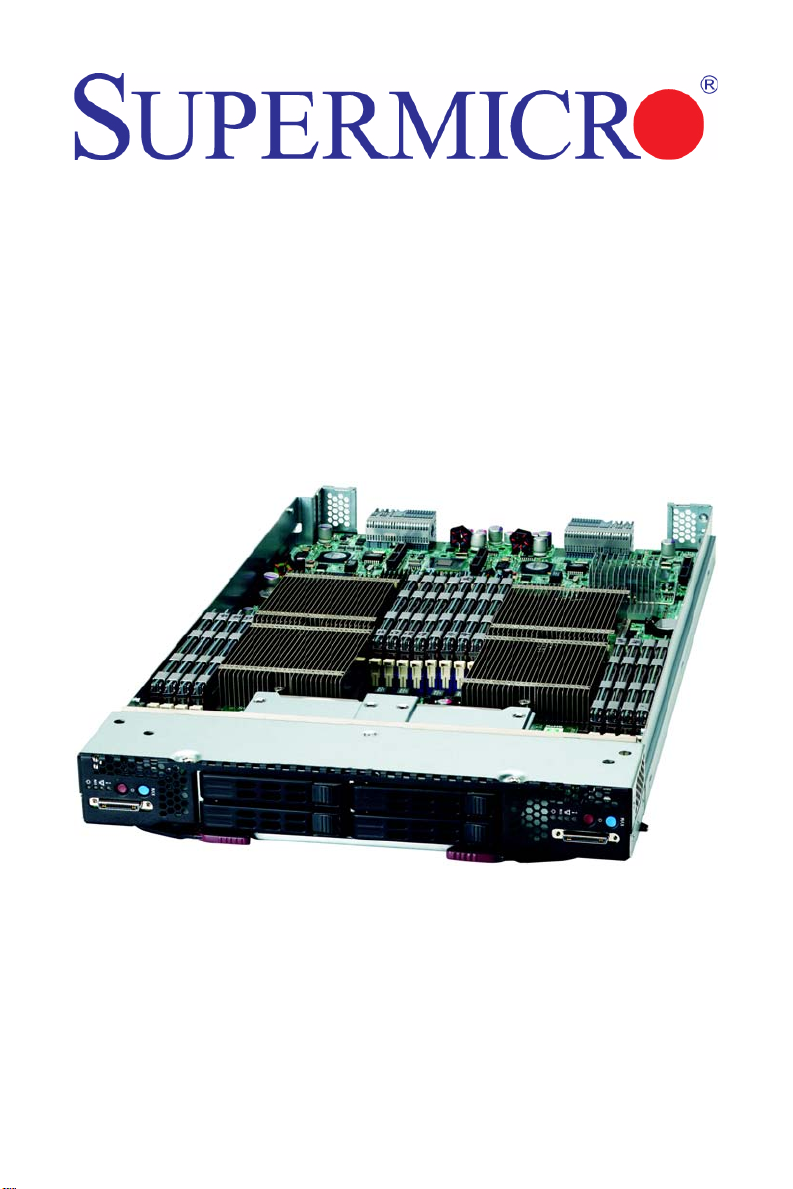
SBI-7226T-T2
Blade Module
User’s Manual
Revison 1.0a
Page 2

SBI-7226T-T2 Blade Module User’s Manual
The information in this User’s Manual has been carefully reviewed and is believed to be accurate. The
vendor assumes no responsibility for any inaccuracies that may be contained in this document, makes no
commitment to update or to keep current the information in this manual, or to notify any person or
organization of the updates. P lease Note: For the most up-to-date version of this manual, please see
our web site at www.supermicro.com.
Super Micro Computer, Inc. ("Supermicro") reserves the right to make changes to the product described
in this manual at any time and without notice. This product, including software and documentation, is the
property of Supermicro and/or its licensors, and is supplied only under a license. Any u se or rep rodu ction
of this product is not allowed, except as expressly permitted by the terms of said license.
IN NO EVENT WILL SUPERMICRO BE LIABLE FOR DIRECT, INDIRECT, SPECIAL, INCIDENTAL,
SPECULATIVE OR CONSEQUENTIA L DAMAGES ARISING FROM THE USE OR INABILITY TO USE
THIS PRODUCT OR DOCUMENTATION, EVEN IF ADVISED OF THE POSSIBILITY OF SUCH
DAMAGES. IN PARTICULAR, SUPERMICRO SHALL NOT HAVE LIABILITY FOR ANY HARDWARE,
SOFTWARE, OR DATA STORED OR USED WITH THE PRODUCT, INCLUDING THE COSTS OF
REPAIRING, REPLACING, INTEGRATING, INSTALLING OR RECOVERING SUCH HARDWARE,
SOFTWARE, OR DATA.
Any disputes arising between manufacturer and customer shall be governe d by the laws of Santa Clara
County in the State of Californ i a, USA. The State of California, County of Santa Clara shall be the
exclusive venue for the resolution of any such disputes. Super Micro's total liability for all claims will not
exceed the price paid for the hardware product.
FCC Statement: This equipment has been tested and found to comply with the limits for a Class A digital
device pursuant to Part 15 of the FCC Rules. These limits are designed to provide reasonable protection
against harmful interference when the equipment is operated in a commercial environment. This
equipment generates, uses, and can radiate radio frequency energy and, if not installed and used in
accordance with the manufacturer’s instruction manual, may cause harmful interference with radio
communications. Operation of this equipment in a residential area is likely to cause harmful interference,
in which case you will be required to correct the interference at your own expense.
California Best Management Practices Regulat ions for Perchlorate Materials: This Perchlorate warning
applies only to products containing CR (Manganese Dioxide) Lithium coin cells. Perchlorate
Material-special handling may apply. See www.dtsc.ca.gov/hazardouswaste/perchlorate for further
details.
WARNING: HANDLING OF LEAD SOLDER MATERIALS USED IN THIS
PRODUCT MAY EXPOSE YOU TO LEAD, A CHEMICAL KNOWN TO THE
STATE OF CALIFORNIA TO CAUSE BIRTH DEFECTS AND OTHER
REPRODUCTIVE HARM.
Manual Revison 1.0a
Release Date: May 18, 2011
Unless you request and receive written permission from Super Micro Computer, Inc., you may not copy
any part of this document.
Information in this document is subject to change without notice. Other products and companies referred
to herein are trademarks or registered trademarks of their respective companies or mark holders.
Copyright © 201 1 by Super Micro Computer, Inc.
All rights reserved.
Printed in the United States of America
ii
Page 3

Preface
About this Manual
This manual is written for professional system integrators, Information Technology
professionals, service personnel and technicians. It provides information for the
installation and use of Supermicro's SBI-7226T-T2 Blade Module. Installation and
maintenance should be performed by experienced professionals only.
Manual Organization
Chapter 1: Introduction
The first chapter provides a checklist of the main components included with the
SBI-7226T-T2 Blade Module and describes its main features.
Chapter 2: System Safety
You should familiarize yourself with this chapter for a general overview of safety
precautions that should be followed when installing and servicing the SBI-7226T-T2
Blade Module.
Chapter 3: Setup and Installation
Refer to this chapter for details on installing the SBI-7226T-T2 Blade Module into the
SuperBlade chassis. Other sections cover the installation and placement of memory
modules and the installation of hard disk drives into the blade module.
Chapter 4: Blade Module Features
This chapter coves features and component information about the SBI-7226T-T2 Blade
Module. Included here are descriptions and information for mainboard components,
connectors, LEDs and other features of the blade module.
Chapter 5: RAID Setup Procedure
RAID setup and operations for the SBI-7226T-T2 Blade Module are covered in this
chapter.
Chapter 6: BIOS
BIOS setup is covered in this chapter for the SBI-7226T-T2 Blade Module.
Appendix A: BIOS POST Codes
BIOS POST Codes for the SBI-7226T-T2 Blade Module are explained in this appendix.
iii
Page 4

SBI-7226T-T2 Blade Module User’s Manual
Notes
iv
Page 5

Table of Contents
Chapter 1 Introduction.......................................................................1-1
1-1 Overview.............................................................................................1-1
1-2 Product Checklist of Typical Components.....................................1-1
1-3 Blade Module Features....................................................................1-2
Processors..............................................................................................1-2
Memory...................................................................................................1-2
Storage....................................................................................................1-3
Density....................................................................................................1-3
1-4 Contacting Supermicro.....................................................................1-5
Chapter 2 System Safety..................................................................2-1
2-1 Electrical Safety Precautions...........................................................2-1
2-2 General Safety Precautions.............................................................2-2
2-3 Electrostatic Discharge Precautions ..............................................2-2
2-4 Operating Precautions......................................................................2-3
Chapter 3 Setup and Installation.................................................3-1
3-1 Overview.............................................................................................3-1
3-2 Installing Blade Modules..................................................................3-1
Powering Up a Blade Unit.......................................................................3-1
Powering Down a Blade Unit ..................................................................3-1
Removing a Blade Unit from the Enclosure............................................3-1
Removing/Replacing the Blade Cover....................................................3-2
Installing a Blade Unit into the Enclosure ...............................................3-2
3-3 Processor Installation .......................................................................3-4
3-4 Onboard Battery Installation............................................................3-5
3-5 Memory Installation...........................................................................3-6
Populating Memory Slots........................................................................3-6
DIMM Installation....................................................................................3-8
3-6 Hard Disk Drive Installation.............................................................3-9
3-7 Installing the Operating System....................................................3-11
Installing with an External USB CD-ROM Drive....................................3-11
Installing via PXE Boot..........................................................................3-11
Installing via Virtual Media (Drive Redirection) .....................................3-12
3-8 Management Software...................................................................3-12
v
Page 6

SBI-7226T-T2 Blade Module User’s Manual
3-9 Configuring and Setting up RAID.................................................3-12
Chapter 4 Blade Module Features..............................................4-1
4-1 Control Panel.....................................................................................4-2
Power Button ..........................................................................................4-3
KVM Button.............................................................................................4-3
LED Indicators ........................................................................................4-3
KVM Connector.......................................................................................4-3
4-2 Mainboard...........................................................................................4-4
Jumpers..................................................................................................4-7
CMOS Clear............................................................................................4-7
4-3 Blade Unit Components...................................................................4-8
Memory Support .....................................................................................4-9
Hard Disk Drives.....................................................................................4-9
Chapter 5 RAID Setup Procedure...............................................5-1
5-1 BIOS Configuration Utilities.............................................................5-2
5-2 BIOS Setup ........................................................................................5-2
Chapter 6 BIOS.......................................................................................6-1
6-1 Introduction.........................................................................................6-1
Running Setup........................................................................................6-1
6-2 Main BIOS Setup Menu ...................................................................6-1
System Time/System Date .....................................................................6-2
6-3 Advanced Settings Menu.................................................................6-2
CPU & Clock Configuration............................................. ... .....................6-3
IDE Configuration....................................................................................6-4
PCI/PnP Configuration............................................................................6-5
Super IO Configuration...........................................................................6-6
Chipset Configuration .............................................................................6-6
CPU Bridge Configuration....................................................................6-7
NorthBridge Configuration....................................................................6-7
SouthBridge Configuration...................................................................6-8
ACPI Configuration................................................................................. 6-9
AHCI Configuration.................................................................................6-9
Event Log Configuration ............................................................... ........6-10
IPMI Configuration................................................................................6-10
Intel VT-d Configuration........................................................................6-11
MPS Configuration................................................................................6-11
PCI Express Configuration....................................................................6-12
vi
Page 7

SMBIOS Configuration...................................... ... .................................6-12
Remote Access Configuration ..............................................................6-12
System Health Monitor..........................................................................6-13
6-4 Boot Menu........................................................................................6-13
6-5 Security Menu..................................................................................6-14
6-6 Exit Menu..........................................................................................6-15
Appendix A BIOS POST Codes....................................................A-1
A-1 BIOS POST Messages....................................................................A-1
A-2 BIOS POST Codes...........................................................................A-3
Recoverable POST Errors................................... ...................................A-4
Terminal POST Errors....................................... ... ...................................A-4
vii
Page 8

SBI-7226T-T2 Blade Module User’s Manual
Notes
viii
Page 9

List of Figures
Figure 1-1. Full Rack of Blade Enclosures and Blade Servers.........................1-4
Figure 3-1. Inserting a Blade into the Enclosure...............................................3-3
Figure 3-2. Locking the Blade into Position.......................................................3-3
Figure 3-3. Installing a Processor in a Socket..... ... ...........................................3-5
Figure 3-4. Installing the Onboard Battery................................................. ... ... .3-5
Figure 3-5. 8-Slot DIMM Numbering.................................................................3-7
Figure 3-6. Installing a DIMM into a Memory Slot.............................................3-8
Figure 3-7. Installing a Hard Drive in a Carrier................................................3-10
Figure 4-1. SBI-7226T-T2 Blade Unit Front View.............................................4-1
Figure 4-2. Blade Control Panel........................................................................4-2
Figure 4-3. B8DTT Mainboard.......................................................................... 4-5
Figure 4-4. Intel 5500/IOH-24D Tylersburg + ICH10R Chipset:
Block Diagram
for SBI-7226T-T2 ..............................................................................................4-7
Figure 4-5. Exploded View of SBI-7226T-T2 Blade Module.............................4-8
Figure 5-1. Advanced Settings Screen .............................................................5-2
Figure 5-2. IDE Configuration Screen – Configure RAID Drives.......................5-3
Figure 5-3. Selecting Max Ports Option............................................................5-4
Figure 5-4. Selecting RAID Utility......................................................................5-5
Figure 5-5. Enabling Hot Plug...........................................................................5-6
Figure 5-6. Exit BIOS Setup..............................................................................5-7
Figure 5-7. Screen Message.............................................................................5-8
ix
Page 10

SBI-7226T-T2 Blade Module User’s Manual
Notes
x
Page 11

List of Tables
Table 1-1. SBI-7226T-T2 Blade Specification Features....................................1-2
Table 3-1. Populating Eight Memory Slots per Node
for Interleaved Operation ..................................................................................3-6
Table 4-1. SBI-7226T-T2 Blade Unit Features..................................................4-1
Table 4-2. Blade Control Panel.........................................................................4-2
Table 4-3. Blade Module LED Indicators ..........................................................4-3
Table 4-4. B8DTT Mainboard Layout................................................................4-6
Table 4-5. Main Components of SBI-7226T-T2 Blade Unit...............................4-9
Table 6-1. CPU Configuration Submenu...........................................................6-3
Table 6-2. IDE Configuration Submenu............................................................6-4
Table 6-3. PCI/PnP Configuration Submenu ....................................................6-5
Table 6-4. Super IO Configuration Submenu....................................................6-6
Table 6-5. Chipset Configuration Submenu......................................................6-6
Table 6-6. CPU Bridge Configuration Submenu...............................................6-7
Table 6-7. NorthBridge Configuration Submenu...............................................6-7
Table 6-8. SouthBridge Configuration Submenu ..............................................6-8
Table 6-9. ACPI Configuration Submenu..........................................................6-9
Table 6-10. AHCI Configuration Submenu........................................................6-9
Table 6-11. Event Log Configuration Submenu..............................................6-10
Table 6-12. IPMI Configuration Submenu.......................................................6-10
Table 6-13. Intel VT-d Configuration Submenu...............................................6-11
Table 6-14. MPS Configuration Submenu......................................................6-11
Table 6-15. PCI Express Configuration Submenu ..........................................6-12
Table 6-16. SMBIOS Configuration Submenu................................................6-12
Table 6-17. Remote Access Configuration Submenu.....................................6-12
Table 6-18. Boot Menu....................................................................................6-13
Table 6-19. Security Menu..............................................................................6-14
Table 6-20. Exit Menu.....................................................................................6-15
Table A-1. BIOS POST Messages....................................................................A-1
Table A-2. Terminal POST Errors.....................................................................A-4
Table A-3. Boot Block Flash ROM Terminal POST Errors................................A-8
xi
Page 12

SBI-7226T-T2 Blade Module User’s Manual
Notes
xii
Page 13

Chapter 1
Introduction
1-1 Overview
The SBI-7226T-T2 blade module is a compact self-contained server that connects into a
pre-cabled enclosure that provides power, cooling, management and networking
functions. One enclosure for the SBI-7226T-T2 blade module can hold ten blade units.
Each blade module contains two “Nodes” that each are a separate and server system,
providing up to the equivalent of 20 blade units in one 10-blade module enclosure.
In this manual, “blade system” refers to the entire system (including the enclosure and
blades units), “blade” or “blade unit” refers to a single blade module and “blade
enclosure” is the chassis that the blades, power supplies and modules are housed in.
Please refer to our web site for information on operating systems that have been
certified for use with the SuperBlade (www.supermicro.com/products/superblade/).
1-2 Product Checklist of Typical Components
Your blade module ships with its mainboard already installed in its chassis. Memory,
hard disk drives and the CPU must all be installed by the user after shipment. See
Chapter 3: "Setup and Installation" on page 3-1 for details on installation of these
components.
Aside from the blade module unit itself, the following optional Mezzanine add-on cards
(with Infiniband Switch) may be ordered for your blade module:
• AOC-IBH-XDD
• AOC-IBH-XDS
• AOC-IBH-XQS
• AOC-IBH-XQD
See the Supermicro website and the SuperBlade Network Modules User’s Manual on
your SuperBlade system’s CD-ROM for more details on these add-on cards.
1-1
Page 14

SBI-7226T-T2 Blade Module User’s Manual
1-3 Blade Module Features
Table 1-1 lists the main features of the SBI-7226T-T2 blade module. See the proceeding
section for components typically included in a blade system and other optional
components. Specific details on the SBI-7226T-T2 blade module is found in Chapter 4:
"Blade Module Features" on page 4-1.
Table 1-1. SBI-7226T-T2 Blade Specification Features
Mainboard
Processors
FSB Speed QPI speed | Up to 6.4 GT/s
Chipset Intel 5500/IOH-24D Tyler sburg + ICH10R
Graphics Controller Onboard Matrox G200eW Graphics chip with 16MB of SDRAM
BIOS 32 Mb AMI® SPI Flash EPROM BIOS
Memory Capacity
SATA Controller
Hard Drive Bays Four (4) hot-swap drive bays for 2.5" SATA disk drives
B8DTT (proprietary form factor)
Chassis Dimensions (HxWxD): 11.32” x 1.67” x 20.5”
Supports two 1366-pin LGA Socket processors in each node for up to four
®
64-bit quad-core Xeon® series processors. Please refer to our web
Intel
site for a complete listing of supported processors.
Eight 240-pin DIMM sockets per node supporting up to 64 GB of ECC
Registered DDR3-1333/1066/800 SDRAM DIMMs or 16 GB of ECC
Unbuffered DDR3-1333/1066/800 SDRAM DIMMs in two 3-DIMM an d t wo
1-DIMM memory banks for each node.
SATA Controller ICH10R on-chip controller for four Serial ATA drives, two
for each node
Processors
The SBI-7226T-T2 blade module supports up to two 1366-pin Intel Xeon 5500 series
processors in each node for a total of four.
Refer to the Supermicro web site for a complete listing of supported processors (http://
www.supermicro.com/products/superblade). Please note that you will need to check the
detailed specifications of a particular blade module for a list of the CPUs it supports.
Details on installation of the processor into the SBI-7226T-T2 blade module are found in
Chapter 3: "Setup and Installation" on page 3-1.
Memory
The SBI-7226T-T2 blade module has eight 240-pin DIMM sockets in each node that can
support up to 16 GB of ECC Unbuffered DDR3-1333/1066/800 SDRAM or 64 GB of
ECC Registered DDR3-1333/1066/800 SDRAM DIMMs. Both interleaved and
non-interleaved memory are supported, so you may populate any number of DIMM
slots.
1-2
Page 15

Chapter 1: Introduction
Please refer to the Supermicro web site for a list of supported memory
(www.supermicro.com/products/superblade). The detailed specifications for a blade
module will contain a link to a list of recommended memory sizes and manufacturers.
Details on installation of memory modules into the SBI-7226T-T2 blade module are
found in Chapter 3: "Setup and Installation" on page 3-1.
Storage
The SBI-7226T-T2 blade module can have four 2.5" SATA (Serial ATA) hard disk drives
in front-mounted easy removable carriers, two for each node. See Chapter 3: "Setup
and Installation" on page 3-1 for storage installation details.
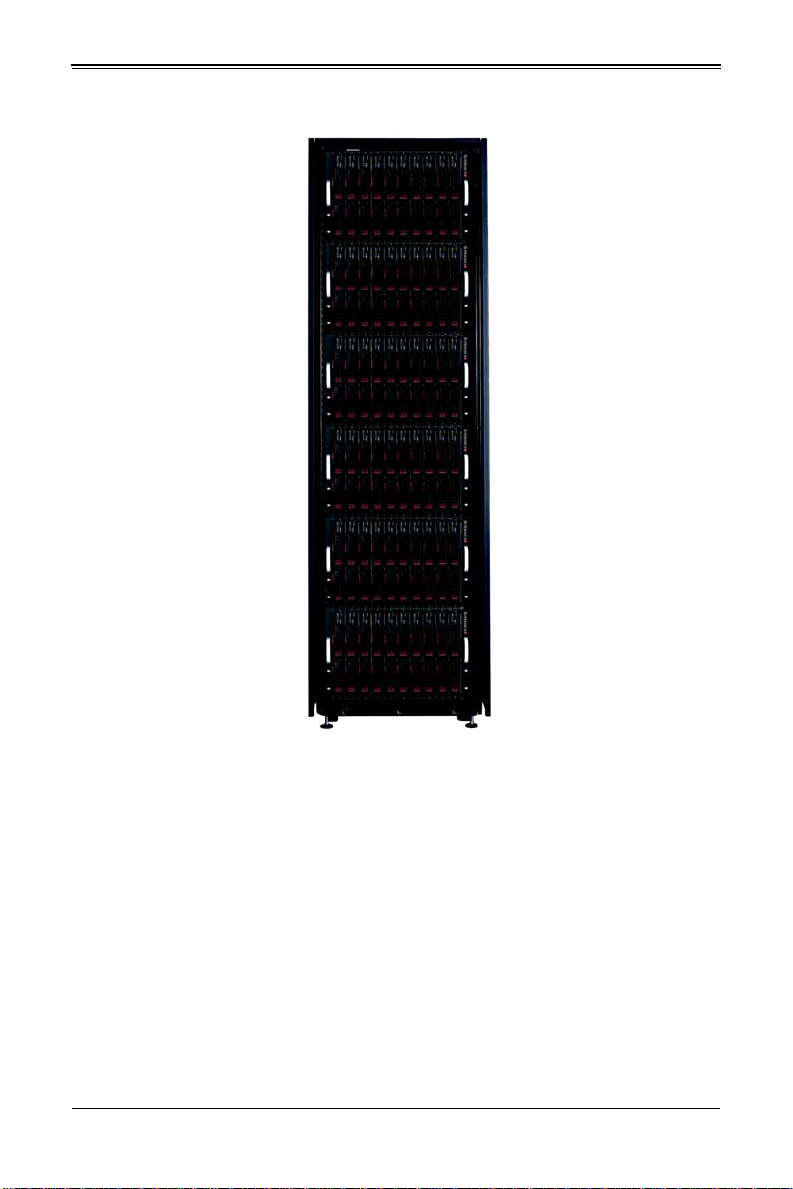
Density
A maximum of ten blade modules may be installed into a single blade enclosure with
two nodes. Each blade enclosure is a 7U form factor, so a standard 42U rack may
accommodate up to six enclosures with 60 blade modules, or the equivalent of 120 1U
servers. With the inclusion of six CMM modules, twelve Gigabit Ethernet switches and
six InfiniBand switches, this would occupy up to 144U space in a conventional 1U server
configuration.
Figure 1-1 displays a view of a full rack with six blade enclosures in it, each with ten
blades to an enclosure.
1-3
Page 16
SBI-7226T-T2 Blade Module User’s Manual
Figure 1-1 . Full Rack of Blade Enclosures and Blade Servers
1-4
Page 17

1-4 Contacting Supermicro
Headquarters
Address: Super Micro Computer, Inc.
980 Rock Ave.
San Jose, CA 95131 U.S.A.
Tel: +1 (408) 503-8000
Fax: +1 (408) 503-8008
Email:
Web Site: www.supermicro.com
Europe
Address: Super Micro Computer B.V.
Tel: +31 (0) 73-6400390
Fax: +31 (0) 73-6416525
Email:
Asia-Pacific
Address: Super Micro Computer, Inc.
Tel: +886-(2) 8226-3990
Fax: +886-(2) 8226-3991
Web Site: www.supermicro.com.tw
Technical Support:
Email: support@supermicro.com.tw
Tel: +886-2-8228-1366, ext. 132 or 139
marketing@supermicro.com (General Information)
support@supermicro.com (Technical Support)
Het Sterrenbeeld 28, 5215 ML
‘s-Hertogenbosch, The Netherlands
sales@supermicro.nl (General Information)
support@supermicro.nl (Technical Support)
rma@supermicro.nl (Customer Support)
4F, No. 232-1, Liancheng Rd.
Chung-Ho 235, Taipei County
Taiwan, R.O.C.
Chapter 1: Introduction
1-5
Page 18

SBI-7226T-T2 Blade Module User’s Manual
Notes
1-6
Page 19

Chapter 2
System Safety
2-1 Electrical Safety Precautions
Basic electrical safety precautions should be followed to protect yourself from harm and
the SuperBlade from damage:
• Be aware of how to power on/off the enclosure power supplies and the individual
blades as well as the room's emergency power-off switch, disconnection switch or
electrical outlet. If an electrical accident occurs, you can then quickly remove power
from the system.
• Do not work alone when working with high voltage components.
• Power should always be disconnected from the blade module when removing or
installing such system components as the mainboard, memory modules and
processors.
• When working around exposed electrical circuits, another person who is familiar
with the power-off controls should be nearby to switch off the power if necessary.
• Use only one hand when working with powered-on electrical equipment. This is to
avoid making a complete circuit, which will cause electrical shock. Use extreme
caution when using metal tools, which can easily damage any electrical components
or circuit boards they come into contact with.
• Do not use mats designed to decrease electrostatic discharge as protection from
electrical shock. Instead, use rubber mats that have been specifically designed as
electrical insulators.
• The power supply power cords must include a grounding plug and L line. It must be
plugged into grounded electrical outlets. Power input requires 110-240 VAC,
depending upon your power supply module.
• Mainboard Battery: This battery must be replaced only with the same or an
equivalent type recommended by the manufacturer (CR2032 Lithium 3V battery).
Dispose of used batteries according to the manufacturer's instructions.
WARNING: There is a danger of explosion if the onboard battery is installed
upside down, which will reverse its polarities.
WARNING: Please handle used batteries carefully . Do not damage the battery in
any way; a damaged battery may release hazardous materials into the
environment. Do not discard a used battery in the garbage or a public landfill.
Please comply with the regulations set up by your local hazardous waste
management agency to dispose of your used battery properly.
• Mainboard replaceable soldered-in fuses: Self-resetting PTC (Positive Temperature
Coefficient) fuses on the mainboard must be replaced by trained service technicians
2-1
Page 20

SBI-7226T-T2 Blade Module User’s Manual
only. The new fuse must be the same or equivalent as the one replaced. Contact
technical support for details and support.
2-2 General Safety Precautions
Follow these rules to ensure general safety:
• Keep the area around the SuperBlade clean and free of clutter.
• Place the blade module cover and any system components that have been removed
away from the system or on a table so that they won't accidentally be stepped on.
• While working on the system, do not wear loose clothing such as neckties and
unbuttoned shirt sleeves, which can come into contact with electrical circuits or be
pulled into a cooling fan.
• Remove any jewelry or metal objects from your body, which are excellent metal
conductors that can create short circuits and harm you if they come into contact with
printed circuit boards or areas where power is present.
• After accessing the inside of the system, replace the blade module's cover before
installing it back into the blade enclosure.
2-3 Electrostatic Discharge Precautions
Electrostatic discharge (ESD) is generated by two objects with different electrical
charges coming into contact with each other. An electrical discharge is created to
neutralize this difference, which can damage electronic components and printed circuit
boards.
The following measures are generally sufficient to neutralize this difference before
contact is made to protect your equipment from ESD:
• Use a grounded wrist strap designed to prevent static discharge.
• Keep all components and printed circuit boards (PCBs) in their antistatic bags until
ready for use.
• Touch a grounded metal object before removing the board from the antistatic bag.
• Do not let components or PCBs come into contact with your clothing, which may
retain a charge even if you are wearing a wrist strap.
• Handle a board by its edges only; do not touch its components, peripheral chips,
memory modules or contacts.
• When handling chips or modules, avoid touching their pins.
• Put the mainboard and peripherals back into their antistatic bags when not in use.
• For grounding purposes, make sure the blade enclosure provides excellent
conductivity between the power supplies, the blade modules and the mainboard.
WARNING: This product may be connected to an IT power system. In all cases,
make sure that the unit is also reliably connected to Earth (ground).
2-2
Page 21

Chapter 2: System Safety
2-4 Operating Precautions
Care must be taken to assure that the cover of the blade unit is in place when the blade
is operating to assure proper cooling. Out of warranty damage to the blade can occur if
this practice is not strictly followed.
Any drive carrier without a hard drive installed must remain fully installed in the drive bay
when the blade module is operating to ensure proper airflow.
2-3
Page 22

SBI-7226T-T2 Blade Module User’s Manual
Notes
2-4
Page 23

Chapter 3
Setup and Installation
3-1 Overview
This chapter covers the setup and installation of the blade module and its components.
3-2 Installing Blade Modules
Up to ten SBI-7226T-T2 blade modules may be installed into a single blade enclosure
(depending upon your enclosure and blade). Blade modules with Windows and Linux
operating systems may be mixed together in the same blade enclosure.
Powering Up a Blade Unit
Each blade unit may be powered on and off independently from the rest of the blades
installed in the same enclosure. A blade unit may be powered up in two ways:
• Press the power button on the blade unit.
• Use IPMIView or the web-browser based management utility to apply power using
either a CMM module, or by the use of the onboard BMC chip in the blade module.
Powering Down a Blade Unit
A blade unit may be powered down in either of five ways:
• Press the power button on the blade unit.
• Use IPMIView or the web-browser based management utility to power down (if you
have Operator or Admin privileges on the CMM).
• Use SuperBladeTool when connected to the CMM to power down (if you have
Operator or Admin privileges on the CMM).
• Use IPMIview or a browser connected to the onboard BMC chip to power down.
• Use SuperBladeTool to use a Command Line Interface (CLI) to the onboard BMC
chip, if you have Operator or Admin privileges.
Removing a Blade Unit from the Enclosure
Although the blade system may continue to run, individual blades should always be
powered down before removing them from the enclosure.
Removing a Blade Unit from the Enclosure
1. Power down the blade unit (see "Powering Down a Blade Unit" above).
2. Squeeze both handles to depress the red sections then pull out both handles
completely and use them to pull the blade unit from the enclosure.
3-1
Page 24

SBI-7226T-T2 Blade Module User’s Manual
NOTE: Blade Modules can be Hot-Plugged from the enclosure.
Removing/Replacing the Blade Cover
The blade cover must be removed to access the mainboard when you need to install or
remove processors, memory units, the onboard battery and so on.
Removing/Replacing the Blade Cover
1. Remove the blade unit from the enclosure (see "Removing a Blade Unit from the
Enclosure" above).
2. Depress the two buttons on the cover while pushing the cover toward the rear of the
blade unit. When it stops, lift the cover off the blade unit.
3. To replace the cover, fit the six grooves in the cover into the studs in the sides of the
blade, then slide the cover toward the front of the blade to lock it into place.
Installing a Blade Unit into the Enclosure
Make sure the cover of the blade unit has been replaced first before installing a blade
unit in the enclosure.
Installing a Blade Unit into the Enclosure
1. Slowly push the blade unit into its bay with the handles fully pulled out (see
Figure 3-1).
2. When the blade stops, push the handles back in to their locked position, making
sure the notches in both handles catch the lip of the enclosure (see Figure 3-2).
NOTE: Blade Modules can be Hot-Plugged into the enclosure.
WARNING: Use extreme caution when inserting a blade module into the
enclosure. If the blade's power connector becomes damaged, it can damage
pins on other blade bays that it is inserted into.
3-2
Page 25

Chapter 3: Setup and Installation
Figure 3-1 . Inserting a Blade into the Enclosure
Figure 3-2. Locking the Blade into Position
3-3
Page 26

SBI-7226T-T2 Blade Module User’s Manual
3-3 Processor Installation
One or two processors may be installed to the mainboard of each node. See Chapter 1
for general information on the features of the blade unit and the Supermicro web site for
further details including processor, memory and operating system support.
WARNING: This action should only be performed by a trained service
technician. Allow the processor heatsink to cool before removing it.
Removing a Processor
1. Power down and remove the blade unit from the enclosure (see Section 3-2:
Installing Blade Modules on page 3-1 for details).
2. Remove the cover of the blade unit (see "Removing/Replacing the Blade Cover" on
page 3-2).
3. Loosen the two screws that secure the heatsink to the mainboard.
4. Remove the heatsink by gently rotating it back-and-forth sideways with your fingers
to release it from the processor. Set the heatsink aside and upside-down so that
nothing comes into contact with the thermal grease on its underside.
5. Raise the lever of the processor socket up until the processor is released from the
socket, then lift the silver cover plate and remove the processor.
WARNING: This action should only be performed by a trained service
technician.
Installing a Processor
1. If present, remove the protective black PnP cap from the processor socket.
2. Raise the lever of the processor socket until it reaches its upper limit.
3. Lift the silver cover plate completely up and out of the way.
NOTE: Be careful not to damage the pins protruding from the CPU socket.
4. Align pin 1 of the processor with pin 1 of the socket (both are marked with a small
gold triangle) and gently seat the processor into the socket (Figure 3-3).
5. Check to make sure the processor is flush to the socket and fully seated.
6. Lower the socket lever until it locks.
7. To install the heatsink, apply thermal grease to the top of the processor. (If
reinstalling a heatsink, first clean off the old thermal grease with a clean, lint-free
cloth.)
3-4
Page 27

Chapter 3: Setup and Installation
Gold dot
Socket key
CPU key
Notched corner
CPU pin
Lithium Battery
Battery Holder
8. Place the heatsink on the processor then tighten two diagonal screws until snug,
then the other two screws.
9. When all four screws are snug, tighten them all to secure the heatsink to the
mainboard.
NOTE: Do not overtighten the screws as this may damage the processor or the
heatsink.
10. Replace the cover on the blade unit and finish by installing the unit back into the
blade enclosure.
Figure 3-3. Installing a Processor in a Socket
3-4 Onboard Battery Installation
A battery is included on the mainboard to supply certain volatile memory components
with power when power has been removed from the blade module. If this battery dies, it
must be replaced with an equivalent CR2032 Lithium 3V battery. Dispose of used
batteries according to the manufacturer's instructions. See Figure 3-4 for a diagram of
installing a new onboard battery.
WARNING: There is a danger of explosion if the onboard battery is installed
upside down, which reverses its polarities.
Figure 3-4. Installing the Onboard Battery
3-5
Page 28
SBI-7226T-T2 Blade Module User’s Manual
3-5 Memory Installation
The mainboard of each blade unit must be populated with DIMMs (Dual In-line Memory
Modules) to provide system memory. The DIMMs should all be of the same size and
speed and from the same manufacturer due to compatibility issues. See details
below on supported memory and our web site (www.supermicro.com/products/
superblade for recommended memory.
Populating Memory Slots
The mainboard of a SBI-7226T-T2 blade module has eight memory slots per node. Both
interleaved and non-interleaved memory are supported, so you may populate any
number of DIMM slots.
Populating slots at the same time with memory modules of the same size and of the
same type will result in three-channel, interleaved memory, which is faster than
single-channel, non-interleaved memory. See Table 3-1 and Figure 3-5 for details.
For an interleaved configuration, memory modules of the same size and speed
must be installed. You should not mix DIMMs of different sizes and speeds.
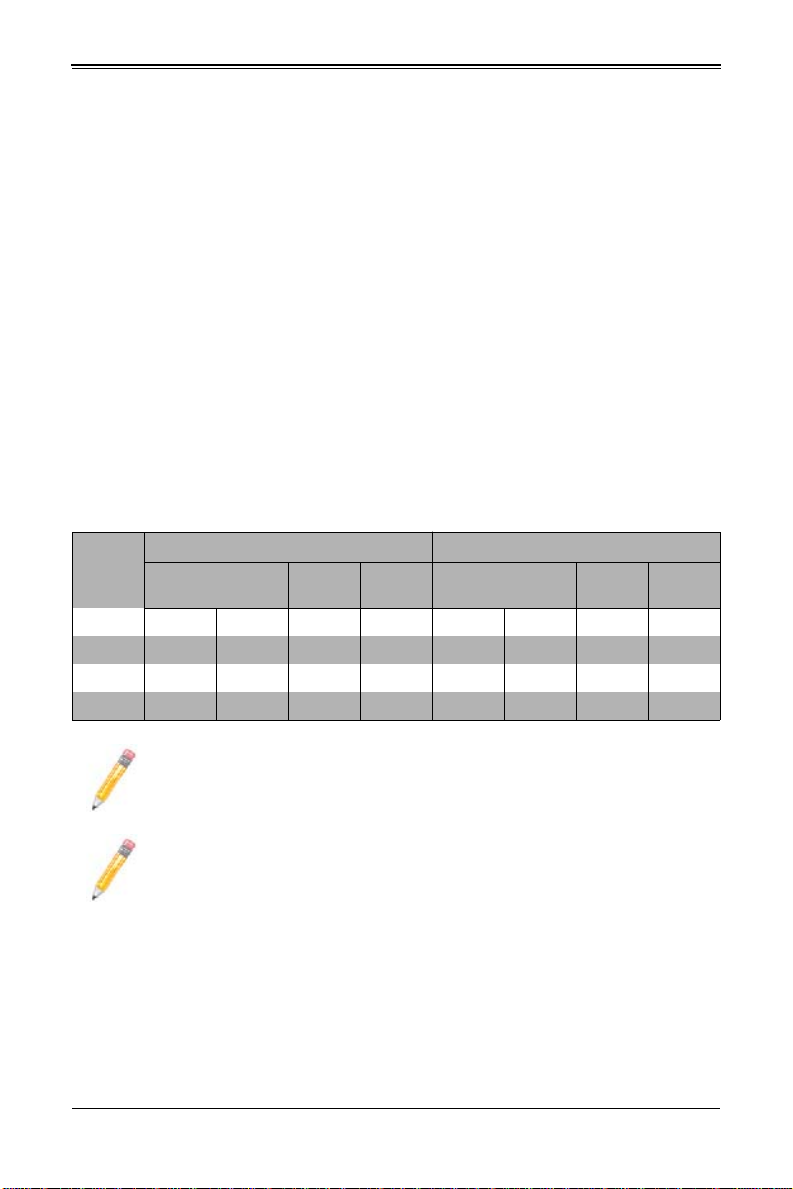
Table 3-1. Populating Eight Memory Slots per Node for Interleaved Operation
Number
of
DIMMs
2 DIMMs 1A --- --- --- 1A --- --- --4 DIMMs 1A --- 2 --- 1A --- 2 --6 DIMMs 1A --- 2 3 1A --- 2 3
8 DIMMs 1A 1B 2 3 1A 1B 2 3
Channel 0
Processor 1 Processor 2
Channel 1Channel
2
Channel 0
Channel 1Channel
2
NOTE: The DIMM slot number specified in Table 3-1 equals the DIMM slot to
be populated. A “---” indicates that the DIMM slot should be left unpopulated.
DIMMs for one board are P1/P2 and P3/P4 for the other board.
NOTE: Though multiple DIMM memory module types and speeds may be
supported, you need to use DIMM memory modules of the same speed and
type.
3-6
Page 29
Chapter 3: Setup and Installation
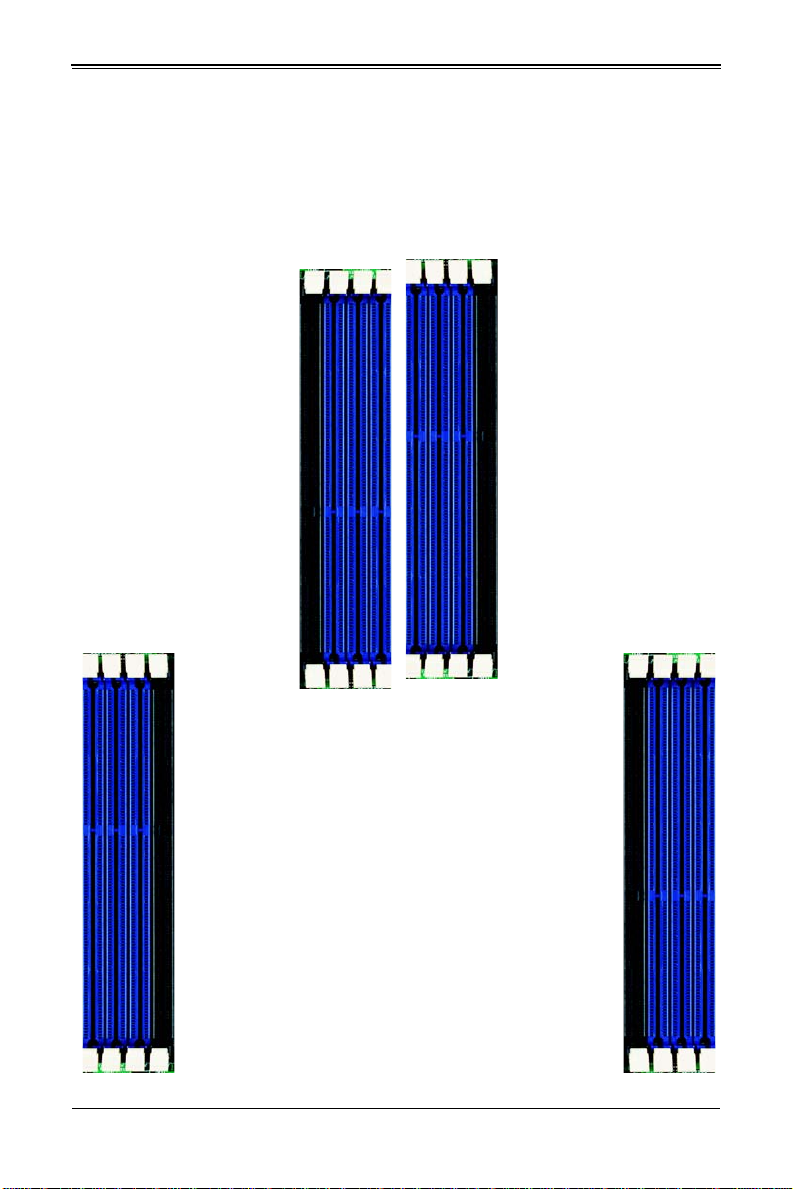
Edge of Board
Toward CPU
Toward CPU
Edge of Board
Toward CPU
Toward CPU
P2-DIMM1A
P2-DIMM1B
P2-DIMM2
P2-DIMM2
P3-DIMM2
P3-DIMM3
P3-DIMM1A
P3-DIMM1B
P4-DIMM1A
P4-DIMM1B
P4-DIMM2
P4-DIMM3
P1-DIMM2
P1-DIMM3
P1-DIMM1A
P1-DIMM1B
Figure 3-5. 8-Slot DIMM Numbering
3-7
Page 30

SBI-7226T-T2 Blade Module User’s Manual
To Inst all: Insert module vertically
and press down until it snaps into
place. Pay attention to the bottom
notch.
To Remove: Use your thumbs to
gently push each release tab
outward to free the DIMM from the
slot.
DIMM Installation
WARNING: Exercise extreme care when installing or removing DIMM modules
to prevent any possible damage.
Installing DIMM Memory Modules
1. Power down the blade module (see "Powering Down a Blade Unit" on page 3-1).
2. Remove the blade from the enclosure and the cover from the blade (see
"Removing/Replacing the Blade Cover" on page 3-2).
3. Insert each DIMM vertically into its slot, starting with slots 1A and 2A. Pay attention
to the notch along the bottom of the module to prevent inserting the DIMM
incorrectly (see Figure 3-6).
Figure 3-6. Installing a DIMM into a Memory Slot
4. Gently press down on the DIMM until it snaps into place in the slot. Repeat for all
modules (see Table 3-1 for installing DIMMs into the slots in the correct order).
5. Replace the air shroud and the blade cover and install the blade module back into
the enclosure.
6. Power up the blade unit (see "Powering Up a Blade Unit" on page 3-1).
3-8
Page 31

Chapter 3: Setup and Installation
3-6 Hard Disk Drive Installation
Hard disk drives are installed in “carriers” which are hot-swappable and can be removed
or replaced without powering down the blade unit they reside in. A blade module needs
a hard disk drive with an operating system installed to operate.
WARNING: To maintain proper airflow, both hard drive bays must have drive
carriers inserted during operation whether or not a drive is installed in the carrier.
To remove a hard drive carrier, do the following:
Removing a Hard Drive Carrier
1. Locate the colored “Open” button at the bottom of the drive carrier and press it with
your thumb. This action releases the drive carrier from the drive bay.
2. Pull the release handle out about 45-degrees, then use it to pull the drive carrier out.
To Install a hard drive, use the following procedure:
Installing a Hard Drive
1. Remove a blank drive carrier from the blade (see removal procedure above).
2. Insert a 2.5” drive into the carrier with the PCB side facing down and the connector
end toward the rear of the carrier.
3. Align the drive in the carrier so that the screw holes of both line up. Note that there
are holes in the carrier marked “SAS/SATA” to aid in correct installation.
4. Secure the drive to the carrier with four screws as shown in Figure 3-7: "Installing a
Hard Drive in a Carrier" on page 3-10.
5. Insert the drive carrier into its slot keeping the Open button at the bottom. When the
carrier reaches the rear of the bay the release handle will retract.
6. Push the handle in until you hear the carrier click into its locked position.
3-9
Page 32

SBI-7226T-T2 Blade Module User’s Manual
Figure 3-7. Installing a Hard Drive in a Carrier
3-10
Page 33

Chapter 3: Setup and Installation
3-7 Installing the Operating System
An operating system (OS) must be installed on each blade module. Blades with
Microsoft Windows OS and blades with Linux OS can both occupy and operate within
the same blade enclosure. Refer to the SuperMicro web site for a complete list of
supported operating systems.
There are several methods of installing an OS to the blade modules.
Installing with an External USB CD-ROM Drive
The most common method of installing the OS is with an external USB CD-ROM drive.
Take the following steps to install the OS to a blade module:
WARNING: Installing the OS from an external CD-ROM drive may take several
hours to complete.
1. Connect an SUV cable (Serial port/USB port/Video port cable) to the KVM
connector on the front of the blade module. You will then need to attach a USB hub
to the USB port on this cable to provide multiple USB ports.
2. Connect the external CD-ROM drive, a USB keyboard and a mouse to the USB hub.
You will also need to connect a monitor to the video connector on the SUV cable.
Turn on the blade module.
3. Insert the CD containing the OS into the CD-ROM drive.
4. Follow the prompts to begin the installation.
Installing via PXE Boot
PXE (Preboot Execution Environment) is used to boot a computer over a network. To
install the OS via PXE, the following conditions must be met:
1. The PXE B
2. A PXE server has been configured (this can be another blade in the system).
3. The PXE server must be connected over a network to the blade to be booted.
4. The blade has only non-partitioned/unformatted hard drives installed and no
bootable devices attached to it.
Once these conditions are met, make sure the PXE server is running. Then turn on the
blade on which you wish to boot and/or install the OS. The BIOS in the blade will look at
all bootable devices and finding none will connect to the PXE server to begin the boot/
install.
OOT option in BIOS must be enabled.
3-11
Page 34

SBI-7226T-T2 Blade Module User’s Manual
Installing via Virtual Media (Drive Redirection)
You can install the OS via Virtual Media through either the IPMIview (Java based client
utility), SuperBladeTool or the Web-based Management Utility. With this method, the OS
is installed from an ISO image that resides on another system/blade.
Refer to the manuals on your SuperBlade CD-ROM for further details on the Virtual
Media (CD-ROM or Drive Redirection) sections of these two utility programs.
3-8 Management Software
System management may be performed with either of three software packages:
IPMIview, SuperBladeTool or a Web-based Management Utility. These are designed to
provide an administrator with a comprehensive set of functions and monitored data to
keep tabs on the system and perform management activities.
Refer to the manuals on your SuperBlade CD-ROM for further details on the various
functions provided by these management programs.
3-9 Configuring and Setting up RAID
Each blade module that supports two or more hard drives may be used to create a RAID
array. The procedures for doing this vary depending upon the blade model chosen for
your SuperBlade system.
See Chapter 5 for details on how to configure and set up RAID on your blade module.
3-12
Page 35

Chapter 4
Blade Module Features
Figure 4-1. SBI-7226T-T2 Blade Unit Front View
This chapter describes the SBI-7226T-T2 blade unit. Installation and maintenance
should be performed by experienced technicians only.
See Figure 4-1 for a front view of the blade unit and Table 4-1 for its features.
Table 4-1. SBI-7226T-T2 Blade Unit Features
Feature Description
Processors
Memory
Storage One or two 2.5" hot-plug SATA hard disk drives per node
Ports KVM port (1)
Features
Power Consumption
Supports Dual 1366-pin LGA Socket processors for up to two Intel 64-bit
quad-core Xeon series processors.
Supports up to 64 GB of ECC Registered DDR3-1333/1066/800 SDRAM
DIMMs or 16 GB of ECC Unbuffered DDR3-1333/1066/800 SDRAM
DIMMs in six DIMM slots
Onboard Matrox G200eW Graphics chip with 16 MB of SDRAM, IPMI 2.0,
Plug and Play, APM 1.2, DMI 2.3, PCI 2.2, ACPI 1.0/2.0, SMBIOS 2.3,
Real Time Clock
Base Power Draw (~35W) / Power per CPU (60W/80W/95W) / Power per
DIMM (typically ~7W)
4-1
Page 36

SBI-7226T-T2 Blade Module User’s Manual
1
5
4
3
6
7
2
4-1 Control Panel
Each blade has a similar control panel (Figure 4-2) with power on/off button, a KVM
connector, a KVM button and four LEDs on the top front of the unit. The numbers
mentioned in Figure 4-2are described in Table 4-2.
Figure 4-2. Blade Control Panel
Table 4-2. Blade Control Panel
Item Function State Description
1 Power Button N/A Turns blade module on and off
2 KVM Button N/A Initiates KVM function
3 Power LED
4 KVM/UID LED
5 Network/IB LED
System Fault
6
LED
7 KVM Connector N/A Connector for SUV/KVM cable
Green Indicates power status “On”
Orange Indicates power status “Off” (with power cables plugged in)
Blue Indicates KVM being utilized on blade unit
Flashing Blue Indicates UID activated on blade module
Flashing Green Indicates network activity over LAN
Flashing Orange Indicates network activity over InfiniBand module
Red
Indicates a memory error, overheat, VGA error or any error
that prevents booting
4-2
Page 37

Chapter 4: Blade Module Features
Power Button
Each blade has its own power button so that individual blade units within the enclosure
may be turned on or off independently of the others. Press the power button (#1) to turn
on the blade server. The power LED (#3) will turn green. To turn off, press and hold the
power button for >4 seconds and the power LED will turn orange.
KVM Button
KVM stands for Keyboard/Video/Mouse. With KVM, a user can control multiple blades
with a single keyboard/video/mouse setup. Connect your keyboard, mouse and monitor
to the USB and VGA connectors on the CMM module, then push the KVM button on the
control panel of the blade module you wish to access.
LED Indicators
Blade module LEDs are described below in Table 4-3.
Table 4-3. Blade Module LED Indicators
LED State Description
Green Po w er On
Power LED
KVM/UID LED
(Blue)
Network LED
(Green)
System Fault
LED (Red)
Amber Standby
Red Power Failure
Steady On Indicates that KVM has been initialized on this blade module
Flashing
Flashing
Steady On
Serves as a UID indicator (the UID function is activated with a
management program)
Flashes on and off to indicate traffic (Tx and Rx data) on the LAN
connection to this blade module.
This LED illuminates red when a fatal error occurs. This may be the
result of a memory error, a VGA error or any other f atal error that
prevents the operating system from booting up.
a
a. In the event of a power failure, the N+1 Redundant Power Supply (if included in your
system's configuration) shares the system load to provide uninterrupted operation. The
failed power supply should be replaced with a new one as soon as possible.
KVM Connector
Alternatively, you may connect a KVM cable (CBL-0218L, with a keyboard/video/mouse
attached) to the KVM connector (#7) of the blade you wish to access. To switch to
another blade, disconnect the cable then reconnect it to the new blade.
See the Web-based Management Utility User’s Manual on your SuperBlade system
CD-ROM for further details on using the KVM function remotely.
4-3
Page 38

SBI-7226T-T2 Blade Module User’s Manual
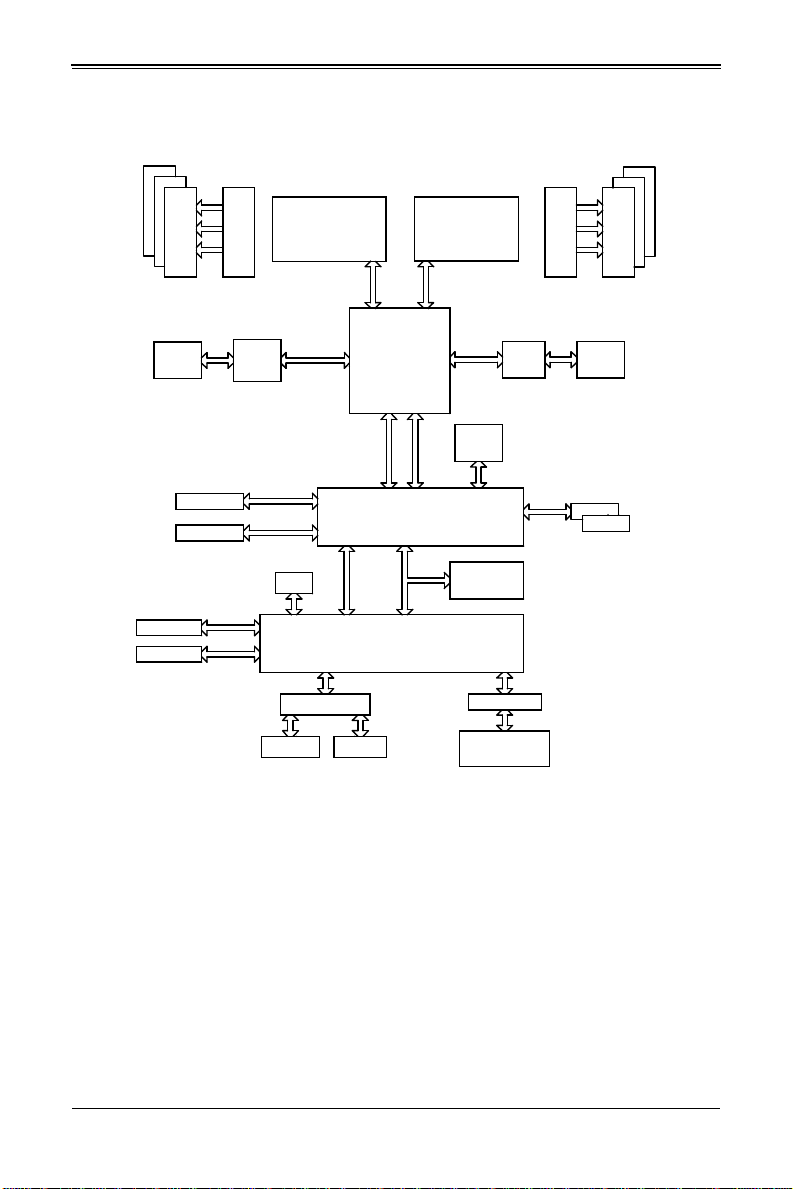
4-2 Mainboard
The mainboard of the SBI-7226T-T2 blade unit is a proprietary design, which is based
on the Intel 5500/IOH-24D Tylersburg + ICH10R chipset. See Figure 4-4 for a block
diagram of this chipset, Figure 4-3 for a view of the B8DTT Mainboard and Figure 4-5
for an exploded view diagram of the blade unit.
4-4
Page 39

Chapter 4: Blade Module Features
2
6
7
3
6
5 5
9
1 4
5
5
8
8
7
9
10
10
11 11
12
12
14
14
13 13
Figure 4-3. B8DTT Mainboard
4-5
Page 40

SBI-7226T-T2 Blade Module User’s Manual
Table 4-4. B8DTT Mainboard Layout
Item Description
1 CPU1 Socket
2 CPU2 Socket
3 CPU3 Socket
4 CPU4 Socket
5 DIMM Slots (see Figure 3-5: "8-Slo t DIMM Numbering" on page 3-7 for details).
6 Space for 2.5” SATA Hard Drive
7 Gbx Connector (for power and logic to backplane)
8 BIOS Chip
9 Onboard Battery
10 Intel 5500 Chip/IOH-24D
11 ICH10R Chip
12 KVM Module
13 Matrox G200eW Graphics chip
14 InfiniBand Daughter Card Connectors
4-6
Page 41
Chapter 4: Blade Module Features
PROCESSOR#0
PROCESSOR#1
#1
DDR3 DIMM
#2
DDR3 DIMM
#1
#1
#1
DDR3 DIMM
#2
DDR3 DIMM
IOH
TYLERSBURG
24D
ICH10R
HERMON-BMC
VGA SWITCH
PCI
SATA #1
SATA
LPC
SST25
VF016
RTL8201N PHY
LPC_SIO
W83527
ACPI
CMM BMC-LAN
1-port
10/100MB
Kawela
82576
CMM LAN
2-port
GB
DDR II
USB-3/4/5
USB-0/1
PANEL-USB
CMM-USB
CMM-UART
UART0
UART1
PANEL-UART
PCI-E X8
IB
CMM
LAN
IB
SATA #2
#1
#1
CMM-VGA
PANEL-VGA
Figure 4-4. Intel 5500/IOH-24D Tylersburg + ICH10R Chipset: Block Diagram
for SBI-7226T-T2
Jumpers
The jumpers present on the mainboard are used by the manufacturer only; there are no
jumpers used to configure the operation of the mainboard.
CMOS Clear
JBT1 is used to clear CMOS and will also clear any passwords. JBT1 consists of two
contact pads located near the BIOS chip (#10 in Figure 4-3).
4-7
Page 42

SBI-7226T-T2 Blade Module User’s Manual
1
2
2
3
4
3
5
4
3
2
2
Clearing CMOS
1. First power down the blade and remove it from the enclosure.
2. Remove the blade cover to access the mainboard (see Section : Removing/
Replacing the Blade Cover on page 3-2 for further details). Short the CMOS pads
with a metal object such as a small screwdriver.
3. Replace the cover, install the blade back into the enclosure and power it on.
4-3 Blade Unit Components
Figure 4-5. Exploded View of SBI-7226T-T2 Blade Module
4-8
Page 43
Chapter 4: Blade Module Features
Table 4-5. Main Components of SBI-7226T-T2 Blade Unit
Item Description
1 Blade Unit/Module
2 SATA Hard Drives (2 per blade node, 4 total)
3 DIMMs (system memory, 8 per node)
4 CPU Heatsinks (4)
5 Top Cover
Memory Support
The SBI-7226T-T2 blade module supports up to 64 GB of ECC Registered DDR3-1333/
1066/800 SDRAM or 16 GB of ECC Unbuffered DDR3-1333/1066/800 SDRAM in six
DIMM sockets. See Section 3-5 for further details on mainboard memory installation.
Hard Disk Drives
The SBI-7226T-T2 blade unit accommodates up to four 2.5" SATA hard disk drives, two
per node, which are mounted in drive “carriers”. The drives are hot-swappable and can
be removed or replaced without powering down the blade unit they reside in. The four
drives can be used to set up a RAID array (SATA RAID 0 or 1 only) or JBOD. These
drives use a yellow color for the Blade HDD active LED.
WARNING: Enterprise level hard disk drives are recommended for use in
Supermicro chassis and servers. For information on recommended HDDs, visit
the Supermicro WEB SITE at http://www.supermicro.com/products/nfo/files/
storage/SAS-1-CompList-110909.pdf.
WARNING: To maintain proper airflow, both hard drive bays must have drive
carriers inserted during operation whether or not a drive is installed in the carrier.
4-9
Page 44

SBI-7226T-T2 Blade Module User’s Manual
4-10
Page 45

Chapter 5
RAID Setup Procedure
Each SBI-7226T-T2 blade module supports four hard drives, two per node, which may
be used to create a RAID array. For the blade’s B8DTT mainboard, you may use the
BIOS setup to configure for either the Intel or Adaptec RAID controller and utility: use
the Intel driver for Windows and the Adaptec driver for Linux - both are included on the
CD that ships with the system.
Important Notes
Please read the following notes and warnings before setting up your RAID array.
NOTE: Before adding a new drive to an array, back up any data contained on
the new drive. Otherwise, all data will be lost.
NOTE: If you stop the BUILD or CLEAR process on a RAID 1 from the ACU, you
can restart it by pressing <C
NOTE: A RAID 1 created using the QUICK INIT option may return some data
miscompares if you later run a consistency check. This is normal and is not a
cause for concern.
NOTE: The ACU allows you to use drives of different sizes in an array.
However, during a build operation, only the smaller drive can be selected as the
source or first drive.
TRL> + <R>.
NOTE: When migrating from single volume to RAID 0, migrating from a larger
drive to a smaller drive is allowed. However, the destination drive must be at
least half the capacity of the source drive.
WARNING: Adaptec does not recommend that you migrate or build an array on
Windows dynamic disks (volumes), as it will result in data loss.
WARNING: Do not interrupt the creation of a RAID 0 using the MIGRATE option. If
you do, you will not be able to restart or to recover the data that was on the
source drive.
5-1
Page 46
SBI-7226T-T2 Blade Module User’s Manual
5-1 BIOS Configuration Utilities
The SBI-7226T-T2 blade module uses either a Intel or Adaptec RAID Configuration
Utility to do the final RAID configuration on your system. The choice depends upon
which configuration utility you chose in the BIOS setup.
For details and instructions on the use of these utilities see the SuperMicro website at
http://www.supermicro.com/support/manuals/ for these RAID Installation Guides.
5-2 BIOS Setup
Use the BIOS setup to configure for either the Intel or Adaptec RAID Utility and to other
set RAID options. The BIOS setup procedure is shown below.
See Chapter 6 for information on using your system’s BIOS setup.
Setting up the BIOS for RAID
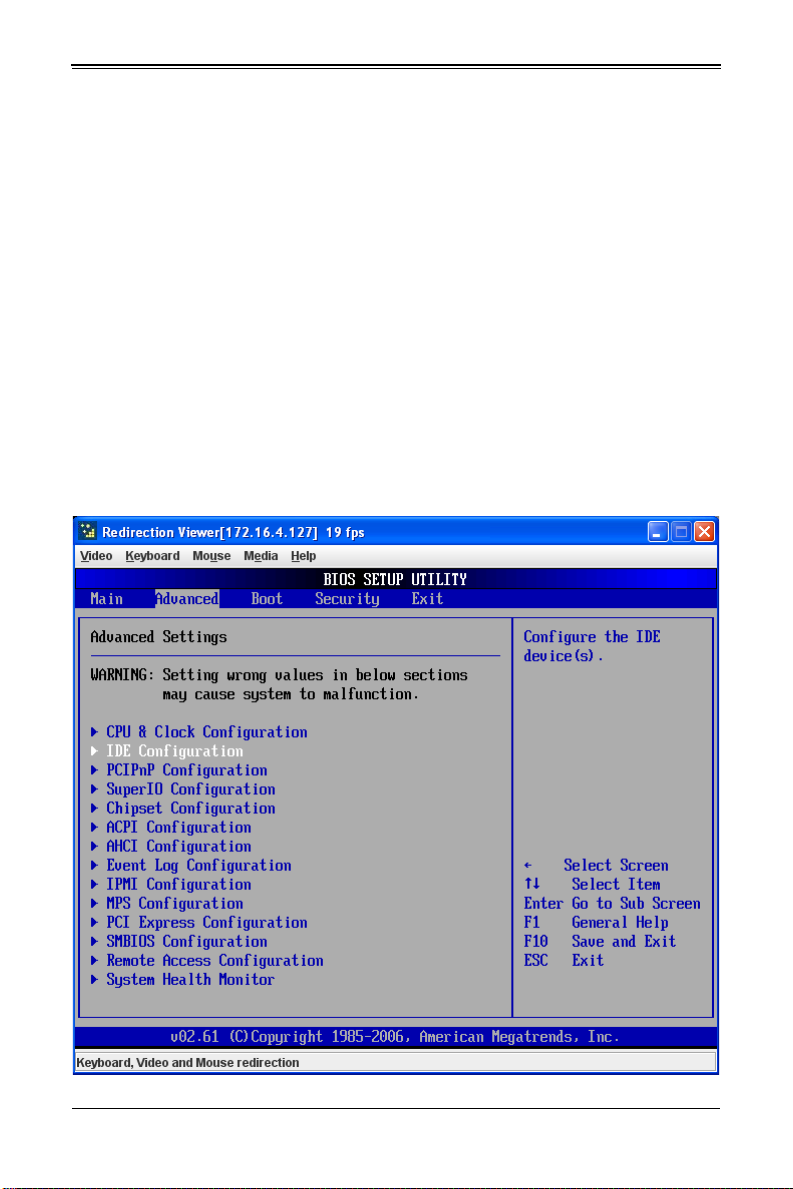
1. In the A
DVANCED SETTINGS screen of the BIOS Setup, select the IDE
C
ONFIGURATION sub-menu (Figure 5-1) and press ENTER.
Figure 5-1. Advanced Settings Screen
5-2
Page 47

Chapter 5: RAID Setup Procedure
2. In the IDE Configuration screen that appears (Figure 5-2), select the SATA drives
you wish to configure as RAID drives. For each drive, select the C
AS menu option and select the RAID option for it.
The screen will change to reflect your changes and display new menu options.
Figure 5-2. IDE Configuration Screen – Configure RAID Drives
ONFIGURE SATA#
5-3
Page 48

SBI-7226T-T2 Blade Module User’s Manual
3. In the changed IDE CONFIGURATION screen, select the MAX PORTS ON SATA# option
and set your ports selection (Figure 5-3).
Figure 5-3. Selecting Max Ports Option
5-4
Page 49

Chapter 5: RAID Setup Procedure
4. For the RAID ID Support menu option (Figure 5-4), select either the Intel or Adaptec
utility for configuring your RAID configuration.
Figure 5-4. Selecting RAID Utility
5-5
Page 50

SBI-7226T-T2 Blade Module User’s Manual
5. The last option is for enabling or disabling Hot Plug support for your RAID
configuration using the H
OT PLUG menu option (Figure 5-5).
Figure 5-5. Enabling Hot Plug
5-6
Page 51

Chapter 5: RAID Setup Procedure
6. Press the Esc key once to exit the IDE CONFIGURATION screen and go to the EXIT
menu in the BIOS setup. From the Exit menu, select S
confirm your RAID configuration changes and exit the BIOS Setup (Figure 5-6).
Figure 5-6. Exit BIOS Setup
AVE CHANGES AND EXIT to
5-7
Page 52
SBI-7226T-T2 Blade Module User’s Manual
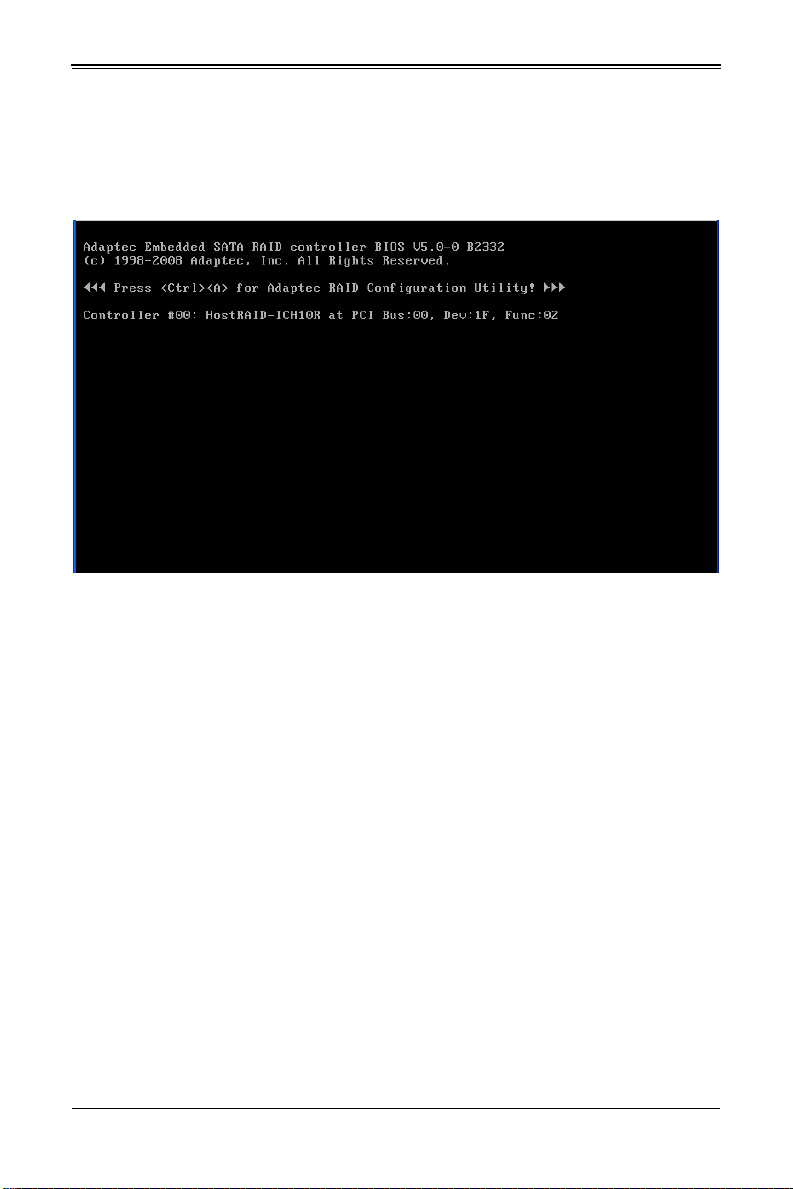
7. Your system will reboot. When the reboot displays the screen message in
Figure 5-7 press C
step 4 (Intel or Adaptec).
TRL-A to bring up the RAID Configuration Utility you chose in
Figure 5-7. Screen Message
5-8
Page 53

Chapter 6
BIOS
6-1 Introduction
This document describes the AMI® BIOS Setup utility for the SBI-7226T-T2 Blade
Module. The AMI ROM BIOS is stored in a flash chip and can be easily upgraded using
a floppy disk-based program.
Running Setup
NOTE: Default settings are in bold text unless otherwise noted.
The BIOS setup options described in this section are selected by choosing the
appropriate text from the M
section, although the screen display is often all you need to understand how to set the
options.
When you first power on the computer, the BIOS is immediately activated. While the
BIOS is in control, the Setup program can be activated in one of two ways:
1. By pressing <D
2. When the message Press the <Delete> key to enter Setup appears briefly at the
bottom of the screen during the POST, press the <D
S
ETUP menu.
AIN BIOS SETUP screen. All displayed text is described in this
ELETE> immediately after turning the system on, or
ELETE> key to activate the main
6-2 Main BIOS Setup Menu
The MAIN MENU screen has two main frames. The left frame displays all the options that
can be configured. “Grayed-out” options cannot be configured. The right frame displays
the key legend. Above the key legend is an area reserved for a text message. When an
option is selected in the left frame, it is highlighted in white. Often a text message will
accompany it.
NOTE: The BIOS has default text messages built in. SuperMicro retains the
option to include, omit, or change any of these text messages.
Settings printed in Bold are the default values. Use the U
among the different settings in each menu. Use the L
the options for each setting.
6-1
P/DOWN arrow keys to move
EFT/RIGHT arrow keys to change
Page 54

SBI-7226T-T2 Blade Module User’s Manual
Items that use sub-menus are indicated with the icon. With the item highlighted,
press the <E
NTER> key to access the submenu.
The BIOS setup utility uses a key-based navigation system called hot keys. Most of
these hot keys (<F1>, <F10>, <E
used at any time during the setup navigation process. Press the <E
CMOS S
ETUP menu.
NTER>, <ESC>, <ARROW> keys, and so on) can be
SC> key to exit the
When you first enter the AMI BIOS Setup utility, you will see the MAIN MENU screen. You
can always return to the M
with the arrow keys. The M
AIN MENU by selecting the Main tab on the top of the screen
AIN MENU screen provides you with a system overview, which
includes the version, built date and ID of the AMIBIOS, the type, speed and number of
the processors in the system and the amount of memory installed in the system.
System Time/System Date
You can edit the SYSTEM TIME/SYSTEM DATE field to change the system time and date.
Highlight S
through the keyboard. Press the <T
YSTEM TIME or SYSTEM DATE using the <ARROW> keys. Enter new values
AB> key or the <ARROW> keys to move between
fields.
The date must be entered in DAY/MM/DD/YYYY format. The time is entered in
HH:MM:SS format. Please note that time is in a 24-hour format. For example, 5:30 A.M.
appears as 05:30:00 and 5:30 P.M. as 17:30:00.
6-3 Advanced Settings Menu
Choose Advanced from the BIOS Setup Utility main menu with the arrow keys. The
items with a triangle beside them have sub menus that can be accessed by highlighting
the item and pressing <E
S
ETTINGS menu:
• CPU & Clock Configuration
• IDE Configuration
• PCI/PnP Configuration
• Super IO Configuration
• Chipset Configuration
• ACPI Configuration
• AHCI Configuration
• Event Log Configuration
• IPMI Configuration
• Intel VT-d Configuration
• MPS Configuration
• PCI Express Configuration
• SMBIOS Configuration
• Remote Access Configuration
• System Health Monitor
NTER>. Below is a list of all submenus in the ADVANCED
6-2
Page 55

Chapter 6: BIOS
CPU & Clock Configuration
The menu options in the CPU CONFIGURATION submenu and their descriptions are
shown in Table 6-1.
Table 6-1. CPU Configuration Submenu
Menu Option Description
CPU Settings (Static)
Ratio CMOS Setting
Hardware Prefetcher
Adjacent Cache Line
Prefetch
MPS and ACPI
MADT Ordering
Max CPUID Value
Limit
Intel (R) Virtualization
Tech
Execute-Disable Bit
Capability
Intel (R) HT
Technology
Active Processor
Cores
A20M
Intel SpeedStep(tm)
tech
Intel (R) TurboMode
Tech
Intel (R) C-State tech
C3 State
C6 State
C State Package
Limit Setting
This menu displays static information for Module Version, Manufacturer,
Frequency, BCLK Speed, Cache L1, Cache L2, Cache L3, Ratio Status and
Ratio Actual Value.
This setting sets the ratio between CPU Core Clock and the FSB Frequency . The
default is 20.
For UP platorms leave this setting enabled. For DP/MP ser vers, you can use t his
setting to tune performance to the specific applica tion.S ettin gs are Enabled and
Disabled.
For UP platorms leave this setting enabled. For DP/MP ser vers, you can use t his
setting to tune performance to the specific applica tion.S ettin gs are Enabled and
Disabled.
This setting specifies either M
Legacy Ordering for Windows 2000 or earlier OS’s.
This setting is disabled for WindowsXP. Settings are Enabled and Disabled.
When enabled, a VMM can utilize the additional HW Caps that are provided by
Intel Virtualization Technology. Settings are Enabled and Disabled.
NOTE: A full reset is required to change this setting.
When disabled, this setting forces the XD feature flag to always return to 0.
Settings are Enabled and Disabled.
When Disabled, only one thread per enabled core is enabled. Settings are
Enabled and Disabled.
This setting specifies the number of cores in each processor package to activat e.
Settings are All, 1 or 2.
Legacy OSes and APs may need A20M enabled. Settings are Enabled and
Disabled.
Use this setting to enable or disable GV3. Settings are Enabled and Disabled.
Turbo mode allows the processor cores to run faster t han their marked freque ncy
in specific conditions. Settings are Enabled and Disabled.
When enabled, the CPU idle is set to C2/C3/C4. Settings are Enabled and
Disabled.
Use this setting to select the Nehalem C-state action. Settings are Disabled,
ACPI C2 and ACPI C3.
Use this setting to enable or disable the Nehalem C6 state action. Settings are
Enabled and Disabled.
Use this setting to select the option that will program into C State the package
limit register. Settings include Auto, C1, C3, C6 and C7.
ODERN ORDERING for Windows XP or later OS’s or
6-3
Page 56

SBI-7226T-T2 Blade Module User’s Manual
Table 6-1. CPU Configuration Submenu (Continued)
Menu Option Description
C1 Auto Demotion
C3 Auto Demotion
Spread Spectrum
Mode
When this setting is enabled, the CPU will conditionally demote C3/C6/C7
requests to C1 based on uncore auto-demote information. Settings are Enabled
and Disabled.
When this setting is enabled, the CPU will conditionally demote C6/C7 requests
to C3 based on uncore auto-demote information. Settings are Enabled and
Disabled.
Use this setting to Enable or Disable Spread Spectrum Mode.
IDE Configuration
The menu options in the IDE ConfiguraTION submenu and their descriptions are shown
in Table 6-2
Table 6-2. IDE Configuration Submenu
Menu Option Description
SATA#1
Configuration
Configure SATA#1 as Use this setting to configure SATA#1. Options include IDE, RAID or AHCI.
Max Ports on SATA#1
RAID ID Support
Hot Plug
Hard Disk Write
Protect
IDE Detect Time Out
(Sec)
ATA(PI) 80-Pin Cable
Detection
This setting allows you to set your SATA#1 Configuration as either Enhanced,
D
ISABLED or COMPATIBLE.
Use this setting to specify the maximum ports on SATA#1. Options include
4-ports and 6-ports.
If you have selected the RAID setting above, then you may use this setting to
specify the RAID ID support used. Options include Intel or A
If you have selected the RAID setting above, then you may use this setting to
enable or disable Hot Plugging. Settings are Enabled and Disabled.
Use this setting to Enable or Disable device write protection. This will be
effective only if device is accessed through the BIOS.
This setting allows you to select the time out value for detecting ATA/ATAPI
devices. Options are 5-second increments between 5 and 35 seconds. Default is
35.
This setting allows you to select the mechanism for detecting an 80-pin ATA(PI)
cable. Options include Host, Device or Host & Device.
DAPTEC.
6-4
Page 57

Chapter 6: BIOS
PCI/PnP Configuration
The menu options in the PCI/PNP CONFIGURATION submenu and their descriptions are
shown in Table 6-3.
Table 6-3. PCI/PnP Configuration Submenu
Menu Option Description
Clear NVRAM Select YES to clear NVRAM during boot-up. The options are YES and No.
Select YES to allow the OS to configure Plu g & Play devices.
Plug & Play OS
PCI Latency Timer
Allocate IRQ to PCI
VGA
Palette Snooping
PCI IDE BusMaster
Offboard PCI/ISA IDE
Card
IRQ3/IRQ4/IRQ5/
IRQ7/IRQ9/IRQ10/
IRQ11/IRQ14/IRQ15
DMA Channel 0/
Channel 1/Channel 3/
Channel 5/Channel 6/
Channel 7
Reserved Memory
Size
NOTE: Selecting Y
that supports Plug & Play.
Select No to allow AMIBIOS to configure all devices in the system.
This option sets the latency of all PCI devices on the PCI bus. Select a value to
set the PCI latency in PCI clock cycles. Options are 32, 64, 96, 128, 160, 192,
224 and 248.
Set this value to allow or restrict the system from giving the VGA ada pter card a n
interrupt address. The options are Yes and N
Select E
NABLED to inform the PCI devices that an ISA graphics device is inst alled
in the system in order for the graphics card to function properly. The options are
NABLED and Disabled.
E
When enabled, this allows BIOS to use PCI busmastering for reading/writing to
IDE drives. Options include Enabled and Disabled.
Some PCI cards may require that this setting be set to the PCI slot number that
is holding the card. The Auto setting works for most PCI IDE ca rds. Options
include Auto and PCI Slot 1 thorugh PCI Slot 6.
This feature specifies the availability of an IRQ to be used by a PCI/PnP device.
ESERVED for the IRQ to be used by a Legacy ISA device. The options
Select R
are Available and R
Select Available to indicate that a specific DMA channel is available to be used
by a PCI/PnP device. Select R
for a Legacy ISA device. The options are Available and Reserved.
You may set reserved memory with this setting. The options are Disabled, 16K,
32
K and 64K.
ES is not required for system boot if your system has an OS
O.
ESERVED.
ESERVED if the DMA channel specified is reserved
6-5
Page 58

SBI-7226T-T2 Blade Module User’s Manual
Super IO Configuration
The menu options in the SUPER IO CONFIGURATION submenu and their descriptions are
shown in Table 6-4.
Table 6-4. Super IO Configuration Submenu
Menu Option Description
Serial Port1 Address
Serial Port2 Address
Serial Port 2
Mode
This option specifies the base I/O port address and In terrupt Request ad dress of
serial port 1. The options are D
• Select D
• Select 3F8/IRQ4 to allow the serial port to use 3F8 as its I/O port address
This option specifies the base I/O port address and In terrupt Request ad dress of
serial port 2. The options are D
Select D
When this option is set to D
unavailable.
Select 2F8/IRQ3 to allow the serial port to use 2F8 as its I/O port address and
IRQ 3 for the interrupt address.
This tells the BIOS which mode to select for serial port 2. The options are
Normal, I
ISABLED to prevent the serial port from accessing any system
resources. When this option is set to D
becomes unavailable.
and IRQ 4 for the interrupt address.
ISABLED to prevent the serial port from accessing any syst em resour ces.
RDA and ASKIR.
ISABLED, 3F8/IRQ4, 3E8/IRQ4 and 2E8/IRQ3.
ISABLED, the serial port physically
ISABLED, 2F8/IRQ3, 3E8/IRQ4 and 2E8/IRQ3.
ISABLED, the serial port physically becomes
Chipset Configuration
The CHIPSET CONFIGURATION submenu contains two submenus as shown in Table 6-5.
Table 6-5. Chipset Configuration Submenu
Menu Option Description
CPU Bridge
Configuration
NorthBridge
Configuration
SouthBridge/
Configuration
This menu configures the CPU Bridge features. For details see Table 6-6.
This menu configures the NorthBridge Chip. For details see Table 6-7.
This menu configures the SouthBridge Chip. For details see Table 6-8.
6-6
Page 59

Chapter 6: BIOS
CPU Bridge Configuration
The menu options in the NORTHBRIDGE CONFIGURATION submenu and their descriptions
are shown in Table 6-6.
Table 6-6. CPU Bridge Configuration Submenu
Menu Option Description
CPU Information
(Static)
QPI Links Speed
QPI Frequency
QPI L0s and L1 This setting allows you to Enable or Disable QPI L0s and L1.
Memory Frequency
Memory Mode
Demand Scrubbing This setting Enables or Disables ECC demand scrubbing.
Patrol Scrubbing This setting Enables or Disables ECC patrol scrubbing.
Displays for CPU Revision, Current QPI Frequency , Cur rent Memory Frequency,
Memory Reference Code Revision and CSI Reference Code Revision are all
statically displayed at the top of this menu.
This setting allows you to transition the QPI links to Full-speed or leave them in
Slow-mode.
This setting allows you to transition the links to the specified speed when
transitioning the links to full-speed (if supported by all components). Options
include Auto, 4.800GT, 5.866GT and 6.400GT.
This setting forces a DDR3 frequency slower than the common tCK detected via
SPD. Options include Auto, Force DDR-800, Force DDR-1066 and Force
DDR-1333.
This setting sets the Memory Mode. Options include Independent (i ndepe nden t
channel), Channel Mirroring (mirrors channel space between channels),
Lockstep (locksteps channel 0 and 1) and Sparing (for sparing mode).
NorthBridge Configurat ion
The menu options in the NORTHBRIDGE CONFIGURATION submenu and their descriptions
are shown in Table 6-7.
Table 6-7. NorthBridge Configuration Submenu
Menu Option Description
Static Infomation
Crystal Beach / DMA
IOH Max Payload
Size
This menu displays static information for NB Revision and the Current QPI
Frequency.
This setting allows you to Disable or Enable the Crystal Beach DMA
Configuration.
Use this setting to set the IOH Max Payload Size to either 128B or 256B.
6-7
Page 60

SBI-7226T-T2 Blade Module User’s Manual
SouthBridge Configuration
The menu options in the SOUTHBRIDGE CONFIGURATION submenu and their descriptions
are shown in Table 6-8.
Table 6-8. SouthBridge Configuration Submenu
Menu Option Description
USB Functions
USB Port Configure
USB 2.0 Controller
USB Configuration
USB
Configuration
Information
(Static)
Legacy USB
Support
USB 2.0
Controller Mode
BIOS EHCI
Hand-Off
Legacy USB 1.1
HC Support
Hotplug USB FDD
Support
SMBUS Controller This setting allows you to Enable or Disable the SMBUS controller.
Restore on AC Power
Loss
Power Button
Function
This setting Enables or Disables USB Functions for the system. Disabling this
setting allows you to configure the USB 2.0 Controller setting.
This setting allows you to specify the USB ports for your system when the USB
Functions setting is enabled. Options include 6x6 USB Ports and 8x4 USB
Ports.
This setting is only active when the USB Functions setting is disabled. It allows
you to Enable or Disable the USB 2.0 Controller.
This static display shows Module V ersion and USB Device s Enabled information .
Select Enabled to enable the support for USB Legacy. Disable Legacy support if
there are no USB devices installed in the system. A
if no USB devices are connected. The options a re D
Select the controller mode for your USB ports. Options are HiSpeed and
ULLSPEED. (HiSpeed=480 Mbps, FullSpeed=12 Mbps).
F
Enable or DISABLE a workaround for OS's without EHCI hand-off support.
This setting allows you to Enable or Disable Legacy USB 1.1 HC support.
This setting allows you to create a dummy FDD device that will be associated
with the hotplugged FDD later. The Auto option creates this dummy device only if
there is no USB FDD present. Options include Auto, Enabled and Disabled.
Use this setting to specify the option for restoring on an AC power loss. Options
include Power Off, Power On and Last State.
Use this setting to specify the function of the power button when it is turned off .
Options include 4-second Override and Instant Off.
UTO disables Legacy support
ISABLED, Enabled and AUTO.
6-8
Page 61

Chapter 6: BIOS
ACPI Configuration
The menu options in the ACPI CONFIGURATION submenu and their descriptions are
shown in Table 6-9.
Table 6-9. ACPI Configuration Submenu
Menu Option Description
Advanced ACPI
Configuration
ACPI Version
Features
ACpI APIC
support
AMI OEMB Table
Headless Mode This setting Enables or Disables the Headless operation mode through ACPI.
NUMA Support This setting Enables or Disables NUMA support.
Chipset ACPI
Confguration
Energy Lake
Feature
APIC ACPI SCI
IRQ
USB Device
Wakeup from S3/
S4
High Performance
Event Timer
Use this sub-menu to configure additional ACPI options.
This setting enables RSDP pointers to 64-bit Fixed System Description Tables.
Options include ACPI v1.0, ACPI v2.0 and ACPI v3.0.
Use this setting to include the ACPI APIC table pointer to the RSDT pointer list.
Options are Enabled and Disabled.
Use this setting to include the OEMB table pointer to the R(x)SDT pointer lists.
Options are Enabled and Disabled.
Use this sub-menu to confgure chipset ACPI related configuration settings.
Use this setting to Enable or Disable the Energy Lake feature.
Use this setting to Enable or Disable the APIC ACPI SCI IRQ.
Use this setting to Enable or Disable USB Device Wakeup from S3/S4.
Use this setting to Enable or Disable High Performance Event Timing.
AHCI Configuration
The menu options in the ACPI CONFIGURATION submenu and their descriptions are
shown in Table 6-10.
Table 6-10. AHCI Configuration Submenu
Menu Option Description
AHCI BIOS Support Use this setting to Enable or Disable AHCI BIOS support.
AHCI CD/DVD Boot
Time Out
AHCI Port0~Port5
Settings
This sets the AHCI CD/DVD Boot time out duration in increments from 5 to 35
seconds. Some SATA CD/DVDs in AHCI mode need to wait longer and therefore
need a longer time out setting.
While entering setup, BIOS auto detects the presence of IDE devices and
displays the status of auto detection for the device.
6-9
Page 62

SBI-7226T-T2 Blade Module User’s Manual
Table 6-10. AHCI Configuration Submenu (Continued)
Menu Option Description
SATA Port 0~5
S.M.A.R.T.
This setting selects the type of device connected to the system.Options include
Auto or Not Installed.
S.M.A.R.T stands for Self-Monitoring, Analysis and Reporting Technology. This
setting Enables or Disables the S.M.A.R.T. feature.
Event Log Configuration
The menu options in the EVENT LOG CONFIGURATION submenu and their descriptions are
shown in Table 6-11.
Table 6-11. Event Log Configuration Submenu
Menu Option Description
View Event Log Highlight this item and press <ENTER> to view the contents of the event log.
Mark All Events as
Read
Clear Event Log
Highlight this item and press <ENTER> to mark all events as read.
Select Yes and press <E
O to verify.
N
NTER> to clear all event logs. The options are YES and
IPMI Configuration
The menu options in the IPMI CONFIGURATION submenu and their descriptions are
shown in Table 6-12. These options are only available with the SBI-7226T-T2 blade
module.
Table 6-12. IPMI Configuration Submenu
Menu Option Description
IPMI Information
Display (Static)
View BMC System
Event Log
SEL Entry
Number
Clear BMC System
Event Log
Set LAN
Configuration
IP Address Use this sub-menu for IP Address configuration.
This static display provides information for the S tatus of BMC and IPMI Firmware
Revision.
This sub-menu allows you to view all events in the BMC Event Log. It will take a
maximum of 15 seconds to read all BMC SEL records.
Use the +/- keys to traverse the BMC Event Log.
Use this option to clear all events in the BMC System Event Log.
This is the input for the SET LAN Configuration command. See IPMI 1.5
Specification Table 19.1 for details.
NOTE: Each question in this sub-menu may take a considerab le amount of time
to complete.
6-10
Page 63

Chapter 6: BIOS
Table 6-12. IPMI Configuration Submenu (Continued)
Menu Option Description
IP Address
Source
IP Address
MAC Address Use this sub-menu for MAC Address configuration.
MAC Address
Subnet Mask Use this sub-menu forSubnet Mask configuration.
Subnet Mask
Gateway
Address
Gateway
Address
This setting allows you to specify either a DHCP or Static IP Address Soruce. If
you select Static for the IP Address So urce, then the IP Address setti ng becomes
active.
This setting allows you to set the IP Address for your LAN Configuration in
decimal format of XXX.XXX.XXX.XXX and with values less than 256. The
current IP Address is statically displayed below.
This setting allows you to set the IP Address for your LAN Configuration in hex
format of XX.XX.XX.XX.XX.XX. The current MAC A ddress is st at ically d isp layed
below.
This setting allows you to set the Subnet Mask for your LAN Configuration in
decimal format of XXX.XXX.XXX.XXX and with values less than 256. The
current Subnet Maks is statically displayed below.
Use this sub-menu for Gateway Address configuration.
This setting allows you to set the Gateway Address for your LAN Configuration in
decimal format of XXX.XXX.XXX.XXX and with values less than 256. The
current Gateway Address is statically displayed below.
Intel VT-d Configuration
The menu options in the INTEL VT-D CONFIGURATION submenu and their descriptions are
shown in Table 6-13.
Table 6-13. Intel VT-d Configuration Submenu
Menu Option Description
Intel VT-d This setting Enables or Disables Intel VT-d virtualization in your system.
MPS Configuration
The menu options in the MPS CONFIGURATION submenu and their descriptions are
shown in Table 6-14.
Table 6-14. MPS Configuration Submenu
Menu Option Description
MPS Revision
This setting allows you to set the MPS Revision for your system to either 1.1 or
1.4.
6-11
Page 64

SBI-7226T-T2 Blade Module User’s Manual
PCI Express Configuration
The menu options in the PCI Express CONFIGURATION submenu and their descriptions
are shown in Table 6-15.
Table 6-15. PCI Express Configuration Submenu
Menu Option Description
Active State Power
Management
This setting allows you to Enable or Disable PCI Express L0s and L1 lin k power
states.
SMBIOS Configuration
The menu options in the SMBIOS CONFIGURATION submenu and their descriptions are
shown in Table 6-16.
Table 6-16. SMBIOS Configuration Submenu
Menu Option Description
SMBIOS SMI Support
This setting allows you to Enable or Disable the SMBIOS SMI Wrapper support
for PnP func 50h-54h.
Remote Access Configuration
The menu options in the REMOTE ACCESS CONFIGURATION submenu and their
descriptions are shown in Table 6-17.
Table 6-17. Remote Access Configuration Submenu
Menu Option Description
Remote Access
Serial Port Number
Serial Port Mode
Flow Control
Redirection After
BIOS POST
Terminal Type Selects the type of the target terminal: ANSI, VT100 and VT-UTF8.
VT-UTF8 Combo Key
Support
Sredir Memory
Display Delay
Allows you to Enable or Disable remote access. If enabled, the settings below
will appear.
Selects the serial port to use for console redirection. Options are COM1 and
COM2.
Selects the serial port settings to use. Options are (115200 8, n, 1), (57600 8,
1), (38400 8,
Selects the flow control to be used for console redirection. Options are None,
ARDWARE and SOFTWARE.
H
Options are D
(redirection during POST and during boot loader) and Always (redirection
always active). Note that some OS's may not work with this set to Always.
Allows you to Enable or D
VT100 terminals.
Use this setting to set the delay in seconds to display memory information.
Options are No Delay , 1
N, 1), (19200 8, N, 1) AND (09600 8, N, 1).
ISABLE (no redirection after BIOS POST), BOOT LOADER
ISABLE VT-UTF8 combination key support for ANSI/
SEC, 2 SECS and 4 SECS.
6-12
N,
Page 65

Chapter 6: BIOS
System Health Monitor
The SYSTEM HEALTH MONITOR submenu contains systems monitor displays for the
following information: CPU1 T
CPU1 V
CORE, CPU2 VCORE, 3.3V VCC, +5VIN, +12VIN, CPU1 DDR3 VTT, CPU2 DDR3
VTT, 5V
STANDBY and BATTERY VOLTAGE.
EMPERATURE, CPU2 T EMPERATURE, SYSTEM T EMPERATURE,
6-4 Boot Menu
The menu options for the BOOT menu are shown in Table 6-18.
Table 6-18. Boot Menu
Menu Option Description
Boot Settings
Configuration
Quick Boot
Quiet Boot
AddOn ROM
Display Mode
Bootup Num-Lock
PS/2 Mouse
Support
Wait for ‘F1’ If
Error
Hit ‘DEL’ Message
Display
Interrupt 19
Capture
Onboard NIC
Option ROM
Boot Device
Priority
This sub-menu allows you to configure setting for system boot.
If ENABLED, this option will skip certain tests during POST to reduce the time
needed for the system to boot up. The options are Enabled and D
If Disabled, normal POST messages will be displayed on boot-up. If E
this display the OEM logo instead of POST messages.
Set this option to display add-on ROM (read-only memory) messages. The
options are Force BIOS and K
• Select Force BIOS to allow the computer system to force a third party BIOS
to display during system boot.
• Select K
Set this value to allow the N
The options are On and O
Use this setting to Enable or Disable support for a PS/2 mouse in your system.
Options include Enabled, Disabled and Auto.
Select Enable to activate the W
Enabled and D
Select Enabled to display message to hit the DEL key to enter SETUP. The
options are Enabled and D
Select Enabled to allow ROMs to trap Interrupt 19. The options are Enabled
and D
This setting allows you to set your Onboard NIC Option ROM. Options include
Disabled, PXE and iSCSI.
Use this sub-menu to specify the boot device priority sequence for devices
installed in your system. .
EEP CURRENT to allow the computer system to display the BIOS
information during system boot.
ISABLED.
ISABLED.
EEP CURRENT. The default setting is Force BIOS.
UMBER LOCK setting to be modified during boot up.
FF.
AIT FOR F1 IF ERROR function. The options are
ISABLED.
ISABLED.
NABLED,
6-13
Page 66

SBI-7226T-T2 Blade Module User’s Manual
Table 6-18. Boot Menu
Menu Option Description
These settings specify the boot sequence from the available devices installed in
your system. A device enclosed in parenthesis indicates that it has been
disabled in the corresponding type menu. Options for all three of these settings
are available boot devices and Disabled.
1st ~ Boot
Devices
Hard Disk Drives
1st ~ Drive
The devices to set are:
ST BOOT DEVICE
•1
•2ND BOOT DEVICE
•3RD BOOT DEVICE
•4TH BOOT DEVICE
and so on.
This sub-menu specifies the boot device priority sequence from the available
hadrd drives installed in your system.
These settings specify the boot sequence from the available hard disk drives
devices installed in your system.
The devices to set are:
ST DRIVE
•1
•2ND DRIVE
•3RD DRIVE
•4TH DRIVE
and so on.
6-5 Security Menu
The menu options for the SECURITY menu are shown in Table 6-19.
The AMI BIOS provides a Supervisor and a User password. If you use both passwords,
the Supervisor password must be set first.
Menu Option Description
Change Supervisor
Password
Change User
Password
Boot Sector Virus
Protection
Select this option and press <ENTER> to access the sub menu, and then type in
the password.
Select this option and press <ENTER> to access the sub menu, and then type in
the password.
This option is near the bottom of the S
NABLED and Disabled.
E
• Select D
• Select E
NABLED, the AMI BIOS displays a warning when any program (or virus)
When E
issues a Disk Format command or attempts to write to the boot sector of t he hard
disk drive.
Table6-19. Security Menu
ECURITY SETUP screen. The options are
ISABLED to deactivate the Boot Sector Virus Protection.
NABLED to enable boot sector protection.
6-14
Page 67

Chapter 6: BIOS
6-6 Exit Menu
Select the EXIT tab from AMI BIOS SETUP UTILITY screen to enter the EXIT BIOS SETUP
screen. The options for the E
additionally press <E
Menu Option Description
Save Changes and
Exit
Discard Changes and
Exit
Discard Changes
Load Optimal
Defaults
Load Fail-Safe
Defaults
When you have completed the system configuration changes, se lect this option
to leave BIOS Setup and reboot the computer, so the new system configuration
parameters can take effect. Select S
and press <E
Select this option to quit BIOS Setup without making any permanent changes to
the system configuration and reboot the computer. Select D
XIT from the EXIT menu and press <ENTER>.
E
Select this option and press <E
AMI BIOS Utility Program.
T o set this feature, select LOAD OPTIMAL DEFAULTS from the EXIT menu and press
<E
NTER>. Then Select OK to allow BIOS to automatically load the OPTIMAL
EFAULTS as the BIOS Settings. The OPTIMAL SETTINGS are designed for
D
maximum system performance, but may not work best for all computer
applications.
To set this feature, select L
press <E
stability, but not maximum performance.
XIT menu are shown in Table 6-20. You may also
SC> to exit without saving or <F10> to save your settings and exit.
Table 6-20. Exit Menu
NTER>.
NTER>. The FAIL-SAFE settings are designed for maximum system
AVE CHANGES AND EXIT from the EXIT menu
ISCARD CHANGES AND
NTER> to discard all the changes and return to
OAD FAIL-SAFE DEFAULTS from the EXIT menu and
6-15
Page 68

SBI-7226T-T2 Blade Module User’s Manual
Notes
6-16
Page 69

Appendix A
BIOS POST Codes
A-1 BIOS POST Messages
During the Power-On Self-T est (POST), the BIOS will check for problems. If a problem is
found, the BIOS will activate an alarm or display a message. The following is a list of
such BIOS messages.
Table A-1. BIOS POST Messages
BIOS Message Description
Failure Fixed Disk
Stuck key Stuck key on keyboard.
Keyboard error Keyboard not working.
Keyboard Controller Failed
Keyboard locked - Unlock key switch Unlock the system to proceed.
Monitor type does not match CMOS -
Run SETUP
Shadow Ram Failed at offset: nnnn
System RAM Failed at offset: nnnn
Extended RAM Failed at offset: nnnn
System battery is dead - Replace and
run SETUP
System CMOS checksum bad - Default
configuration used
System timer error The timer test failed. Requires repair of system board.
Real time clock error
Check date and time settings
Fixed disk is not working or not configured properly. Check to
see if fixed disk is attached properly. Run Setup. Find out if the
fixed-disk type is correctly identified.
Keyboard controller failed test. May require replacing keyboard
controller.
Monitor type not correctly identified in Setup
Shadow RAM failed at offset nnnn of the 64k block at which
the error was detected.
System RAM failed at offset nnnn of in the 64k block at which
the error was detected.
Extended memory not working or not configured properly at
offset nnnn.
The CMOS clock battery indicator shows the battery is dead.
Replace the battery and run Setup to reconfigure the system.
System CMOS has been corrupted or modified incorrectly,
perhaps by an application program that changes dat a stored in
CMOS. The BIOS installed Default Setup Values. If you do not
want these values, enter Setup and enter your own values. If
the error persists, check the system battery or contact your
dealer.
Real-Time Clock fails BIOS hardware test. May require board
repair.
BIOS found date or time out of range and reset the Real-Time
Clock. May require setting legal date (1991-2099).
A-1
Page 70

SBI-7226T-T2 Blade Module User’s Manual
Table A-1. BIOS POST Messages (Continued)
BIOS Message Description
Previous POST did not complete successfully. POST loads
default values and offers to run Setup. If th e failure was caused
Previous boot incomplete - Default
configuration used
Memory Size found by POST differed
from CMOS
Diskette drive A error
Diskette drive B error
Incorrect Drive A type - run SETUP Type of floppy drive A: not correctly identified in Setup.
Incorrect Drive B type - run SETUP Type of floppy drive B: not correctly identified in Setup.
System cache error - Cache disabled
CPU ID: CPU socket number for Multi-Processor error.
EISA CMOS not writeable ServerBIOS2 test error: Cannot write to EISA CMOS.
DMA Test Failed
Software NMI Failed
Fail-Safe Timer NMI Failed ServerBIOS2 test error: Fail-Safe Timer takes too long.
device Address Conflict Address conflict for specified device.
Allocation Error for: device
CD ROM Drive CD ROM Drive identified.
Entering SETUP... Starting Setup program
Failing Bits: nnnn
Fixed Disk n Fixed disk n (0-3) identified.
Invalid System Configuration Data Problem with NVRAM (CMOS) data.
I/O device IRQ conflict I/O device IRQ conflict error.
PS/2 Mouse Boot Summary Screen: PS/2 Mouse installed.
by incorrect values and they are not corrected, the next boot
will likely fail. On systems with control of wait states, improper
Setup settings can also terminate POST and cause this error
on the next boot. Run Setup and verify that the waitstate
configuration is correct. This error is cleared the next time the
system is booted.
Memory size found by POST differed from CMOS.
Drive A: or B: is present but fails the BI OS POST disket te test s.
Check to see that the drive is defined with the proper diskette
type in Setup and that the diskette drive is attached correctly.
RAM cache failed and BIOS disabled the cache. On older
boards, check the cache jumpers. You may have to replace the
cache. See your dealer. A disabled cache slows system
performance considerably.
ServerBIOS2 test error: Cannot write to extended DMA (Direct
Memory Access) registers.
ServerBIOS2 test error: Cannot generate software NMI
(Non-Maskable Interrupt).
Run ISA or EISA Configuration Utility to resolve resource
conflict for the specified device.
The hex number nnnn is a map of the bits at t he RAM address
which failed the memory test. Each 1 (one) in the map
indicates a failed bit. See errors 230, 231, or 232 above for
offset address of the failure in System, Extended, or Shadow
memory.
A-2
Page 71

Table A-1. BIOS POST Messages (Continued)
BIOS Message Description
nnnn kB Extended RAM Passed
nnnn Cache SRAM Passed
nnnn kB Shadow RAM Passed
nnnn kB System RAM Passed
One or more I2O Block Storage
Devices were excluded from the Setup
Boot Menu
Operating system not found
Parity Check 1 nnnn
Parity Check 2 nnnn
Press <F1> to resume, <F2> to Setup,
<F3> for previous
Press <F2> to enter Setup
PS/2 Mouse: PS/2 mouse identified.
Run the I2O Configuration Utility
System BIOS shadowed System BIOS copied to shadow RAM.
UMB upper limit segment address:
nnnn
Video BIOS shadowed Video BIOS successfully copied to shadow RAM.
Where nnnn is the amount of RAM in kilobytes successfully
tested.
Where nnnn is the amount of system cache in kilobytes
successfully tested.
Where nnnn is the amount of shadow RAM in kilobytes
successfully tested.
Where nnnn is the amount of system RAM in kilobytes
successfully tested.
There was not enough room in the IPL table to display all
installed I2O block-storage devices.
Operating system cannot be located on either drive A: or drive
C:. Enter Setup and see if fixed disk and drive A: are properly
identified.
Parity error found in the system bus. BIOS attempts to locate
the address and display it on the screen. If it cannot locate the
address, it displays ????. Parity is a method for checking
errors in binary data. A parity error indicates that some data
has been corrupted.
Parity error found in the I/O bus. BIOS attempts to locate the
address and display it on the screen. If it cannot locate the
address, it displays ????.
Displayed after any recoverable error message. Press <F1> to
start the boot process or <F2> to enter Setup and change the
settings. Press <F3> to display the previous screen (usually an
initialization error of an Option ROM, i.e., an add-on card).
Write down and follow the information shown on the screen.
Optional message displayed during POST. Can be turned of f in
Setup.
One or more unclaimed block storage devices have the
Configuration Request bit set in the LCT. Run an I2O
Configuration Utility (e.g. the SAC utility).
Displays the address nnnn of the upper limit of Upper
Memory Blocks, indicating released segments of the BIOS
which can be reclaimed by a virtual memory manager.
:
A-2 BIOS POST Codes
This section lists the POST (Power-On Self-Test) codes for the AMI BIOS. POST codes
are divided into two categories: recoverable and terminal.
A-3
Page 72

SBI-7226T-T2 Blade Module User’s Manual
Recoverable POST Errors
When a recoverable type of error occurs during POST, the BIOS will display an POST
code that describes the problem. BIOS may also issue one of the following beep codes:
• One long and two short beeps – video configuration error
• One repetitive long beep – no memory detected
Terminal POST Errors
If a terminal type of error occurs, BIOS will shut down the system. Before doing so,
BIOS will write the error to port 80h, attempt to initialize video and write the error in the
top left corner of the screen.
The following is a list of codes that may be written to port 80h.
Table A-2. Terminal POST Errors
Post Code Description
02h Verify Real Mode
03h Disable Non-Maskable Interrupt (NMI)
04h Get CPU type
06h Initialize system hardware
07h Disable shadow and execute code from the ROM.
08h Initialize chipset with initial POST values
09h Set IN POST flag
0Ah Initialize CPU registers
0Bh Enable CPU cache
0Ch Initialize caches to initial POST values
0Eh Initialize I/O component
0Fh Initialize the local bus IDE
10h Initialize Power Management
11h Load alternate registers with initial POST values
12h Restore CPU control word during warm boot
13h I nitialize PCI Bus Mastering devices
14h Initialize keyboard controller
16h 1-2-2-3 BIOS ROM checksum
17h Initialize cache before memory Auto size
18h 8254 timer initialization
1Ah 8237 DMA controller initialization
1Ch Reset Programmable Interrupt Controller
20h 1-3-1-1 Test DRAM refresh
A-4
Page 73

Table A-2. Terminal POST Errors (Continued)
Post Code Description
22h 1-3-1-3 Test 8742 Keyboard Controller
28h Auto size DRAM
29h Initialize POST Memory Manager
2Ah Clear 512 kB base RAM
2Ch 1-3-4-1 RAM failure on address line xxxx*
2Eh 1-3-4-3 RAM failure on data bits xxxx* of low byte of memory bus
2Fh Enable cache before system BIOS shadow
32h Test CPU bus-clock frequency
33h Initialize Phoenix Dispatch Manager
36h Warm start shut down
38h Shadow system BIOS ROM
3Ah Auto size cache
3Ch A d va nc ed co nfiguration of chipset registers
3Dh Load alternate registers with CMOS values
41h Initialize extended memory for RomPilot
42h Initialize interrupt vectors
45h POST device initialization
46h 2-1-2-3 Check ROM copyright notice
47h Initialize I20 support
48h Check video configuration against CMOS
49h Initialize PCI bus and devices
4Ah Initialize all video adapters in system
4Bh QuietBoot start (optional)
4Ch Shadow video BIOS ROM
4Eh Display BIOS copyright notice
4Fh Initialize MultiBoot
50h Display CPU type and speed
51h Initialize EISA board
52h Test keyboard
54h Set key click if enabled
55h Enable USB devices
58h 2-2-3-1 Test for unexpected interrupts
59h Initialize POST display service
5Ah Display prompt “Press F2 to enter SETUP”
5Bh Disable CPU cache
:
A-5
Page 74

SBI-7226T-T2 Blade Module User’s Manual
Table A-2. Terminal POST Errors (Continued)
Post Code Description
5Ch Test RAM between 512 and 640 kB
60h Test extended memory
62h Test extended memory address lines
64h Jump to UserPatch1
66h Configure advanced cache registers
67h Initialize Multi Processor APIC
68h Enable external and CPU caches
69h Setup System Management Mode (SMM) area
6Ah Display external L2 cache size
6Bh Load custom defaults (optional)
6Ch Display shadow-area message
6Eh Display possible high address for UMB recovery
70h Display error messages
72h Check for configuration errors
76h Check for keyboard errors
7Ch Set up hardware interrupt vectors
7Dh Initialize Intelligent System Monitoring
7Eh Initialize coprocessor if present
80h Disable onboard Super I/O ports and IRQs
81h Late POST device initialization
82h Detect and install external RS232 ports
83h Configure non-MCD IDE controllers
84h Detect and install external parallel ports
85h Initialize PC-compatible PnP ISA devices
86h Re-initialize onboard I/O ports.
87h Configure Motherboard Configurable Devices (optional)
88h Initialize BIOS Data Area
89h Enable Non-Maskable Interrupts (NMIs)
8Ah Initialize Extended BIOS Data Area
8Bh Test and initialize PS/2 mouse
8Ch Initialize fl oppy controller
8Fh Determine number of ATA drives (optional)
90h Initialize hard-disk controllers
91h Initialize local-bus hard-disk controllers
92h Jump to UserPatch2
A-6
Page 75

Table A-2. Terminal POST Errors (Continued)
Post Code Description
93h Build MPTABLE for multi-processor boards
95h Install CD ROM for boot
96h Clear huge ES segment register
98h 1-2 Search for option ROMs. One long, two short beeps on check-sum failu re
99h Check for SMART Drive (optional)
9Ah Shadow option ROMs
9Ch Set up Power Manageme nt
9Dh Initialize security engine (optional)
9Eh Enable hardware interrupts
9Fh Determine number of ATA and SCSI drives
A0h Set time of day
A2h Check key lock
A4h Initialize typematic rate
A8h Erase F2 prompt
AAh Scan for F2 key stroke
ACh Enter SETUP
AEh Clear Boot flag
B0h Check for errors
B1h Inform RomPilot about the end of POST.
B2h POST done - prepare to boot operating system
B4h 1 One short beep before boot
B5h Terminate QuietBoot (optional)
B6h Check password (optional)
B7h Initialize ACPI BIOS
B9h Prepare Boot
BAh Initialize SMBIOS
BBh Initialize PnP Option ROMs
BCh Clear parity checkers
BDh Display MultiBoot menu
BEh Clear screen (optional)
BFh Check virus and backup reminders
C0h Try to boot with INT 19
C1h Initialize POST Error Manager (PEM)
C2h Initialize error logging
C3h Initialize error display function
:
A-7
Page 76

SBI-7226T-T2 Blade Module User’s Manual
Table A-2. Terminal POST Errors (Continued)
Post Code Description
C4h Initialize system error handler
C5h PnPnd dual CMOS (optional)
C6h Initialize note dock (optional)
C7h Initialize note dock late
C8h Force check (optional)
C9h Extended checksum (optional)
CAh Redirect Int 15h to enable remote keyboard
CBh
CCh Redirect Int 10h to enable remote serial video
CDh Re-map I/O and memory for PCMCIA
CEh Initialize digitizer and display message
D2h Unknown interrupt
The following are for the boot block in Flash ROM:
Post Code Description
E0h Initialize the chipset
E1h Initialize the bridge
E2h Initialize the CPU
E3h Initialize system timer
E4h Initialize system I/O
E5h Check force recovery boot
E6h Checksum BIOS ROM
E7h Go to BIOS
E8h Set Huge Segment
E9h Initialize Multi Processor
EAh Initialize OEM special code
EBh Initialize PIC and DMA
ECh Initialize Memory type
EDh Initialize Memory size
EEh Shadow Boot Block
EFh System memory test
F0h Initialize interrupt vectors
F1h Initialize Run Time Clock
Redirect Int 13h to Memory Technologies Devices such as ROM, RAM, PCMCIA, and
serial disk
Table A-3. Boot Block Flash ROM Terminal POST Errors
A-8
Page 77

Table A-3. Boot Block Flash ROM Terminal POST Errors (Continued)
Post Code Description
F2h Initialize video
F3h Initialize System Management Manager
F4h Output one beep
F5h Clear Huge Segment
F6h Boot to Mini DOS
F7h Boot to Full DOS
If the BIOS detects error 2C, 2E, or 30 (base 512K RAM error), it displays an additional
word-bitmap (
xxxx) indicating the address line or bits that failed. For example, “2C 0002”
means address line 1 (bit one set) has failed. “2E 1020" means data bits 12 and 5 (bits
12 and 5 set) have failed in the lower 16 bits. The BIOS also sends the bitmap to the
port-80 LED display. It first displays the checkpoint code, followed by a delay, the
high-order byte, another delay, and then the low order byte of the error. It repeats this
sequence continuously.
:
A-9
Page 78

SBI-7226T-T2 Blade Module User’s Manual
Notes
A-10
Page 79

Disclaimer
The products sold by Supermicro are not intended for and will not be used in life support
systems, medical equipment, nuclear facilities or systems, aircraft, aircraft devices,
aircraft/emergency communication devices or other critical systems whose failure to
perform be reasonably expected to result in significant injury or loss of life or
catastrophic property damage. Accordingly, Supermicro disclaims any and all liability,
and should buyer use or sell such products for use in such ultra-hazardous applications,
it does so entirely at its own risk. Furthermore, buyer agrees to fully indemnify, defend
and hold Supermicro harmless for and against any and all claims, demands, actions,
litigation, and proceedings of any kind arising out of or related to such ultra-hazardous
use or sale.
Page 80

SBI-7226T-T2 Blade Module User’s Manual
 Loading...