

Superfly SUPERX8, 000BOM-SUPERX10, 000BOM-SUPERX14, 000BOM-SUPERX15, 000BOM-SUPERX12 User Manual
Page 1

Basketball Hoop
User Manual
Page 2

Basketball Hoop
The following models are all compatible with our Superfly X Basketball Hoop.
We do not recommend use of this Basketball Hoop with non Superfly X Trampolines.
[SUPERX8] Superfly X Trampoline 8ft
[000BOM-SUPERX10] Superfly X Trampoline 10ft
[000BOM-SUPERX12] Superfly X Trampoline 12ft
[000BOM-SUPERX14] Superfly X Trampoline 14ft
[000BOM-SUPERX15] Superfly X Trampoline 15ft
This trampoline accessory comes equipped with warnings and instructions for
its proper assembly, care, maintenance, and use. This information must be
read by all supervisors and users before any person is allowed to use it.
Follow all warnings pictured below or otherwise included in this manual. If you
have any questions regarding these warnings, please contact us.
After reading this manual if you have further questions or if you would like to
contact us, please visit our web site at www.tradetested.co.nz.
For Assistance
Contact our exclusive New Zealand retailer Trade Tested
0800 800 880
[email protected]
www.tradetested.co.nz
Page 3
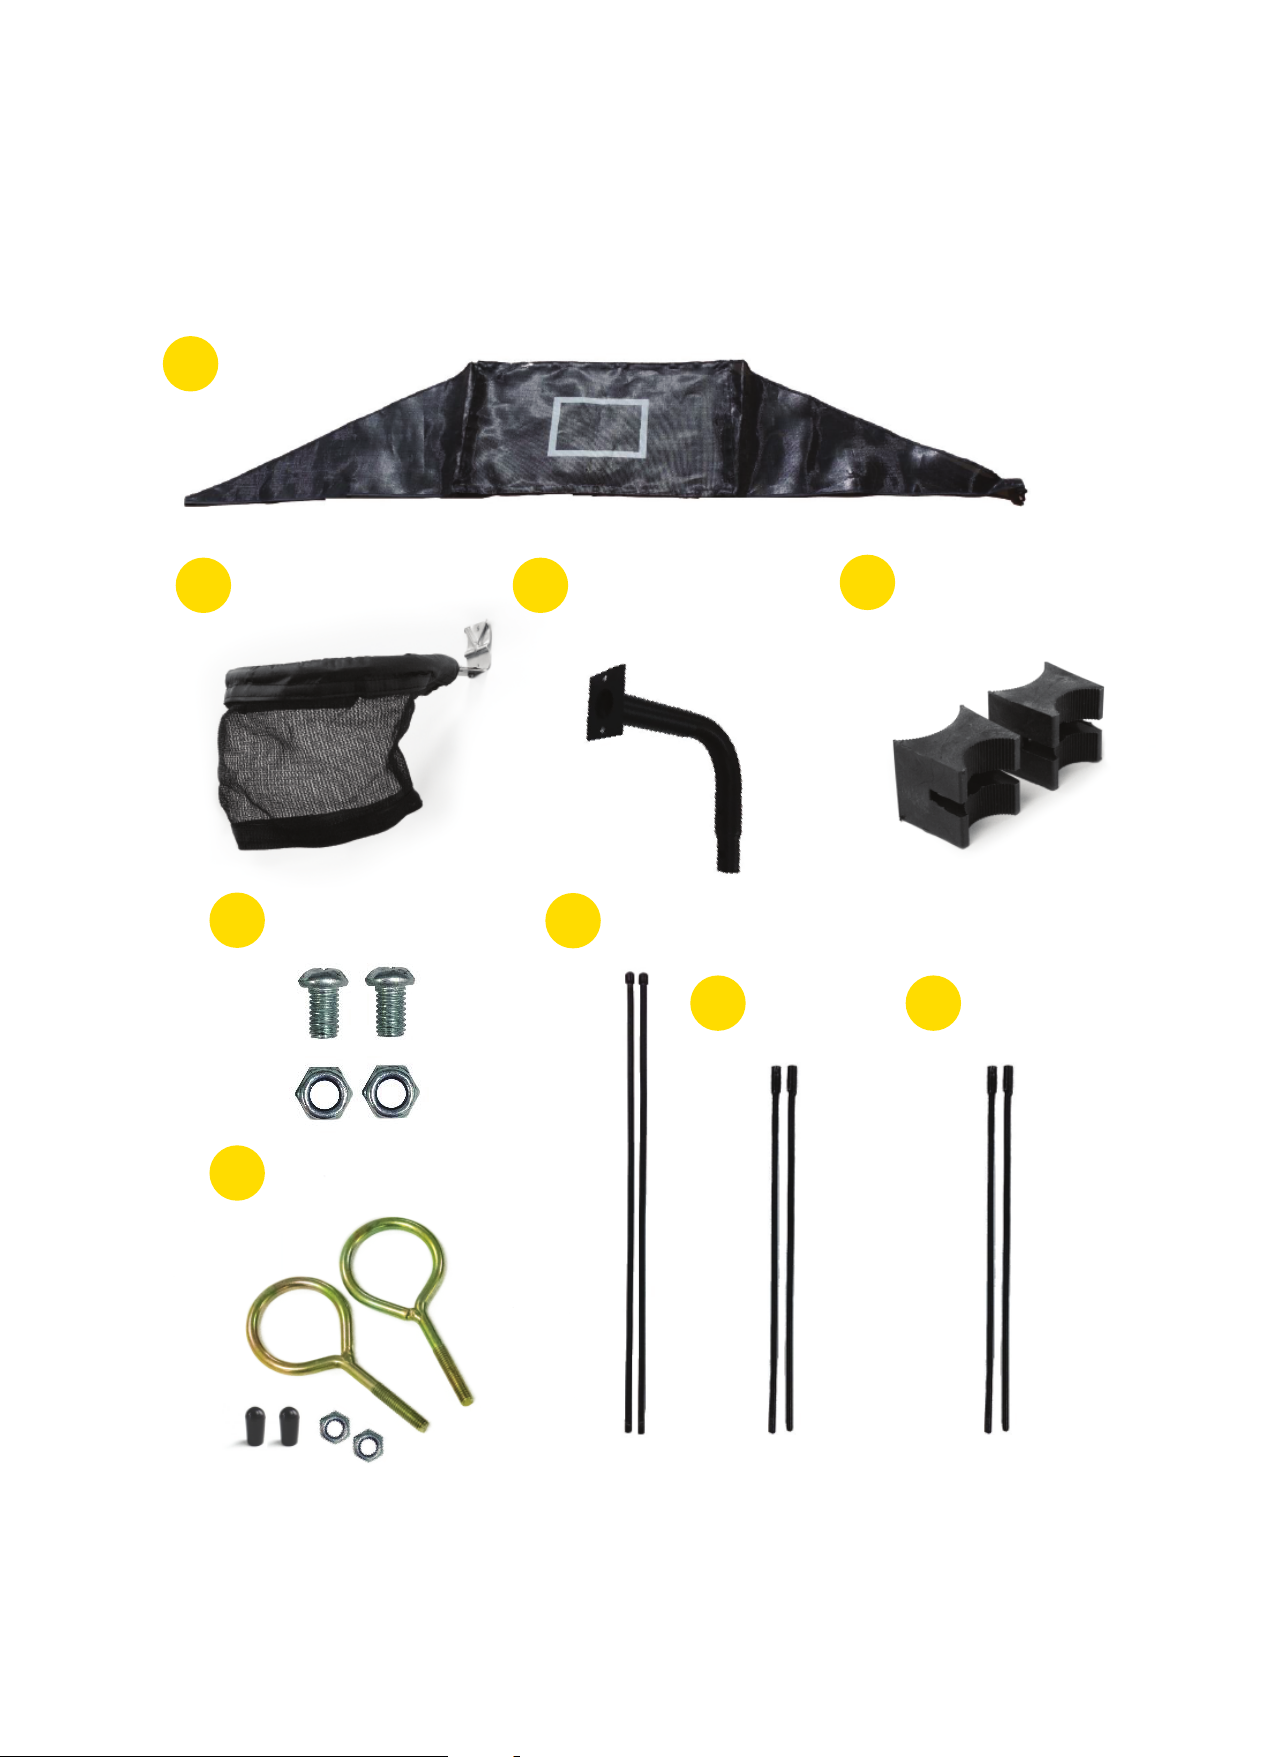
Basketball Hoop Parts List
Congratulations on your Superfly purchase!
Please follow these assembly instructions carefully
and you’ll be up and dunking in no time!
1
Backboard
2
Basketball Rim
2
L-Shaped
Basketball Post
3
L-Post Spacers
4
L-Post Bolts
5
Eye Bolts
6
Long Poles
7
Poles (A)
8
Poles (B)
1
Page 4
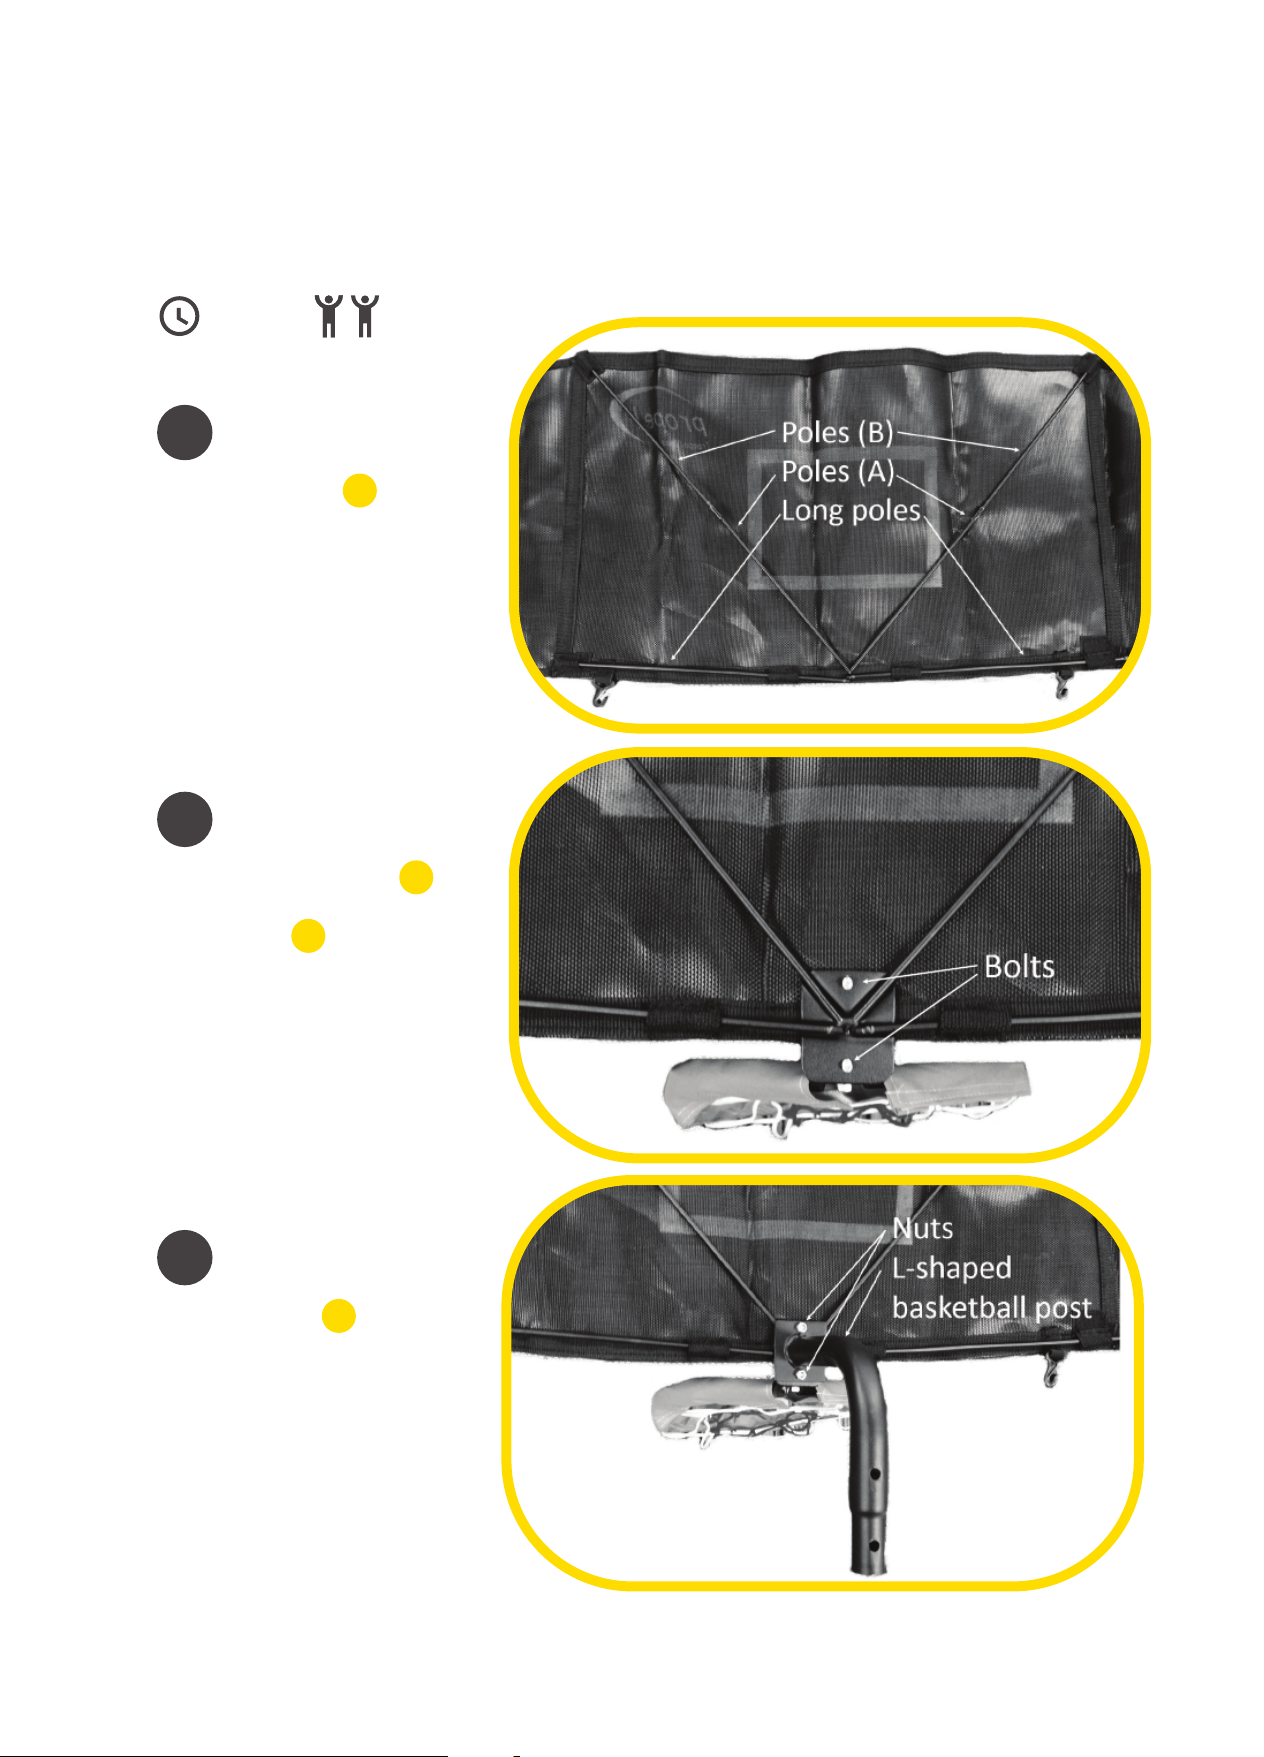
Basketball Hoop Assembly
Please read all instructions before beginning and make
sure you have all parts necessary!
2 ADULTS30MIN
1
Insert Support Poles
Lay the backboard face down
and insert the support poles.
See diagram.
2
Attach Rim
Place the basketball rim
in the correct position and insert
the two bolts into the two
holes in the basketball rim.
See diagram.
1
2
4
3
Attach L-Post
Place the L-post over
the current assembly, then
tighten the nuts and bolts.
3
2
Page 5
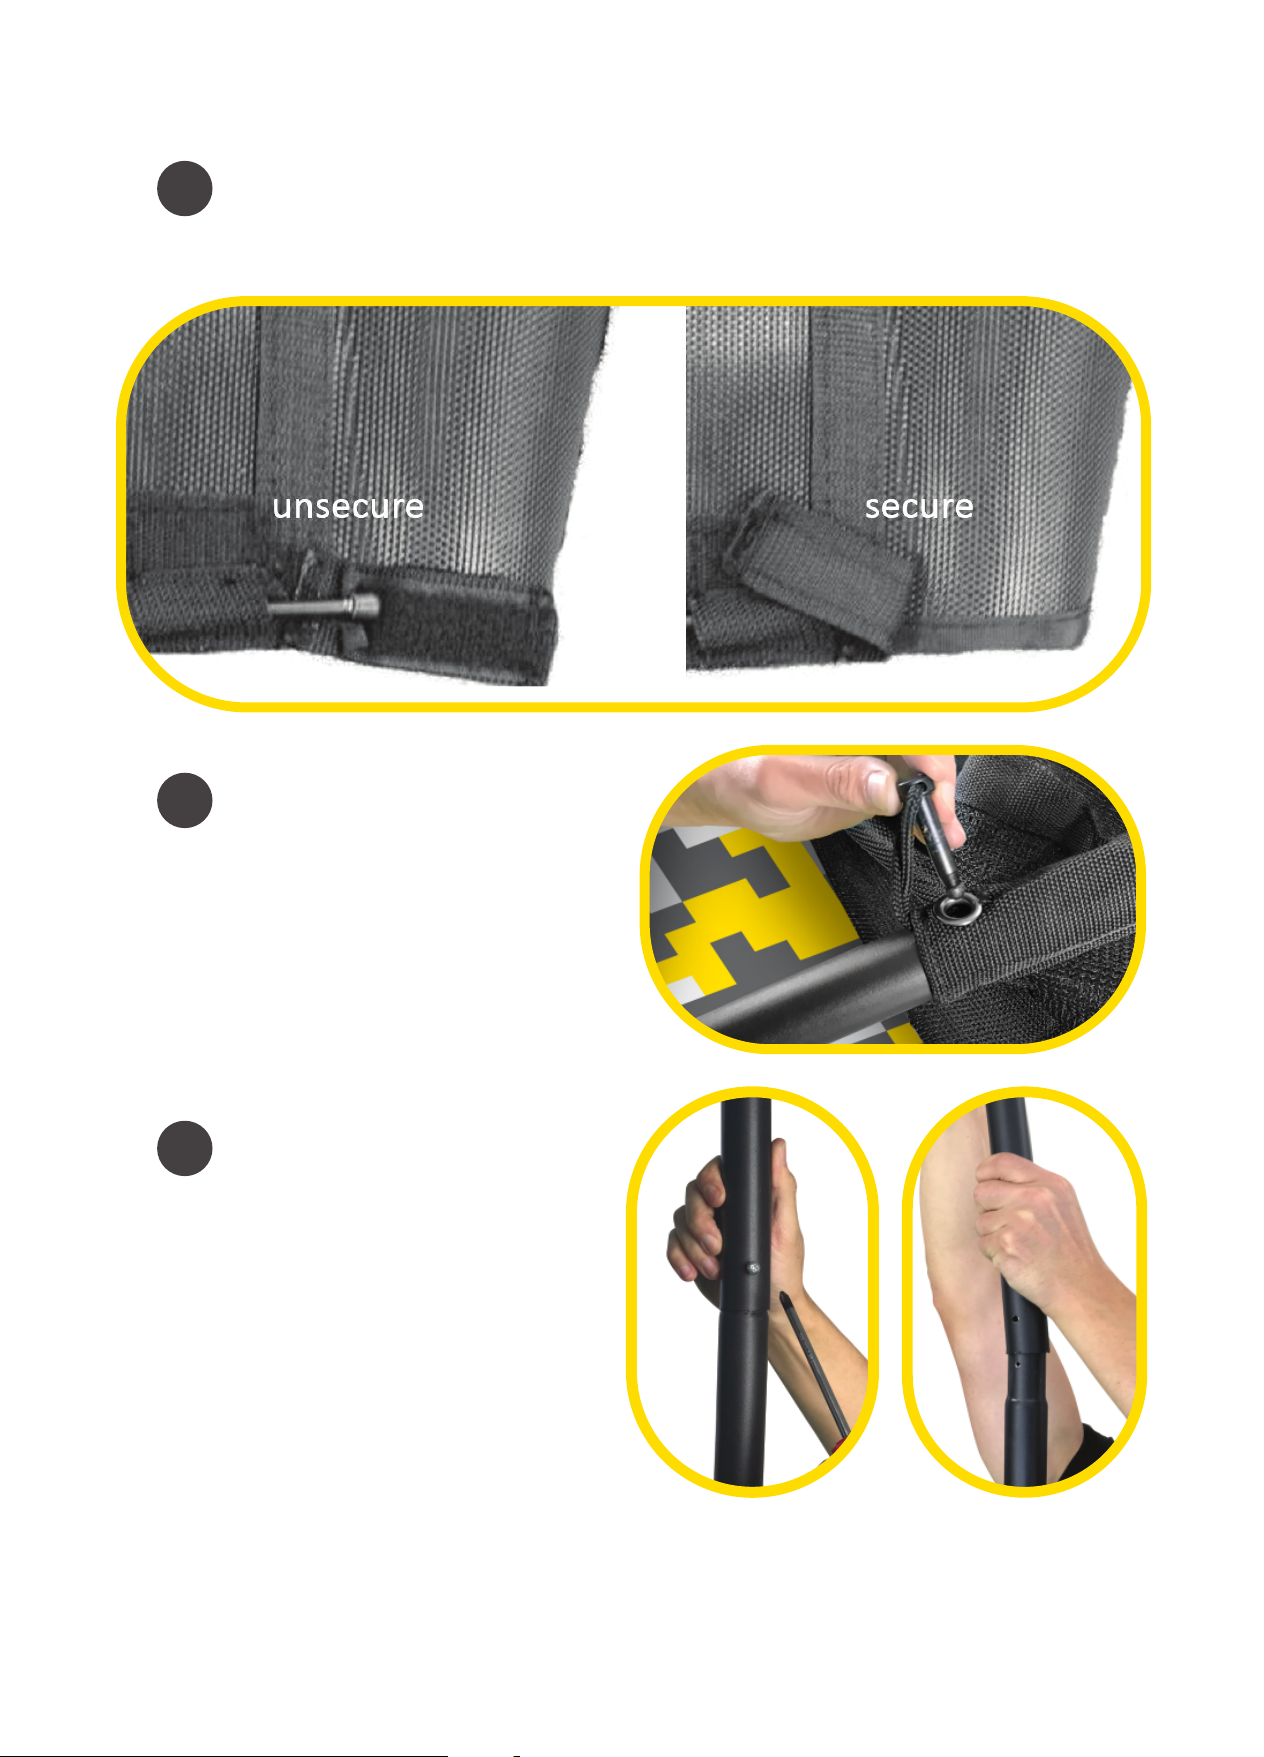
4
Secure the backboard
Secure the Velcro in the bottom corner of the backboard.
5
Remove saftey net sock
Start by removing the trampoline net sock
that covers the uppernet rail. Pull out the
securing pin and lift the sock o.
Remove the
6
upper net pole
Unscrew the upper net pole and lift
it o the lower net pole.
3
Page 6
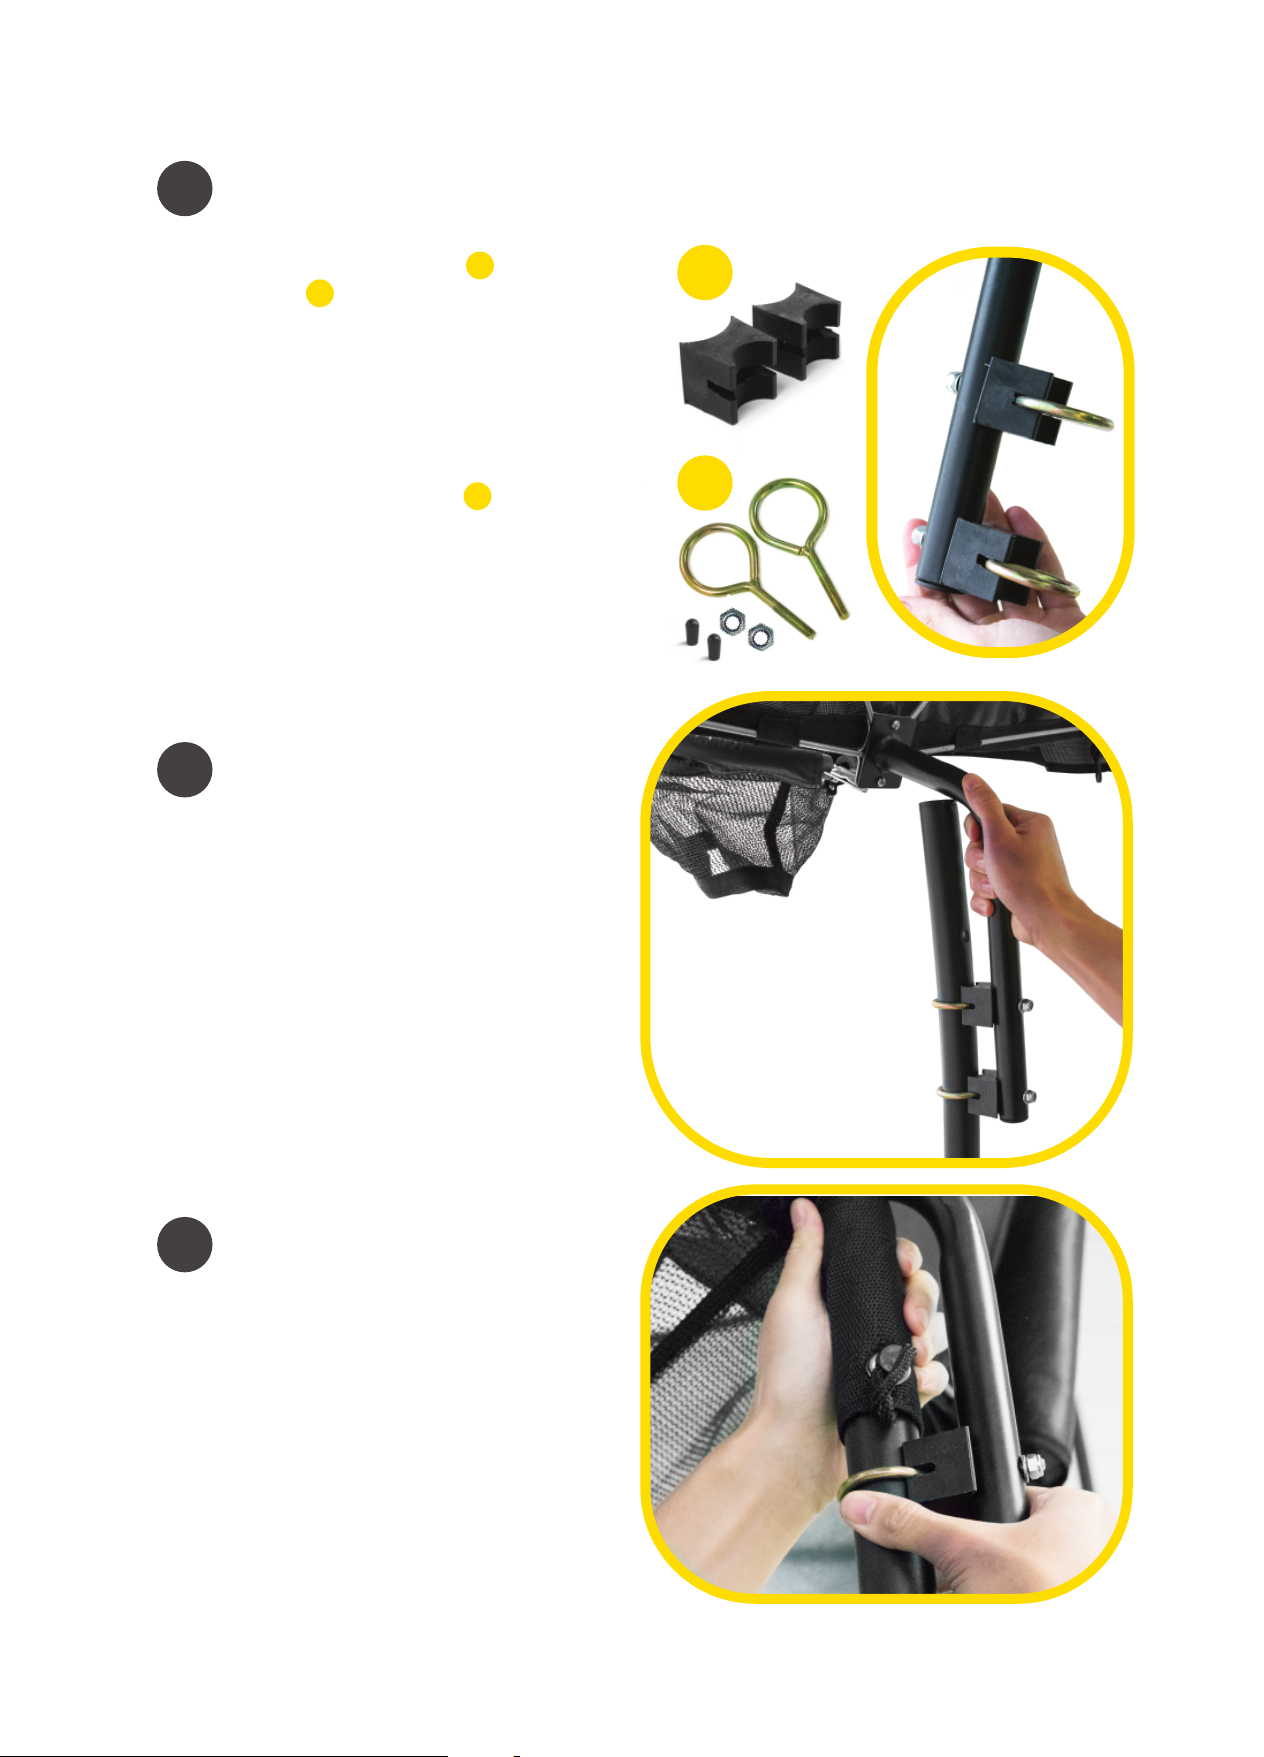
Attach eye bolts
7
and spacers to L-post
Begin by slotting each eye bolt into one of the
L-post spacers , ensuring that the rounded hook
fits into the cut out in the spacer.
Now insert the tip of the eye bolt into the L-post
making sure the spacers are on the same side as
the hoop itself.
Hand tighten the included nuts to secure the
eye bolt and spacer tot he L-post.
Attach basketball hoop
8
3
5
5
to upper safety net pole
3
5
Slide the hand tightened basketball hoop
onto the upper safety net pole. Ensure
that the basketball hoop will be facing
inward towards the trampoline once the
upper safety pole is re attached.
Reattach the saftey
9
net sock
Whilst the basketball hoop is on the
safety net pole, move back to the
trampoline and pull the saftey net sock
back over the saftey net pole and secure
with the attached bolt.
4
Page 7
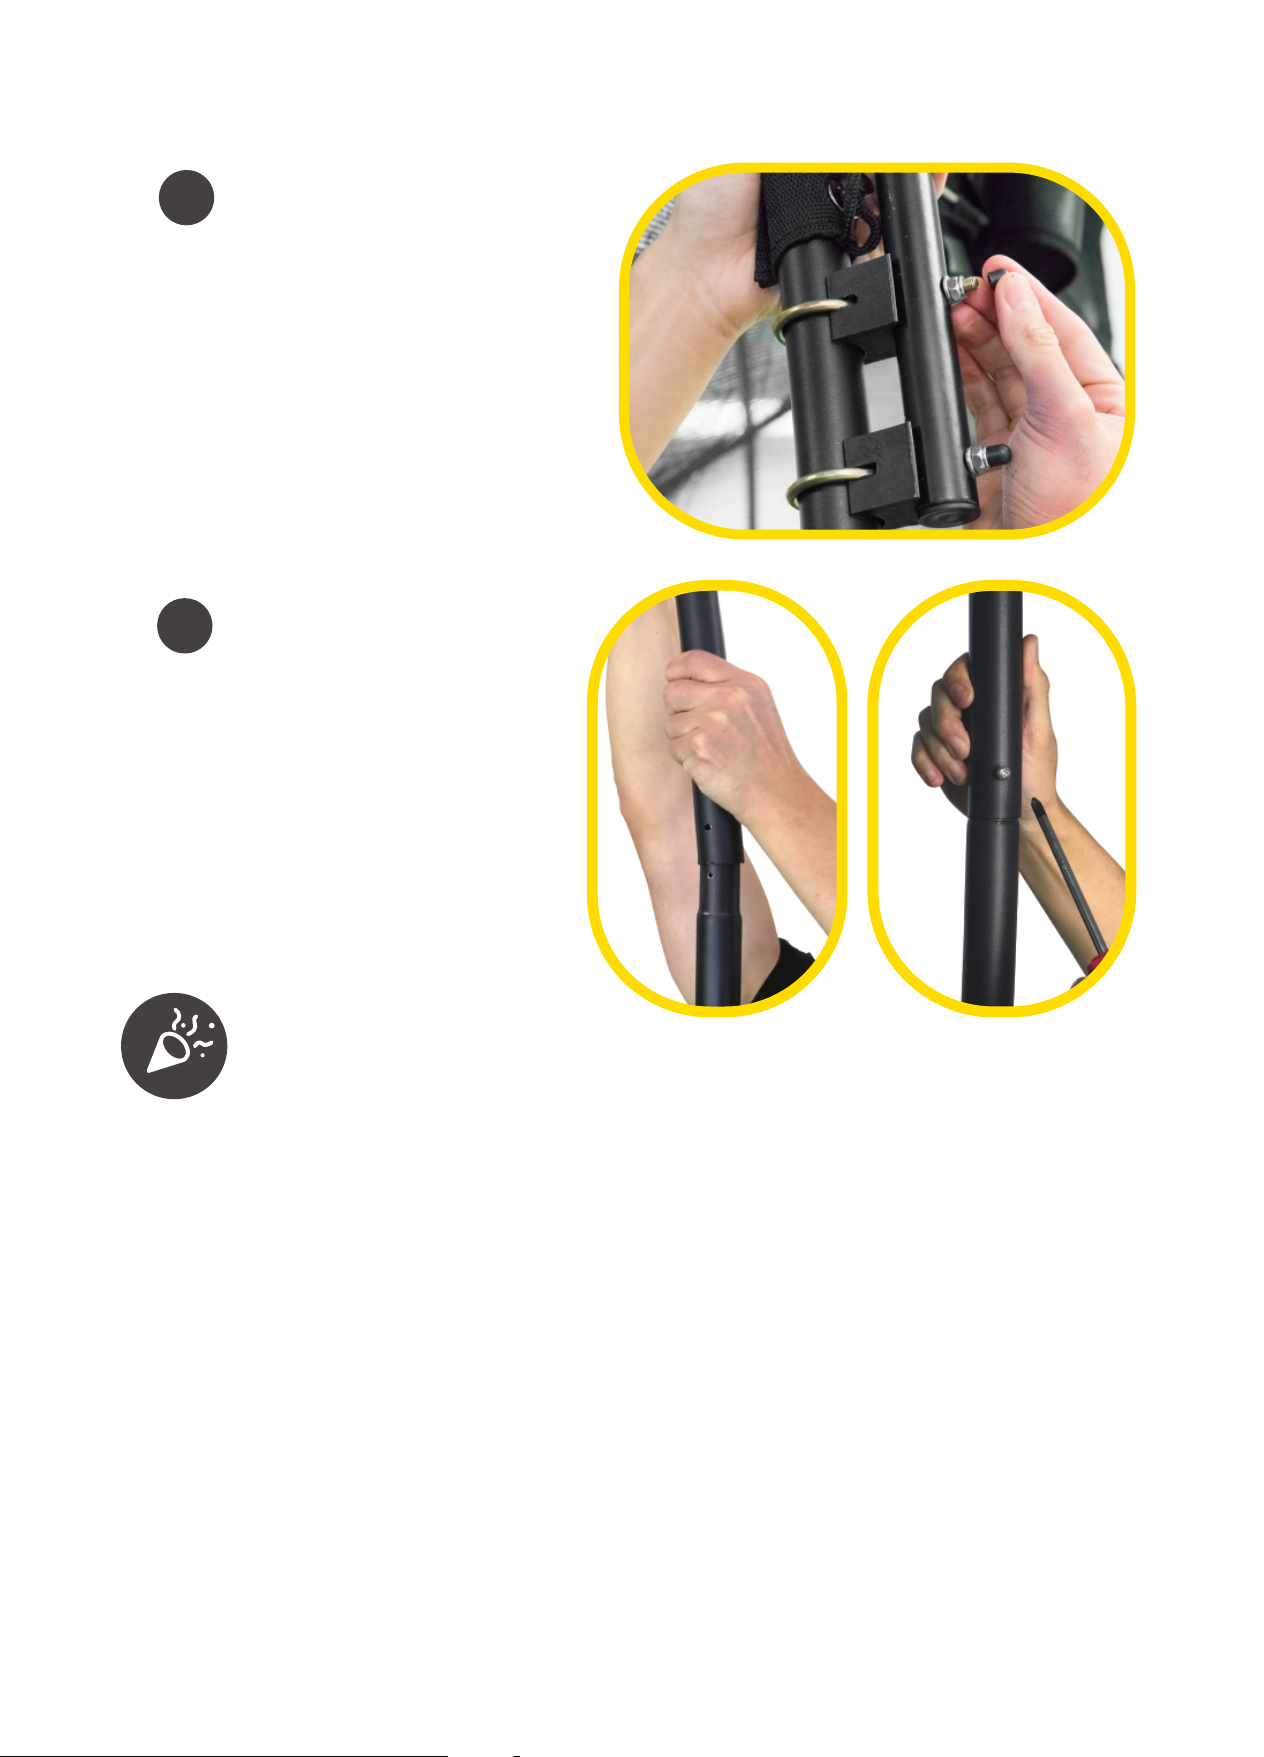
10
Tighten and align
the basketball hoop
Finish by aligning the hoop so that it will
be facing the center of the trampoline and
fully tighten the nuts so that it is stable.
Attach the safety caps to the screws to
cover the exposed bolt.
11
Reattach the net pole
to the trampoline
Finish by attaching the upper net pole
back onto the trampoline, You may need
a second person to push the lower net
pole inward in order to slide the upper
net pole on.
Once the uppe rnet pole is in place
secure the two together with the screw.
Congratulations!
You’re Ready To Go!
5
Page 8

For Assistance
Contact our exclusive New Zealand retailer Trade Tested
0800 800 880
[email protected]
www.tradetested.co.nz
 Loading...