

Super Circuits PC33C5G, PC33C5G-RTI, PC33C5G-RTIA, PC153C5G, PC153C5G-RTI User Manual
...
Color CCD Box Camera
User Manual
Products: PC33C5G, PC33C5G-RTI, PC33C5G-RTIA,
PC153C5G, PC153C5G-RTI, PC153C5G-RTIA
Camera With Optional Lens
Please read this manual before installing and using this camera and always follow instructions for proper use.
Save this manual away for future reference.
PC33C5G_PC153C5G_CM
5/12/11

ii
www.supercircuits.com
LEGAL NOTICE
Supercircuits products are designed to meet safety and performance
standards with the use of specic Supercircuits authorized accessories.
Supercircuits disclaims liability associated with the use of non-Supercircuits
authorized accessories.
The recording, transmission, or broadcast of any person’s voice without their
consent or a court order is strictly prohibited by law.
Supercircuits makes no representations concerning the legality of certain
product applications such as the making, transmission, or recording of video
and/or audio signals of others without their knowledge and/or consent. We
encourage you to check and comply with all applicable local, state, and federal
laws and regulations before engaging in any form of surveillance or any
transmission of radio frequencies.
Other trademarks and trade names may be used in this document to refer
to either the entities claiming the marks and names or their products.
Supercircuits, Inc. disclaims any proprietary interest in trademarks and trade
names other than its own.
No part of this document may be reproduced or distributed in any form or by
any means without the express written permission of Supercircuits, Inc.
© 2011 Supercircuits, Inc. All rights reserved.
11000 N. Mopac Expressway, Building 300, Austin, TX 78759
Sales/Support: 1.800.335.9777 | Fax: 1.866.936.7257

iii
Color Box Camera User Manual
PRECAUTIONS
Precautions
• Do not install the camera in temperature condition or humidity that is
outside the specied operating range.
• Do not install the camera under unstable lighting.
• Do not touch the CCD element. If it is necessary to clean the element, use
a soft cloth moistened with alcohol to remove any dust build up.
• Do not drop the camera; protect it from physical shocks.
• Do not use the camera close to an gas or oil leak.
• Do not disassemble the camera.
• Never point the camera directly at intense light.
• Do not expose the camera to rain or spill beverage on it.

iv
www.supercircuits.com
TABLE OF CONTENTS
Table of Contents
SECTION 1 Features . . . . . . . . . . . . . . . . . . . . . . . . . . . . . . . . . . . . . . . . . . . . . . . . . 1
1.1 Camera components . . . . . . . . . . . . . . . . . . . . . . . . . . . . . . . . . . . . . .2
1.2 System options. . . . . . . . . . . . . . . . . . . . . . . . . . . . . . . . . . . . . . . . . . .4
SECTION 2 Installation . . . . . . . . . . . . . . . . . . . . . . . . . . . . . . . . . . . . . . . . . . . . . . 5
2.1 What’s in the box . . . . . . . . . . . . . . . . . . . . . . . . . . . . . . . . . . . . . . . . .5
2.2 What you need. . . . . . . . . . . . . . . . . . . . . . . . . . . . . . . . . . . . . . . . . . .5
2.3 Installing the camera . . . . . . . . . . . . . . . . . . . . . . . . . . . . . . . . . . . . .5
2.4 Aiming the Camera . . . . . . . . . . . . . . . . . . . . . . . . . . . . . . . . . . . . . . .8
SECTION 3 SETUP Menu (OSD) Usage . . . . . . . . . . . . . . . . . . . . . . . . . . . . . . . . . . 9
3.1 SETUP menu options . . . . . . . . . . . . . . . . . . . . . . . . . . . . . . . . . . . . 10
SECTION 4 Cleaning . . . . . . . . . . . . . . . . . . . . . . . . . . . . . . . . . . . . . . . . . . . . . . . . 19
SECTION 5 Specications . . . . . . . . . . . . . . . . . . . . . . . . . . . . . . . . . . . . . . . . . . . 20
APPENDIX A Troubleshooting . . . . . . . . . . . . . . . . . . . . . . . . . . . . . . . . . . . . . . . . . 22
APPENDIX B Dimensions . . . . . . . . . . . . . . . . . . . . . . . . . . . . . . . . . . . . . . . . . . . . . 24

1
Color Box Camera User Manual
SECTION 1: FEATURES
SECTION1 Features
• 1/3” Sony® CCD image sensor
• C/CS lens mount (lens not included)
• Digital Noise Reduction (DNR)
• Digital Wide Dynamic Range (D-WDR)
• Motion detection (4 zones)
• Auto white balance
• True Day & Night function
• Manual/DC drive lens support
• High sensitivity microphone
• Miscellaneous functions
• On screen Display (OSD) control
Mounting Bracket Connector
(top and bottom sides)
Auto-iris Lens Jack
C/CS Mount Lens
Optional Manual Lens

2
www.supercircuits.com
SECTION 1: FEATURES
1.1 Camera components
Front View
1 Light sensor
2 Microphone
3 Indicator LED
Back View
1 Audio
2 Function setup joystick
3 UTP Gain
4 Power (12 VDC or 24 VAC)
5 Video
6 RS485 and UTP terminations
3
Color Box Camera User Manual
SECTION 1: FEATURES
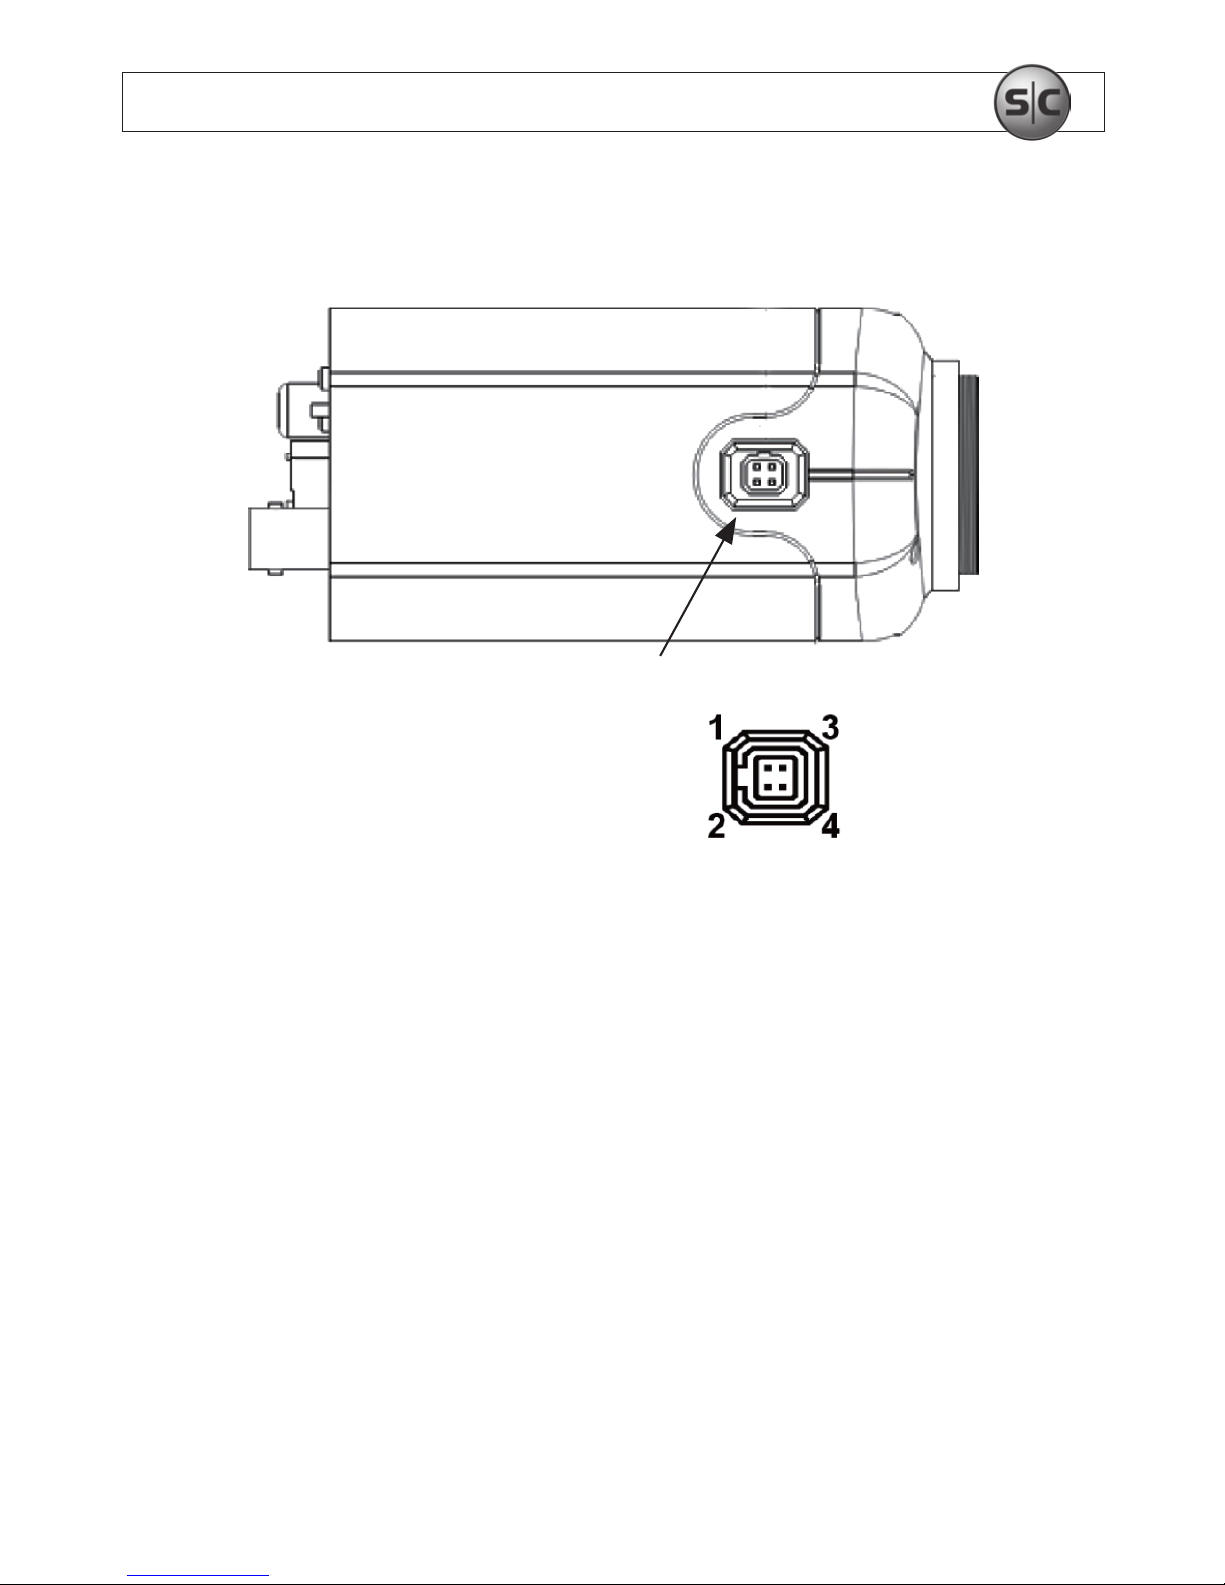
Side View
Auto-Iris Jack
Auto-IrisJack
PinAssignments
Pin DCDriver
1 - Control
2 + Control
3 - Drive
4 + Drive
4
www.supercircuits.com
SECTION 1: FEATURES
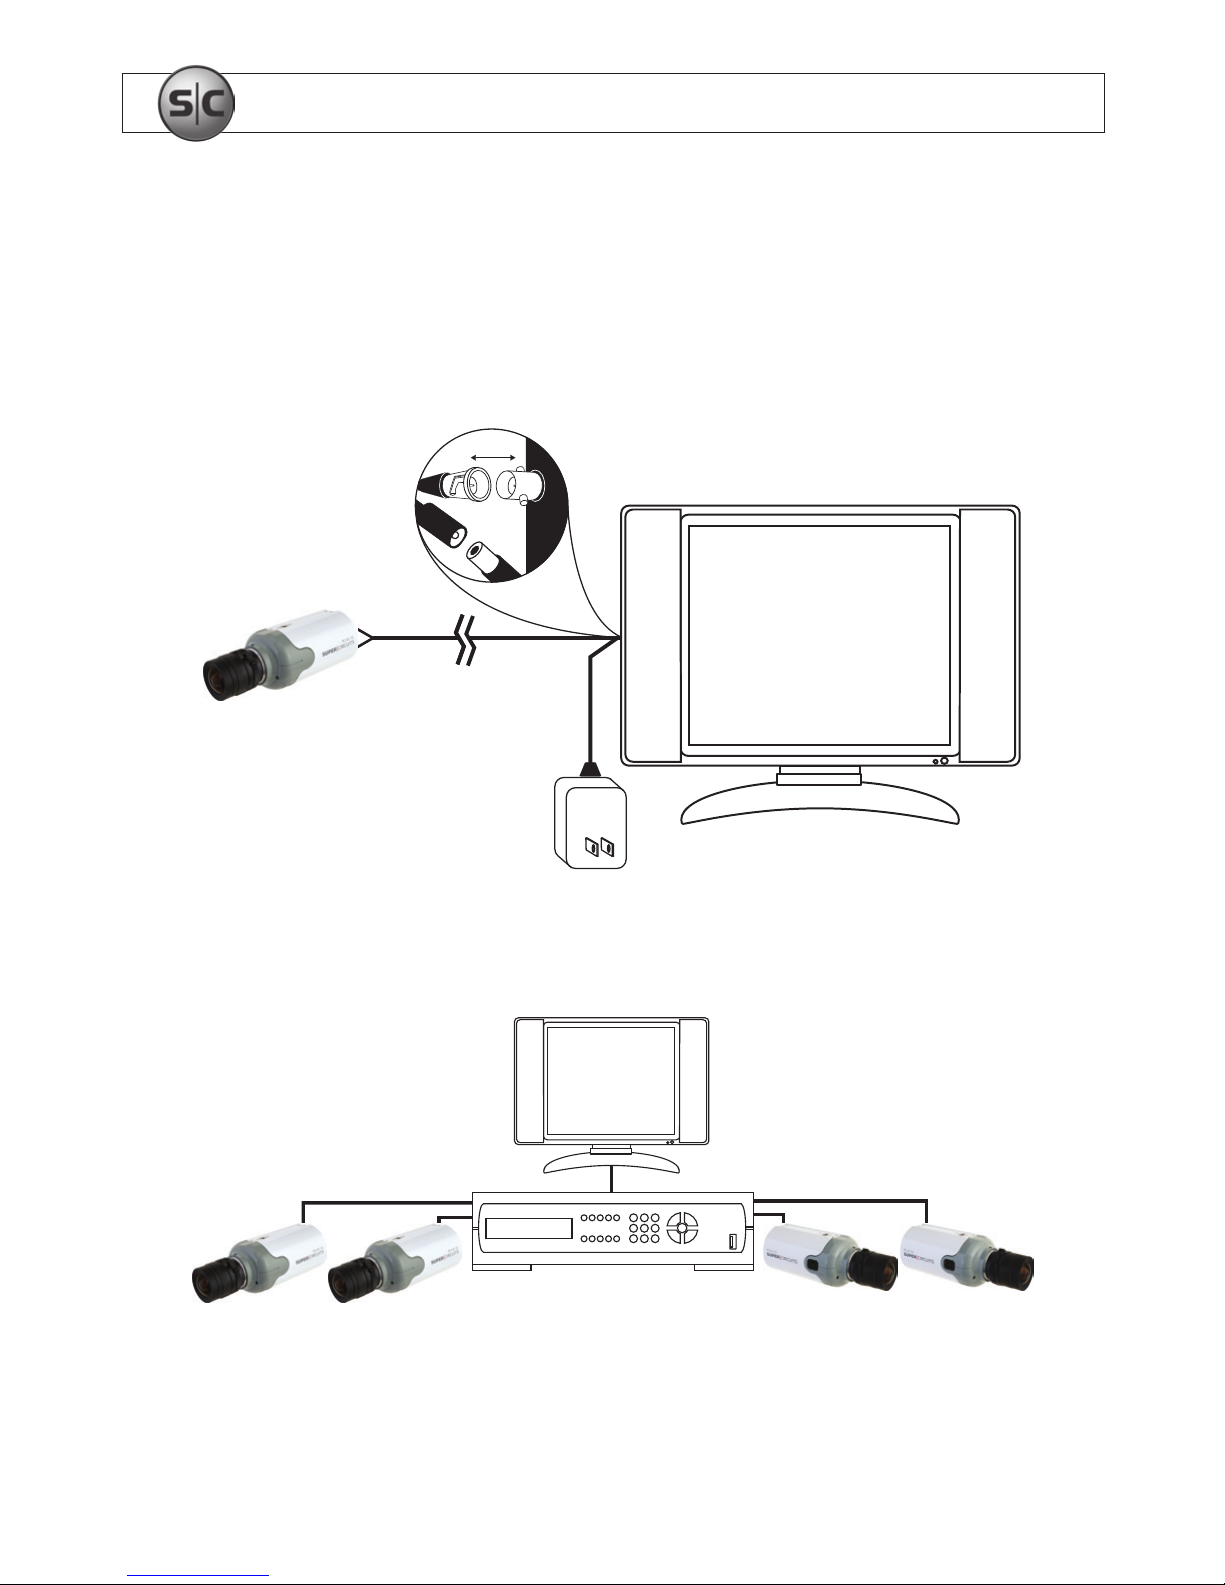
1.2 System options
The camera can be connected to a CCTV monitor or to a DVR.
Connect
Multiple camera system with DVR and monitor
Multiple camera system with DVR and monitor

5
Color Box Camera User Manual
SECTION 2: INSTALLATION
SECTION2 Installation
2.1 What’s in the box
The camera package contains:
• Camera assembly
• Instruction manual
• Hex wrench
2.2 What you need
To install the camera, you will need:
• C/CS type lens (PC33C5G and PC153C5G)
• Mounting bracket, such as a Supercircuits SKU MB14
• Hardware and tools to attach the mounting bracket to the mounting surface
• Video, audio, and power extension cables
• 12 VDC or 24 VAC power adapter
2.3 Installing the camera
This procedure steps through the installation of a C/CS mount box camera using the
Supercircuits MB14 mounting bracket (sold separately). If you are using a dierent
 Loading...