

Page 1
QUICK-START GUIDE
CONTENTS
1. CHARGING THE BATTERY
2. PHYSICAL DESCRIPTION
3. SYSTEM CONNECTIONS
4. VIEWING RECORDED FILES
5. MOTION DETECTION
MDVR16
WARNING!
WAR NING: Always make sure the power is OFF before plugging or unplugging power to MDVR.
Plugging or unplugging when power is on can result in severe damage to your MDVR.
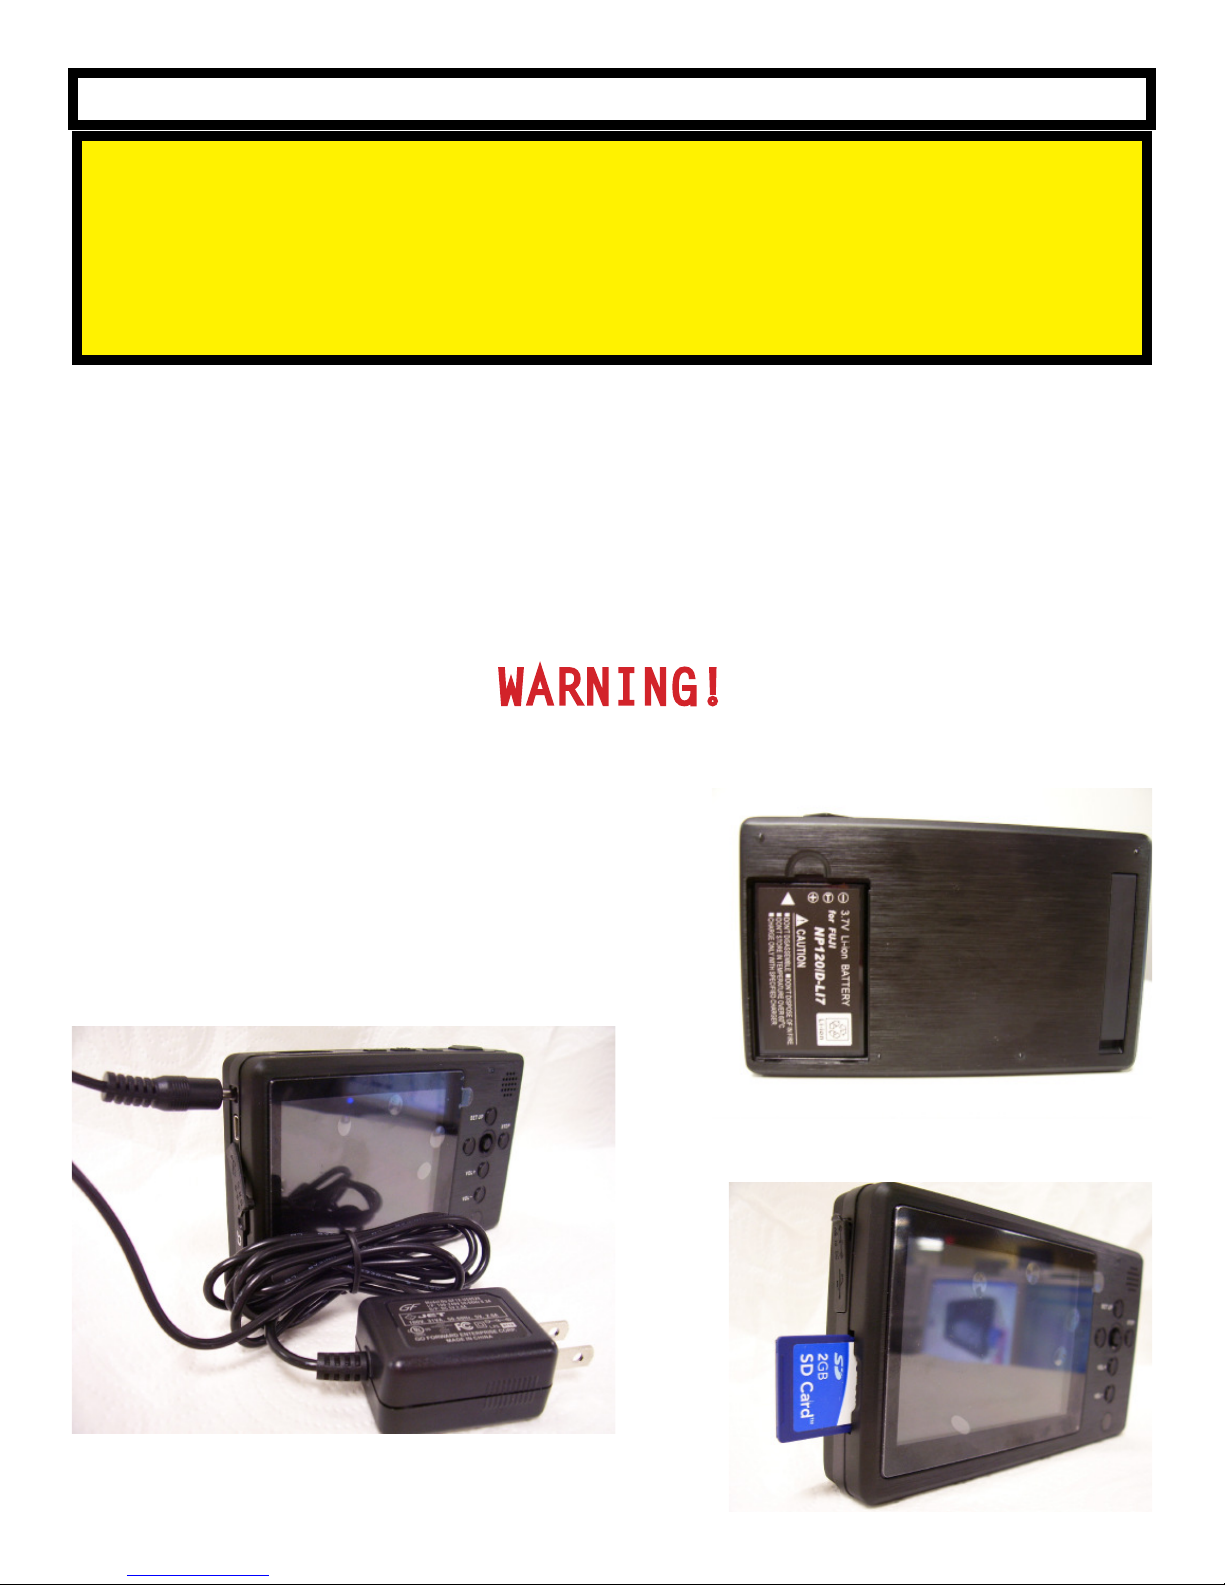
CHARGING/ BATTERY
Charge the battery for at least 12 hours before operating.
Insert battery into the back of your dvr with the label pointing
outside and the white arrow pointing towards the top. Plug
AC/DC power supply into DVR.
SD card is optional, used to transfer
fi les..
Page 2
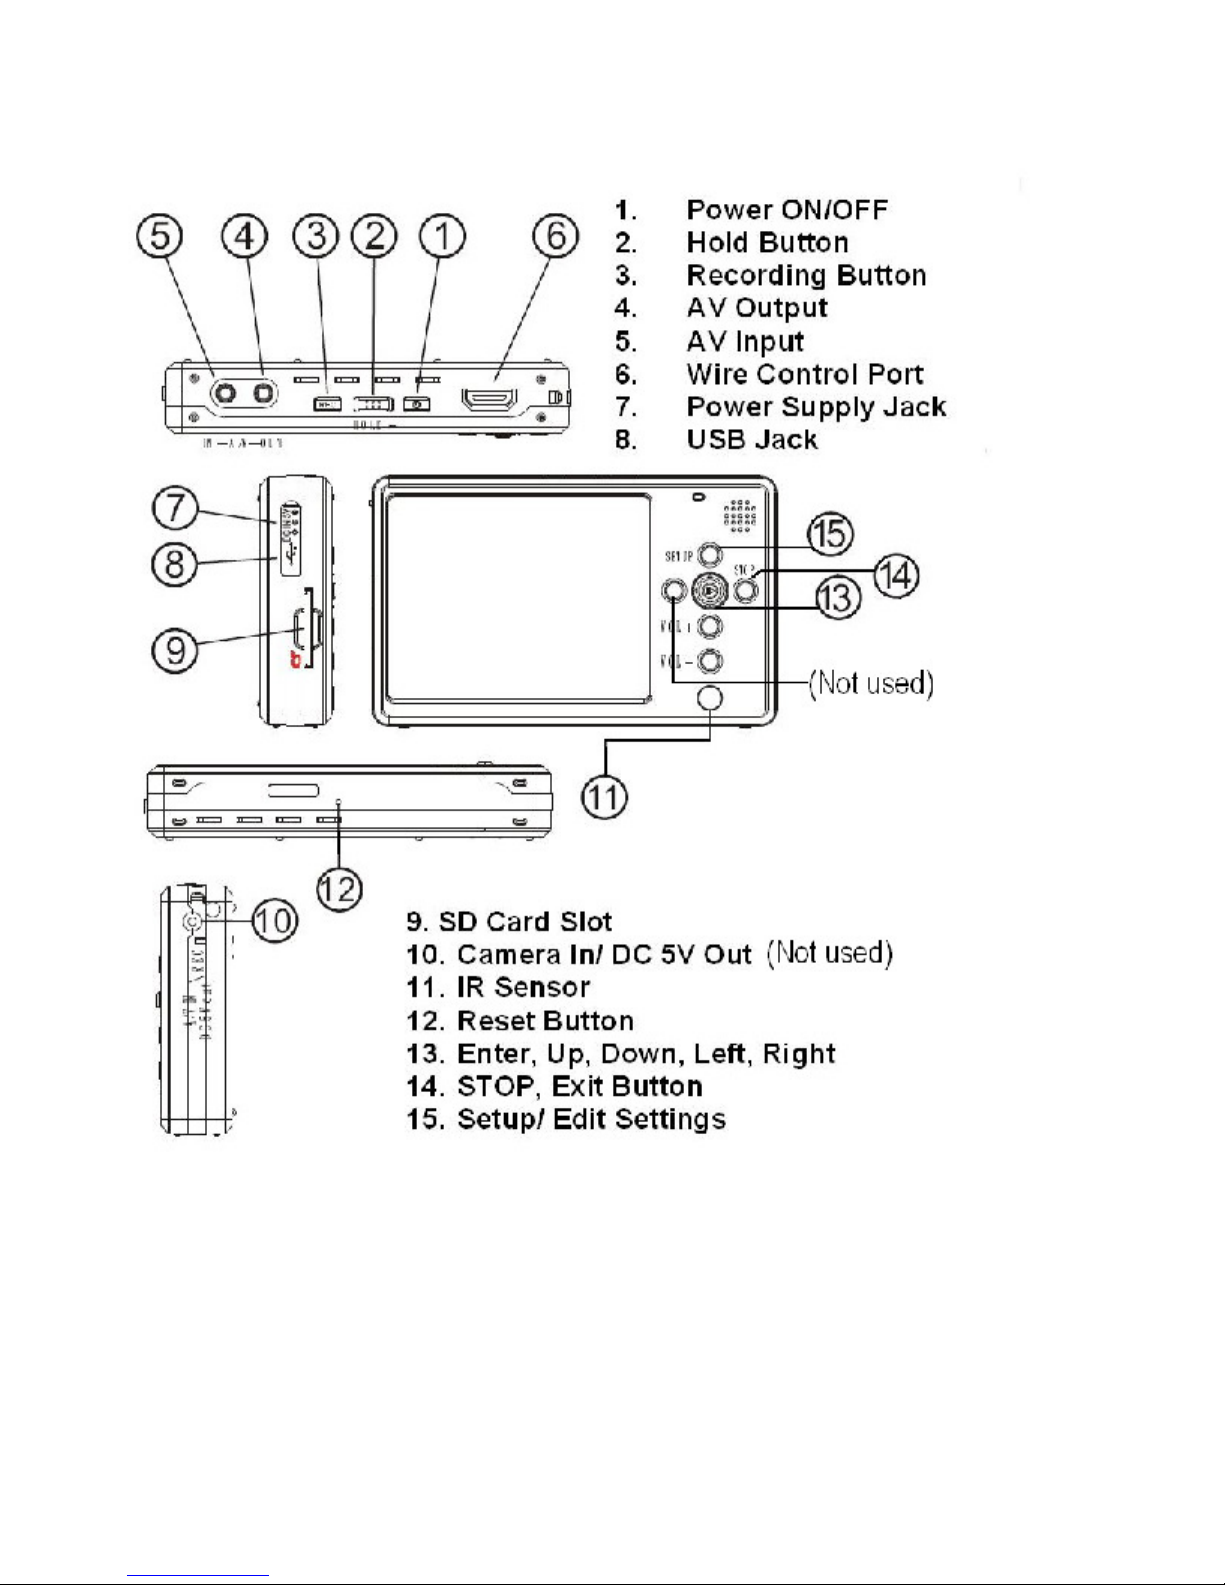
PHYSICAL DESCRIPTION
Page 3
SYSTEM CONNECTIONS
VERY IMPORTANT!
You have two options for connecting cameras to the MDVR. The fi rst option will let you use the power
from the MDVR to power the camera (providing cameras do not exceed 12V 250ma). This option will
give you the best portability. The second option requires for you to use a camera an external power
source when using cameras that require more than 250ma. DO NOT USE CAMERAS
REQUIRING MORE THAN 12V250ma, WITH THE FIRST OPTION. DOING SO WILL
DAMAGE THE MDVR.
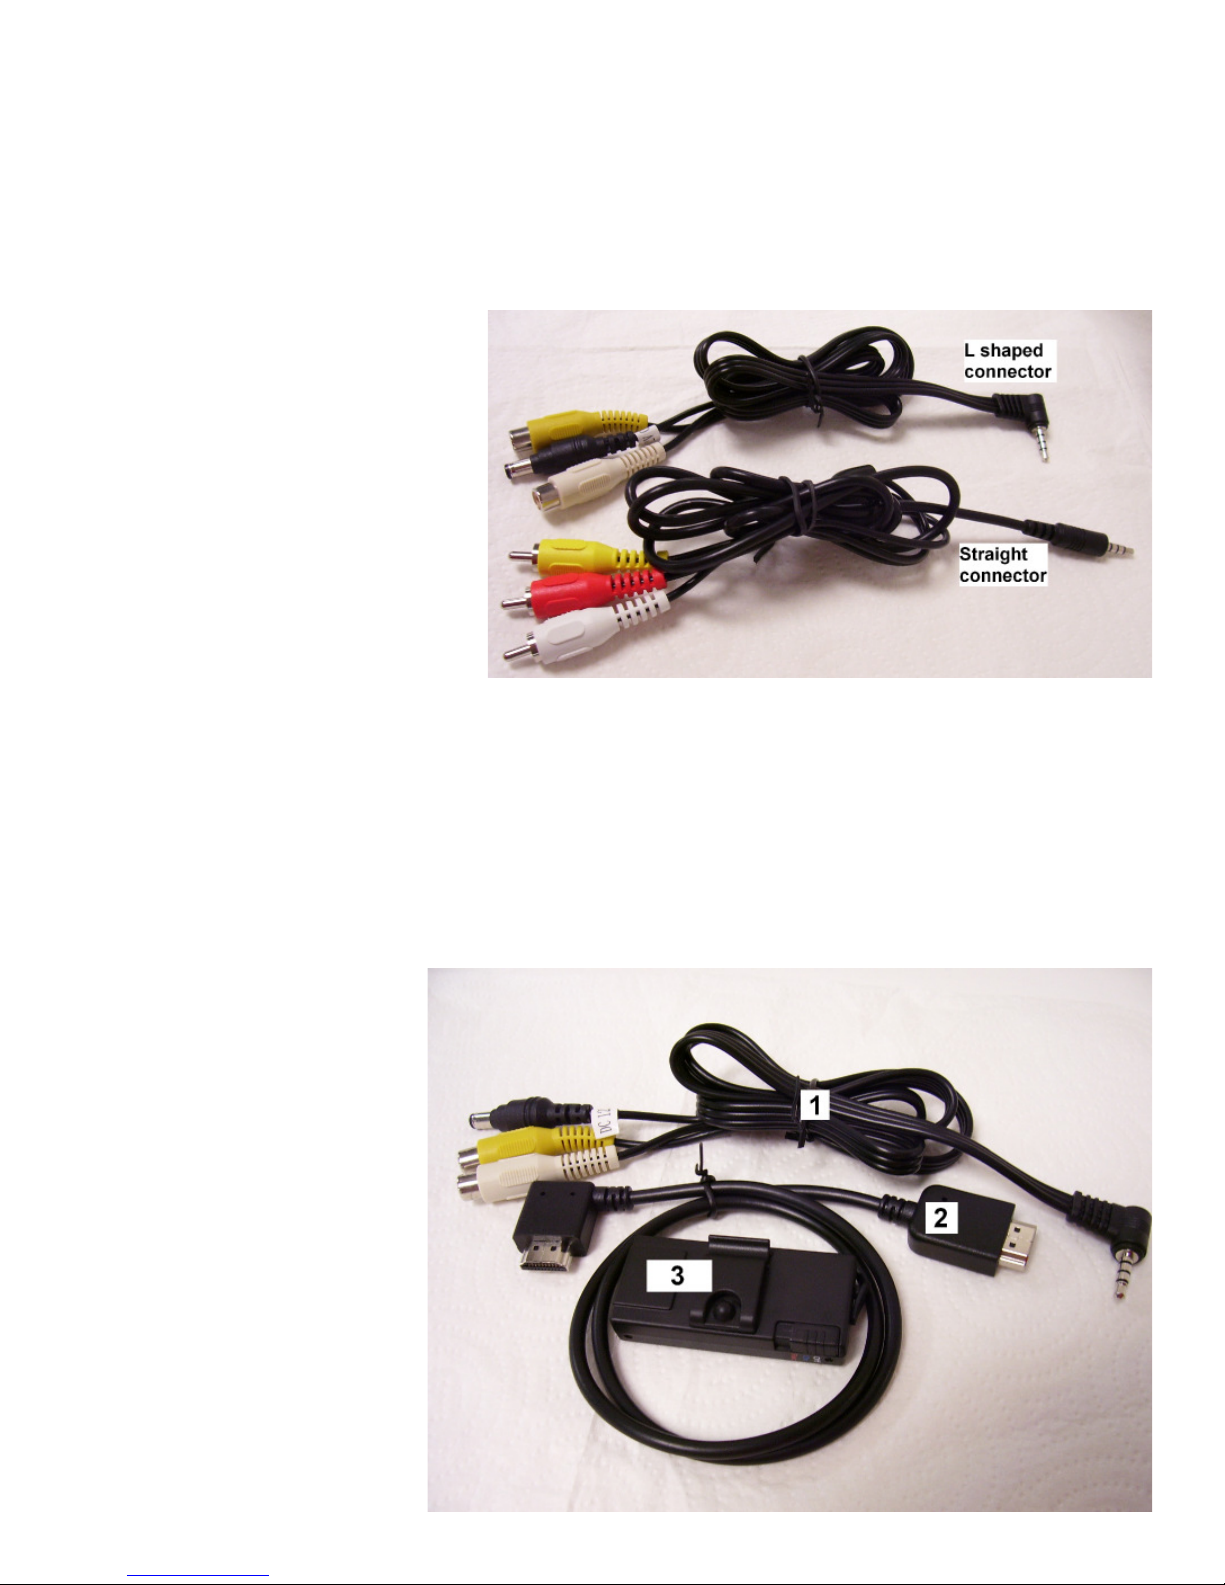
You will get two different cables, the
trick is to use the correct cable for the
option you select. Option 1 has the
L shaped MDVR connector with the
black 12VDC 250ma power connector.
Option 2 has the straight MDVR connector used with cameras requiring an
external power supply.
OPTION 1:
The following parts are needed to setup option 1, using a camera that does not exceed
12V250ma power requirement. Use the L shape connector cable (1) and connect it to
the controller (3). From the small controller use the multi-pin bus cable (2) for the controller to DVR connection.
1. L shaped connector cable with a marked black 12VDC 250ma connector.
2. Multi-pin/ Bus
3. Controller
NOTE: When connecting the
Controller to the MDVR using
the bus cable (2), the MDVR will
power ON and OFF
automatically . Use the
controller to turn the MDVR ON,
OFF and Rec.
Page 4
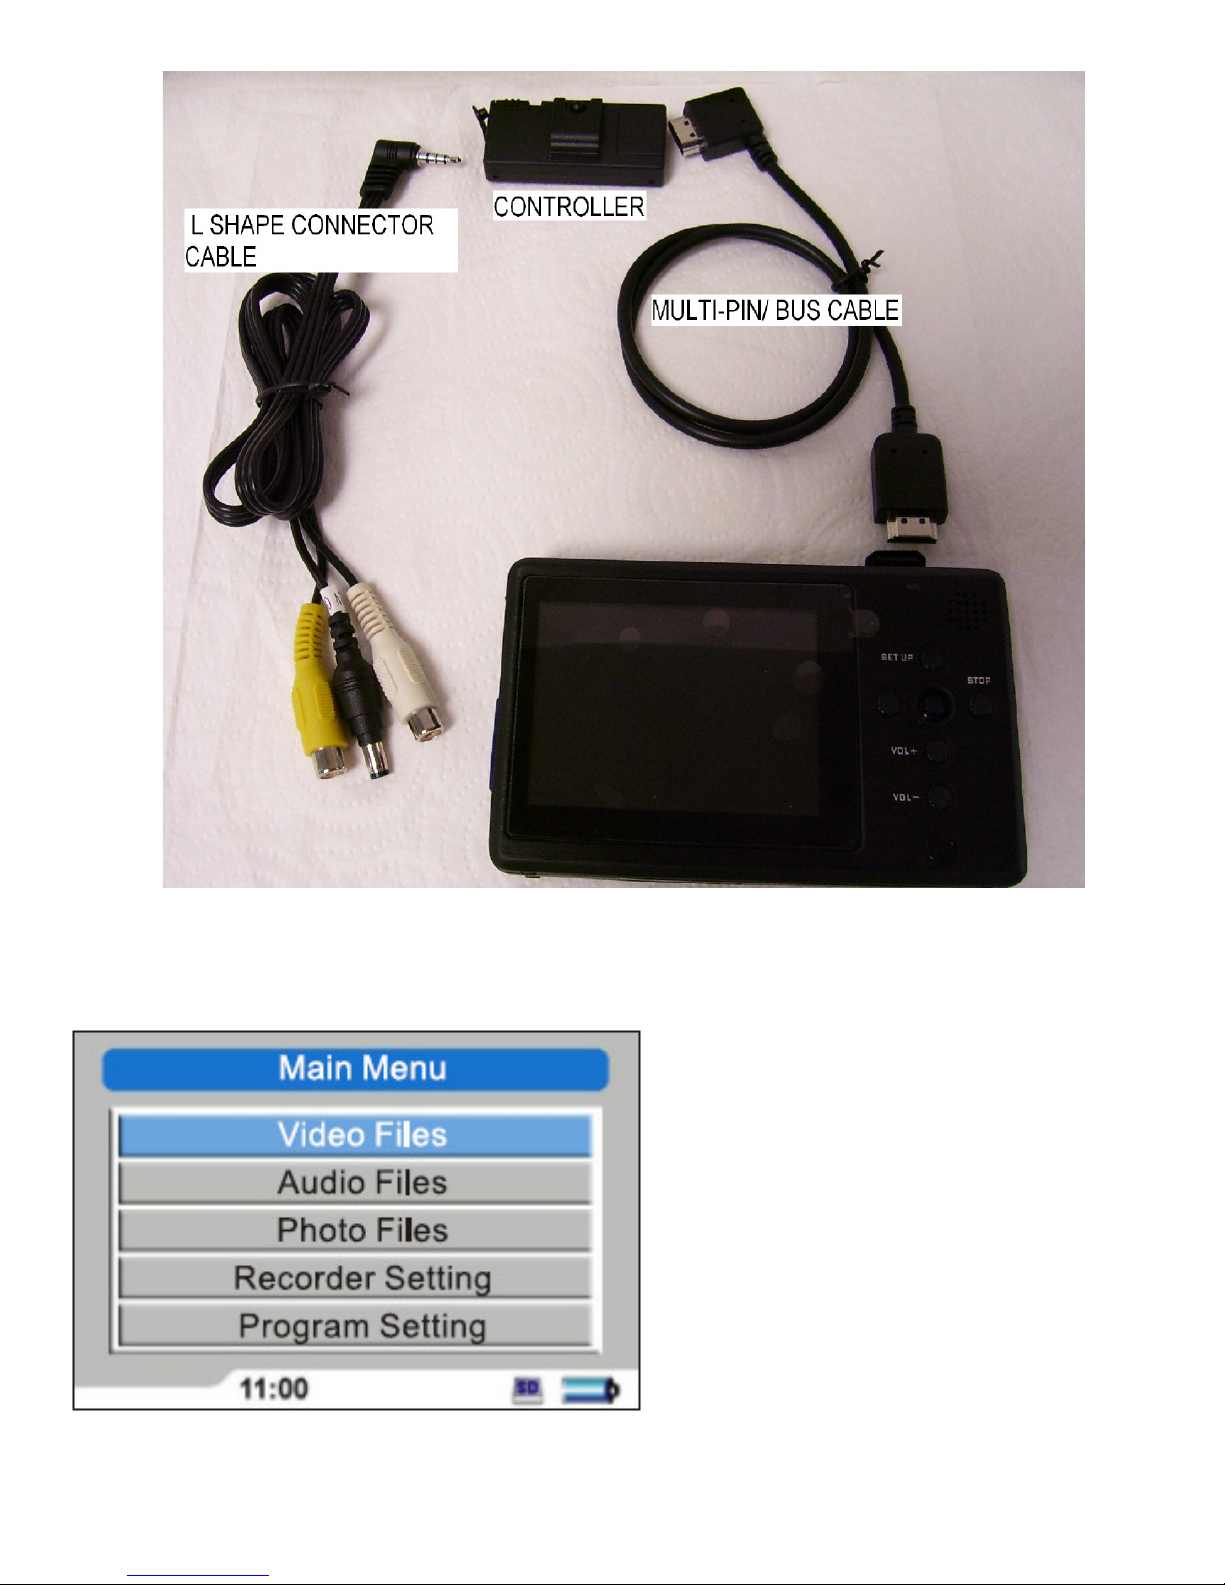
1. Connect your camera to the yellow video input connector and your black 12V250ma connector to
your camera 12VDC input. Do not turn on the MDVR using the MDVR on and off power button.
Use the On, and Off switch on the small controller to turn the MDVR On/Off. You will see the
following Main Menu.
Page 5
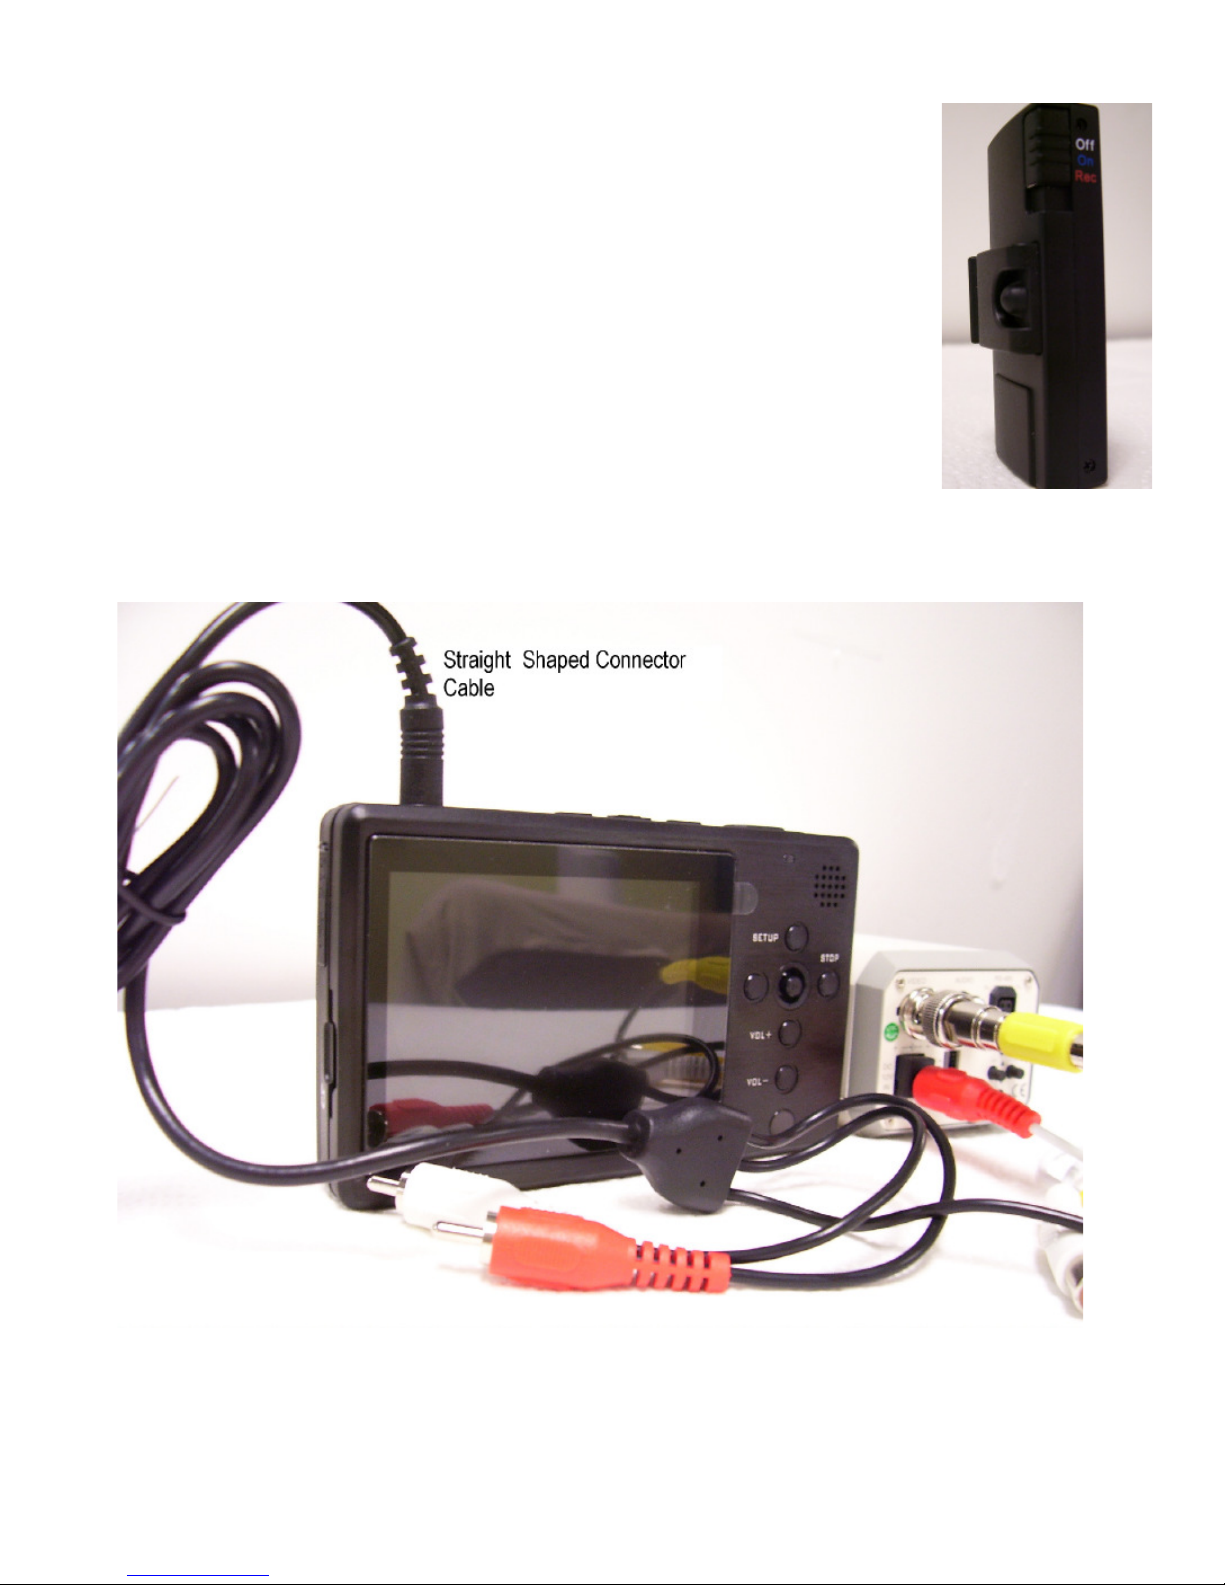
MDVR Controller
2. Use the controller Rec option to record live video. Move the controller switch
to the On position for Menu options. You are done with option 1, lets move on
to option 2.
OPTION 2:
The following parts are needed to setup option 2. Option 2 is used when the MDVR is not used
to power the camera and will use an external power supply to power the camera. Use the straight
shaped connector cable.
1. Plug your straight connector cable into the A/V IN on top of your MDVR.
2. Connect the yellow connector to your camera and power your camera with an external power
supply.
3. Turn your MDVR On.
4. Hit the record button.
Page 6
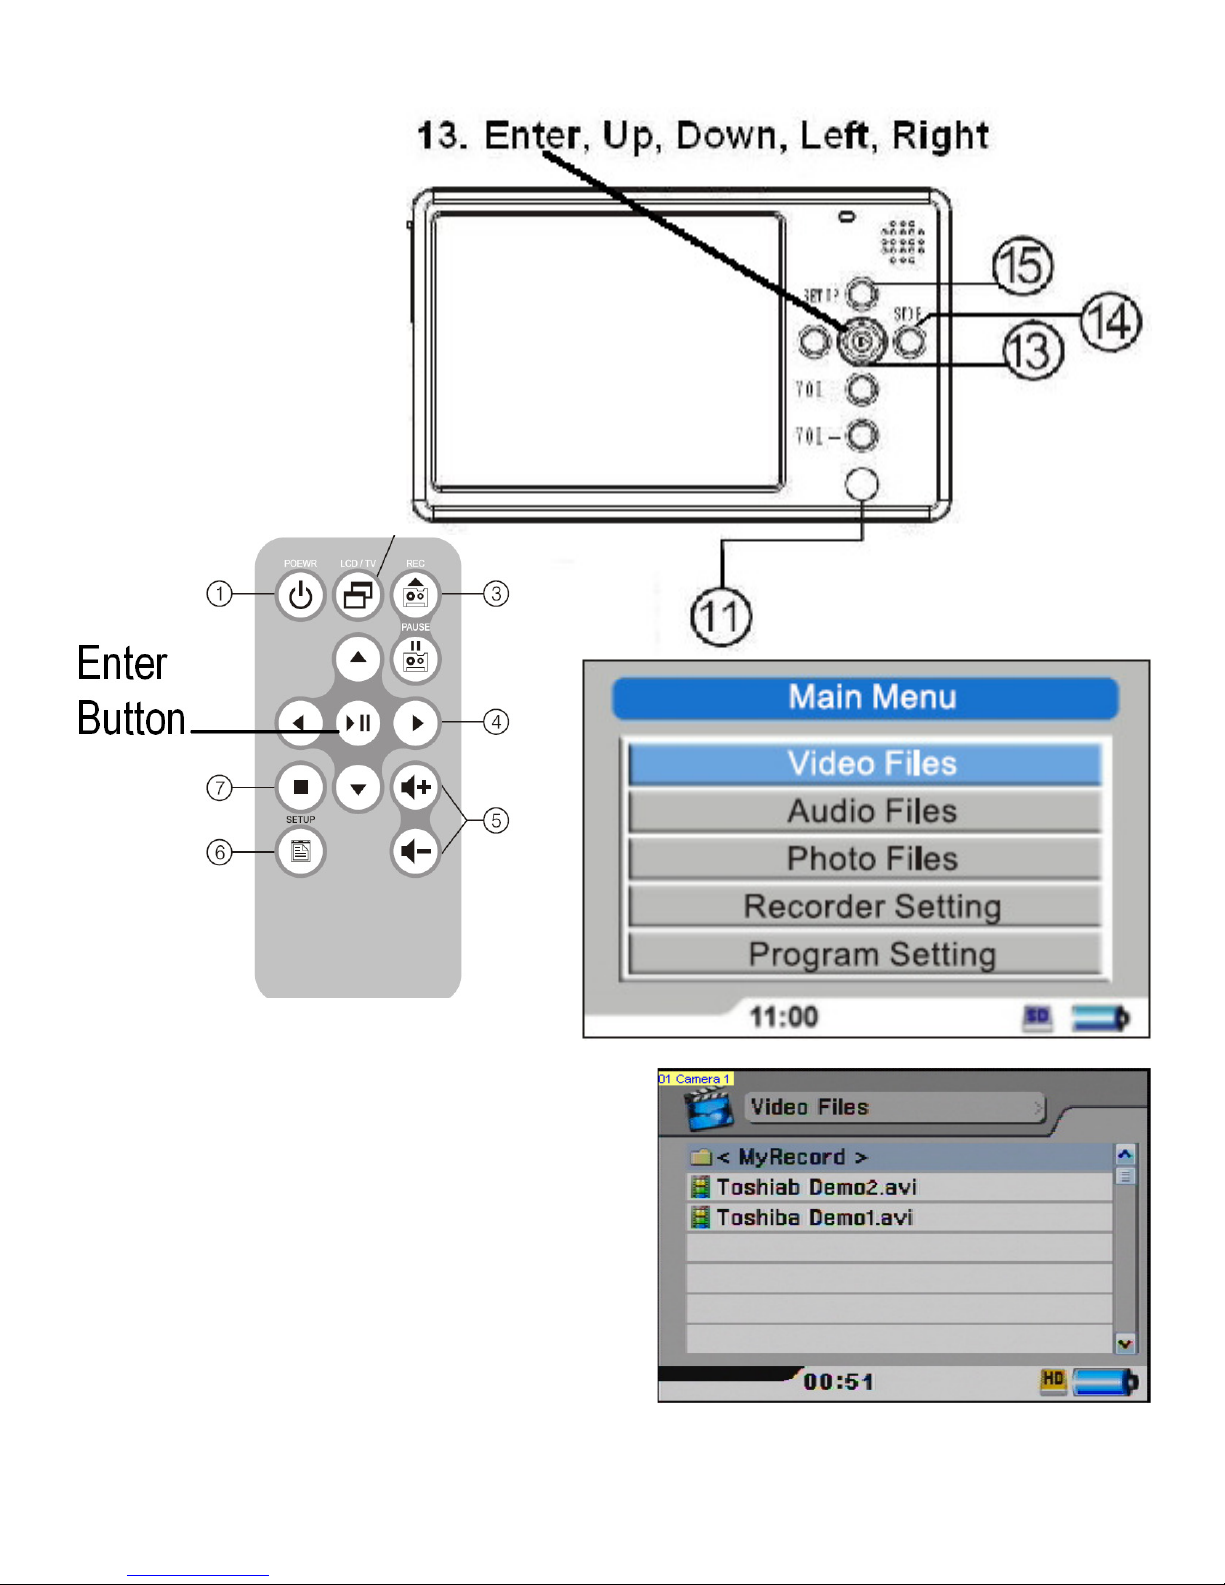
VIEWING RECORDED FILES
1. At the MAIN MENU, Select
Video fi les hit the enter
button using the remote or
the MDVR front panel.
2. You can view the demo’s already created or your
own video by going into My Record fi le. Select My
Record fi le and push the Enter button.
Page 7
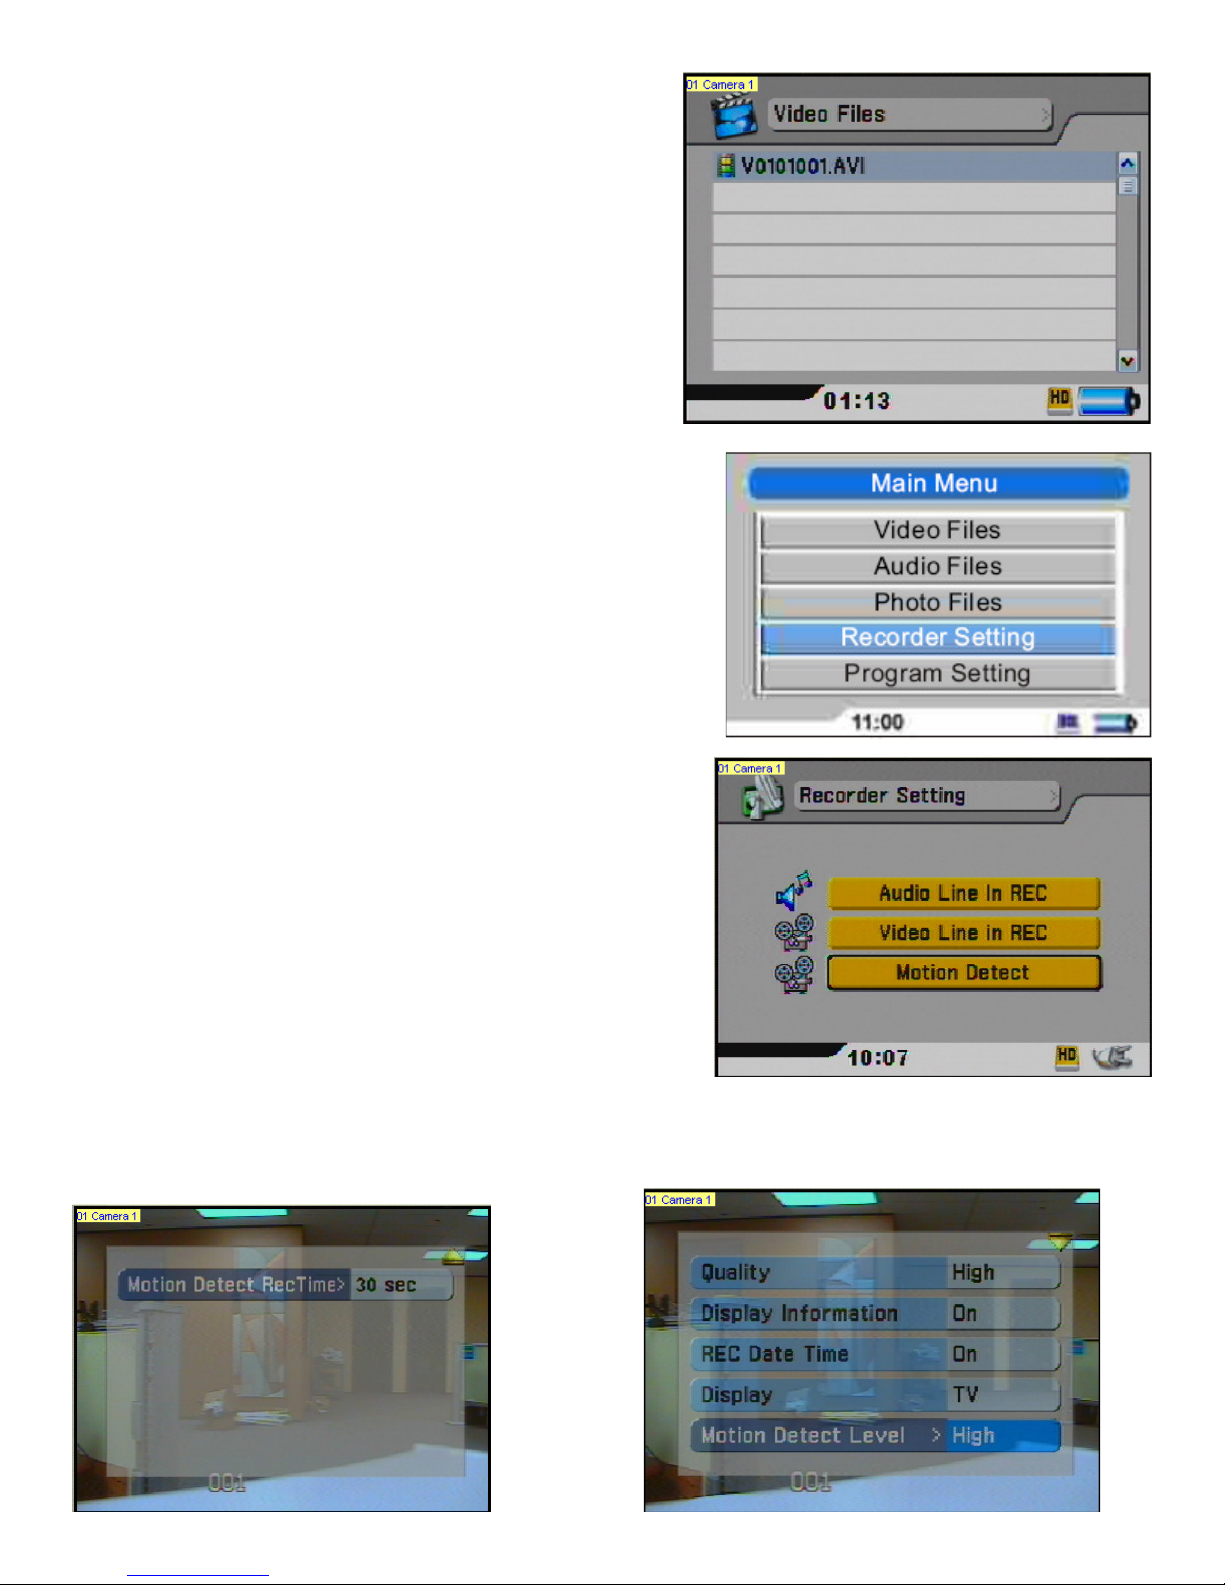
3. Select your fi le and hit the Enter button, at this time
you should be viewing your video. Exit by pushing the
Stop button.
MOTION DETECTION
1. Select Recorder Settings from the main menu and push
the enter button.
2. Select Motion Detect and push the enter button.
3. You will see live video, push the Setup button on the
MDVR front panel or remote. Scroll down to Motion
Detect Rec Time and select a motion time duration. Exit
by pushing the Stop button. Press REC to Start Detecting.
The MDVR will only record motion for the time duration.
Exit by pushing the Stop button.
MOTION SENSITIVITY
From the same Motion menu, scroll down to Motion Detect Level to set the motion sensitivity level
(Low, Middle, High). Press Stop to exit menu. Press or switch REC to start motion recording.
 Loading...