

Page 1
DVR Quick Operation Guide
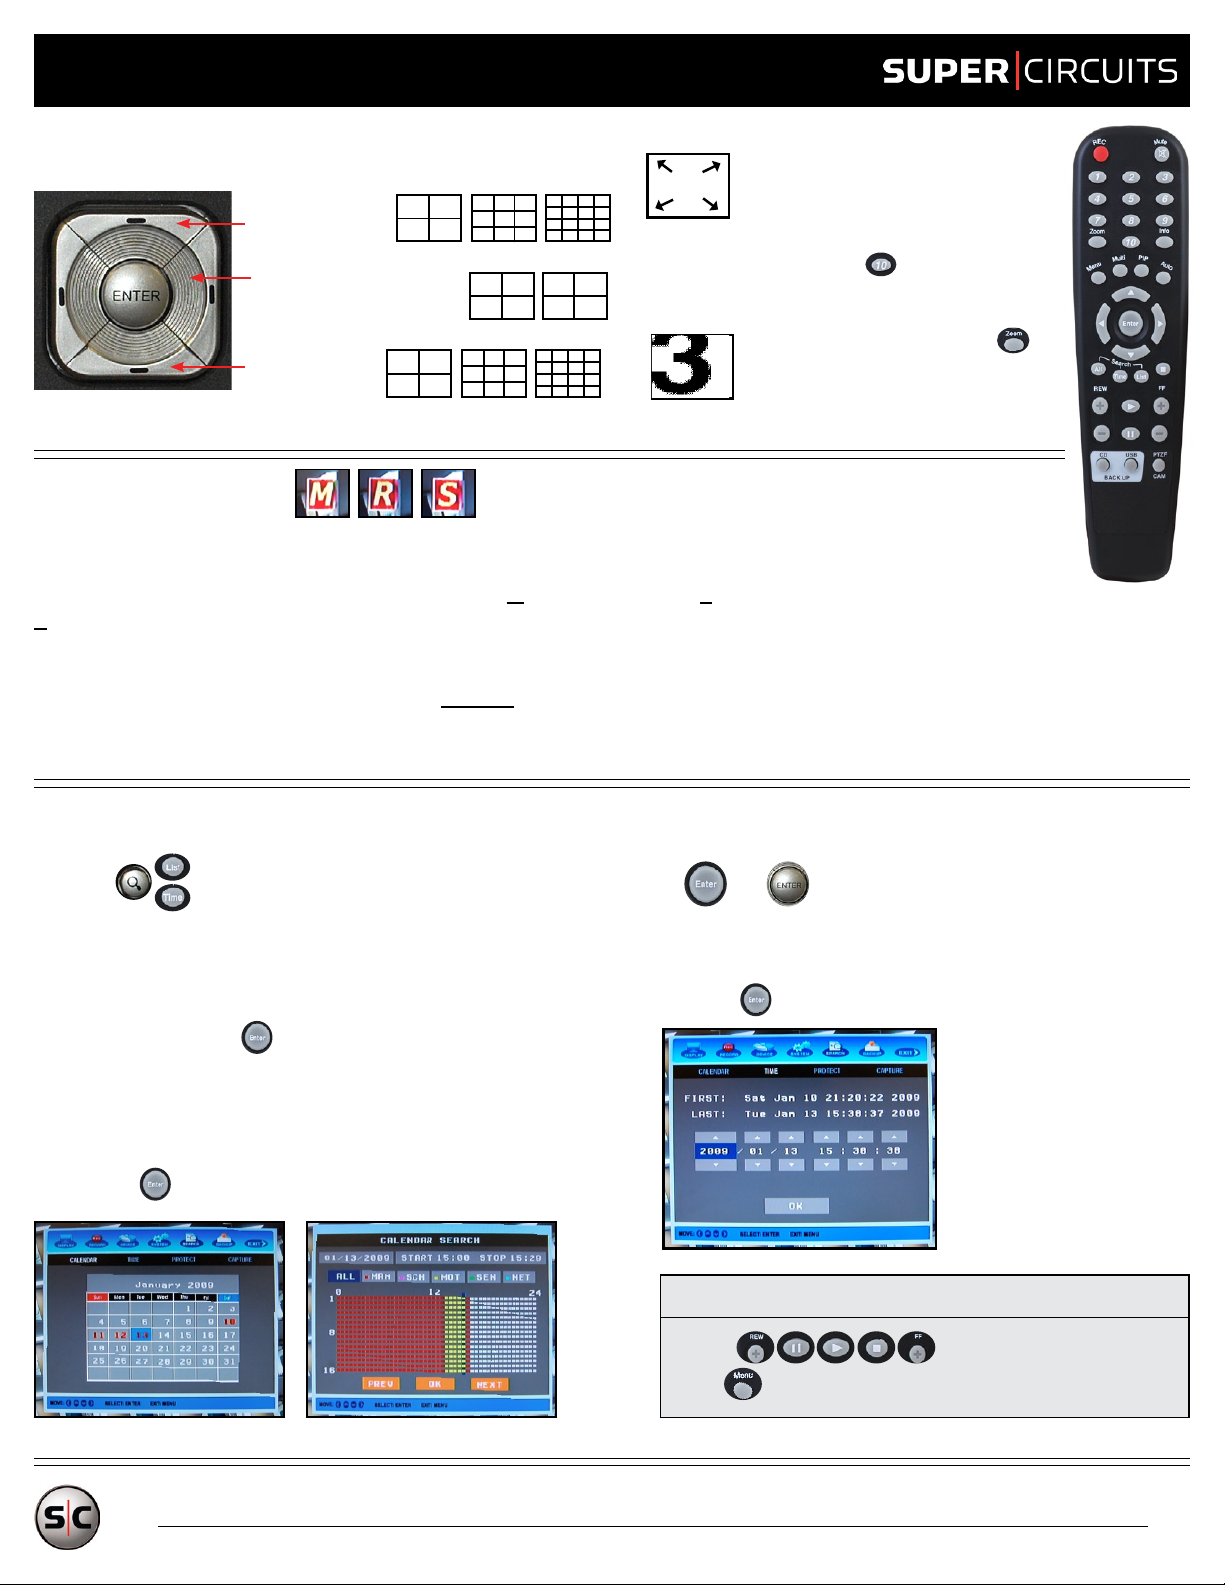
Changing Views and Selecting Cameras
2
4
1 2 3 4
5 6 7 8
9 10 11 12
13 14 15 16
5
7
UP/DOWN Change
Camera Layout
LEFT/RIGHT Changes Which
Cameras are Displayed
1
3
1 2 3
2
4 5 6
4
7 8
1
3
Push the desired camera number
Full Screen
to bring that single camera to a
full screen view.
For cameras 1-9 push the numeric key. For
cameras 10-16, push the button rst
6
followed by the desired camera number.
8
UP/DOWN Change
Camera Layout
1
3
1 2 3
2
4 5 6
4
7 8
1 2 3 4
5 6 7 8
9 10 11 12
13 14 15 16
Zoom
When viewing full screen, the
button will electronically magnify
the image. Use arrow keys to move
around the magnied view.
Recording Video
Typically when installing a DVR, one will congure the unit to record 24/7 or more commonly, to record
only when movement is detected on a particular camera. A small indicator is shown on each video screen,
identifying the recording mode for that camera: M- Motion recording, S- Scheduled recording, R- manual
Recording. A small red square in the video window also indicates that recording is occurring. Unless you have specically
congured your DVR to be manually activated by pressing “REC” button, we advise that you do not use that button unless
you have a clear view of a video screen and can visually conrm, if recording is in progress or not. Pressing the “REC”
button while the DVR is recording video will CANCEL the current recording. Pushing the “REC” button while no recording is
in progress, will activate recording on all channels congured to allow manual recording. Generally it is better to trust your
DVR to record video based upon the settings you’ve established and tested during setup.
Locating and Playing Back Recorded Video
1) Press to search for video. Use arrow keys to navigate and or to choose options.
2) Choose the desired method of searching for video:
Time Line (LIST) Search:
• Use arrow keys to select date (orange dates contain video)
• Use arrow keys and to select the desired time on the
time line to begin playback.
• Parts of the time line containing video are colored:
Pink = Scheduled Recording | Yellow = Motion Recording
Red = Manual Recording | Green = Sensor Recording.
• Pressing on a time will begin video playback
For order assistance, questions and inquiries, please contact one of our sales consultants at:
1-877-995-2288 or email [email protected], or please feel free to browse our website at www.supercircuits.com.
Supercircuits is a registered trademark of Supercircuits INC. Copyright © 2009 Supercircuits, Inc. All rights reserved. www.supercircuits.com
GoTo (Time):
• Use arrow keys to choose desired date /time, then
press to start playback.
Video Playback Control:
Press to control playback or
press to exit playback and back up in menus.
Cont. on back
Page 2
DVR Quick Operation Guide
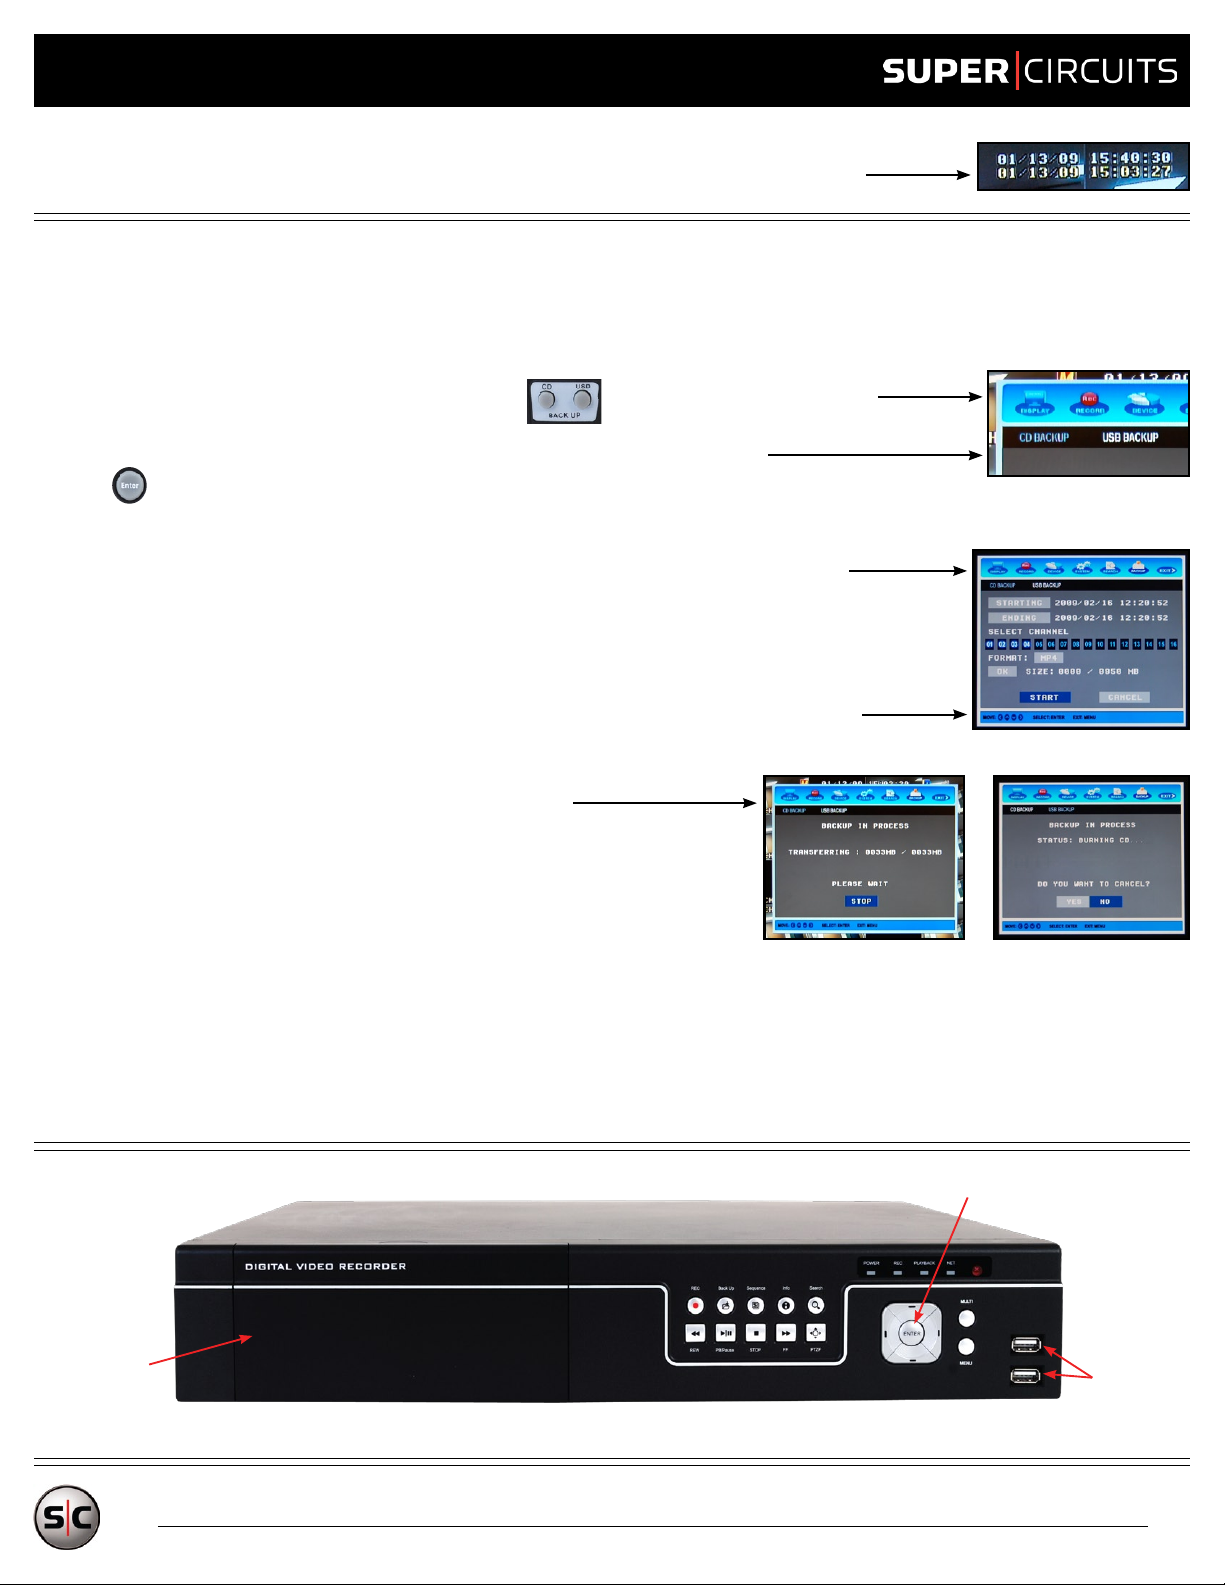
• During Video playback, two times are displayed on the top of the screen. The rst time is the
current time, the second time is the time that the video currently playing, was recorded.
Exporting / Backing Up Recorded Video
Specify a segment of video from one or more cameras for export, and saving the video to a USB Memory Key or CD/DVD Disc
• After locating the video you wish to export, make a note of the start and end time of the
video segment. Navigate to the “BACKUP” menu, and choose “USB BACKUP” or
“CD BACKUP”. Alternatively you can also press the button on the remote control.
• Insert the USB key or CDR / DVR-R / DVD+R media to backup the video onto.
Press choosing either “USB BACKUP” or “CD BACKUP”
(Note: The optical drive is located behind a door on the left side of the DVR, this must be open for the optical drive to accept and eject discs.)
• Use the arrow keys to navigate to specify the starting and ending times of the desired
video segment as well as the desired cameras to export.
• Choose the desired video format for the export. .AVI les are playable by many 3rd party video
players on the market, but will save each video channel as an individual le. .MP4 Format will
include a .exe video player on the CD or USB device allowing authenticated playback of
multi-camera video on any Windows PC.
• Choose “Start” and the video export process will begin.
• For CD or DVD video exports, the export process is complete when
the CD or DVD drive ejects the disc.
• When exporting video to USB, for best results we suggest waiting an ADDITIONAL 60 seconds after the backup screen
clears, indicating completion of the backup process. This will ensure the DVR has had sufcient time to nish the
backup writing process.
TIP: If you insert the USB memory key into a PC and no les can be located, or the video les appear corrupted, the USB key was likely removed
prematurely during the backup process.
(Also used to change camera display layout)
Navigation Buttons
CD/DVD
Optical Drive
(Behind Door)
USB Ports
For order assistance, questions and inquiries, please contact one of our sales consultants at:
1-877-995-2288 or email [email protected], or please feel free to browse our website at www.supercircuits.com.
Supercircuits is a registered trademark of Supercircuits INC. Copyright © 2009 Supercircuits, Inc. All rights reserved. www.supercircuits.com
 Loading...