

Page 1
Page 2
CUSTOM TUNING - READ ME
Before installing third-party tuning software on your device, refer to
the third-party tuning dealer/developer’s instructions and warnings,
including any user manual or other written material, and your vehicle’s
user manual. Modications to your vehicle through third-party tuning
software may result in death or serious injury, property damage, or
both.
WARNING
Flashpaq Pro can be used to store and load to your vehicle custom
tuning les that are developed by third-parties. Powerteq LLC does
not calibrate, test, verify, validate or provide custom tuning for the
Flashpaq Pro. All custom tuning, and calibrations loaded to your
vehicle, are sourced and purchased at your discretion from a thirdparty. Reference your local, state and federal laws and regulations,
including but not limited to California Air Resources Board (CARB)
and U.S. Environmental Protection Agency (EPA) regulations, prior
to the using any third-party calibrations. Powerteq LLC does not
endorse any independent tuning shops or resellers. Powerteq LLC
does not recommend using this device with any other tuning module
or device that modies the vehicle powertrain control module (PCM)
parameters, increases horsepower or torque, or modies transmission
Page 3

characteristics. Your custom tuning dealer is responsible for
ensuring that calibrations les developed by such dealer are in
compliance with any and all applicable laws and regulations.
Questions associated with calibrations, tuning, or custom settings
should be handled directly with the third-party tuning dealer/
developer.
POWERTEQ LLC IS NOT RESPONSIBLE FOR AND SHALL
HAVE NO LIABILITY TO YOU FOR ANY CLAIMS ARISING
OUT OF OR RELATING TO ANY MISAPPLICATION OF THE
FLASHPAQ PRO, CUSTOM TUNES, IMPROPER USE OF
CALIBRATIONS, MALFUNCTION OR LACK OF LEGAL
COMPLIANCE FOR CUSTOM PROGRAMS CREATED BY THIRDPARTIES.
Page 4
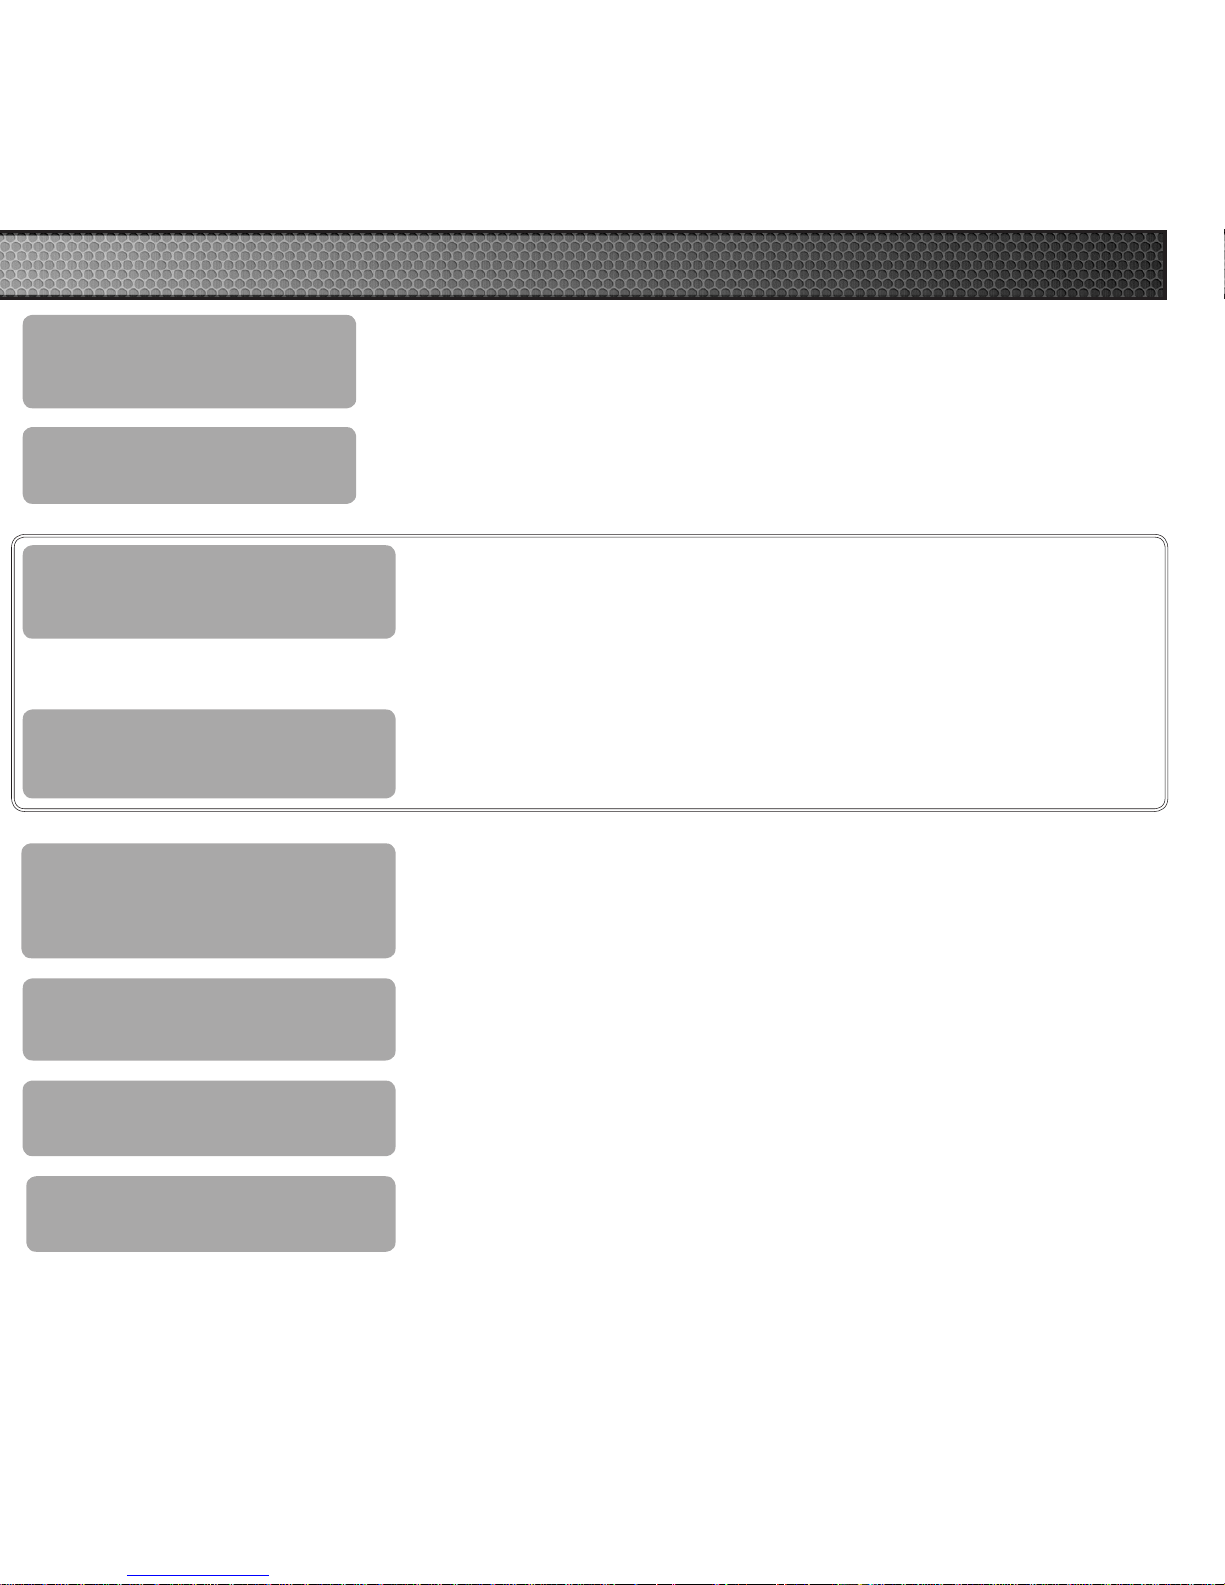
(2) Use Flashpaq Pro to
read vehicle stock
(4) Contact Calibrator once
device is updated
(5) Calibrator targets the
Flashpaq Pro with tunes
(6) Connect the Flashpaq
Pro to Ignition Software
(7) Tune the vehicle
The calibrator is a company and/or individual that creates custom
tunes based o your vehicle’s stock les. You will recieve a
“Dealer Key” from them.
The Flashpaq Pro will read your vehicle’s computer and save all
the origional stock les.
Download the Ignition Update Software and update the device.
You will need the “Dealer Key” in order to update.
Let the calibrator know that you have saved stock and updated
using ignition. The calibrator will automatically recieve your
stock le through an online portal specic to them.
The Calibrator will contact you letting you know that they
have created the custom tunes and “targeted” your device.
This means that the next time you update using Ignition, your
device will automatically update with the custom tunes.
Update your device with the custom tunes.
See the “Tuning your Vehicle” section.
CUSTOM TUNING PROCESS - AT A GLANCE
(1) Contact a Calibrator
OR
(3) Manually email your
stock le to your dealer
If your dealer prefers this method over the Ignition Software
option above, refer to the Manual Stock File Transfer section
for more information.
(3) Connect the Flashpaq
Pro to the Ignition Software
Page 5
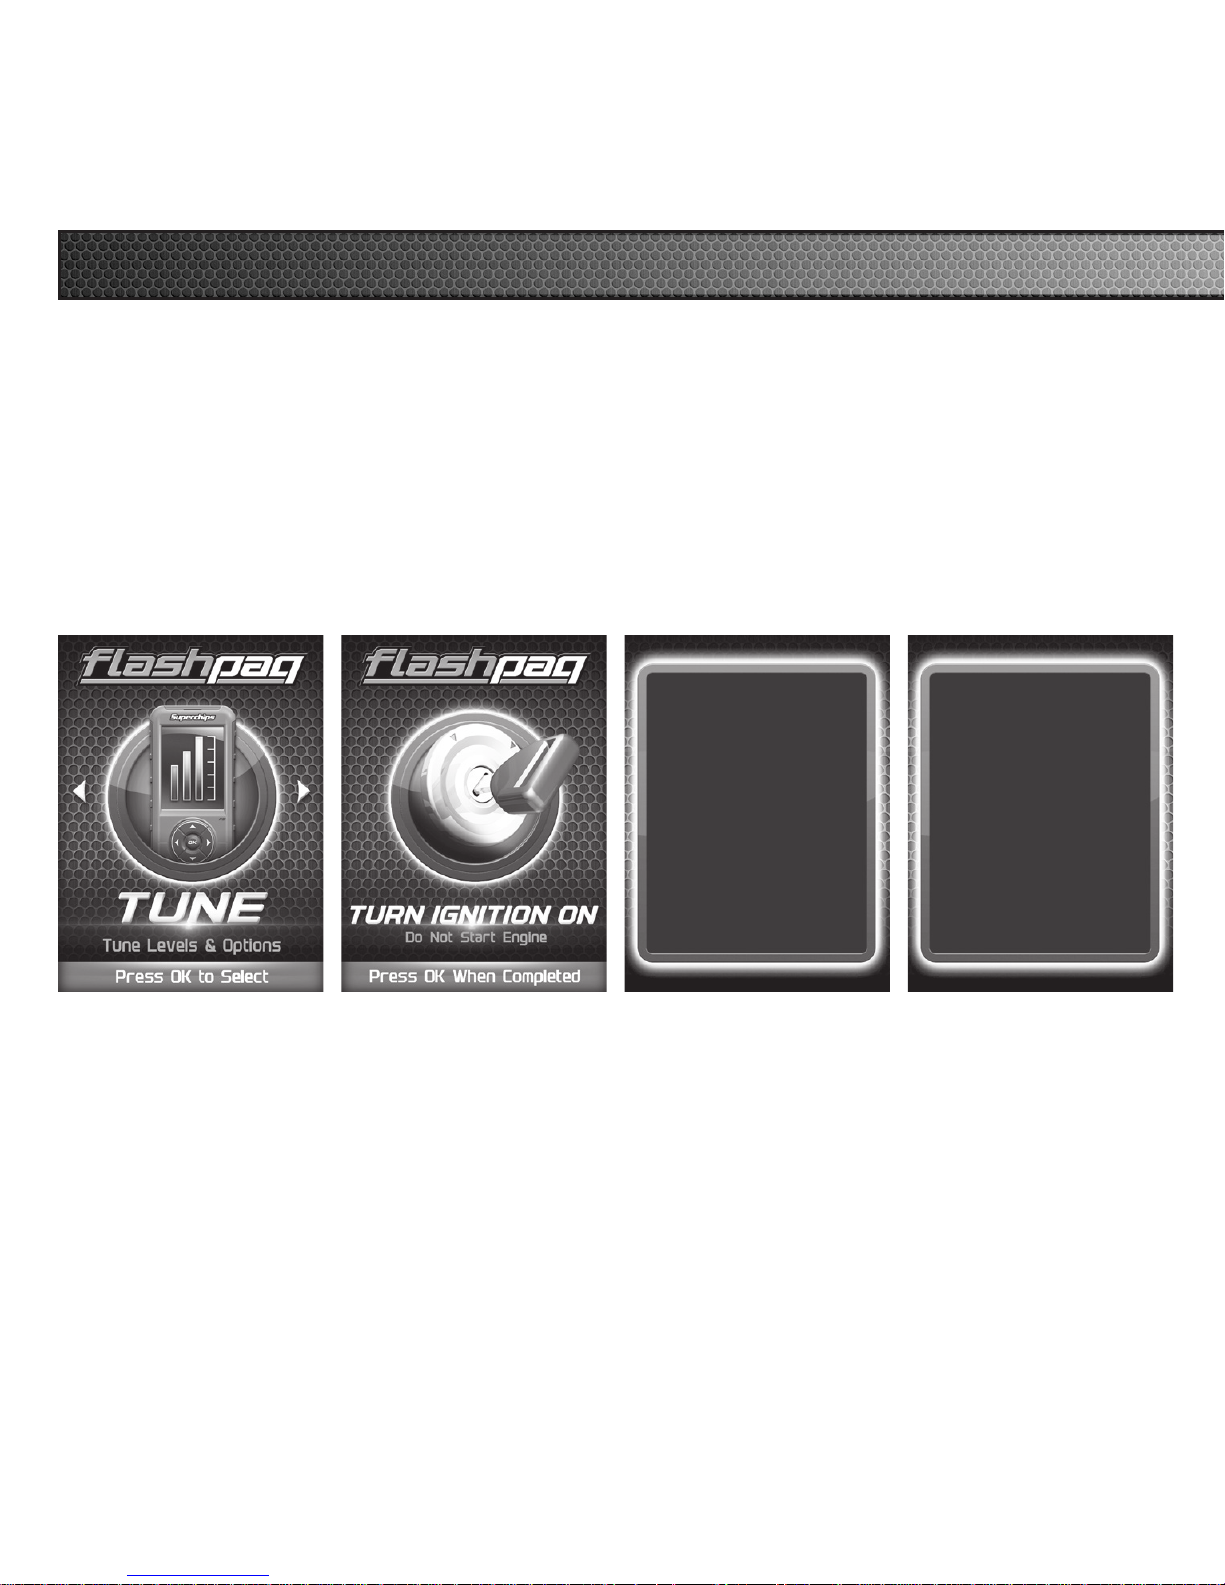
READ VEHICLE STOCK
STEP 1 - Plug
the device into
your vehicle’s
OBDII port. Enter
the Tuning Menu
by pressing OK.
STEP 2 - Turn
the ignition on,
but do not start
the engine.
STEP 3 - Follow
the on-screen
instructions.
Loading your
Vehicle
Application...
Please Wait
STEP 4 - Allow
the device to save
your stock les.
Stock Files are Saved
Successfully!
Press OK to continue
Before custom tunes can be created, you will need to save the vehicle’s stock
les.
Page 6
LOADING CUSTOM TUNES MANUALLY
Prior to receiving custom tunes, a professional calibrator will need to be
contacted.
STEP 1 - After saving the stock les
to your device, connect it to your
computer using the supplied USB
cable.
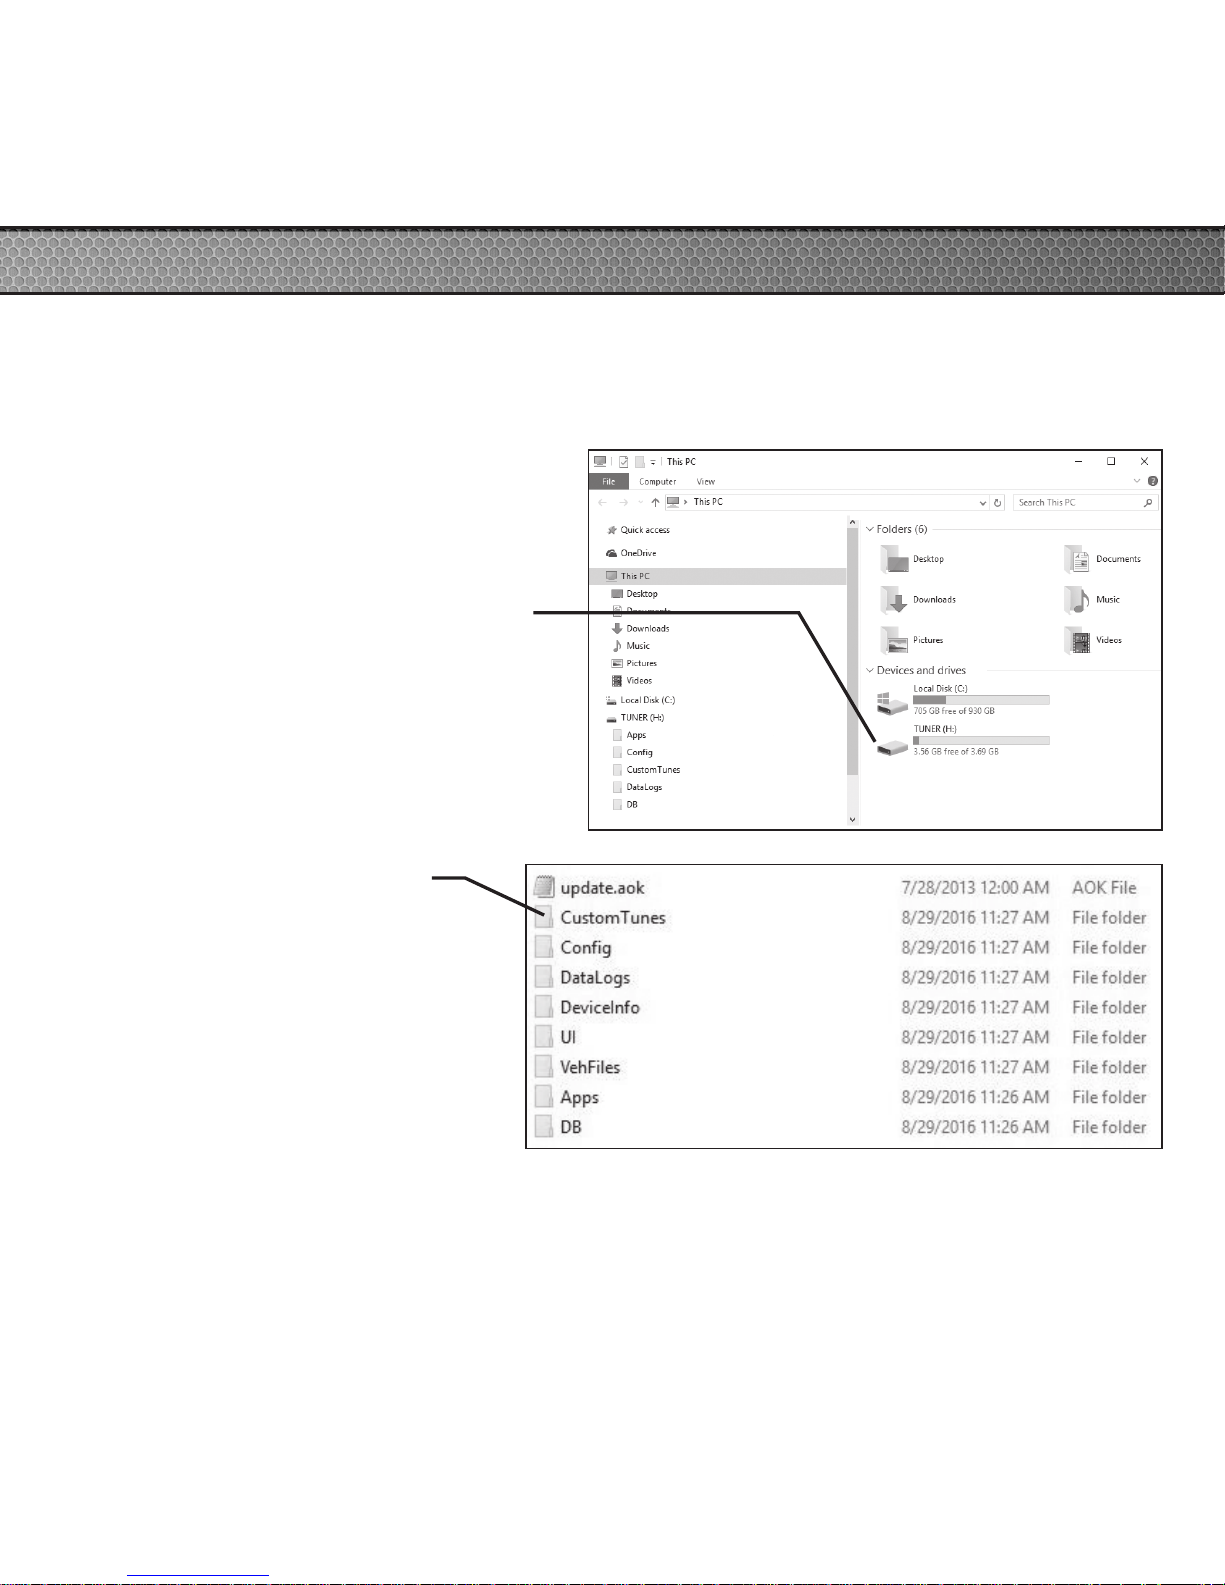
STEP 2 - Locate the drive named
“Powerteq”. Double-click the icon
to open the drive and display it’s
folders.
STEP 3 - Locate the folder
named CustomTunes.
Double-click it to open.
STEP 4 - Select the le named
“Stock.epq” and save it to your
desktop.
STEP 5 - Attach the le to an
email and send it to your custom calibrator.
Page 7
LOADING CUSTOM TUNES WITH IGNITION
Prior to receiving custom tunes, a professional calibrator will need to be
contacted.
STEP 1 - After saving the stock les to your device, contact the Calibrator and
ask for their “Dealer Key”.
WRITE DEALER KEY HERE
(NOTE: The dealer key is a code you use when registering your device using
the Ignition Update Software.)
STEP 2 - Once you have downloaded and installed Ignition to your computer,
double click the icon to open the software.
STEP 3 - Connect the Flashpaq Pro to your computer using the supplied USB
cable.
(NOTE: Ignition will automatically recognize your device.)
STEP 4 - When the “Update Now?” screen appears in Ignition, select the Yes
button.
(NOTE: If this is your rst time connecting to Igntion, you will be required to
register the device. Follow Steps 5 - 7 to
register.)
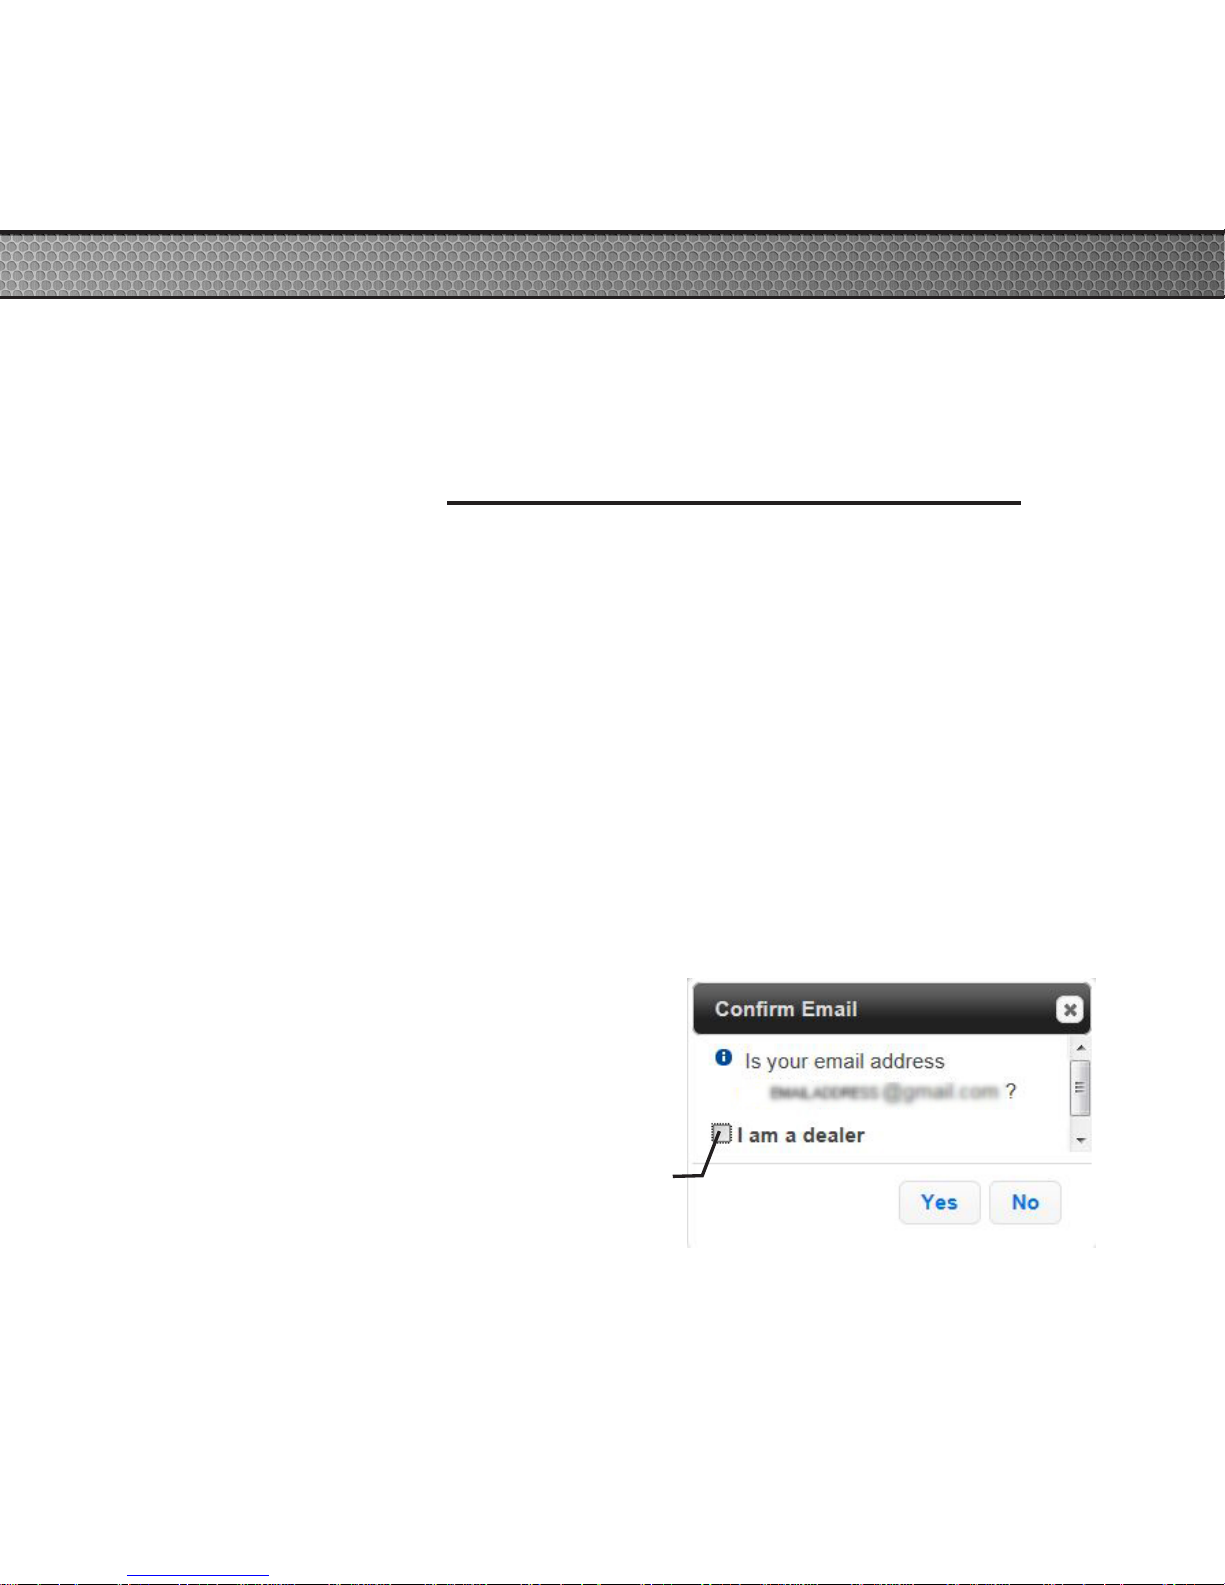
STEP 5 - If you are asked to “Conrm Email”
select Yes if it is the email you would like to
use. Select No if you prefer to register using
another address. DO NOT select the “I am a
dealer” box.
Page 8
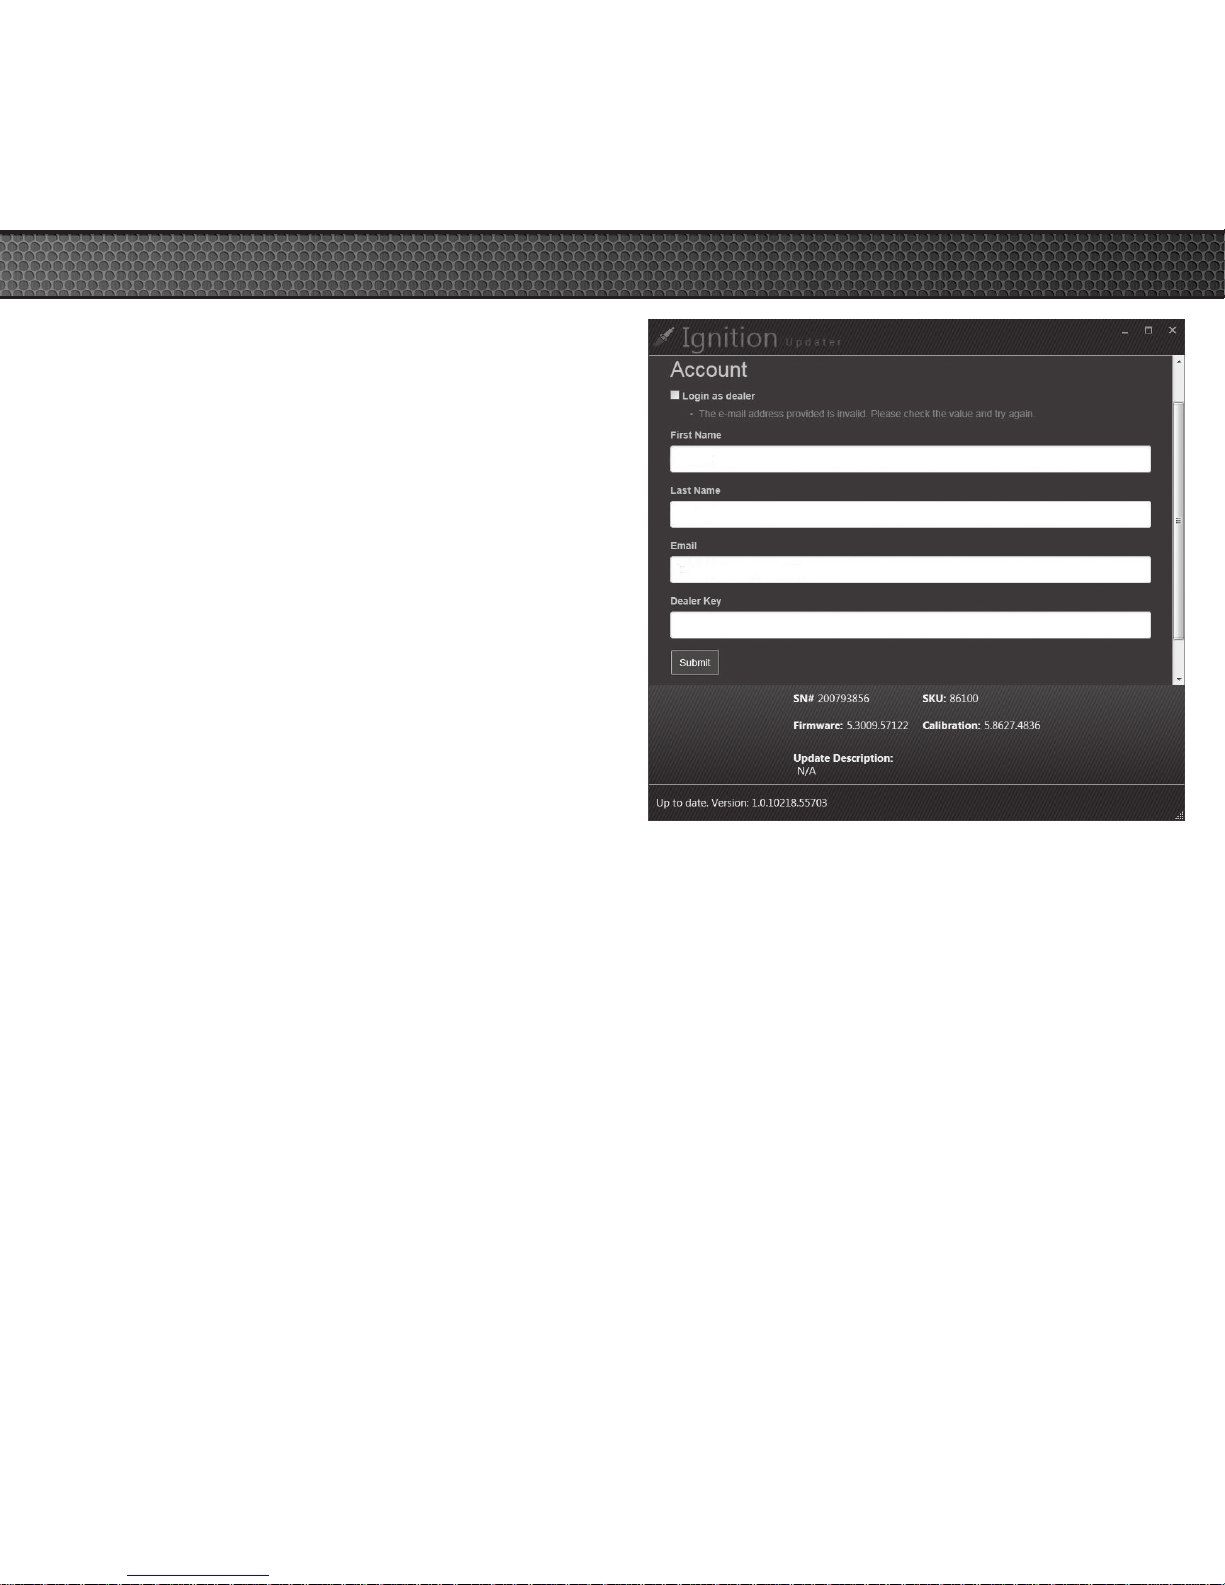
STEP 6 - When the registration
form appears, ll out all required
information.
STEP 7 - Click the submit button.
STEP 8 - When the “Update Now?”
screen re-appears in Ignition, select
the Yes button.
(NOTE: During the update process,
your device will send the stock le
data to the calibrator.)
CAUTION: Do Not unplug the device until the update is complete.
STEP 9 - Contact the Calibrator and let them know you have updated your
device.
(NOTE: They automatically recieve the stock les and will work on creating
your custom tunes.)
STEP 10 - After the Calibrator lets you know your tunes are ready and
available, update your device with Ignition.
(NOTE: The custom tune levels will be added during the update.)
Page 9
PROGRAMMING USING CUSTOM TUNES
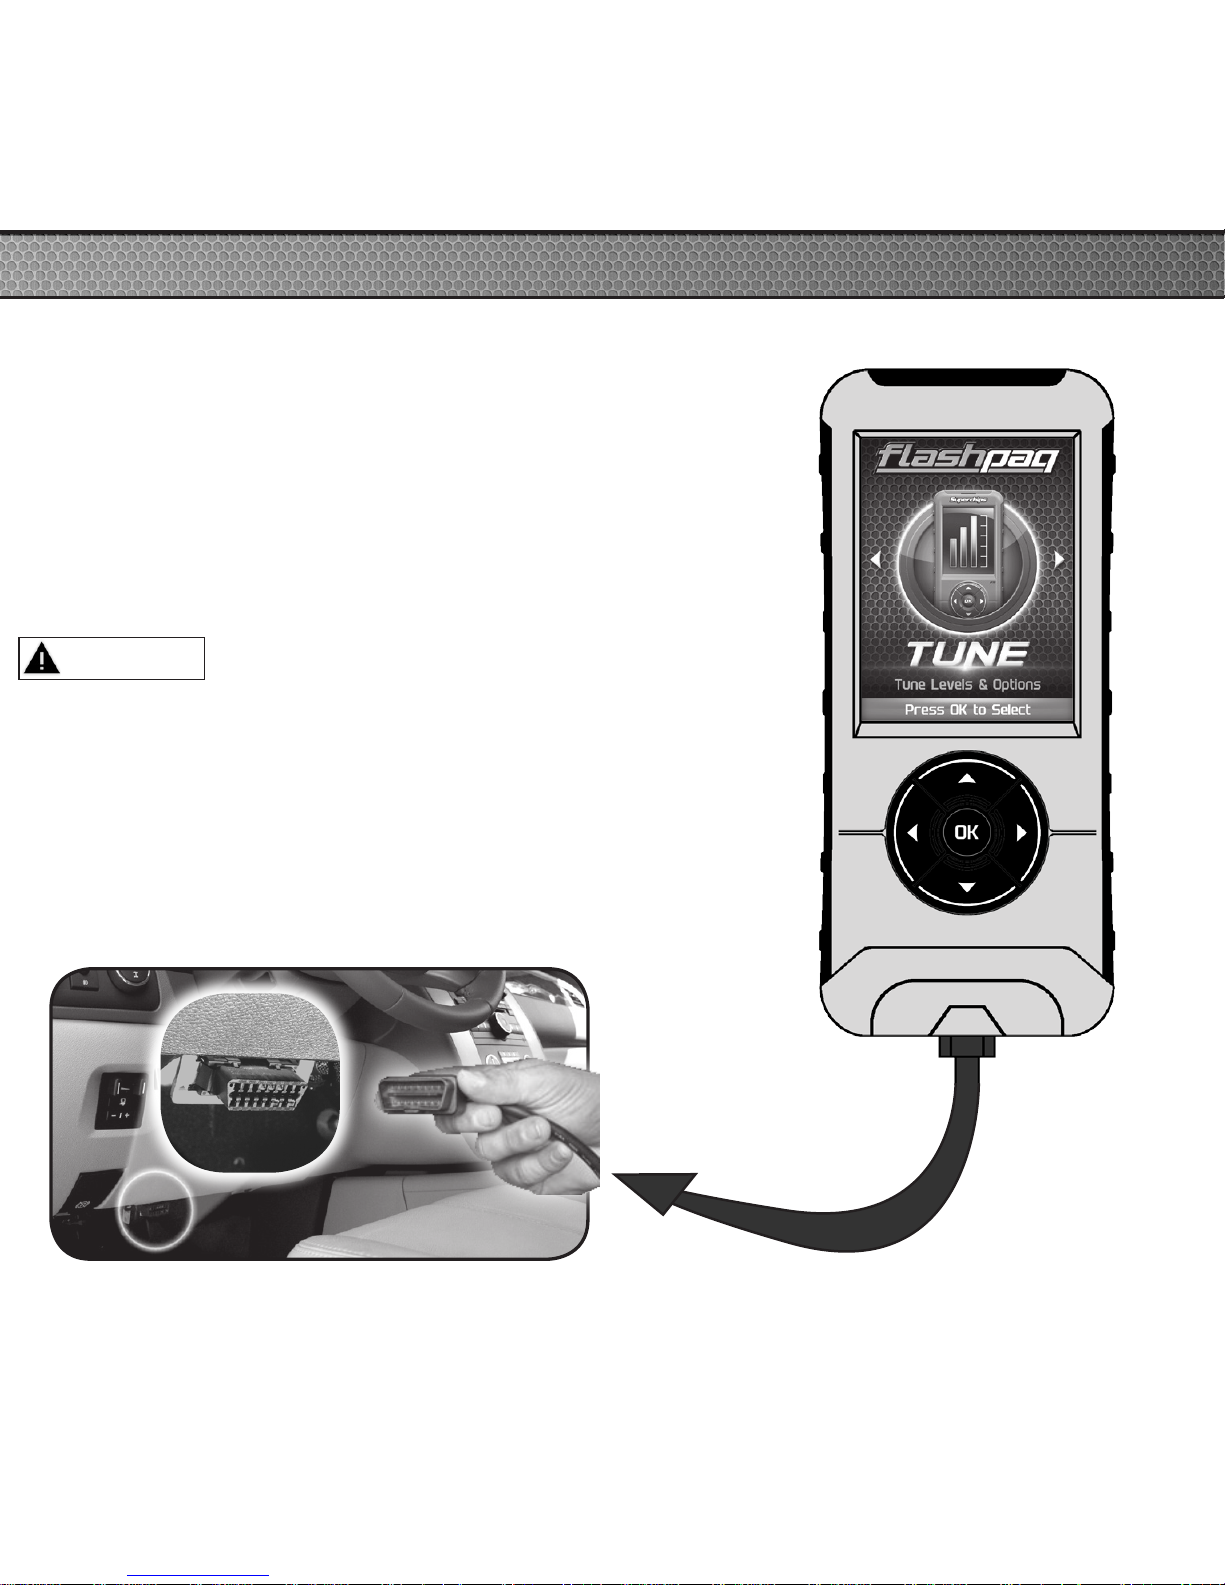
STEP 1 - Plug the device into the OBDII port.
(The device will automatically power-on once it has
been connected.)
NOTICE
Do not remove or bump the OBD-II connector during any
programming sequence. If you do, the vehicle may not start.
Do not program your vehicle while parked in unsafe locations
including heavy trac or places without cell phone service
and the internet (if possible).
WARNING
Page 10
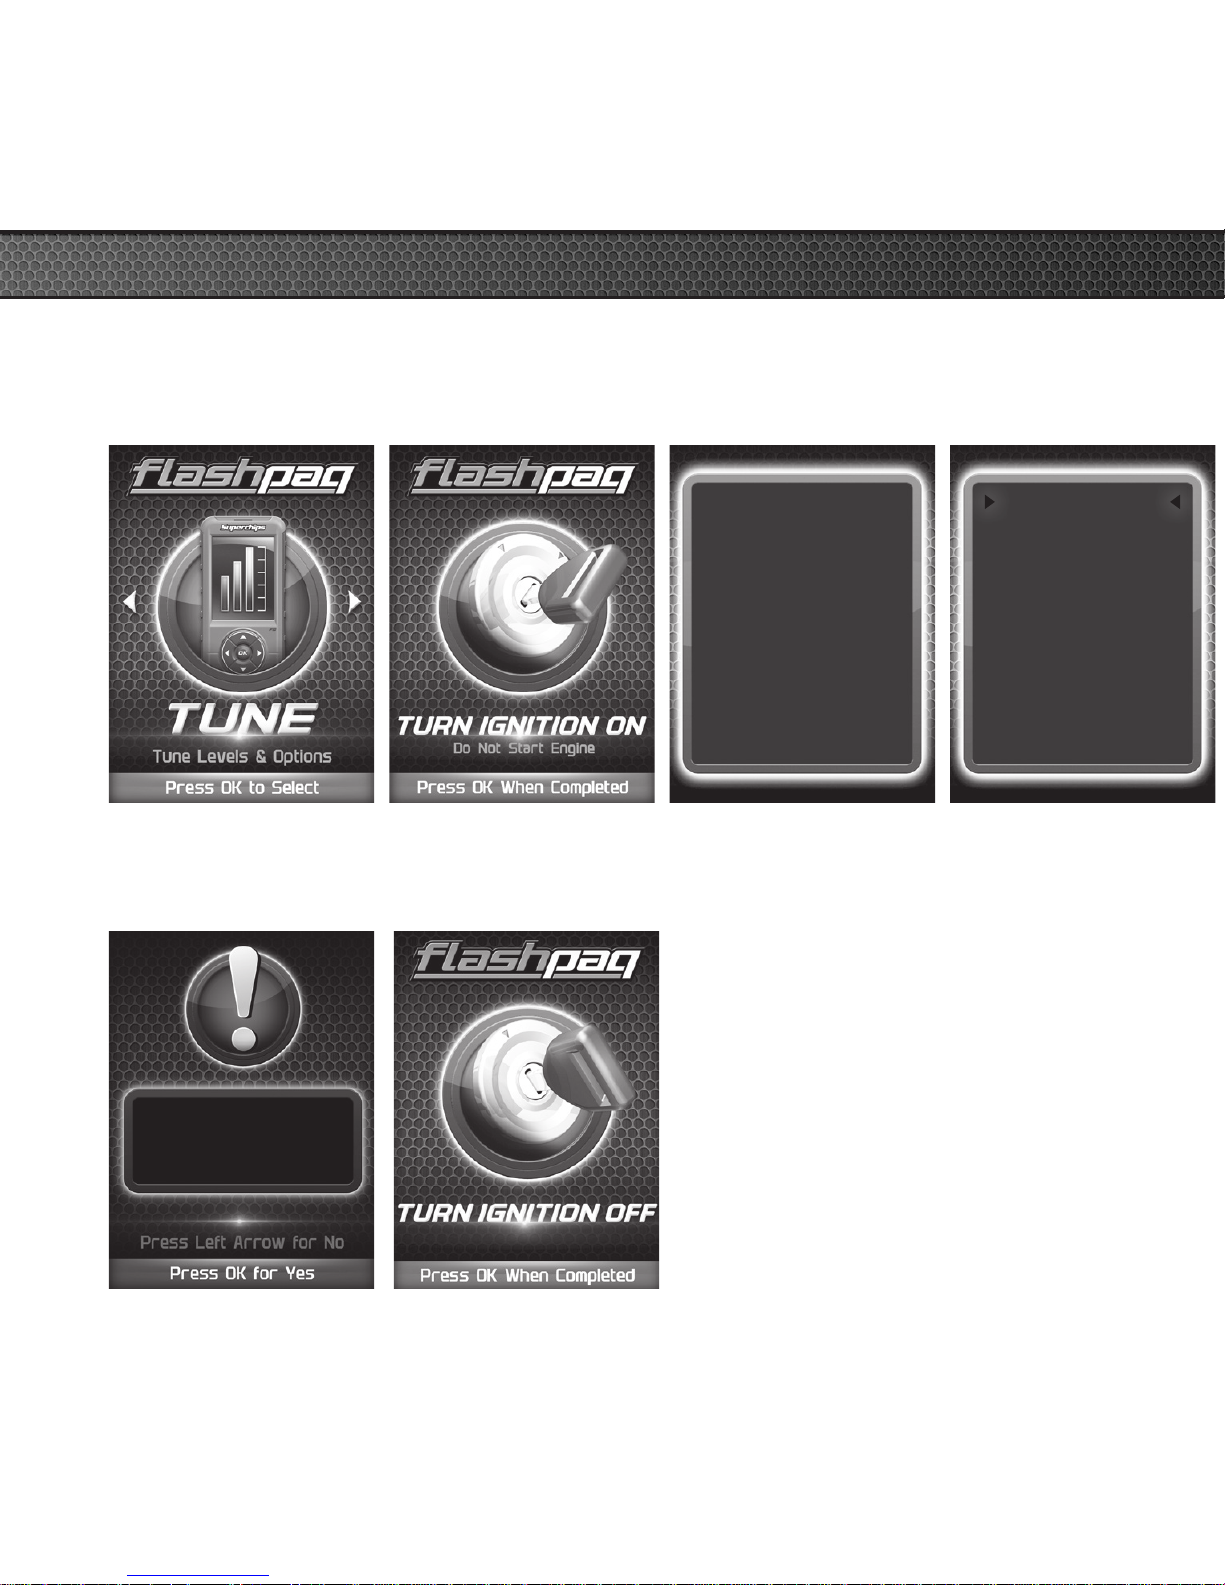
STEP 2 - Enter
the Tuning Menu
by pressing OK.
STEP 3 - Turn
the ignition on,
but do not start
the engine.
STEP 4 - Follow
the on-screen
instructions.
Select Tuning
Loading your
Vehicle
Application...
Please Wait
STEP 5 - Select
the Stock option
from the list.
Select Tuning
Custom Tune 1
Custom Tune 2
Stock
Install the Tune File?
STEP 6 - Install
the Tune File by
pressing OK.
STEP 7 - Turn the
Ignition O. Press
OK to continue.
Page 11
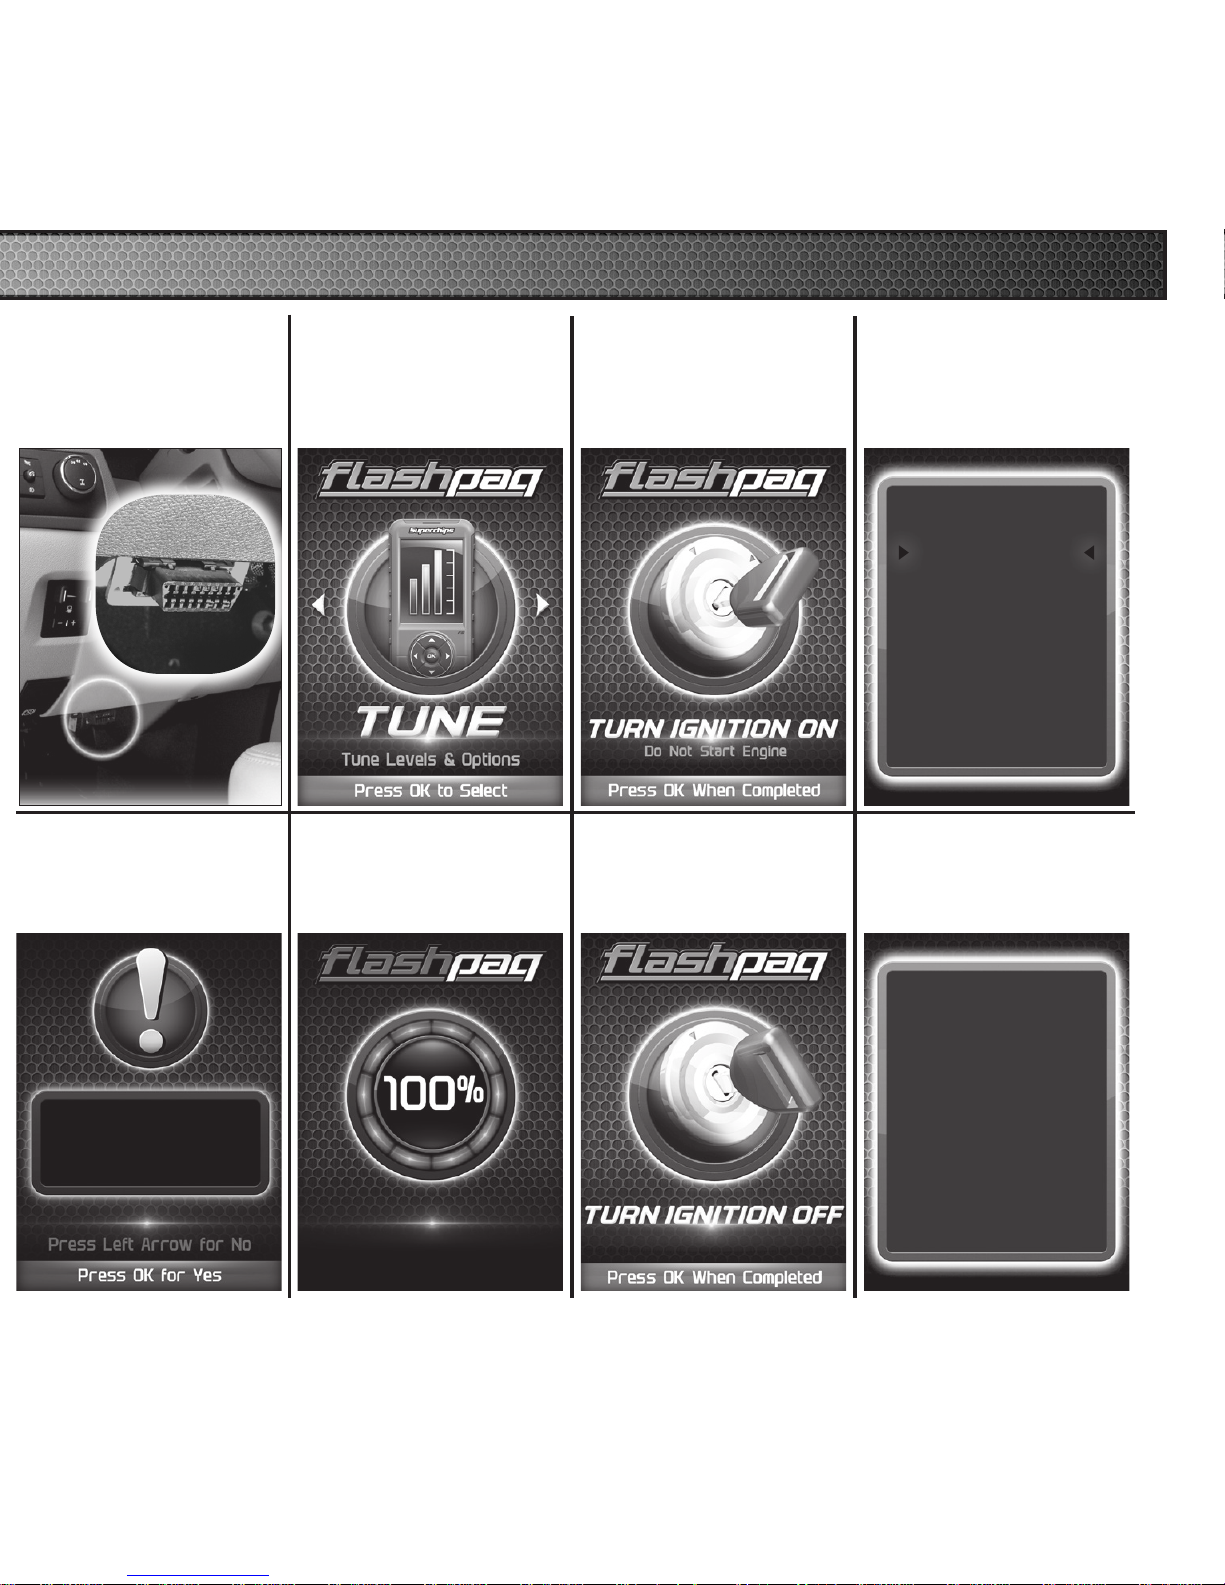
STEP 1 - Plug
the device into
the OBDII port.
Installing Engine
STEP 6 - Allow
the stock settings
to be re-installed.
Install the Stock File?
RETURNING YOUR VEHICLE TO STOCK
STEP 2 - Enter
the Tuning Menu
by pressing OK.
STEP 3 - Turn
the ignition on,
but do not start
the engine.
STEP 4 - Select
the Stock option
from the list.
Select Tuning
Custom Tune 1
Custom Tune 2
Stock
STEP 5 - Install
the Stock File by
pressing OK.
STEP 7 - Turn the
Ignition O. Press
OK to continue.
STEP 8 - Press
OK to return to
the main menu.
Select Tuning
Vehicle was Returned to
Stock Successfully
Press OK to continue
 Loading...