

Page 1
User Manual
Important: Read all instructions prior to installation.
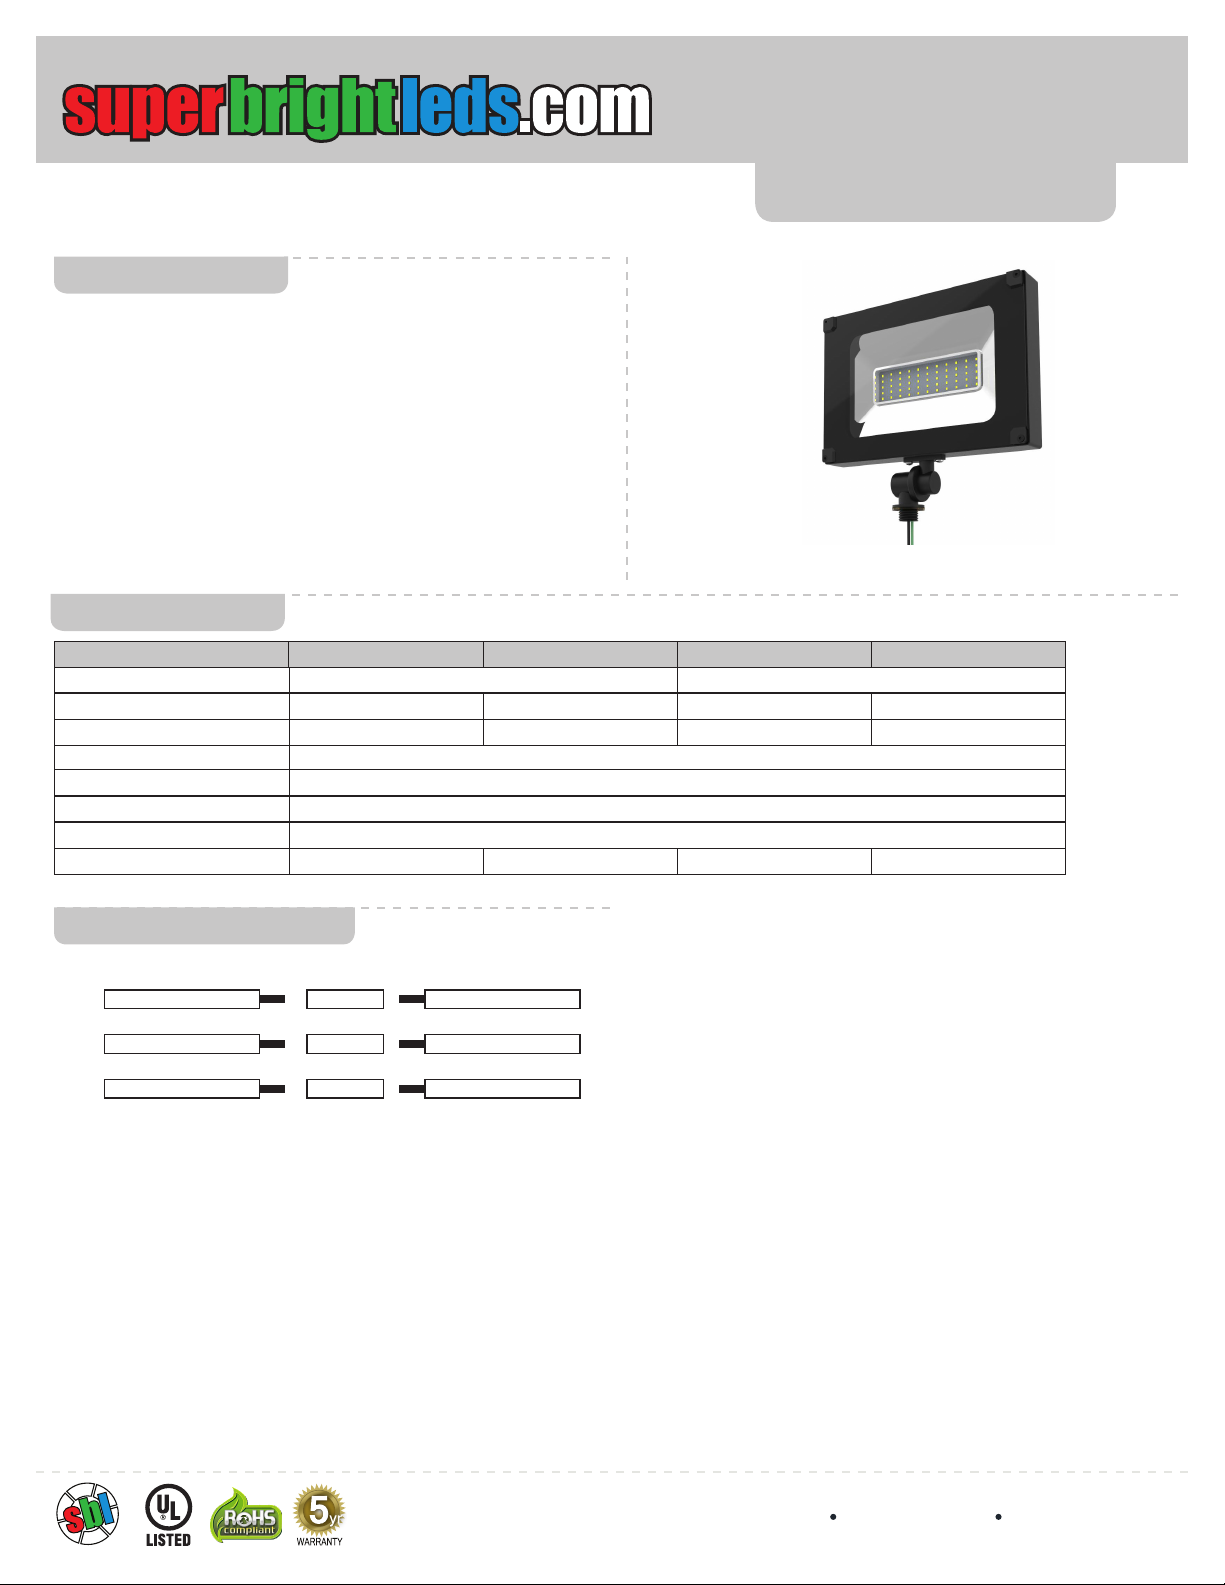
FLCKM Series
Knuckle-mount LED Flood Light Fixture
Safety and Notes
• Product should be installed and serviced in accordance with
applicable national, state, and local building and electrical codes.
• To reduce the risk of electric shock, ensure that the main power
source and circuit breakers are switched o before performing
any installation or wiring procedures.
• Avoid looking directly into lamp when illuminated.
• Ensure all mounts are securely attached and will support the
weight of the xture. Failure to properly support xture may result
in damage or injury, for which the manufacturer does not
assume responsibility.
Specications
Specications FLCKM-xK10 FLCKM-xK20 FLCKM-xK30 FLCKM-xK50
Operating Voltage Range 120 VAC 100–277 VAC
Total Power Consumption 10 W 20 W 30 W 50 W
Current Draw 83 mA 167 mA 0.25 A @120 VAC 0.42 A @120 VAC
Beam Angle 110 degree
Operating Temperature -4°–104° F (-20°–40° C)
Environmental Rating IP65
Dimmable No
Fixture Weight 1 lb 2 oz (0.52 kg) 1 lb 11 oz (0.76 kg) 2 lb 11 oz (1.22 kg) 4 lb 2 oz (1.87 kg)
FLCKM-40K30
Wiring Diagram
Line
Neutral
Ground
Black
L L
White
N N
Green
GND GND
Rev Date: V3 11/05/2018
4400 Earth City Expy, St. Louis, MO 63045 866-590-3533 superbrightleds.com
Page 2
1
2
4 5
3
L
N
Live Wire
Null Line
Ground Line
Pic.A Pic.B
Rotatory- Angle
Rotatory- Angle
Angle Align Line
Angle Indicate Line
User Manual
Important: Read all instructions prior to installation.
Knuckle-mount LED Flood Light Fixture
Installation Instructions
1 2a 2b
or
Lock-Nut
Thread
FLCKM Series
3
90˚ 90˚
Line Wire Black
Neutral Wire White
Grou Greennd Wire
L
N
Pic.A
Phillips Screwdriver
4 5
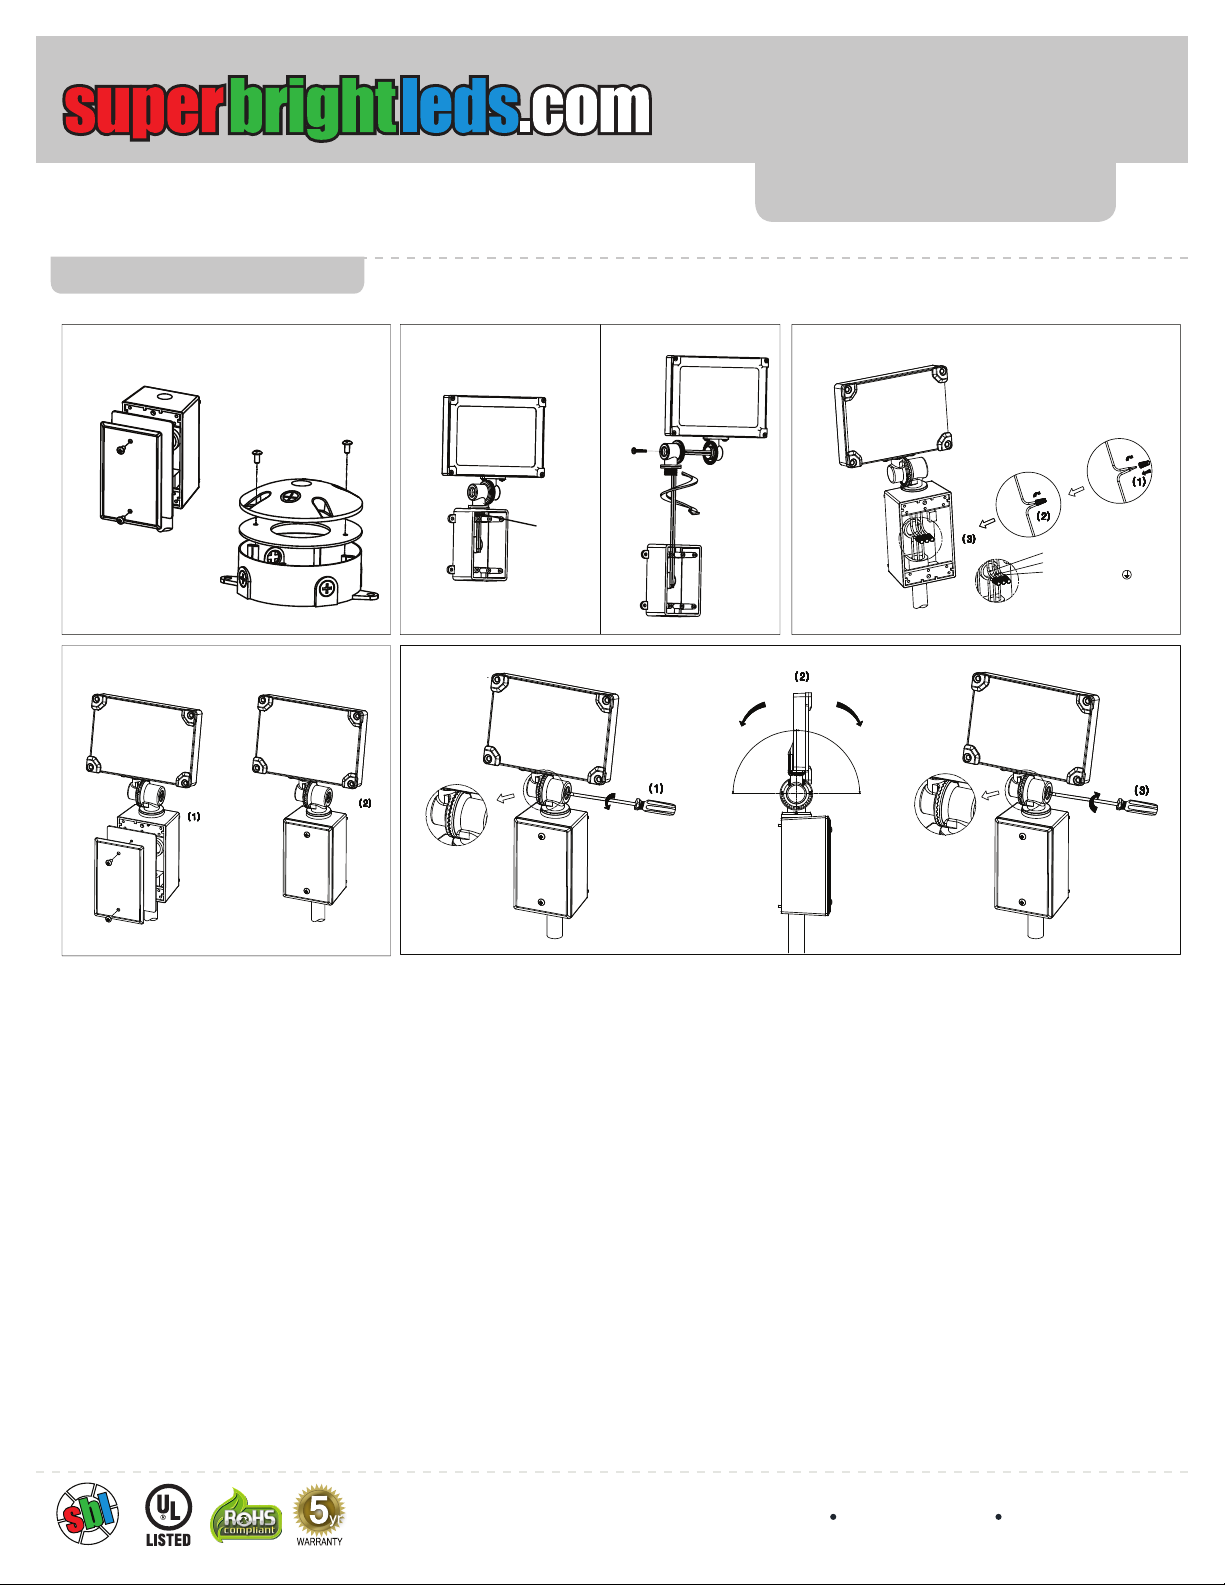
1. Use a screwdriver to remove junction box cover.
2. Secure the light by using a locknut on inside of junction box (Fig. 2a) or by
threading the knuckle mount into the junction box (Fig. 2b). If the knuckle mount
is being threaded into junction box, loosen and remove screw on knuckle mount
to separate it from light.
3. Connect wiring. (Fig. 3)
4. Reinstall junction box cover. (Fig. 4)
5. Loosen screw on knuckle mount and adjust the light to the desired angle.
Once in place, tighten screw securing light in position. (Fig. 5)
Phillips Screwdriver
Pic.B
Rev Date: V3 11/05/2018
4400 Earth City Expy, St. Louis, MO 63045 866-590-3533 superbrightleds.com
Page 3
User Manual
165.10mm
Important: Read all instructions prior to installation.
Knuckle-mount LED Flood Light Fixture
Dimensional Diagrams
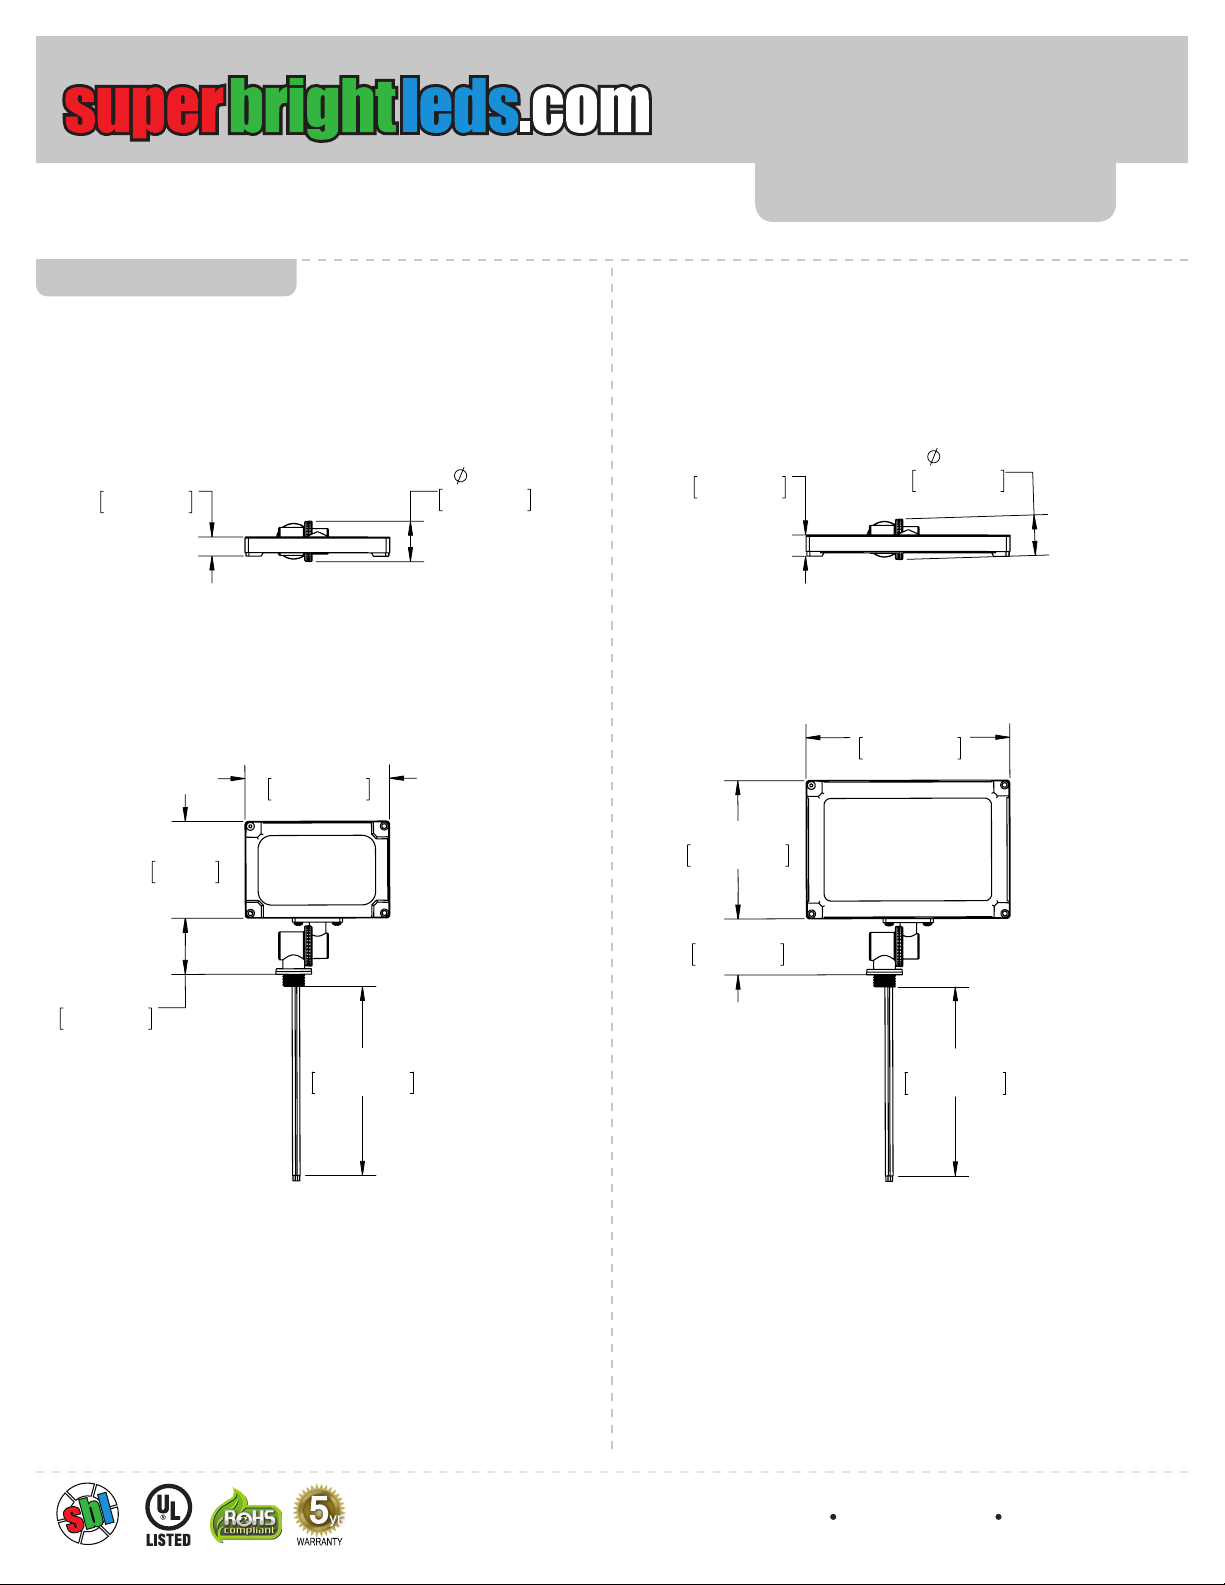
FLCKM-xK10
.71in
18.05mm
5.35in
135.99mm
1.50in
38.10mm
.79in
20.04mm
FLCKM Series
FLCKM-xK20
7.55in
191.77mm
1.50in
38.12mm
2.08in
52.78mm
3.58in
91mm
7.00in
177.80mm
5.12in
130.05mm
2.08in
52.76mm
7.00in
177.80mm
Rev Date: V3 11/05/2018
4400 Earth City Expy, St. Louis, MO 63045 866-590-3533 superbrightleds.com
Page 4
User Manual
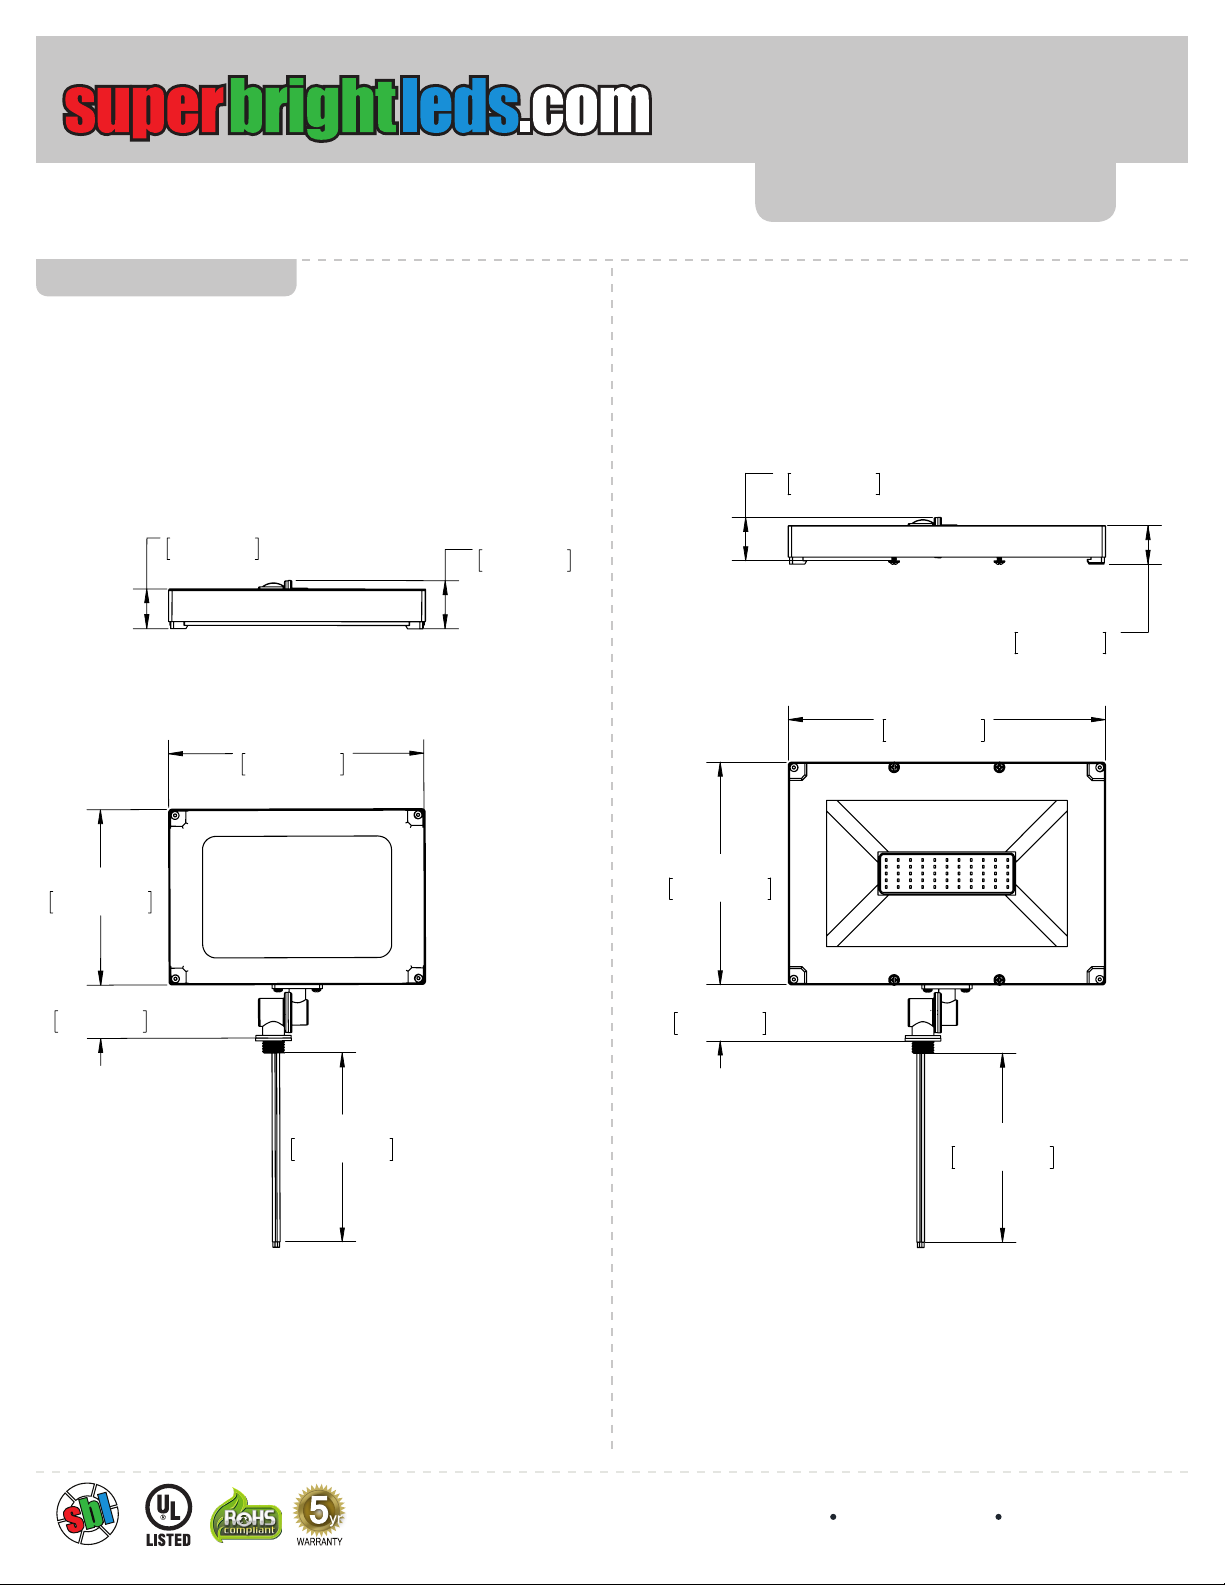
8.25in
209.55mm
11.75in
298.45mm
2.08in
52.83mm
7.00in
177.80mm
1.61in
40.88mm
1.43in
36.32mm
Important: Read all instructions prior to installation.
Knuckle-mount LED Flood Light Fixture
Dimensional Diagrams
FLCKM-xK30
1.47in
37.41mm
9.46in
240.21mm
1.78in
45.29mm
1.61in
40.88mm
FLCKM Series
FLCKM-xK50
11.75in
298.45mm
1.43in
36.32mm
6.50in
165.10mm
1.98in
50.17mm
7.00in
177.80mm
8.25in
209.55mm
2.08in
52.83mm
7.00in
177.80mm
Rev Date: V3 11/05/2018
4400 Earth City Expy, St. Louis, MO 63045 866-590-3533 superbrightleds.com
 Loading...