

Superabrasive Lavina 12, Lavina 12E User Manual
LAVINA® 12/12E
User Manual
Tech Support Line: 800-987-8403 | www.superabrasive.com | info@superabrasive.us
1

Superabrasive Owner’s Manual Original Language – Lavina® 12 4/2017
2
CONTENT
1. GENERAL INFORMATION
Manufacturer 3
General Description 3
Machine Characteristics 3
Lavina® 12 Main Design 3
Environmental Conditions 3
Electrical Connection 3
Vacuum Connection 3
Water Connection 3
Technical Data 4
Vibrations 4
Sonorous Emissions 4
Label Data 4
Customer service 4
2. SAFETY INSTRUCTIONS
Recommended Use 4
Prohibited Use 4
Preparation for Work 4
Protection Devices 4
Arrest Functions 4
Safe Use 4
Residual Risks 5
Before You Begin 5
Operating the Machine 5
After Work is completed 5
The Work Area 5
Personal Protective Equipment (PPE) 5
Operator 5
6. EXPLODED VIEW
General exploded view (Fig.6.1) 7
Exploded view of the outside housing (Fig.6.2) 7
Exploded view of the inside housing (Fig.6.3) 8
Exploded view of a pulley (Fig.6.4) 8
Exploded view of the belt driving pulley (Fig.6.5) 8
Exploded view of the belt tensioning device (Fig.6.6) 8
Exploded view of the power tool attachment (Fig.6.7) 8
7. MAINTENANCE AND INSPECTION
Cleaning 9
Check Daily 9
Check Every 200 Working Hours 9
Check Every 500 Working Hours 9
Vacuum 9
Mechanical Parts 9
Dust 9
8. TROUBLESHOOTING
Index of Problems and Solutions
Replacing Power Cord and Plugs 9
Tensioning the Belt 9
3. OPERATION
Before start operation 5
Preliminary Controls 5
Mounting Tools 5
Tool Protecting Guard 6
Setting the Speed 6
Switching On and Off 6
Operating Machine 6
Stopping Machine 6
4. ACCESSORIES
Wrenches 6
Tool holders 6
5. POPULAR TOOLS
Tools 6
9. WARRANTY AND RETURNS
Warranty Policy 10
Return Policy 10
10. DISPOSAL 10
11. MANUFACTURER’S CONTACTS
10
12. SPARE PARTS
Lavina® 12 Assembly and Parts Specification General
(Fig. 12.1) 11
Lavina® 12 Assembly and Parts Specification Housing
(Fig. 12.2) 12
Lavina® 12 Assembly and Parts Specification
Planetary Head (Fig. 12.3) 13
Lavina® 12 Assembly and Parts Specification Pulley
(Fig. 12.4) 13
Lavina® 12 Assembly And Parts Specification Motor
Connection (Fig. 12.5) 14

Superabrasive Owner’s Manual Original Language – Lavina® 12 4/2017
Fig.1.1
1. GENERAL INFORMATION
This owner’s manual is intended for the operator of the Lavina® 12 machine, the servicing technician as well as for
anyone involved with operating or servicing the machine. We recommend that you read the instructions very carefully
and follow them strictly. The manual includes information about assembling, using, handling, adjusting and maintaining
your Lavina® 12 floor grinding and polishing machine.
MANUFACTURER
Superabrasive was founded in 1987, as a manufacturer of high quality diamond tools for the stone and concrete
industry. Today, Superabrasive is one of the world’s leading companies in the production of diamond tools and floor
grinding machinery. At Superabrasive, we strive to deliver the very best solutions to our customers, and enable them to
work more efficiently.
GENERAL DESCRIPTION
The Lavina® 12 machine is a 3-disc machine intended for polishing and buffing concrete, marble, granite, limestone and
terrazzo surfaces with diamond tools. The Lavina® 12 is intended to work on countertops, steps of stairs treads,
bathroom floors, and walls or difficult to reach surfaces. Additionally, the machine could be used for grinding wood floor
surfaces.
For best results, use only tools manufactured or recommended by Superabrasive and its distributors.
WARNING!
The Lavina® 12 machine is manufactured and fitted for the above-mentioned applications only! Every other use may
possess risks to the persons involved. Each hour of operation, stop the machine for 15 minutes to allow the drive
system to cool.
MACHINE CHARACTERISTICS
The Lavina® 12 is made to easily grind/polish working surfaces. It runs 3 heads to increase grinding capacity.
LAVINA® 12 MAIN DESIGN
The handles provide the operator maximum of comfort and control. They
allow the operator to work safely. (Fig.1.1-1)
The controls are positioned on top of the power tool. (Fig.1.1.2-3)
The power tool is mounted on top of the planetary head and the gears are
driving a clutch. The clutch is driving the belt of the planetary movement and
the movement the toothed gear which is driving over pignons the three
grinding heads. (Fig.1.1-4)
The planetary head with a lightweight aluminum top plate covers the
working tools. (Fig.1.1-5)
The protective skirt mounted with Velcro® protects the operator from dust
and debris. (Fig.1.1-6)
The hour meter shows total hours of operation. (Fig.1.1-7)
ENVIRONMENTAL CONDITIONS
The temperature range for operating the Lavina® 12 outdoors is between 41°F and 86°F or 5°C and 30°C. Never use
the Lavina® 12 during rain or snow when working outdoors. When working indoors, always operate the machine in wellventilated areas.
ELECTRICAL CONNECTION
The voltage (Volt) and power (Ampere) are displayed on a label on the of the power tools to avoid any incorrect
connection. Refer to these before connecting the power. To avoid electrical shocks, make sure the ground power
supply is functioning properly.
VACUUM CONNECTION
A connection for a vacuum dust extractor is located on the power tool. The Lavina® 12 does not include a vacuum dust
extractor. The customer must purchase the vacuum dust extractor separately. The hose of the vacuum extractor must
be Ø 1”1/2 or 38 mm and can be fitted over the pipe. The vacuum dust extractor must be adapted for grinders and have
a minimum air displacement of 220m3/h or 130 CFM with a negative vacuum of 21 kPa.
WATER CONNECTION
A quick connection for a water tube of diameter ¼” with ball valve is placed under the power tool.
3
Superabrasive Owner’s Manual Original Language – Lavina® 12 4/2017
4
Lavina® 12 110 Volt
Lavina® 12E 220 Volt
Angle grinder
FEIN WPO 14-25E
FEIN WPO 14-25E
Voltage/Hz
1 ph x 110 V 50/60Hz
1 ph x 220 V 50/60Hz
Amperage
Max 10.9 Amps
Max 6 Amps
Breaker requirement
15 Amps
15 Amps
Power
1.2 kW
1.2 kW
Driver Speed
900-2500 rpm
900-2500 rpm
Platen Speed
820-2240
820-2240
Platform Speed
160-440
160-440
Platen Driving Direction
counterclockwise
counterclockwise
Platform Driving Direction
clockwise
clockwise
Working width
307 mm
12”
307 mm
12”
Tool holder diameter
3x 127 mm
3x 5”
3x 127 mm
3x 5”
Tool diameter
3x 127 mm
3x 5”
3x 127 mm
3x 5”
Weight
15 kg
33 lbs
15 kg
33 lbs
Application
Dry/wet
Dry/wet
Vacuum connection
38 mm
1”1/2
38 mm
1”1/2
Water Feeding
Central
Central
Water connection
Hose ¼”
Hose ¼”
Cable length
4 m
12.8 ft
4 m
12.8 ft
Machine LxWxH
430x315x216 mm
16.9”x12.4”x8.5”
430x315x216 mm
16.9”x12.4”x8.5”
Packing LxWxH
450x351x249 mm
17.7”x13.8”x9.8”
450x351x249 mm
17.7”x13.8”x9.8”
TECHNICAL DATA
LABEL DATA
The data on the label provides the correct voltage and kW (needed for operational purposes);
Weight (needed for transportation purposes); production year and serial number (needed for maintenance purposes).
CUSTOMER SERVICE
For customer assistance and technical support call your local distributor or call Superabrasive Inc. at
1-800-987-8403 or visit us at: www.superabrasive.com , where you can download a copy of this manual.
The protection devices are working properly.
2. SAFETY INSTRUCTIONS
RECOMMENDED USE
The Lavina
grind and polish concrete, terrazzo, natural stone and
hardwoods. It can be used for renovations as well as for
polishing. The machine is also designed for dry use. Use a
vacuum of appropriate size. For more information, please
refer to the chapter on handling the vacuum connection.
PROHIBITED USE
The machine MUST NOT be used:
For applications different from the ones stated in the
General Description chapter.
For not-suitable materials.
In environments which: Possess risks of explosion
Possess high concentration of powders or oil substances
in the air
Possess risks of fire
Feature inclement conditions.
PREPARATION FOR
WORK
Make sure that:
You have closed the work area, so that no person
unfamiliar with operating the machine can enter the area.
The tool plate and tools are adjusted to the machine
properly
There are no missing parts of the machine
®
12 machine is designed and manufactured to
The electrical cable is free to move and follow the
machine easily.
PROTECTION DEVICES
The machine is equipped with several protection devices
including the following:
A protection skirt and a hood for protecting the tool
plates.
These devices protect the operator and/or others
persons from potential injuries. Do not remove them. On
contrary, before using the machine, please ensure that
all protection devices are mounted and function properly.
ARREST FUNCTIONS
Functions of arresting of the machine are following:
Button to stop the motor (category 1)
SAFE USE
The Lavina
correlated with its use. However, it is not possible to
eliminate the risks of an eventual accident with the
machine. Unskilled or uninstructed operator may cause
correlated residual risks. Such risks are:
Position Risks due to operator’s incorrect working
Entanglement Risks due to wearing
Training Risks due to lack of operational training
®
12 is designed to eliminate all risks
position
inappropriate working clothes
Superabrasive Owner’s Manual Original Language – Lavina® 12 4/2017
5
NOTE: In order to reduce all consequences of the above-
mentioned risks, we advise that machine operators will follow
the instructions in the manual at all time.
RESIDUAL RISKS
During the normal operating and maintenance cycles, the
operator is exposed to few residual risks, which cannot
be eliminated due to the nature of the operations.
BEFORE YOU BEGIN
Working area must be clear from any debris or objects.
A first-time operator must always read the manual and
pay attention to all safety instructions.
All electric connections and cables must be inspected for
potential damages.
Ground wire system of the power supply must be also
inspected.
Perform general daily inspections of the machine and
inspect the machine before each use.
Always inspect the safety devices:
The tool protector must be working
The machine must be clean
Confirm that there are no missing parts especially after
transportation, repair or maintenance.
OPERATING MACHINE
When operating the Lavina
is no one, but you around the machine.
Never leave the machine unattended while working.
The electrical cable must move freely and must be
damage-free.
Check if the surface, you work on, is not too uneven. If
this is the case, it may damage the machine.
AFTER WORK IS COMPLETED
®
12, make certain that there
THE WORK AREA
Make certain that people do not enter the work area.
Avoid cables and hoses being in the way.
Always check the surface for debris
PERSONAL PROTECTIVE EQUIPMENT (PPE)
Always wear safety shoes when working with the
machine.
Always wear ear protectors when working with the
machine.
All personnel in the immediate work area must wear
goggles eye protectors with side shields.
Always wear safety gloves when changing the tools.
Always wear clothes suitable for the work environment.
OPERATOR
The operator must know the machine’s work
environment.
Only one operator at a time can work with the machine.
The operator must be properly trained and well instructed
prior operating the machine.
The operator must understand all the instructions in this
manual.
The operator must understand and interpret all the
drawings and designs in manual.
The operator must know all sanitation and safety
regulations pertaining to the operation of the machine.
The operator must have grinding experience.
The operator must know what to do in case of
emergency.
The operator must have an adequate technical
knowledge and preparation.
Clean the machine and its surroundings properly
Unplug the machine and wind up the electrical cable
Store the machine in a safe place
3. OPERATION
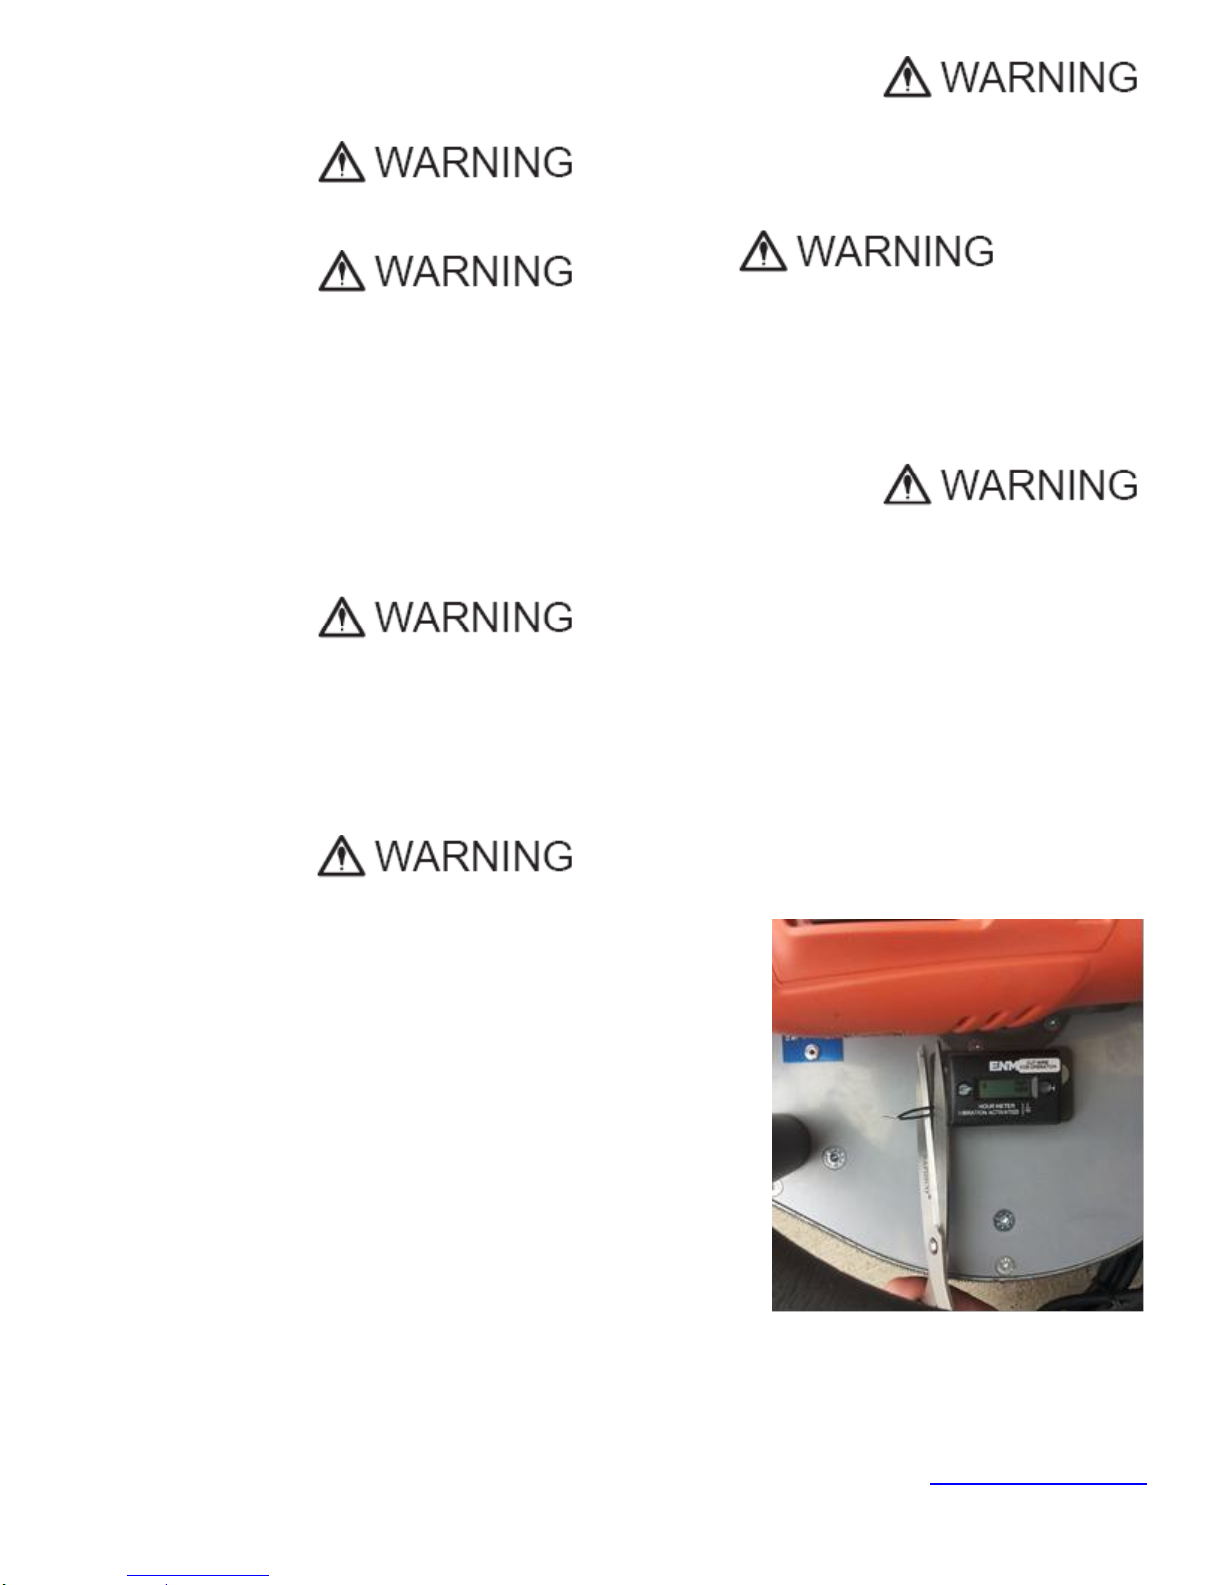
BEFORE START OPERATION CUT THE WIRE OF THE HOUR METER
IF the wire is not cut the hour meter will not start to work. The wires are
not connected to the power supply, they are connected only to the
battery of the hour meter.
PRELIMINARY CONTROLS
Inspect the working area as explained in the safety instructions. For dry
use connect the vacuum extractor and ensure that the vacuum hose is
clear and it will follow the machine easily. Plug in the machine and make
sure that the power cord is free to follow the working direction of the
Lavina® 12. Each hour of operation, stop the machine to make a break of
15 minutes for cooling the drive.
MOUNTING TOOLS
Mount the tools only after ensuring that there is enough diamond bond material left. Be sure that the tool holders are
always clean before mounting. Unplug the machine before dismounting or mounting the tools. The maximum diameter
of the tools is 5” or 127 mm, with thread 5/8”-11-LH UNC. Pay attention the thread is left hand turning or counterclockwise turning also turn opposite as normal. Always use the right wrench to tye the tools. Diamond tools with Velcro
are attached on the tool holders with Velcro. Use only Superabrasive recommended tools see www.superabrasive.com
 Loading...