

Quick Start Manual
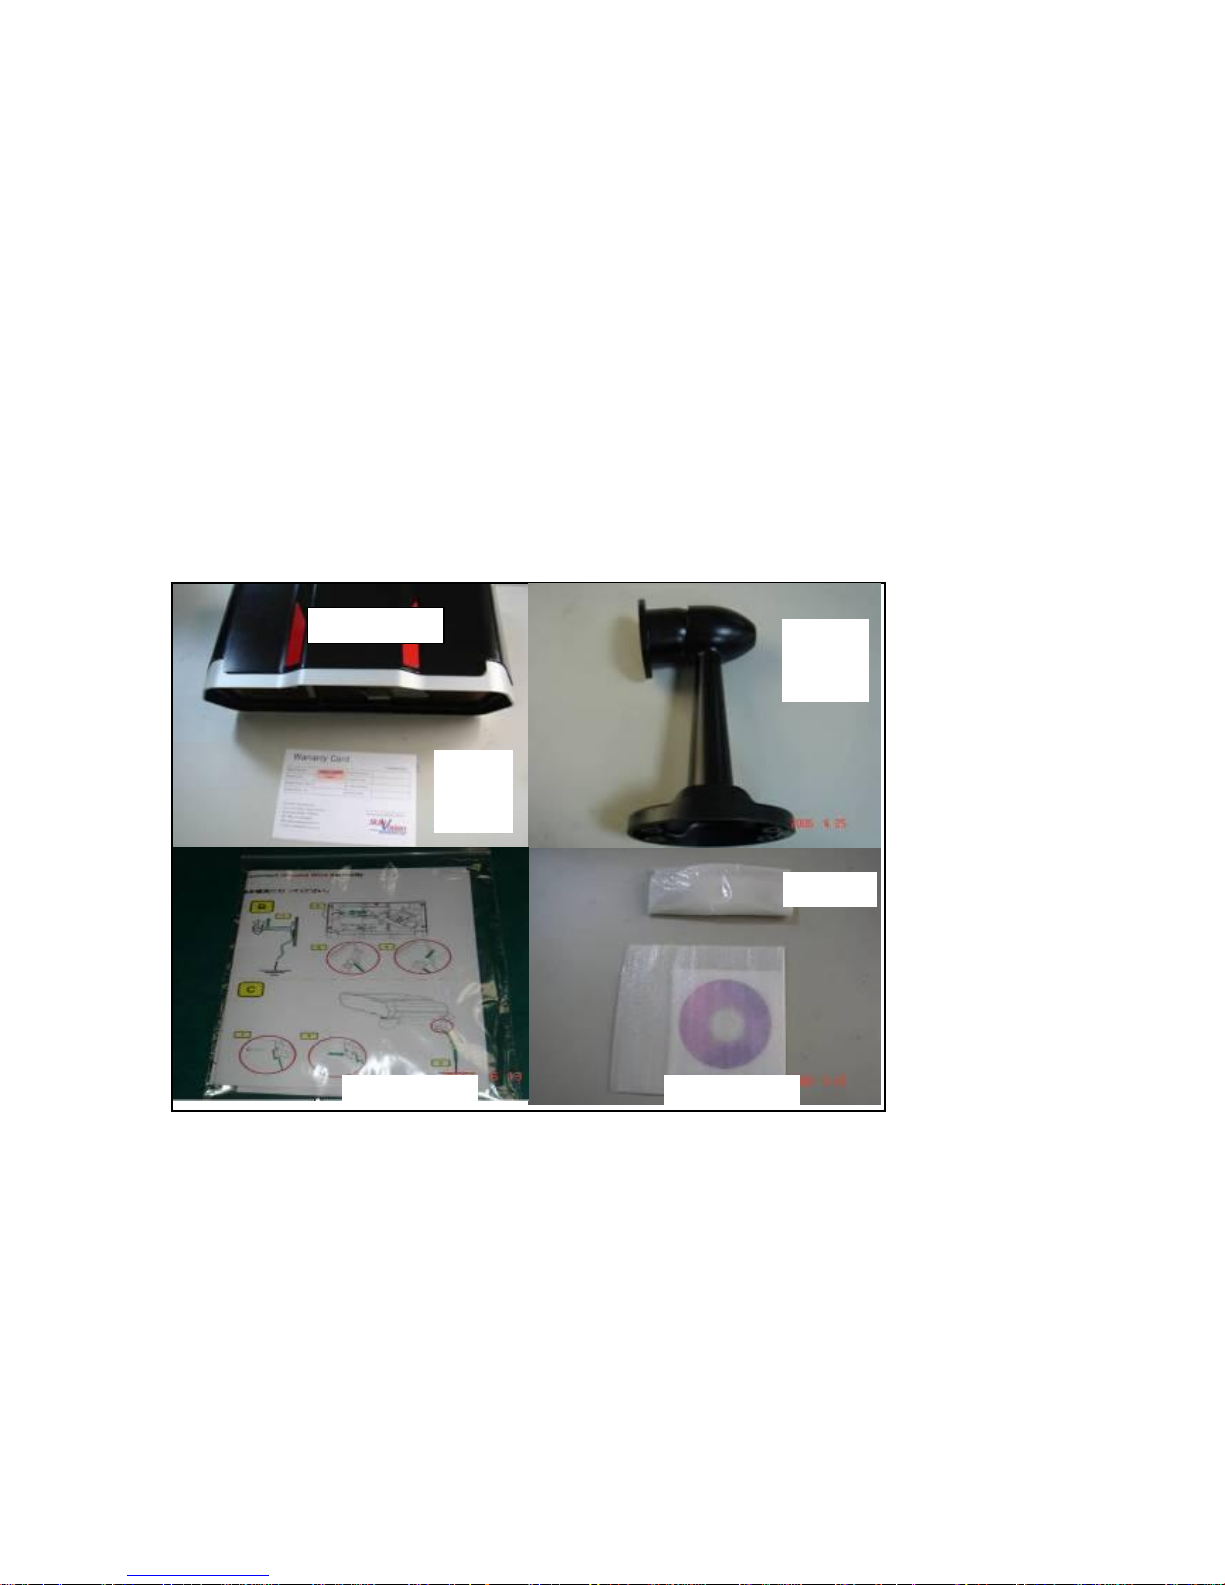
SV3018 Package Contents
1. SV3018 IP Camera
2. Mounting Kit
3. Screw Sets
4. SV3018 Warranty Card
5. SV5100 Installation software tools
6. Switch setting & grounding sheet
Other Items Required for Installation
1. Small TV
2. Notebook or tabletop PC
3. CATE 5E Cable
4. Power Line Cable
SV3018 Monitor
SV5100 software
Mounting
Kit
SV3018
Warranty
Screw Sets
Grounding sheet
Installation Step
Step1. Mounting and wiring
Thread the cat5E and AC power supply cables through the head of mounting kit to the bottom, and install the
mounting kit at desired location. And, fasten the screw at the bottom of the mounting kit to fix the horizontal
and vertical angles of the camera.
Step2. Fixing the cable
Take off the lens of telescopic camera, and fasten the cable glands. Fix the cable on lower housing with ring
buckles. Reinstall the lens.
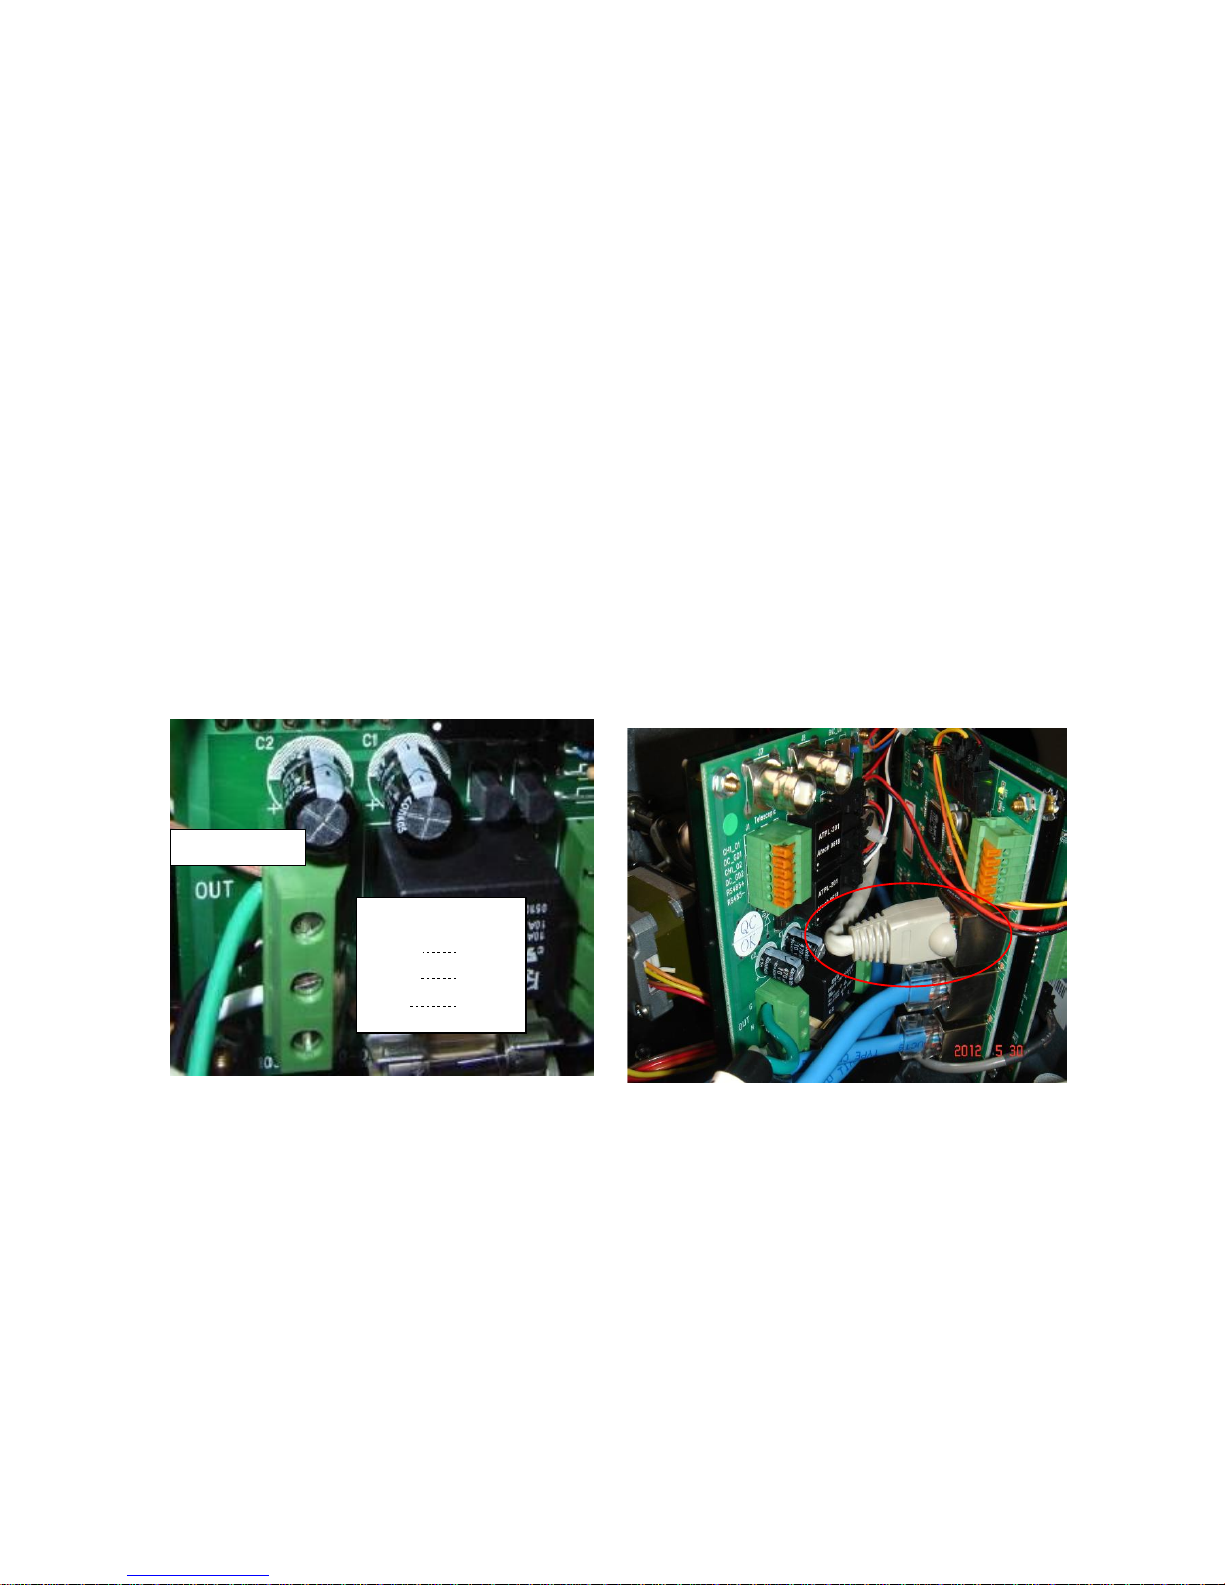
Step3. Connect Power wires on the terminal block & plug Cat5E cable in HUB
Power supply cable
Green Ground
Black Neutral
Red Hot Line
Outside AC input

Step4. Grounding
Step5. Power on & stop tracking
After power on the SV3018, switch down the SW3 & SW39 then push the reset button.
**Please waitting one minute for cameras booting.
SW39
SW3
Reset button

Step6. Fine tune lens focus & room ratio
Before adjusting the video, please prepare one small LCD monitor (TV) with AV input. Connect AV terminal
to BNC terminal,switch SW3 and the telescopic video appear in the TV screen . The aperture, zoom ratio,
and focus are adjustable.
Step7. Switch to auto tracking
Switch up the SW3 & SW39 then push the reset button. Please wait for over one minute booting.
Step8. Run SV5100 installation software tool
After finish the connection between SV3018 and notebook, run SV5100 tool.
Select camera you want to set, and then connect it.If connecting fail, please check netware connecting.

Step9. Calibration Camera & test
A. Choose the Calibration Point On Wide angle camera
B. Aims at the Calibration Point appear in Telescopic Camera, and set the point.
C. Complete all 9 Calibration Points
D. For testing, click on the Wide Angle Camera View randomly to see if targets are in sight.
E. Save Settings
Step10. Set up mask & advance parameters
A. Mask out un-wanted and/or noisy areas
B. Setting important areas, it could be a counter area, or an entrance area.
C. Setting the priority of an area
D. Setting default telescopic camera position
E. Fine tune horizontal, vertical offset, and motion prediction setting.
Step11. Check SV3018 performance
Switch to LIVE page and check the SV3018 tracking performance.
Step12. Connect to NVR or network-recording system, the SV3018 setting is complete.
SV3018 is VIVOTEK-compatible, the cameras are IP8162 inside. About IP video management system,
please contact with VIVOTEK dealer.
 Loading...