

Page 1
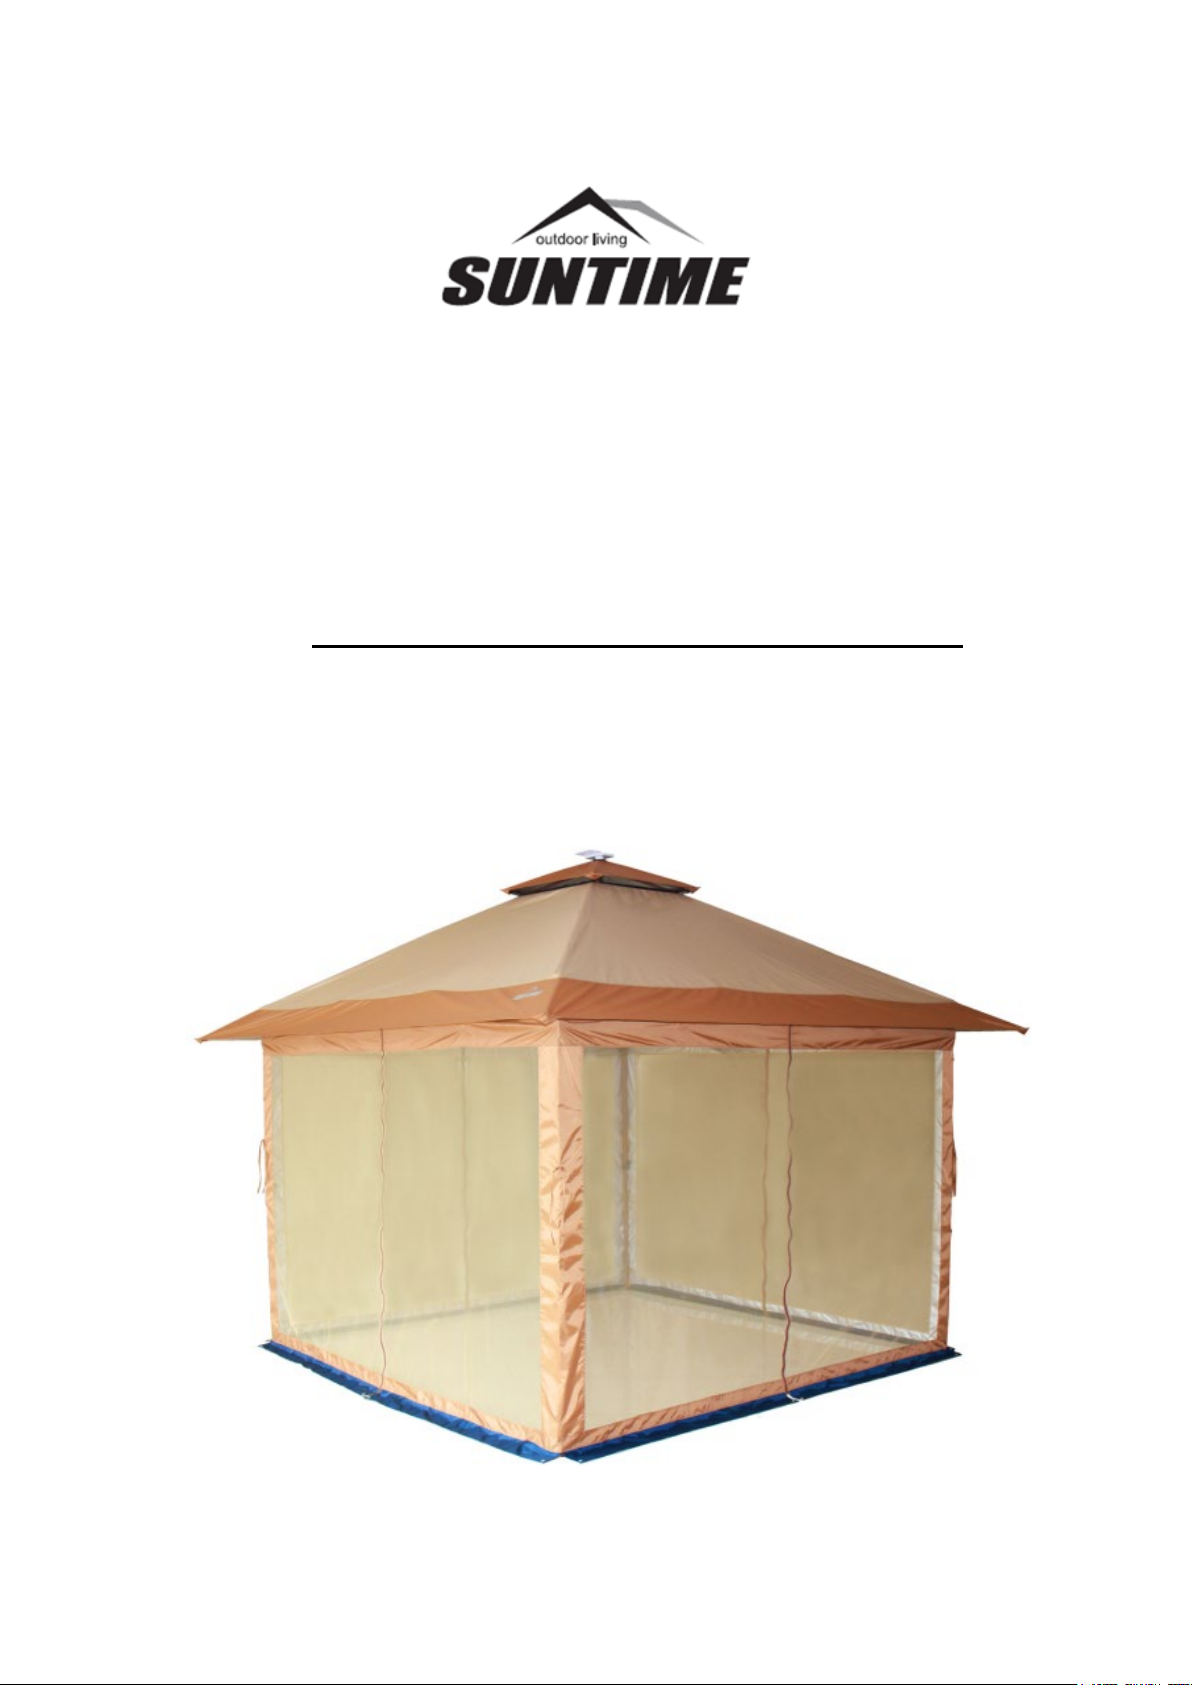
Solo Up Canopy with
Solar Powered LED Lights
Assembly and Safety Instructions
Page 2
READ ALL INSTRUCTIONS
BEFORE USE.
WARNING-- To reduce the risk of fire, electrocution, or serious
personal injury:
• This product is not a toy. Children are not allowed to
assemble/disassemble this item. Extra caution and close supervision are
necessary when assembling/disassembling or using this product near
children.
• To avoid a pinch hazard, DO NOT insert fingers, hands, or other body
parts between the folding parts of the product, especially when
assembling or disassembling the product.
• Do not stand under this product during a lightning storm.
• DO NOT use the product during inclement weather.
• DO NOT barbecue or use open flames (e.g. candles, lanterns, fireworks)
under or near this product.
• Only adults should assemble or disassemble this product for use and/or
storage.
CAUTION-- To reduce the risk of personal injury:
• This product is intended for use as a decorative sunshade and is not
designed to withstand severe weather conditions (e.g. high wind, heavy
rain). Do not use the product for any other purpose.
• DO NOT leave the product permanently assembled, as it is a temporary
structure.
• DO NOT lean on or attempt to climb on this product.
• Always position this product on a firm, level ground surface that allows
insertion of the Ground Stakes to secure product placement.
• DO NOT use this item if any parts show signs of instability or Damage.
Page 3
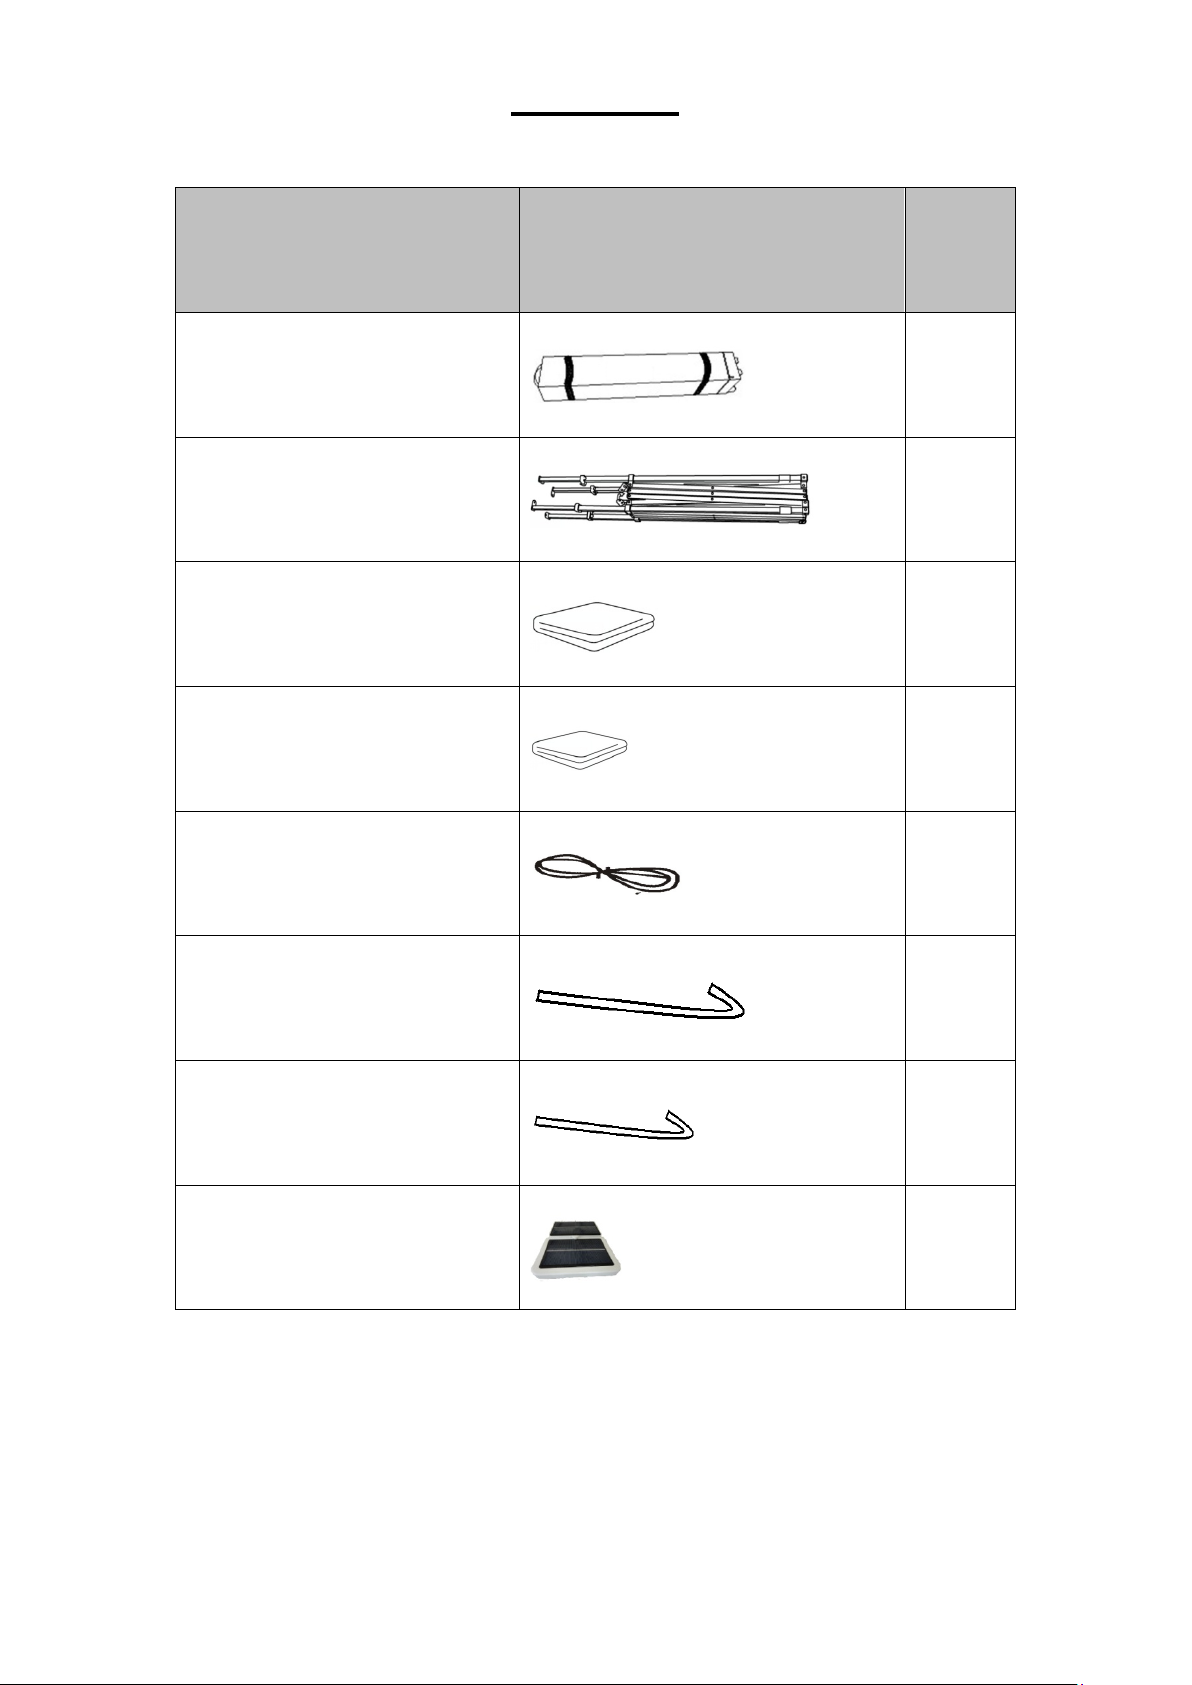
Parts List
Description Illustration Qty
Wheeled Carry Bag
Gazebo Frame
Gazebo Cover
Mesh Screen
Guy Cord
1
1
1
4
4
Ground Stake Large
Ground Stake Small
Solar Panel
NOTICE: Before beginning assembly, ensure all listed parts are included.
8
16
1
Page 4
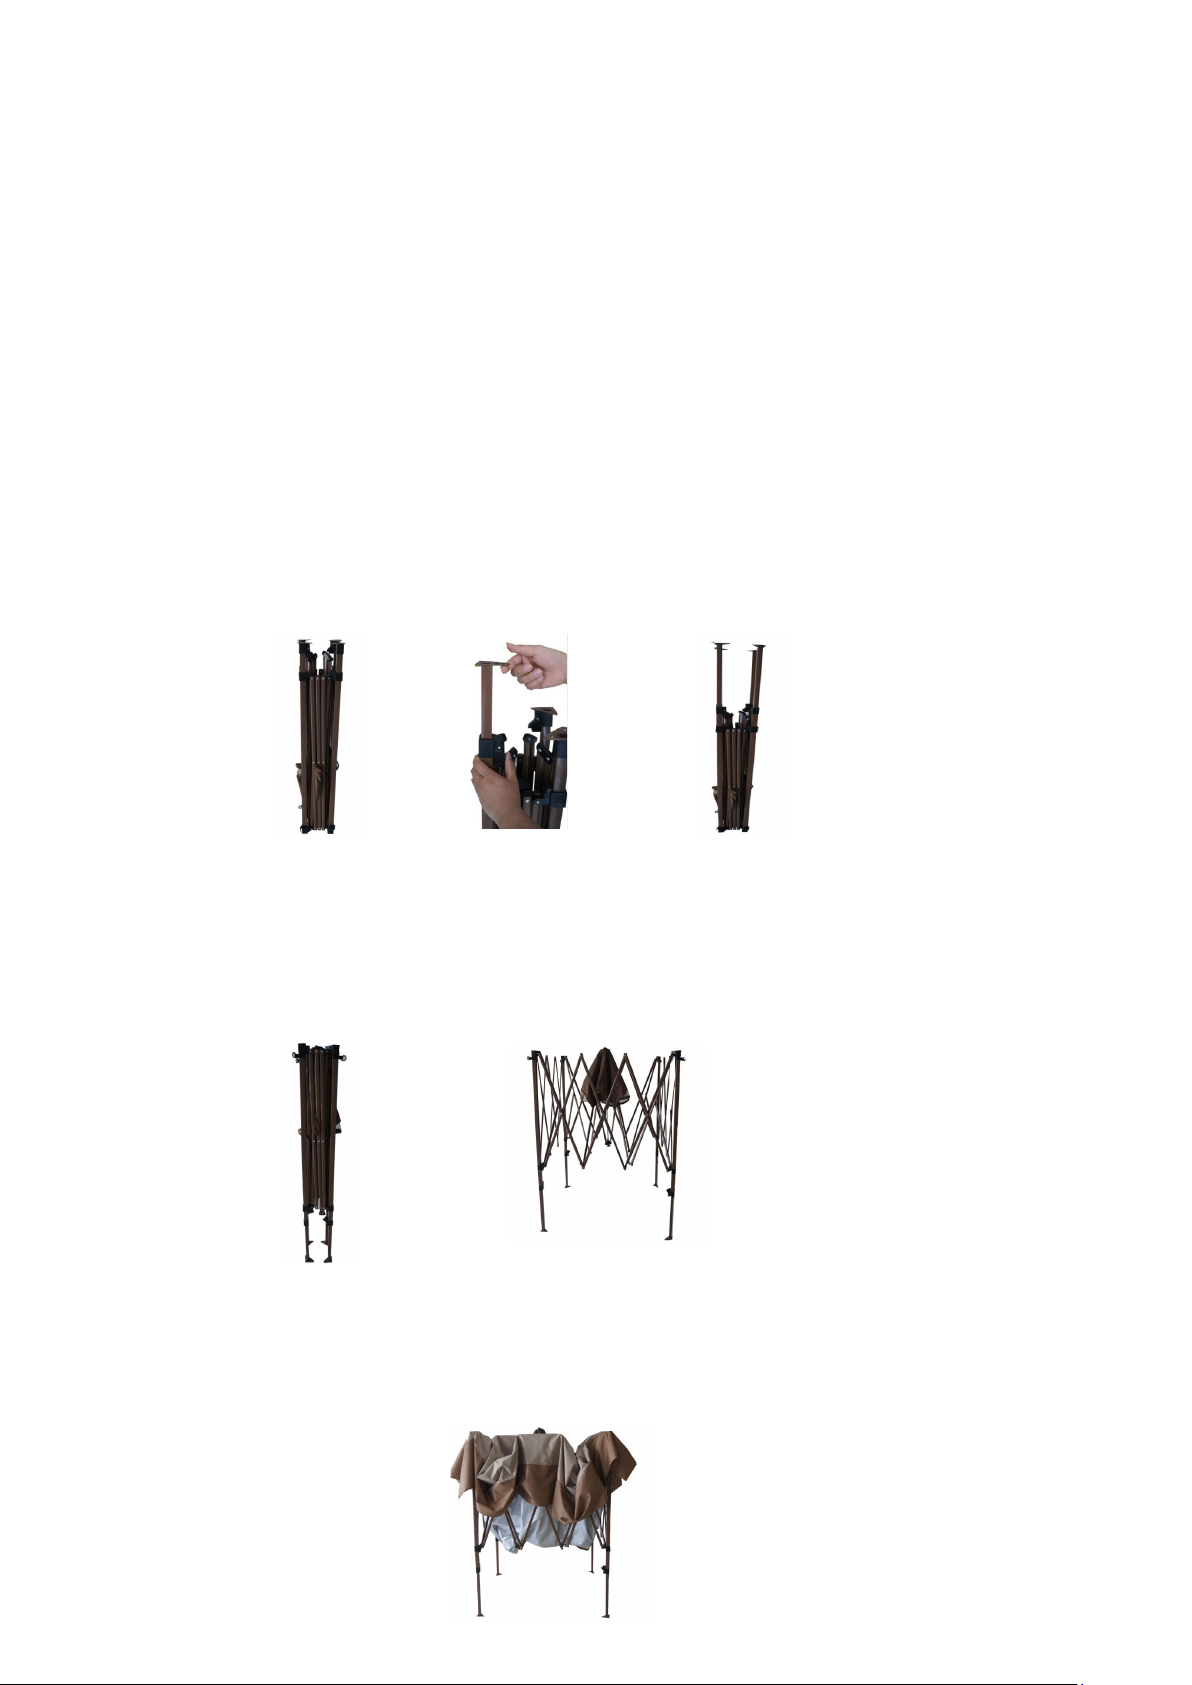
Gazebo Assembly
1. Select a desired location for positioning the gazebo.
2. Remove the gazebo fabric, solar panel, guy cords and ground
stakes from the carrying case for later use.
3. Place the gazebo frame on the desired location and remove the
carrying case.
4. Upend the gazebo and pull out the extendable feet to the first
level.
.
5. Stand the Gazebo back upright. Gently lift one outer frame leg
and pull to open the frame partially until you extend the frame to
a full arm’s length (approx. 5 to 6 feet).
6. Place the gazebo fabric over the partially opened frame.
Check that the fabric corners are correctly positioned over the
frame.
Page 5
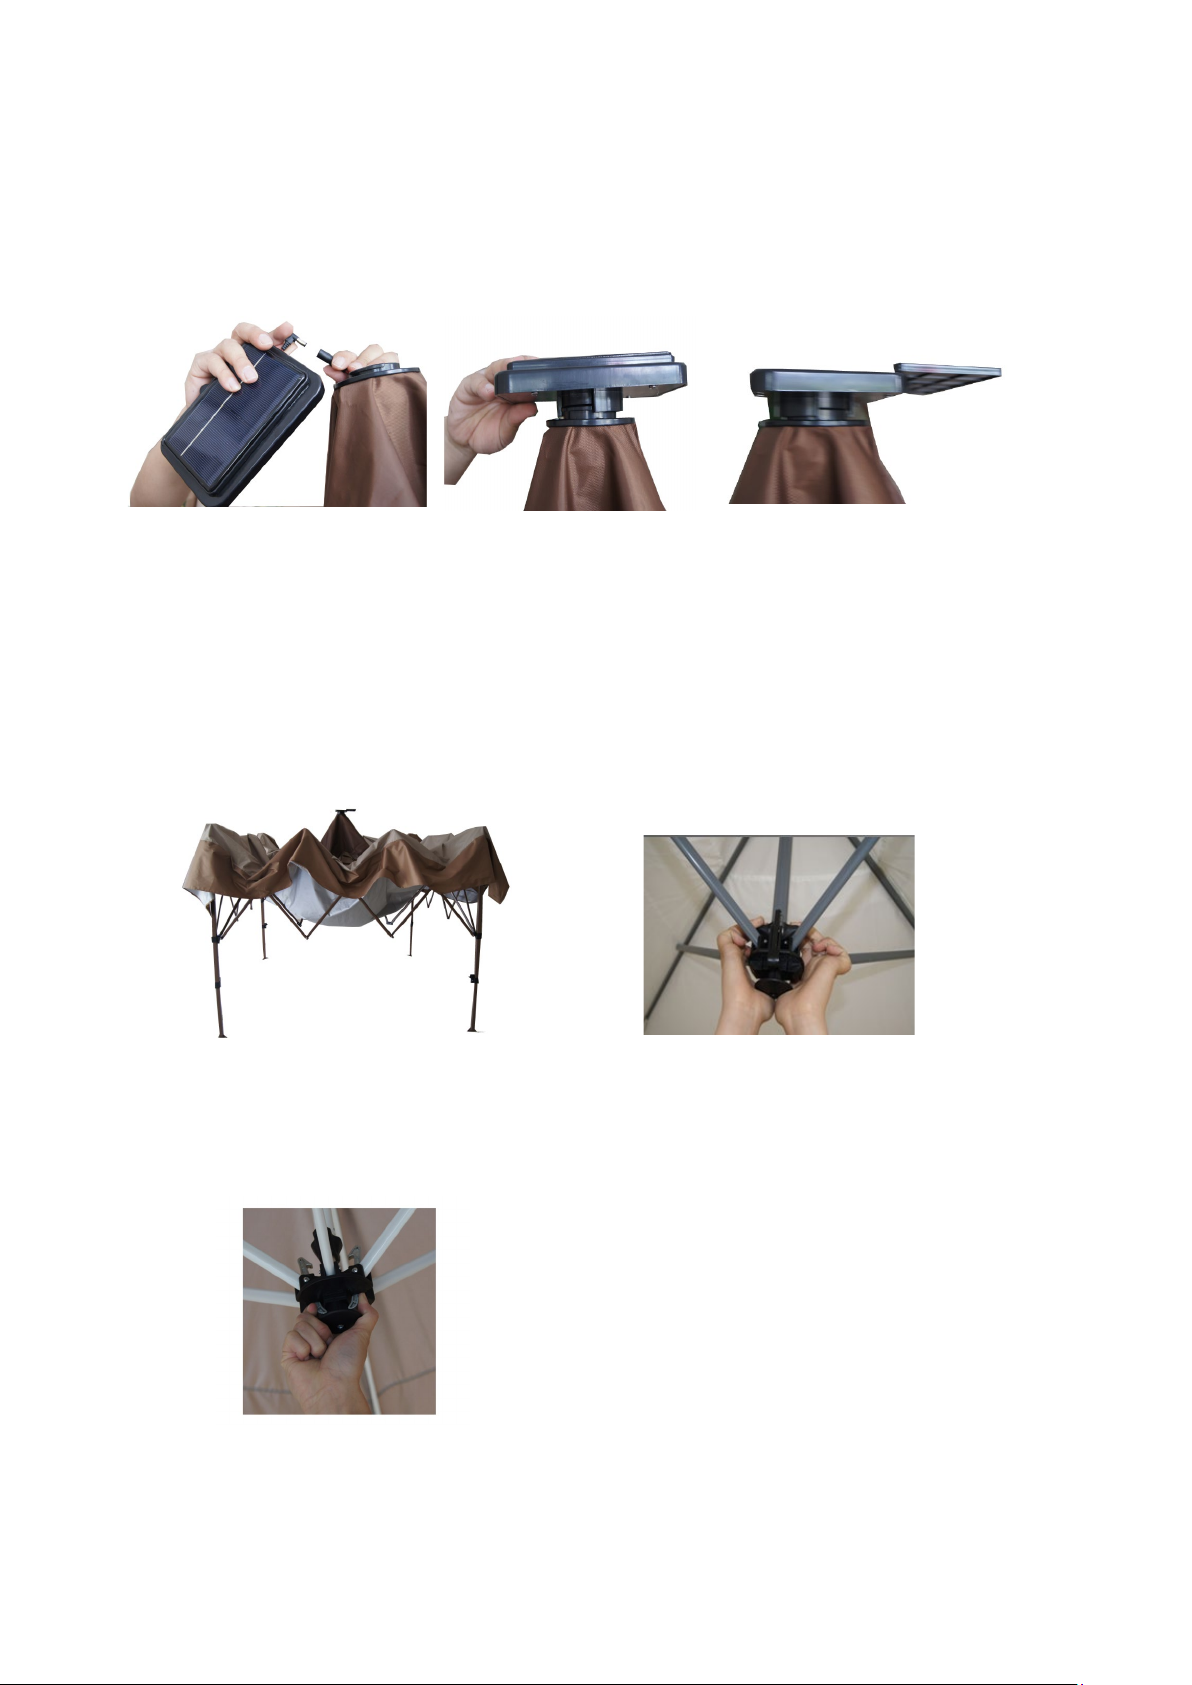
7. Connect plugs in between solar panel and socket on the top of
gazebo. Push down and tighten by twisting clockwise until solar
panel is securely fastened.
8.Pull open the Gazebo as much as you can. Step underneath it
and firmly push the centered frame handle upward until the clamps
snap into place and rest securely over the frame brace.
(To disassemble the gazebo, simply press the clips and unlock
the handle.)
9.To extend the legs to the desired height, push inward on the lever
located inside of each leg, slide the leg up or down, then release the
lever to lock the safety pin into the selected hole.
Repeat to adjust
Page 6
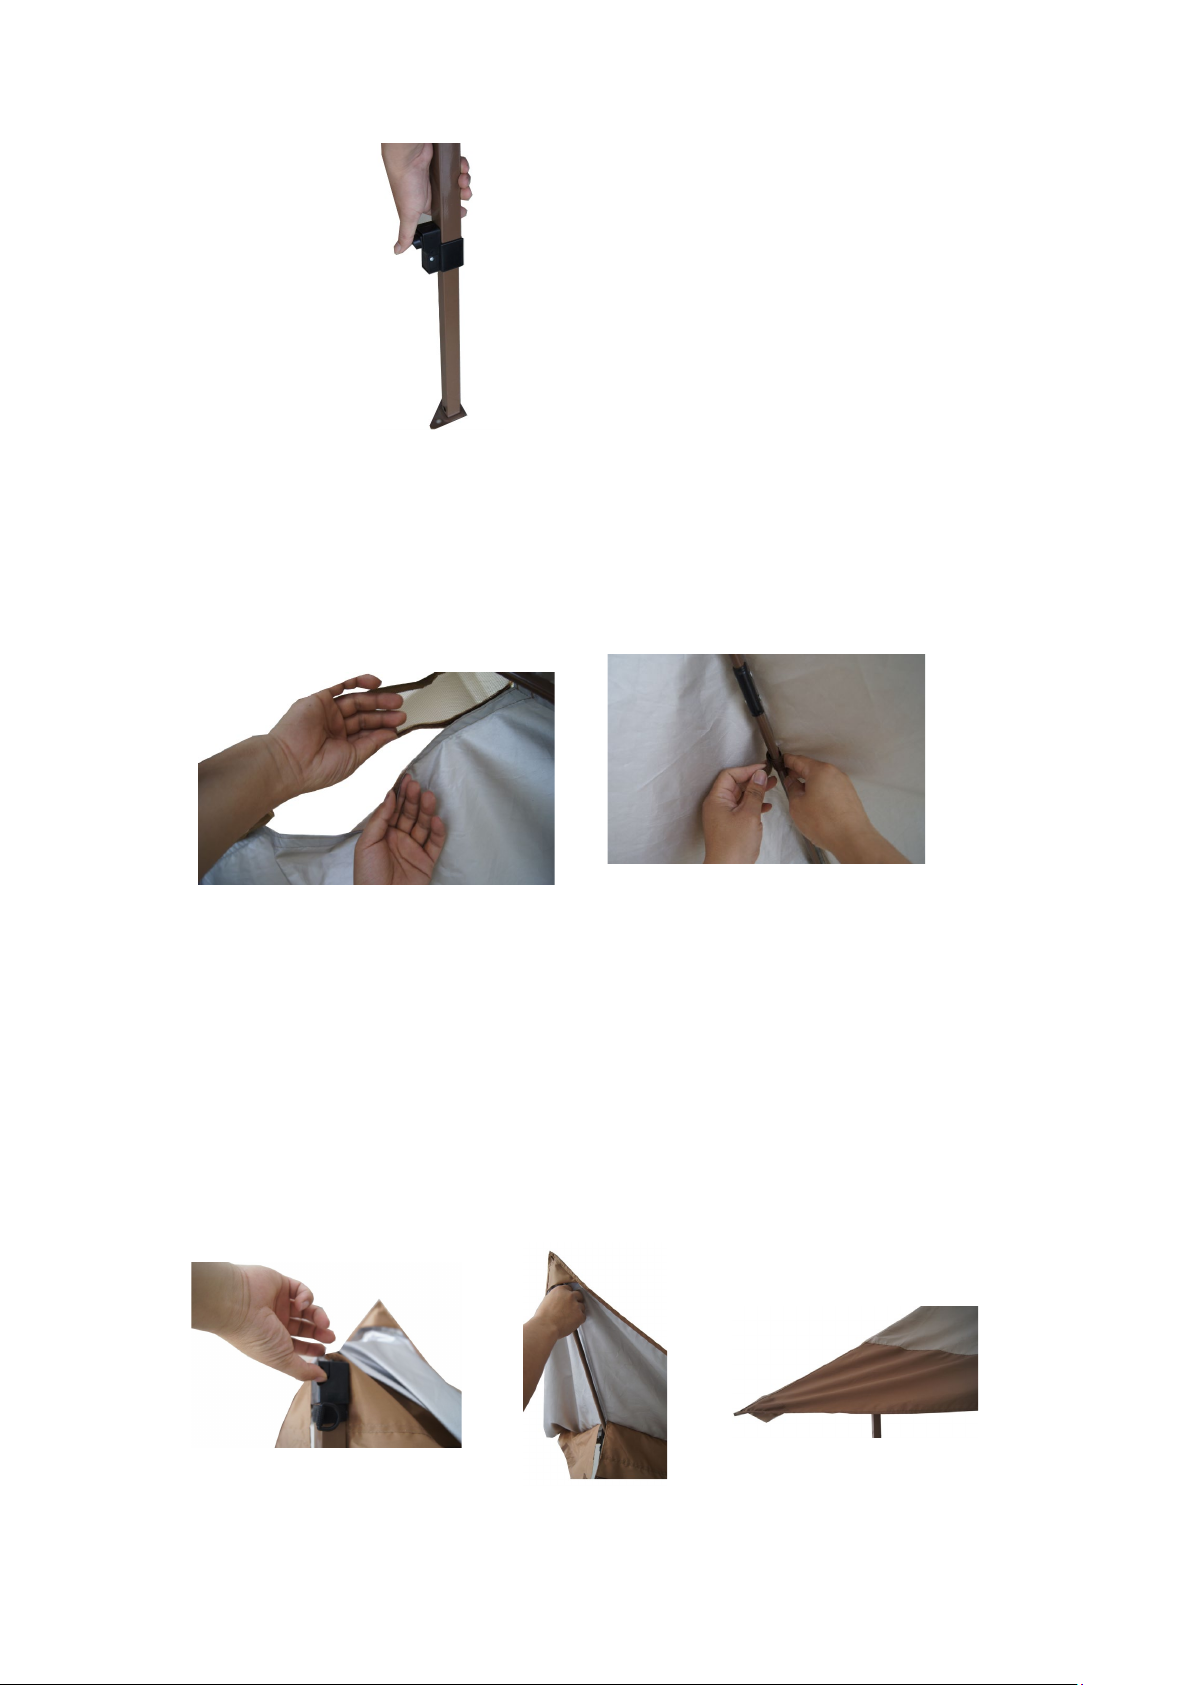
each remaining leg.
10.Assemble the vent cover to the Gazebo fabric by using the
velcro.
9.Pull out the extendable awning bar from the top of the gazebo
pole. Make sure to extend the bar fully and gently push it
downwards to lock it into position. Repeat for the remaining
extendable awning bars.
10.Push up the four wind-brace poles until you hear a loud click.
Page 7
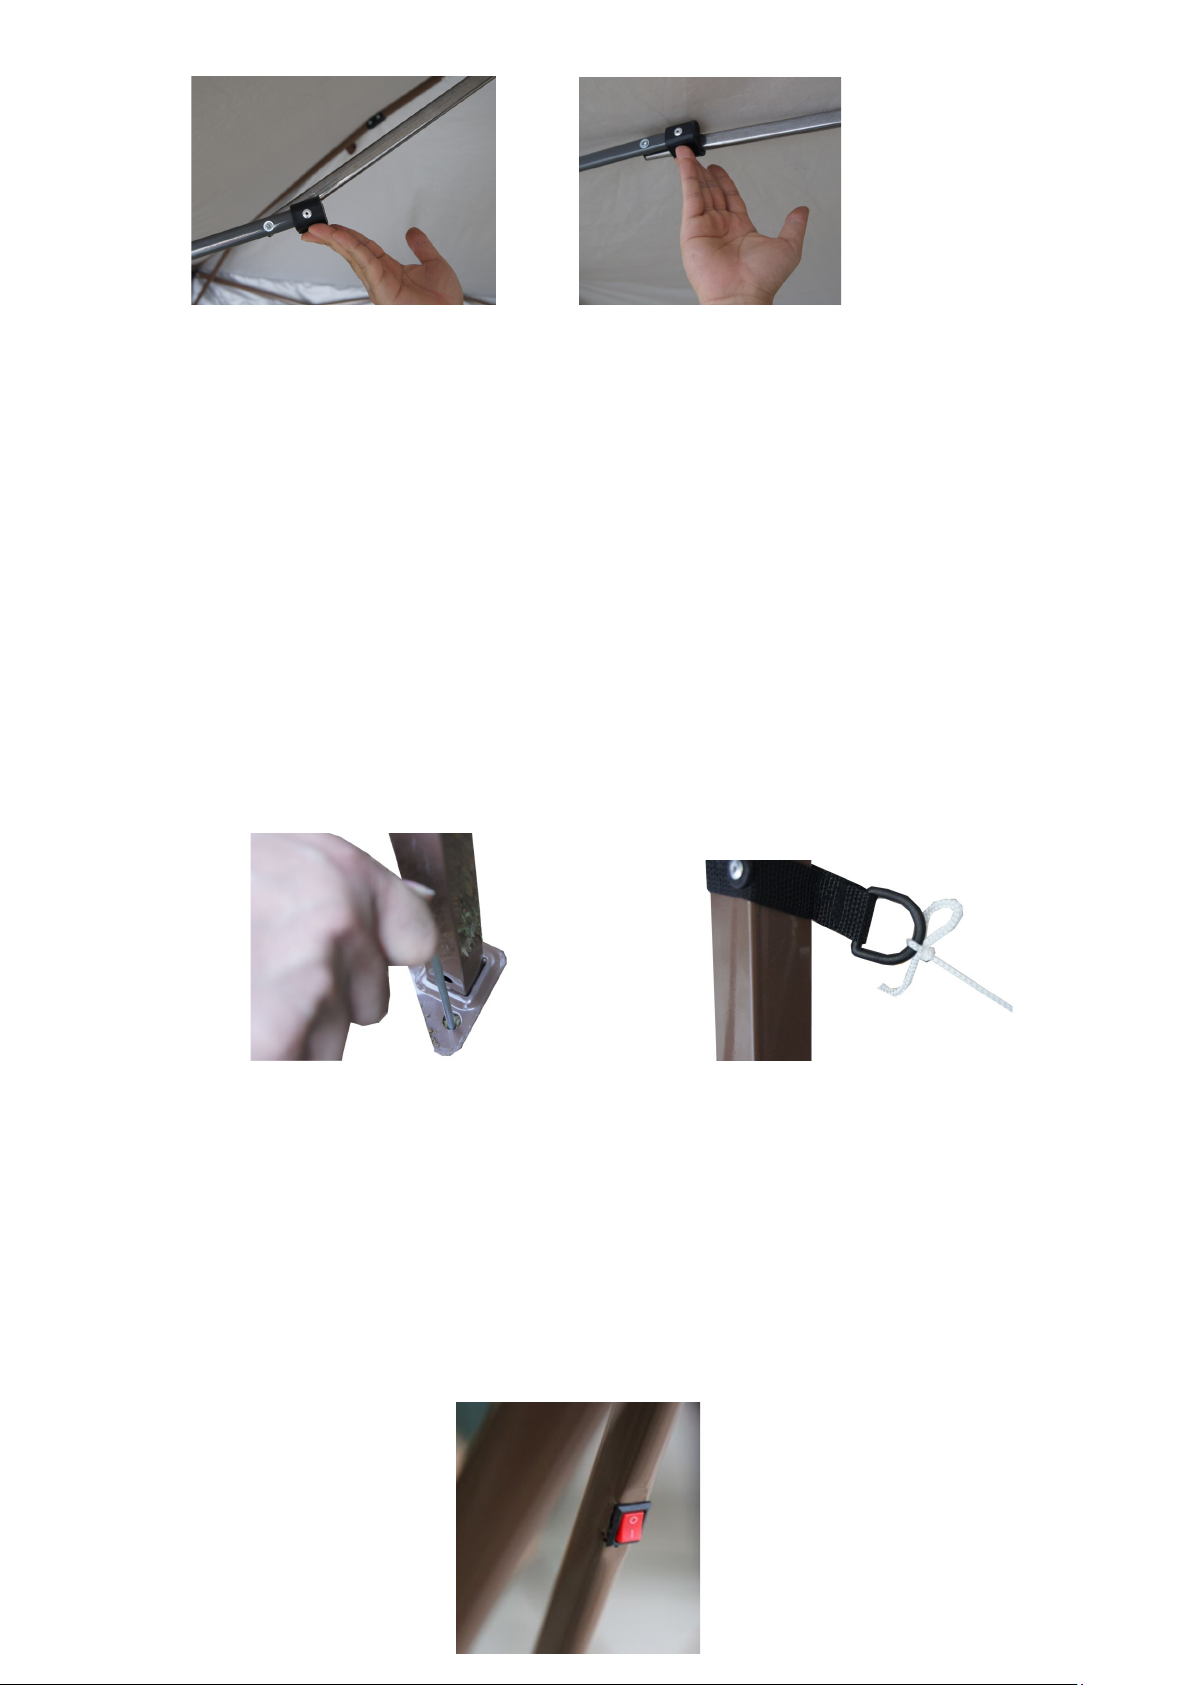
11.To secure placement of the gazebo:
1) Insert the stakes through the hole at the end of each leg.
2) Weight down the gazebo by using the sand bag.
3) Unfold the four guy cords, located on the top corners of the
poles. Extend the guy cords to ground level, securing the end of
the guy cords to ground stakes.
12.Use the switch on the roof pole to operate the lights. 6 hours of
charge will yield 8 hours of LED usage depending on the degree of
sunlight exposure.
Page 8
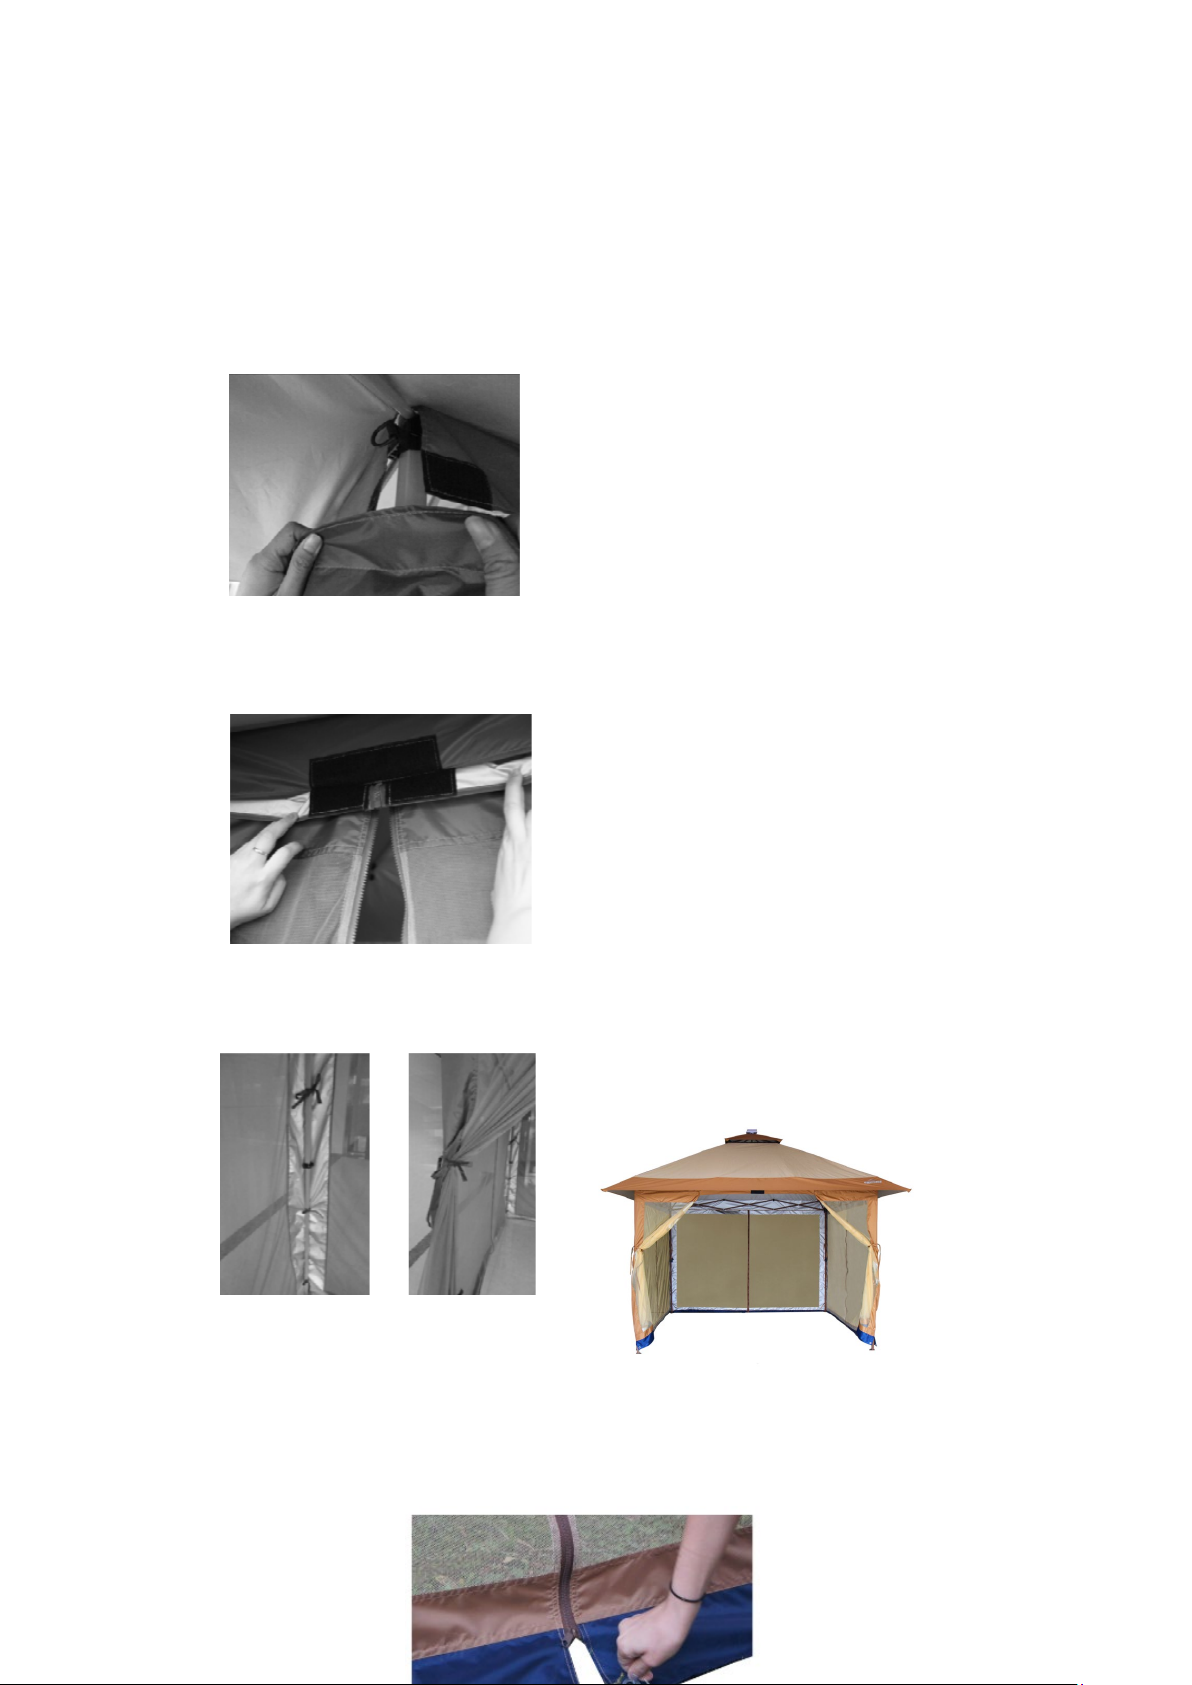
Mesh Screen Assembly
1.
Attach the netting to the gazebo with velcro. Begin by attaching
the center of the netting to the corner gazebo pole. The zipper
section of the netting will be centered between the poles.
2. Zip the top of the two nettings together and assemble to the
gazebo. Repeat for the remaining sides.
3.Use the strings provided to secure the netting to the gazebo
legs.
4.Insert the ground stakes into the corners at the bottom of the
screen when the need arises.
Page 9

For Customer service in the US, Please call :800-306-3829 , or
send email to sales @caesarhardware.com.
Service Hours are 9:00am-5
:00pm , Monday-Friday.
 Loading...