


Congratulations on your purchase of our Pager.
By incorporating some of the most advanced electronic
paging technologies, the is reliable and easy to
use. Best of all, the is affordable and will keep
you in touch with those important to you.
Please carefully read this manual before using your pager
in order to fully understand the functions and
capabilities. Once again, congratulations on your purchase.

> FEATURES
> DESCRIPTION OF INDICATORS & SYMBOLS
> CONTROL BUTTONS
> OPERATION
Turning Pager On
Turning Pager Off
Backlight
Function Menu Screen
Using the Message Folder Menu
Receiving a Personal Message
Selecting a Personal Message
Reading a Personal Message
Manipulating a Message
> FUNCTION MENU
Setting the Audible On/Off
Ÿ
Ÿ
Ÿ
Ÿ
Ÿ
Ÿ
Ÿ
Ÿ
Ÿ Personal
Ÿ
Ÿ
Ÿ
Mail drop Message Service
Notebook
5
7
10
11
12
13
14
15
16
17
18
19
20
21
22
CONTENTS

Ÿ Setting the Alert
Ÿ
Ÿ
Ÿ
Ÿ
Ÿ
Ÿ On/
Ÿ
Ÿ
Ÿ
Ÿ
Ÿ
Ÿ
Ÿ
Ÿ
Setting the Melody Alert
Setting the Tone Alert
Setting the Mail drop Tone On/Off
Setting the Time & Date
Setting the Alarm
Setting the Auto Off
Delete All
Reminder Alert
Setting the Auto Scroll
Setting the Font
Setting the Phone-Directory
Editing The Greeting
Construction of Keyboard
Tone Only Message
> APPENDANT FEATURE
23
23
24
24
25
26
27
28
28
29
29
30
31
31
32
33
CONTENTS

This pager has two characters alphanumeric display
- 2 lines: 16 characters per line (8x16 dots font)
- 4 lines: 21 characters per line (6x8 dots font)
Memory Capacity
- Personal: maximum 1,800 characters
The number of personal message slot is restricted within 28.
- Mail Drop : maximum 18,000 characters
- Notebook : maximum 4,000 characters
Shows Date, Time information and Greeting Message
Message Time Stamping
Notebook message(for Personal only)
Message Lock up to 10 messages(for Personal only)
Reminder Alert for Message(s) Unread (Every 4 minutes)
Duplicate / Error / Lock Message Indication
Automatic Message Scrolling (Slow / Fast)
FEATURES

Individual Message Delete
All message Delete for personal (Excluded Locked and Unread message)
and Mail Drop
Memory Full Indication
Personal Message Alerts : 10 Melodies, 10 Tones, Vibration, Silent, Vibration & tone
Mail Drop message alert tone On/Off (user selectable)
Time & date setting
3 Alarms Clock
LCD Back Lighting
Automatic power On/Off (user programmable)
PHONE-DIR(30 persons)
Low Battery Warning for Battery Replacement
Greeting message Editing (User edit)
Font select (User selectable)
FEATURES

DESCRIPTION OF INDICATORS & SYMBOLS
Indicators
Audio Alert
Vibration Alert
Enabled Alarm
Enabled Auto On/Off
New Page or Unread Message
Indication
Lock Message
In Range or Out Range Indication
Full Battery Status
2/3 Battery Status
1/3 Battery Status
Low Battery Status
Message Continuation
Power On
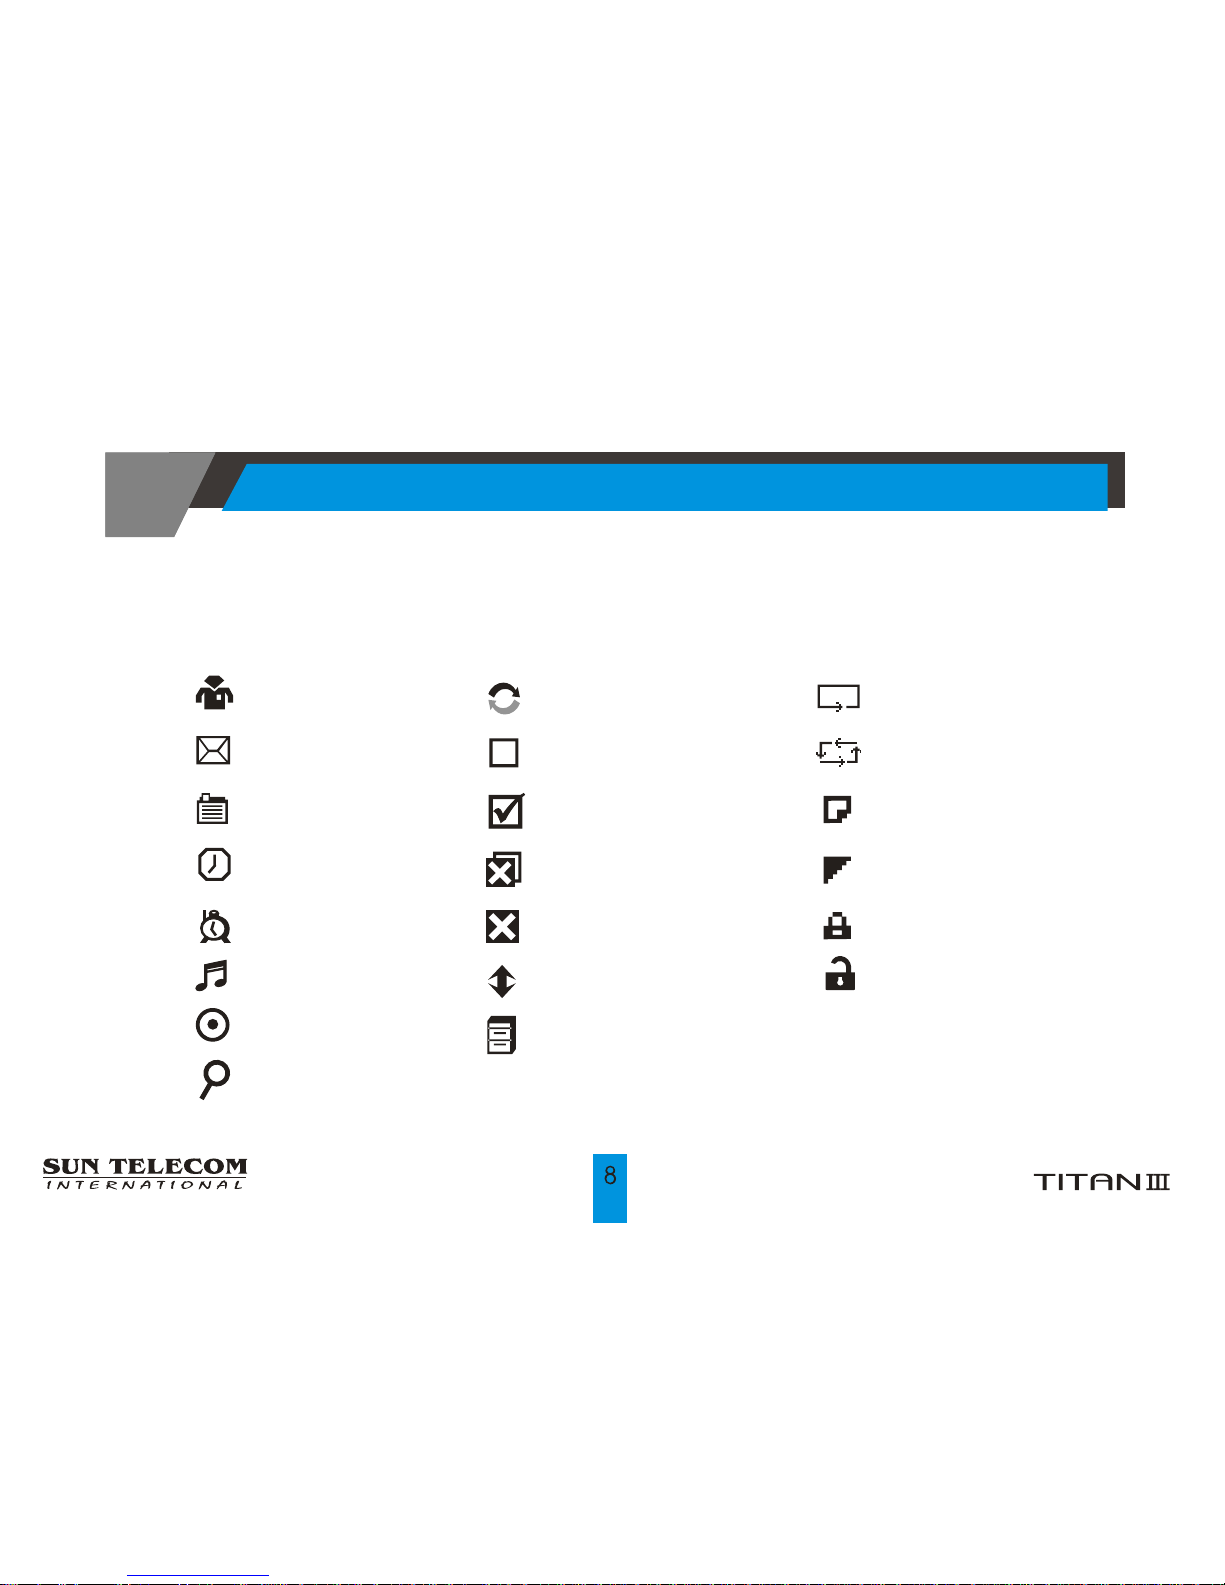
One-time Alarm
Daily Alarm
Unread Message
Read Message
Locked Message
Unlocked Message
DESCRIPTION OF INDICATORS & SYMBOLS
Personal Folder
Mail Drop Folder
NoteBook Folder
Set Time
Set Alarm
Set Alert
Pager Off
Set Font
Set Scroll
Disable Reminder
Enable Reminder
Delete All
Delete
Escape
Move to NoteBook
Symbols

Edit Greeting
Phone directory
Duplicate
message
Error message
Normal
message
Set Auto On/Off
Mail Drop Tone On
Mail Drop Tone Off
Auto Off time
Auto On time
DESCRIPTION OF INDICATORS & SYMBOLS
Melody
Tone
Vibration
Vibration & Tone
Silent
Audible On
Audible Off
Disable Alarm

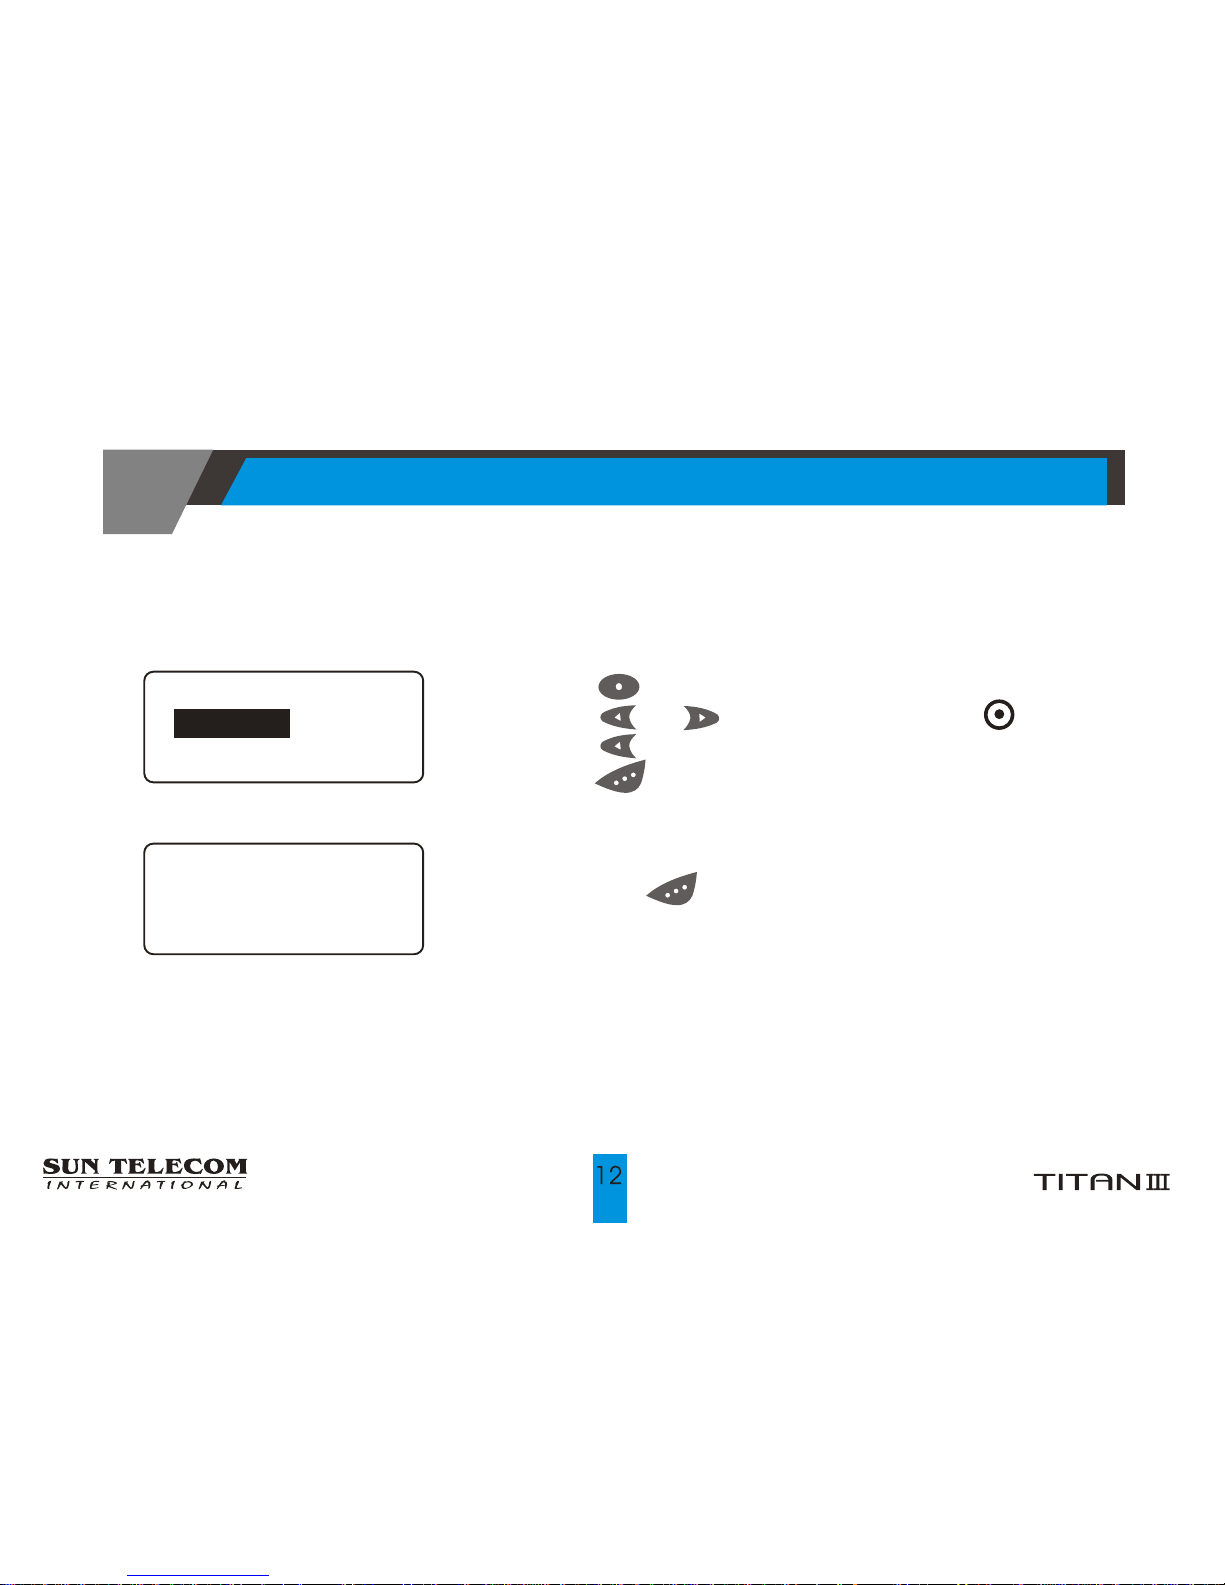
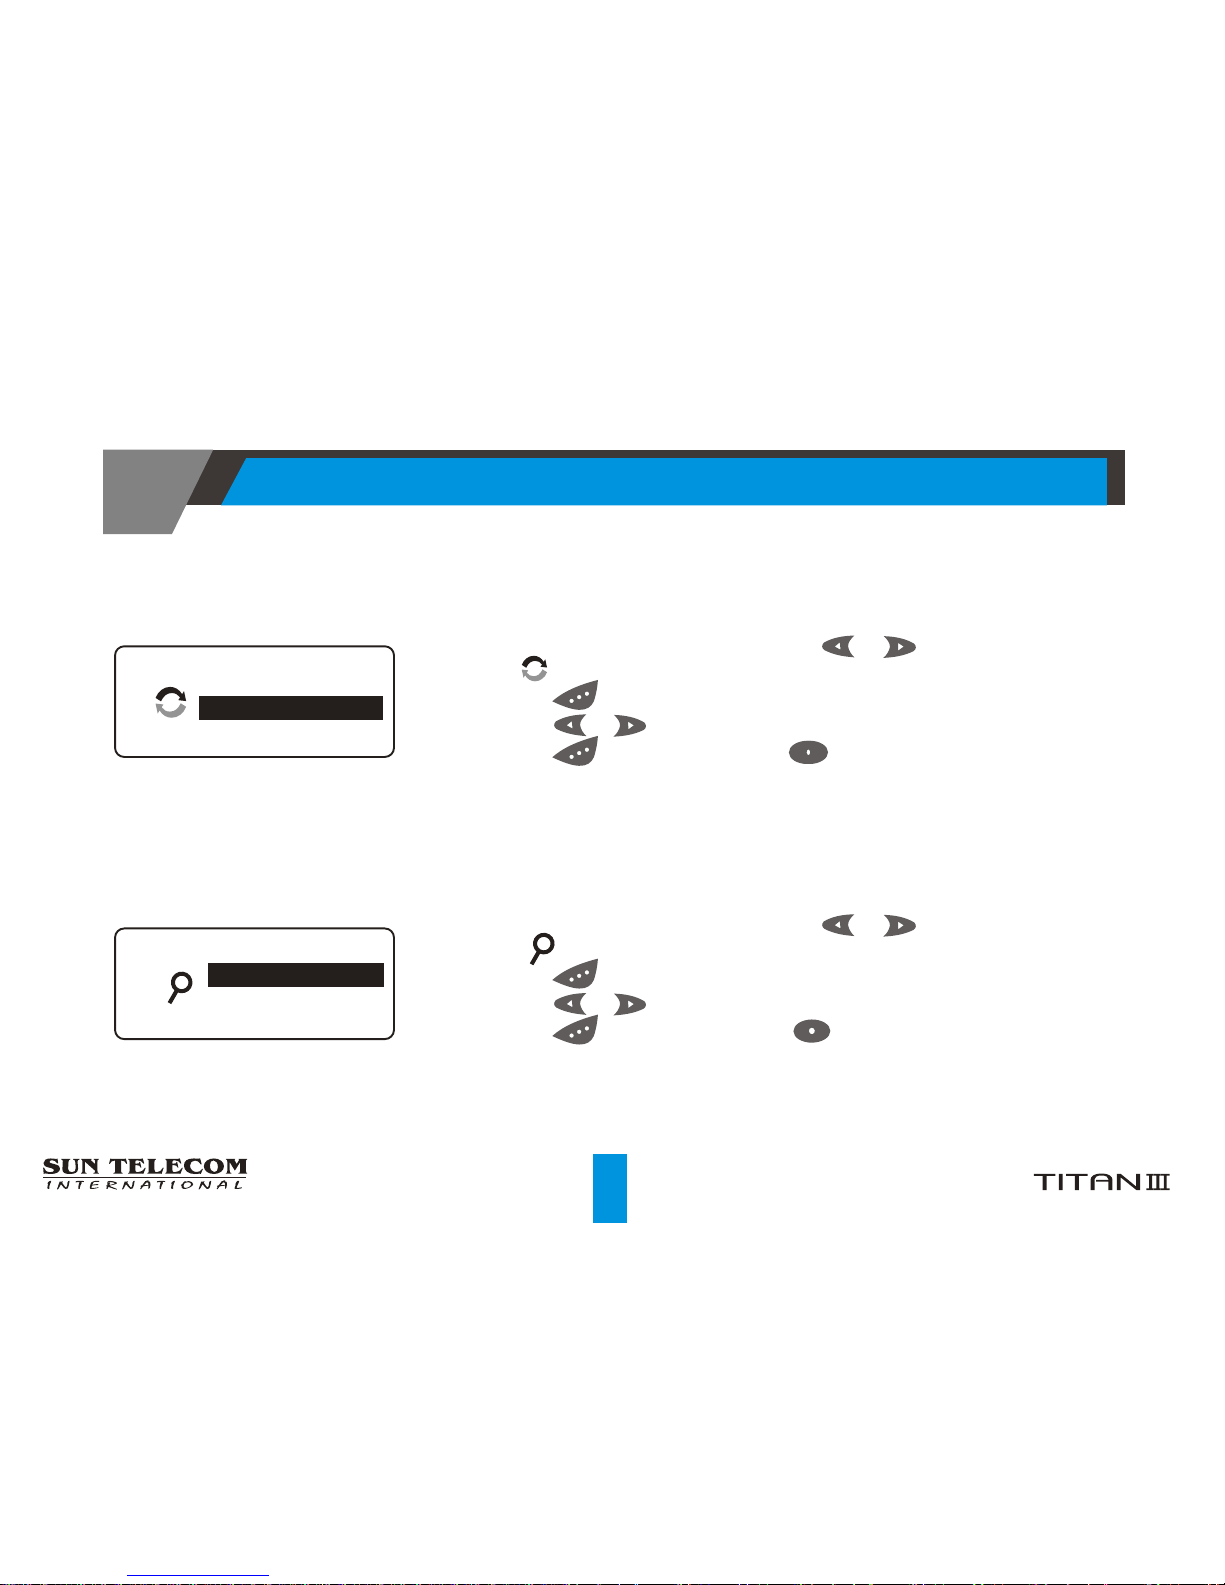
Used to navigate through the Menu, update current
state, scroll(Forward / Backward) messages.
Used to display the Function Menu,
escape current state, and backlight On (press and
hold for two seconds)
Used to display the Message Menu, select a pager
function.
Turn the pager on (press and hold for two seconds
at power off mode).
CONTROL BUTTONS
Turning Pager On
OPERATION
Press and hold for two seconds at power off mode.
Your pager activates the initial alert(vibrates, backlight
on/off, and audibly) and momentarily displayed with the
power-on icon.
At the end of the alert the time, date, and audible alert
icon(or vibrate alert icon) is displayed momentarily.
Greetings (or power up logo) are displayed at the end of
the alert on the start-up screen.
Up to 16 characters available.
Power-on icon is display off at pager on.
Pager stays in standby mode most of time, and at this mode
power-on icon is on.
If unread messages exist, power-on icon blinks.
Main Screen
12:00A 1/ 1/0212:00A 1/ 1/02
SUN TELECOMSUN TELECOM
Standby Screen
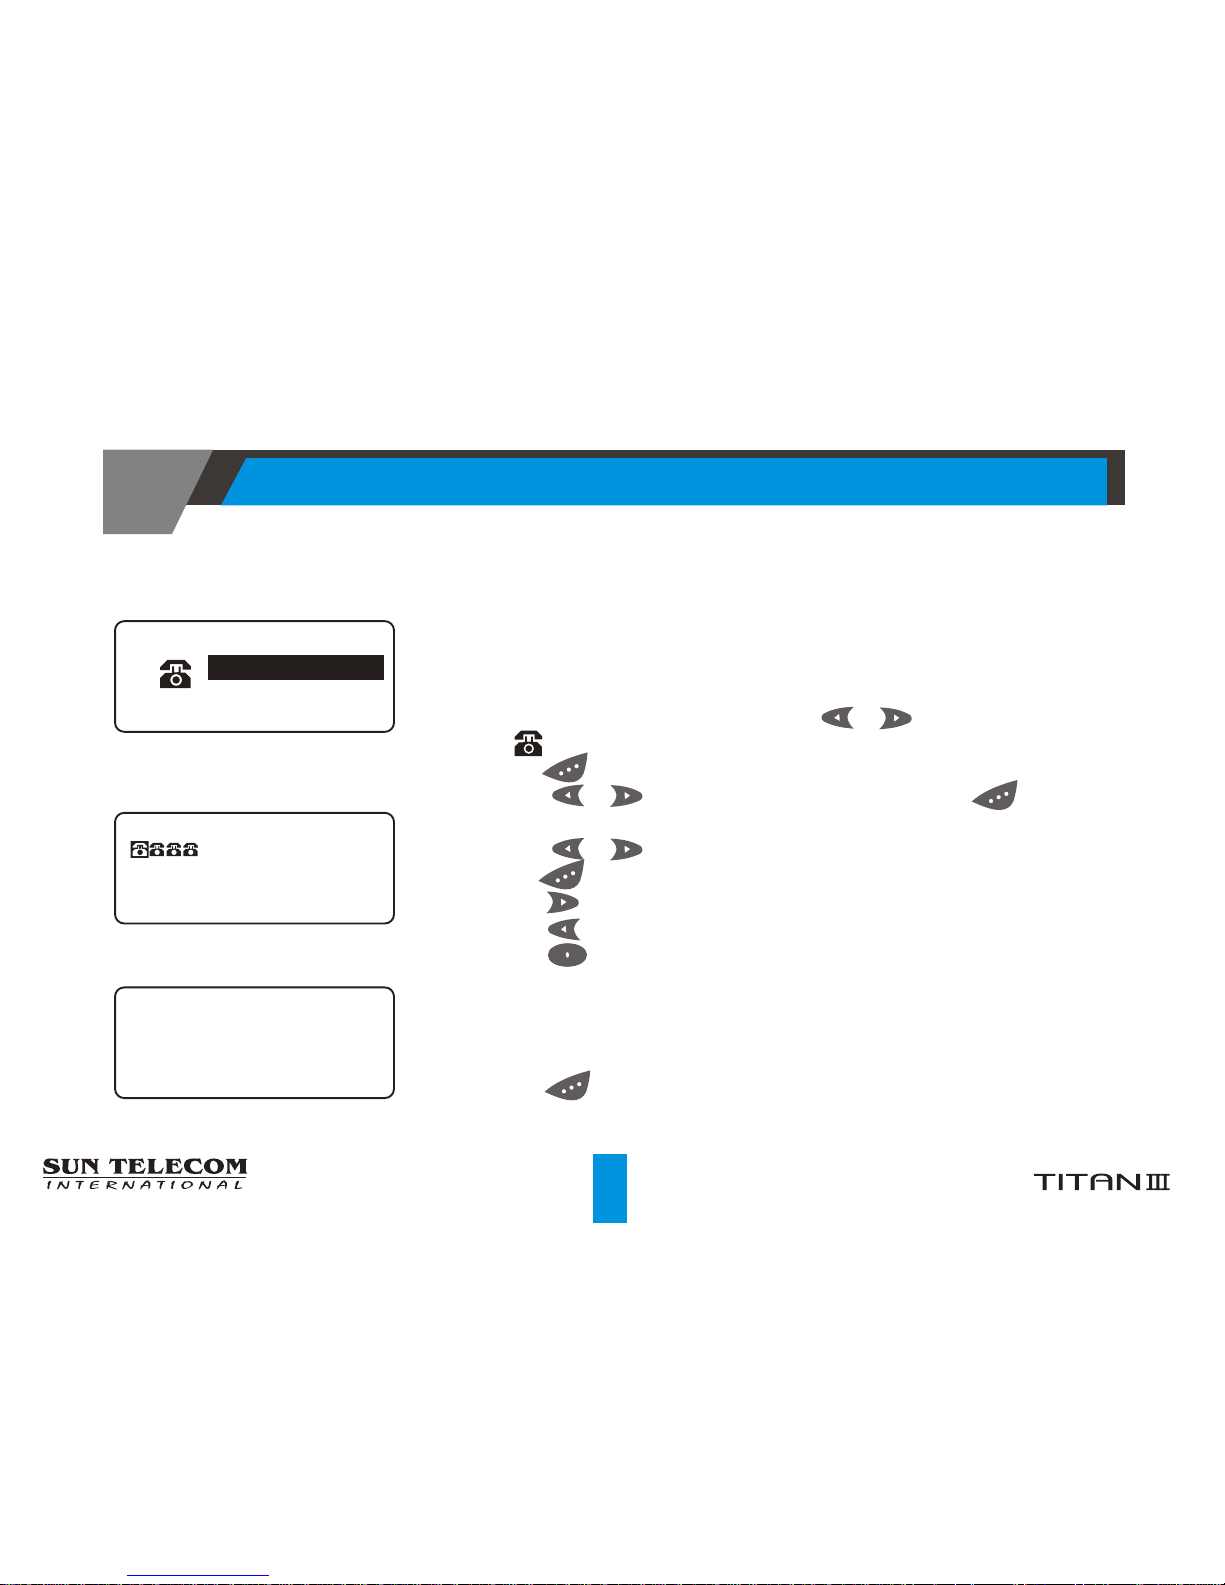
Turning Pager Off
OPERATION
Your is now off and the screen is blank.
If you press shortly, "POWER OFF" is displayed with
current time and date.
And then, Pager cannot be received any message right now.
Only alarm function is to be operated.
Power-on icon is displayed off at power off mode.
Receiver
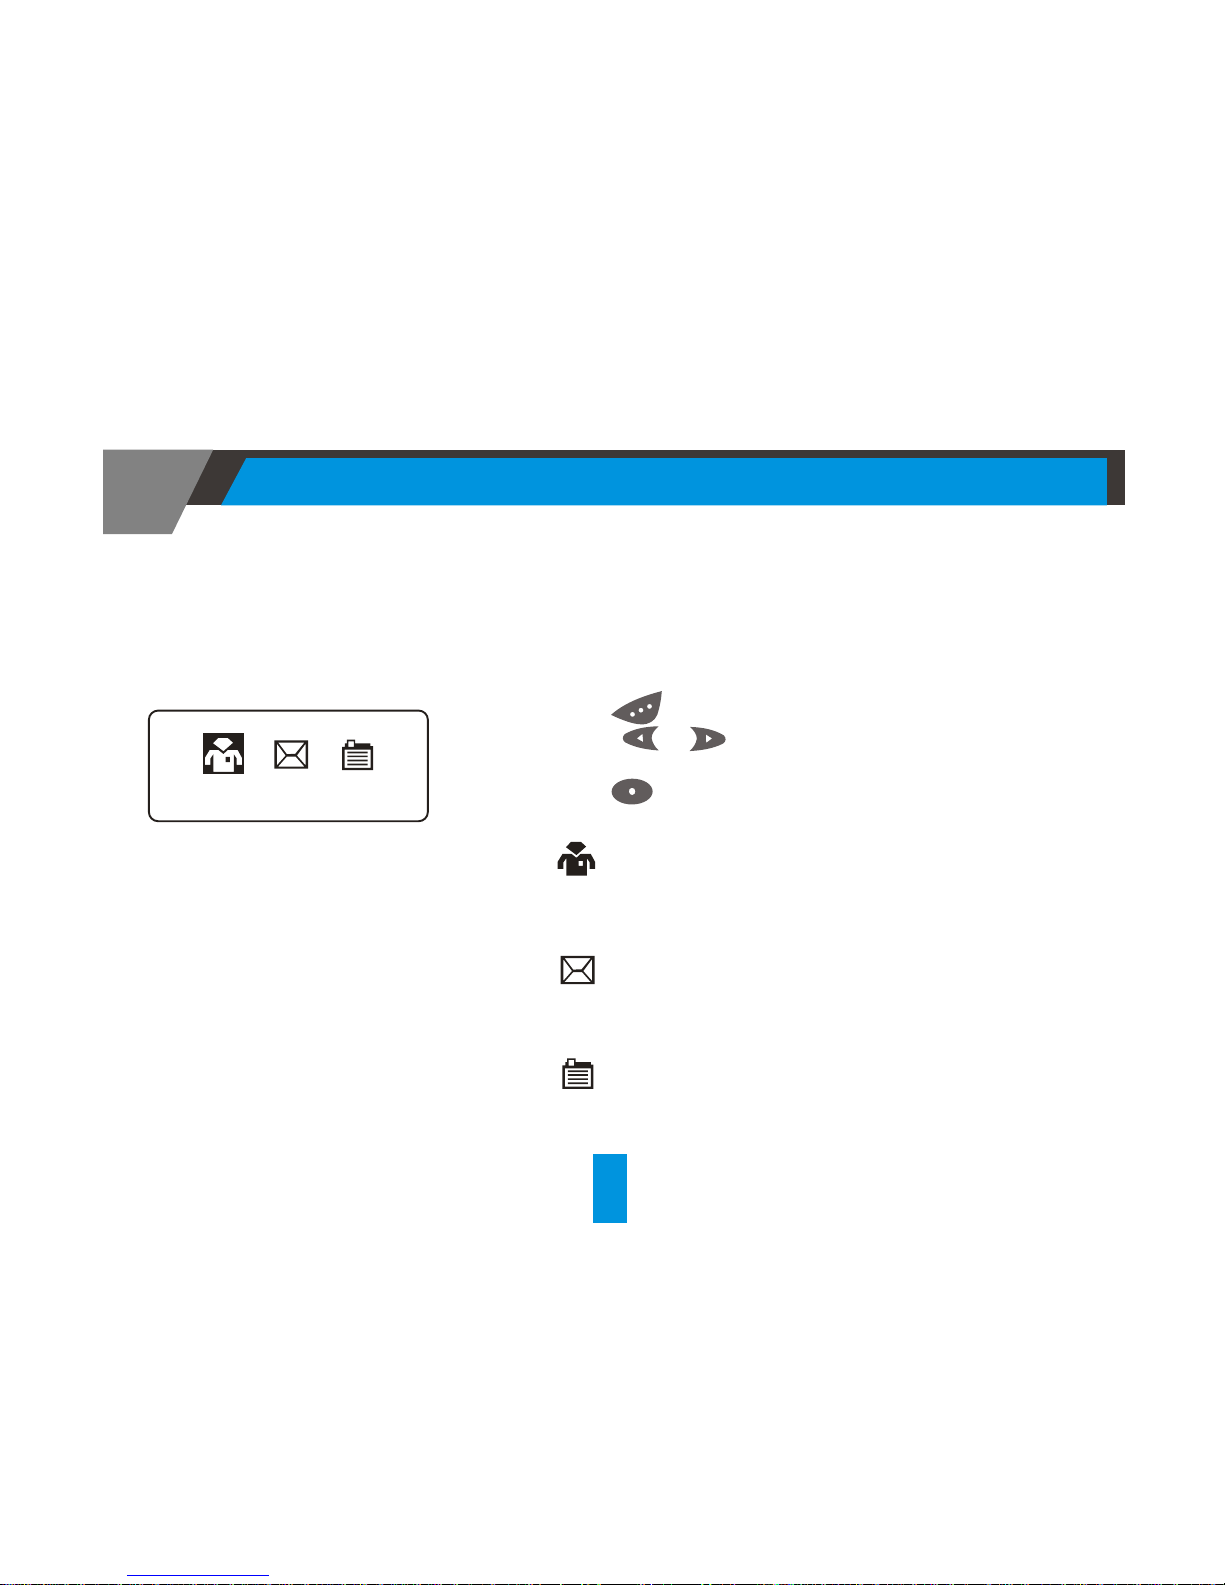
1) Press to display the function menu.
2) Press or to move the cursor to .
3) Press to move the cursor to YES.
4) Press to turn Pager off.
[ NO ] [ NO ]
POWER OFFPOWER OFF
[ YES ] [ YES ]
POWER OFFPOWER OFF
Power off confirm screen
Power off display screen
12:00A 1/ 1/0212:00A 1/ 1/02

OPERATION
To view your display in low light conditions, turn on your pager's backlight by
pressing and holding for two seconds or more. If no further buttons are pressed,
the backlight automatically turns off when the display goes blank. That is, the
backlight automatically turns off when the pager returns to the standby screen.
To prevent backlight from being turn off, press any button repeat again.
Backlight

Function Menu Screen
OPERATION
Note: To escape from any field without making any changes, press .
The Function Menu gives you access to the many features of your pager through a series of
symbols and prompts.
As you move the cursor left or right across the symbols, a corresponding prompt appears.
To activate your function selection, press .
1. Press to display the function menu.
The location of the cursor is indicated by inverted symbol.
2. Press or to move the cursor within the function menu.
As you move through the Function Menu, the function
symbols inverted to indicate the present location of the
cursor.
3. Press to activate function.
To exit from the Function Menu without making any changes or go
back to the Main Screen, press .
Function Menu Screen
SET AUDIBLESET AUDIBLE
Preview Message Screen
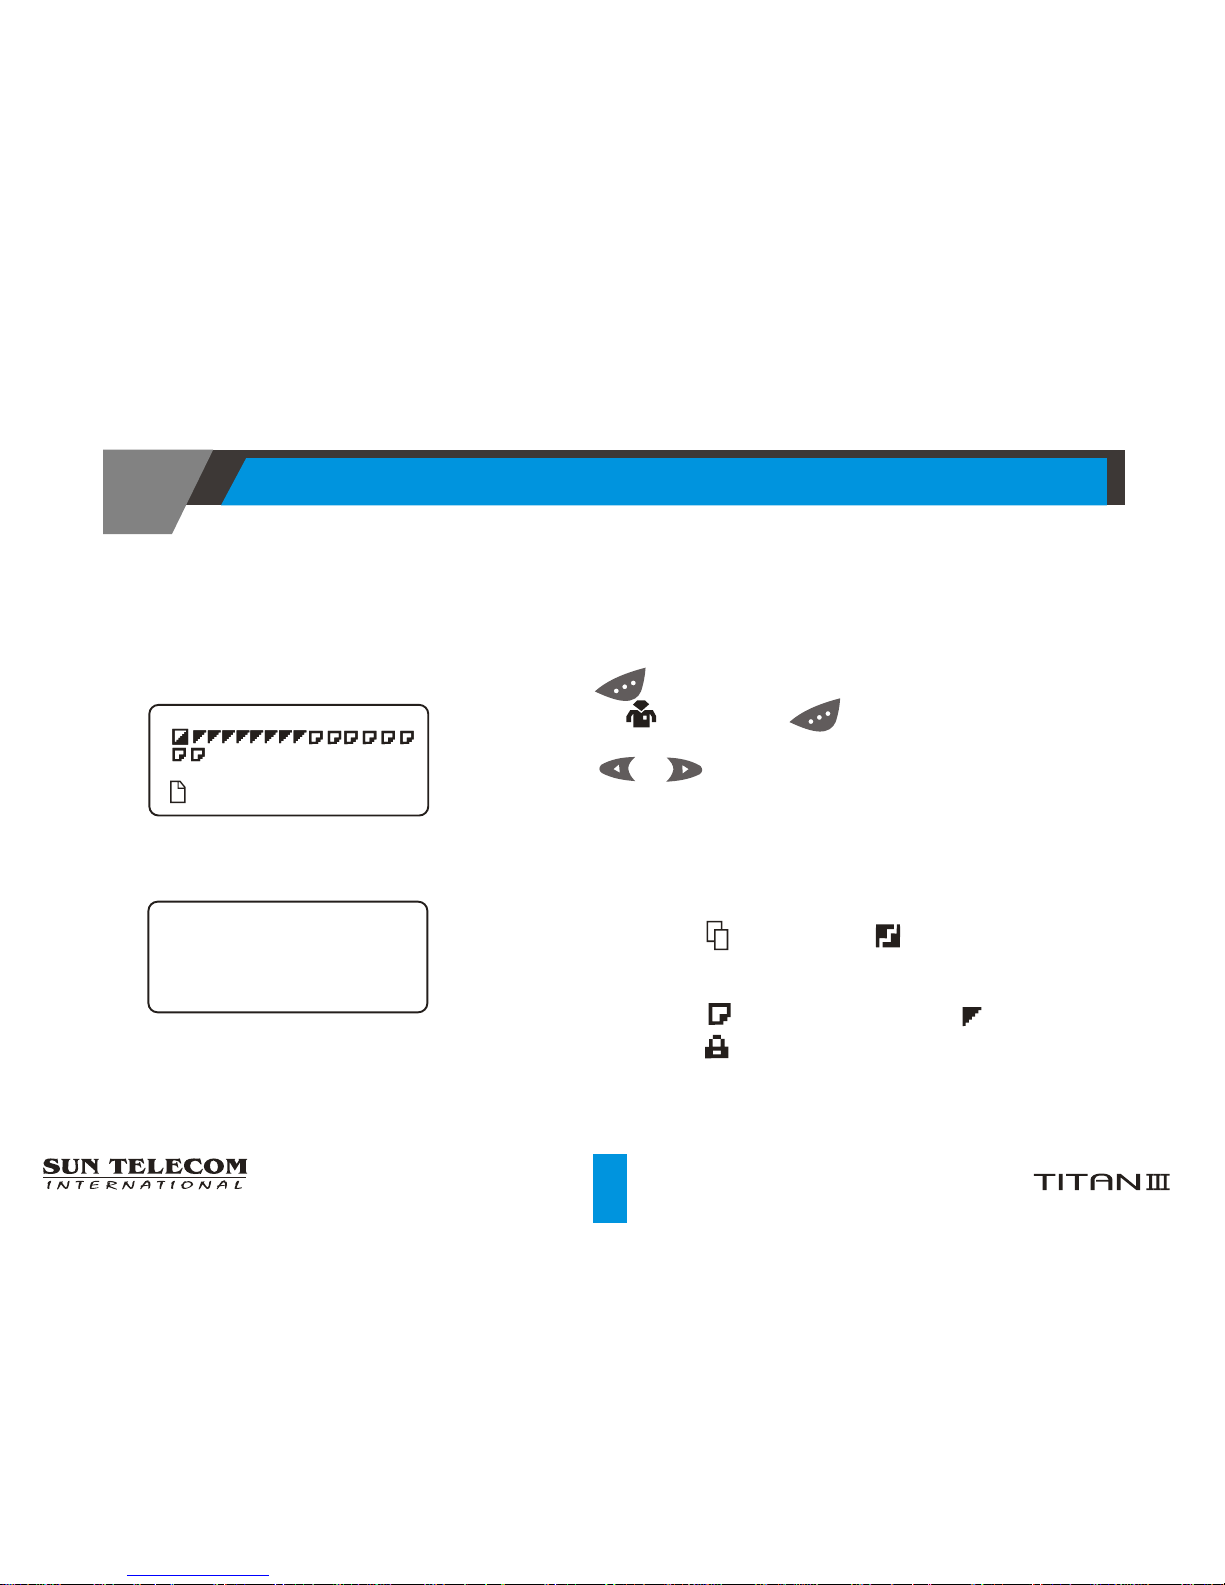
Using the Message Folder Menu
1. Press to display the message Folder menu.
2. Press or to move within the message select menu
(personal, Mail Drop and Notebook).
3. Press to read message.
PERSONAL [ 1] The number of unread Personal
message(s).
MAILDROP [ 1] The number of unread Mail Drop
message(s).
NOTEBOOK[ 1] The number of total messages in
notebook.
PERSONAL [ 1]PERSONAL [ 1]
OPERATION
15

This pager can receive until personal memory are full.
When a message is received, your pager alerts for about
8seconds according to the current alert setting (audible, vibrate, or silent).
By the way, memory space(capacity) is overflow, the oldest message(s) is(are) deleted until it
make room for received message. And pager will delete unlocked message, and then unread
message in order.
This automatically stores the message along with the time and date of which message
was received.
Note: When memory remains under for save message or
the number of message is 28, the "PERSONAL FULL"
displays in main screen.
Receiver
Receiving a Personal Message
OPERATION
16
Selecting a Personal Message
1. Press to display the message folder menu.
2. Move to , and press to display the message select
menu..
3. Press or to move the message you want to read.
As you move through the message selection screen, the
message symbols inverted to indicate the present location of
the cursor.
Note: Duplicated( ) and Error( ) messages are indicated
on the status line.
Message Symbols: (Unread Message), (Read Message),
(Locked Message)
Message Selection Screen
001:1234567890001:1234567890
OPERATION
17
[001/001]
01/01 12:20[AM]
[001/001]
01/01 12:20[AM]
Time Stamp Screen

Reading a Personal Message
1. Press to display the message folder menu.
2. Move to , press to message selection menu.
3. Press or to move the message you want to read.
4. Press to read the message.
5. Press or to forward scroll.
Press to backward scroll.
6. When end of message, time stamp screen is displayed on.
7. If you want to delete/lock/unlock/ move to notebook the message while reading it,
press to display Message Manipulate Menu. Press or to move the cursor to the
desired function, and press to activate it.
Note : When an unread message exists, your pager gives a periodic reminder alert(every 4
minutes) until all Unread messages are read.
A on the status line indicates that you have unread messages.
Reminder alert is enabled or disabled through the Function Menu.
OPERATION
18

Manipulating a Personal Message
While reading the message, press to display Message
Manipulate Menu.
: Used to return to message menu
: Used to delete a read message
: Used to move to notebook
Note : While reading the locked message, symbol cannot be selectable.
Note : ( ): Used to lock/unlock message.
Note : If current message become unlocked, (Lock) will be displayed.
If current message become locked, (Unlock) will be displayed.
Up to 10 messages can be locked to prevent them from being deleted or from being
deleted when memory is full. The symbol displayed on message screen where it is
locked message.
Where has been 10 locked message, or the size of personal folder is less than 200
characters, user can't lock the message. And the following prompt "LOCK FULL" will be
displayed.
selection
OPERATION
Message Manipulating Menu Screen
EXITEXIT

Mail drop Message Service
Reading Messages in Your Mail drop Folder
1) From the Message Menu, press or to move the cursor
to .
2) Mail drop messages are read the same way as personal
messages.
Note : The number of unread Mail drop message will be
displayed in service title line.
Manipulating a Mail Drop Message
1) Press to display Message Manipulate Menu, while
reading the message.
2) : Used to return to message menu
3) : Used to delete a read message
OPERATION
Mail drop Message Service Screen
MAILDROP [ 1]MAILDROP [ 1]
Mail Drop Message Manipulate
Menu screen
EXITEXIT
0101 0202 0303 0404

Notebook
Reading/Deleting Messages in Your Notebook
1) From the Message Folder Menu, press or to move the
cursor to .
2) Press to Notebook Message Selection screen.
3) Notebook messages are read and deleted the same way as
Mail Drop messages.
Note: Notebook messages are deleted one at a time. Storing
to notebook is not activated when it is full.
If it is duplicated with a message in notebook area,
stored message in notebook is replaced to new message.
OPERATION
Notebook Message selection screen
001:1234567890001:1234567890

From the Function Menu,
1. Press or to move the cursor to or .
Note : is Audible On state. is Audible Off state.
2. For audible off with , press ; then pager becomes "Audible Off" mode with short vibration.
For audible on with , press ; then pager becomes "Audible On" mode with selected alert type.
Setting the Audible On/Off
Note : Status at audible on mode :
Alerts with selected type for new personal message.
Beeps shortly if reminder alert is on.
Beeps shortly if Mail Drop Tone is on when new Mail
Drop message is arrived.
Generates alarm tone if alarm is on.
Status at audible Off mode:
Vibrates for 8 seconds to indicate new personal message.
Vibrates shortly to indicate new Mail Drop message.
Vibrates shortly for reminder alert.
Vibrates three times every 8 seconds for alarm.
If alert is silent mode, then audible on/off does not apply.
FUNCTION MENU

1. From the Function Menu, press or to move the cursor
to .
2. Press to change the type of alert (audible, vibrate, or silent).
: Melody 1 ~ Melody 10
: Tone 1 ~ Tone 10
: Vibration
: Silent
: Vibration & Tone
: Mail Drop Tone On/Off
Set Alert Menu Screen
Setting the Alert
1. From the Alert Menu Screen, press or to move the cursor
to .
2. Press to display the select alert screen.
3. Press or to move the cursor to desired number and to
listen the melody.
4. Press to confirm. Press to cancel.
Setting the Melody Alert
Melody Selection Screen
Note: The current alert setting is also displayed on the pager status line.
MELODYMELODY
12345678901234567890
FUNCTION MENU

1. From the Alert Menu Screen, press or to move the
cursor to .
2. Press to display the select alert screen.
3. Press or to move the cursor to desired number and to
listen the tone.
4. Press to confirm. Press to cancel.
Setting the Tone Alert
Tone Selection Screen
1. From the Alert Menu Screen, press or to move the
2. Press to turn the mail drop alert on or off.
3. Press or to move to on [ ON] or off [Off].
4. Press to confirm. Press to cancel.
cursor to or .
Setting the Mail Drop Tone On/Off
12345678901234567890
FUNCTION MENU

1. From the Function Menu, press or to move the cursor
to .
2. Press to display the SET CLOCK screen.
3. Press or to adjust the date, time.
4. Press to move the cursor to next set of
digits.
5. Press tocancel thedate andtime setting.
Note: Press or to increment or decrement the hour(or
Minute) to adjust your desired value.
If pressed and hold, setting value may increment or
decrement speedily.
Setting the Time & Date
Set Time & Date Screen
02/01/01 02/01/01
12:2212:22
[ AM ][ AM ]
FUNCTION MENU
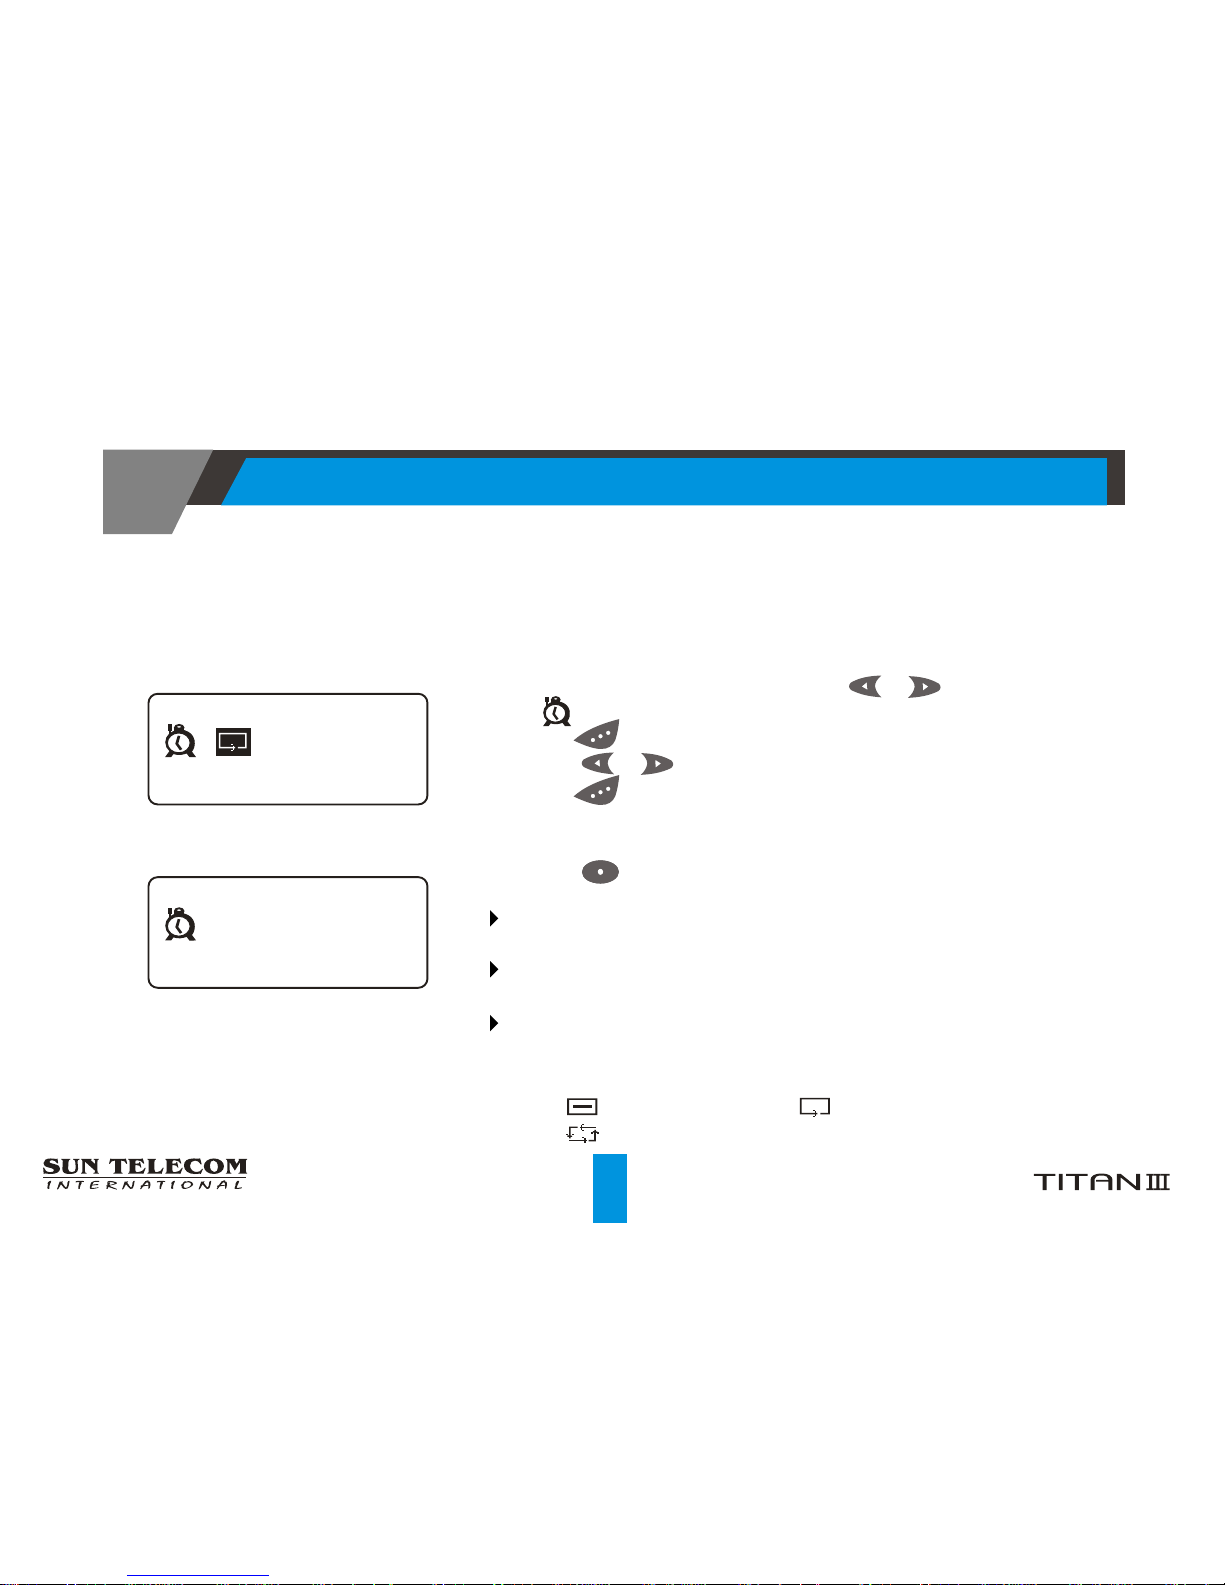
Setting the Alarm
Set Alarm Screen
1. From the Function Menu, press or to move the cursor
to .
2. Press to display the SET ALARM screen.
3. Press or to choose the alarm number.
4. Press to move to the alarm attributes.
5. Repeat steps 3) and 4) for Hour, Minutes, AM-PM, Alarm
message.
6. Press to cancel the alarm setting.
If an alarm is on, alarm indicator is displayed on the
status line.
Alarm can be expired only in main screen, standby mode,
and power off mode.
Alarm alert sound according to the incoming alert.
Melody or Tone : Emits an alarm tone for 20-seconds.
Vibration : Vibrates for 24 seconds.
Note : : Disable Alarm, : One-time Alarm,
: Daily Alarm
Alarm Expire Screen
1 12:001 12:00
[ AM ] [ AM ]
ALARMALARM
1 12:001 12:00
[ AM ] [ AM ]
ALARMALARM
FUNCTION MENU
26
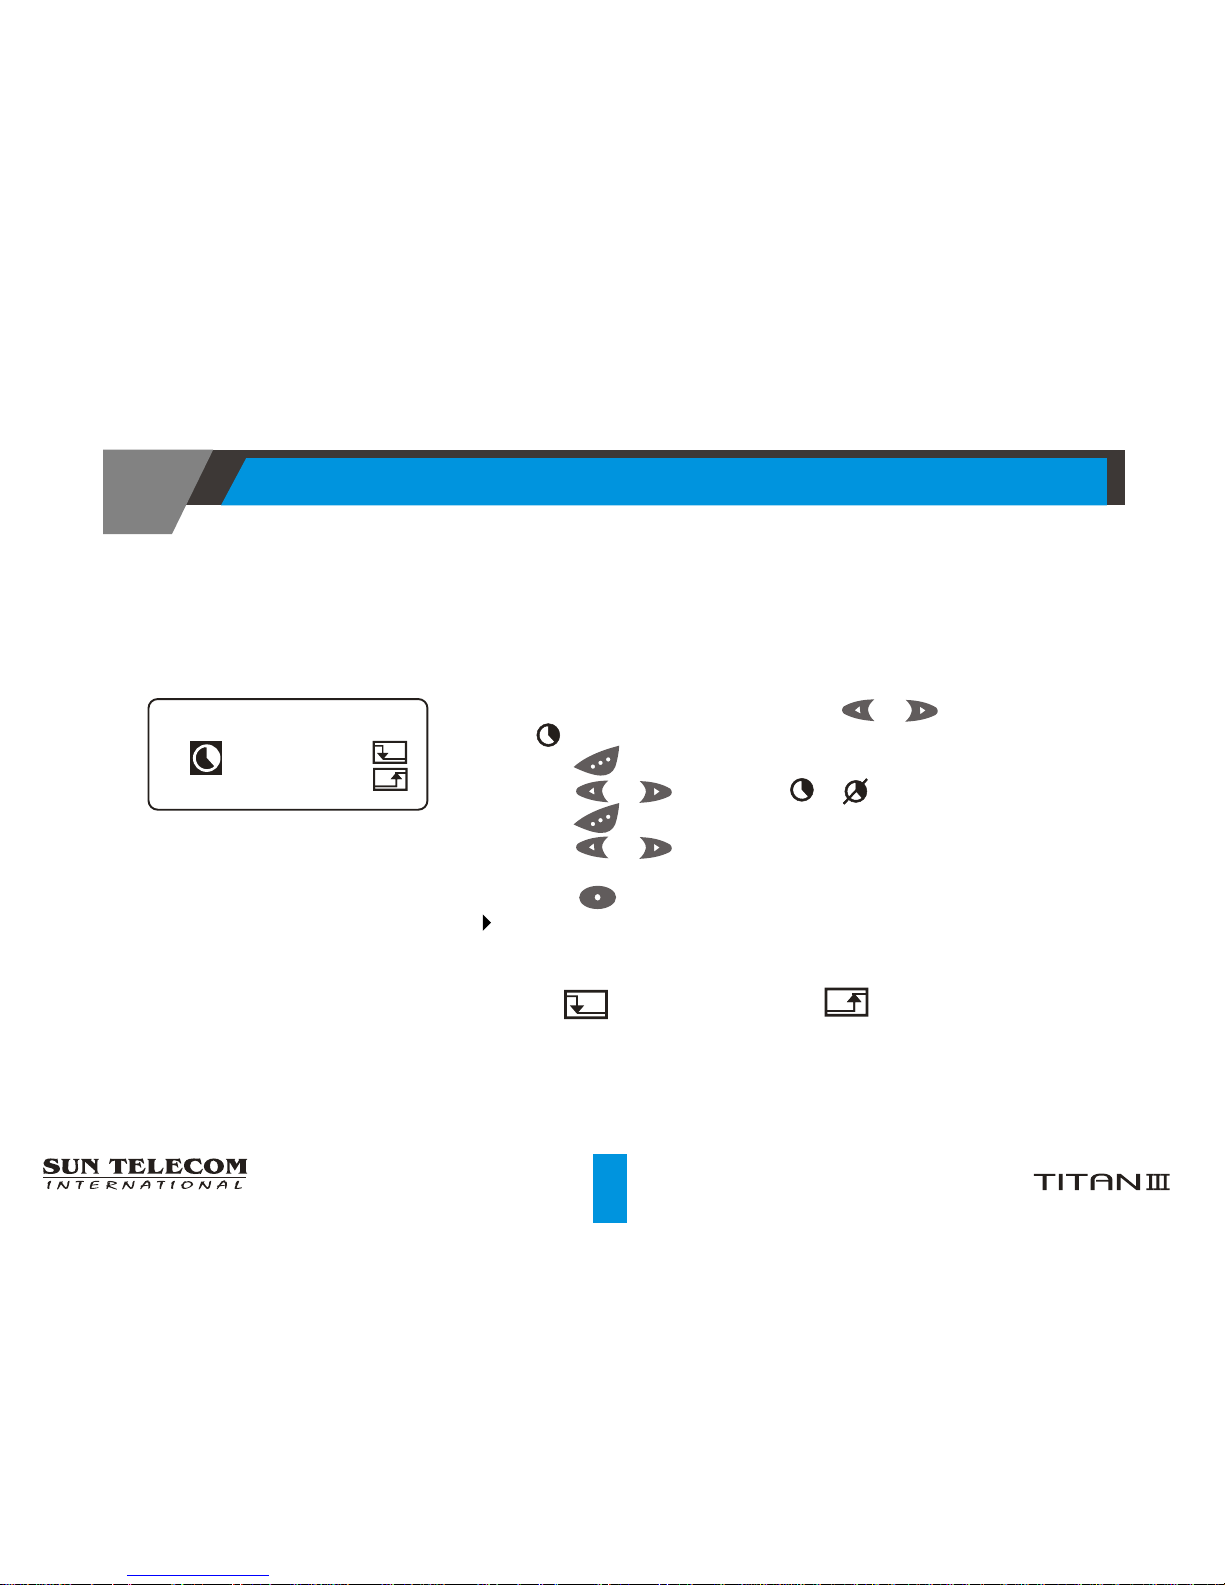
Setting the Auto On/Off
1. From the Function Menu, press or to move the cursor
to .
2. Press to display the AUTO ON/OFF screen.
3. Press or to enable or disable .
4. Press to move the cursor to auto-off hour digits.
5. Press or to adjust the hour of auto-off time.
6. Repeat steps 4) and 5) to adjust the minutes and auto-on time.
7. Press to cancel the auto-power-off-on setting.
Auto-Power-Off-On is executed in Main Screen, Standby
Mode and Power Off Mode.
Note : : Auto Power Off, : Auto Power On
Auto Power Off ScreenOn/
12:00 12:00
[AM] [AM]
06:00 06:00
[AM] [AM]
FUNCTION MENU
27
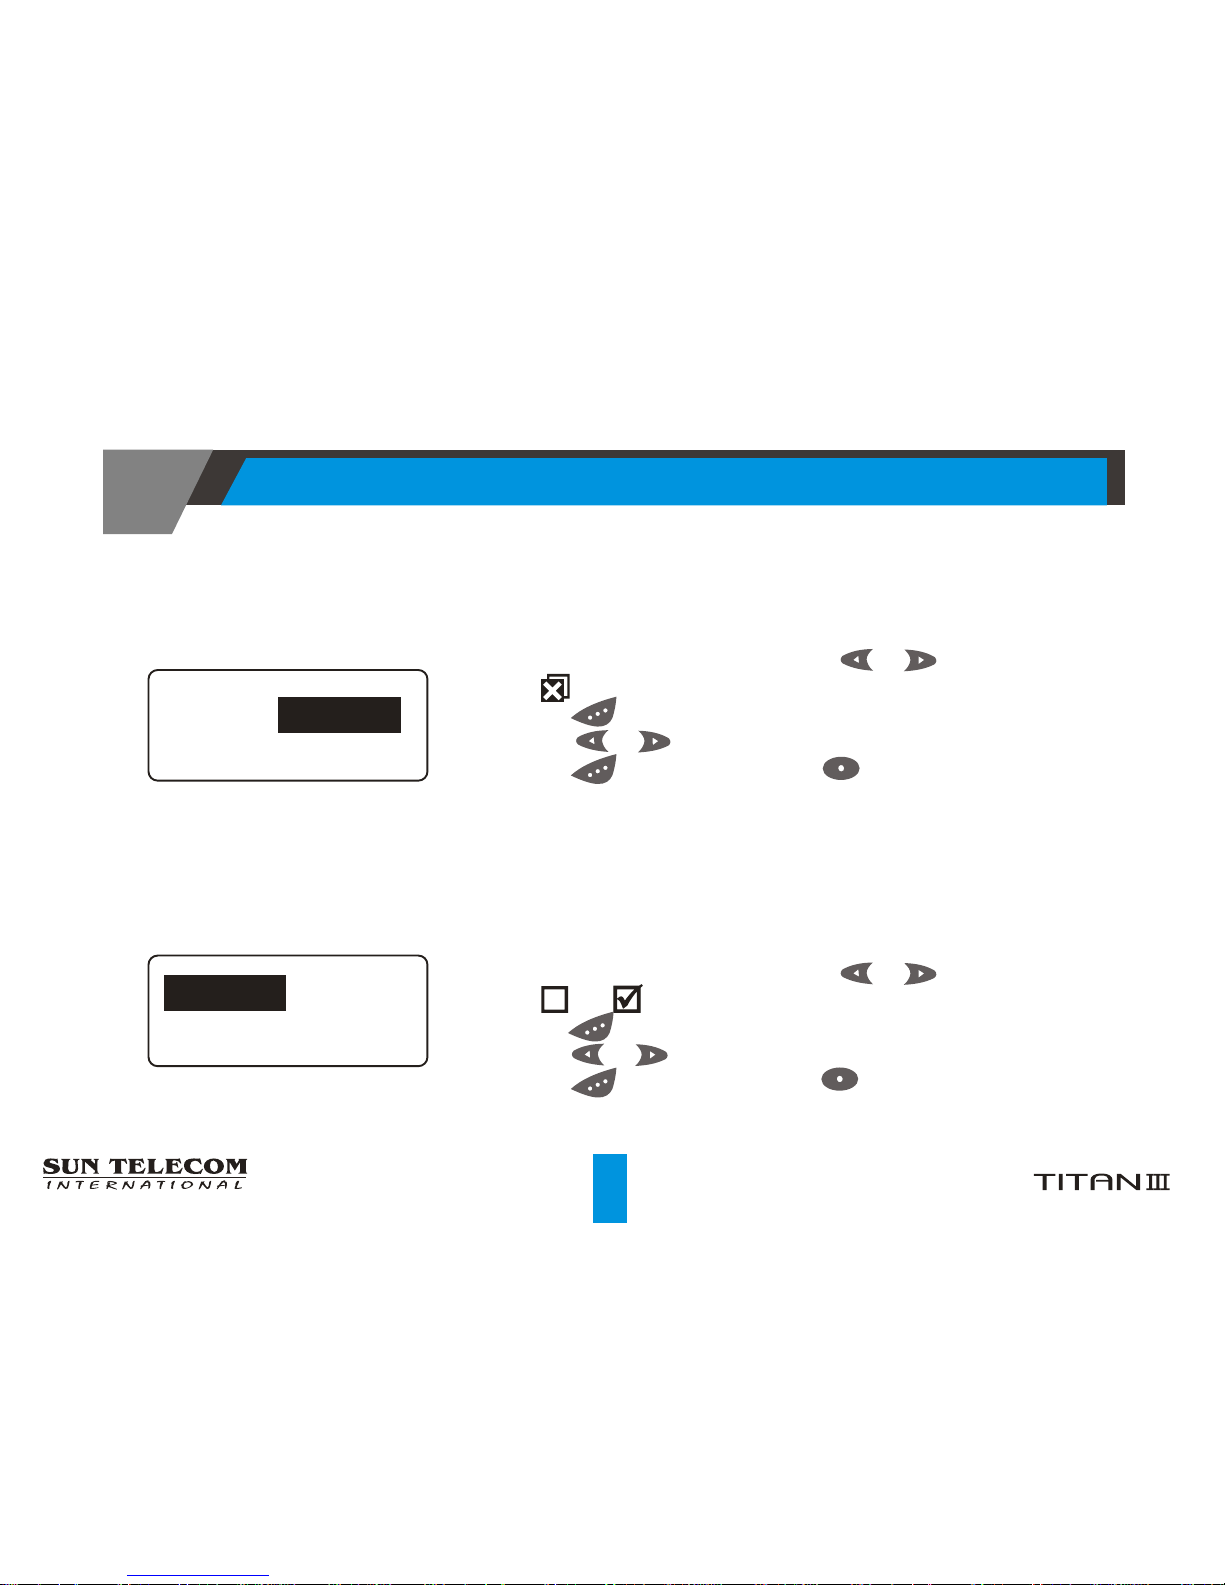
Delete All
1. From the Function Menu, press or to move the cursor
to .
2. Press to display the message DELETE ALL screen.
3. Press or to on [ YES], off [ NO ] .
4. Press to confirm. Press to cancel.
Note: All personal message(exclude locked and unread message)
and mail drop message are deleted.
Delete All Message Screen
[ YES ] [ YES ]
[ NO ][ NO ]
1. From the Function Menu, press or to move the cursor
to or .
2. Press to display the REMINDER ALERT On/Off screen.
3. Press or to on [ ON ] , off [ OFF].
4. Press to confirm. Press to cancel.
Reminder Alert
Reminder Alert On/Off Screen
DELETE ALL DELETE ALL
[ ON ] [ ON ]
[ OFF ][ OFF ]
REMINDER ALERTREMINDER ALERT
FUNCTION MENU
28
1. From the Function Menu, press or to move the cursor
to .
2. Press to display the SET AUTO SCROLL menu screen.
3. Press or to choose the speed of auto scroll.
4. Press to confirm. Press to cancel.
Note: SLOW SCROLL(5 Seconds), FAST SCROLL (3 Seconds),
OFF(disable auto scroll)
Setting the Auto Scroll
Auto Scroll Selection Screen
Setting the Font
1. From the Function Menu, press or to move the cursor
to .
2. Press to display the SET FONT menu screen.
3. Press or to choose the font size.
4. Press to confirm. Press to cancel.
Note: SMALL FONT (6*8 Font), LARGE FONT (8*16 Font)
This Function makes the user read the messages with small
font easily and conveniently.
Font Selection Screen
*SMALL FONT*SMALL FONT
LARGE FONTLARGE FONT
OFF
FAST SCROLL
OFF
FAST SCROLL
* SLOW SCR OLL* SLOW SCR OLL
FUNCTION MENU
29
Setting the Phone-Directory
Phone-Dir menu is consist of "SEARCH" and "ADD & EDIT".
This pager can store up to 30 name and telephone number.
SEARCH
1. From the Function Menu, press or to move the cursor
to .
2. Press to display the phone directory menu..
3. Press or to move "SEARCH" and press to search
the name and telephone number.
4. Press or to move the cursor to search name, and
press to display the selected name and telephone number
5. Press to display the next name and telephone number.
6. Press to display the previous name and telephone number
7. Press to display the manipulate menu.
Note : Phone directory manipulation is same as mail drop.
ADD & EDIT
1. From the phone directory menu, press to move "ADD & EDIT"
2. Press to append the name and telephone number.
3. At first, edit the name and second, edit the telephone number
Note : Please refer to the "Construction of keyboard".
Phone-Dir Menu Screen
Name Search Screen
Name Add & Edit screen
*SEARCH*SEARCH
ADD & EDITADD & EDIT
JOHN JOHN
JOHN JOHN
123-1234123-1234
FUNCTION MENU
30
1. From the Function Menu, press or to move the cursor
to .
2. Press to edit greeting message.
Note : Refer to "Construction of keyboard".
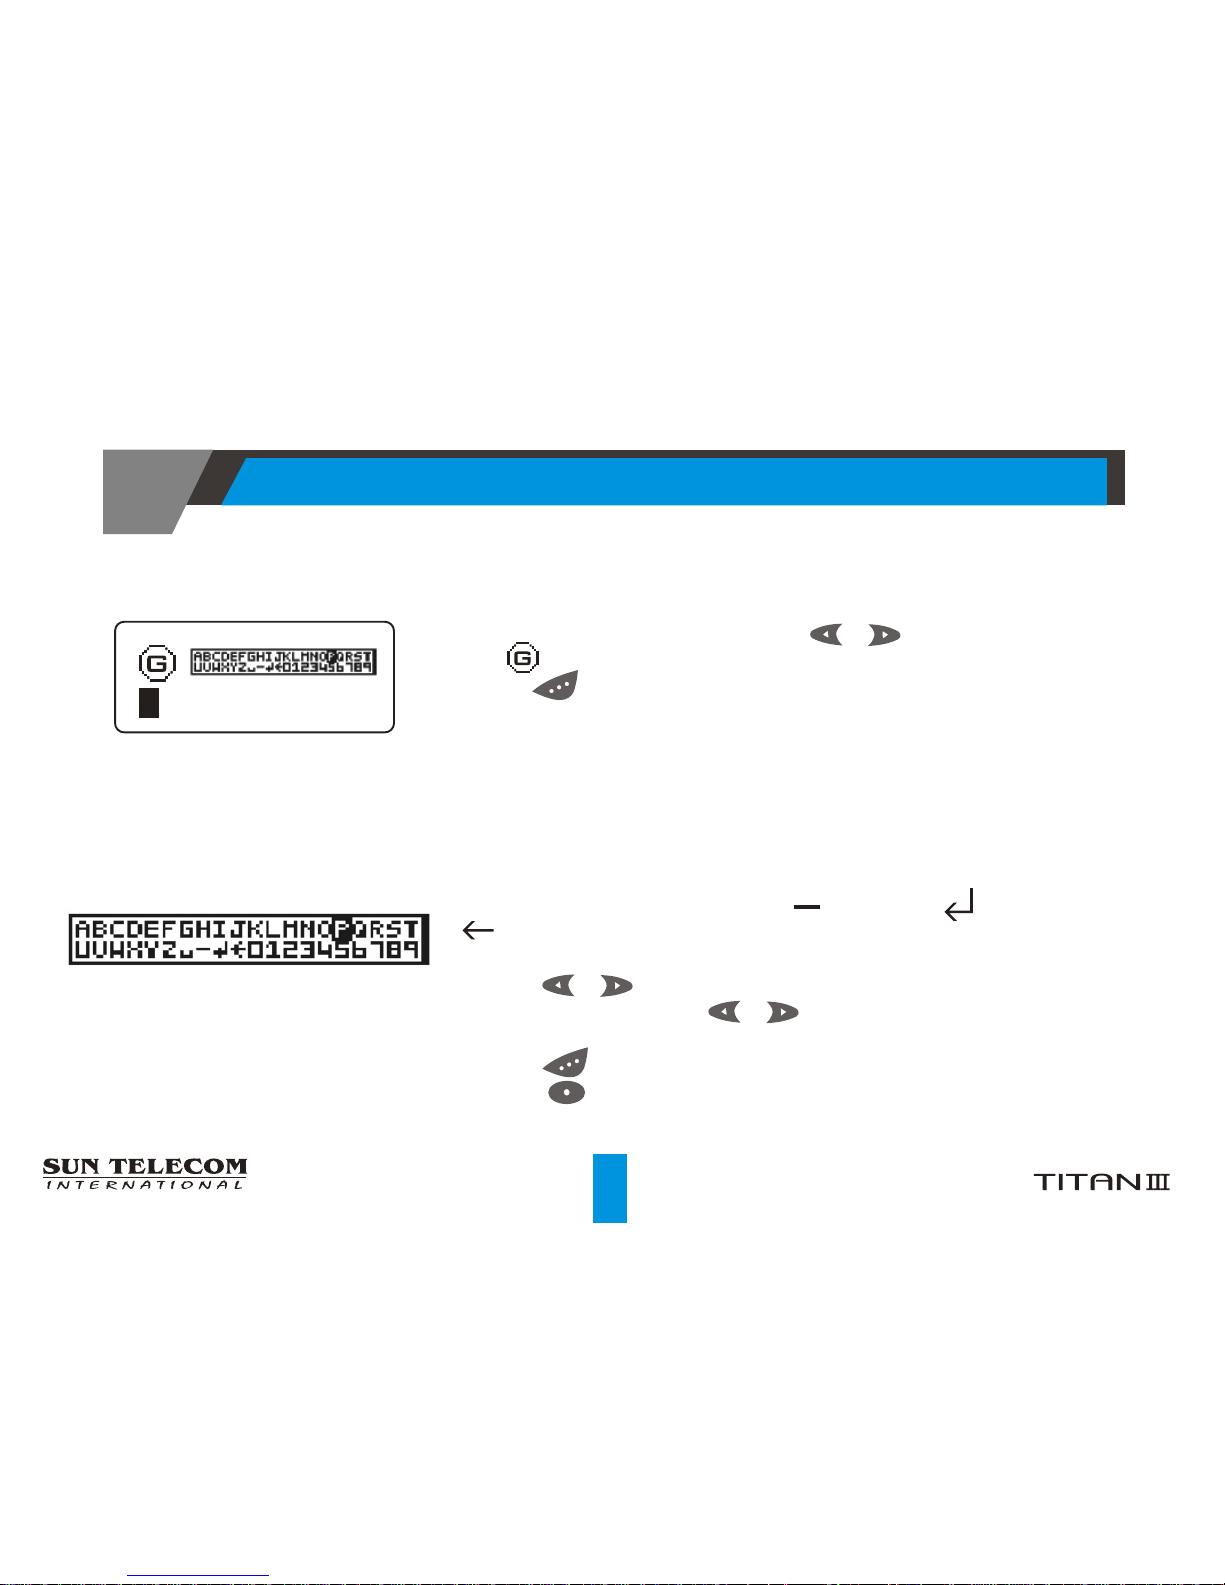
Editing The Greeting
Edit Greeting Screen
A~Z : Alphabet A~Z, SPACE, : Hyphen, : Enter(Confirm),
: Escape(Cancel), 0~9 : Numeric Number 0~9.
1. Press or to move the cursor to a letter.
2. If pressed and hold or for 2 seconds or more, the cursor
may move backward and forward speedily.
3. Press to select the letter.
4. Press to move the cursor backward(for backspacing).
Construction of Keyboard
Keyboard
AGER WORLD AGER WORLD
PP
FUNCTION MENU
31

FUNCTION MENU
Pressing at asks whether a user wants to save a message or
not. However, if a message is a name, then the screen changes to
input phone number or greeting message.
Pressing at [ YES] saves an entered message.
Pressing at [ NO] cancels an entered message.(Not saved)
Pressing at confirms if a user wants to cancel the message.
However, if a message is phone number, then the screen change to
input name.
Pressing at [ YES] cancels the message.
Pressing at [ NO] continues to enter a message(Not saved)
Tone Only Message
This pager considers the following conditions as tone only message.
Tone only message can be displayed as "TONE ONLY".
[ YES ] [ YES ]
[ NO ][ NO ]
SAVE SAVE
[ YES ] [ YES ]
[ NO ][ NO ]
EXIT EXIT
32

Low Battery Check
When the battery is low, "LOW BATTERY" will be displayed on the main screen.
A low battery indicator is displayed on the status line. An audible low battery alert is also heard
at that time. Replace the battery as soon as possible after the low battery alert is heard. It alerts only
once when the low battery symbol is displayed.
APPENDANT FEATURE
Duplicate Message
If the same message is received more than once, duplicate indicator is displayed on the status line to
indicate that your message has already been received. New message contains the latest time stemp.
Error Message check
If the personal message is invalid message, error indicator is displayed on the read selection message.
Antenna Display
Antenna is displayed inside service area, and no antenna display for out of range.
33

Neither your Wireless Provider nor Sun Telecom International is responsible for data that may be
damaged or lost at any time, including, without limitation data lost or damaged during the servicing
of Sun Telecom International hardware. In as much as the wireless data service provided, we cannot
guarantee or warrant that the wireless data service will always be available or will always function
properly. For this and other reasons, the wireless data service should not be relied upon for the
transmission of data relating to emergency or life-threatening or mission critical situations, and Sun
Telecom International disclaims any liability on its behalf and on behalf of its Wireless Providers for
events or damages resulting from such reliance or the failure of the wireless data service to perform
or to be available for your use of the wireless data service, including, without limitation, the lack of
service coverage in the area in which YOU wish to use the wireless solution. To the extent the third
party providing the wireless data service provides any warranties or guarantees that may be passed
on to YOU, such warranties and/or guarantees are automatically passed on to YOU without any
further effort on your part or on the part of Sun Telecom International. Neither Sun Telecom
International nor your wireless provider shall in any way be liable to you for any damages you suffer
or incur (including, but not limited to, general, special, consequential or incidental damages
including damages for loss of business profits, business interruption, loss of business information
and the like and personal injury or wrongful death damages) arising from or in connection with the
use or performance of our product, even if Sun Telecom International or your wireless solution
provider are aware of the possibility of such damages. This limitation is intended to apply and does
apply without regard to whether such damages are claimed, asserted or brought in an action or claim
sounding in tort or contract, or on the warranty, or under any other law or form of action.
This equipment has been tested and found to comply with the limits of a
Class B digital device, pursuant to Part 15 of the FCC Rules. These limits are
designed to provide reasonable protection against harmful interference
in a residential installation. This equipment generates, uses, and can
radiate radio frequency energy and, if not installed and used in
accordance with the instructions, may cause harmful interference to
radio communications. However, there is no guarantee that interference
will not occur in a particular installation. If this equipment does cause
harmful interference to radio or television reception (which can be
determined by turning the equipment off and on), the user is encouraged
to try to correct the interference by one or more of the following measures:
Reorient/Relocate the receiving antenna.
Increase the separation between the equipment and receiver.
Connect the equipment into an outlet on a circuit different from
that to which the receiver is connected.
Consult the dealer or an experienced radio/TV technician for help.

 Loading...