

All Designer Drawers are "Self-Rimming", meaning that whatever
the Cut-Out edge looks like, as it is always rough, the product rim
will cover all edges. Specific to Designer Drawers, see the
adjustable Legs with Rubber Footings located at the Back of Drawer
Box.
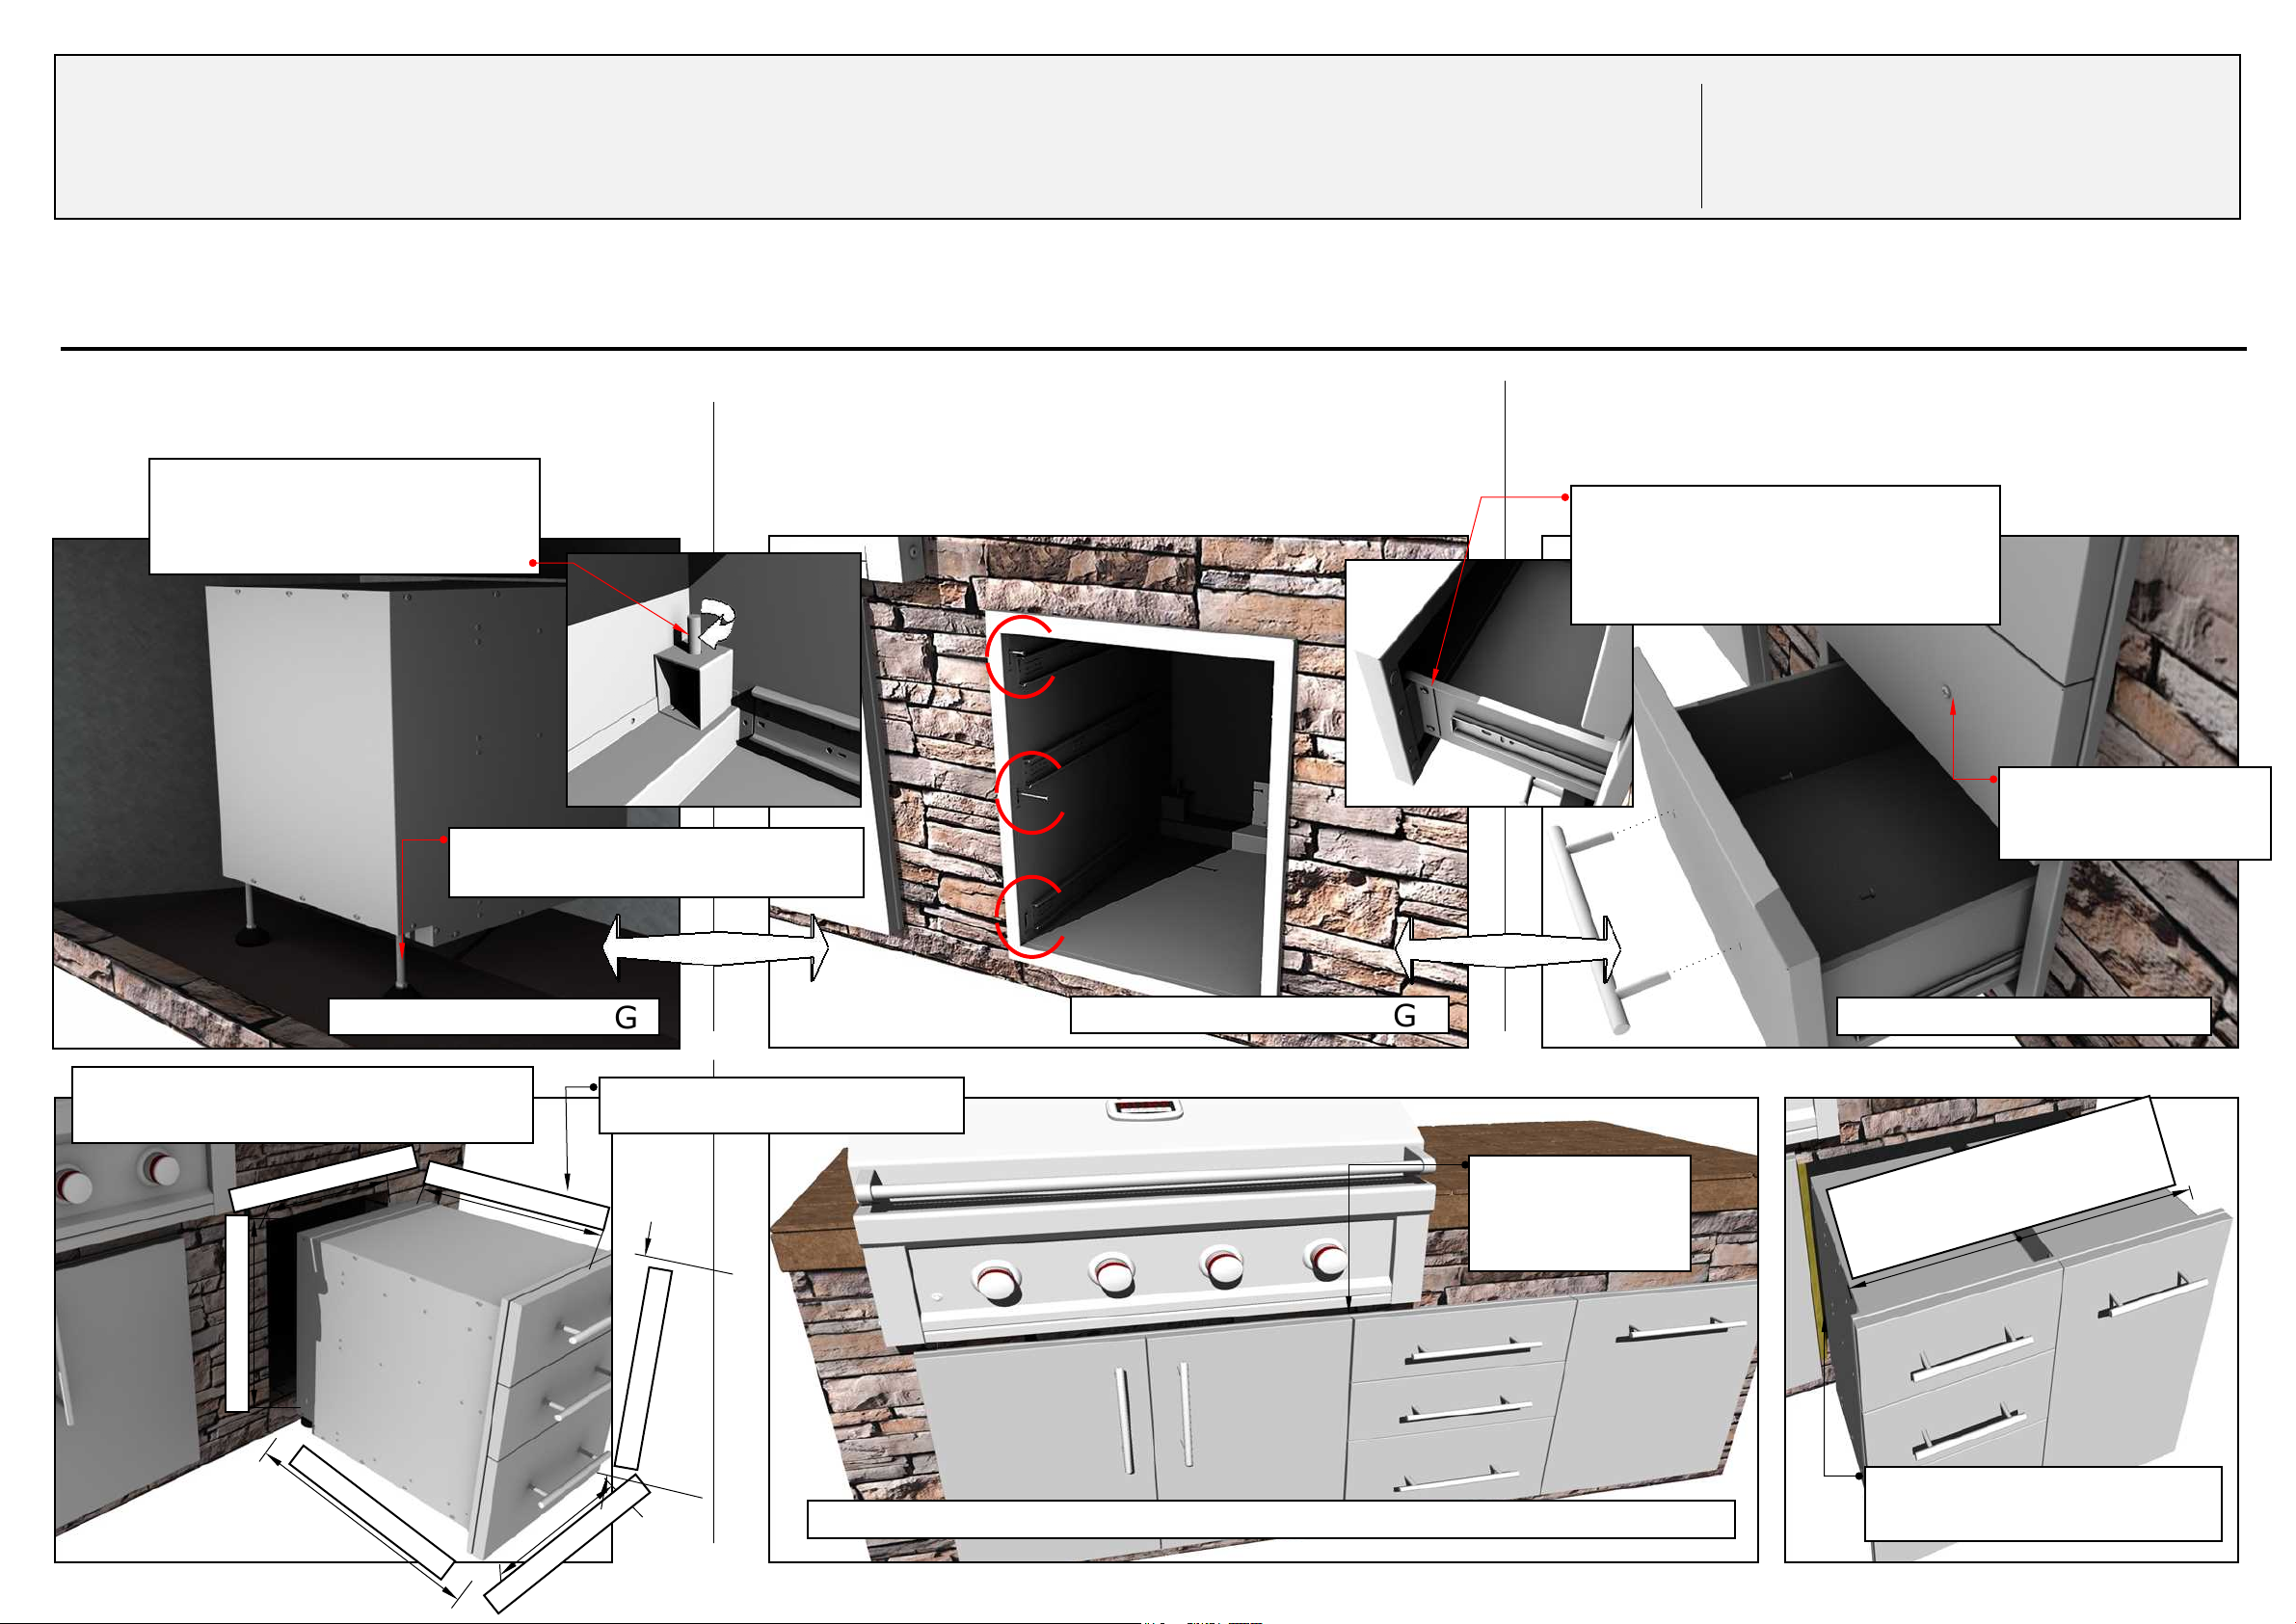
Start by removing ALL drawers by locating the small Black Lever on the Left &
Right Drawer Track while drawer is fully extended. Lift UP on the Left Lever
while Pushing Down on the Right Lever and slide drawer completely out.
Locate the "Pre-Drilled" Holes on the Left and Right sides. You will need to use
correct screw to properly secure to island frame per construction type. If Drawer
box is still not Level - continue adjusting the two leveler bolts in back, also we
suggest using a "Leveler" to find the exact Horizontal Line.
Check the Alignment of the Drawer Box that is Horizontal, add additional
Shimming in back of box if needed. If you have not already installed the
Handles - Please do that now, handles come packaged pinned inside the
drawer face, you may need to reverse them using a Screw Driver.
PLACING:
MOUNTING:
ADJUSTING:
DESIGNER SERIES DRAWERS
INSTALLATION GUIDE
EXAMPLE: ADJUSTING
EXAMPLE: MOUNTING
EXAMPLE: PLACING
CUT-OUT HEIGHT
CUT-OUT WIDTH
PRODUCT WIDTH
PRODUCT HEIGHT
Designer Series Doors & Drawers are configurable both Vertically & Horizontally, follow these steps for proper installation. Designer Series
Components are designed to Match with our Stainless Steel Cabinet Islands.
REFER TO YOUR INDIVIDUAL PRODUCT
SPECIFICATION SHEET THAT CAME WITH
YOUR SUNSTONE PRODUCT
TECHINICAL SUPPORT
888-934-9449 Press 1
SERVICE@SUNSTONEMETALPRODUCTS.COM
PRODUCT DEPTH
CUT-OUT DEPTH
Adjust Leveling Leg Down to floor base
or place brick beneath leg if Drawer Box
is positioned high.
See Leveling Leg locating in back
of Drawer Box, after Drawers are
removed, reach into empty box to
Turn Bolts down-wards in order to
drop Leveling Leg Down for each Side
CUT-OUT DEPTH THE DEPTH OF DRAWER
BOX NOT INCLUDING THE FRONT DRAWER
PANEL AND DRAWER FRAME
If any other the drawer face panels
are not aligned Horizontal, this will
prevent drawer from closing properly.
Locate the two screws on the Left & Right
sides behind drawer panel, looses slightly
to re-align drawer face panel.
See Screws on front
panels, need to unscrew
from inside and fasten on
front drawer face
ADD 3/4" WIDTH IN CUTOUT
WHEN COMBINING MOLTIPLE
COMPONENTS TOGETHER BOTH
HORIZONTALLY & VERTICALLY
1/16" INCH BEVELED
FRAME ALLOWS UNITS
TO BE CONFIGURED BOTH
HORIZONTAL & VERTICLE
ALL WITHIN A SINGLE
CUT-OUT
COMBINE MULTIPLE COMPONENTS IN ANY COMBINATION
WHEN MOUNTING TO FRAME, PLACE
TIGHT SIDE BY SIDE, WITH DRAWERS
REMOVED, SECURE TOPS, BASES & SIDES
TO INNER FRAME.
 Loading...