

Page 1
SUNSHOWER SOLO
INSTALLATION MANUAL
Before installing the Sunshower read this installation manual
EN
Page 2

18
serial sticker
INTRODUCTION
Congratulations with the purchase of your Sunshower Solo. With the Sunshower
Solo you will enjoy the infrared light in your own bathroom! Infrared warmth is very
comfortable, it stimulates the blood circulation and has a healing effect on your
muscles and joints. With the Sunshower Solo you will turn your bathroom easily
into a functional infrared cabin that you can use every day. The Sunshower Solo is
made from high quality materials and has a stylish nish.
Relax, enjoy and experience the Sunshower feeling!
The Sunshower is a safe system and meets all the CE requirements. Read the user
manual carefully before you use the appliance and save it for future reference.
CONTENTS OF THE PACKAGE
• Sunshower Solo
• Bottom bracket
• Top bracket, bolt M8x25
• Waterproof cable socket
• Mounting bag
INSTALLATION SUMMARY
We recommend that you adhere to the following order to install the Sunshower:
1. Determine the location 3
2. Place the brackets 4
3. Connect the electricity 9
4. Install the Sunshower Solo 14
Revisie A
Page 3
19
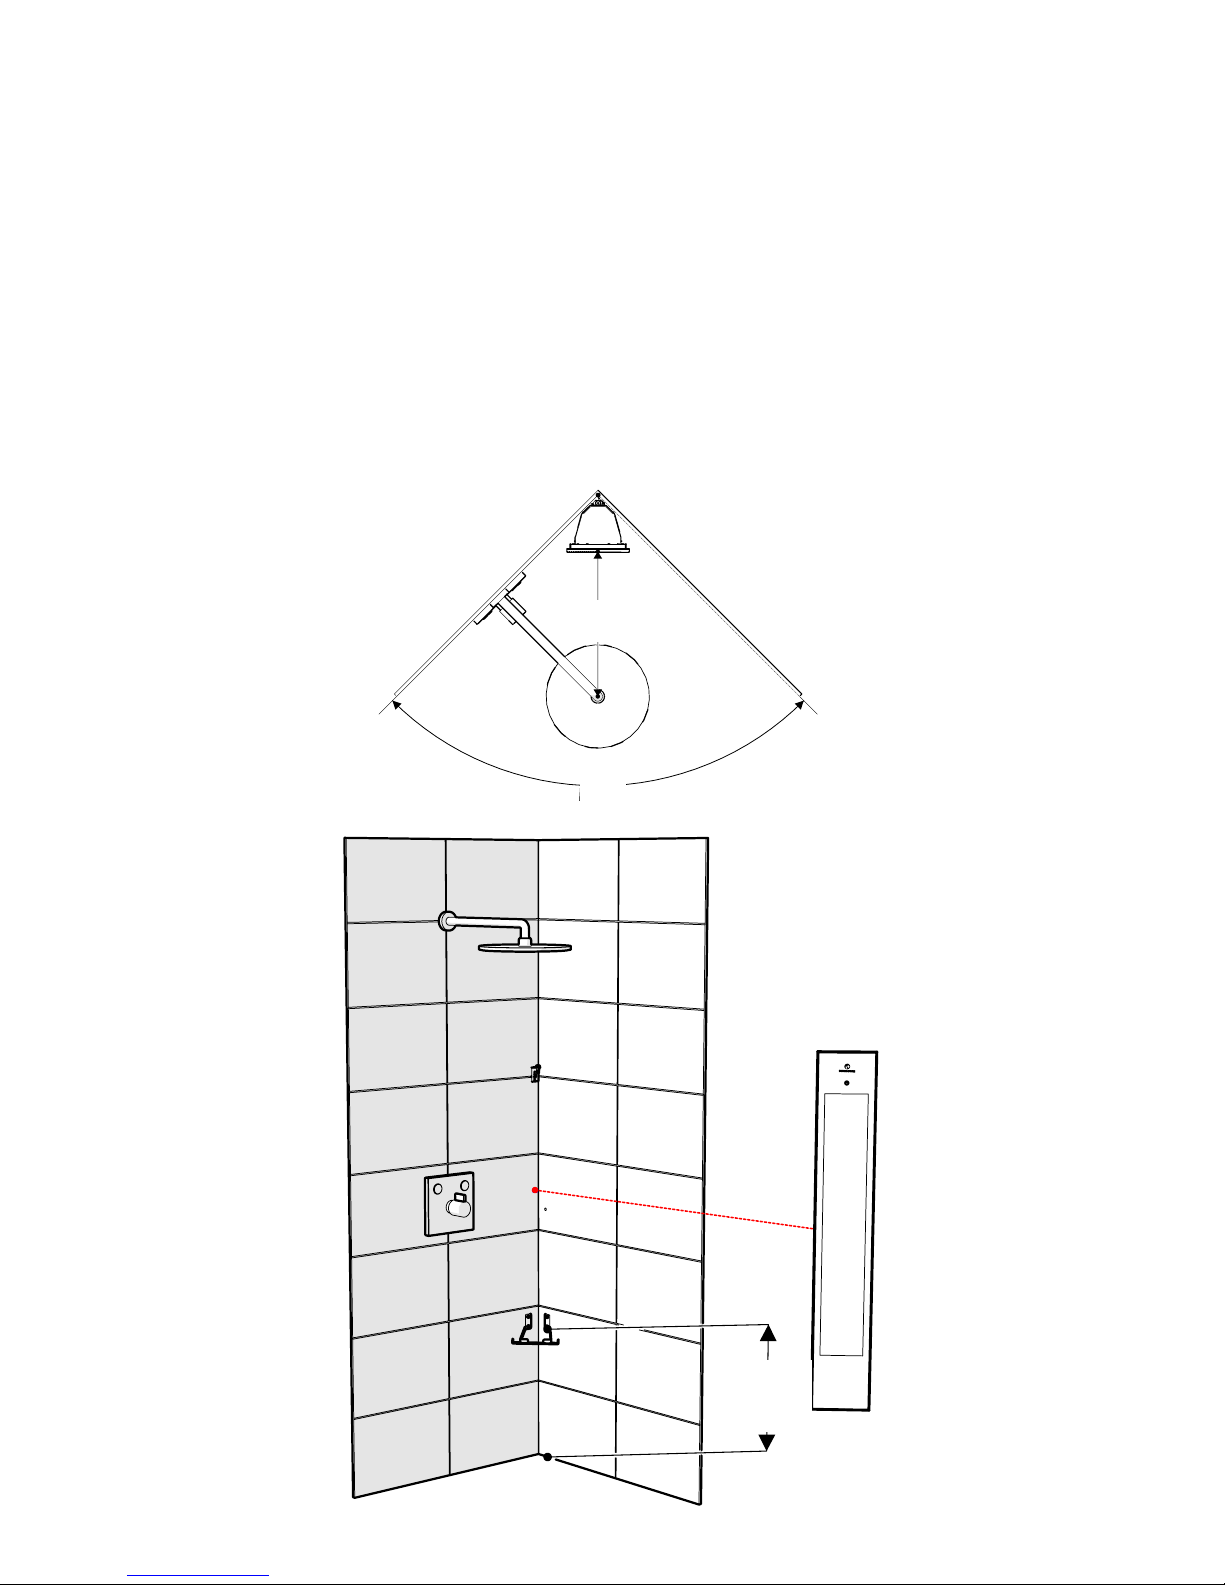
1. DETERMINE THE LOCATION
Distance from the glass pane to the heart of the showerhead.
For a good result the distance between the glass pane of the Sunshower and the
shower head should be about 40 cm.
Determine the mounting height of the Sunshower Solo.
For users between 1.60 m and 1.90 m you can use the average suspension height of
52 cm.
For individuals that are smaller or larger than described above, the mounting height
(in cm) may be determined as follows:
Body Height - 125 cm.
520
400
90°
Page 4
20
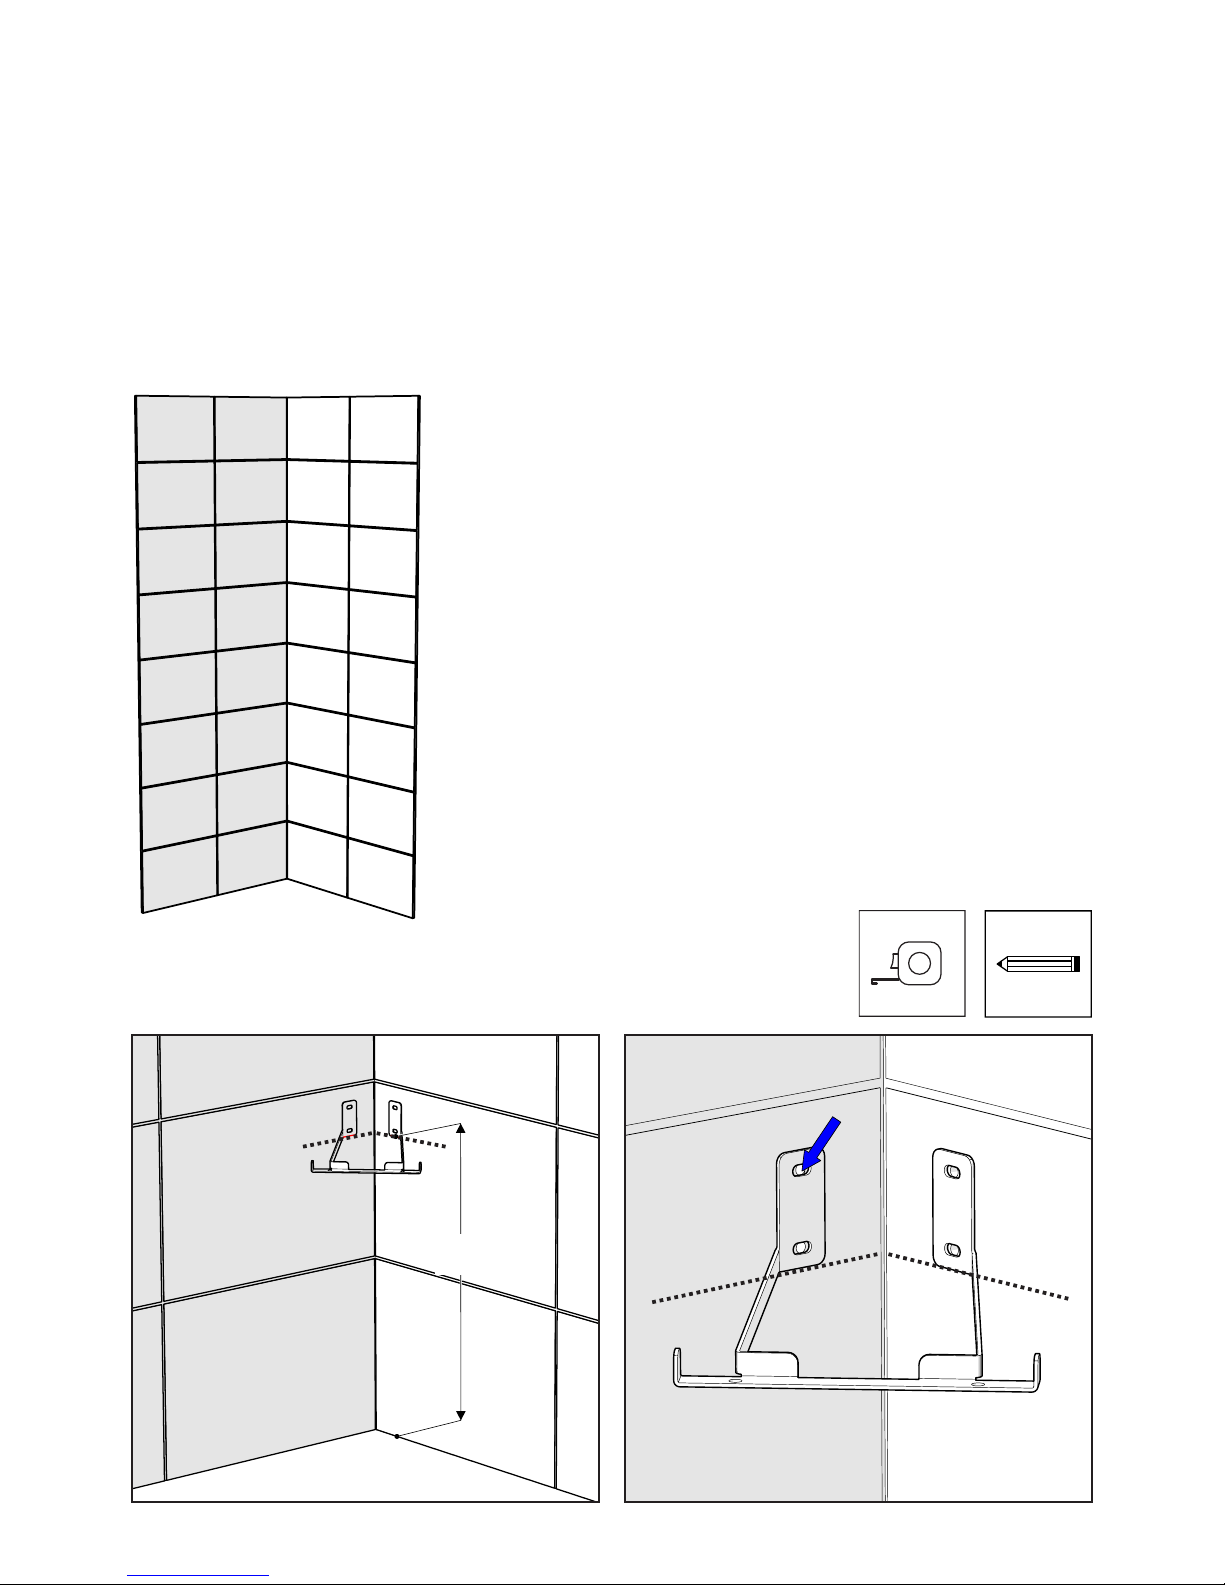
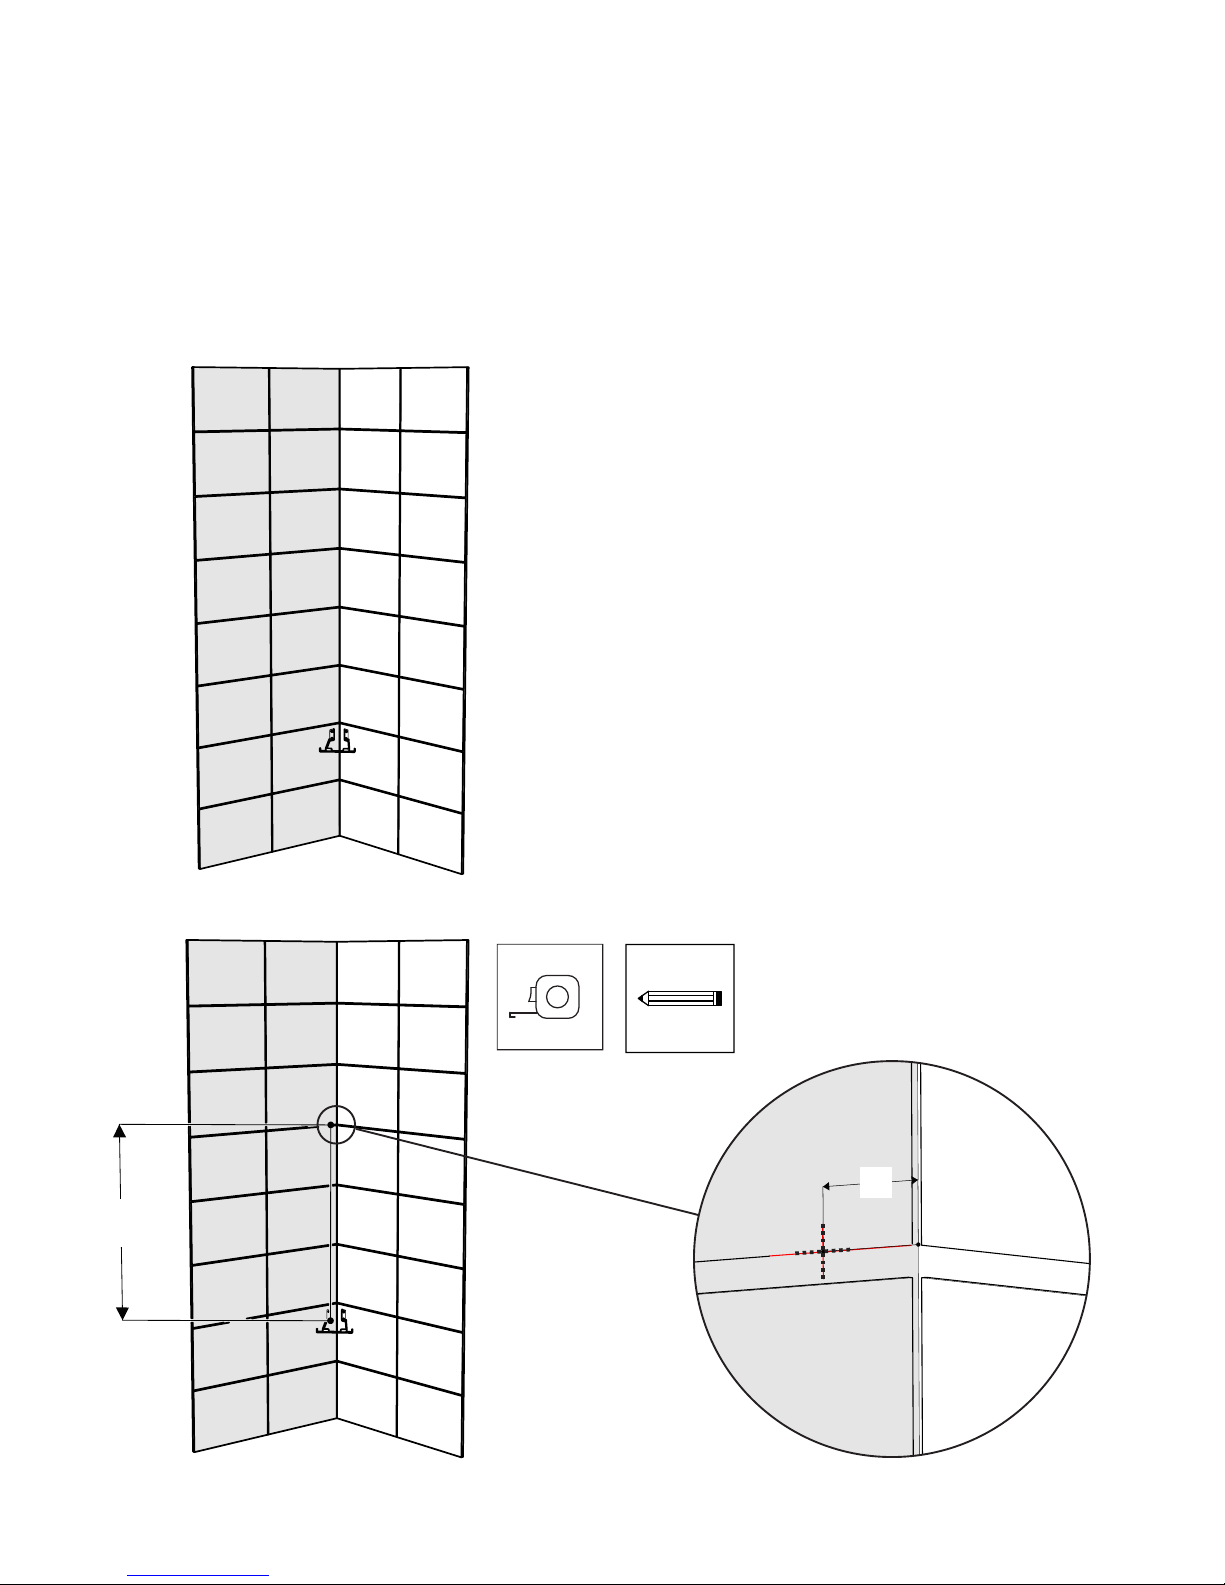
2. PLACE THE BRACKETS
Bottom bracket
1. Starting situation
2. Mark the bracket
3. Drill the holes
4. Place the plugs
5. Attach the bracket with the screws
520
1. Starting situation
2. Mark the bracket
4x
Page 5
21
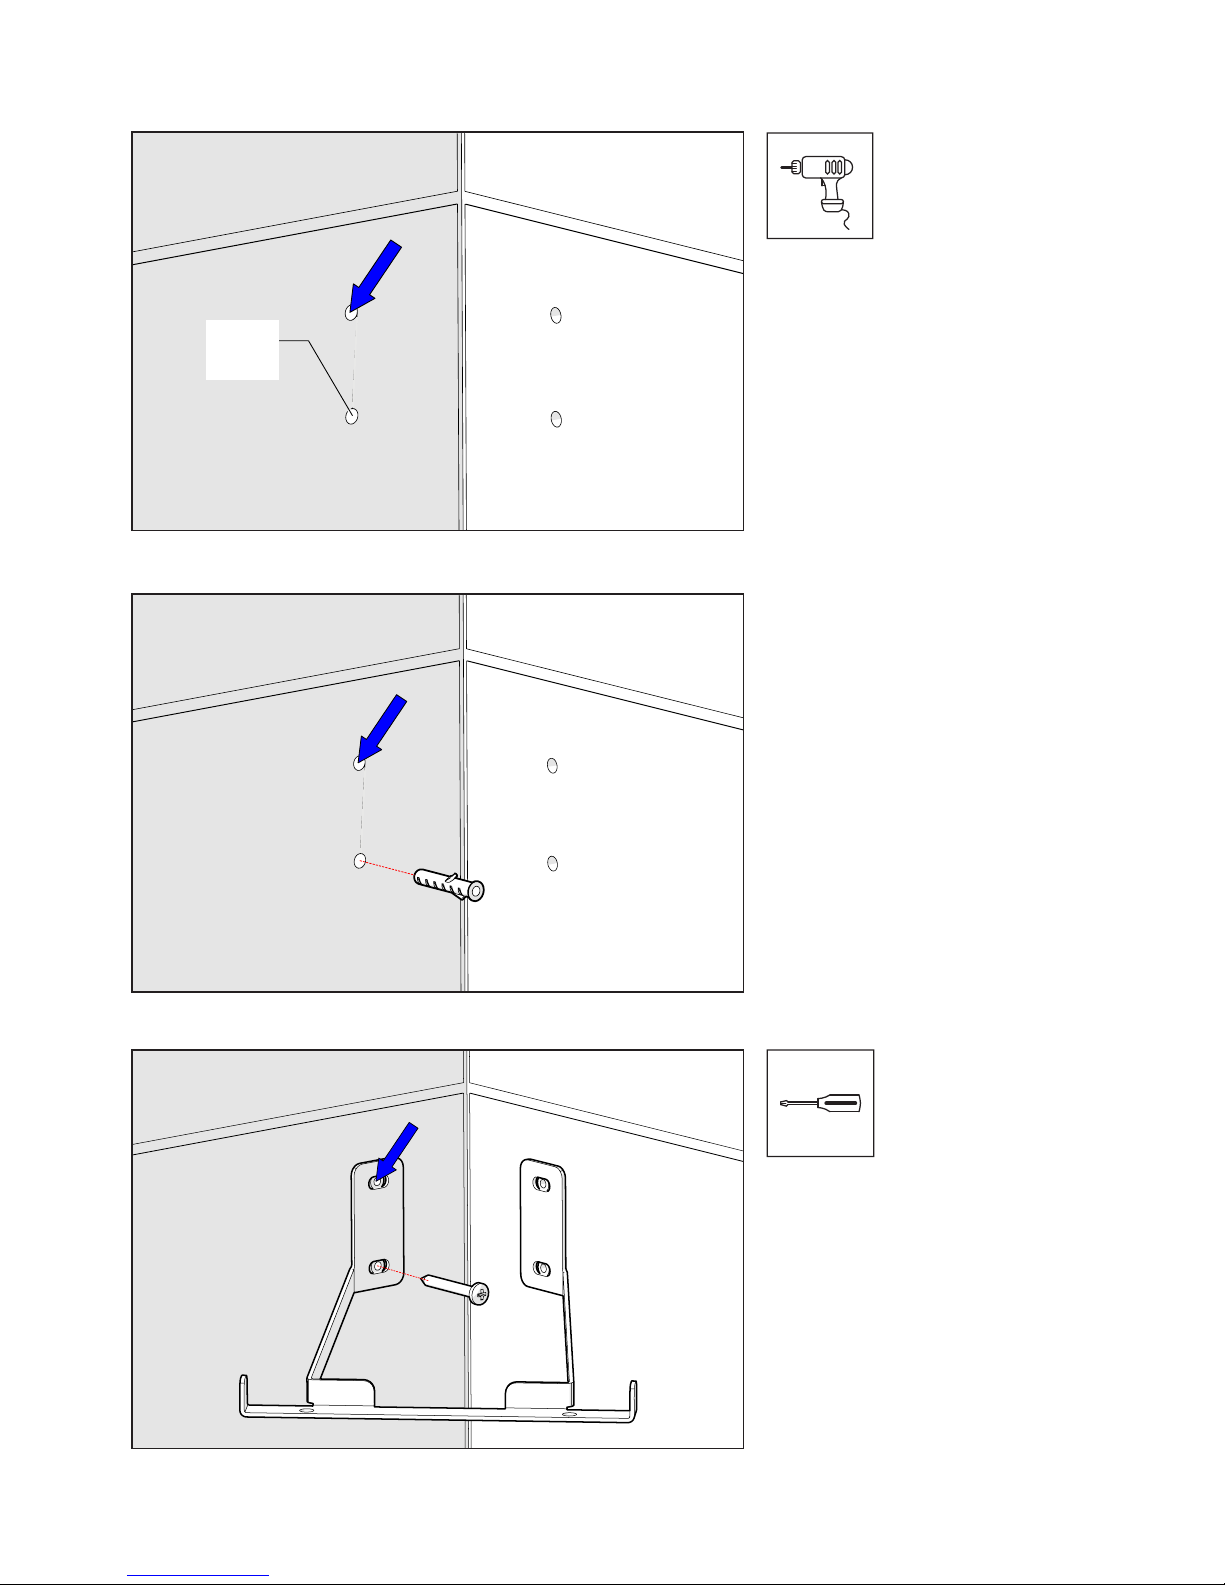
Ø 6
3. Drill the holes
4. Place the plugs
5. Attach the bracket with the screws
4x
4x
4x
Page 6
22
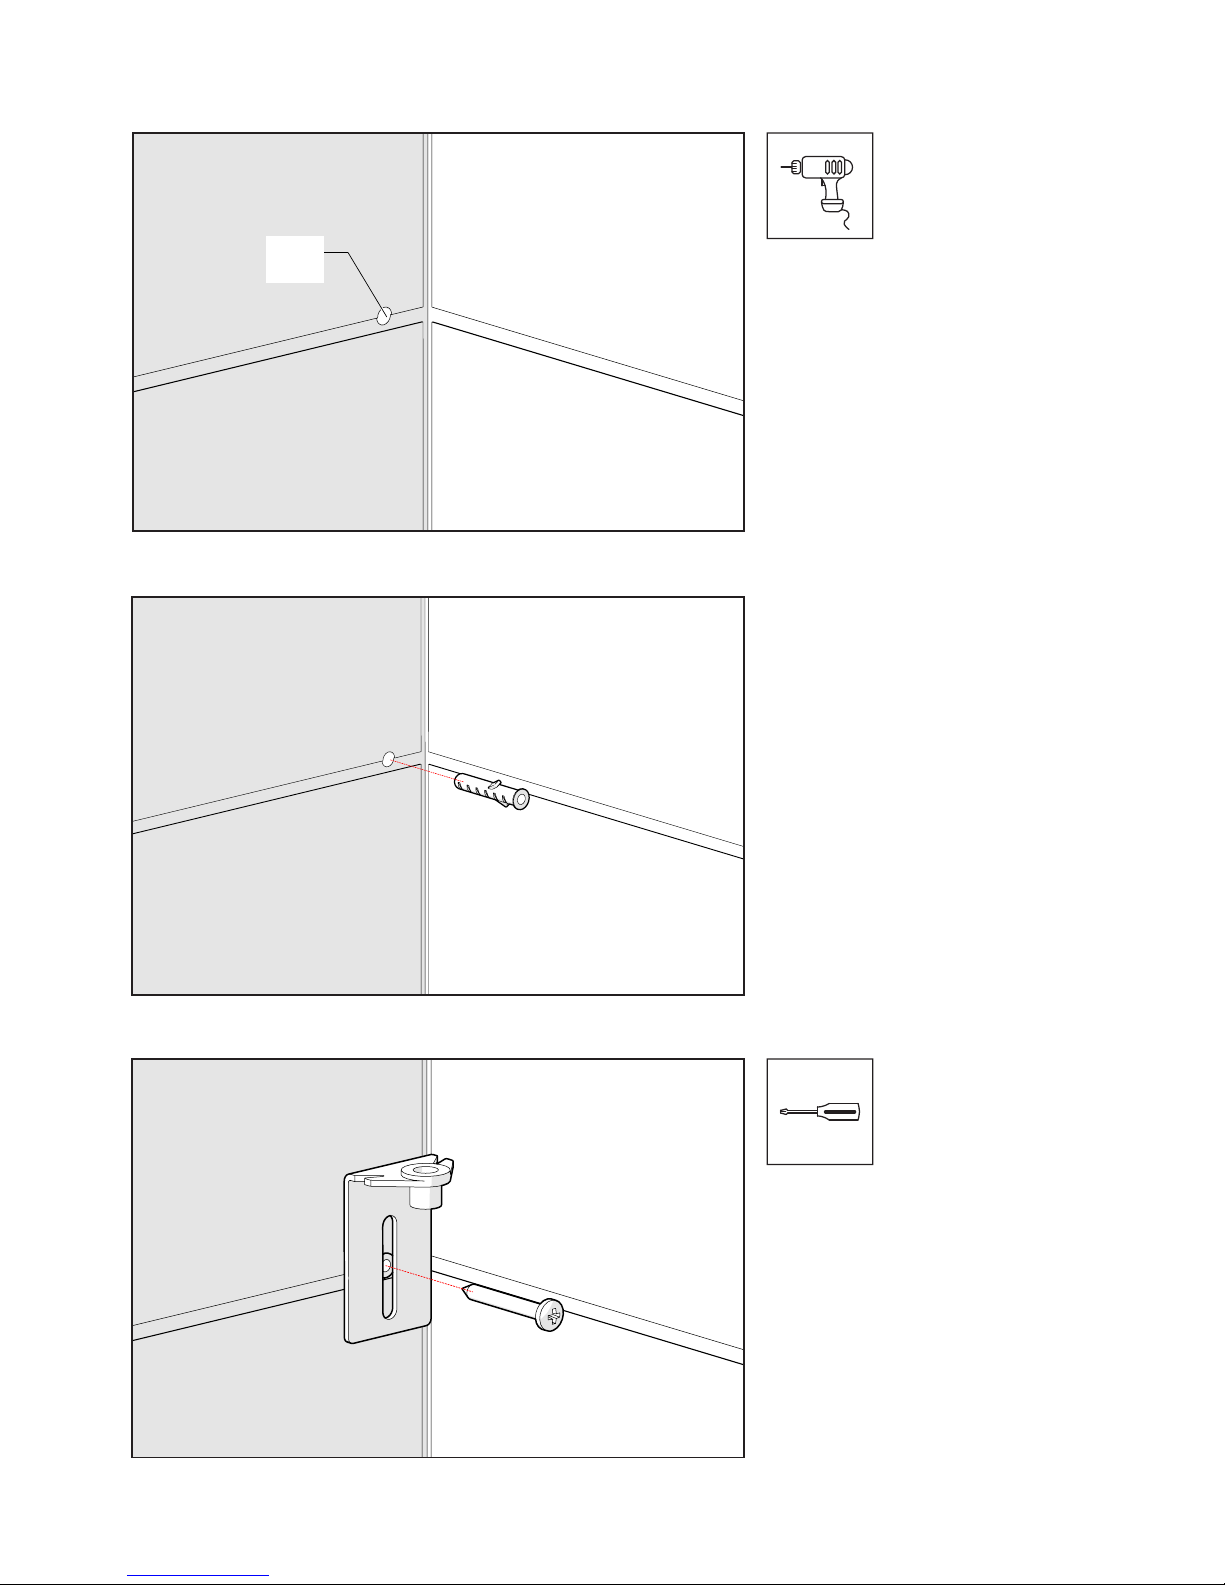
Mount the top bracket on the left or right wall
1. Starting situation
2. Mark the bracket
3. Drill the holes
4. Place the plugs
5. Attach the bracket with the screws
6. Fit the bolt
1. Starting situation
2. Mark the bracket
1000
19
Page 7
23
3. Drill the hole
4. Place the plug
5. Attach the bracket with the screw
Ø 6
1x
1x
1x
Page 8

24
6. Fit the bolt
Screw the bolt as far as is depicted in the picture above.
1x
Page 9
25
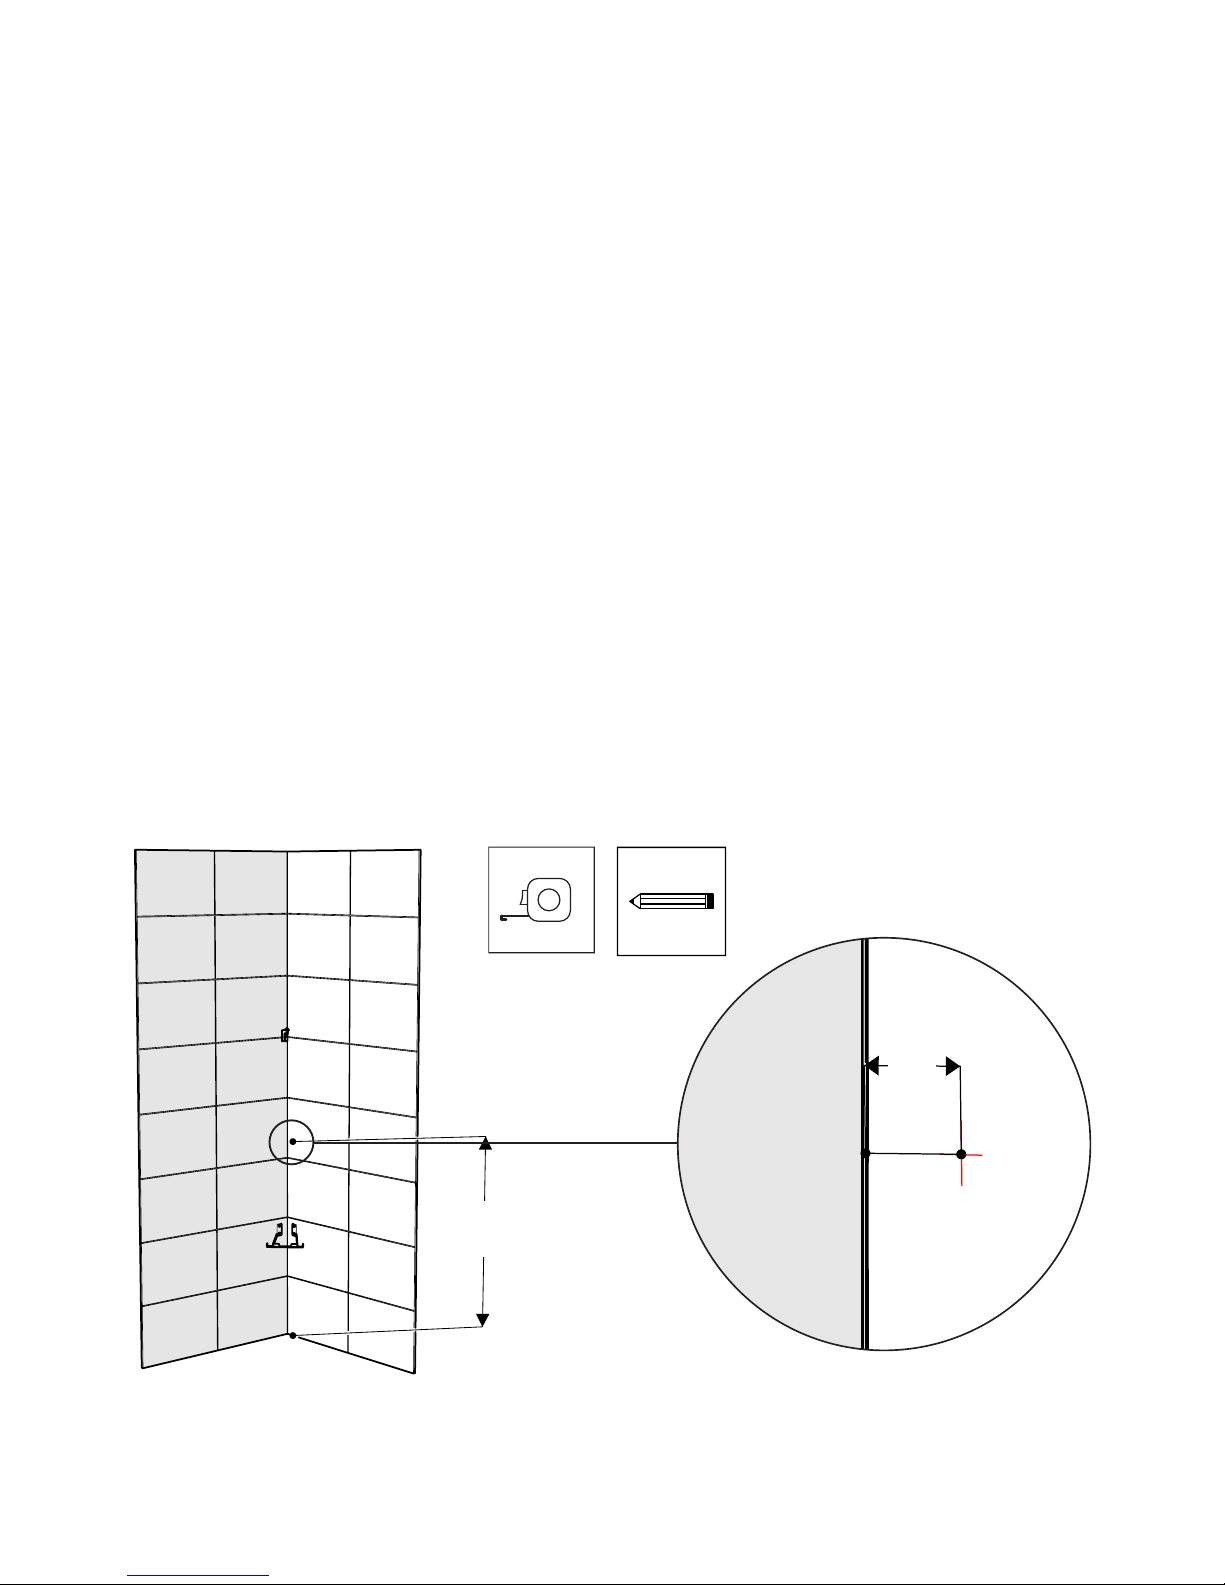
3. CONNECT THE ELECTRICITY
There are three ways to connect the electricity, choose A, B or C.
A. Connect the electricity in another room
You drill a hole into an adjoining room. The cable is out of sight.
B. Place the cable in the wall under the tile
This is only possible in a bathroom to be renovated. The cable is out of sight.
C. Connect the electricity in the bathroom
The cable is visible.
The Sunshower Solo has a cable of 4 meters.
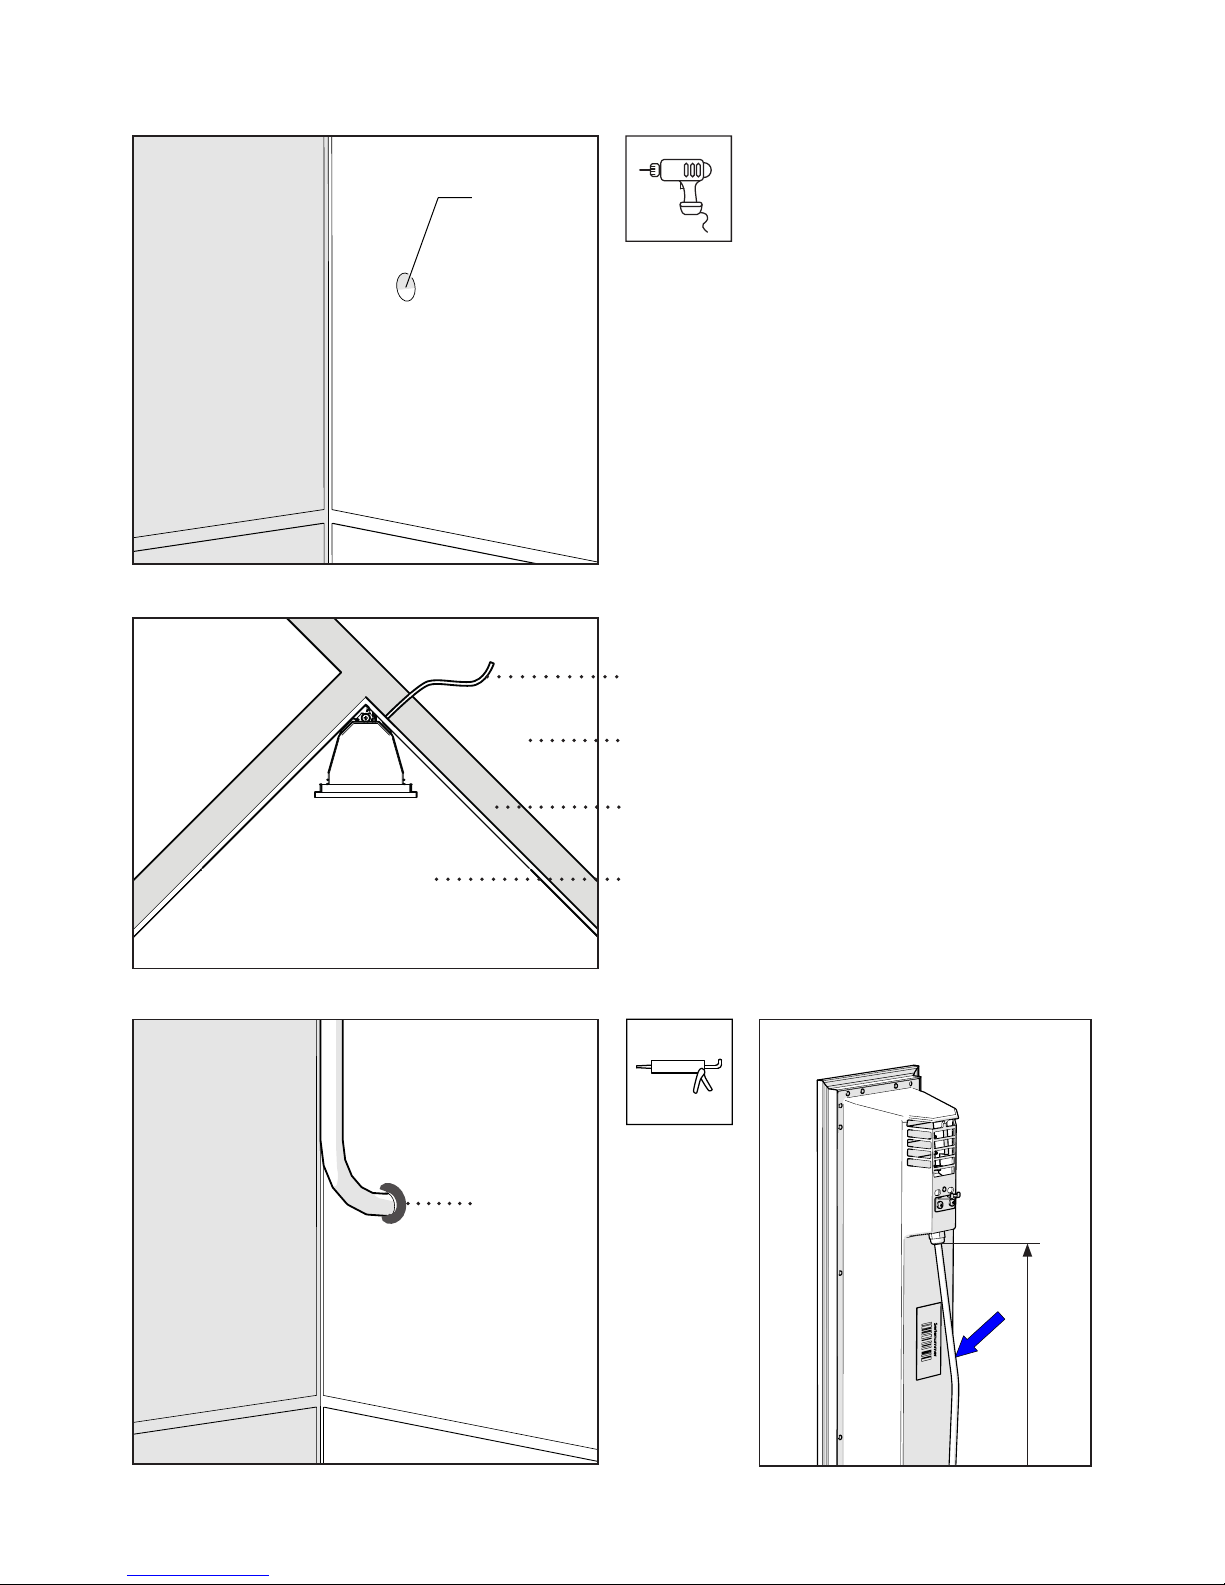
A. Connect the electricity in another room
1. Mark the hole
2. Drill the hole
3. Bring the cable through the hole to the adjacent room
4. Caulking the cable in the bathroom
1000
40
1. Mark the hole
Page 10
26
2. Drill the hole
4. Caulking the cable in the bathroom
Ø 10
Make sure there is 60 cm cable between the wall and the Sunshower.
3. Bring the cable through the hole to the adjacent room
Shower
Adjacent room
Wall
Cable
Caulking
60
Page 11
27
1000
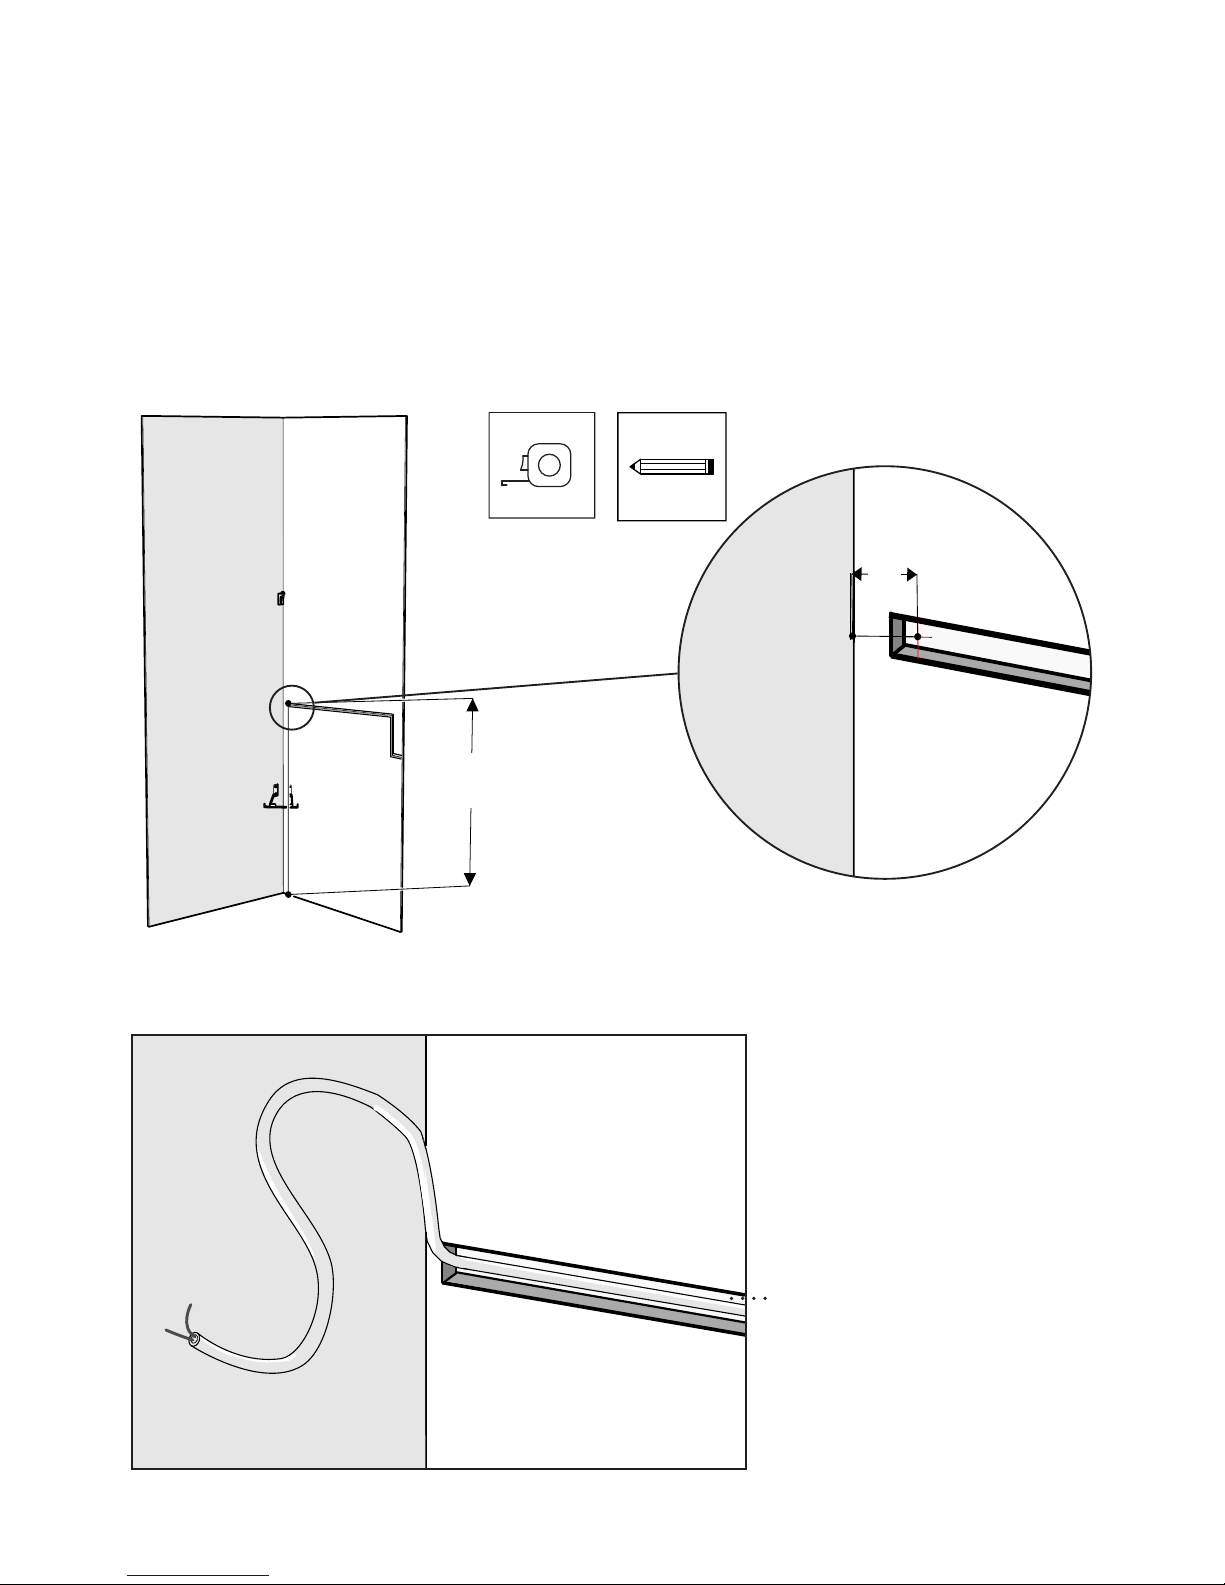
B. Place the cable in the wall under the tile
1. Mark the location the cable should come out of the wall
2. Place the cable in the milled slot
3. After you have placed the tiles you seal the cable
4. Connect the Sunshower by using the cable socket
1. Mark the location the cable should come out of the wall
2. Place the cable in the milled slot
Make sure there is 100 cm cable out of the wall. Later on you will cut it to length.
40
Milled slot
Use a XMVK cable with a maximum outer diameter of Ø10 mm.
Page 12

28
Cable Solo
Own cable
3. Connect the Sunshower by using the cable socket
Make sure there is 60 cm of the cable between the wall and the Sunshower. Use 20
cm cable from the Sunshower and 40 cm of your own cable. The cable socket comes
with an instruction manual. It describes how to connect the cable socket.
Cable socket
3. After you have placed the tiles you seal the cable
Caulking
2040
Page 13

29
C. Connect the electricity in the bathroom
Use a cable conduit to guide the cable to the electrical connection point.
Page 14
30
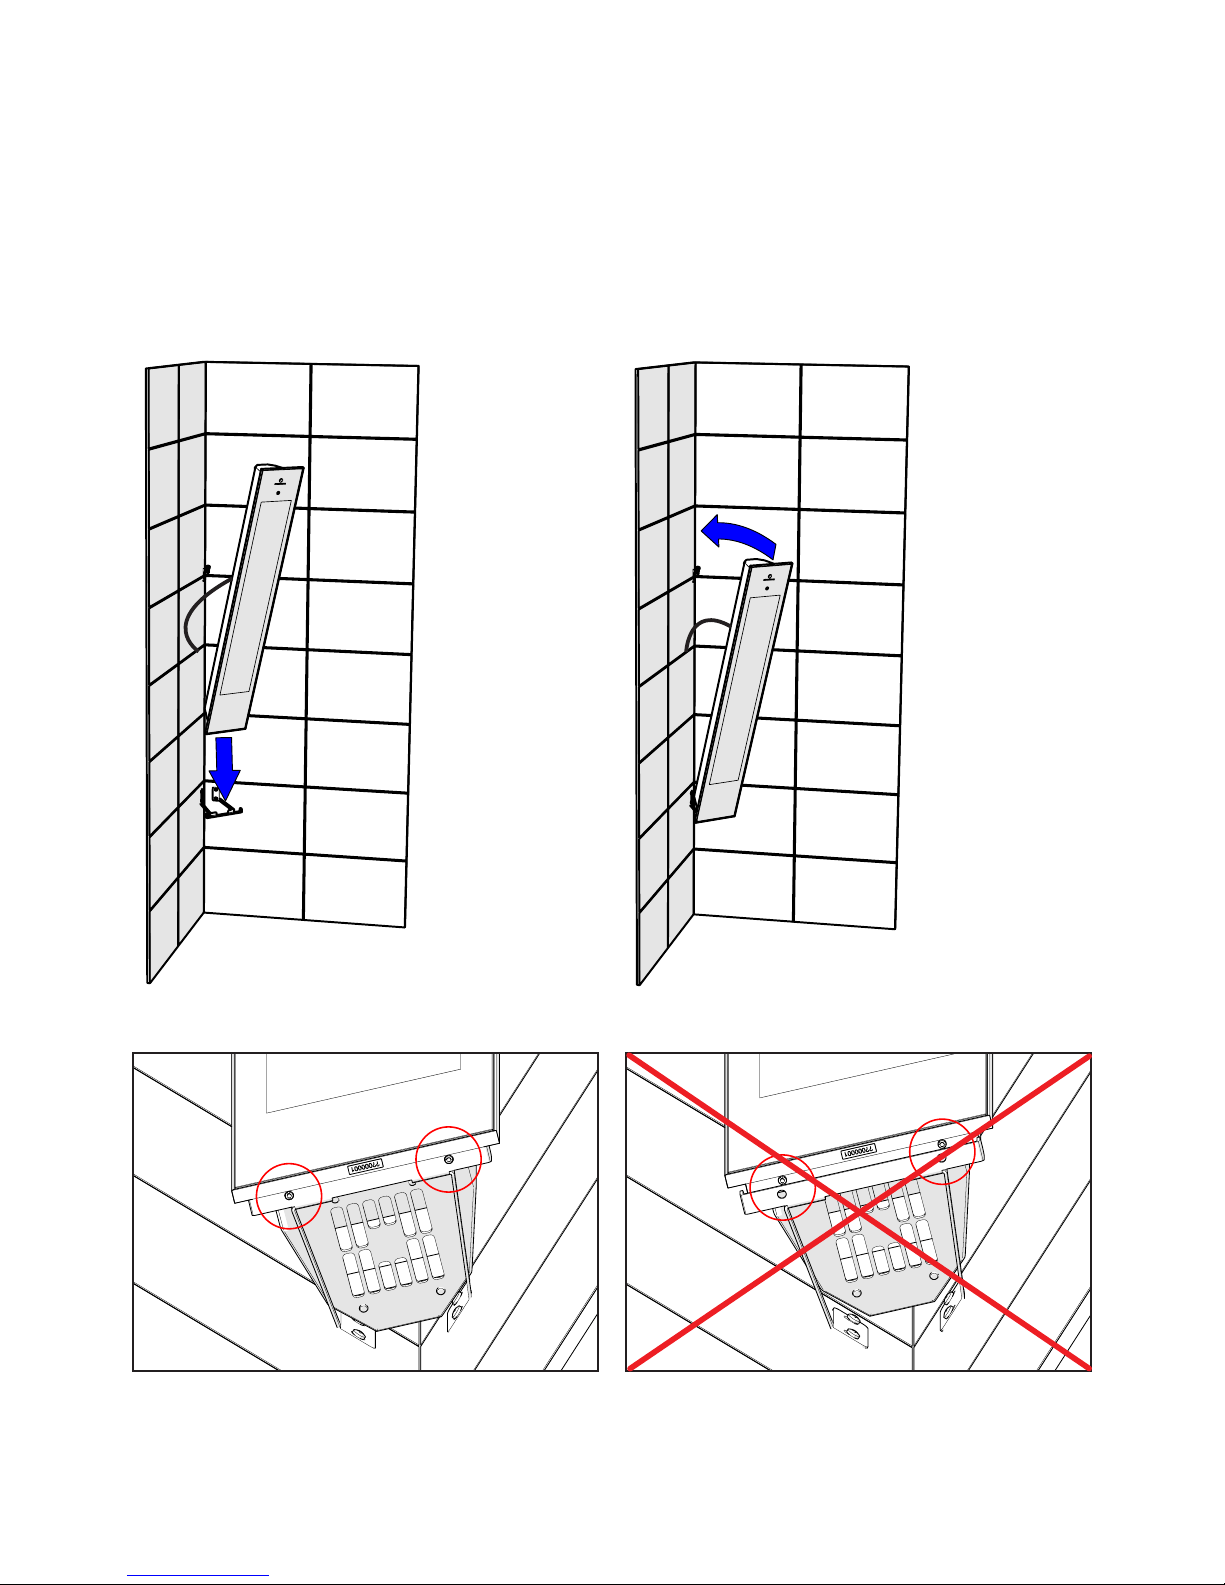
4. INSTALL THE SUNSHOWER SOLO
1. Place the Sunshower Solo on the bottom bracket
2. Make sure the pins are in the holes
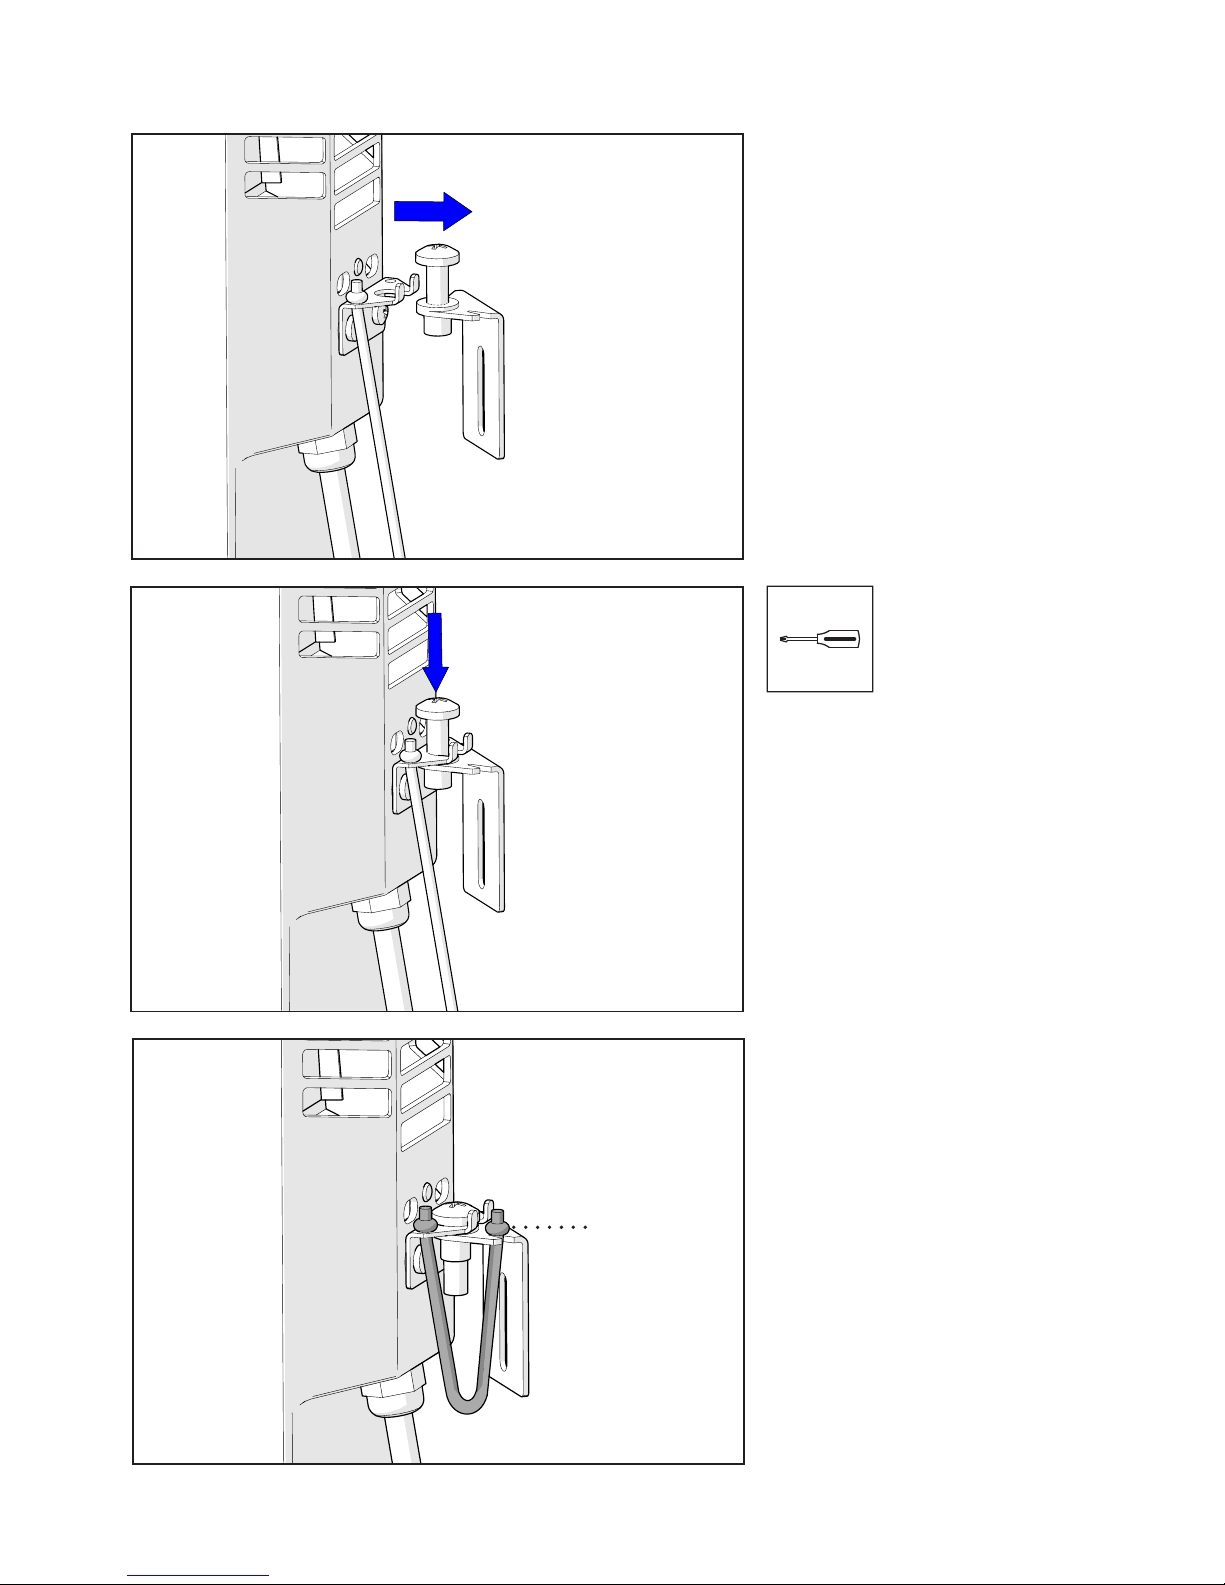
3. Tighten the bolt
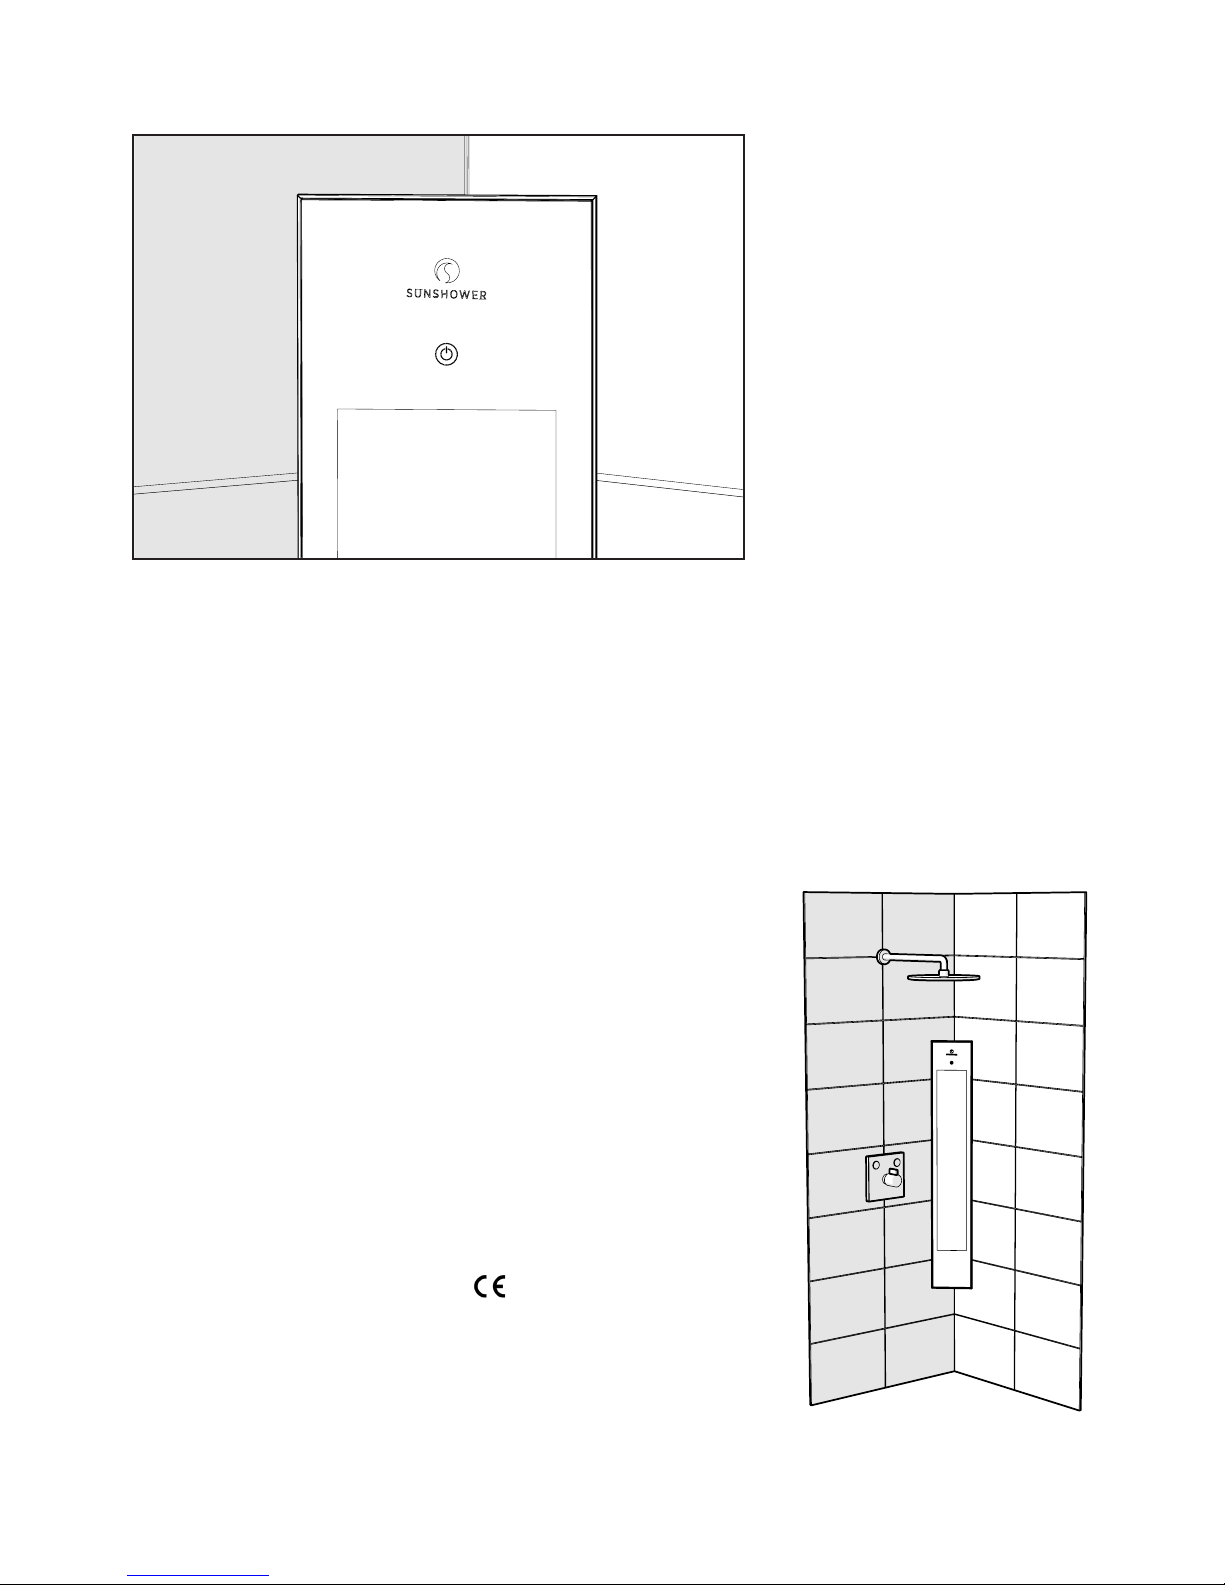
4. Test if the Sunshower is working
2. Make sure the pins are in the holes
1. Place the Sunshower Solo on the bottom bracket
1
2
The pins are properly installed The pins are not properly installed
Page 15
31
3. Tighten the bolt
Black cord
Place the black cord in the V shape of the installation bracket.
Page 16
32
4. Test if the Sunshower is working
Press the on / off button until the infrared lamps and the fan starts. The LED on the
on / off button will illuminate continuously. When the product is cooling the on / off
button shows a ashing LED.
TECHNICAL SPECIFICATIONS
Volt / Frequency 230 V~ / 50Hz
Capacity 1550 W
Dimensions whd 199 x 1238 x 180 mm
Temperature range 10°C tot 40°C
Humidity range 20% tot 100%
Installation height max 2000m above sea
level
Net weight 9,2 kg
Isolation class II (dubbel geisoleerd)
Lamp type 2x IR USHIO 750 W
Approbation mark
 Loading...