

Sunshine Kids Radian 65 Instruction Manual

Warnings 4
Seating Position Information 5
Child Restraint Safety Information 6
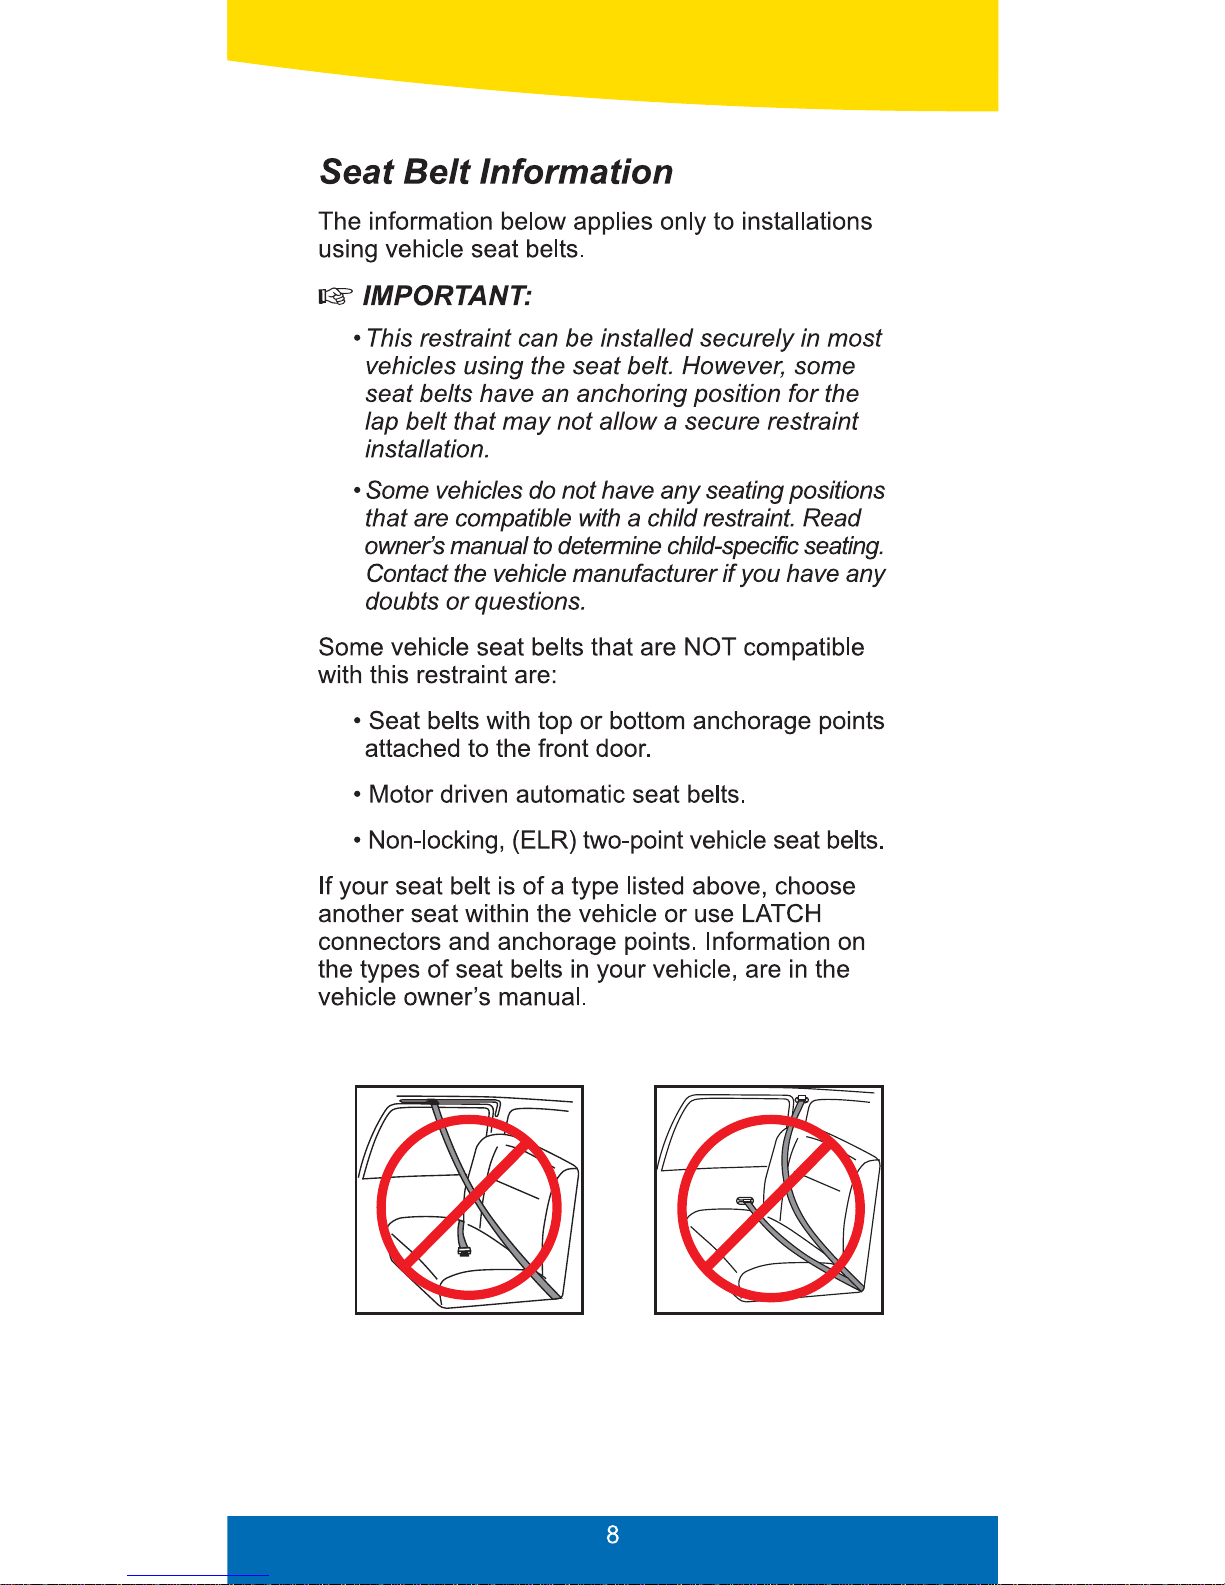
Seat Belt Information 8
Carrying Restraint 9
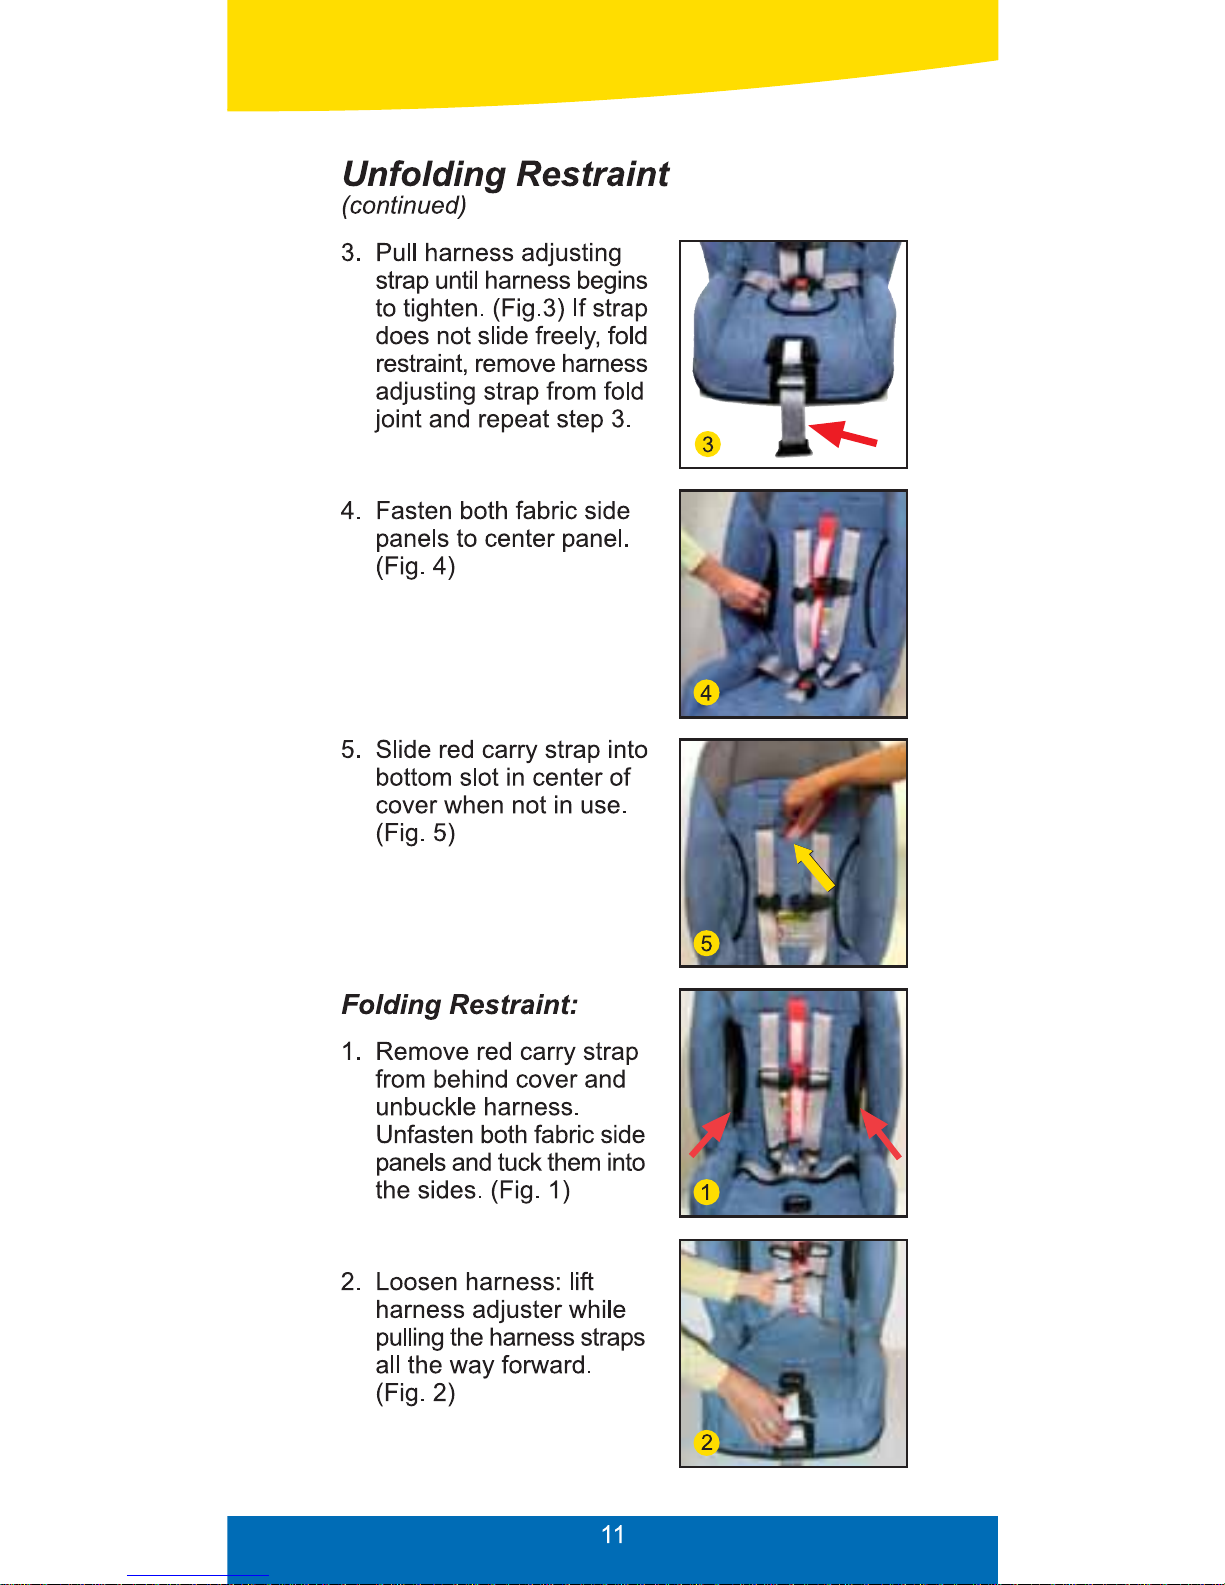
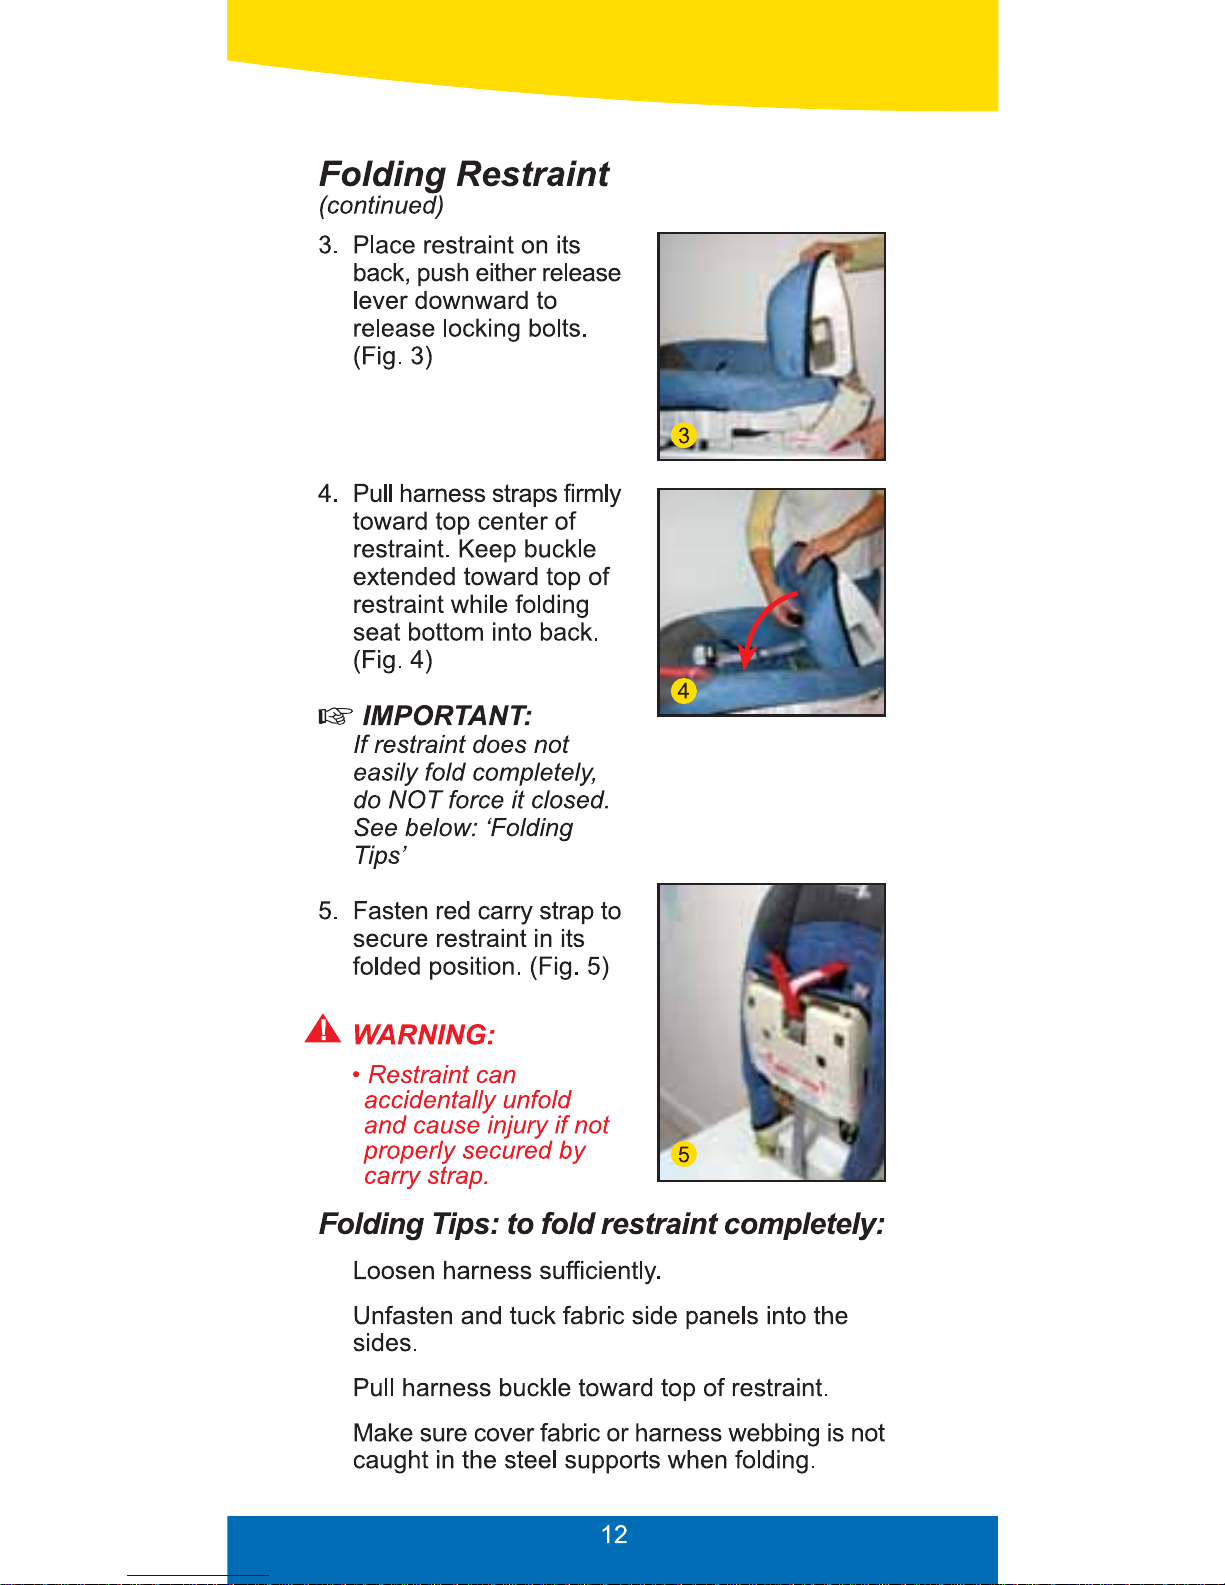
Unfolding and Folding Restraint 10
Installing and Removing Detachable Base 13
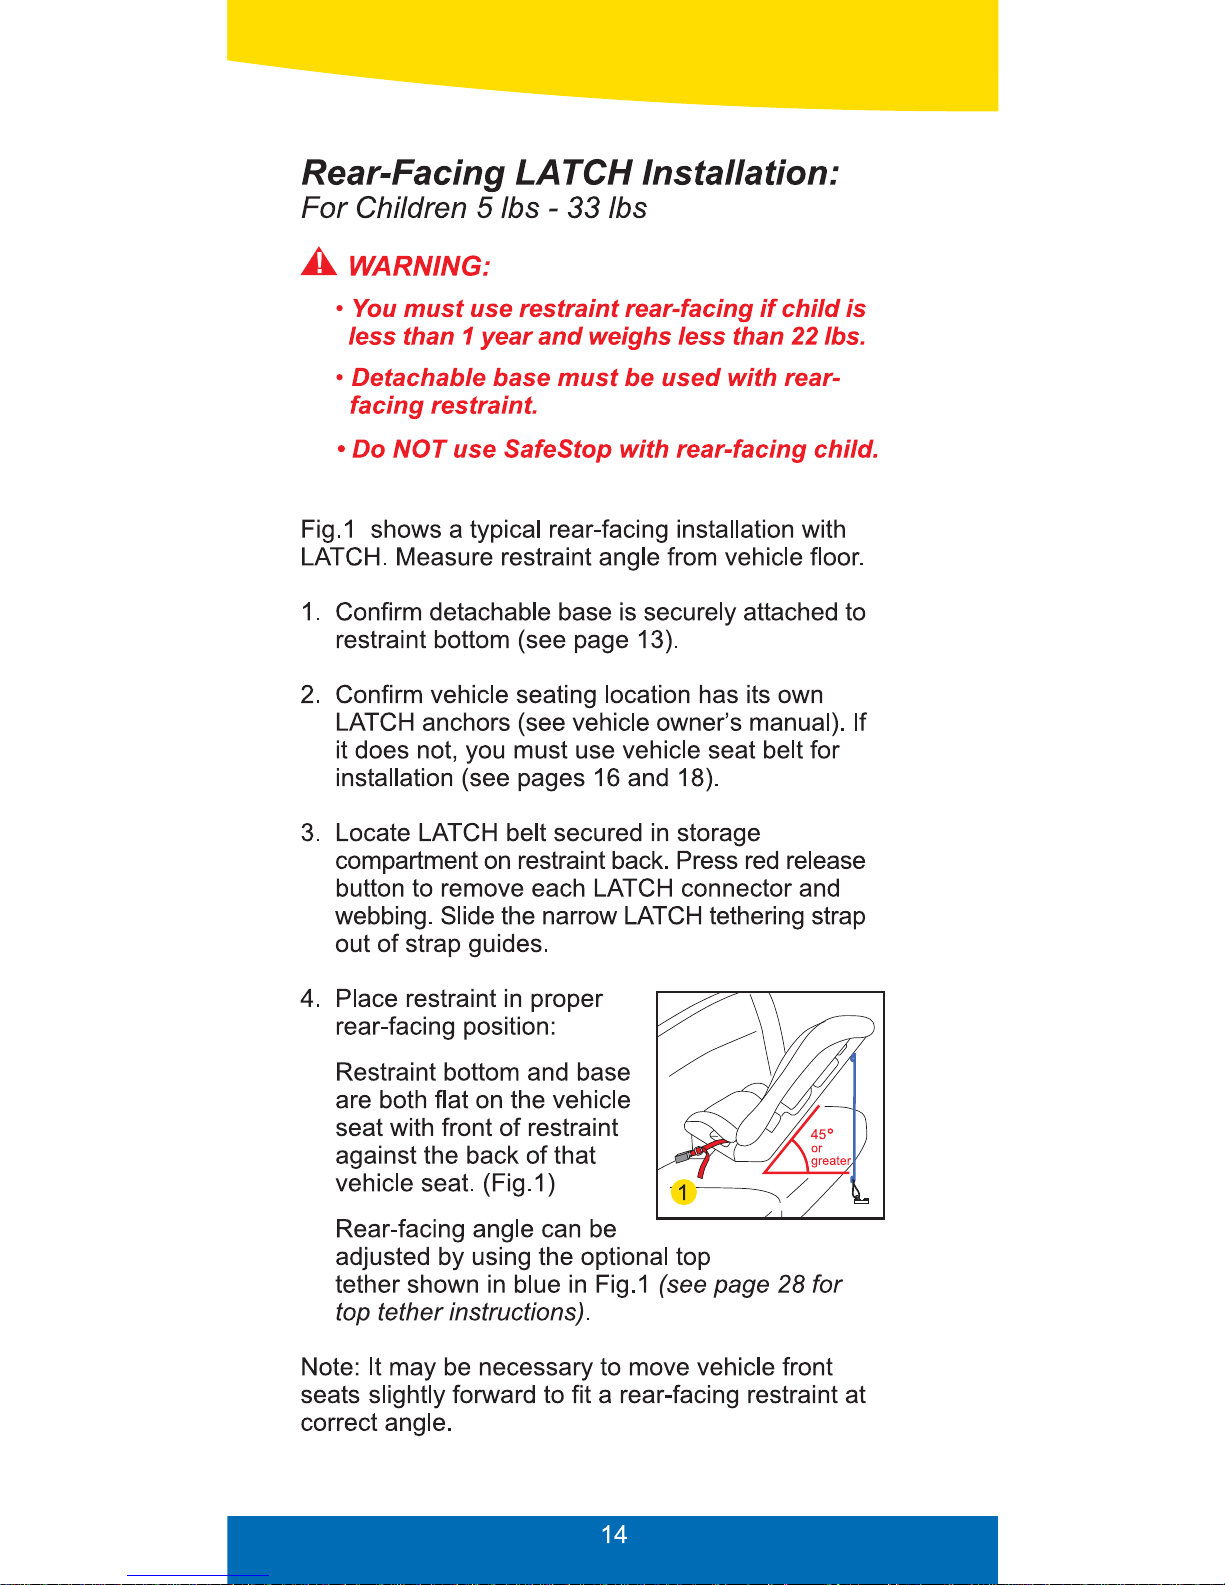
Rear-facing LATCH installation 5 to 33 lbs. 14
Rear-facing Lap-Shoulder Belt installation 5 to 33 lbs. 16
Rear-facing Lap Belt installation 5 to 33 lbs. 18
Forward-facing LATCH installation 22 to 48 lbs. 20
Forward-facing Lap-Shoulder Belt
installation 22 to 65 lbs. 22
Forward-facing Lap Belt installation 22 to 65 lbs. 24
Checking Restraint Stability 25
Aircraft Installation 26
SafeStop Instructions 26
Operating Adjustable Bottom 27
Top Tether 28
Tether Connecting Strap 29
Restraint Harness Buckle 30
Using Harness Clip 31
Properly Securing Child 32
Proper Harness height and Child Height 33
Adjusting harness height 34
Harness Buckle Location 35
Harness Buckle Removal and Installation 35
Locking Vehicle Belt with Locking Clip 37
Restraint Cover 38
Cleaning and Maintenance 39
Warranty Information 42
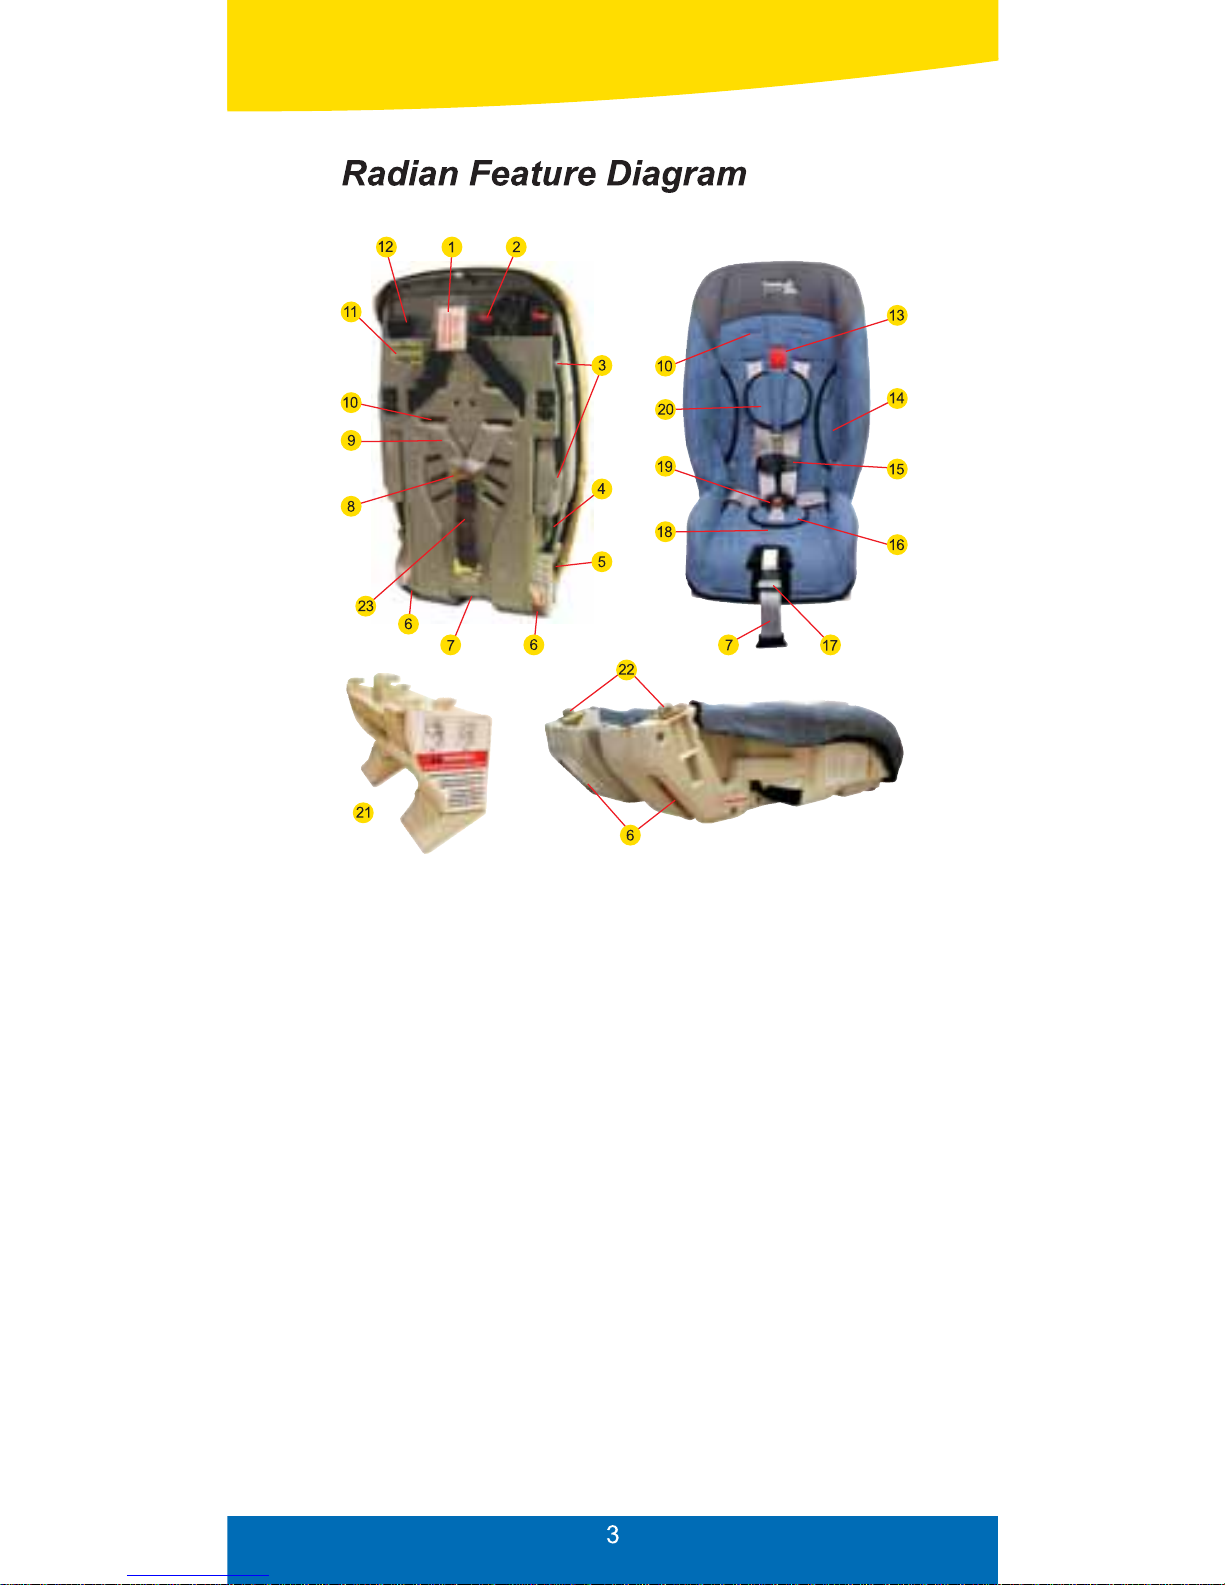
1. Child information tag 12. Top tether
2. LATCH belt 13. Carry strap
3. LATCH
strap guides 14. Fabric side panel
4. Forward-facing belt path 15. Harness clip
5. Rear-facing belt path 16. Buckle pad
6. Release lever 17. Harness adjuster
lever
7. Harness adjuster strap 18. Buckle slot
8. Metal harness yoke 19. Buckle
9. Shoulder harness strap 20. Harness pad
10. Harness slot 21. Detachable base
11. Locking clip 22. Locking bolts
23. SafeStop

Follow all instructions labeled on this child
restraint and in the written instruction manual
on the lanyard located on back of restraint.
For infants under 4.5 kg (10 lbs), consult
pediatrician for recommended seat back angle
before installation.
Failure to follow all instructions and product
labels can result in death or serious injury in a
crash. Carefully read and understand this
instruction manual prior to using restraint. If you
have any questions, visit www.skjp.com or
contact Sunshine Kids at 1-888-336-7909.
Use only with children weighing between 5 lbs to
65 lbs (2.3 kg to 29.5 kg) and who have a height
of 51 inches (129.5 cm) or less.
Use only in rear-facing position with any infant
weighing less than 22 lbs (10 kg).
Maximum child weights: rear-facing 33 lbs (15
kg), forward-facing 65 lbs (29.5 kg).
Only secure this child restraint with the vehicles
lower universal anchorage system (LATCH) if
available or with vehicle seat belt.
Do not use vehicles LATCH anchorage points
to install restraint for a child weighing more than
48 lbs (22 kg) unless vehicle manual allows.
Use the top tether strap when installing this restraint
forward-facing. Check vehicle manual for limits.
Always use the SafeStop device according to
manufacturers instructions.
Always use a locking clip if it is required for
proper restraint installation. Consult vehicle
owners manual.
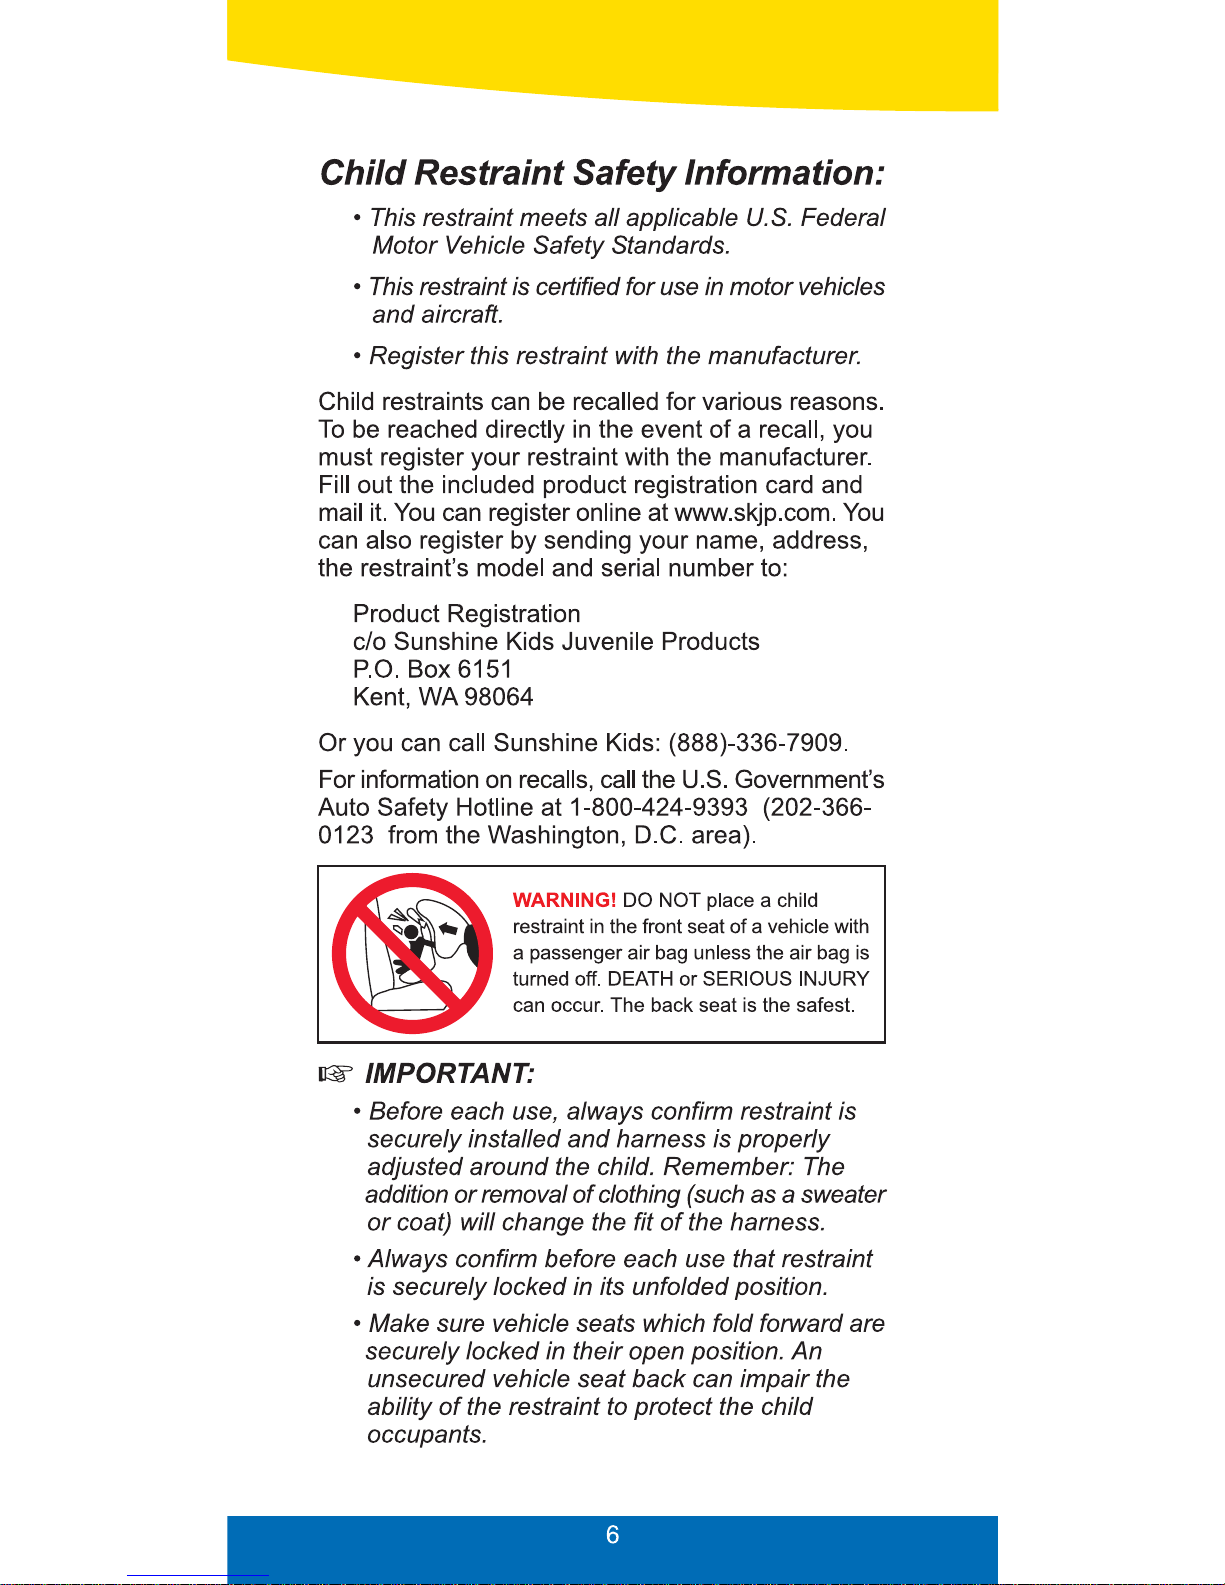
WARNING: Before installing restraint in a vehicle
equipped with front passenger airbags, carefully
read the vehicle owners manual for proper
restraint installation instructions.
Some vehicles have passenger seating in which
the passenger faces the side or the rear of the
vehicle. Do not install this restraint in such
passenger seating. Only use this restraint in a
vehicle seat which faces an adult passenger
toward the front of the vehicle.
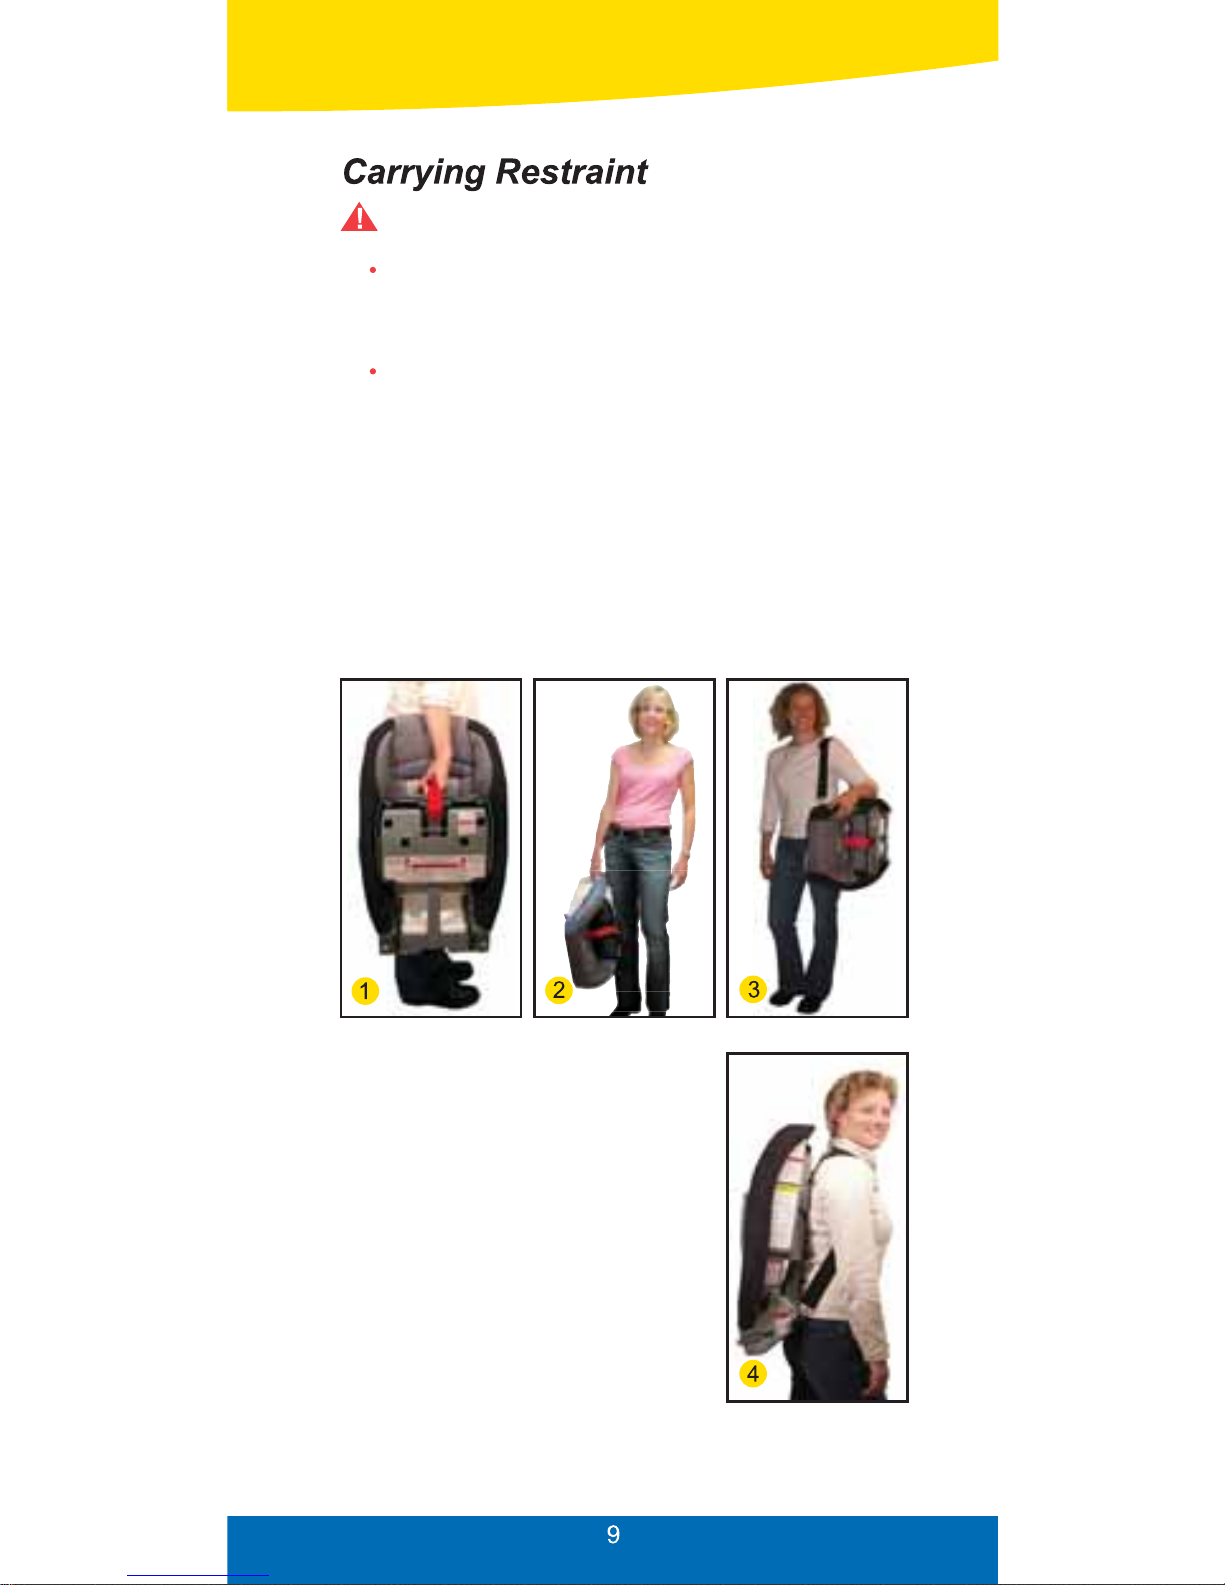
There are four ways to carry restraint:
1) Red carry strap (Fig. 1)
2) Plastic side (Fig. 2)
3) Shoulder strap: Connect shoulder strap* to webbing
anchors on side of restraint (Fig.3)
WARNING:
Do not carry restraint by harness adjuster strap
(see diagram, page 3). This can damage the
mechanism and the webbing.
Only the shoulder strap made by Sunshine Kids
is approved for use with this restraint.
4) Backpack:
(Requires two shoulder
straps*)
Connect shoulder straps to
lower webbing anchors on
both sides and upper
webbing anchors on back of
restraint (Fig. 4).
*Padded shoulder strap
available as a separate
accessory, not included.

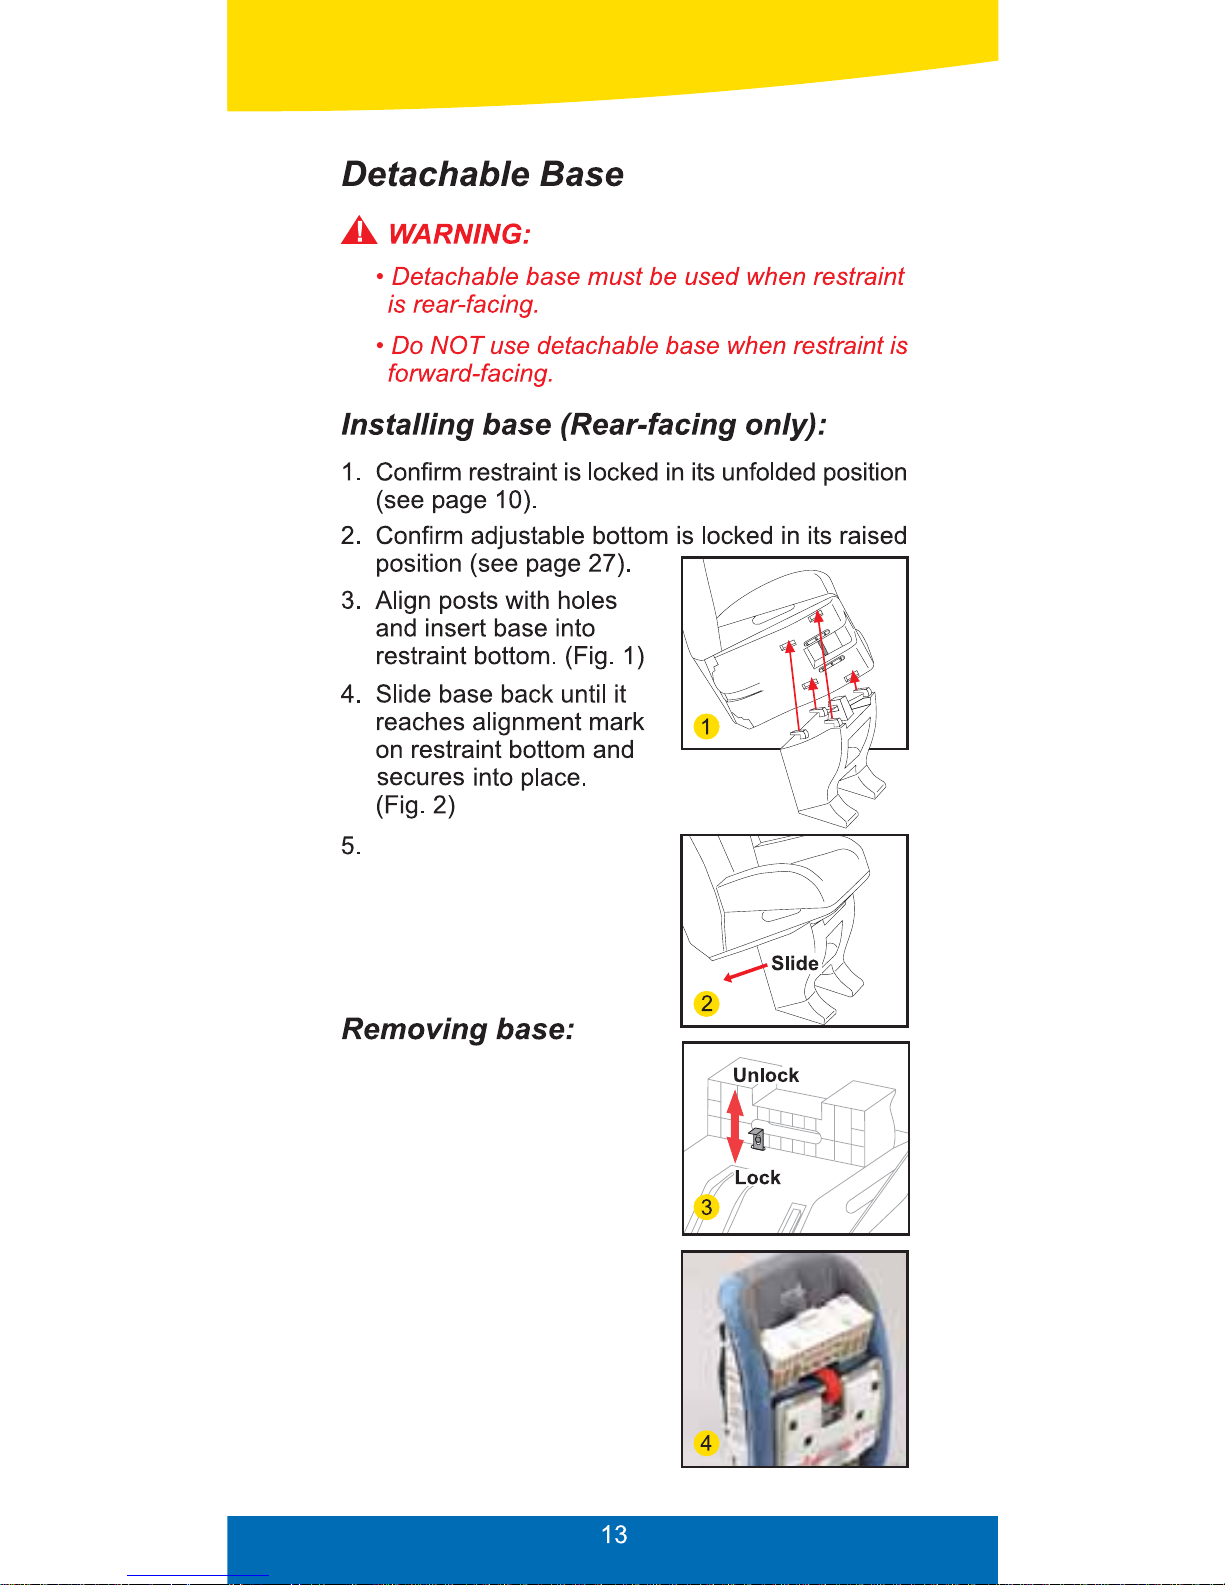
Push down metal tab
to lock base (Fig. 3).
1. Lift metal tab to unlock
base (Fig. 3).
2. Slide base forward (the
opposite direction as
shown in Fig. 2).
3. Pull base away from
restraint bottom.
Tip: To carry detachable
base, fit it inside folded
restraint (Fig. 4).
 Loading...