

Page 1
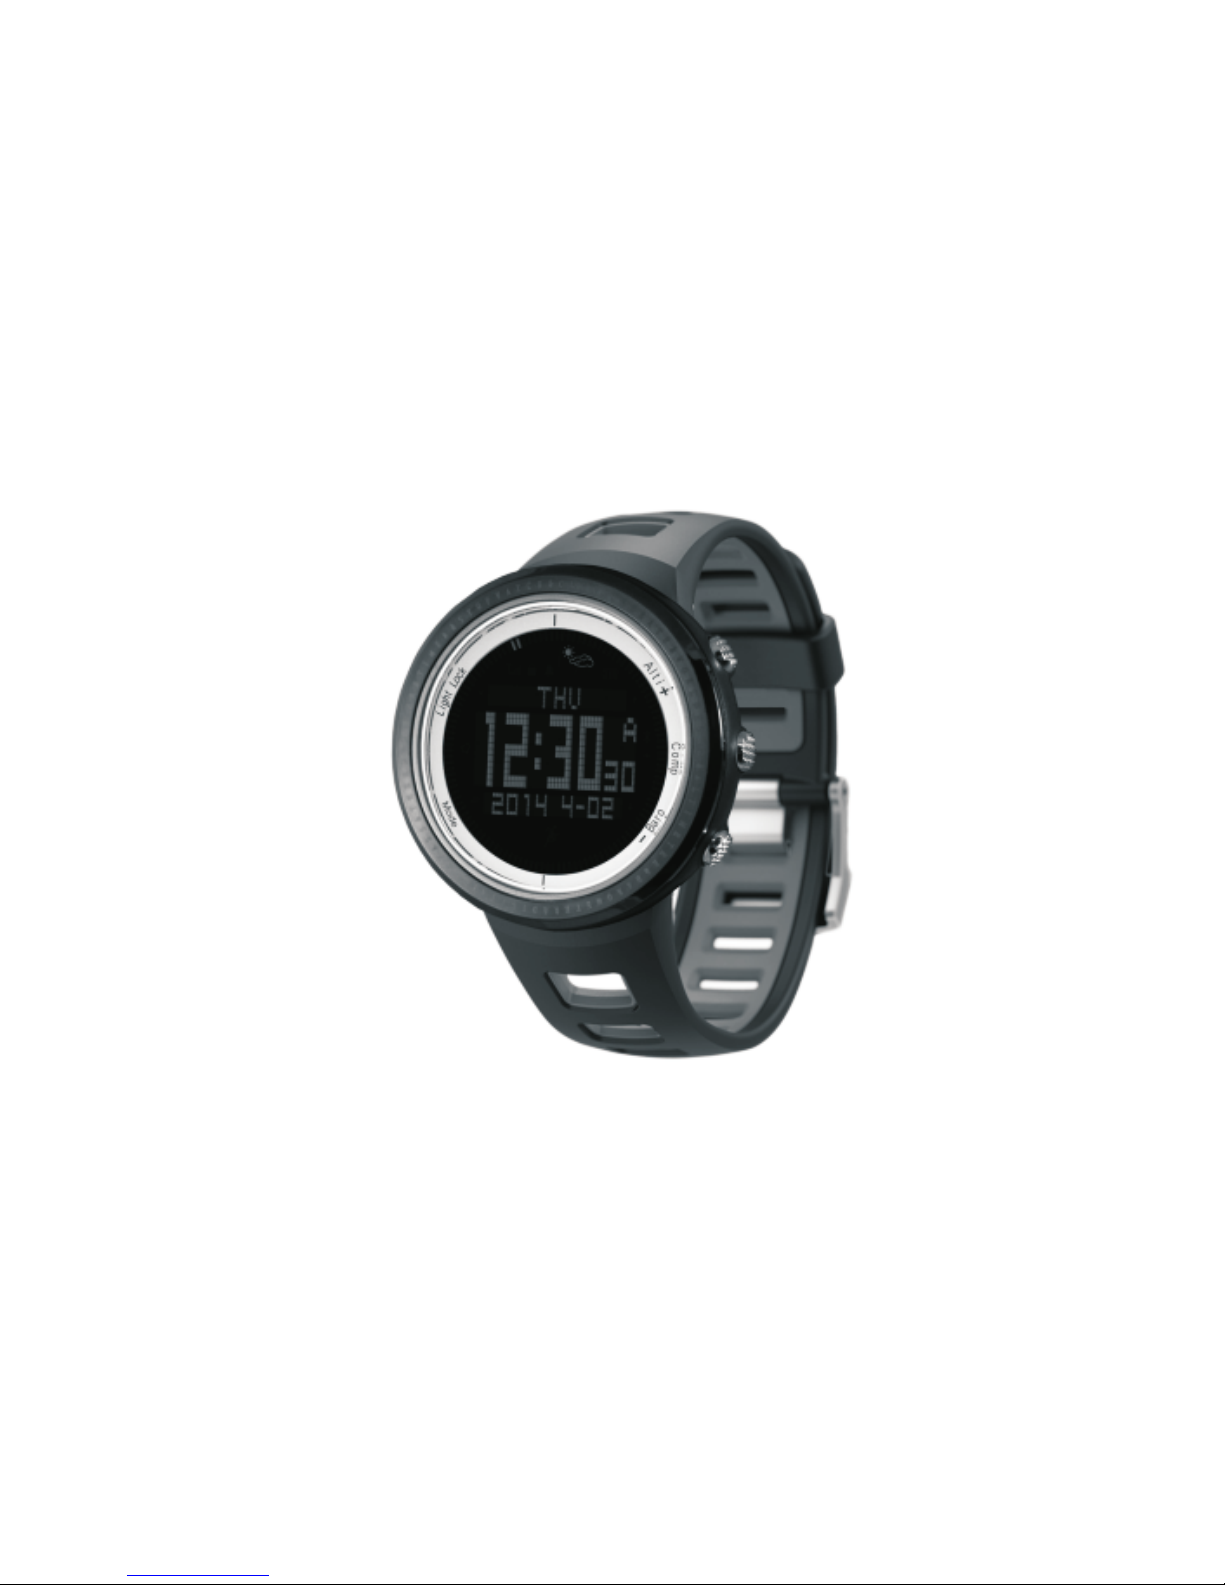
Smart Watch
USER GUIDE
Page 2

Contents
1. Introduction.....................................................................................1
2. Features .........................................................................................1
3. Start .............................................................................................. 1
4. LCD display of function mode........................................................... 2
5. General setting................................................................................3
5.1 Setting item............................................................................. .4
5.2 Adjust data................................................. .......... ....................4
5.3 Changing units......................................................................... .4
5.4 Changing general setting.......................................................... .5
5.5 Backlight ..................................................................................5
6. Time mode........ ............................................................................ .5
6.1 Time setting...............................................................................6
6.2 Alarm clock setting.....................................................................7
6.3 Stopwatch.................................................................................8
6.4 Countdown timer........................................................................8
6.5 Pedometer........................................................................... .... 9
7. Altimeter & Barometer Mode......... ..................................................10
7.1 How altimeter & barometer work................................. ...............10
7.2 Sea level altitude & sea level air pressure setting.........................11
7.3 Weather forecast......................................................................12
7.4 Altimeter .................................................................................12
7.5 Barometer................................................................................14
8. Compass .......................................................................................14
8.1 ...............................................................14
8.2 Using compass.........................................................................16
9. Replacing battery ...........................................................................17
10
12. Specifications...............................................................................23
Getting accuracy data
.Bluetooth ON/OFF.........................................................................18
11.APP introduction............................................................................19
11.1 basic surface............................................................................19
11.2 pedometer surface....................................................................20
11.3 altimeter surface.......................................................................21
11.4 barometer surface.....................................................................22
Page 3
1. Introduction
This sports watch incorporates bluetooth,altimeter, barometer, compass,
pedometer,sunrise and sunset times, thermometer, log recorder, time,
stopwatch, dual time and calendar etc. This user guide describes
main functions, operation method and some application living
example. Every chapter describes one mode with LCD display
drawing. Setting method and using method are described in it also.
You can enjoy the outdoor sport fullest.
1
2. Features
◆ Time functions: hour, minute, second, year(2010-2099), month,
date, weekday, 12H/24H
◆ Alarm clock
◆
◆ Stopwatch(0~99:59:59),(MAX record 10 group).
◆ Pedometer, step counter, movement time record calorie,
distance record
◆ Sunrise and sunset times (Default 28 cities or set the latitude
and longitude).
◆ Compass, altimeter, barometer, thermometer, air pressure trend
◆ The total increase/decrease height ,
◆ Air pressure trend chart ( latest 48hours)
◆ 7days altitude, barometric record and check
◆ Movement relative height view
◆ Digit compass,
◆ Low battery remind
◆ EL backlight
◆ luetoothB
Highest point/lowest point
16 direction display
Countdown timer( 99:59:59~0)
3. Start
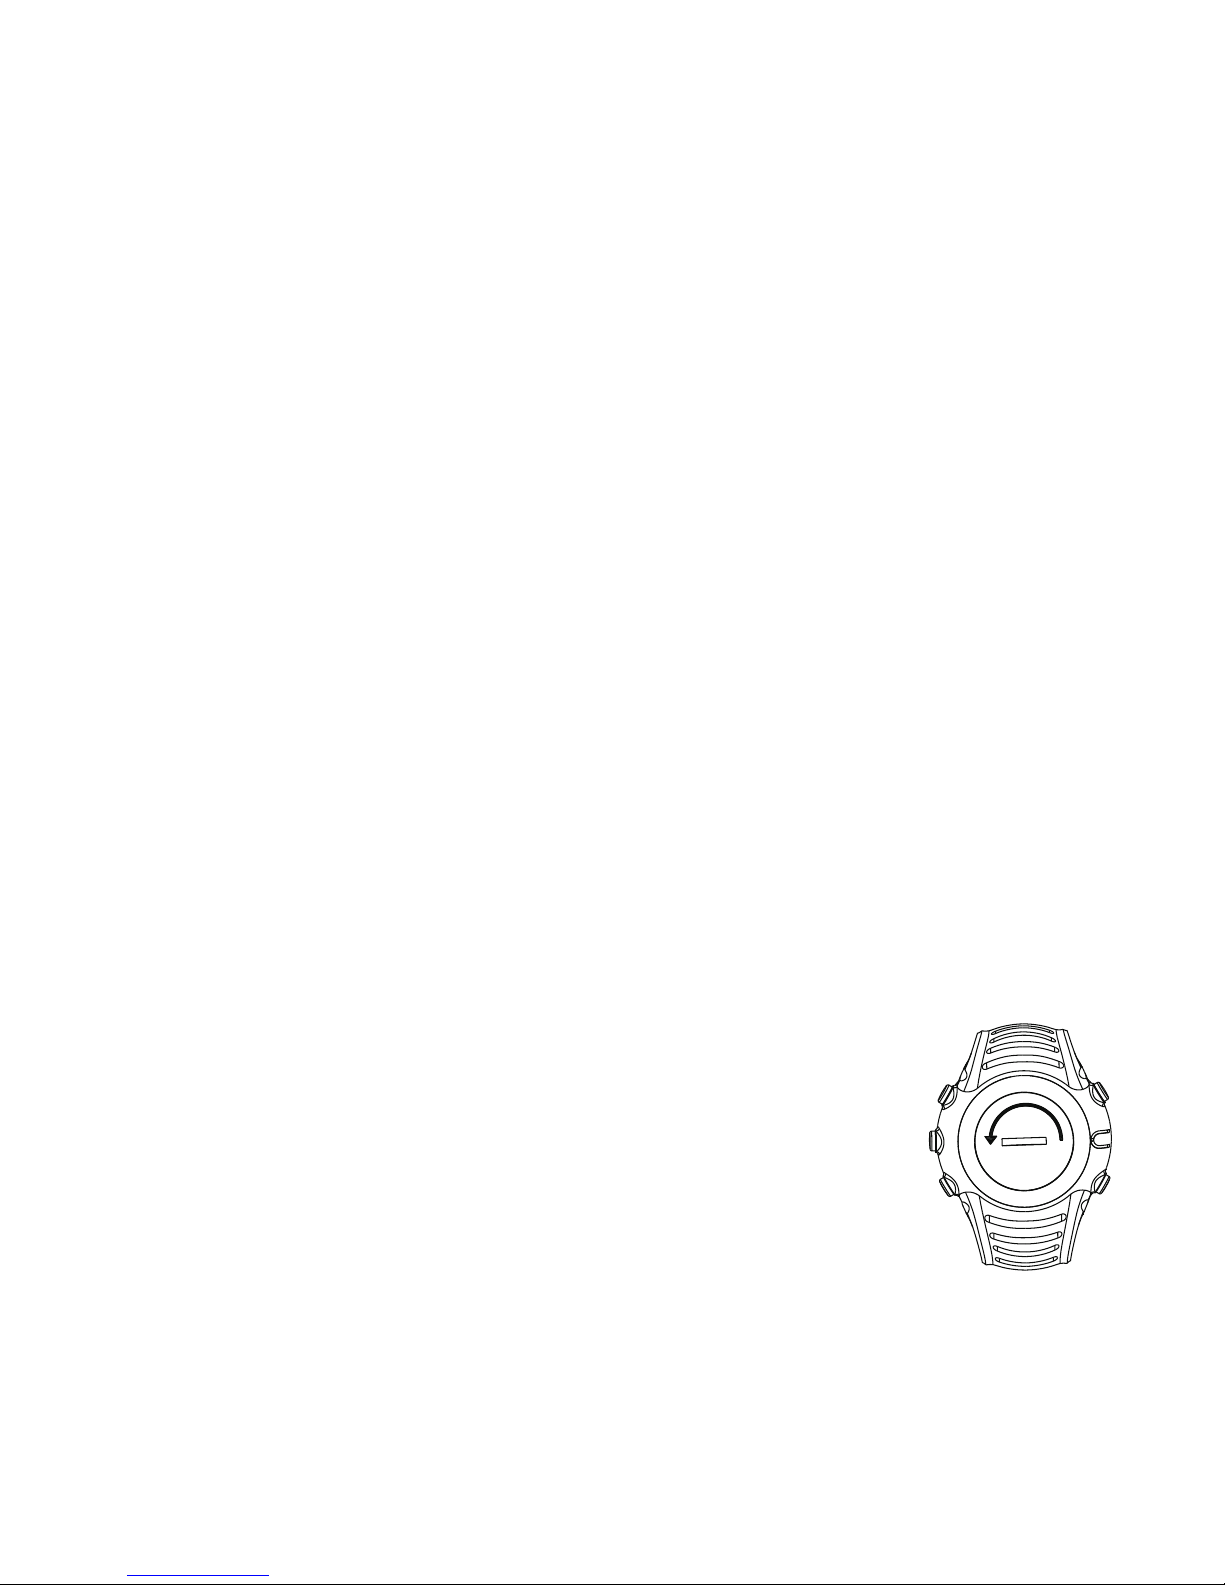
Use one coin turn contrarotate back cover. put on battery
CR2032 to open the watch.
Page 4
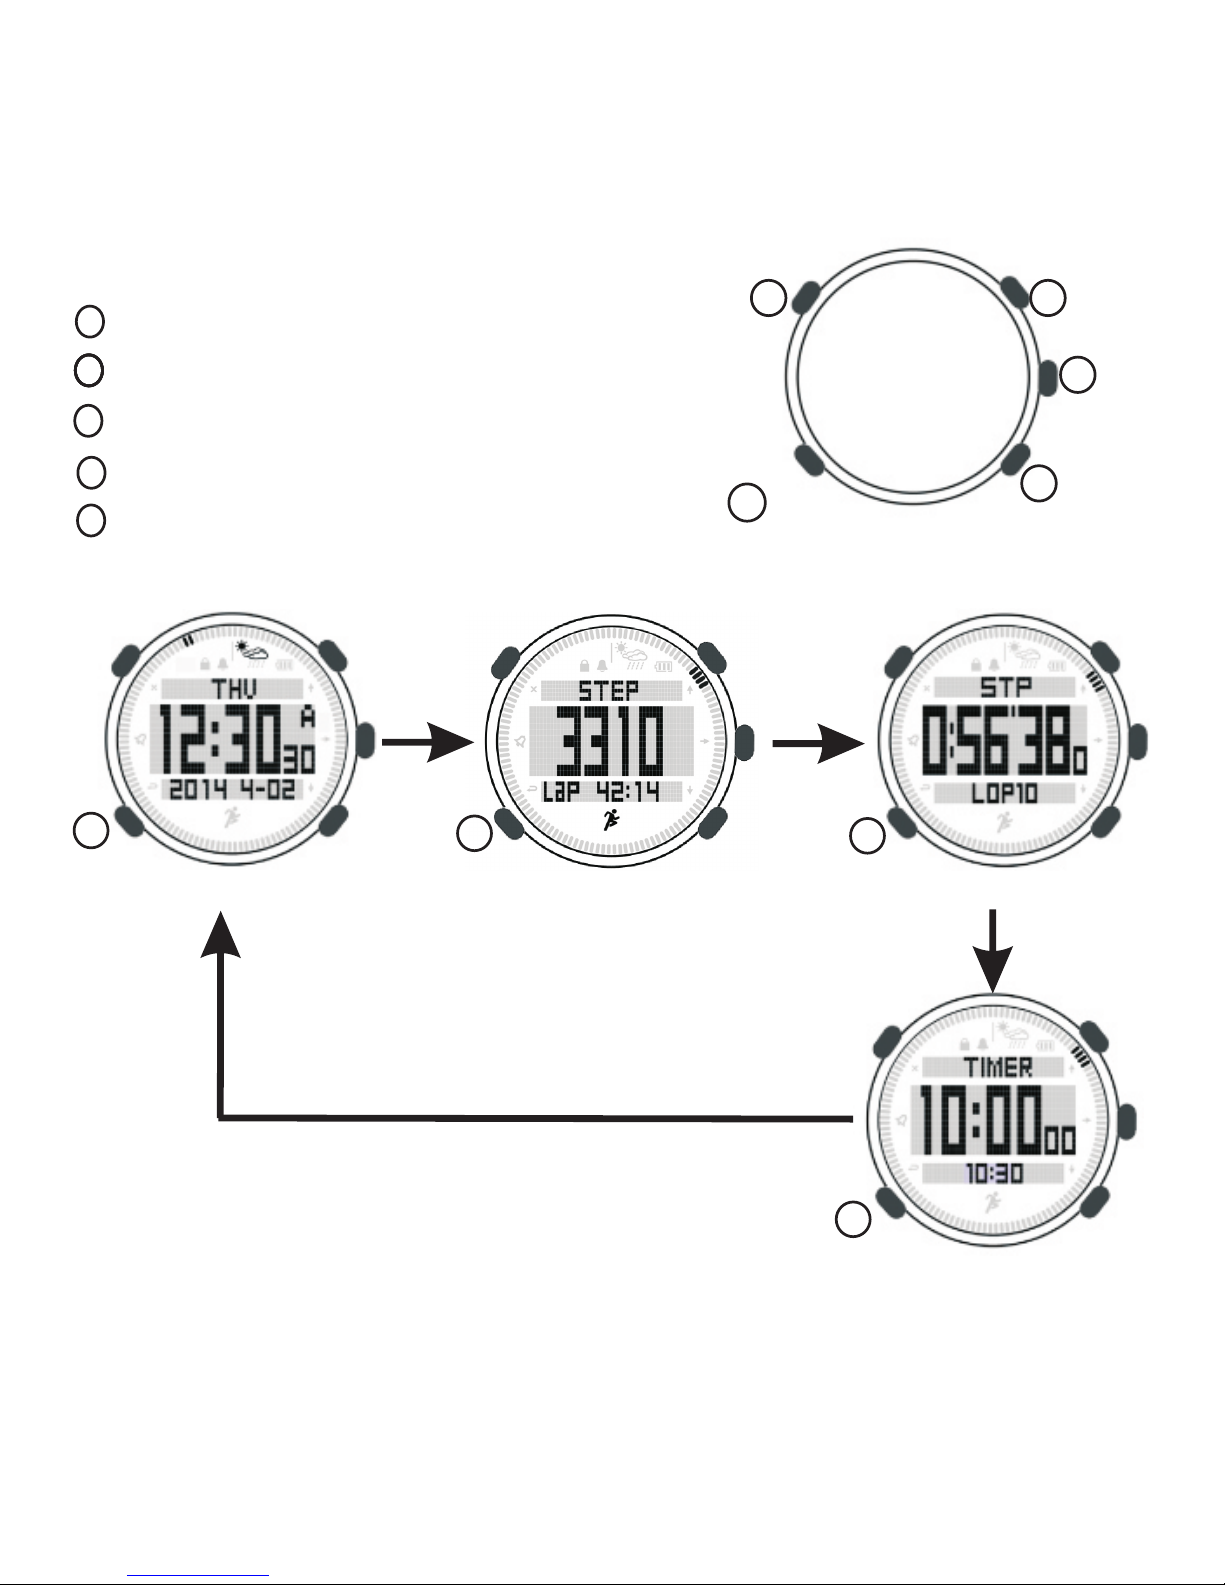
Figure 1
Light/bluetooth
Mode
Baro/-
Alti/+
Comp
L A
C
B
M
A
B
C
M
M
M
M
M
Time
Pedometer
Stopwatch
Countdown Timer
Press[ M]
Under time mode, press button e
Stopwatch, Countdown timer
in turn.
[M] to nter
Pedometer,
4. LCD display of function mode
A
B
C
L
A
B
C
A
B
C
Altitude/Up/ Start/ Stop
Barometer/Down/Reset
Compass/Confirm/History
Time/Setting
Backlight/bluetooth
2
Button operation
Page 5
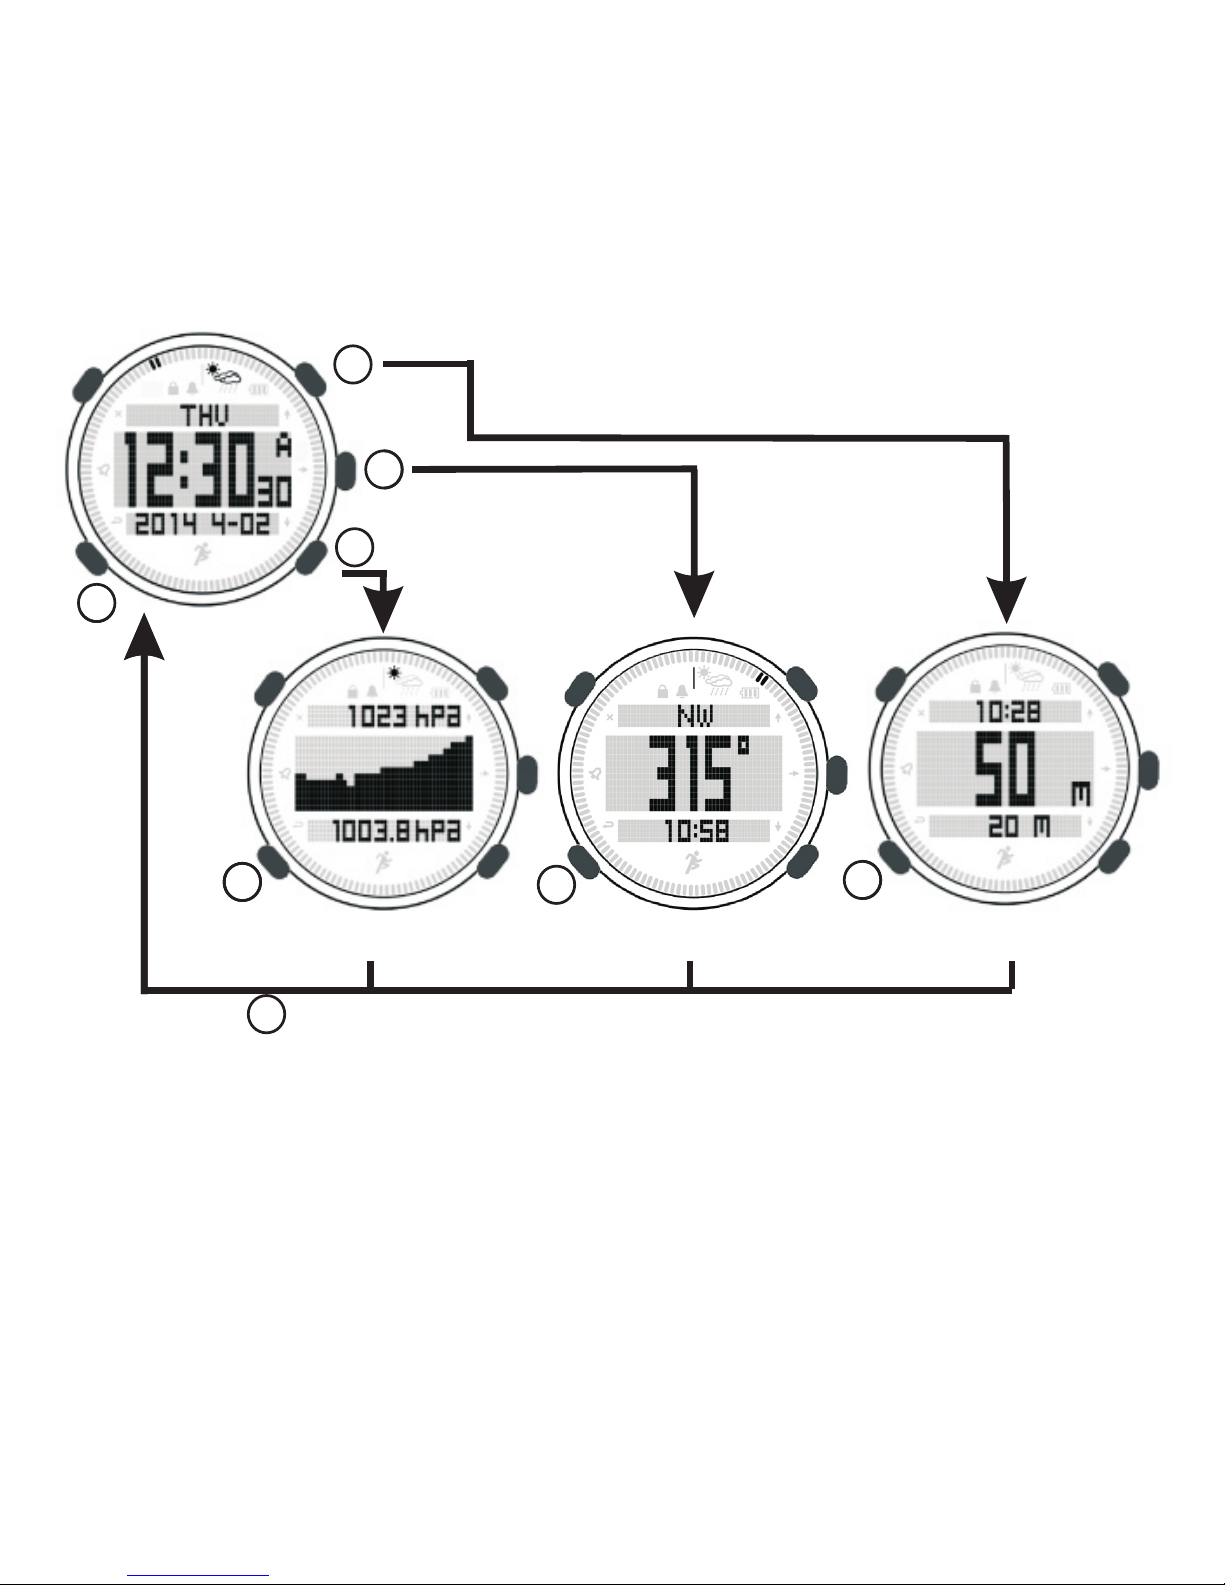
Figure 3
M
Time
A
C
B
Press A
Altitude
Press
M
M
M
M
A
C
B
Press C
Barometer
Compass
M
M
M
Press B
5. General setting
Before you start to use your sports watch, it’s better to set the
measurement units and general setting according to your
preference. General setting is adjusted in MENU.
Hold press button [M] 5 sec under time mode to enter setting
mode.Press [L] to exit setting.
Under time mode, press
[A] , [B] or [C]
can enter into altimeter, barometer,
compass mode separately. Press [M]
return back to time mode.
3
M
Page 6

5.2 Adjust data
Enter MENU to adjust setting. Any adjustment you make in MENU
take effect immediately. For example, if you enter TIME-DATE in
MENU and adjust the time from 12:00 to 11:30, then press [M] to
saving and exit. The time will be update to 11:30.
5.3 Changing units
Detail setting items of unit is as below,
● TIME:24H/ 12H
● DATE:DD.MM/ MM.DD
● TEMPERATURE: ℃/℉
● AIR PRESSURE:hPa/inHg
● ALTITUDE: meter/feet
● WEIGHT: kg/Lb
● STEPS: cm/inch
5.1 Setting items
[A] or [B]
[C] [M] to return back to last
menu. Press [ L] to exit setting.Detail setting is as below,
●Time-date: set time,date,countdown timer, alarm,world time,DST
●Sunrise: city selection, latitude, longtitude, time zone setting
●Units: set time format, date format, temperature unit, barometer
unit, altitude unit, weight unit, stride unit
●Pedometer: set stride and weight
●General: set button tone, LCD contrast, weather forecast
●Compass: magnetic declination
●Alti-baro: sea level altitude and sea level air pressure
After enter setting, press to switch setting items.
Press to enter setting item. Press
4
Page 7
A
Method to change unit:
1) Under time mode, long press [ M]enter MENU
2) Press [A] two times to UNITS, press [C] to enter Units setting.
3) Press [A] or [B] to select setting items, press [C] to enter
selected items. Press [A] or [B] to select unit.
4) Press [L] to save and exit setting or press [M] to return back to
last menu.
● BUTTON TONE: on/off
● LCD CONTRAST: 0-10 level
● WEATHER: Sunny - Partly cloudy - Cloudy - Rainy
PS:
[L] to
[L]
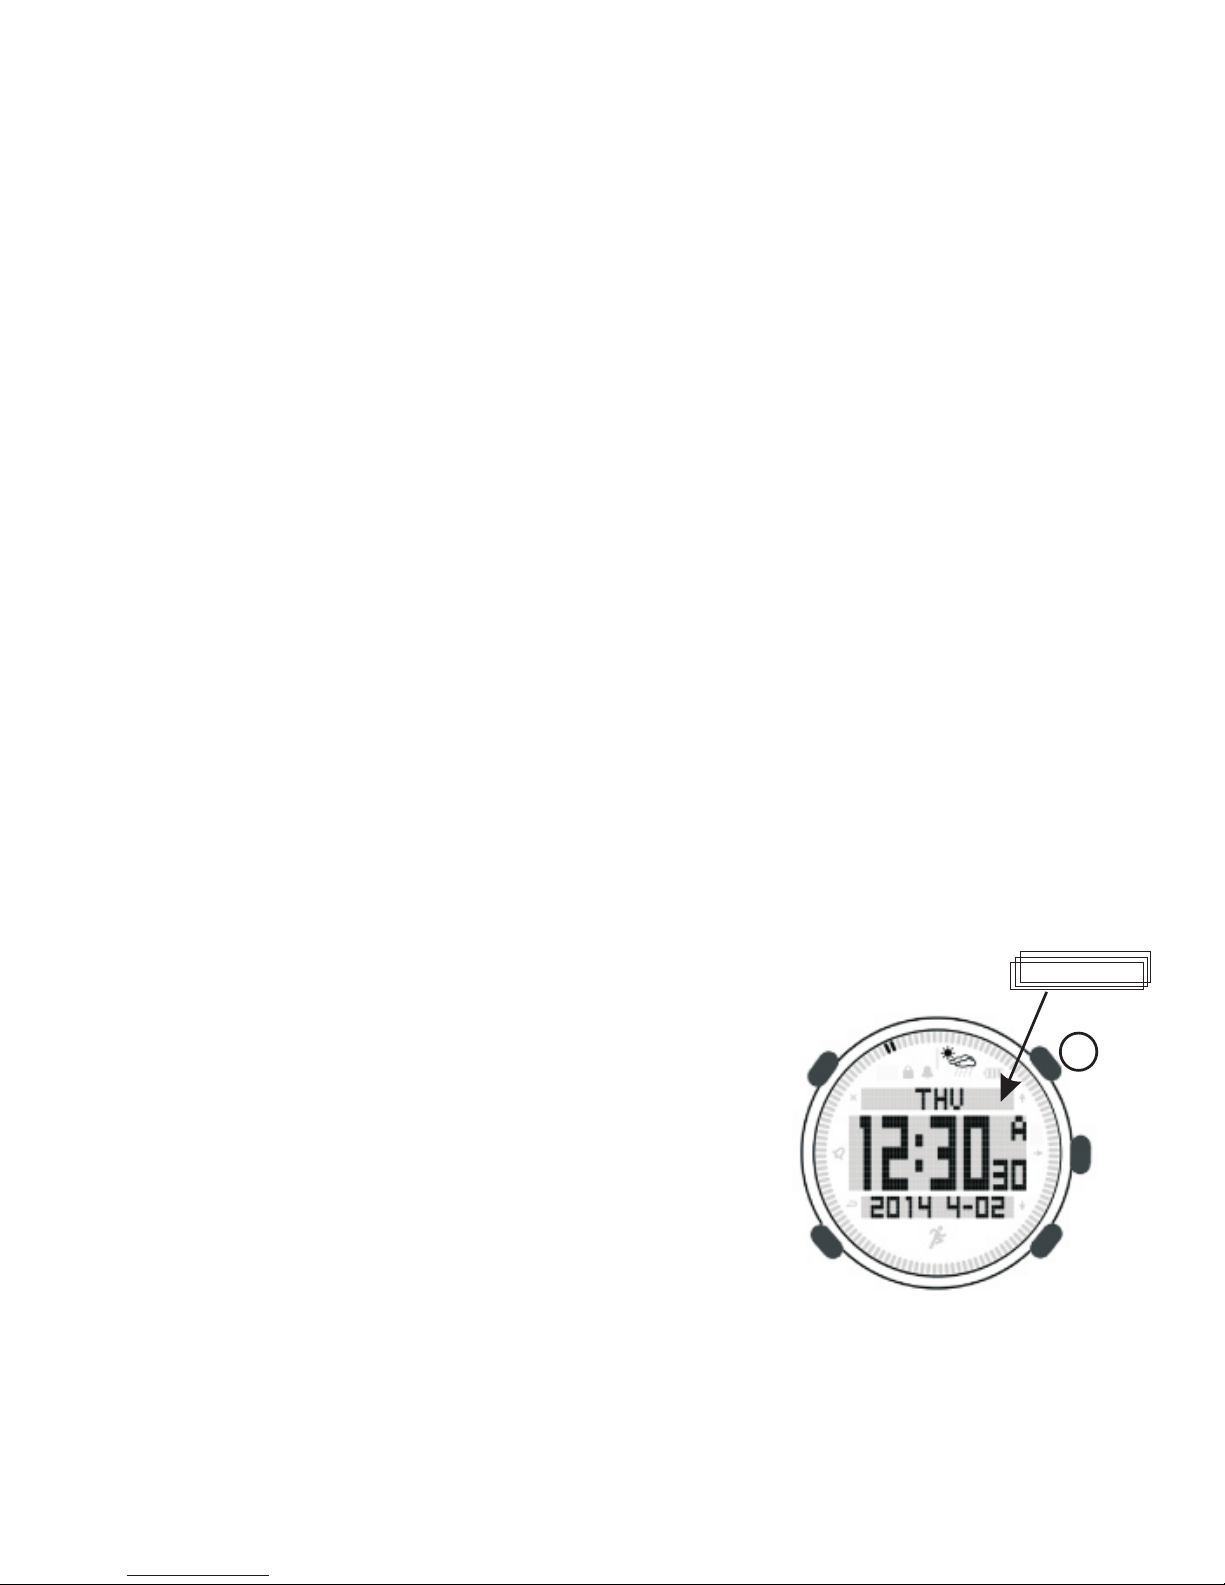
ime mode, it display week, date, time,
weather conditions. Long press [A] to switch
below items at upper LCD display,
● Week
● Sunrise and Sunset time
● World time
5.4 Changing general setting
In GENERAL you set the general settings, including:
The weather forecast accuracy is about 70%
5.5 Backlight
Press turn on backlight and it will be turned off after 5 seconds.
Under MENU, long press to turn on backlight.
6. Time mode
Under t
5
Page 8

6.1 Time setting
6.1.1 Time & Date setting
1) Under time mode, long press [M] to enter setting mode
2) Press [C] to enter into time-date
3) Press [C] to enter into time
4) Press [C] to switch setting items: hour, minute, second
5) Press [A] or [B] to adjust data
6) Press [M] to return back to last menu, press [A] to switch to
date setting, press [C] to enter into date setting mode
7) Press [C] to switch setting items: year, month, day
8) Press [A] or [B] to adjust data
9) Press [L] to save and exit setting
6.1.2 World time setting
1) Under time mode, long press [M] to enter setting mode
2) Press [C] to enter into time-date
3) Press [A] in turn to switch to dual time
4) Press [C] to enter into dual time setting mode
5) Press [A] or [B] to select city
6) Press [L] to save and exit setting
6.1.3 DST setting
1) Under time mode, long press [M] to enter setting mode
2) Press [C] to enter into time-date
3) Press [A] in turn to switch to DST
4) Press [C] to enter into DST setting mode
5) Press [A] or [B] to turn on or off DST
6) Press [L] to save and exit setting
6
Page 9

6.1.4 Sunrise and sunset setting
Select one city which you locate,
1) Under time mode, long press [M] to enter setting mode
2) Press [A] to switch to SUNRISE
3) Press [C] to enter into Sunrise setting
4) Press [C] to enter city selection
5) Press [A] or [B] to select city
6) Press [L] to save and exit setting
If the city which you located is not listed in unit, please set longitude,
latitude and time zone,
1) Under time mode, long press [M] to enter setting mode
2) Press [A] to switch to SUNRISE
3) Press [C] to enter into Sunrise setting
4) Press [A] to switch to Latitude, Longitude and time zone in turn.
5) Press [C] to enter into setting
6) Press [A] or [B] to set data
7) Press [L] to save and exit setting
6.2 Alarm clock setting
1) Under time mode, long press [M] to enter setting mode
3) Press [C] to enter into time-date
4) Press [A] to switch to alarm
3) Press [C] to enter into alarm clock setting, and to select sound
or shock warning.
3) Press [C] to switch setting items including alarm clock work
group, turn on/off, hour, minute
5) Press [A] or [B] to set detail data
6) Press [L] to save and exit setting
7
Page 10
A
when turn alarm clock, the symbol will display on LCD.
Press any button to turn off alarm. Or keeping 30 seconds, it will
stop alarm automatically.
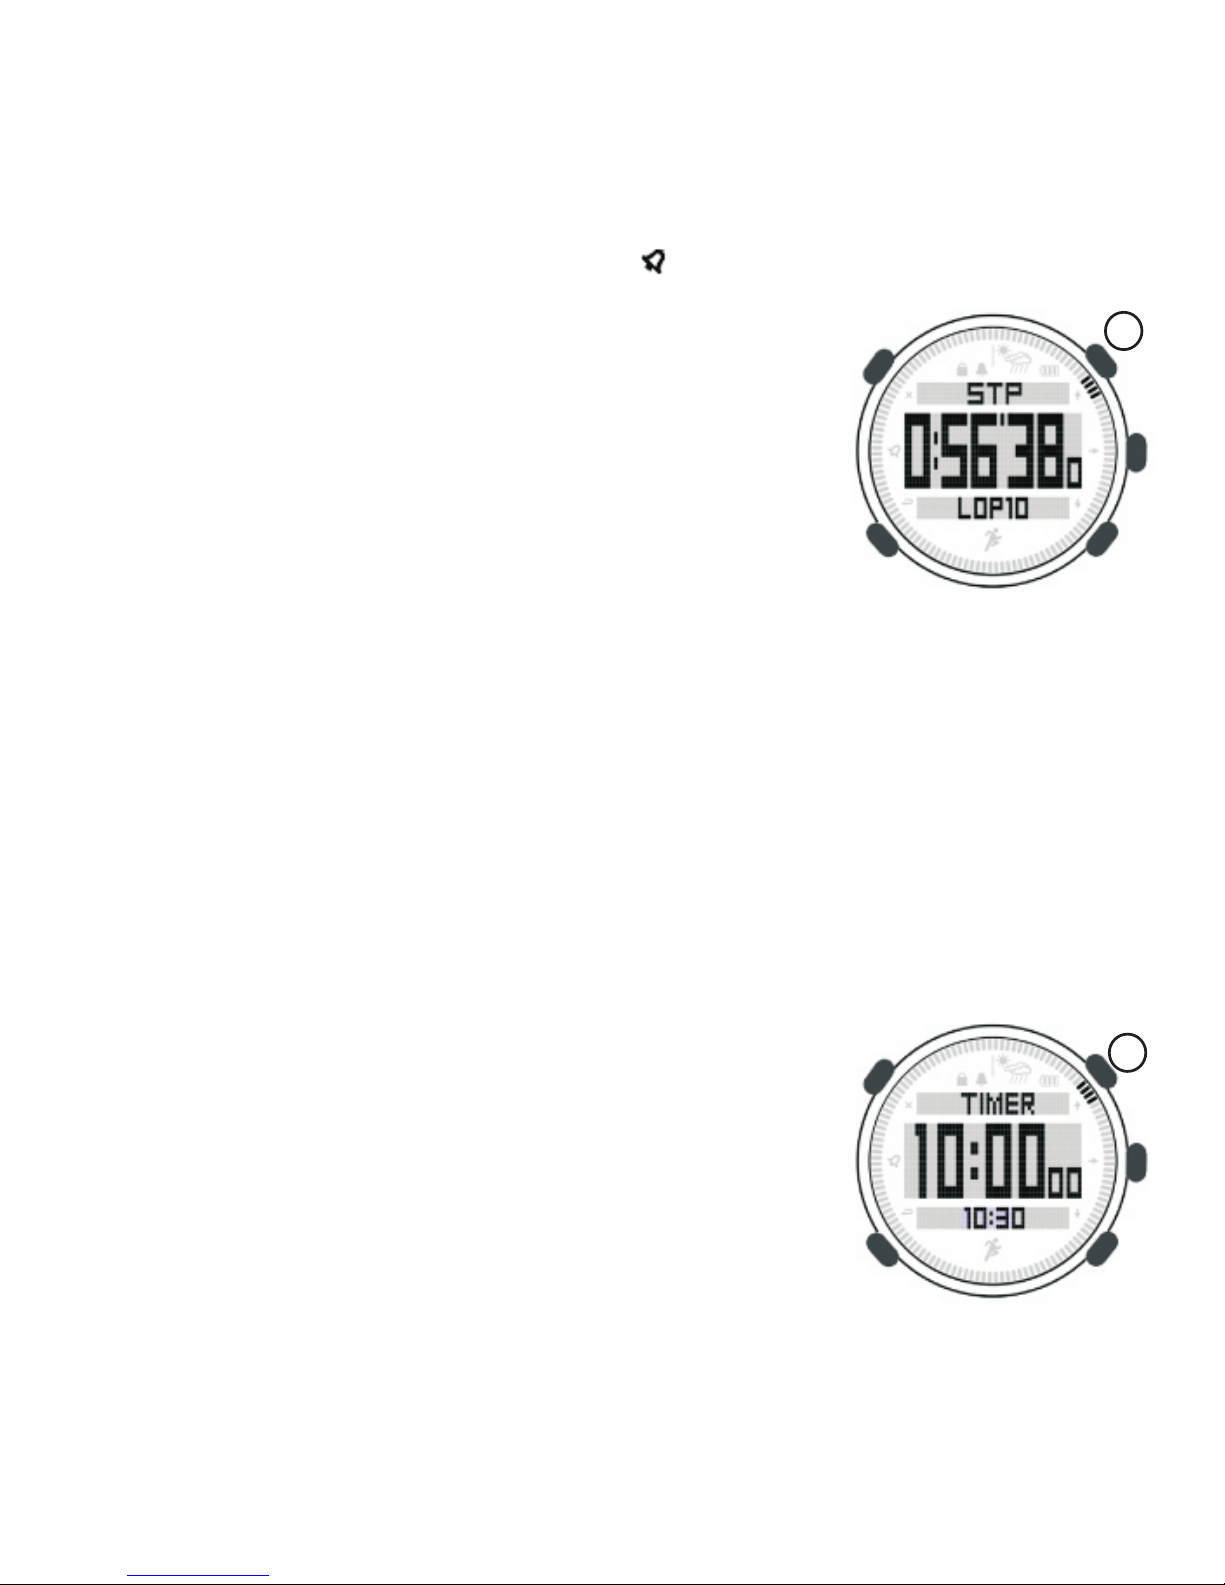
1) Under time
2) Press [A] to start, stop or restart stopwatch
3) Press [B] to record each lap, total 10 group
4) Press [C] to review data when stopwatch stop to record
5) Press [A] or [B] to switch each lap
6) Press [B] 2 seconds to reset stopwatch
1) Under time mode, long press [M] to enter setting mode
2) Press [C] to enter to time-date
3) Press [A] two times to countdown timer
4) Press [C] to enter into countdown timer setting
5) Press [C] to switch among hour, minute and second in turn.
6) Press [A] or [B] to set data
7) Press [L] to save and exit setting
Start to countdown,
1) Under time mode, press [M] three times to
enter countdown timer mode
Press [B] 2 seconds to reset countdown timer
6.3 Stopwatch
mode, press button [M] twice
to enter stopwatch.
6.4 Countdown timer
Countdown timer setting,
2) Press [A] to start, stop and restart.
3)
A
8
Page 11
B
A
6. 5 Pedometer
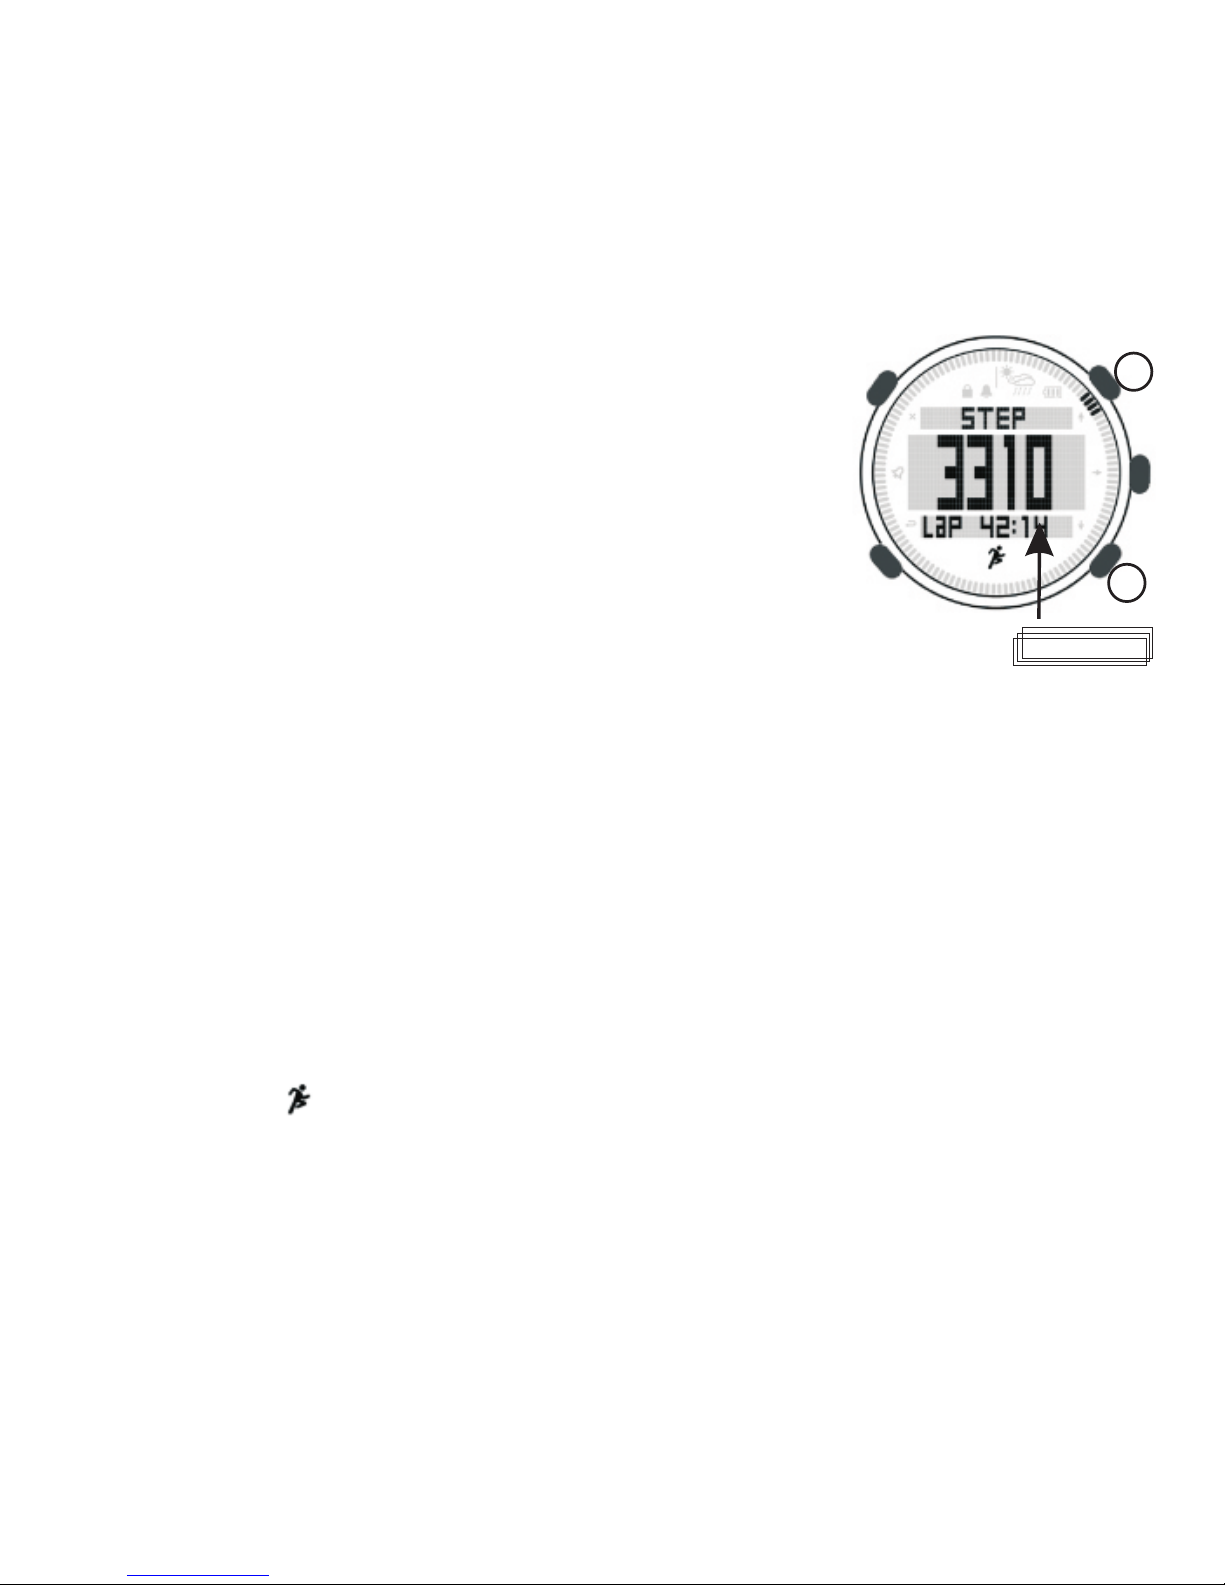
Under time mode, press [M] to enter pedometer mode.
LCD display,
- Upper: STEP
- Middle: steps
- Below: Press [B] to switch among current time,
sports time, step speed, calorie and distance
edometer setting,
1) Under time mode, long press [M] to enter setting mode
2) Press [A] three times to enter pedometer
2) Press [C] to enter to pedometer setting
5) Press [C] to switch between step distance and weight setting
6) Press [A] or [B] to set data
7) Press [L] to save and exit setting
Using pedometer,
1) Under time mode, press [M] to enter pedometer mode
●Current time(00:00)
●Sports time(Lap00:00:00)
●Step speed( 0. 0Km/h or Mi/h)
●Calorie(0 KCAL)
●Mileage(0.00 Km or Mile)
P
2) Press [A] to start, stop pedometer, when turn on pedometer,
there will be icon display on screen. And pedometer will work
under every mode.
3) Press [A] to stop work, press [B] to reset data.
PS: 1. To get more accuracy measurement, it’s better using it under
pedometer mode.
2. To save battery, pedometer will be turned off automatically
9
Page 12

at 0:00 everyday. Please turn on it if you need.
Under below situations, pedometer may not measure so accuracy,
1) In bag with irregular shaking
2) Hanging on waist or backpack vertically
3) Walking unnatural
4)
5) Walking irregular at crowded place
6)
7) C
8)
7. Altimeter & Barometer Mode
Wearing sandals, slippers, clogs etc
Walking very slowly
limbing at steep slope or going up or down stairs
Taking bus or car etc.
7.1 How Altimeter & Barometer work
Altimeter & barometer is measured base on one sensor which can
measures air pressure. Knowing the work method of altimeter and
barometer, it help you using this unit more accurately.
Caution: please ensure there is no dirty or sand near sensor. Please
don't insert anything into the hole of the sensor.
7.1.1 Getting correct readings
Under barometer mode, you can get current air pressure.
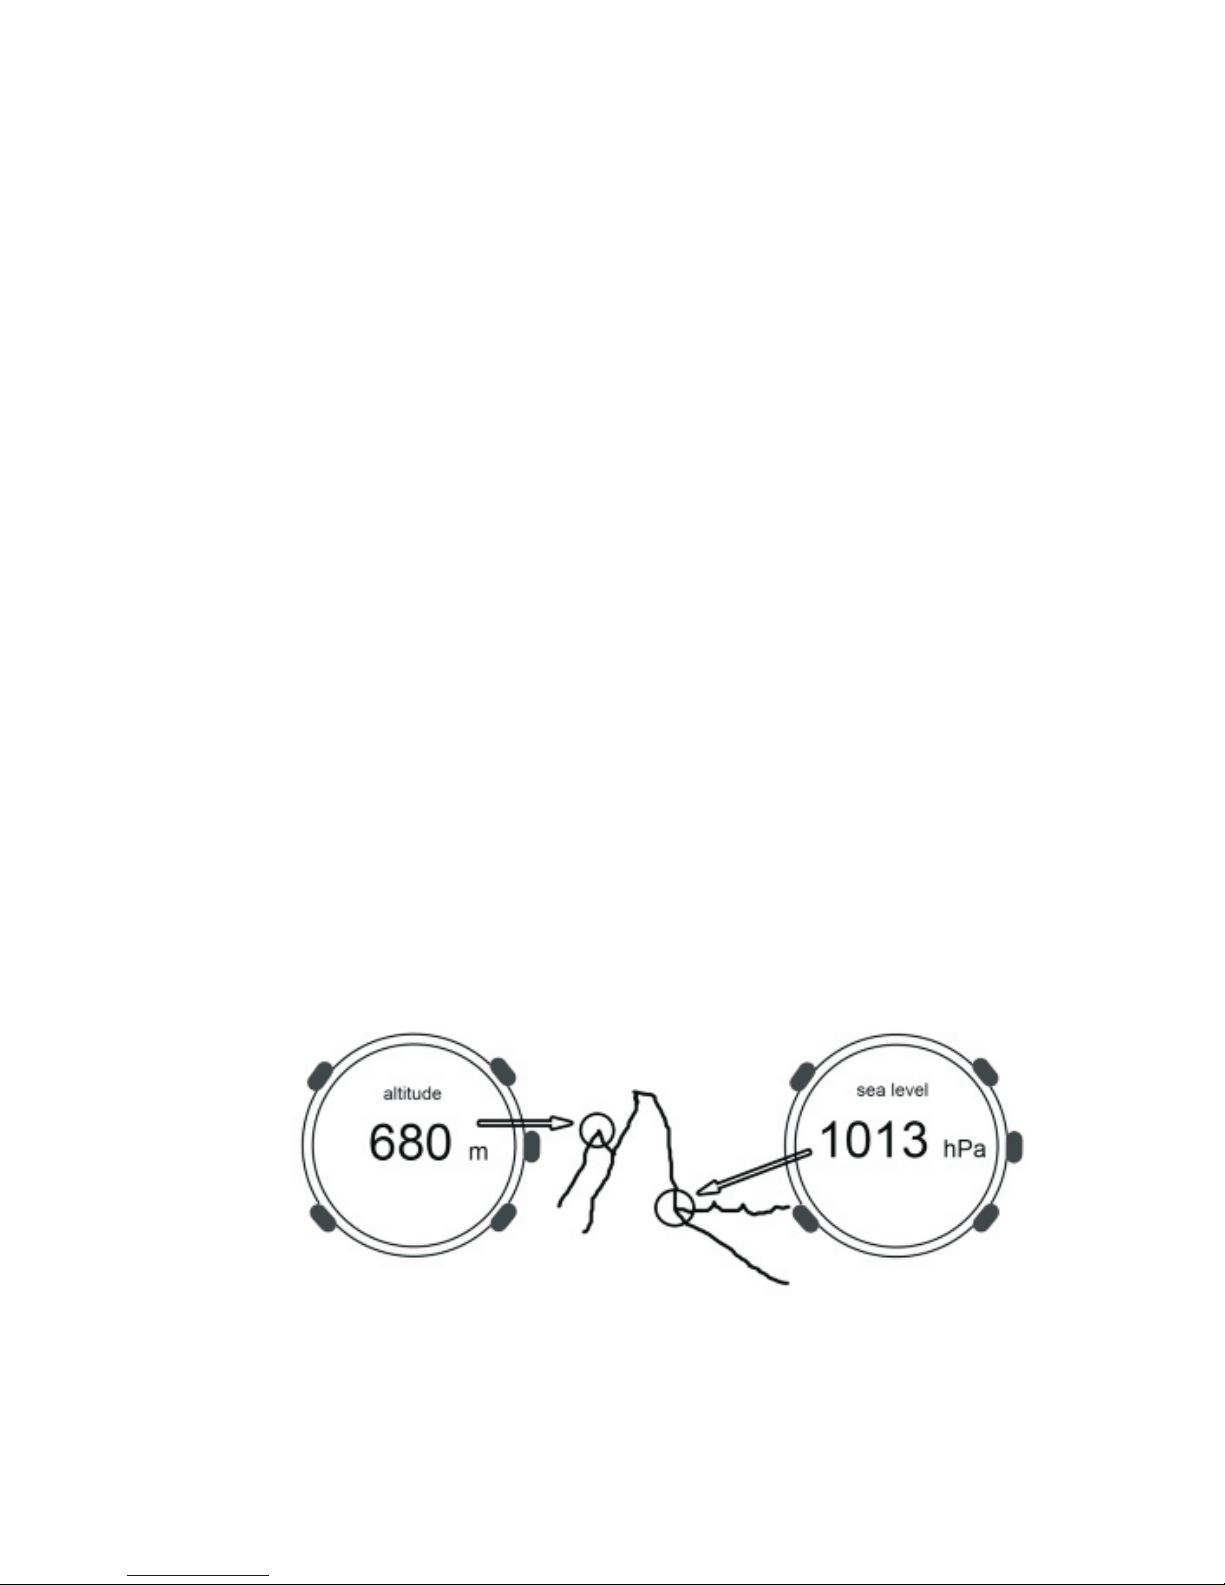
If you want to get accuracy sea level air pressure, please input
accuracy sea level altitude base on your location. Sea level altitude
can be checked on some topographic maps.
If you want to get accuracy sea level altitude, please input accuracy
sea level air pressure base on your location. Sea level air pressure
can be checked on some weather news paper or website.
Weather changing can influence altitude measurement. When
10
Page 13
weather change high frequency, it’s better to calibrate sea level
altitude or sea level air pressure. Especially calibrate when start to
climbing.
7.1.2 Why the result is not accuracy
If keeping altimeter mode long time at same place and the weather
changes, the altitude will be not accuracy.
During climbing, if the weather changes high frequency, the altitude
will be not accuracy.
At this time, please calibrate sea level altitude or sea level air
pressure on time.
7.2 Sea level altitude & sea level air pressure setting
1) Under time mode, long press [M] to enter setting mode
2) Press [A] in turn to alti-baro
3) Press [C] to enter alti-baro
4) Press [B] to switch between sea level altitude and sea level air
pressure.
5) Press [C] to enter into setting mode
6) Press [A] or [B] to set data
7) Press [M] to return to last menu
8) Press [L] to save and exit setting
11
Page 14
A
7.3 Weather forecast
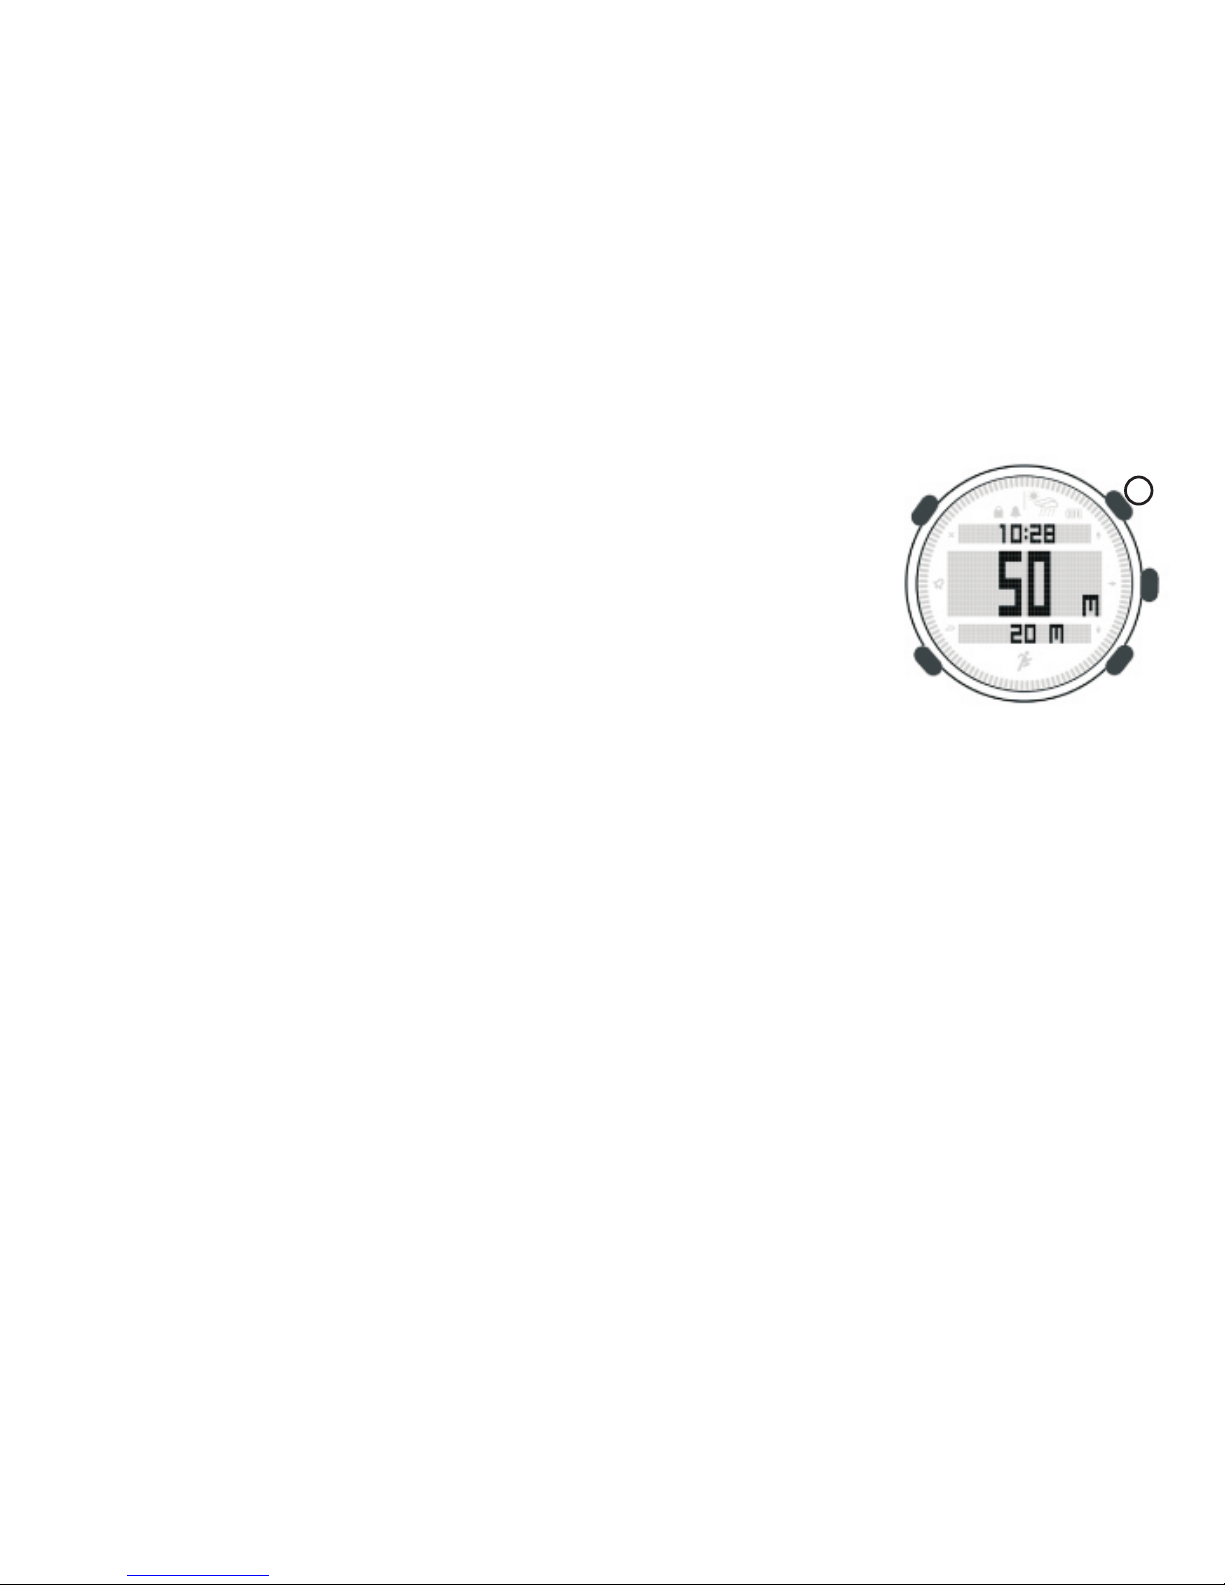
Under time mode, weather forecast will display on top of LCD.
Weather forecast have four style: sunny - partly cloudy - cloudy raining. The accuracy of weather forecast is 70%.
When climbing or under altimeter mode, the accuracy of weather
forecast will be influenced. If it is not accuracy enough, please
calibrate it base on item 5.4.
7.4 Altimeter
ltimeter mode, press [C] to check altitude
record. Press [A] or [B] to browse altitude record in turn.
Under time mode, press [A] to enter altimeter mode.
LCD display,
- Upper: Sports time
- Middle: Sea level altitude
- Below: Press [B] to switch among climbing altitude, temperature,
climb rate, climbing time.
PS: During measuring temperature, please take off on wrist as
body temperature will influence the accuracy.
Climbing altitude
Under time mode, press [A] to enter altimeter mode. At below of
LCD display, it is climbing altitude.
When start climbing, long press [B] to clear climbing altitude to
zero . Then press [B] to switch to climbing time (LOG 00:00:00),
press [A] to start to record climbing time.
Under climbing time record mode, press [A] can start or stop record.
Long press [B] to reset climbing altitude and time seperately.
Altitude record
Unit will record altitude every half hour and display as an altitude
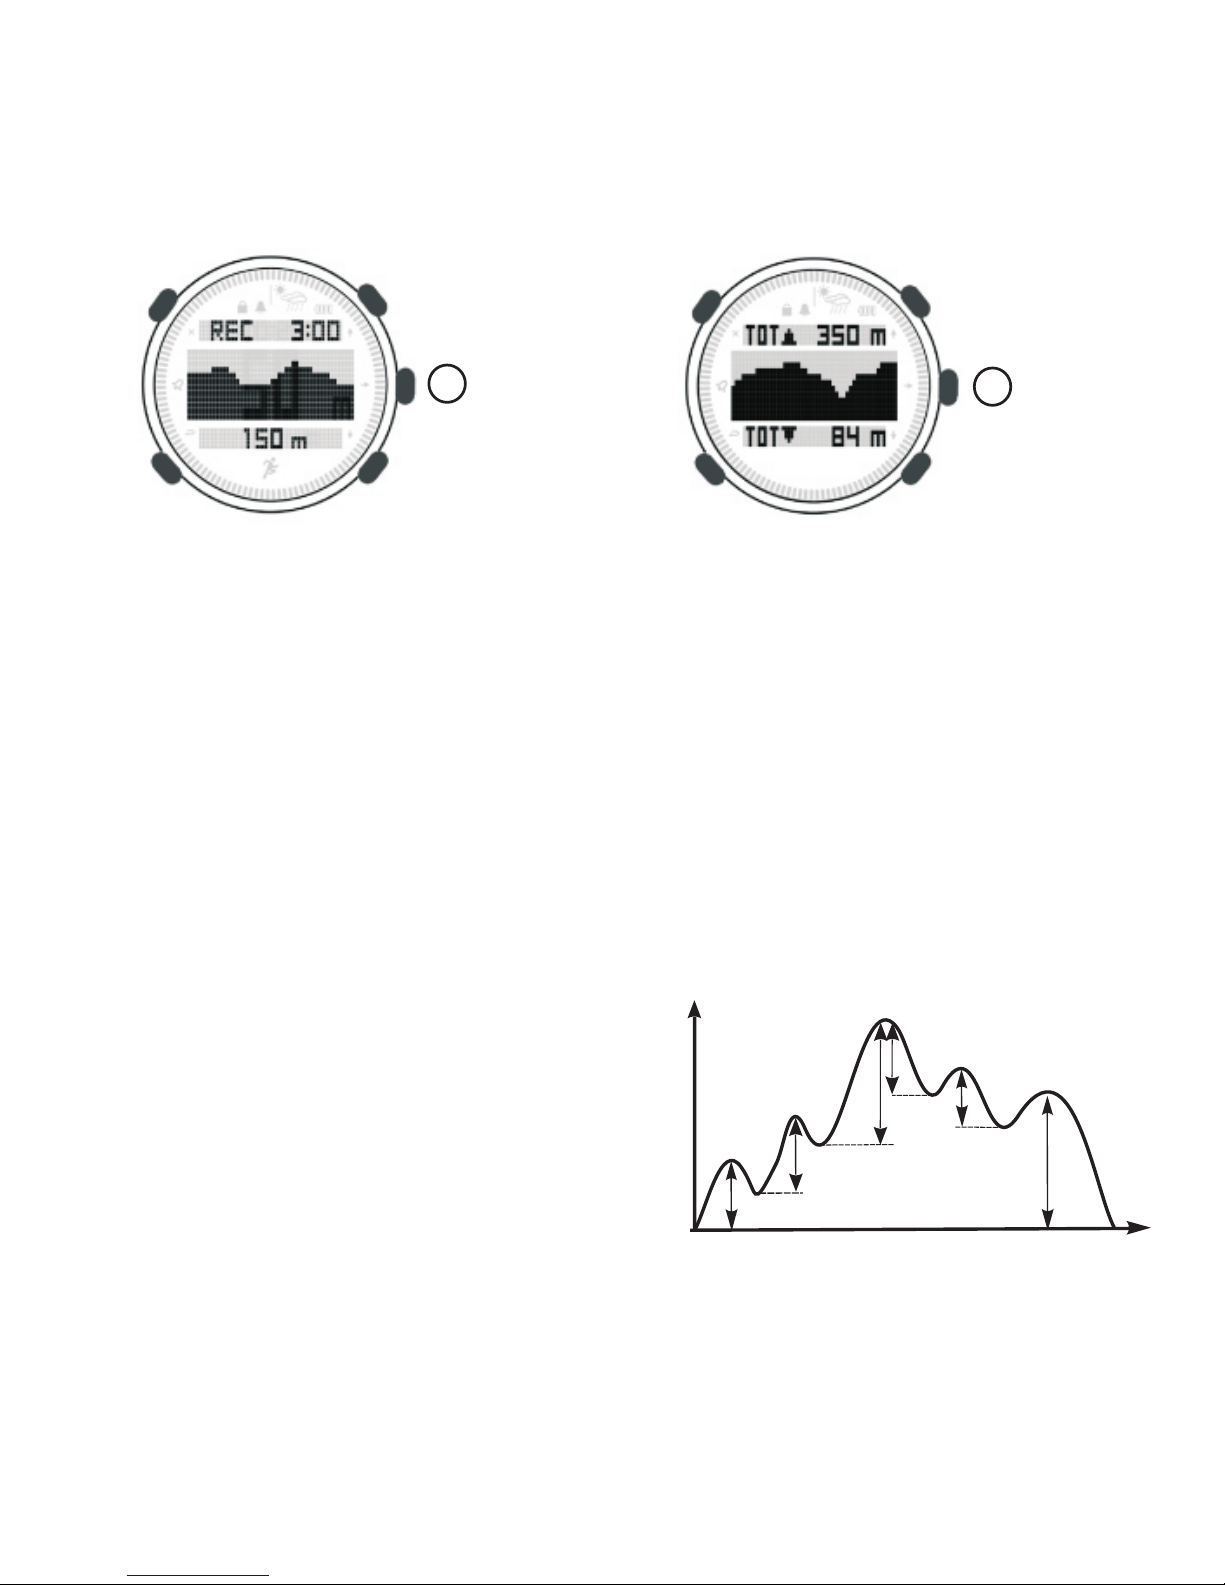
trend chart. Under a
12
Page 15
C
Total altitude gain and total altitude loss
Under altimeter mode, press [B] to switch to climbing time
Press [A] to start climbing time record, unit will count altitude gain
and altitude loss automatically.
Press [A] to stop climbing time record. Unit will count total altitude
gain and loss automatically.
Long press [C] to clear zero of total altitude gain and loss.
Under altimeter mode, press [C] two times to check total altitude
gain and loss.
Calculation of total altitude gain and loss,
From A to B, propradation,
The total height gain=d1+d2+d3;
From B to C retrogradation,
The total height loss=d4+d5+d6
C
Altitude record Total altitude gain and loss
Altitude
Time
d1
d2
d3
d4
d5
d6
A
B
C
13
Page 16
B
7.5 Barometer
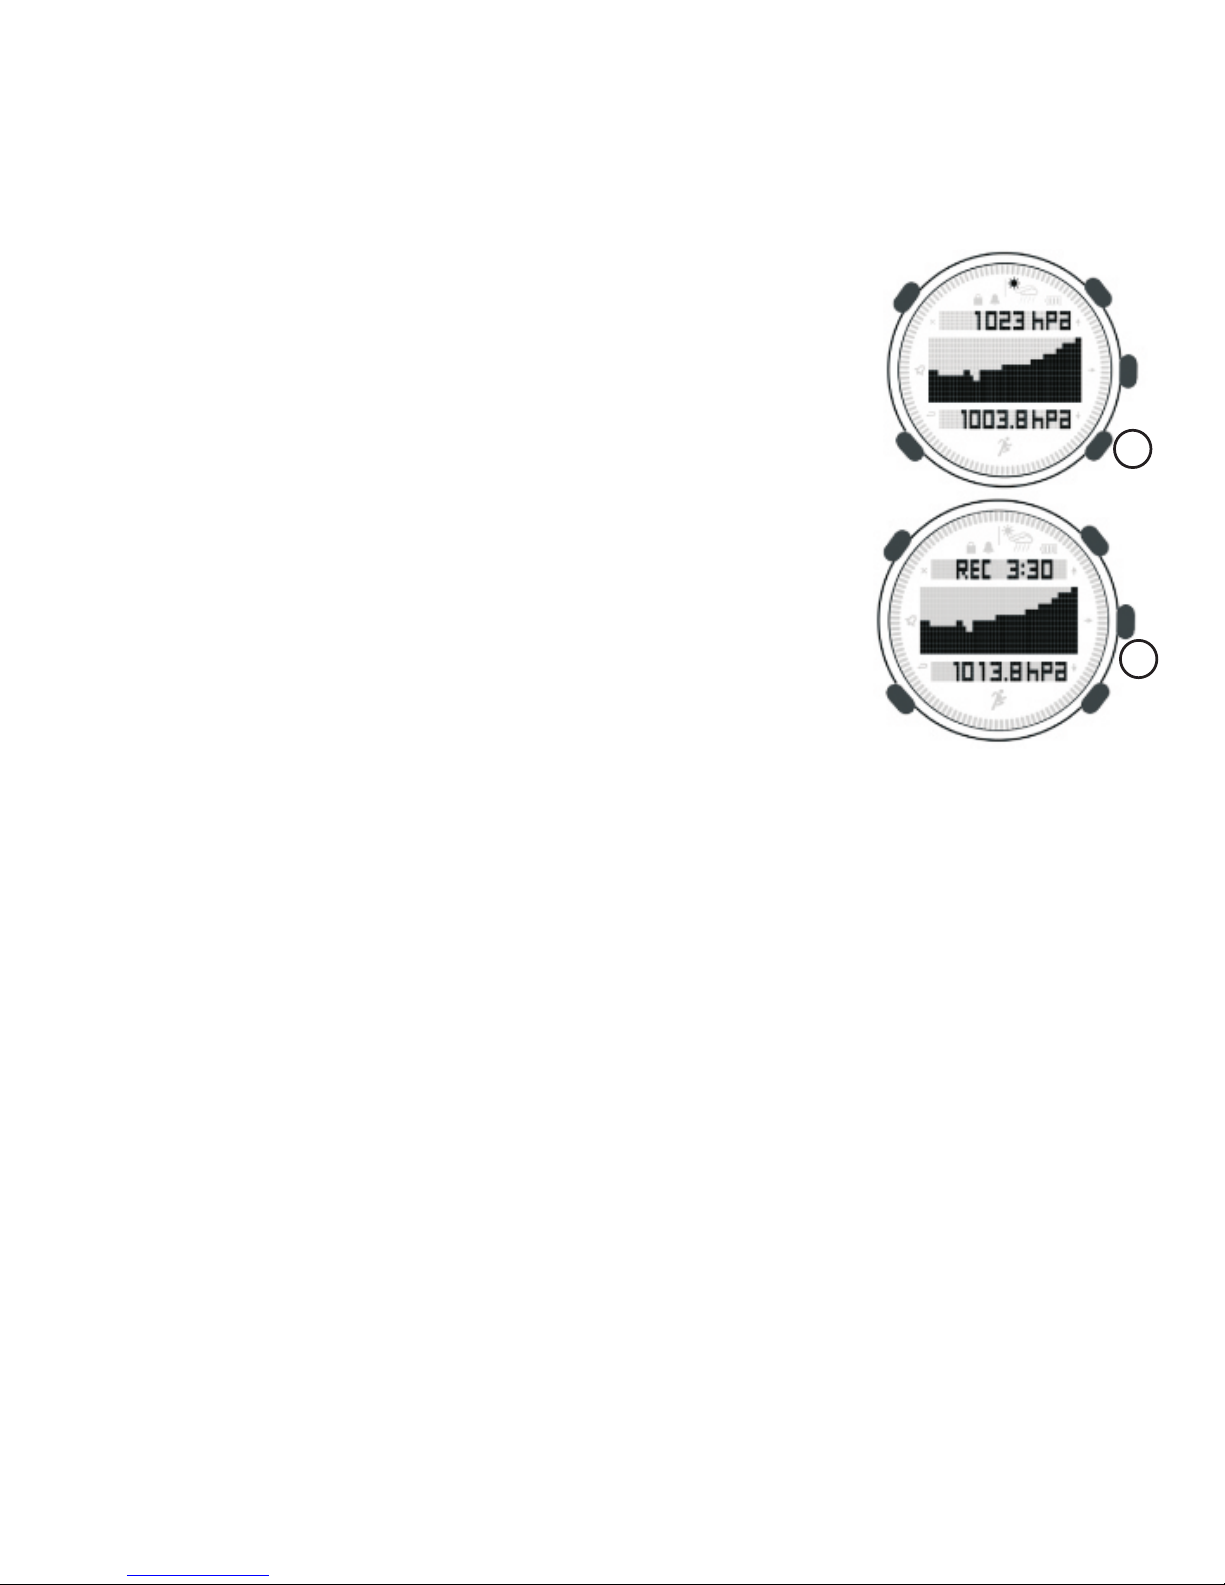
Under time mode, press [B] to barometer mode.
LCD display,
- Upper: Sea level air pressure
- Middle: 24 hours air pressure trend chart
- Below: Press [B] to switch among current air
pressure, time and temperature.
Air pressure record
Unit will record air pressure every half hour
and display as an air pressure trend chart.
Under barometer
8
Under time mode, press [C] to enter compass mode.
A. When should we calibrate compass?
Using first time or after replacing battery, press to enter
compass mode. It requests calibrate compass first.
To let compass working more accuracy, we should calibrate
compass regularly. When compass decline degree too much, we
should calibrate compass
mode, press [C] to check
air pressure record. Press [A] or [B] to browse
air pressure record in turn.
. Compass
8.1 Getting accuracy data
Under compass mode, please ensure to keep horizontal to get
accuracy data. If there is no operation in 30 seconds, LCD will show
“start compass” to save battery. Press [C] restart compass.
8.1.1 Compass calibration
[C]
C
14
Page 17
C
B. How to enter into compass calibration?
Using first time or replacing battery, press [C] , it will enter into
compass calibration. To get more accuracy data, under compass
mode, long press [C] , it will enter into compass calibration.
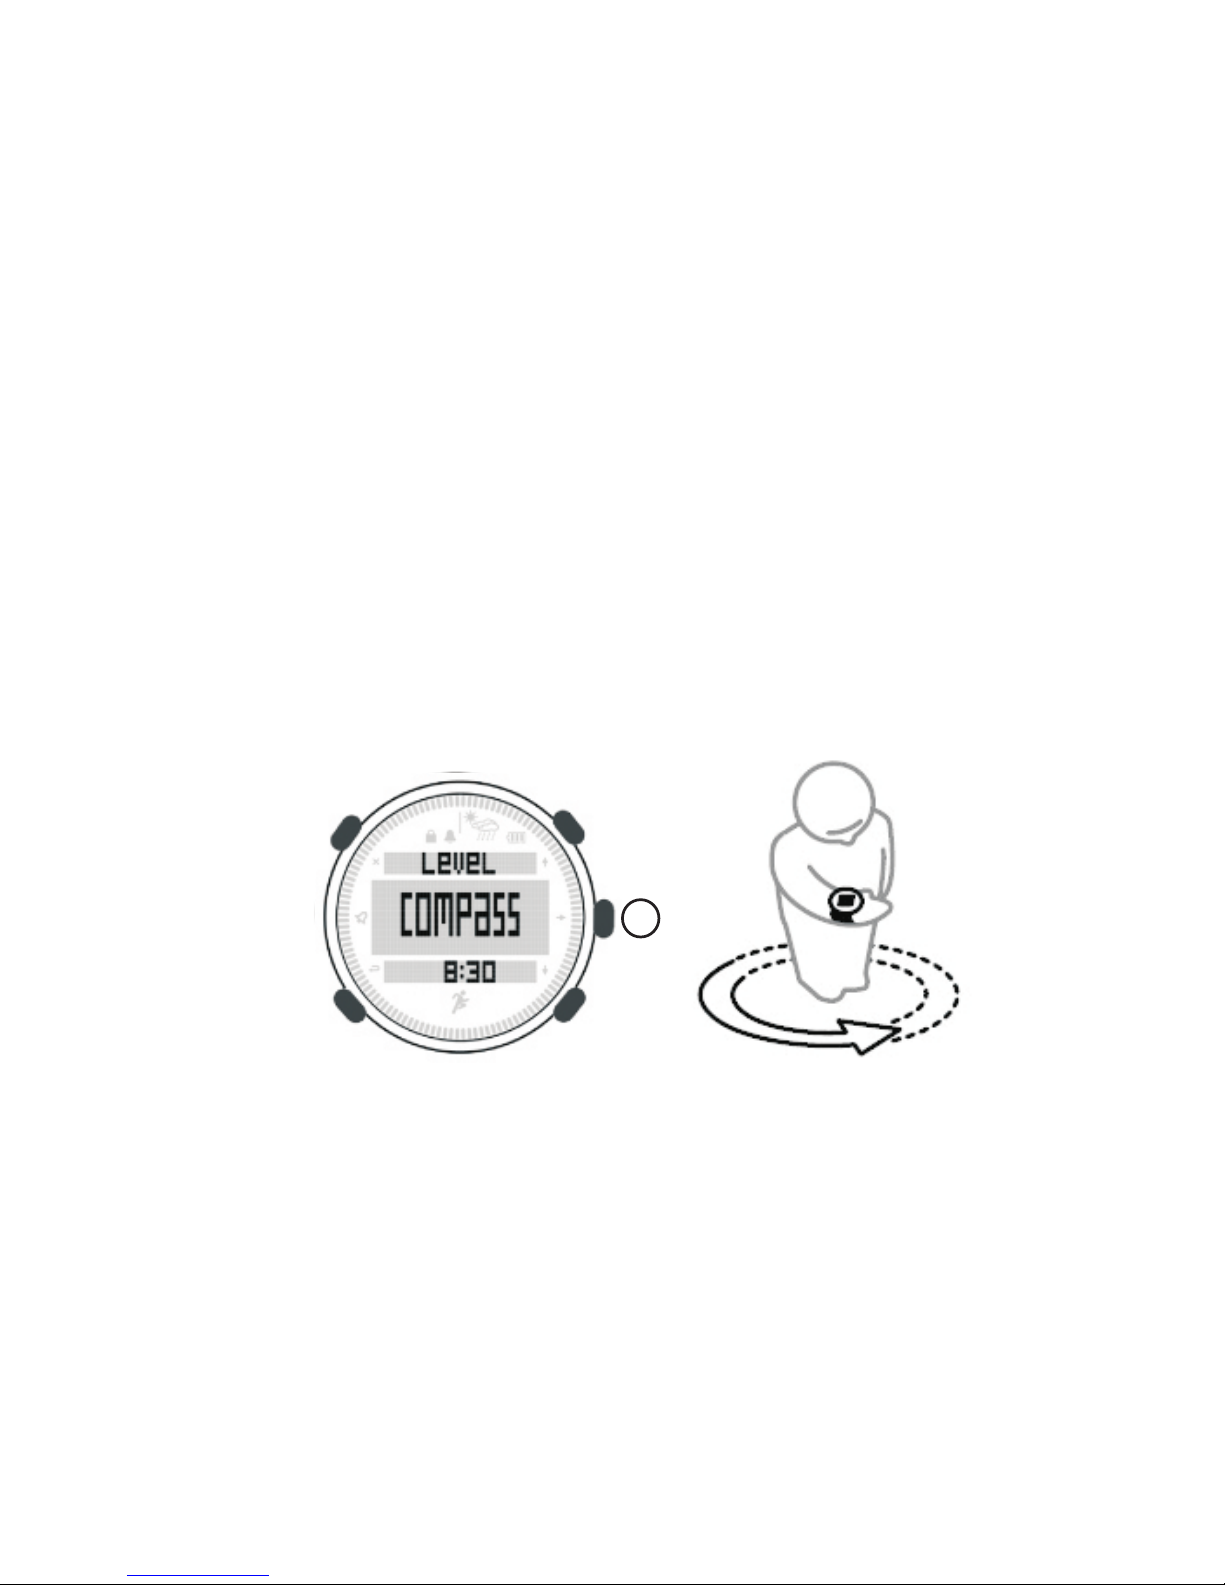
C.How to calibrate compass?
When enter into calibration, circle on LCD display will rotate, splay
on the top. Keep watch level, rotate it clockwise with equal speed
and slowly till it exits calibration automatically and enter into
compass mode.
If there is no operation in 30 seconds, compass will go to IDLE mode.
If calibrating is not successfully, compass calibration mode will be
displayed on LCD when enter into compass mode. Then we should
calibrate it again.
Magnetic Declination
Magnetic declination is defined as the angle between magnetic
north (the direction the north end of a compass needle points) and
true north. Only a GPS can determine true north by knowing your
exact orientation on the earth. All digital compasses measure
15
Page 18
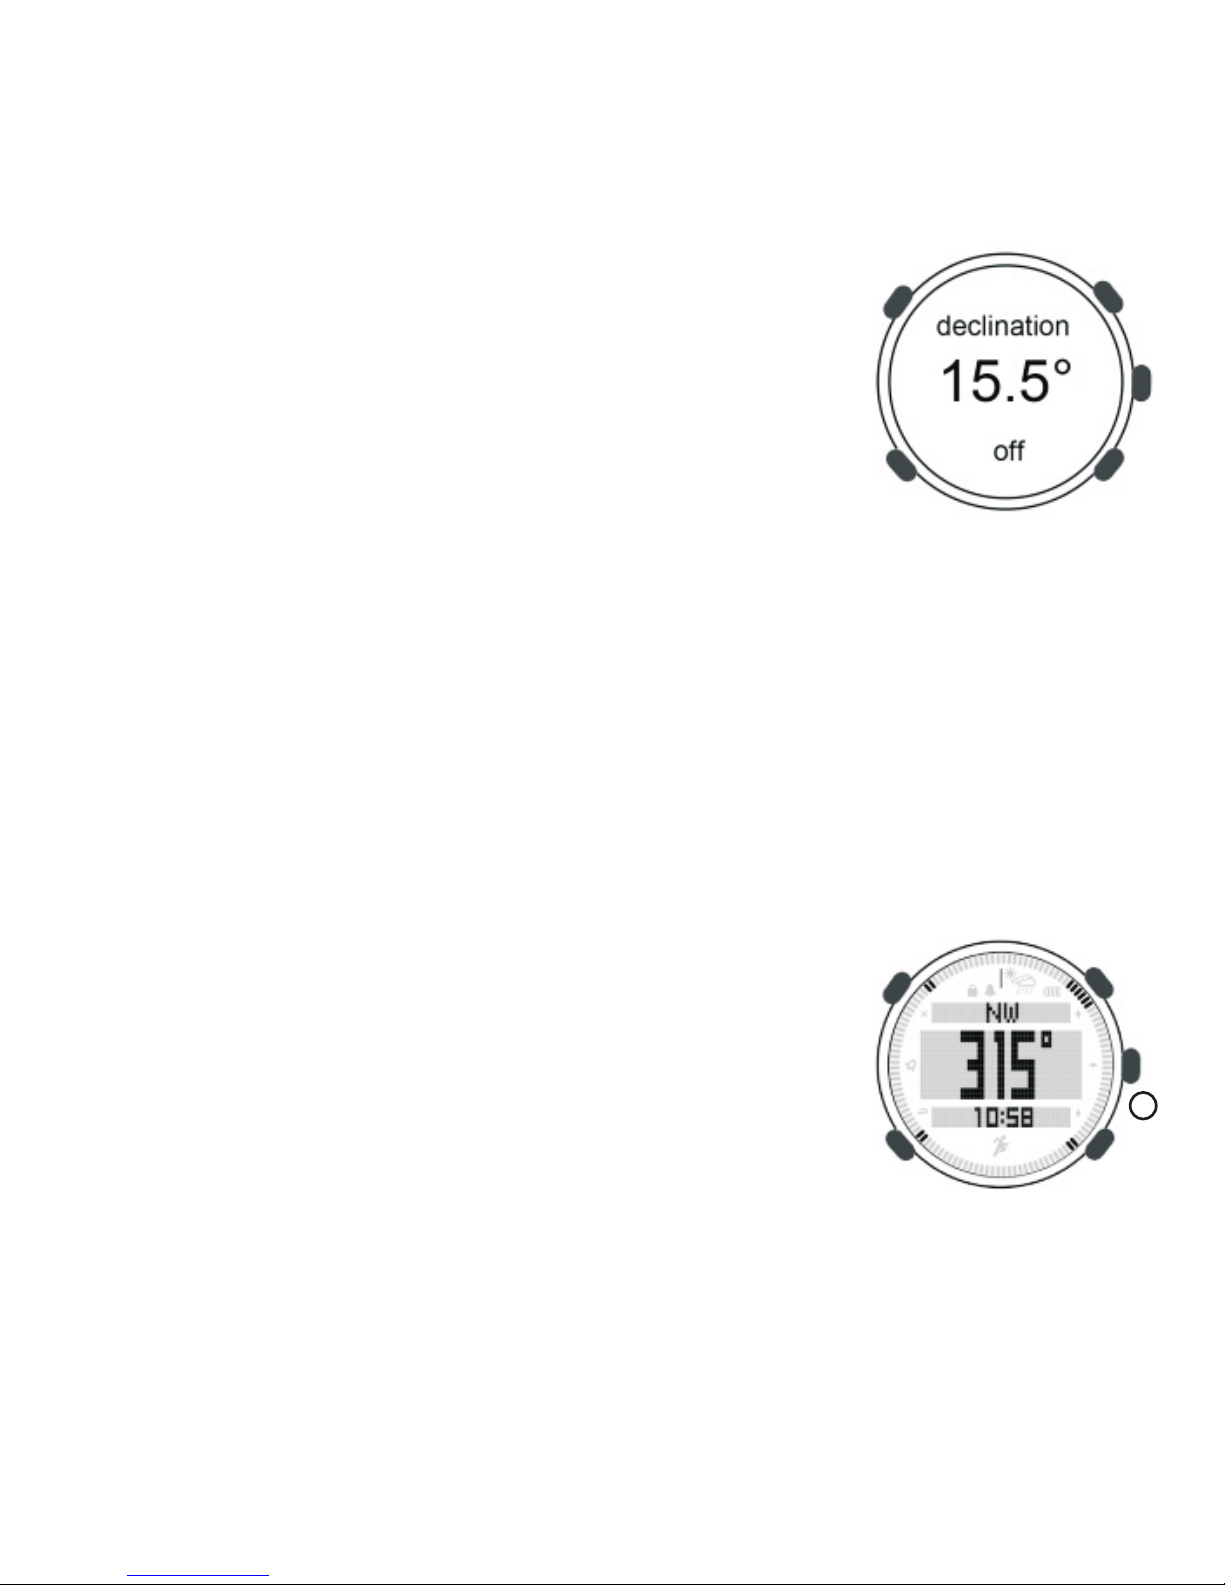
magnetic north. The declination is positive when
the magnetic north is east of true north. The
declination is negative when the magnetic north
is west of true north. To determine the declination
for your location, visit: http://www.ngdc.noaa.gov
/geomagmodels/Declination.jsp
For example, Phoenix, AZ produces the following
result: Declination = 10 degrees 59 minutes changing 6 minutes
per year). To convert to decimal format: Declination = 10+ 59' / 60
('/ nteger, Declination = 11play. This will offset magnetic north by +
11 degrees ( or 11 degrees to the East) to true north. Note that the
magnetic declination changes as a function of time for your location.
In the above example, the declination changes -6 minutes ( or 0. 10
time function is insignificant.
Magnetic declination setting,
1) Under time mode, long press [M] to enter setting mode
2) Press [A] in turn to compass
3) Press [C] to enter declination
4) Press [A] or [B] to set data
5) Press [L] to save and exit setting
8.2 Using compass
Under time mode, press button [C] to enter
compass mode.
LCD display:
- Upper: Bearing code (such as NE, SW, ESE etc.)
- Middle: Degree (This degree is measured degree between north
C
16
Page 19

to current position )
- Below: Time
- Outer ring: Three black points (Always indicating North)
9. Battery replacing
This unit adopts 3v lithium battery. Model no. is CR2032.
NOTE: To reduce the risk of fire or burns, do not crush, puncture or
dispose of used batteries in fire or water. Recycle or dispose of
used batteries properly.
NOTE: Please take care of O-ring at battery notch. If it is missed,
the waterproof level will be reduced.
NOTE:: Turn on backlight high frequency will reduce battery life.
Install or change battery:
1) Adopt a coin and rotate anticlockwise to open battery case.
Please take care O-ring on battery notch and keep unit clean and
dry, take off old battery
2) Keep BTT+ at top and install battery
3) Cover the battery case, align thread and rotate clockwise.
Normally rotation will be very easy. When you have to rotate it
powerful, the thread may not be aligned or be broken.
4)Tighten up battery case
17
Page 20
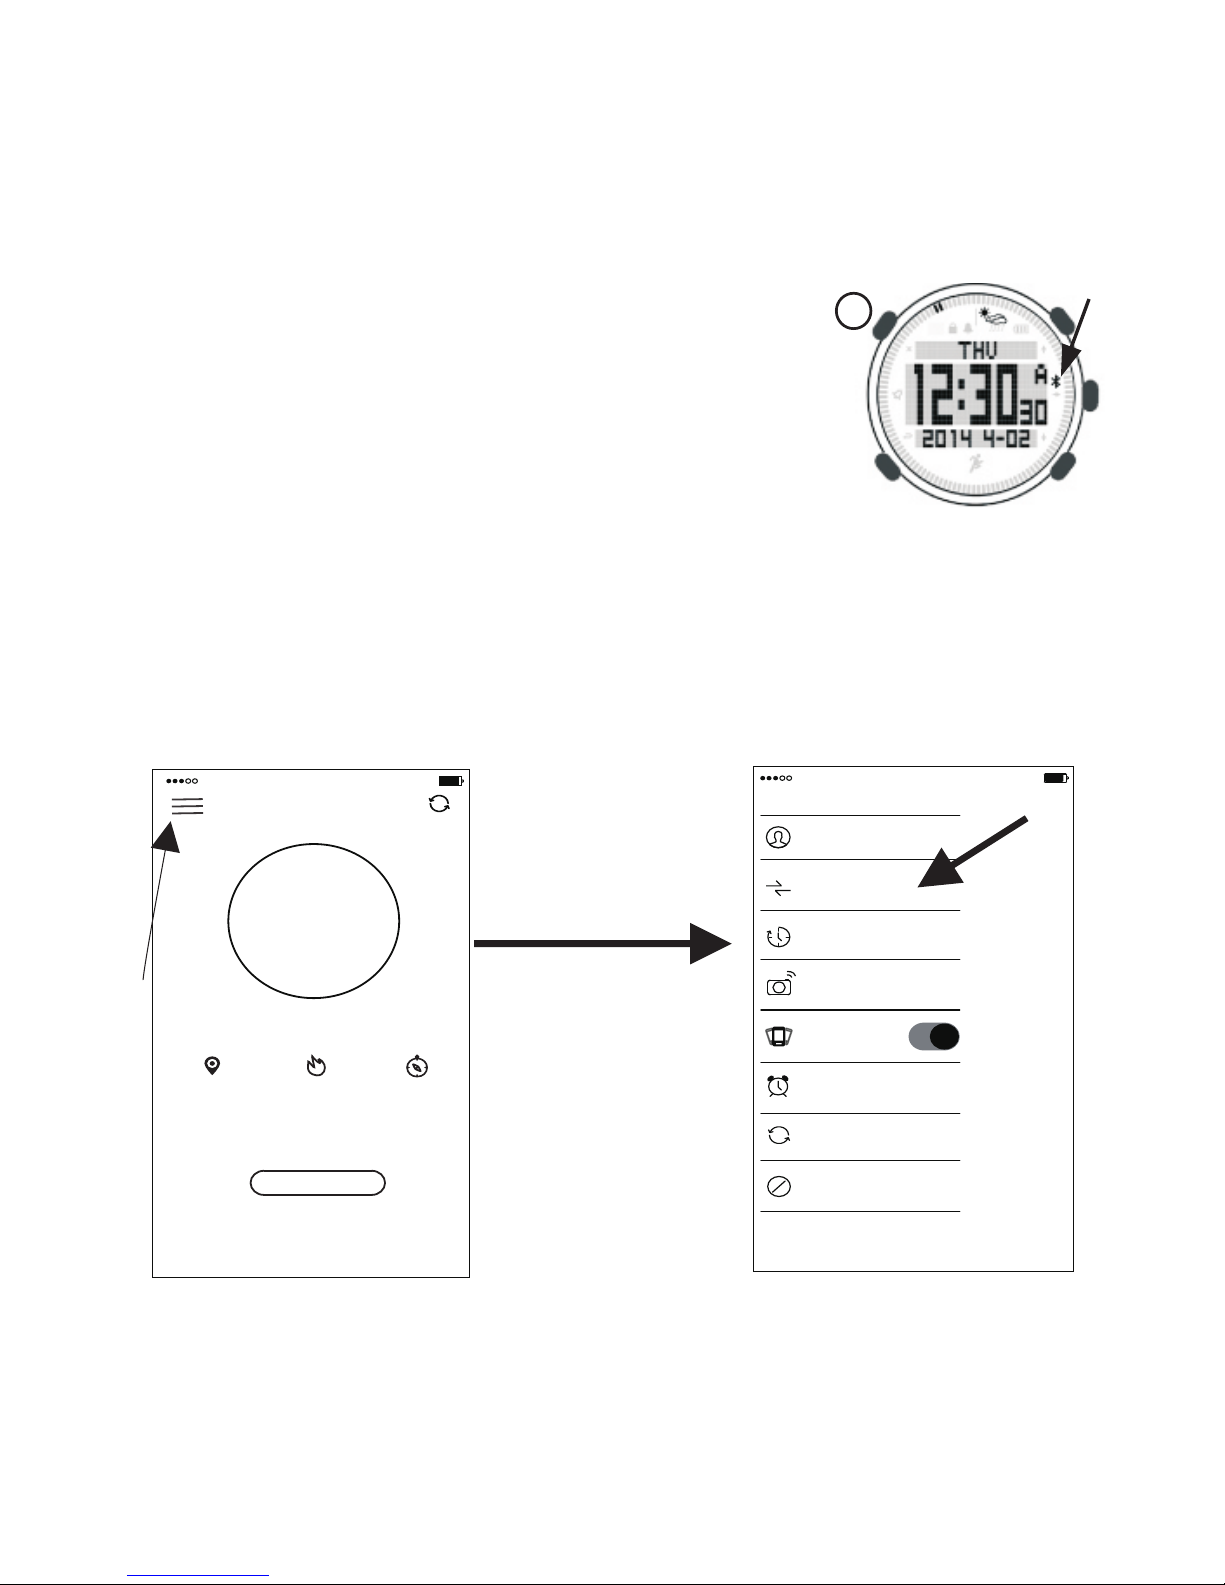
10.Bluetooth ON/OFF
under the time surface Long press button“L”such as
Figure 4 the screen will show the icon that is
bluetooth(the arrow show the position)this icon will blink,
it mean bluetooth on. after that long press again to off it.
Bluetooth connect
1.First scan two-dimension code
. meantime open the Smart phone bluetooth Figure 4
after that press the arrow ( the Figure 5 )show to enter the Basic surface.
(Figure 6),then press “Device” to connect the Smart watch. the blink bluetooth
icon would be stop it. it means connection successful.
PS:you also can search “climbing” at APP store or Google play to download APP
(the code on last page ) ,
download the apps
0 9 : 3 5
96%
中国移动
4G
Climber
Device
Sync Time
Camera
Incoming Call
Alert Clock
Reset Watch
Unbind
中国移动
4G
0 9 : 3 5
9 6 %
Walk
Step
0
0%
Goal:5000 steps
0.00KM 0.00Kcal 0min
ShenZhen
Figure 5
Figure 6
18
L
Page 21
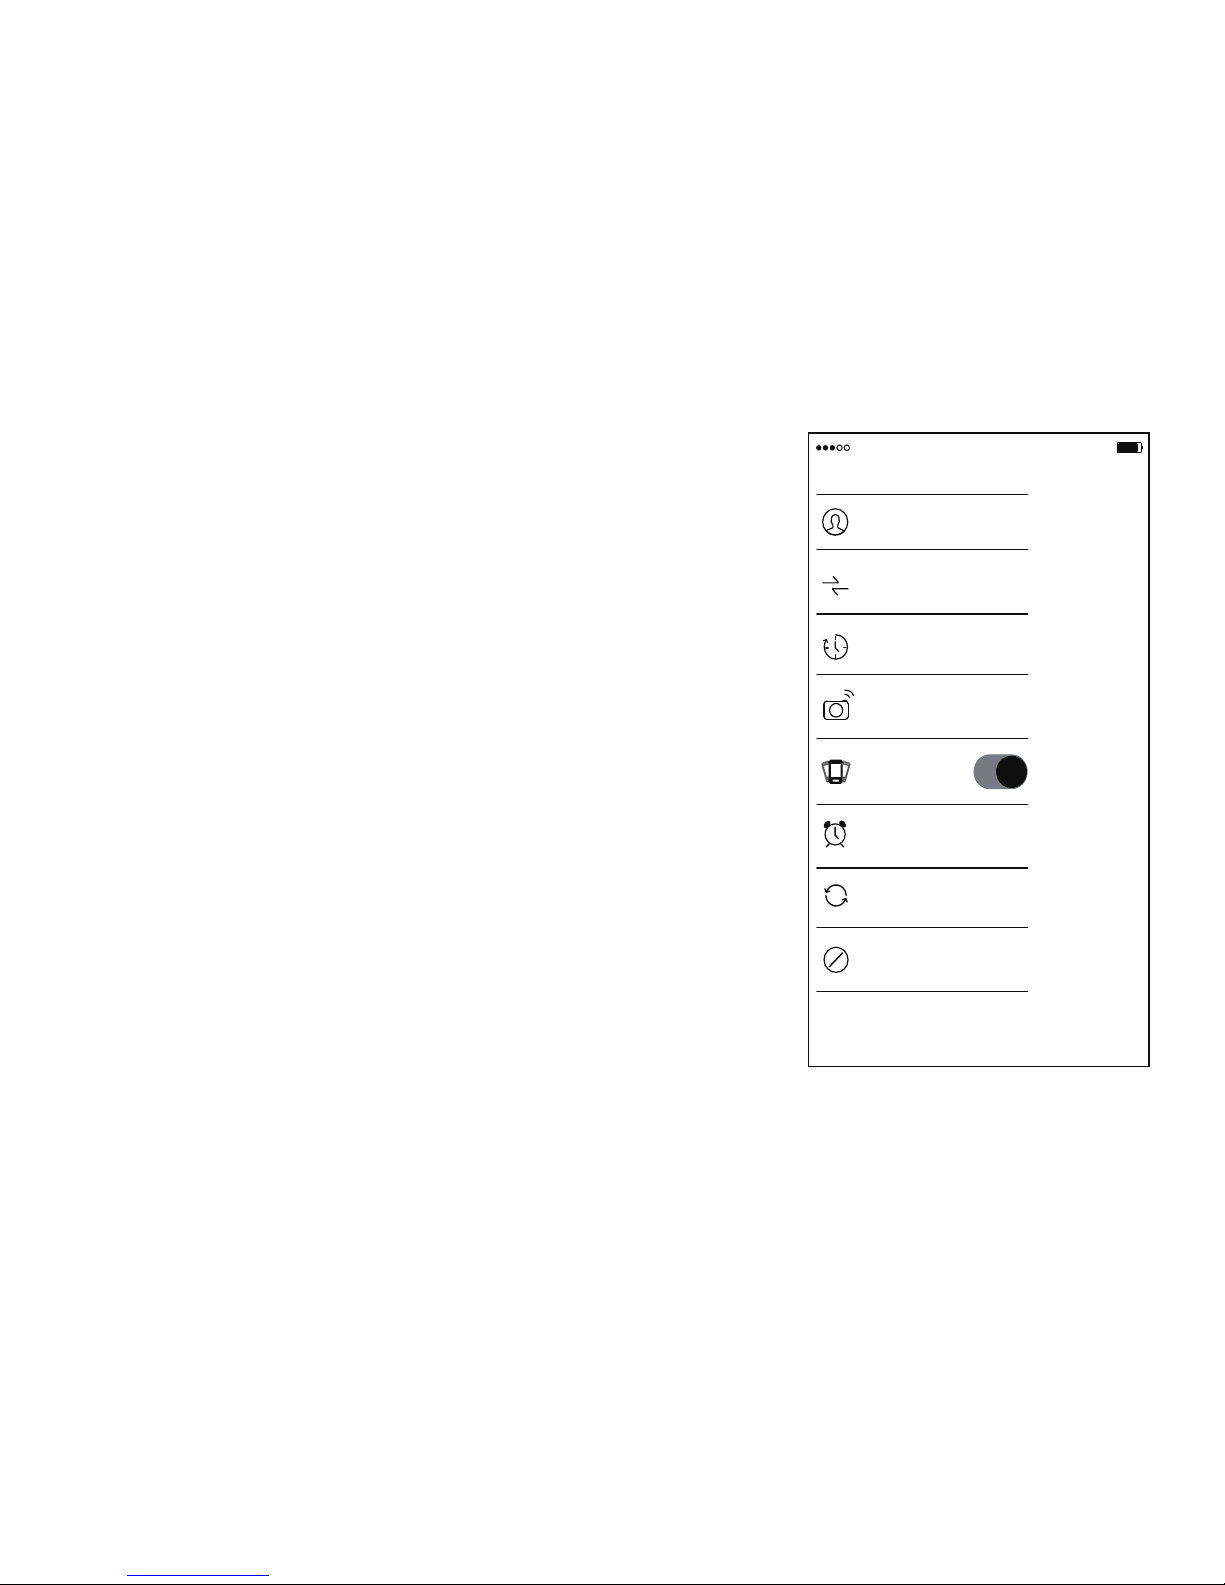
11.APP Introduce
The APPS have four surface”Basic””Walk””Altimeter”“Barometer”
11.1 Basic surface(Figure 7)
1)Climber:you can set your basic data,
such as Birthday,Gender, Height ect.
.
2)Device: connect the Smart watch
3)Sync time: can sync the smart phone
time on the watch
4)Camera: can use the watch to be the
shutter(press any button to make
picture).
5)Incoming call: the watch will shock to
reminder meantime the watch screen will
show number(PS:Few mobile device may
can not remind cause of incompatible
problem)
6)Alert Clock: available set two group
7)Reset Watch: clear all smart watch data
8)Unbind: remove the connect for current watch
Figure 7
19
0 9 : 3 5
96%
中国移动
4G
Climber
Device
Sync Time
Camera
Incoming Call
Alert Clock
Reset Watch
Unbind
Page 22
中国移动
4G
0 9 : 3 5
9 6 %
Walk
Step
0
0%
Goal:5000 steps
0.00KM 0.00Kcal 0min
ShenZhen
Figure 8
0
Total Distance
0.00Km
day
week
Month
1
2
3
4
5
6
7
8
0
中国移动
Total Calorie
0.0千Kcal
2016-01-15 Friday
2 0 1 6 - 0 1 - 0 5
1
2
3
4
5
6
7
89101112
13
14
15
16
171819
20
21
22
23
24
Figure 9
20
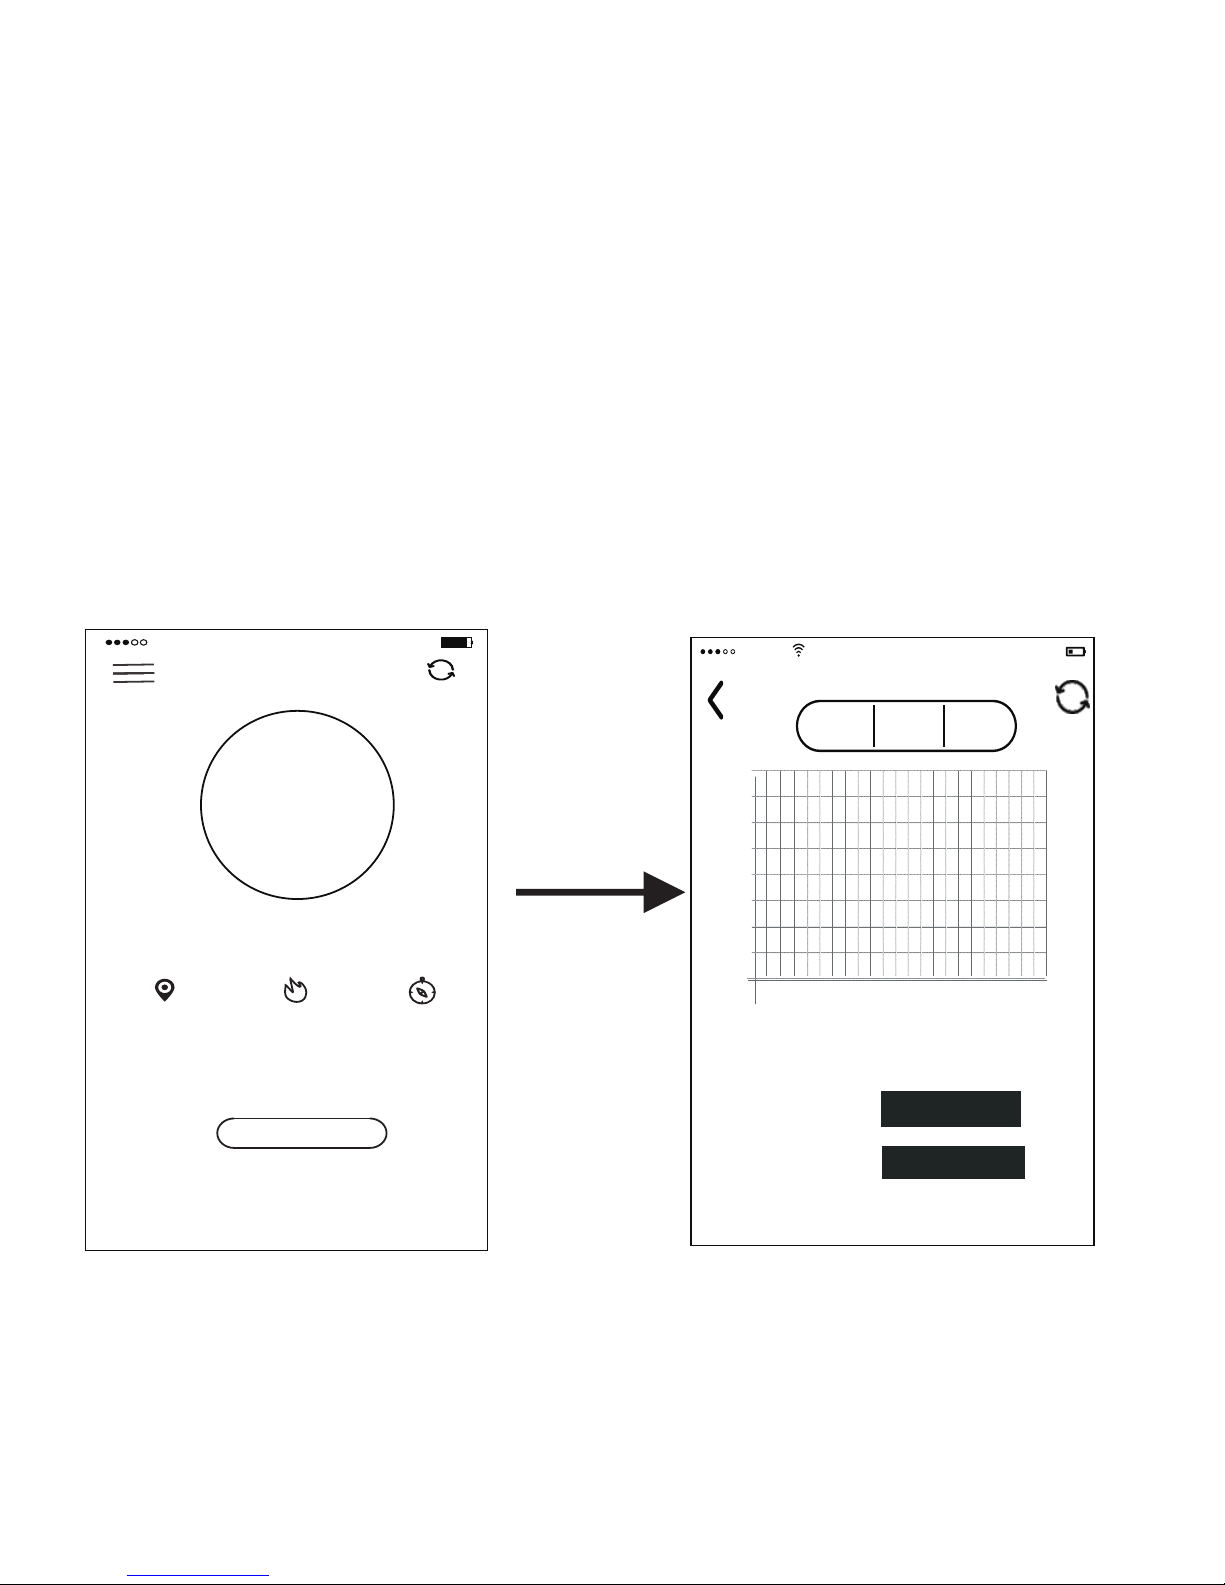
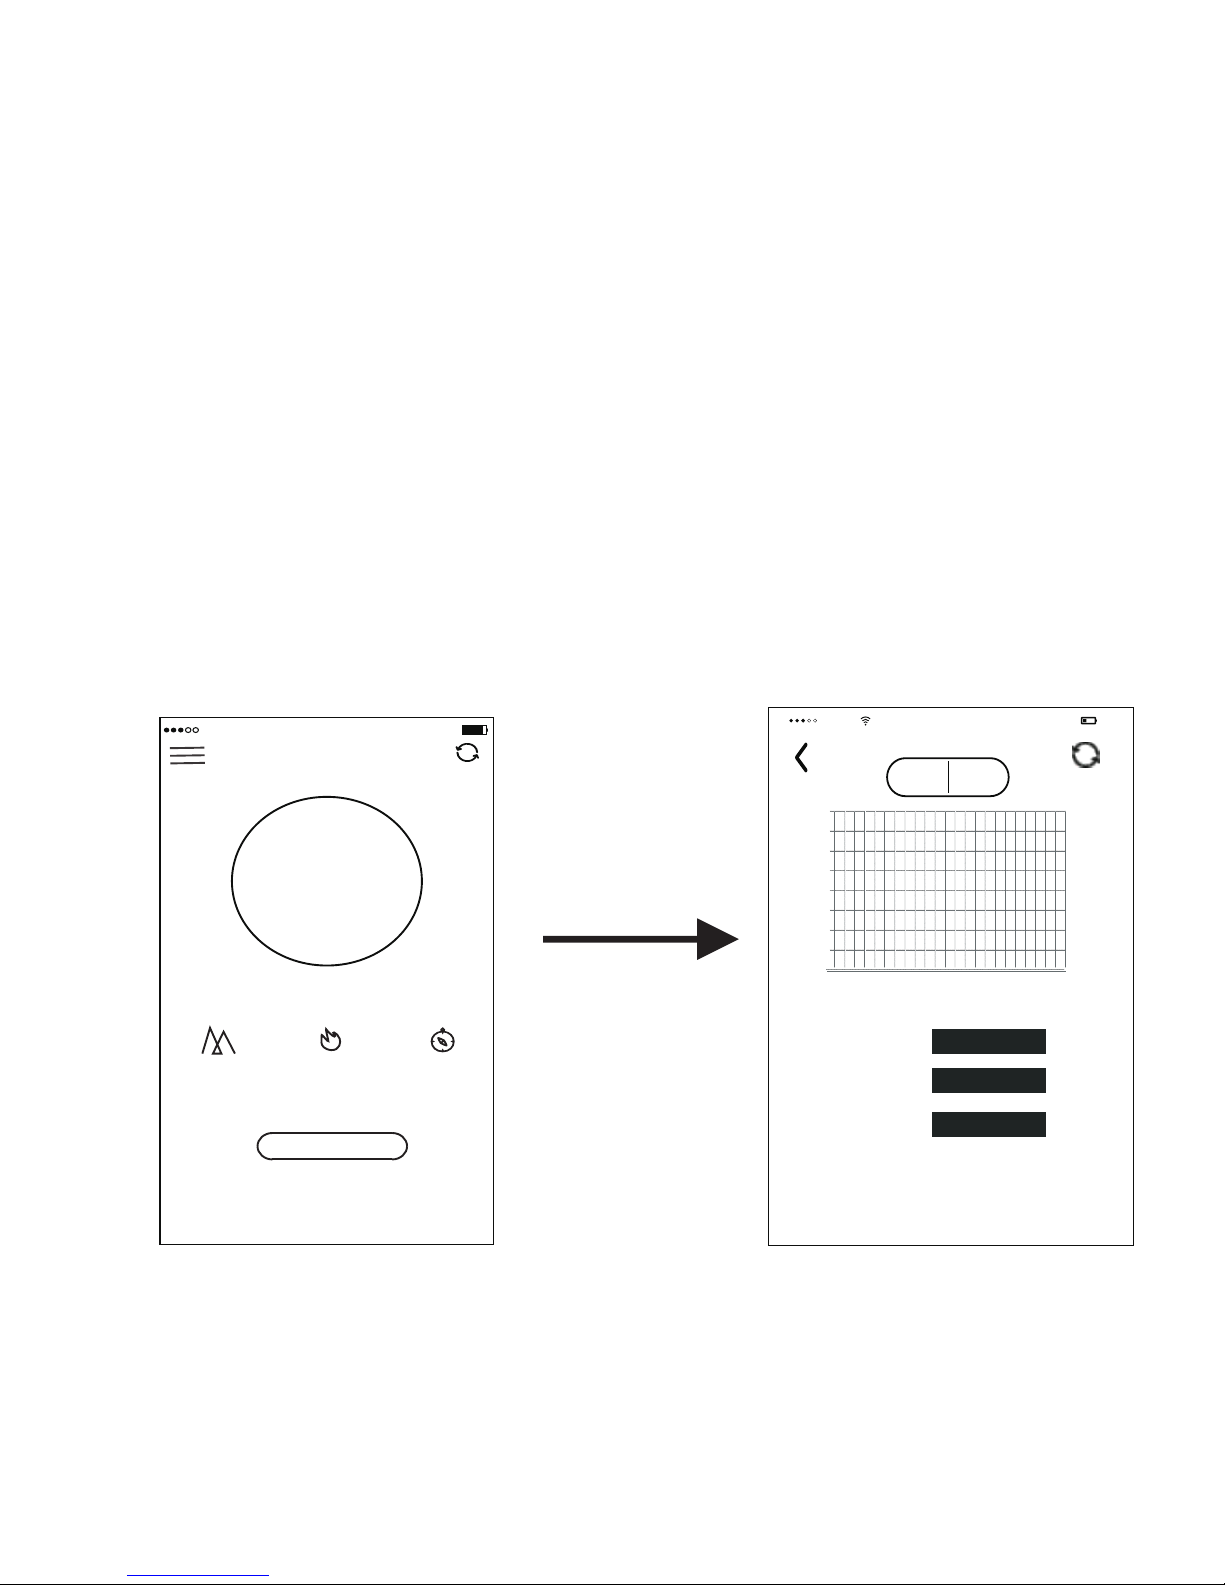
11.2 Walk
the main surface for“Walk”. please reference Figure 8, press top
left icon to enter “basic”.you can see your step at present and
percent of the goal of each day in the circle. you also can check
the distance, the caloire and exercise time at present. your present
position will show on the below of the surface.
PS: this position is according to your Smart Phone .
when you press the area of circle you will enter to Figure 9.
it can moniter your day, week and month that your walk database.
let you compare it.
Page 23
中国移动
4G
0 9 : 3 5
9 6 %
Altimeter
Altitude
8
M
Goal:1000米
0M 0.00Kcal 0H0M
ShenZhen
11.3 Altimeter
under the "Walk" slide your smart phone enter to “Altimeter” .please
reference Figure 10 press top left to enter the “basic”.you can see the
altitude at present in the circle. you also can check the sea surface height,
caloire and exercise time at present. your present position will show on the
below of the surface.
sea surface height
when you press the area of circle you will enter to Figure 11. it can moniter
your day,week that your altimeter database. let you compare it.
,
: " " will automatic receive the database from your
smart phoneby internet.the data is according to your position
PS
Figure 10
Total Climb
0.0M
20%
23:52
day
week
1
2
3
4
5
6
7
8
0
中国移动
Total Down
Total Time
0.0M
0H0M
2016-01-15 Friday
2 0 1 6 - 0 1 - 15
1
2
3
4
5
6
7
89101112
13
14
15
16
171819
20
21
22
23
24
Figure 11
21
Page 24
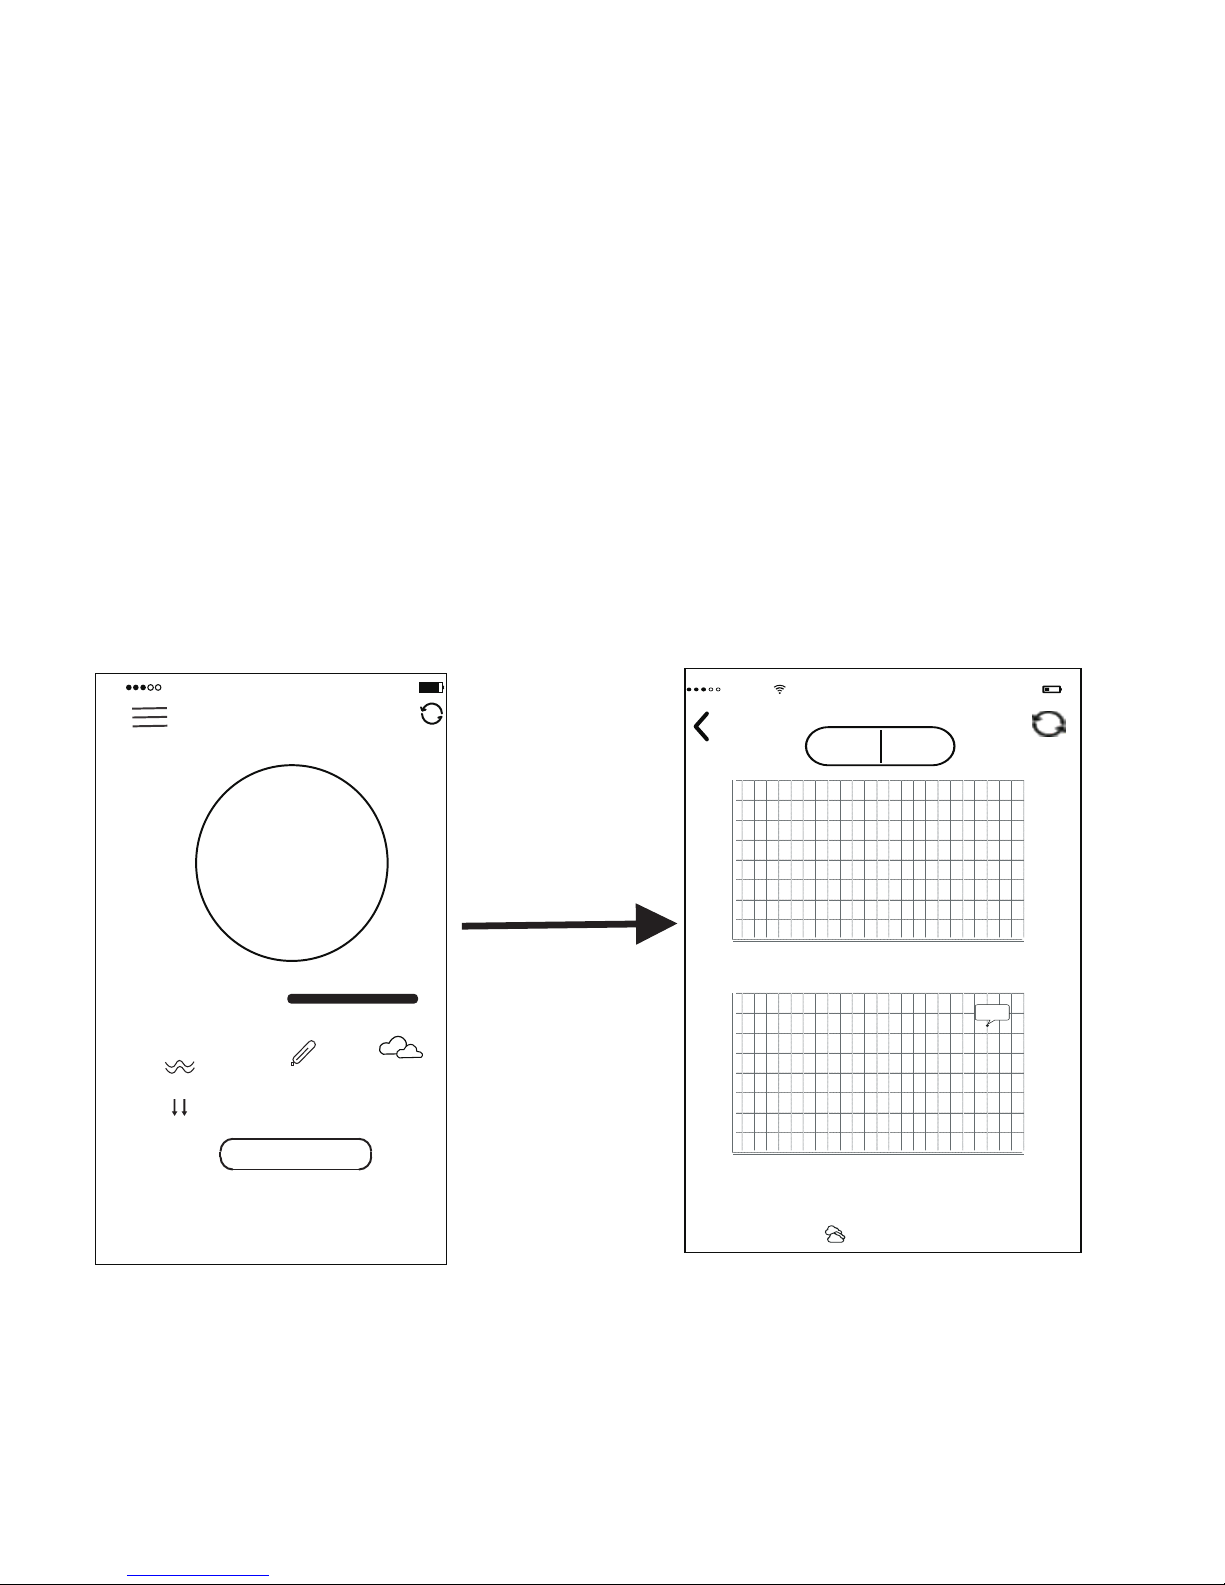
Figure 12
day
week
0
1
2
3
4
5
6
7
8
20%
中国移动
2016-01-15 Friday
2 3 : 5 3
2 0 1 6 - 0 1 - 15
1
2
3
4
5
6
7
89101112
13
14
15
16
171819
20
21
22
23
24
0
1
2
3
4
5
6
7
8
2 0 1 6 - 0 1 - 15
1
2
3
4
5
6
7
89101112
13
14
15
16
171819
20
21
22
23
24
19.0°C
1 7 - 2 4 °C
中国移动
4G
0 9 : 3 5
9 6 %
气压
当前气压
1022.7hpa
钓鱼指数:62%
深圳
I
1025.0hpa 13-20°C
多云转晴
中国移动
4G
0 9 : 3 5
9 6 %
Barometer
Pressure
1022.7hpa
Fishing rate:62%
ShenZhen
I
1025.0hpa 13-20°C
cloudy
Figure 13
22
11.4 Barometer
under the "Altimeter" slide your smart phone enter to “Barometer”.
please reference Figure 12,
press top left to enter the “basic”.you can see the Pressure at present in the
circle. you also can check the sea surface pressure, temperature and weather
at present. your present position will show on the below of the surface.
PS:" sea surface pressure" and" weather" will automatic
receive the database from your smart phone by internet. the
data is according to your position.the “temperature” is sync
Smartwatch.
when you press the area of circle you will enter to Figure 13. it can moniter
day and week that air pressure and temperature database. let you compare it.
Page 25

12. Specifications
● Operating temperature:-20℃ - - +60℃ / -4℉ -- + 140℉
● Storage temperature:- 30℃ -- + 60℃ / -22℉ -- +140℉
● Water-resistant:50m / 160ft
● Battery: CR2032
● Battery life-time: about 1 year in normal use
Altimeter
● Display range:-500m -- 9000m / -1640ft -- 32760ft
● Resolution:1m / 3ft
Barometer
● Display range:300 -- 1100hPa / 8.8 -- 32.6inHg
● Resolution:0. 1hPa / 0.03inHg
Thermometer
● Resolution:1°C / 1°F
Compass
● Resolution:1°
Apps
● Min:Android 4.3
● Min:IOS 7
23
Page 26
24
APP download
IOS
android
Page 27

 Loading...