

Page 1

USB 3.0 3.5’’ SATA 6G Hard Drive
Enclosure
All brand names and trademarks are properties of their
respective owners.
User Manual
Ver. 1.00
Page 2

Contents:
Features ................................................................................ 3
System Requirements .......................................................... 3
Package Contents ................................................................. 3
Hard Drive Installation ....................................................... 4
Connecting the Enclosure Kit to a Computer ................... 7
Driver Installation ............................................................... 7
MN6000000036 Page 2
Page 3

Features
Connect any SATA storage to any USB port
Supports SuperSpeed USB 3.0 data rate up to 5Gb/s
Compliant to Universal Serial Bus 3.0 Specification, Revision
1.0
Compliant to Universal Serial Bus Specification, Revision 2.0
Supports SATA speed of 6.0Gbps, 3.0Gbps and 1.5Gbps
Compliant with Serial ATA Specification, Revision 3.1
Support for UASP (USB attached SCSI protocol)
Supports SATA 3.5’’ hard drives
LED indicator for SATA activity
Plug and Play, no driver installation
System Requirements
Windows® XP/Vista/7/8/8.1 (32/64 bit)
One available USB port (Recommend USB 3.0 port)
Package Contents
1 x Enclosure 1 x USB 3.0 cable
MN6000000036 Page 3
Page 4
1 x User Manual 1 x Power Adapter
Hard Drive Installation
Install a hard disk drive in the Enclosure Kit by completing the
following steps.
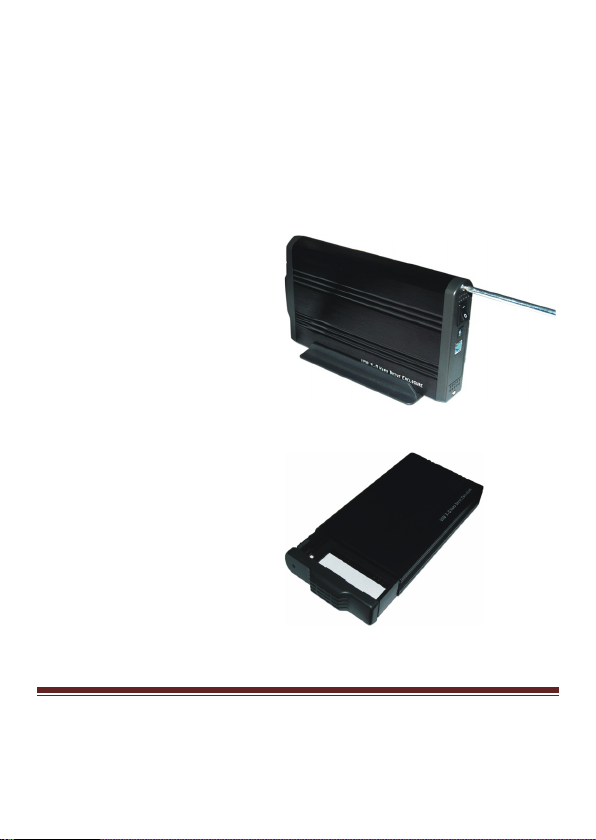
1. Disassemble the rear
panel from the housing
by removing one screw
from each side of the
housing with a screw
driver.
2. Push the bottom panel
out of the housing.
MN6000000036 Page 4
Page 5
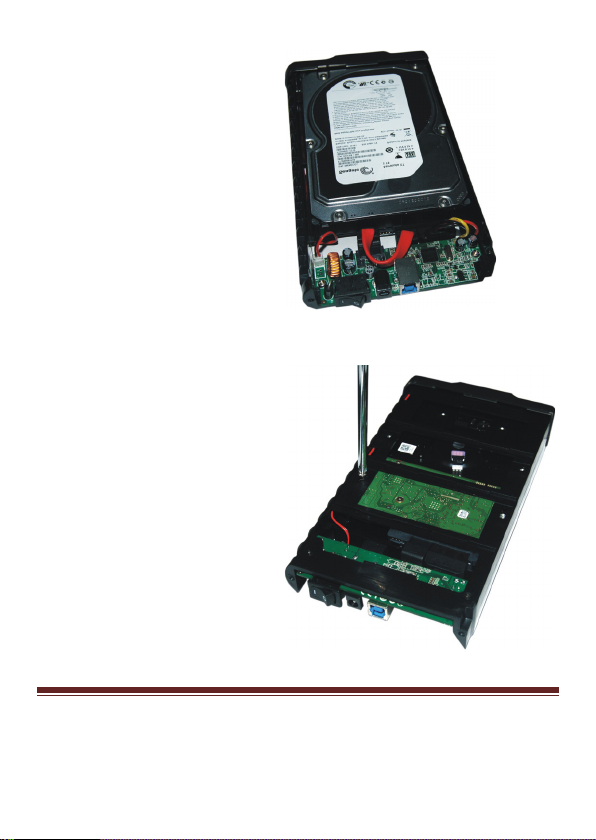
3. Insert the SATA cable
into the hard drive, and
insert the control board
power cable into the
receptacle on the hard
drive.
4. Turn the enclosure so that
the bottom side is facing
up and insert the first
screw. Tighten the first
screw ensuring that
proper alignment is
maintained while
tightening. Repeat for the
three screws.
MN6000000036 Page 5
Page 6
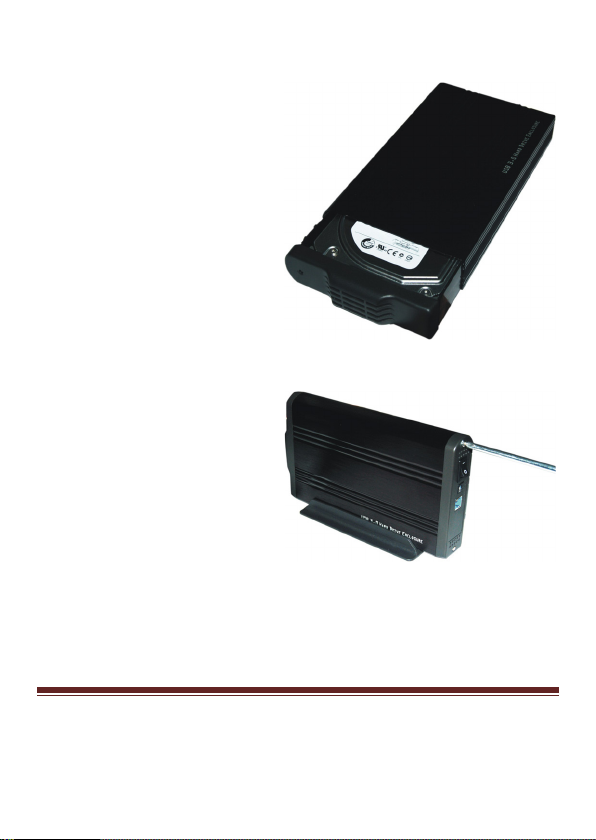
5. Align the edges of the
hard drive platform and
carefully slide the
assembled platform into
the enclosure housing.
6. Fasten the rear panel to
the enclosure housing by
replacing the (2) screws
removed in step 1.
7. The Enclosure Kit is now assembled and ready for connection to a
computer.
MN6000000036 Page 6
Page 7

Connecting the Enclosure Kit to a Computer
Complete the following steps to connect the enclosure to a host
computer.
1. Connect the AC/DC power adapter, then turn on the power switch;
ensure that the blue LED indicator is active.
2. Connect the USB 3.0 cable from the Enclosure to an available
USB port on the computer system.
Driver Installation
No driver installation is required for Windows operating systems, as
this enclosure is natively supported, so the drivers are already installed.
MN6000000036 Page 7
 Loading...