


Jiangsu Xinri E-vehicle Co.,Ltd.
No.501 Xishan Road, Anzhen,Xishan District ,Wuxi, Jiangsu Province, P.R.China
www.sunraev.com www.mikuev.com
Email: info@sunraev.com Tel: 86- 0510-88109820
Cool to be cool
Miku Max
Operator’s Manual
Electric Scooter
Powered by Sunra EV

DESIGNED BY MIKU TEAM
DESIGNED BY MIKU TEAM
TABLE OF
CONTENTS
SECTION 01
SECTION 02
SECTION 03
SECTION 04
SECTION 05
SECTION 06
SECTION 07
SECTION 08
Safety Guidelines-definitions
General Precautions
The Manual Of Smart Chip Charger
Performane
Fast Assembly
Pre-ride Checklist
Power Pack & Charging
Maintenance Tips
WARNING!
Read and understand all safety precautions in this manual before operating.
Failure to comply with instructions in this manual could result in personal injury,
property damage, and/or voiding of your warranty.
WARNING!
It is your responsibility to know and obey all applicable local, state, and federal
laws at all times while operating this electric scooter including but not limited to
traffic safety, vehicle registration, emissions, and noise.
DESIGNED BY MIKU TEAM
DESIGNED BY MIKU TEAM
Safety Guidelines-Definitions01
This manual contains important information that you need to know and understand in order to protect
YOUR SAFETY and to PREVENT EQUIPMENT PROBLEMS. The following symbols help you recognize this
information. Please read the manual and pay attention to these sections.
DANGER: Damages indicate a certainty or strong possibility of personal injury or death if
instructions are not followed.
WARNING: Warning indicates a strong possibility of equipment damage or possibility of
personal injury if instructions are not followed.
CAUTIONS: Cautions indicates a possibility of equipment damage if instructions are not
followed.
WARNING! Improper operation or maintenance of this scooter could result in serious injury and property
damage. Read and understand safety instructions tips and operating instructions before using this scooter.
Always obey all applicable local, state, and federal laws when operating this scooter.
Save These Important Safety Instructions!
Read and understand all of these safety instructions. Be sure to retain them for future use.
General Precautions02
Read and follow all instructions in the manual of MIKU products, before attempting to operate this scooter. Don’t
discard this Operator’s Manual, or any other material or documentation included with this scooter.
Modifying the scooter and/or removing original equipment and/or safety decals could make this scooter unsafe for operation.
Replace any safety decals that become unreadable or detached from the scooter. Decals provide critical warning
about potential hazards or safety requirements.
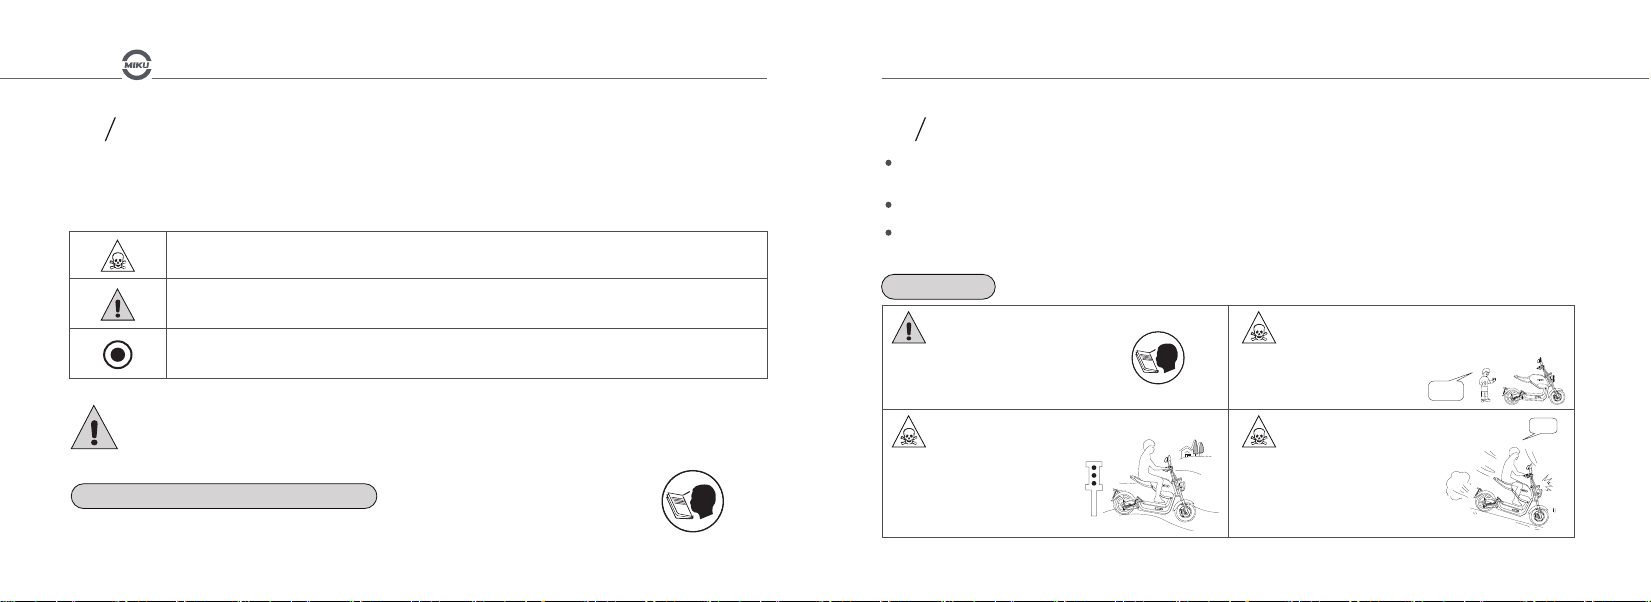
Traffic safety
Always follow the entire pre-ride
checklist prior to starting or
operating the scooter.
Always obtain mature, supervised
instruction and sufficient practice
in an uncongested area before
this scooter on any public
thoroughfare.
Your safety while riding this scooter depends entirely on your
ability to exercise proper judgment. You must be of sufficient
age,understanding,mental capacity,and physical capability to
safely operate this scooter.
Above
16
Excessive vehicle speed is a leading cause
of accidents, which can cause death or
serious harm to you, other people,
and/or property.Always obey all
applicable traffic safety laws while
operating this scooter, being sure
to account for current weather and
traffic conditions and slow down if necessary.
Don’t
01/02
DESIGNED BY MIKU TEAM
DESIGNED BY MIKU TEAM
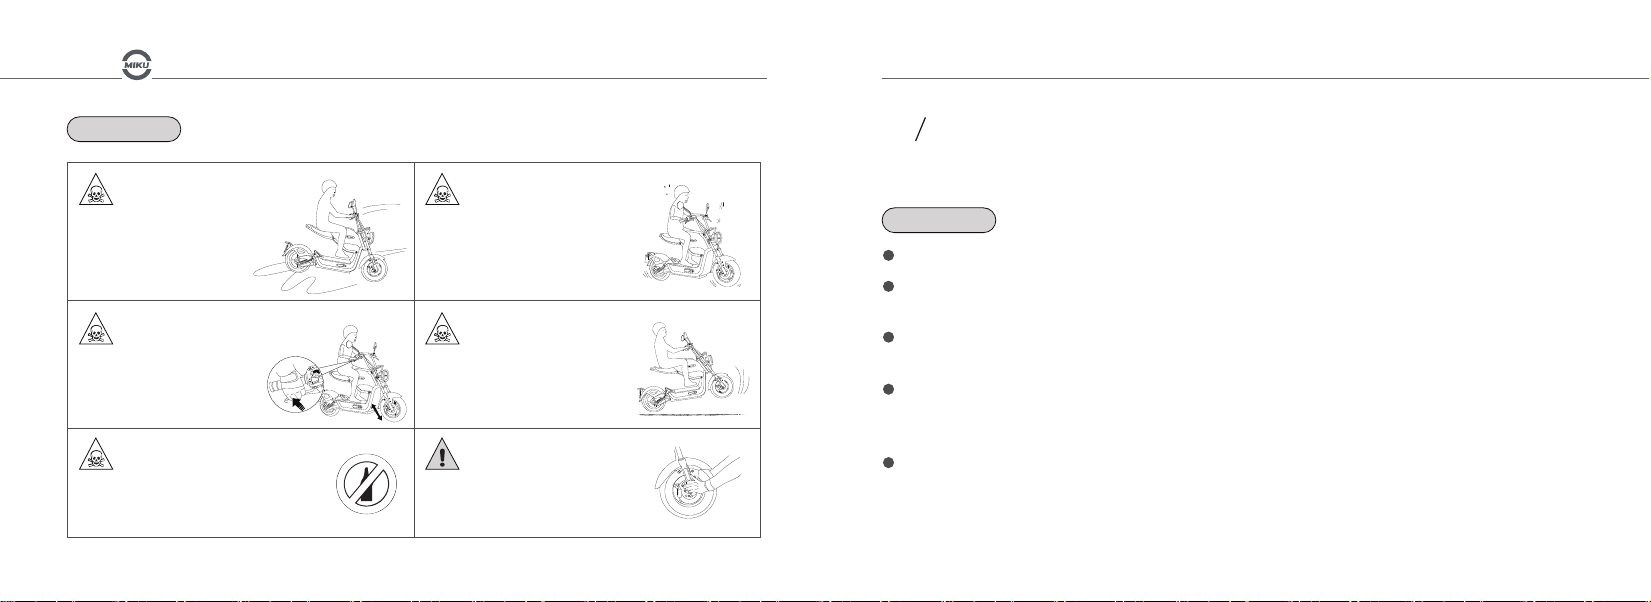
Traffic safety
Use extreme caution when riding
on wet, slippery, rough, or sloped
terrain. There is an increased risk
of loss of control, which can
result in injury,death, and/or
property damage.
Stop the scooter and shut off the motor
immediately if the scooter makes unusual
noises or vibrations. Check the
scooter for damage. Excessive
noise or vibration is a sign
of loose or worn parts.
Never operate scooter while under the
influence of alcohol, drugs or medication
of any kind. Such operation is dangerous
to yourself and/or others and may be
illegal in your location.
Use extreme caution when riding on
wet, slippery, rough, or sloped terrain.
There is an increased risk of loss of
control, which can result in injury,
death, and/or property damage.
Never use this scooter to perform
any type of racing, stunt riding,
jumps, spin-outs, donuts, or
other maneuvers. You could
kill or injure yourself or others
and/or cause property damage.
Check tire pressure before operating
the scooter using a property
calibrated tire air pressure gauge.
03
The manual of smart chip charger
Instruction
1
The charger should be matched with the alternating voltage of local power supply before connecting charger.
2
The charger is designed and tested for original battery from manufacturer. Do not use them for the other
mismatching batteries.
3
The charger is tested and matched with its scooter. If the charger is used on other scooter, it might make different
charging effect and/or cause battery damage.
4
Please connect charger and scooter before connect to local power supply, while you are going to charge the
battery. Please disconnect the charger from local power supply while the battery is fully charged. Don’t
disconnect charger and scooter while the charger is connected with local power supply for safety reason.
5
Do not violently shake the charger. It might cause damage of the charger.
03/04
DESIGNED BY MIKU TEAM
6
Keep the charger away from any water, dust or high temperature.
7
The charger creates the heat while working. It should be stored in well ventilated place and keep away from
any inflammable things.
8
Keep it away from children.
9
If any wire or shell was broken, Please send it to the professional repairing service. Don’t open or repair it
yourself. This action will cause danger and lose warranty of the charger.
10
The charger is designed and made for electric scooter battery charging use. Don’t make it for other use.
11
Any incorrect usage which does not follow this instruction will lose guarantee from seller.
children
DESIGNED BY MIKU TEAM
Using direction
1
While the charger is connected with battery,green light is turned on to indicate the testing status of charging.
2
While the charger is connected to 110V/220V/250V local AC power supply,the green light turns to red to indicate
charging status.
3
After 4-6 hours charging, the red light turns to green to indicate the battery charging is finished.
4
While the charging is finished, the charger will cut off power from AC power supply automatically.
05/06

DESIGNED BY MIKU TEAM
performance
04
The performance of an electric scooter is different from gasoline engine driven or human powered vehicles.
It’s very important to understand how the MIKU electric scooter works before riding.
Riding distance of per charge
More Less
Route
low Speed High Speed
Fewer Stops
Flat
Smooth Pavement
Rider
Modulated Riding
Streamlined
Reduced Cargo
Stop & Go
Elevation Changes
Soft Gravel
Aggressive Riding
Fully Upright
Heavier
DESIGNED BY MIKU TEAM
Weather
Warm Weather Cold Weather
No Wind
Dry Roads
Scooter
Inflated Tires Underinflated Tires
Balanced Power Pack
Test condition: New vehicle with new battery, Temperature at 20°C, No wind, All lights (on the scooter) off,
loading weight at 75kg, standard pressure.
Riding habit, Road conditions, environment and temperature might shorten the riding distance of per charge.
Tire pressure and loading weight shorten driving distance of per charge.
The riding distance of per charge might shorter in Winter because of battery’s peculiarity.
Riding distance of per charge will be shortened by battery lifetime loss.
High Head Winds
Slippery Roads
Unbalanced Power Pack
07/08

DESIGNED BY MIKU TEAM
DESIGNED BY MIKU TEAM
05
FAST ASSEMBLY
You can prepare for your first riding after simple 2-step assembly.
1 2
Step : Fasten mirrors on the fixing holes
at steering bar and tighten with a wrench.
Step : Adjust mirrors in proper position.
Pre-Ride Checklist06
WARNING! Always perform the entire pre-ride checklist before using the scooter as this can
help you spot problems that could interfere with safe scooter operation. Failure to follow this
entire checklist before every ride can cause death, serious injury, and/or property damage
to yourself and/or others.
Ignition switch
Front brake lever
Throttle grip
Turn signals
Headlight
780mm
Dashboard
Rear brake lever
1065mm
1685mm
Mirror
Left switch
Right switch
Storage case
Battery case
Footstep
Side stand
09/10

DESIGNED BY MIKU TEAM
DESIGNED BY MIKU TEAM
Ignition Switch
OFF Position
This position is used to turn the scooter
OFF, disabling the electrical system.
ON Position
This position is used for operating the scooter.
Install the key and turn clockwise.At this position
the following sequence occurs:
Lights turn ON Dashboard turns ON
To operate the steering lock:
Turn the handlebar all the way to the left.
With the key in the OFF position, push the
key down and turn the key counter-clockwise.
To unlock the steering lock:
Install the key and turn clockwise.
3
1
1
2
Alarm
Sound the alarm for tracking position
of the scooter.
2
Lock
Turn on anti-theft system.
3
Unlock
Turn off anti-theft system.
Brake Levers & Throttle
5
Ⅰ
Ⅱ
Ⅲ
巡航
Rear brake lever : When stopping the scooter, squeeze the left brake lever smoothly and firmly to engage the
5
6
7
rear brake.Always engage the rear brake first.
Front brake lever : Squeeze the right lever to engage the front brake. The right lever must be squeezed gently
6
at first to avoid locking the front wheel.
Throttle grip : The rotary throttle grip is on the right handlebar.Accelerate by rotating the throttle towards
7
you. Decelerate by rotating the throttle away from you. The throttle includes a safety spring that snaps the throttle
back to end when released.
DANGER!
Use extreme caution when engaging the front brake to avoid locking the front wheel.
Locking the front wheel can cause a serious accident.
11/12

DESIGNED BY MIKU TEAM
Ⅰ
Ⅱ
Ⅲ
巡航
km
TRIP
ODO
km/h
%
A
DESIGNED BY MIKU TEAM
Left&Right Switch
Left switch
1
High & low beam
2
Turn signal
3
Horn
4
5
1
2
3
6
Right switch
4
5
Headlight switch
6
Cruise control key :
The speed will be kept without throttle by press Cruise
control key.
The cruise performance will be canceled by any braking
operation.
Dashboard
3 4
1
READY P
2
1
Energy level indicator
2
Speedometer
3
Daylight Indicator
4
Left turn signal indicator
5
Riding time indicator
6
High Beam Indicator
7
8
9
5
6
7
8
9
Right turn signal
Total odometer
Trip odometer
13/14

DESIGNED BY MIKU TEAM
DESIGNED BY MIKU TEAM
1
Energy level indicator
This indicator and readout displays the amount of energy
remaining in the power pack, similar to the fuel gauge on
a gasoline powered scooter.
2
Speedometer
The speedometer is a digital display in kilometers per hour (km/h).
3
Daylight Indicator
When the scooter is starting, the daylight indicator is turned
on automatically.
4
Left turn signal indicator
Flashes green when a left turn is selected by the turn signal
switch. This arrow remains flashing until the turn signal
request has been canceled.
5
Riding time indicator
The clock displays riding time of single trip.
6
High Beam Indicator
When the headlight high beam is on, this indicator illuminates
blue, and remains on until the high beam is turned off.
7
Right turn signal
Flashes green when a right turn is selected by the turn signal
switch. This remains flashing until the turn signal request has
been canceled.
8
Total odometer
The total odometer displays the total distance the
scooter has been ridden in kilometers.
9
Trip odometer
The trip odometer displays the distance of single riding in
kilometers.
Before Starting the Engine/Motor
Tires
1
Ensure that both tires have at least 1/8 inch tread depth at center.
2
Both tires must be inflated to the pressure indicated on the tire sidewalls.
3
Replace the tires if tread height is less than 1/8 inch at the center of tires.
Throttle
1
Check for smooth operation. Make sure throttle grip could return to cut off power.
2
Check for frayed cable or damaged cable housing. Replace damaged cable to avoid electricity shock.
3
Check for mud, debris and ice in the throttle mechanism. Clean out any contamination.
Fasteners
1
Check that all axle nuts and lug nuts are secure.
2
Check for missing fasteners. Replace as necessary.
3
Check that all other fasteners are secure. Tighten as necessary.
Steering
1
Make sure steering turns freely.
2
Check for proper “toe-in” of wheels
3
Lubricate/adjust as necessary. See the Maintenance section.
Chassis frame
Check for bent/damaged components. Replace as necessary.
Battery
Check the power level to ensure it’s enough for riding.
Lights
Check for proper operation. Replace bulbs as necessary.
15/16

DESIGNED BY MIKU TEAM
DESIGNED BY MIKU TEAM
Shutting off the scooter
Always shut off the scooter by turning the ignition switch to OFF.
CAUTION: Squeeze brake lever will shut off the motor, however leaving the ignition switch at the
ON position could drain the battery.
Stopping the scooter
DANGER! Wet, oily, or sandy roads reduce braking effectiveness. Hard braking on these surfaces
could lead to loss of control and a serious accident. Always reduce speed as gradually as possible.
When braking, always engage the rear brake first to retain maximum control
of the scooter. Most of your stopping power comes from the front wheel.
Parking
Always keep the key in the lock position when parking the scooter to prevent
theft. Park on smooth and hard surface,being sure to use the side stand
whenever possible.
The side stand is conbined with parking stop swith.The parking stop swith will
cut off the power of the motor while the side stand is released.
Motor safety
Keep the scooter free of dirt and
debris,especially in the throttle
linkage area.
Never start the engine or motor unless
you are property seated with your
hands firmly on the controls.
Fasteners
Make sure that all srews,locknuts,and bolts are
properly tightened.Never over-tighten
hardware that is designed to move.
restrictingmoving parts can cause
a loss ofcontrol and possible injury
or death.
Never tamper with,alter,or change the scooter
motor settings .The motor governor is factory
set and protects the motor from damage.
Excessive motor speed is potentially
dangerous to the operator by standers,
and the motor itself.
Operating the scooter in conditions where water,mud,snow,
dirt sand or other debris can get into the throttle wire conduit
and or the throttle mechanism can
cause the wire or throttle mechanism
to bind,which may lead to throttle
sticking,loss of control,and possible
death,injury,and or property damage.
Ⅰ
Ⅱ
Ⅲ
巡航
Always replace torque-type locknuts with
new locknuts of the same type after
removing the old ones.
17/18

DESIGNED BY MIKU TEAM
DESIGNED BY MIKU TEAM
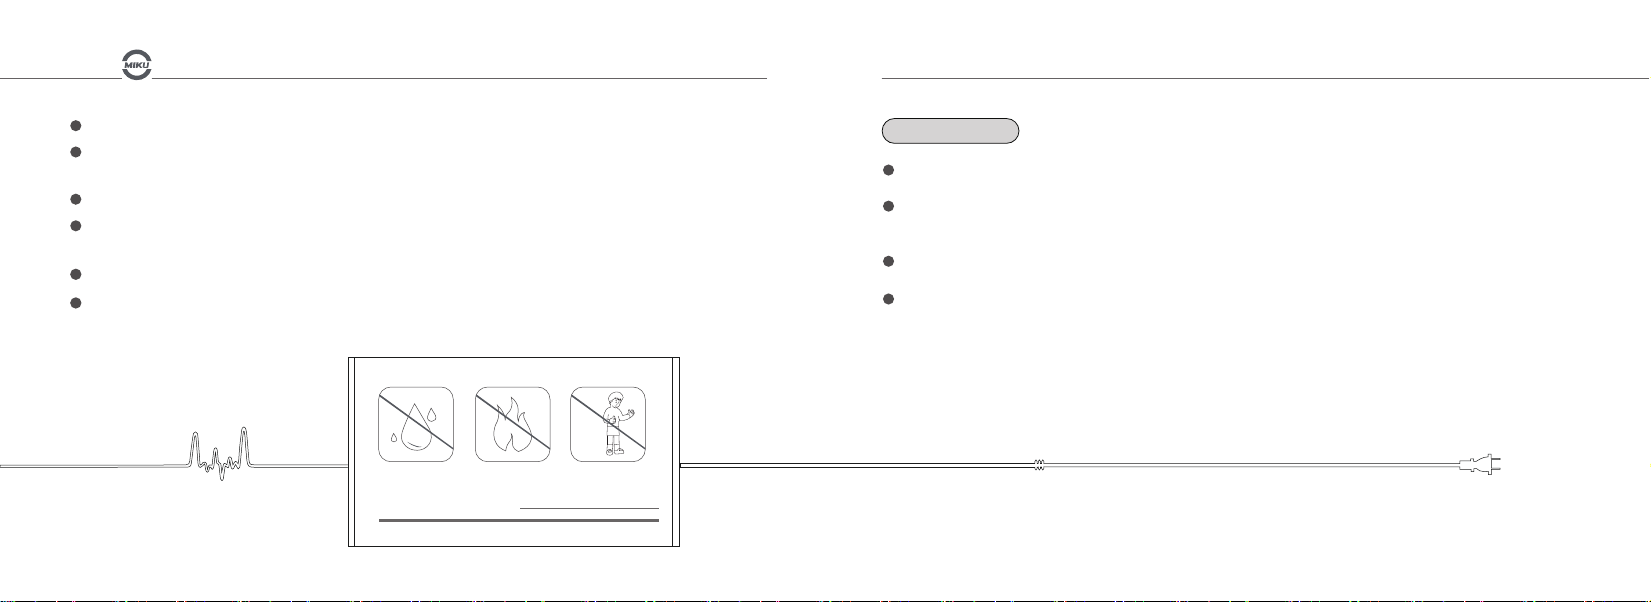
Battery charging
Check the local civil electricity
power supply before battery
charging.Make sure the battery
charger is matched with the power
supply.
original from
manufacturer
MIKU
MAX
Always use a Miku original battery
charger from manufacturer.
Improper charger might pose a fire
or explosion risk.
MIKU
MAX
The battery is fully charged , while
the state light on the charger turns
green.
07 Power Pack & Charging
Miku Max holds a portable power pack in the battery case at the bottom of the scooter.
The power pack could be charged in the scooter or separately charged out of the scooter.
MAX
MIKU
Charging on battery
Take out the power pack from the battery case;
Connect the charger plug to the charging scoket
on the power pack;
The charging is in process if the charging indicators
are on.
Charging on scooter
Connect the charger plug to the charging
scoket on the scooter;
The charging is in process if the red charging
indicator on the charger are on.
Charging Scoket
19/20

DESIGNED BY MIKU TEAM
DESIGNED BY MIKU TEAM
Storage case
1
Take the Power pack out
Pull the button at the bottom of storage csae to open the bottom case;
Disconnect the wire and take the power pack out.
1
BATTERY POWER
INDICATOR INSTRUCTIONS
The battery is located within the power pack and requires no special break in period.
The power indicators show 5 levels of battery power.
MIKU
MAX
Each indicator show 20% of battery power.
The power indicators are blinking while the battery is
under charging.
The power pack is fully charged while 5 power indicators
are all staying on.
21/22

DESIGNED BY MIKU TEAM
DESIGNED BY MIKU TEAM
08 Maintenance Tips
If you own an MIKU electric scooter you should know there are many things that can go wrong
With you electric scooter to hinder its performance. That is why the way you care for your electric
scooter is so important.
Don’t modify the scooter from the
manufacturer’s original design
and configuration.
Assembly ,maintenance and or repair of this
scooter should only be performed by designated
dealers or authorized repair
centers for e-scooter repairs
Authorized
to ensure quality work and
safe scooter conditions.
Never wash or operate the scooter in freezing
temperatures.Water can freeze in wire and the
throttle mechanism,possibly resulting in throttle
sticking ,which can
cause the motor to
continue to run and
result in loss of control.
While stopping,always shut off the scooter
to aviod move unexpectedly.
OFF
Item purpose Rate
Brake
Tyre
Rim
Shock absorber
Ignition & throttle
Wire
Screw
Battery
Charger
Lubrication
cleaning
Check braking performance, prevent traffic accident due to braking malfunction
Check tyre damage & air pressure, prevent flat tyre or power
Check rim strength & remove dirt in bearing, prevent rim breaking or jamming
Check front & rear shock absorbers, remove dirt & maintain lubrication,
Check ignition & throttle, prevent jamming or occasional failure
Check wire connector loose or damage, prevent wire malfunction
Check wire connector loose or damage, prevent wire malfunction
Check battery appearance & cell performance, prevent wire malfunction &
Check whether charger wire damage, braking, off-line, input &
Check front wheel axle, brake need to add lubrication or not
overconsumption during driving
prevent shock absorber jamming
lengthen lifespan
output connector complete and reliable or not
Surface cleaning
Daily
Daily
Weekly
Weekly
Weekly
Weekly
Monthly
Monthly
Monthly
Monthly
Monthly
23/24

DESIGNED BY MIKU TEAM
Serial No:
VIN print
motor number
VIN plate
The vehicle identification number(VIN) is required for all warranty work,theft recovery,and consumer safety.
The complete VIN also appears on a plate at the bottom of classis frame.
The VIN print is located at steering pipe of classis frame.
 Loading...