

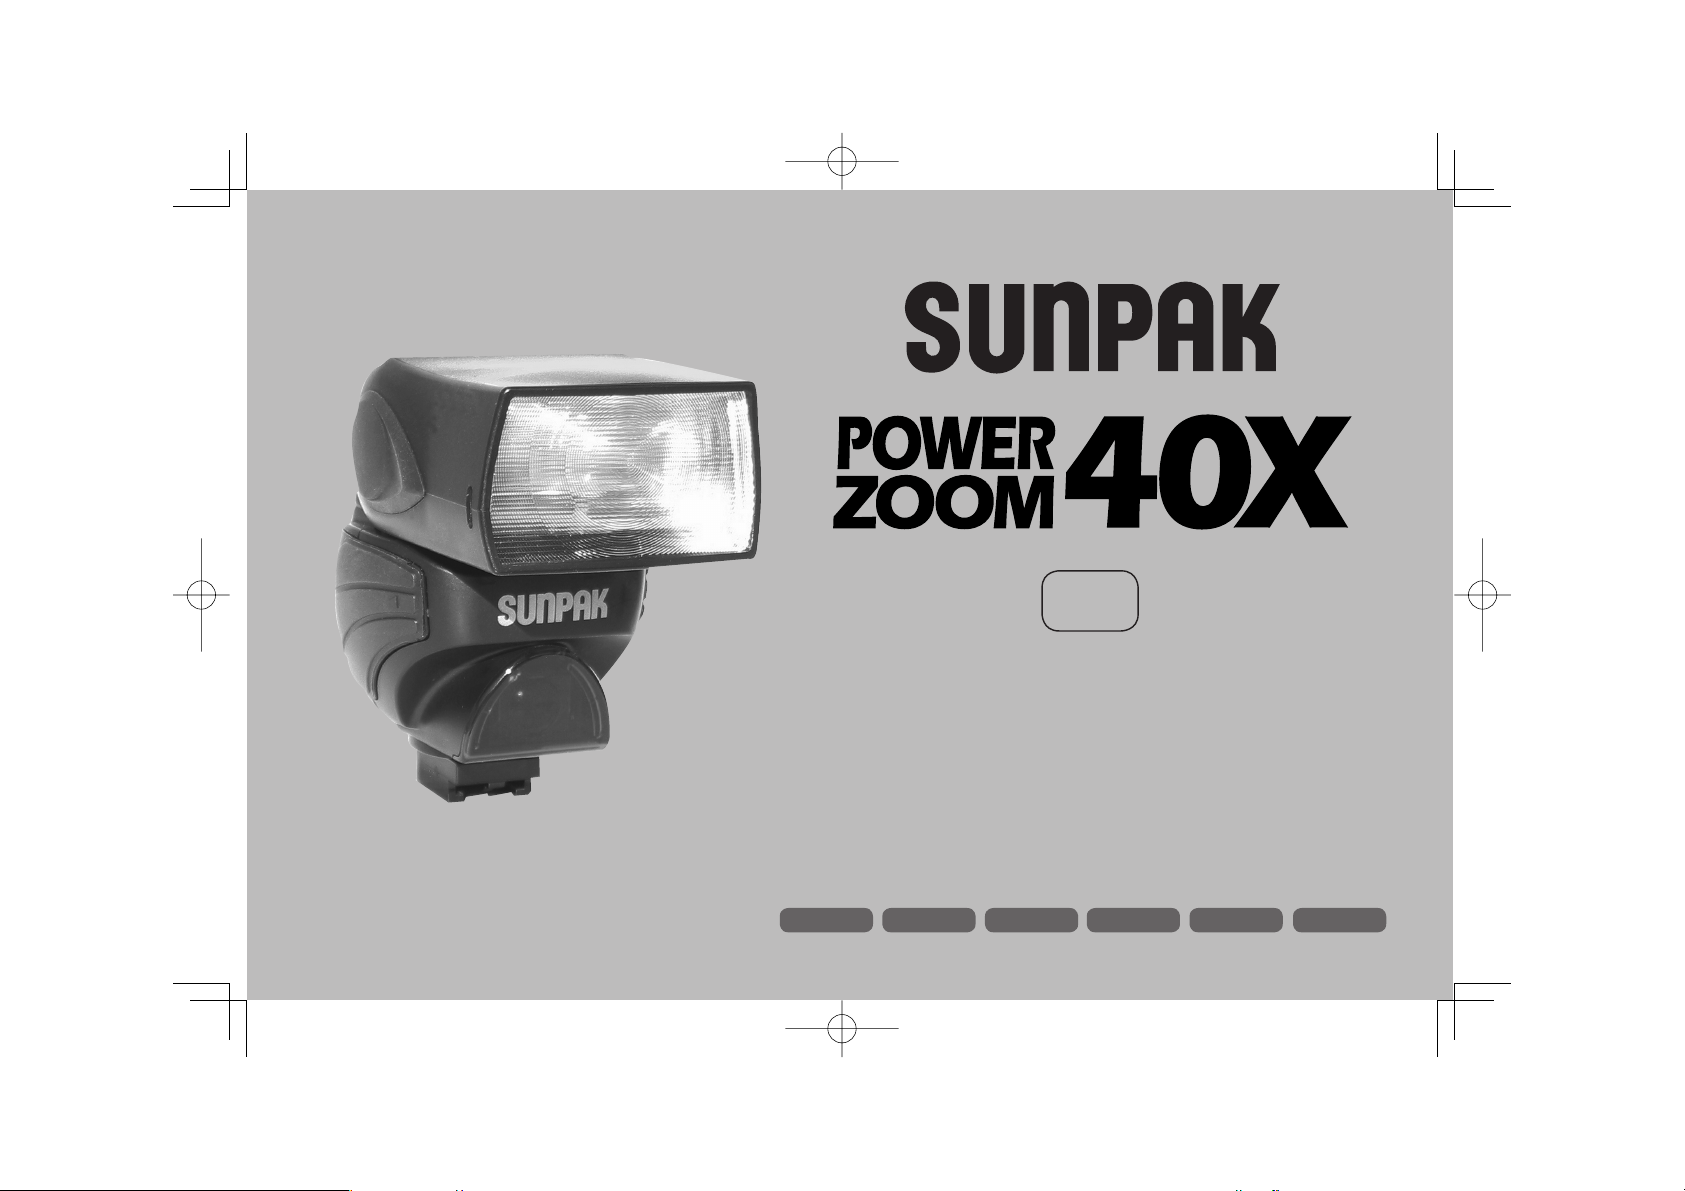
Page 1
so
使用説明書
OWNER’S MANUAL
GEBRAUCHSANWEISUNG
ISTRUZIONI
MANUAL D’INSTRUCTIONS
MANUAL DE USUARIO
日本語
SUNPAKPZ40X1 07.3.15,5:45:34PM
English Deutsch Français Italiano Español
Page 2
IMPORTANT SAFEGUARDS
English
Please read and follow these essential safety procedures to prevent accidents,
injury to yourself and others, as well as property damage. Read all these
instructions carefully to insure the safe use of your Sunpak flash unit.
WARNING Failure to observe the instructions marked by this symbol
while handling the product may result in loss of life or serious bodily injury.
Make sure to observe the instructions.
CAUTION Failure to observe the instructions marked by this symbol
while handling the product may result in serious bodily injury or damage to
property. Make sure to observe the instructions.
WARNING Do not attempt to open, repair, or modify this unit. It contains
a high-voltage circuit, which may cause a fire, electric shock, or serious injury.
Do not use accessories other than those specified by SEA & SEA SUNPAK CO.,
LTD. Doing so may cause a fire, electric shock, or other injury.
Do not touch any exposed internal component of the unit if the unit is dropped or
damaged, or if foreign matter enters the unit.
Do not operate the unit near the eyes (especially those of infants).
Flashing the unit near someone's eyes may cause visual impairment. Make sure
to allow a minimum distance of about 3 feet (1 meter) or more from the subject,
especially when taking pictures of infants.
Make sure to install the batteries with correctly. When replacing batteries, replace
all the old batteries with a set of new batteries of same type and from the same
manufacturer. Using batteries of the wrong type or old batteries may result in
leakage, heat buildup, rupture, shortened service life, or loose connections. Keep
the unit away from beverages and other liquids, cosmetics or chemicals. Spills or
splashes of liquid entering the unit may cause a fire, electric shock, or injury.
Do not operate the unit in extremely humid environments, such as a bathroom or
near a humidifier. This may result in a fire, electric shock, or injury.
Do not operate the unit if there is any chance that a flammable or volatile gas is
present.
CAUTION Do not expose the unit to splashes, sprays or water droplets.
Do not expose batteries to a very hot environment.
Do not attempt to charge disposable batteries.
Do not place the unit in direct sunlight or where it can be exposed to high humidity.
This can result in excessive humidity inside the unit, which can cause damage to or
failure of the unit.
Do not store the unit in a dusty place; otherwise, subsequent use of the unit may
result in a fire or electric shock.
Do not place the unit in an unstable position, otherwise, the unit may fall or drop
accidentally, causing damage to the unit or personal injury.
Other Precautions
Do not clean the unit with benzene or other solvents. This can result in
discoloration or deformation of the unit.
Stains or dirt should be removed with a soft dry cloth.
SAVE THESE INSTRUCTIONS
CAUTION
● DO NOT EXPOSE TO SPLASHES OR DROPS OF WATER.
● BATTERIES SHOULD NOT BE EXPOSED TO EXCESSIVE HEAT SUCH AS
INTENSE SUNLIGHT, FIRE, ETC.
● DISPOSABLE BATTERIES (SUCH AS CARBON-ZINC AND ALKALINE
CELLS) SHOULD NEVER BE CHARGED.
11
SUNPAKPZ40X11 07.3.15,5:45:48PM
Page 3

Welcome to the worldwide family of Sunpak Owners. Your Sunpak PZ40X is
specially designed for Sony α series. Your new PZ40X has many unique features;
please take a few minutes to read this owner's manual carefully.
Table of contents
Important Safeguards …………………………………………………………
Features and Function of the Sunpak PZ40X ……………………………………
Description of Parts …………………………………………………………
Installing the batteries ……………………………………………………………
Mounting the PZ40X to the camera ………………………………………
Automatic Shut-down ………………………………………………………………
Mode Select Button …………………………………………………………………
Power Zoom Head ………………………………………………………………
Using the PZ40X with Digital Cameras ……………………………………………
ADI Mode …………………………………………………………………………
TTL mode ……………………………………………………………………………
Manual Mode ………………………………………………………………………
Adjustable Bounce Flash Head …………………………………………………
Continuous Use ………………………………………………………………………
Technical Specifications of PZ40X …………………………………………………
11
12
13
14
14
14
15
16
16
16
17
17
18
19
19
Features and Function of the Sunpak PZ40X
* Multi-step Auto Power Zoom function automatically provides optical flash coverage
matched to the focal length of the lens in use. (24-80mm)
* Super-compact size. This unit is 40% smaller and 2-1/2 oz. (70g) lighter than previous
flash units with the same features and power output, making it far easier to handle
on-camera, while taking up little space in your camera bag.
* You can use the PZ40X in the ADI Mode (When you use both camera and lens having this
function) which employs a high accurate TTL flash control.
* A large, easy to read LCD panel displays all the information needed to monitor and control
all flash settings. The panel can be illuminated for easy reading in dark conditions.
The data display remains on for 5 seconds after pressing the display button.
* The PZ40X has a built-in auto-focus assist light, which comes on automatically to aid
auto-focusing at low light levels.
* The PZ40X provides five Manual flash output settings, from full power to 1/16.
* The PZ40X has a power-saving function that turns the unit off automatically if it hasn't
been used for 5 minutes. This energy-saving feature reduces battery consumption.
* The PZ40X flash head can be tilted upward incrementally to a full 90 degrees (vertical),
for convenient bounce flash capability.
Note:
* When using the PZ40X on your camera, please hold your camera and not the flash. If
you hold onto the PZ40X only, your camera may slip off the flash foot and be damaged,
or the weight of the camera may damage the flash foot.
*If you use PZ40X with cameras other than Sony α series, you can only use it in
Manual Mode. Please refer to Page 17.
*Depending on the type of lens used, the distance may not be indicated on the LCD
Display.
*PZ40X can not be used the second curtain synchronization.
Important: Flash coverage limitations
When using a lens with a focal length less than 24mm, the PZ40X will not cover the
entire field of view, and the edges and corners of the image will be dark. Also, the overall
exposure may not be correct. Please use this unit with lenses of 24mm or greater focal
length.
12
SUNPAKPZ40X12 07.3.15,5:45:49PM
Page 4
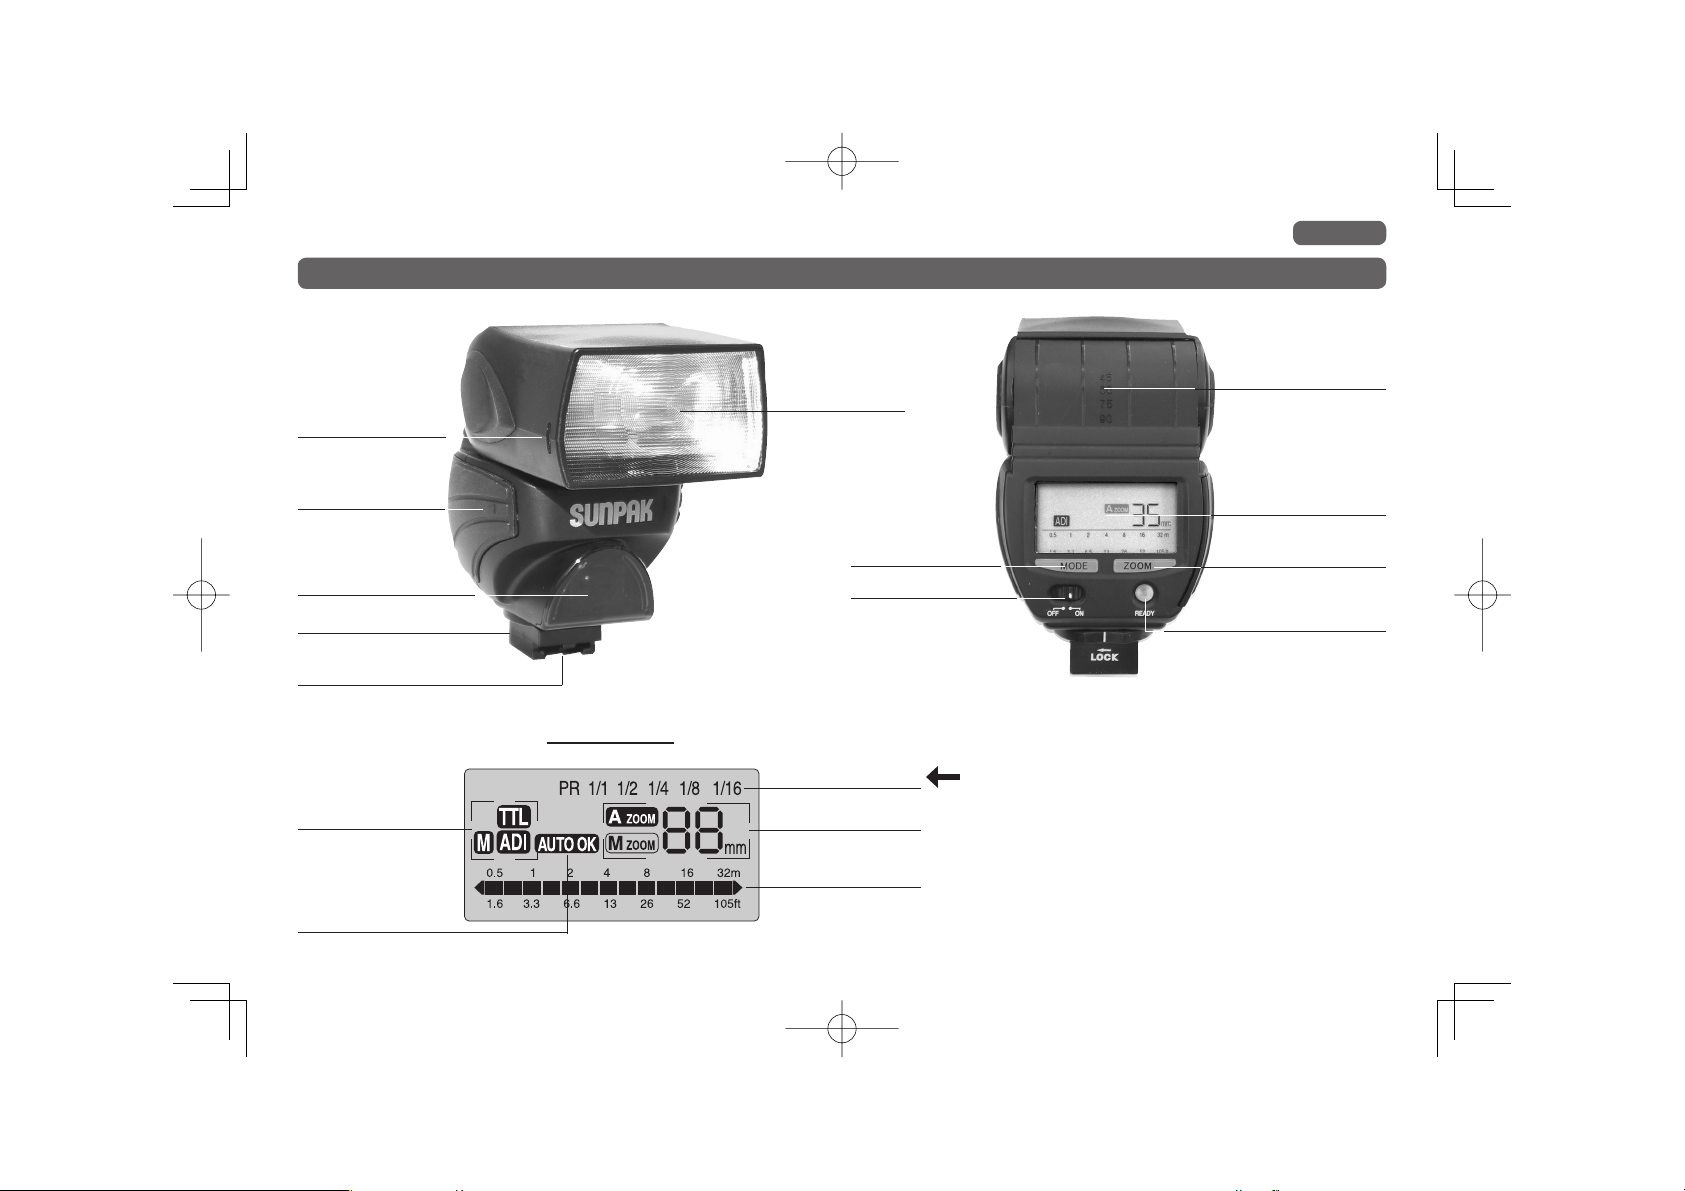
Description of Parts
English
Accessory (optional)
Mounting Guide
Battery Compartment
Cover
Autofocus Infrared
Flash
Knurled Lock Ring
Dedicated/Hot Shoe Contact
Flash Functions
Auto OK
LCD Display
Flashtube Housing
Mode Select Button
Power Switch
Power Ratio
Zoom Focal Length
Flash Range Scale
Bounce angle display to
the upwards
LCD Display
Zoom Button
Ready Light/Test
(Open Flash) button
When the focal length of a lens shifts to wider angle than 24mm,
"F-mm" is displayed. In this case, the circumference becomes dark
and the right exposure is not obtained. Please use the focal length
of 24mm or more.
13
SUNPAKPZ40X13 07.3.15,5:45:50PM
Page 5

Installing the batteries
1. Before installing the batteries, please check
that the power switch is in the "OFF" position. To
unlock the battery compartment, push lightly on
the center of the cover.
2. To open the battery compartment slide the
cover back (toward the rear of the unit) as
shown.
3. Insert two AA size batteries into the battery
compartment according to the polarity
indications " +− ". The battery compartment
is designed to prevent incorrect insertion. The
PZ40X will not operate if the batteries are
installed incorrectly.
4. Press the battery cover in and forward, until
it snaps into place. When the unit is switched
on, it will start charging with a slight humming
sound and the "Ready Light" will come on when
charging is completed.
5. To turn the power off slide the switch to the
"OFF" position. The "Ready Light" will go off and
the unit will not flash.
*Before mounting the flash unit onto the camera, please turn the flash unit off. If it
is turned on, the flash unit may self-fire, or damage the flash unit may result.
We recommend that you use Sunpak rechargeable NiMH (nickel metal-hydride)
batteries when possible. They provide shorter recycling times, an increased
number of flashes per set, as well as energy-saving benefits.
* The flash is ready to fire as soon as the Ready Light is lit. However, full power
will not be available for several seconds. We suggest that you wait a few seconds
after the Ready Light activates to achieve maximum output.
* If it takes longer than 30 seconds for the "Ready Light" to come back on, when
the flash is fired in Full Power Mode, replace the batteries with a fresh set.
Mounting the PZ40X to the camera
*When mounting or detaching the PZ40X from the camera, always make sure the
ON/OFF Switch is to the "OFF" position, or damage may occur.
1. Slip the unit onto the camera's hot shoe. Turn the knurled lock ring to firmly affix
the flash unit.
2. When the PZ40X is used with Sony alfa series cameras, the shutter speed is
set automatically. When used with other cameras, please set the shutter speed to
the appropriate flash sync speed (check your camera manual).
Automatic shut-down
In order to save battery life, the PZ40X automatically switches to the Power
Saving Standby Mode after about 5 minutes. The LCD panel will go blank and the
flash ready light will turn off.
To reactivate the flash, simply slide the switch to the "OFF" position and then back
to the "ON" position, or lightly depress the camera's shutter release. The flash
ready indicator will go on again after a brief delay.
* When using Sony alfa series cameras, lightly depress the camera's shutter
release, or simply slide the switch to the "OFF" position and then back to the "ON"
position.
* When using cameras other than Sony alfa series, push the ready button or
simply slide the switch to the "OFF" position and then back to the "ON" position.
* To get out of "Auto Power Save" mode, slide the power switch to the "OFF"
position. Then slide the switch to "ON" while holding the Zoom Button.
14
SUNPAKPZ40X14 07.3.15,5:45:50PM
Page 6

English
Mode Select Button
Chart 1
ADI Mode
TTL Mode
Manual Mode
Note; this chart shows how to select the functions and set the PZ40X using the Mode Select Button and the Zoom button.
Press the Mode Select Button
This mode can be used only when using cameras
having ADI mode.
This mode can be used when using cameras
without ADI mode.
Repeated pressing of the mode button will
cycle the flash display from ADI Mode to
TTL and through the manual power ratio
settings, returning to the ADI Mode.
Press the Zoom button
15
SUNPAKPZ40X15 07.3.15,5:45:51PM
Page 7

Power Zoom Head
24mm28mm35mm50mm80
mm
ADI Mode
The PZ40X is equipped with a motorized zoom
head. It is controlled by the camera and is set
automatically to provide optimal flash coverage
for the focal length of the lens in use. It can even
select intermediate settings within the 24-80mm
focal length range. Or, it can be manually set
select to 24, 28, 35, 50, and 80mm by using the
Manual Zoom Mode.
* Auto power Zoom works with lenses of 24mm to 80mm
(converted to 35mm film SLR camera) focal length.
* When using only Sony α series with their exclusive lens, the Auto
Power Zoom function can be used. With other lenses, use the manual (M-Zoom)
Mode.
Using the PZ40X with Digital Cameras
With α series digital cameras, ADI Mode (having ADI Mode function on a camera),
TTL Mode and Manual Mode are available.
Please refer to Page 15. When taking a picture, the Ready light blinks at first and
then lights steadily. While you can take a picture as soon as the ready light blinks,
we recommend that you wait for the Ready Light to remain on before shooting to
insure that you get the best exposure.
* If it takes longer than a few seconds for the Ready Light to illuminate, or
the Ready Light doesn’t light at all, please replace the batteries or change
rechargeable batteries.
* We recommend that you use Ni-MH batteries for faster recycling and more
flashes per charge.
You can use ADI Mode when you use Sony α series
having ADI Mode function (Please refer to Instruction
Manual of camera.). When using the PZ40X, camera
with ADI mode switches to "ADI" when an input button
is pushed and "ADI" is displayed as shown in the figure
at right. (The initial setup TTL Mode will be displayed
if a switch is turned on.) In response to a signal from
the camera, the flash unit calculates the correct flash exposure based on the film
speed, sets the aperture instantly, and displays the effective TTL flash range on the
PZ40X LCD panel. The flash unit determines the optimum amount of light required
for a proper exposure with films from ISO6 to 6400. The available range will be
displayed when you partly depress the camera's shutter release, or when the
Ready Light is on.
The flash range is from 1.5 ft to 105 ft (0.5 to 32m) and is indicated by means of a
bar graph. An asterisk indicates distances greater than 105 ft (32m).
* ADI mode is the advanced TTL function that enables the flash to balance the light
between subject and background to provide the best overall exposure.
When taking a bounce photograph, please use TTL mode. In case the shutter speed
indicator is blinked at ADI Mode, please set the aperture of camera to the “lighting”
position. When using a camera without ADI function, it is set automatically at P.TTL
Mode or TTL Mode. (In this case, ”TTL” Mode appears on the LCD display.)
TTL Mode Setting
ADI Mode .... The most advanced flash control system to have the optimal
flash. The pre-flash result and distance information from the D type lens
controls the amount of flash volume. This function is available only when Sony
α series are equipped with Alfa type lens.
TTL Mode (All of Sony cameras with TTL measuring function).... This gives
the optimal aperture to an object all the time. The brightness of the background
is not, so that the object sometimes becomes too bright.
16
SUNPAKPZ40X16 07.3.15,5:45:52PM
Page 8

English
TTL Mode
Mount the PZ40X on the camera and push the
mode-selector button until the LCD panel displays
TTL. The PZ40X now calculates exposure based on
the camera's selected aperture and film speed and
displays the effective TTL distance range. The display
of the effective distance range does not appear until
you partly depress the camera's shutter release or
the Ready Light comes on. A bar graph shows the
flash range display from 1.5 ft to 105 ft (0.5m to 32m). An asterisk will appear if
this distance is exceeded.
TTL Mode with Sonyαseries cameras, Aperture Setting and Shutter
Speed (Table 2)
Sonyαseries
Camera
Mode
Setting
Aperture
Setting
All mode
Shutter
Speed *1
Finder
Indication
* All mode groups refer to the mode of a flash. (A TTL, TTL, M)
*1Shutter speed is set to the X-sync speed or a slower shutter speed. Since X-sync speeds
vary with different camera models, please refer to your camera's instruction manual.
"P" mode,
Illust mode
(Program AE)
Automatically set
by ambient light
Automatically set by
ambient light
"A" mode
(Aperture
Preference AE)
Manual set
(F/STOP)
Automatically set by
ambient light
is displayed
"S" mode
(Shutter
Preference AE)
Automatically set
by ambient light
Manual set Manual set
"M" mode
(Manual)
Manual set
(F/STOP)
Manual Mode
There are five power-output settings available with
the PZ40X in manual mode, from full power to
1/16 power. First, push the Mode Selector button
continually until “M” is displayed. The flash will then
be in the Manual mode. Please refer to the Chart 1
on page 15 for details on setup. Once the battery
switch is turned to "OFF", the setting "Manual Mode"
is cancelled.
Here are some situations when manual mode is desirable or useful:
1. Daylight synchronization (Flash is used outdoors to lighten shadows or when
the subject is photographed against a strong backlight)
2. When certain focal-length length lenses will be used, such as fisheye type.
3. When a motor drive or an auto-winder will be used.
4. When a number of flashes are used together.
Note: An arrow in the LCD display indicates that the maximum flash range of
105 ft. (32m) has been exceeded.
Aperture Setting, Shutter Speed, Range Calculation for Manual Mode
(Table 3)
Sonyαseries
Mode
Aperture
Camera
Flash
Camera
Range
Finder Indication
Range = Zoom Guide number(p.19) ×
√
A, M mode
PR (Power Ratio) 1/1 〜 1/16
M, A-manual set
the LCD panel
is displayed
film speed
ISO 100
÷ F Stop
17
SUNPAKPZ40X17 07.3.15,5:45:53PM
Page 9

Auto OK
When the subject is within the Auto Effective Range and there is enough light, the
"Auto OK" symbol in the LCD display will blink for about 2 seconds after the flash
has been fired.
If the symbol goes out, then there was not enough light for an exposure. In that
case, either move closer to the object or select a larger aperture.
Even if the subject is within the Auto Effective Range, the "Auto OK" symbol may
not blink due to the color of an object (dark color with low reflectivity).
If the flash is fired immediately after the Ready Light comes ON, the effective
range may be reduced. (Please wait 5 to 10 seconds after the Ready Light is ON
to achieve maximum power.)
Test Flash
If the Test Button is pressed after the Ready Light is on, it fires the flash. The Auto
OK cannot be used for TTL test flash.
Autofocus Infrared Assist Light
When used in the dark or in low-light conditions, the PZ40X emits an infrared
auxiliary light when the camera's shutter release button is lightly pressed.
The camera's Autofocus system uses this light to achieve better autofocus
performance.
Adjustable Bounce Flash Head
The SUNPAK PZ40X includes a flash head that allows you to position the light in a
number of vertical positions, in all exposure modes. For more pleasing and creative
lighting effects, such as softening shadows on a subject, the Bounce Flash Head of
the PZ40X is adjustable vertically up to 90 degrees.
Please set the PZ40X to TTL mode when using bounce photography as shown the
right table.
Camera
Flash
ADI NO OK
TTL OK OK
1. Do not attempt to force the Head beyond the settings
available, or damage to the flash unit will occur.
2. Press the shutter release button of the camera
partway in to check whether the correct aperture and
shutter speed are selected.
*Important. Note that the effectiveness of the bounce
flash feature is dependent upon the distance to, and the condition of the reflecting
surface used.
The angle of the flash must also be set properly to achieve the best possible
lighting effects. Aim the flash head at a point on the bounce surface, halfway
between the flash and the subject. Normally, when the flash is bounced off a
surface, it will usually lose 25 % power or more, even when the surface is white.
Therefore, when a bounce flash photo is taken in TTL mode, it is recommended
that you select a larger aperture than for a direct flash photograph.
*Bounce your flash off a white surface whenever possible to achieve the best
overall illumination level. Please note that in color photography, when a colored
surface is used for bounce lighting, it will reflect its color on the subject.
ADI TTL
18
SUNPAKPZ40X18 07.3.15,5:45:55PM
Page 10

Continuous Use
Do not use the flash continuously for more than the number of times stipulated in
the table below, in order to prevent damage to the unit. Once the maximum number
of flashes has been reached, allow the flash to rest for at least 10 minutes before
using it again.
Mode
ADI, TTL, M(1/1 〜 1/2)
M (1/4 〜 1/16)
Maximum Use
15
20
Technical Specifications of PZ40X
Guide Number : ISO 100 (m/ft)
35mm
50mm
28mm
Zoom setting
Manual flash
24mm
(0.9in)
1/1
24/78 26/85 28/92 34/111 40/131
17/56 18/59 20/66 24/78 28/92
1/2
1/4
12/40 13/43 14/46 17/56 20/66
1/8
8/26 9/30 10/33 12/40 14/46
1/16
6/20 6/20 7/23 8/26 10/33
(1.1in)
(1.4in)
Numbers of flashes and Recycling time
Number of flashes Recycling time
AA alkaline batteries
AA Ni-MH Batteries
* Numbers of flashes: Measured with new batteries that are within 3 months from their date of
production, flashed every 30 seconds continuously and recycled to the point at which the Ready Light
takes 30 seconds to come on after the last flash.
Recycling time: The time to activate the Ready Light under the above conditions.
Approx 100 Approx 10 sec
Approx 140 Approx 8 sec
(2.0in)
80mm
(3.1in)
English
Effective Lens focus Cover 28mm lens or more equivalent to 35mm film
distance camera.
Cover 18mm lens or more equivalent to APS size
digital SLR camera.
Power Zoom Automatic setting / Signal from camera
Manual setting / Pressing the Zoom Button
AF illuminator Range 1-5m (22 – 16in) (Lens F2/50mm)
Operating temperature 0˚C - 40˚C (32˚F - 104˚F)
Dimensions 93(H)X63(W)X90(L)mm (3.6 x 2.4 x 3.5 in)
Weight 200g (7.0 oz)
Note. The design and specifications of this product are subject to change without prior notice.
19
SUNPAKPZ40X19 07.3.15,5:45:56PM
Page 11

KAJ1384A
SUNPAKPZ40X56 07.3.15,5:46:28PM
 Loading...