

Page 1

1
SWC-2013 Manual
SWC-2013 is a USB 3.0 to 6 bay SATA hard drive docking station. It supports simultaneous access of six 2.5” or
3.5” SAT A hard disk for both data read and data write. It is also backward compatible with USB 2.0 and USB 1.1. The
maximum transfer speed of USB 3.0 can reach 5Gbps. The actual transfer speed of SWC-2013 is depends on
HDD/SSD.
SWC-2013
supports Flash Copy, Offline Clone, Offline Compare, Online Clone, which is able to copy data
and system files from Source HDD to Target HDD completely.
SWC-2013 provides high storage capacity, high
data transfer rate, and best data protection.
Function Chart:
1、 Power indicator 1
2、 Power indicator 2
3、C lone/Compare processing % indicator
4、Clone/Compare button
5、Bay ‘1
6、Bay ‘2
7、Bay ‘3’
8、Bay ‘4’
9、Bay ‘5’
10、Bay ‘6’
11、USB3.0 input
12、DC input
13、DC input
14、Power switch (ON/OFF)
Function:
• Complies with Gen2i/Gen2m of Serial A TA II Electrical Specification 2.6
• Supports SAT A II Asynchronous Signal Recovery (Hot Plug) feature
• Complies with USB 3.0 Specification, USB Mass Storage Class, Bulk-Only Transport Specification
• Suppor ts USB Su per-Speed/High-Speed/Full-Speed Operation
• Supports USB2.0/USB3.0 power saving mode
• Supports Multi LUN for USB2.0/USB3.0
• One Touch clone/Compare function.
• Easy to Install and Set-up
• Design for Win2000, WinXP, WinVista, Win7, Win8, MAC 9.2 or later version.
For more detail SPEC and demo video please check our Web site at
http://www.sunnywill.com.tw/index.php/product/6-bay-sata-docking
Page 2
2
Offline CLONE:
Warning: all the data in the TARGET HDD will be erased after the clone operation.
Please note the below conditions before clone:
- Bay ‘1’ = SOURCE HDD,
- Bay ’2, 3, 4, 5, 6’ = TARGET HDD
- T ARGET HDD‘s ca pacity MUST be larger than or equal to SOURCE HDD, otherwise the CLONE cannot
be started.
- Before CLONE function starts, make sure the information in TARGET HDD is not important; once
CLONE started, all information from the SOURCE HDD w ill b e covered into T ARGET HDD.
- Once the docking is connected to USB interface, the offline Clone will be invalid. Clone can only process
via software “CloneDrive”
1, Offline clone
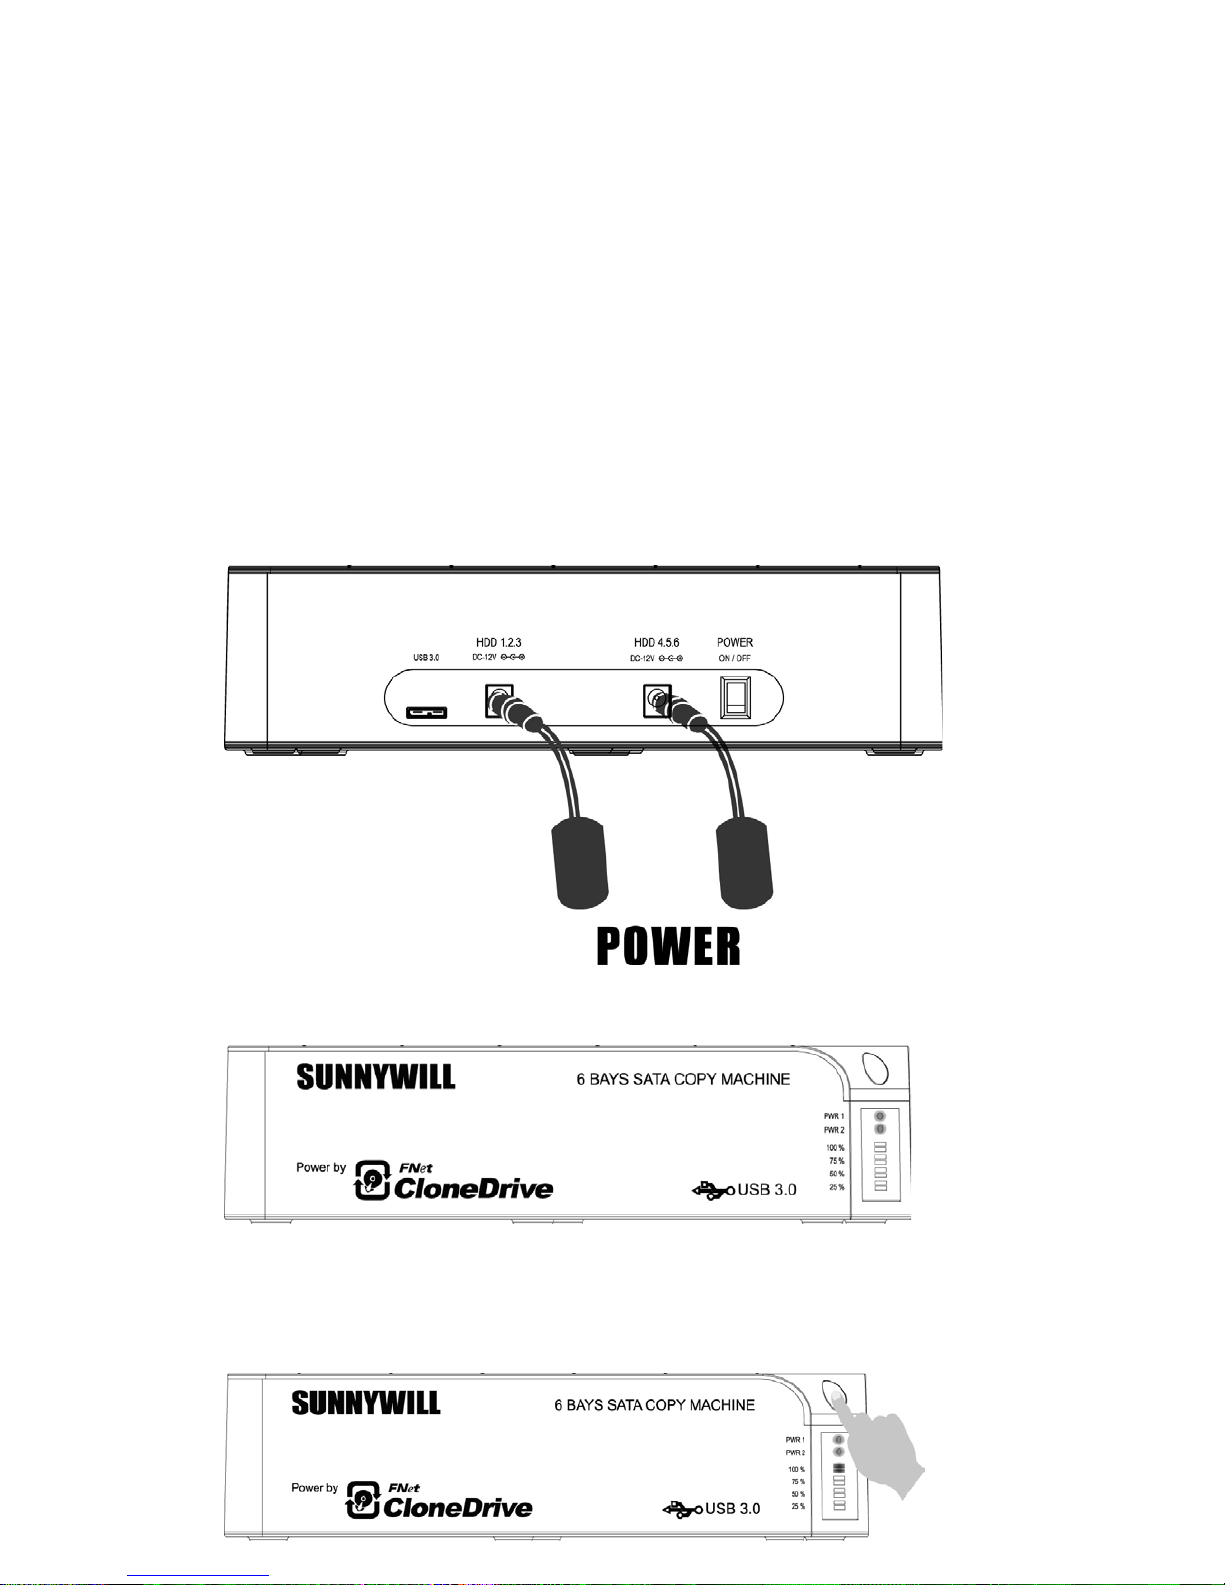
a、Insert source HDD to Bay ‘1’; target HDD to Bay ‘2, 3, 4, 5, 6’, and then turn on the power
b、Once the Bays indicators are on, that means SWC-2013 is ready for clone.
c、Press and hold the clone button for 3 seconds until the indicator light is blinking in blue, press the button
once more for Clone confirmation while all LEDs are still blinking blue. Of fline clone is starting to process
and 25% light will start blinking alone to show its progress.
Page 3

3
d、Clone progress indicator flashes and shows the progress (25%, 50%, 75%, 100%).
e、Once clone is finished, all progress indicators will light up in blue.
f、Turn off power and take out the HDD carefully
Page 4

4
Offline Compare:
Note: For Offline compare mode, the source drive must be placed in bay # 6. And please make sure the bay
#1 is empty
a、Insert source HDD to Bay ‘6’; target HDD to Bay ‘2, 3, 4, 5’, and then turn on the power
b、Once the Bays indicators are on, that means SWC-2013 is ready for compare operation.
c、Press and hold the clone button for 6 seconds until the indicator light is blinking in Orange, press the button
once more for compare confirmation while all LEDs are still blinking Orange. Offline compare is starting
to process and 25% light will start blinking alone to show its progress.
d、Compare progress indicator flashes and shows the progress (25%, 50%, 75%, 100%).
e、Once compare is finished, all progress indicators will light up in Orange.
If there is compare error, the R/W LED will turn RED to indicate which HDD is failed of the comparison.
User can download the slide file “6Bay_CloneMachine_offline_operation.pdf” from web site for more detail
instruction.
Page 5

5
Online Clone:
Software “CloneDrive” Installation
a、Please download the latest version “CloneDrive” from the download page of our official web site
http://www.sunnywill.com.tw/index.php/download
b、Please use the “WinRAR” to uncompress th e download file and r un the “CloneDrivePlus_Setup.exe” to
install the CloneDrivePlus, you can get the winrar from the official download web site at
http://www.rarlab.com/download.htm
c、Please follow the instruction to complete the software installation
d、After the “CloneDrive” is installed, you can find the icon in the right-down corner of win7 task bar.
Please double click the icon.
e、For the first time installation, you will need to fill in the S/N # accordingly (you can find the S/N# on the
license sticker)
f、Please insert Source HDD and Target HDD well to the docking, connect SW-3022 to PC via USB cable.
Turn on the power ,
Page 6

6
g、The “CloneDrive” w ill show the HDD info of each bay.
h、User can choose to “clone the external Disk”, which means the HDD in bay 1 will be the source HDD, and
all the HDD in other bay are the target HDD.
Page 7

7
i、User can choose to “Clone system disk to external disk”, which means the system disk inside the PC would
be the source HDD, and all the HDD in bay 1~6 will be the target HDD.
j、Just click the “Start” on the right-dow n side of the program. Or just push the button on the docking station
twice to start the operation.
Note1: With the CloneDrive, as long as the conte nt in the source HDD i s smaller than the target HDD, the
clone operation could be operated. The software will resize the partition if the target HDD is smaller than
the source HDD.
Note2: With the CloneDrive, the empty space will not be copy to save the operation time.
Page 8
8
FlashCopy operation:
The flash copy is the unique advance technology from Sunnywill Tech. Co. User can enjoy twice fast
transfer speed while copy data between HDDs plugged in the 6bay SATA docking station.
You can see the video demo on our web site at
http://www.sunnywill.com.tw/index.php/product/6-bay-sata-docking
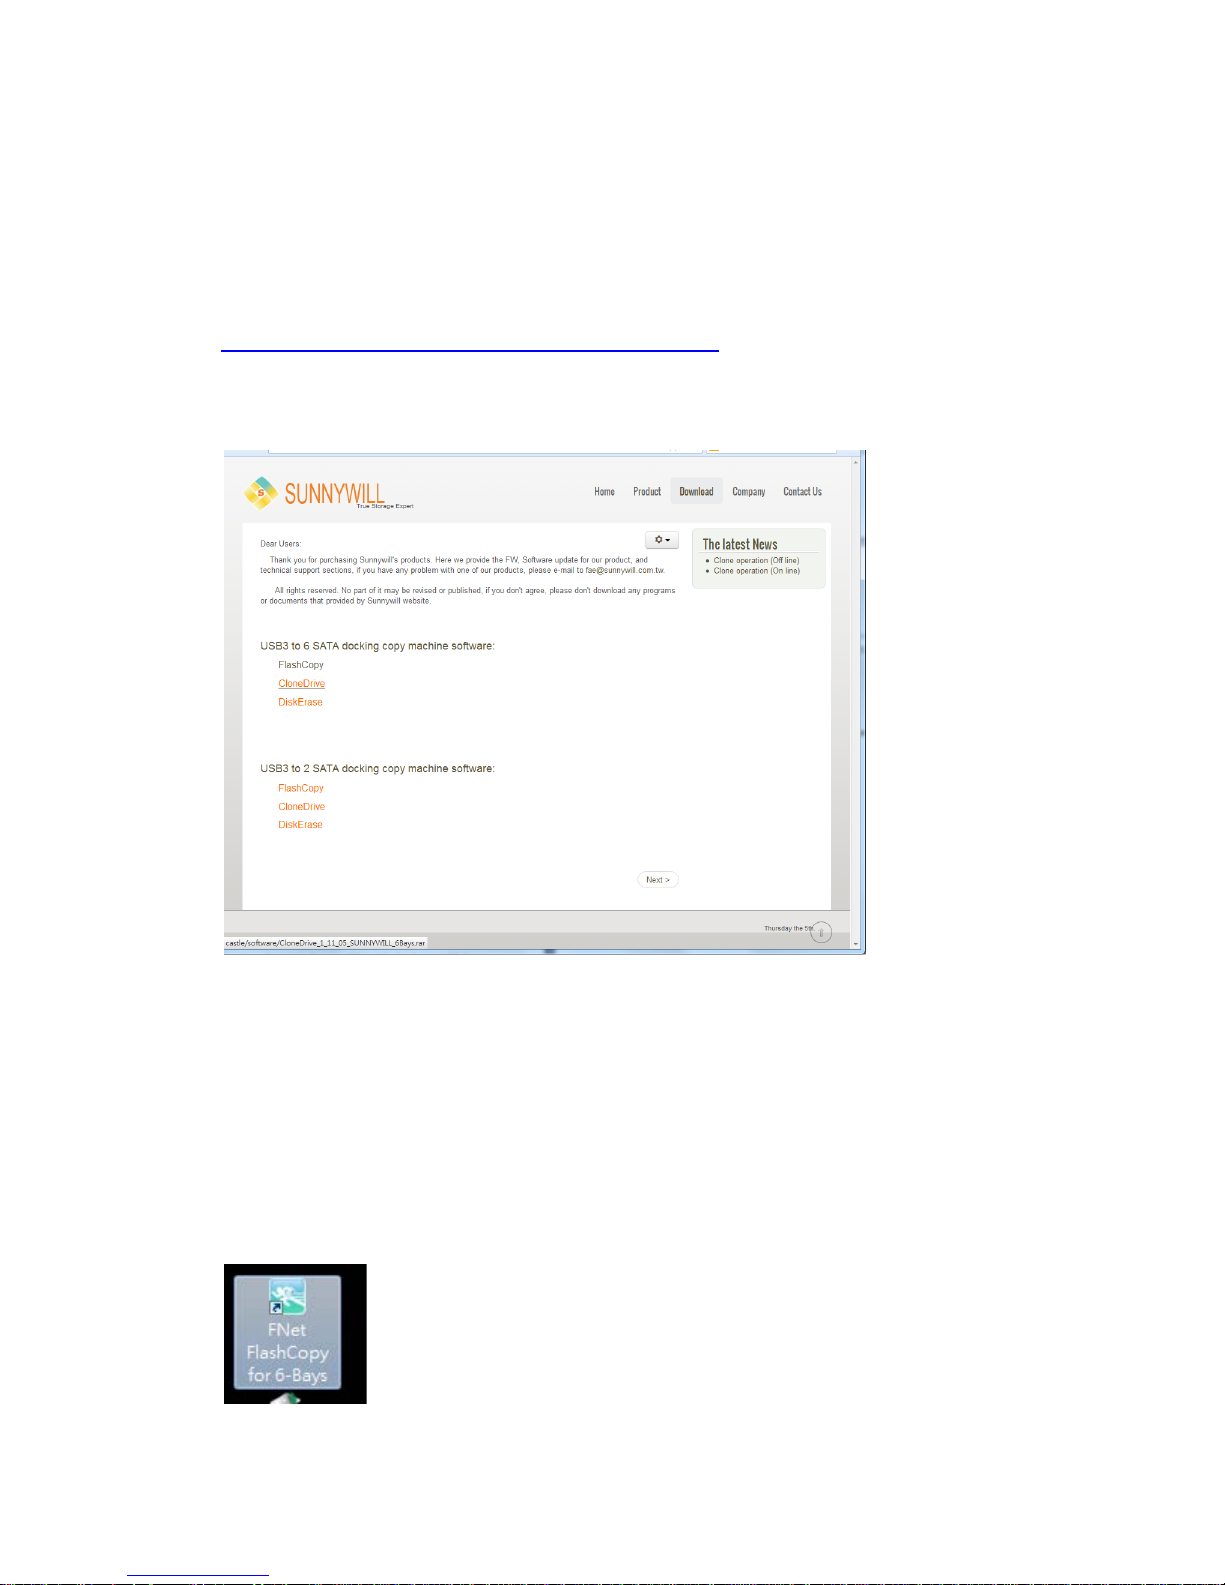
a、Please download the latest version “FlashCopy” from the download page of our official web site
http://www.sunnywill.com.tw/index.php/download
b、Please use the “WinRAR” to uncompress the download file and run the “FlashCopy_Setup.exe” to
install the “FlashCopy”, you can get the winrar from the official download web site at
http://www.rarlab.com/download.htm
c、Please follow the instruction to complete the software installation
d、After the “FlashCopy” is installed, you can find the flashCopy icon on the desktop table, double click
the icon to start the program.
Page 9

9
e、For the first time install, you will need to fill in the S/N # accordingly (you can find the S/N# on the license
sticker)
f、After the filling the S/N, the “FlashCopy” start to show the HDD info in each bay.
Page 10
10
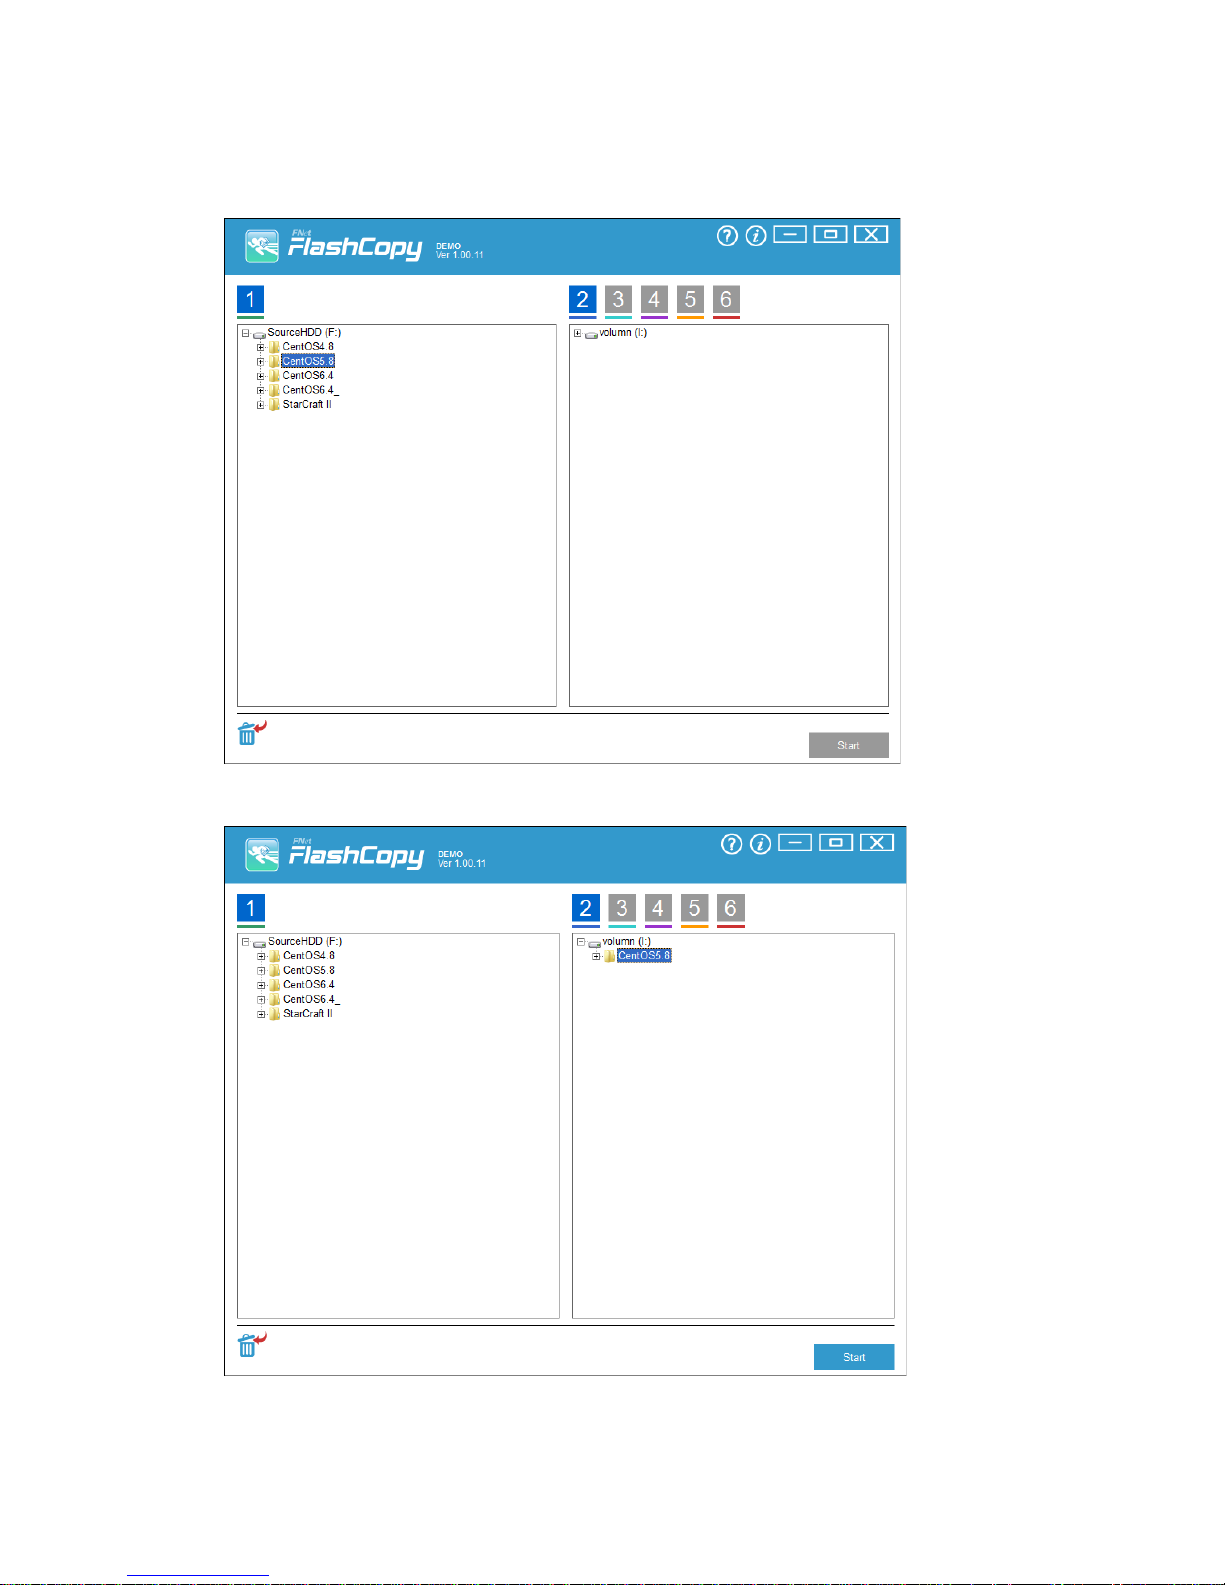
g、Select the file to be copied and drag to the target HDD (The HDD in bay #2 for this case)
Page 11

11
h、Press start button in the right down side of the program to start the operation
i、FlashCopy will save you wait time for copying the data, with FlashCopy, you can easily manage the
data in your HDD.
 Loading...