

Page 1
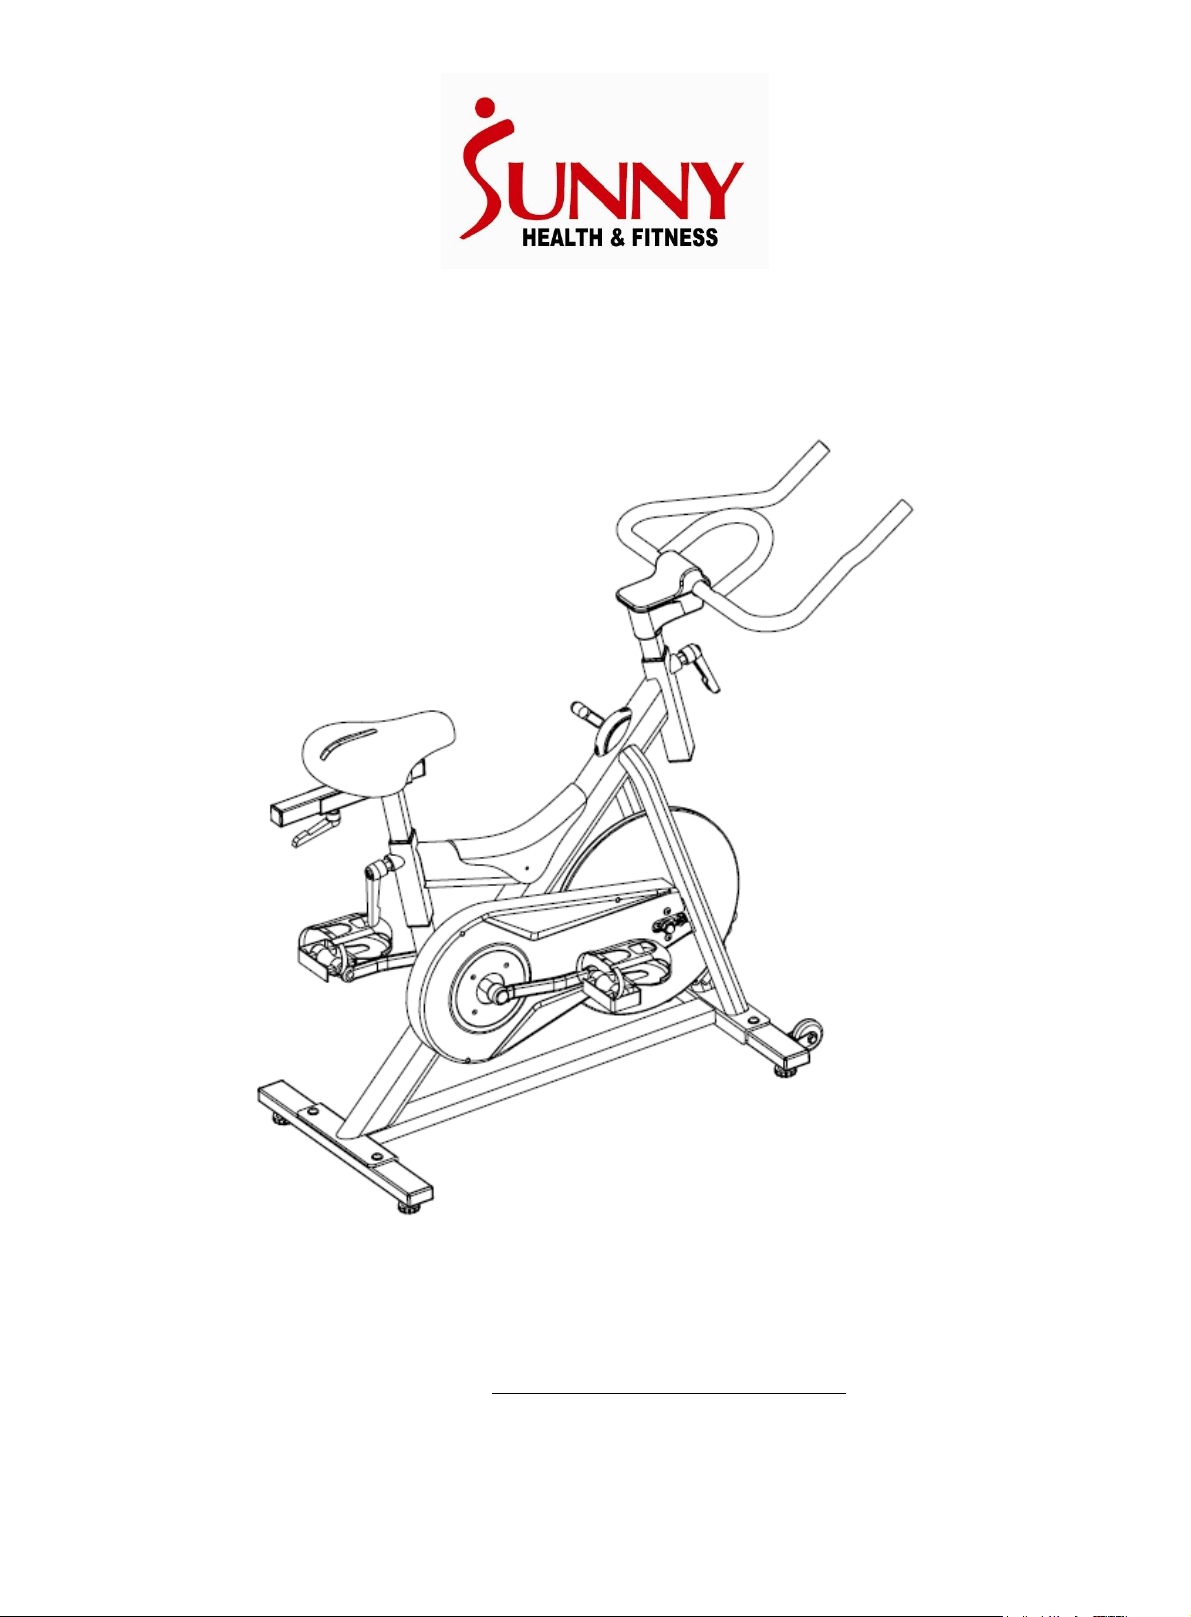
MAGNETIC INDOOR CYCLING BIKE
SF-B904
The specifications of this product may vary from this photo and are subject to change without
notice.
For Customer Service, please contact: support@sunnyhealthfitness.com
Page 2

1
Important Safety Information
We thank you for choosing our product. To ensure your safety and health, please use this
equipment correctly. Please read the information below carefully before using this equipment. It is
important to read this entire manual before assembling and using the equipment. Safe and
effective use can only be achieved if the equipment is assembled, maintained and used properly.
1. Before starting any exercise program you should consult your doctor to determine if you have
any medical or physical conditions that could put your health and safety at risk, or prevent you
from using the equipment properly.
2. Your doctor’s advice is essential if you are taking medication that affects your heart rate, blood
pressure or cholesterol level.
3. Be aware of your body’s signals. Incorrect or excessive exercise can damage your health. Stop
exercising if you experience any of the following symptoms: pain, tightness in your chest, irregular
heartbeat, extreme shortness of breath, lightheadedness, dizziness or feelings of nausea. If you
do experience any of these conditions, you should consult your doctor before continuing with your
exercise program.
4. Keep children and pets away from the equipment. The equipment is designed for adult use
only.
5. Use the equipment on a solid, flat, level surface with a protective cover for your floor or carpet
to ensure safety, the equipment should have at least 0.5 meters of free space all around it.
6. Before using the equipment, please make sure all the nuts and bolts are securely tightened.
7. Always use the equipment as indicated. If you find any defective components while assembling
or checking the equipment, or if you hear any unusual noises coming from the equipment during
use, stop immediately. Do not use the equipment until the problem has been rectified.
8. Wear suitable clothing while using the equipment. Avoid wearing loose clothing that may get
caught in the equipment or that may restrict or prevent movement.
9. This equipment is designed for indoor and home use only, not intended for commercial use.
The maximum weight of user: 220LBS.
10. Care must be taken when lifting or moving the equipment so as not to injure your back.
11. The equipment is not suitable for therapeutic use.
12. Please keep this manual and the assembling tools well for future reference.
Page 3

2
EXPLODED DIAGRAM
Page 4

3
Part No.
Description
Qty
Part No.
Description
Qty
1
Main frame
1
17
Nylon nut
2
2
Rear bottom tube
1
18
Screw
2
3
Front bottom tube
1
19
Bushing
4
4
Saddle vertical tube
1
20
Square cap
2
5
Saddle horizontal tube
1
21
Handlebar
1
6
Handlebar post
1
22
Handlebar cover
1
7L/R
Pedal
1pr
23
Handlebar cover
1
8
Saddle
1
24
Allen bolt
4
9
L-shaped knob
2
25
Spring washer
4
10
Resistant brake
1
26
Flat washer
4
11
Square cap
4
27
Phillips screw
2
12
Foot adjustable knob
4
28
Phillips screw
2
13
Allen bolt
4
29
Flat washer
1
14
Flat washer
4
30
Small L-shaped knob
1
15
Transport wheel
2
31L/R
Crank
2
16
Bolt 2
PARTS LIST
NOTE:
Most of the listed assembly hardware has been packaged separately, but some hardware
items have been preinstalled in the identified assembly parts. In these instances, simply
remove and reinstall the hardware as assembly is required.
Please reference the individual assembly steps and make note of all preinstalled
hardware.
Page 5

4
ASSEMBLY INSTRUCTIONS
Step one:
Install the Front bottom tube (3) and Rear bottom
tube (2) to the Main frame (1) with the Bolts (13) and
Flat washers (14).
Note: The Foot adjustable knobs( 12)under the
bottom tubes can be adjusted to keep the equipment
stable.
Step two:
Attach the Pedals (7L/R) to the Cranks (31L/R)
respectively, viewed from the rider’s seated position.
Note: Both pedals are labeled L FOR LEFT and R FOR
RIGHT.
Important:
To tighten turn the left pedal COUNTERCLOCKWISE
and the right pedal CLOCKWISE.
Step three:
Fix the Saddle (8) onto the Saddle horizontal tube (5), and tighten
with the multi-functional wrench. Attach the well installed Saddle
horizontal tube (5) to the Saddle vertical tube (4), secure with the
Flat washer (29) and small L-shaped knob (30). Insert the Saddle
vertical tube (4) to the main frame section, secure with the
L-shaped knob (9) at a suitable height.
Page 6

5
Step four:
Attach the Handlebar (21) to the Handlebar post (6), secured
with Bolts (24), Flat washers (26) and Spring washers (25).
Then, Set the lower Handlebar cover (23) on the square tube
of the Handlebar post (6) in alignment with the four grooves on
the mouth of the lower Handlebar cover (23). When the lower
Handlebar cover (23) slides to the top of the square tube of the
Handlebar post (6); rotate the cover 45 degrees to align with
the Handlebar (21). Use Screws (27) (28) to fix the upper
Handlebar cover (22) to the lower Handlebar cover (23), so
that the Handlebar (21) and Handlebar post (6) are in between
the Handlebar cover pieces (22, 23). Finally, turn and loosen
the L-shaped knob (9), pull the pin, and then insert the
Handlebar (21) assembly into the Main frame (1) section
simultaneously. Make sure the pin settles into the desired hole
and then secure the Knob.
Important:
This machine has equipped with L-shaped knob (9) for saddle & handlebar vertical adjustment.
Loosen the knob a little bit (no need to screw it out), and then pull the knob to adjust the
height.
1. If the L shape knob touches the tube when securing clockwise, please pull down the L shape
knob and turn it counterclockwise, then release it and secure it clockwise. Repeat it several
times until you secure it firmly.
2. If the L shape knob touches the tube when releasing counterclockwise, please pull down the
L shape knob and turn it clockwise, then release it and secure it counterclockwise. Repeat
it several times until you can move the handles to desired position.
 Loading...