

Page 1

Sun Enterprise™ 10000 Dynamic
Reconfiguration User Guide
Sun Microsystems, Inc.
901 San Antonio Road
Palo Alto,CA 94303-4900
U.S.A. 650-960-1300
Part No.
February 2000
Send comments about this document to: [email protected]
806-2249-10
, Revision 01
Page 2

Copyright 2000Sun Microsystems,Inc., 901San AntonioRoad, PaloAlto, California 94303-4900 U.S.A. All rights reserved.
This productor document is protected by copyright and distributed under licenses restricting its use, copying, distribution, and decompilation.
No part of this product or document may be reproduced in any form by any means without prior written authorization of Sun and its licensors,
if any.Third-partysoftware, including font technology,is copyrighted and licensed from Sun suppliers.
Parts of the product may be derived from Berkeley BSD systems, licensed from the University of California. UNIX is a registered trademark in
the U.S. and other countries, exclusively licensed through X/Open Company,Ltd. For Netscape Communicator™, the following notice applies:
(c) Copyright 1995 Netscape Communications Corporation. All rights reserved.
Sun, Sun Microsystems, the Sun logo, AnswerBook2, docs.sun.com, Solstice, DiskSuite, SunFastEthernet, Ultra Enterprise, Sun Enterprise,
OpenBoot, and Solaris are trademarks, registeredtrademarks, or service marks of Sun Microsystems, Inc. in the U.S. and other countries. All
SPARC trademarks are used under license and are trademarks or registered trademarks of SPARCInternational, Inc. in the U.S. and other
countries. Productsbearing SPARC trademarks are based upon an architecture developed by Sun Microsystems, Inc.
The OPEN LOOK and Sun™ Graphical User Interface was developed by Sun Microsystems, Inc. for its users and licensees. Sun acknowledges
the pioneering efforts of Xerox in researchingand developing the concept of visual or graphical user interfaces for the computer industry. Sun
holds a non-exclusive license from Xerox to the Xerox Graphical User Interface, which license also covers Sun’s licensees who implement OPEN
LOOK GUIs and otherwise comply with Sun’s written license agreements.
RESTRICTEDRIGHTS: Use, duplication, or disclosure by the U.S. Government is subject to restrictions of FAR52.227-14(g)(2)(6/87) and FAR
52.227-19(6/87), or DFAR252.227-7015(b)(6/95) and DFAR227.7202-3(a).
DOCUMENTATIONIS PROVIDED “AS IS” AND ALL EXPRESS OR IMPLIED CONDITIONS, REPRESENTATIONSAND WARRANTIES,
INCLUDING ANY IMPLIED WARRANTYOF MERCHANTABILITY,FITNESS FOR A PARTICULARPURPOSE OR NON-INFRINGEMENT,
ARE DISCLAIMED, EXCEPT TO THE EXTENT THATSUCH DISCLAIMERS ARE HELD TOBE LEGALLY INVALID.
Copyright 2000 Sun Microsystems, Inc., 901 San Antonio Road, Palo Alto, Californie 94303 Etats-Unis. Tousdroits réservés.
Ce produitou document est protégé par un copyright et distribué avec des licences qui en restreignentl’utilisation, la copie, la distribution, et la
décompilation. Aucune partie de ce produit ou document ne peut être reproduite sous aucune forme, par quelque moyen que ce soit, sans
l’autorisation préalable et écrite de Sun et de ses bailleurs de licence, s’il y en a. Le logiciel détenu par des tiers, et qui comprend la technologie
relativeaux polices de caractères, est protégé par un copyright et licencié par des fournisseurs de Sun.
Des parties de ce produit pourront être dérivées des systèmes Berkeley BSD licenciés par l’Université de Californie. UNIX est une marque
déposée aux Etats-Unis et dans d’autres pays et licenciée exclusivement par X/Open Company,Ltd. La notice suivante est applicable à
Netscape Communicator™: (c) Copyright 1995 Netscape Communications Corporation. Tousdroits réservés.
Sun, Sun Microsystems, le logo Sun, AnswerBook2, docs.sun.com, Solstice, DiskSuite, SunFastEthernet, Ultra Enterprise, Sun Enterprise,
OpenBoot, et Solaris sont des marques de fabrique ou des marques déposées, ou marques de service, de Sun Microsystems, Inc. aux Etats-Unis
et dans d’autres pays. Toutesles marques SPARCsont utilisées sous licence et sont des marques de fabrique ou des marques déposées de
SPARC International, Inc. aux Etats-Unis et dans d’autres pays. Les produits portant les marquesSPARCsont basés sur une architecture
développée par Sun Microsystems, Inc.
L’interfaced’utilisation graphique OPEN LOOK et Sun™ a été développée par Sun Microsystems, Inc. pour ses utilisateurs et licenciés. Sun
reconnaîtles effortsde pionniers de Xerox pour la rechercheet le développement du concept des interfaces d’utilisation visuelle ou graphique
pour l’industrie de l’informatique. Sun détient une licence non exclusive de Xerox sur l’interface d’utilisation graphique Xerox, cette licence
couvrant également les licenciés de Sun qui mettent en place l’interface d’utilisation graphique OPEN LOOK et qui en outre se conforment aux
licences écrites de Sun.
CETTE PUBLICATIONEST FOURNIE "EN L’ETAT"ET AUCUNE GARANTIE, EXPRESSE OU IMPLICITE, N’EST ACCORDEE, Y COMPRIS
DES GARANTIES CONCERNANT LA VALEURMARCHANDE, L’APTITUDEDE LA PUBLICATIONA REPONDRE A UNE UTILISATION
PARTICULIERE,OU LE FAIT QU’ELLE NE SOIT PASCONTREFAISANTEDE PRODUIT DE TIERS. CE DENI DE GARANTIE NE
S’APPLIQUERAIT PAS, DANS LA MESURE OU IL SERAIT TENU JURIDIQUEMENT NUL ET NON AVENU.
Please
Recycle
Page 3

Sun Enterprise 10000 SSP Attributions:
This softwareis copyrighted by the Regents of the University of California, Sun Microsystems, Inc., and other parties. The following terms
apply to all files associated with the software unless explicitly disclaimed in individual files.
Theauthors hereby grant permission to use, copy,modify,distribute, and license thissoftwareand its documentation for any purpose, provided
that existing copyright notices are retained in all copies and that this notice is included verbatim inany distributions. No written agreement,
license, or royalty fee is requiredfor any of the authorized uses. Modifications to this software may be copyrighted by their authors andneed
not follow the licensing terms described here, provided that the new terms are clearly indicated on the first page of each file where they apply.
IN NO EVENT SHALL THE AUTHORS OR DISTRIBUTORS BE LIABLE TO ANY PARTYFOR DIRECT,INDIRECT,SPECIAL, INCIDENTAL,
OR CONSEQUENTIAL DAMAGES ARISING OUT OF THE USE OF THIS SOFTWARE, ITS DOCUMENTATION,OR ANY DERIVATIVES
THEREOF, EVEN IF THE AUTHORS HAVEBEEN ADVISED OF THE POSSIBILITYOF SUCH DAMAGE.
THE AUTHORS AND DISTRIBUTORS SPECIFICALLYDISCLAIM ANY WARRANTIES,INCLUDING, BUT NOT LIMITED TO, THE
IMPLIED WARRANTIES OF MERCHANTABILITY,FITNESS FOR A PARTICULARPURPOSE, AND NON-INFRINGEMENT.THIS
SOFTWARE ISPROVIDED ON AN "AS IS" BASIS, AND THE AUTHORS AND DISTRIBUTORS HAVE NOOBLIGATIONTO PROVIDE
MAINTENANCE, SUPPORT,UPDATES,ENHANCEMENTS, OR MODIFICATIONS.
RESTRICTED RIGHTS: Use, duplication or disclosure by the government is subject to the restrictions as set forth in subparagraph (c) (1) (ii) of
the Rights in TechnicalData and Computer Software Clause as DFARS 252.227-7013and FAR52.227-19.
This is scotty, a simple tcl interpreter with some special commands to get information about TCP/IP networks. Copyright (c) 1993, 1994, 1995, J.
Schoenwaelder,TU Braunschweig, Germany,Institute for Operating Systems and Computer Networks. Permission to use, copy, modify, and
distribute this software and its documentation for any purpose and without fee is hereby granted, providedthat this copyright notice appears
in all copies. The University of Braunschweig makes no representations about the suitability of this softwarefor any purpose. It is provided “as
is" without express or implied warranty.
Page 4

Page 5

Contents
1. Introduction to DR 1
2. DR Configuration Issues 3
dr-max-mem Variable 3
▼ To Enable the Kernel Cage 3
Configuration for DR Detach 4
I/O Devices 4
Memory 5
Pageable and Nonpageable Memory 5
Target Memory Constraints 6
Correctable Memory Errors 6
▼ To Re-Enable Dump Detection 7
Reconfiguration After a DR Operation 7
When to Reconfigure 8
Disk Devices 8
DR and AP Interaction 9
DR and IDNs 9
RPC Time-Out or Loss of Connection 10
System Quiescence Operation 11
Swap Space 7
v
Page 6

Suspend-Safe/Suspend-Unsafe Devices 12
Special Handling for Tape Devices 13
Special Handling of Sun StorEdge A3000 14
DR and DDI 14
DR and DDI_DETACH 14
DR and DDI_SUSPEND/DDI_RESUME 15
3. Using Dynamic Reconfiguration 17
Attaching a System Board 17
Init Attach 17
Complete Attach 18
Attach Buttons 19
▼ To Attach a Board With Hostview 19
▼ To Attach a Board By Using dr(1M) 23
Detaching a System Board 26
Drain 26
Complete Detach 27
Network Devices 27
Non-Network Devices 28
Processes 29
Processors 30
Finishing the Complete Detach Operation 30
Hostview Detach Buttons 31
▼ To Detach a Board With Hostview 32
▼ To Detach a Board By Using dr(1M) 34
Viewing Domain Information 37
▼ To View Domain Information with Hostview 38
▼ To Specify How Windows Are Updated 38
vi Sun Enterprise 10000 Dynamic Reconfiguration User Guide • February 2000
Page 7

▼ To View DR CPU Configuration Information 39
▼ To View DR Memory Configuration Information 41
▼ To View DR Device Configuration Information 43
▼ To View DR Device Detailed Information 44
▼ To View DR OBP Configuration Information 45
▼ To View the DR-Unsafe Devices 46
vii
Page 8

viii Sun Enterprise 10000 Dynamic Reconfiguration User Guide • February 2000
Page 9

Figures
FIGURE 3-1 Attach Board and Domain Selection Window 20
FIGURE 3-2 Dynamic Reconfiguration Window With init attach Button 21
FIGURE 3-3 Dynamic Reconfiguration Window With the complete Button 22
FIGURE 3-4 Detach—Board and Domain Selection Window 32
FIGURE 3-5 Dynamic Reconfiguration Window With the drain Button 33
FIGURE 3-6 System Information Buttons 38
FIGURE 3-7 DR Properties Window 39
FIGURE 3-8 DR CPU Configuration Window 40
FIGURE 3-9 DR Memory Configuration Window 41
FIGURE 3-10 DR Device Configuration Window 43
FIGURE 3-11 DR Detail Device Window 44
FIGURE 3-12 DR OBP Configuration Window 46
FIGURE 3-13 DR Unsafe Devices Window 47
ix
Page 10

x Sun Enterprise 10000 Dynamic Reconfiguration User Guide • February 2000
Page 11

Preface
This book describes the Dynamic Reconfiguration (DR) feature, which enables you
to logically attach and detach system boards from the Sun Enterprise™ 10000 server
while other domains continue running.
Before You Read This Book
This book is intended for the Sun Enterprise 10000 server system administrator who
has a working knowledge of UNIX® systems, particularly those based on the
Solaris™ operating environment. If you do not have such knowledge, first read the
Solaris User and System Administrator in AnswerBook2™ format provided with this
system and consider UNIX system administration training.
How This Book Is Organized
This document contains the following chapters:
Chapter 1 introduces basic concepts related to the Dynamic Reconfiguration feature.
Chapter 2 describes how to configure the Dynamic Reconfiguration system before
you begin using it.
Chapter 3 describes how to use DR to attach and detach system boards.
Appendix A contains DR error messages.
xi
Page 12

Using UNIX Commands
This document does not contain information on basic UNIX commands and
procedures such as shutting down the system, booting the system, and configuring
devices.
See one or more of the following sources for this information:
■ AnswerBook2 online documentation for the Solaris operating environment,
particularly those dealing with Solaris system administration
■ Other software documentation that you received with your system
xii Sun Enterprise 10000 Dynamic Reconfiguration User Guide • February 2000
Page 13

Typographic Conventions
Typeface or
Symbol Meaning Examples
AaBbCc123 The names of commands, files,
and directories; on-screen
computer output
AaBbCc123 What you type, when
contrasted with on-screen
computer output
AaBbCc123 Book titles, new words or terms,
words to be emphasized
Command-line variable; replace
with a real name or value
Edit your .login file.
Use ls -a to list all files.
% You have mail.
% su
Password:
Read Chapter 6 in the User’s Guide.
These are called class options.
You must be superuser to do this.
To delete a file, type rm filename.
Shell Prompts
Shell Prompt
C shell machine_name%
C shell superuser machine_name#
Bourne shell and Korn shell $
Bourne shell and Korn shell superuser #
xiii
Page 14

Related Documentation
TABLE P-1 Related Documentation
Application Title Part Number
User Sun Enterprise 10000 SSP User Guide 805-2955
Reference Sun Enterprise 10000 SSP Reference
Manual
Sun Enterprise 10000 Dynamic
Reconfiguration Reference Manual
Release Notes Release Notes Supplement Solaris 8 Printed in Media
805-3362
806-2250
Kit.
Ordering Sun Documentation
Fatbrain.com, an Internet professional bookstore, stocks select product
documentation from Sun Microsystems, Inc.
For a list of documents and how to order them, visit the Sun Documentation Center
on Fatbrain.com at:
http://www1.fatbrain.com/documentation/sun
Accessing Sun Documentation Online
The docs.sun.comSMweb site enables you to access Sun technical documentation
on the Web. You can browse the docs.sun.com archive or search for a specific book
title or subject at:
http://docs.sun.com
xiv Sun Enterprise 10000 Dynamic Reconfiguration User Guide • February 2000
Page 15

Sun Welcomes Your Comments
We are interested in improving our documentation and welcome your comments
and suggestions. You can email your comments to us at:
Please include the part number (806-2249-10) of your document in the subject line of
your email.
xv
Page 16

xvi Sun Enterprise 10000 Dynamic Reconfiguration User Guide • February 2000
Page 17

CHAPTER
1
Introduction to DR
Dynamic Reconfiguration (DR) enables you to logically attach and detach system
boards to and from the operating system without causing machine downtime. DR is
used in conjunction with hot swap, which is the process of physically removing or
inserting a system board. You can use DR to add a new system board, reinstall a
repaired system board, or modify the domain configuration on the Sun Enterprise
10000 system.
If a system board is being used by a domain, you must detach it before you can
power it off and remove it. After a new or upgraded system board is inserted and
powered on, you may attach it to the domain.
You can execute DR operations from the SSP through the Hostview GUI (see
hostview(1M)) or through the dr(1M) shell application. DR supports the
following operations:
■ DR Attach – Logically attaches a system board to the operating system running in
a domain. A system board is logically attached when its resources—processors,
memory, and I/O adapters—are configured into a domain and are available to the
Solaris operating environment. The system board must already be present in the
system, powered on, and not be a member of a domain. Normally, you attach a
system board after it is inserted and powered on by your service provider or after
it is detached from another domain.
■ DR Detach – Logically detaches a system board from a domain. A system board is
logically detached when its resources—processors, memory, and I/O adapters—
are removed from the domain configuration and are no longer available to the
domain. Normally, you detach a system board to either move it to another
domain or prepare it for removal.
While DR operations are being performed within a domain, the dr_daemon(1M)
(see the Sun Enterprise 10000 Dynamic Reconfiguration Reference Manual) and the
operating environment write messages regarding the status or exceptions of DR
requests to the domain syslog message buffer ( /var/adm/messages) and the SSP
message files ($SSPOPT/adm/host/messages and $SSPOPT/adm/messages). In
1
Page 18

addition to the status and exception information displayed by Hostview and the
dr(1M) shell application, the dr_daemon(1M) and operating environment
messages are useful for determining the status of DR requests.
Note – Only one DR operation per platform can be active at any time. A DR
operation that is partially completed and then dismissed within one domain does
not prevent a subsequent DR operation from being started in a different domain. A
partially completed DR operation must be finished before a subsequent DR
operation is permitted in the same domain.
2 Sun Enterprise 10000 Dynamic Reconfiguration User Guide • February 2000
Page 19

CHAPTER
2
DR Configuration Issues
This chapter describes how to configure a domain for all DR operations and
capabilities.
Caution – Be careful when choosing the slot into which a board is inserted to
prevent disk controller renumbering. For more information, see “Reconfiguration
After a DR Operation” on page 7.
dr-max-mem Variable
With the Solaris 7 and Solaris 8 operating environments, dr-max-mem is no longer
used. Instead, the DR feature, specifically DR Detach, must be enabled by using the
system(4) variable kernel_cage_enable. A caged kernel confines the
nonpageable memory to a minimal (most often one) number of systems boards. By
default, the kernel cage is disabled, preventing DR Detach operations.
Note – DR Attach is enabled regardless of the setting of kernel_cage_enable.
▼ To Enable the Kernel Cage
1. Edit the /etc/system file so that kernel_cage_enable equals 1.
set kernel_cage_enable=1
2. Reboot the domain.
3
Page 20

After the reboot completes successfully, you can verify that the kernel cage is
enabled by reviewing the /var/adm/messages file for the following message.
NOTICE: DR Kernel Cage is ENABLED
Configuration for DR Detach
This section describes how to configure DR before you perform a detach operation.
I/O Devices
The DR Detach feature works with Alternate Pathing (AP) or Solstice™ DiskSuite™
mirroring when you detach a board that hosts I/O controllers that are attached to
vital system resources. If, for example, the root (/)or/usr partition is on a disk
attached to a controller on the board, the board cannot be detached unless there is a
hardware alternate path to the disk, and AP has been configured to take advantage
of it, or the disk is mirrored. The alternate path or the mirrors must be hosted by
other boards in the domain. The same applies to network controllers. The board that
hosts the Ethernet controller that connects the SSP to the Sun Enterprise 10000
platform cannot be detached unless an alternate path exists to an Ethernet controller
on another board for this network connection.
To enable device suspension for the soc and pln drivers, you must edit the
/etc/system file so that the pln_enable_detach_suspend and
soc_enable_detach_suspend variables are set to 1, as in the following example:
set pln:pln_enable_detach_suspend=1
set soc:soc_enable_detach_suspend=1
The domain swap space should be configured as multiple partitions on disks
attached to controllers hosted by different boards. With this kind of configuration, a
particular swap partition is not a vital resource because swap partitions can be
added and deleted dynamically (see swap(1M) for more information).
Note – When memory (swapfs) or swap space on a disk is detached, there must be
enough memory or swap space remaining in the domain to accommodate currently
running programs.
4 Sun Enterprise 10000 Dynamic Reconfiguration User Guide • February 2000
Page 21

A board that hosts non-vital system resources can be detached whether or not there
are alternate paths to the resources. All of the devices on the board must be closed
before the board can be detached; all of its file systems must be unmounted; and, its
swap partitions must be deleted. You may have to kill processes that have open files
or devices, or place a hard lock on the file systems (using lockfs(1M)) before you
unmount the boards.
All I/O device drivers involved with I/O devices on the board(s) must support the
DDI_DETACH option in the detach entry-point of the driver. This option releases all
system resources associated with that device or adapter.
Memory
If you use memory interleaving between system boards, those system boards cannot
be detached because DR does not yet support interboard interleaving. By default,
hpost(1M) does not set up boards with interleaved memory. Look for the following
line in the hpost(1M) file .postrc (see postrc(4)):
mem_board_interleave_ok
If mem_board_interleave_ok is present, you may not be able to detach a board
that uses memory interleaving.
Note – If you use the ndd(1m) command to set the configuration parameters for
network drivers, the parameters may not persist after a DR Detach or DR Attach
operation. Use the /etc/system file or the driver.conf file for a specific driver
to set the parameters permanently.
Pageable and Nonpageable Memory
Before you can detach a board, the operating system must vacate the memory on
that board. Vacating a board means flushing its pageable memory to swap space and
copying its nonpageable (that is, kernel and OBP memory) to another memory
board. To relocate nonpageable memory, the operating environment on a domain
must be temporarily suspended, or quiesced. The length of the suspension depends
on the domain I/O configuration and the running workloads. Detaching a board
with nonpageable memory is the only time when the operating environment is
suspended; therefore, you should know where nonpageable memory resides, so you
can avoid significantly impacting the operation of the domain. When permanent
memory is on the board, the operating environment must find other memory to
receive the copy.
Chapter 5
Page 22

You can use the dr(1M) command drshow(1M) to determine if the memory on a
board is pageable or nonpageable:
% dr
dr> drshow board_number mem
Similarly, you can determine if the memory on a board is pageable by looking at the
DR Memory Configuration window, which is available when you perform a detach
operation within Hostview. The DR Memory Configuration window is described in
“Viewing Domain Information” on page 37.
Target Memory Constraints
When permanent memory is detached, DR chooses a target memory area to receive
a copy of the memory. The DR software automatically checks for total adherence. It
does not allow the DR memory operation to continue if it cannot verify total
adherence. A DR memory operation might be disallowed because of the following
reasons:
■ The domain is not large enough to hold a copy of the nonpageable memory.
■ The domain is interleaved with memory on other boards.
In the Solaris 7 5/99 version, if no target board is found, the detach operation is
refused, and DR displays the following warning message on the system console:
WARNING: sfdr: sfdr_pre_release_mem: no available target for memunit (board.0)
Correctable Memory Errors
Correctable memory errors indicate that the memory on a system board (that is, one
or more of its Dual Inline Memory Modules (DIMMs), or portions of the hardware
interconnect) may be faulty and need replacement. When the SSP detects correctable
memory errors, it initiates a record-stop dump to save the diagnostic data, which can
interfere with a DR detach operation. Therefore, Sun Microsystems suggests that
when a record-stop occurs from a correctable memory error, you allow the recordstop dump to complete its process before you initiate a DR Detach operation.
If the faulty component causes repeated reporting of correctable memory errors, the
SSP performs multiple record-stop dumps. If this happens, you should temporarily
disable the dump-detection mechanism on the SSP, allow the current dump to finish,
then initiate the DR Detach operation. After the detach operation finishes, you
should re-enable the dump detection.
6 Sun Enterprise 10000 Dynamic Reconfiguration User Guide • February 2000
Page 23
▼ To Re-Enable Dump Detection
1. Log in to the SSP as the user ssp.
2. Disable record-stop dump detection:
SSP% edd_cmd -x stop
This command suspends all event detection on all of the domains.
3. Monitor the in-progress record-stop dump:
SSP% ps -ef | grep hpost
In the grep(1) output, the -D option of hpost indicates that a record-stop dump is
in progress.
4. Perform the DR Detach operation.
5. Enable event detection:
SSP% edd_cmd -x start
Swap Space
The domain swap configuration consists of the swap devices and swapfs (memory).
The domain must contain enough swap space so that it can flush pageable memory.
For example, if you want to remove 1 Gbyte of memory from a 2-Gbyte domain, you
will need 1 Gbyte of swap space, depending on the load. Insufficient swap space
prevents DR from completing the detach of a board that contains memory. If this
happens, the memory drain phase does not complete, so you must abort the detach
operation.
Reconfiguration After a DR Operation
This section describes how to reconfigure your domain after you have attached or
detached a system board.
Chapter 7
Page 24

The DR user interface enables you reconfigure the domain after a DR Attach or DR
Detach operation. The reconfiguration sequence is the same as the reconfiguration
boot sequence (boot -r):
drvconfig; devlinks; disks; ports; tapes;
When you execute the reconfiguration sequence after you attach a board, device
path names not previously seen by the domain are written to the
/etc/path_to_inst file. The same path names are also added to the /devices
hierarchy, and links to them are created in the /dev directory.
When to Reconfigure
You should reconfigure the domain if any of the following conditions occur:
■ Board Addition – When you add a board to a domain, you must execute the
reconfiguration sequence to configure the I/O devices that are associated with the
board.
■ Board Deletion – If you remove a board that is not to be replaced, you may, but do
not have to, execute the reconfiguration sequence to clean up the /dev links.
■ Board Replacement – If you remove a board then reinsert it in a different slot or if
you replace a board with another board that has different I/O devices, you must
execute the reconfiguration sequence to configure the I/O devices that are
associated with the board. However, if you replace a board with another board
that hosts the same set of I/O devices, inserting the replacement into the same slot,
you do not need to execute the reconfiguration sequence. But, be sure to insert a
replacement board into the same slot that was vacated to retain the original
mapping of /dev links to physical names.
Disk Devices
Disk controllers are numbered consecutively as the disks(1M) program encounters
them. All disk partitions are assigned /dev names according to the disk controller
number that disks(1M) assigns. For example, all disk partitions that are accessible
using disk controller 1 are named /dev/dsk/cXtYdZsW
where:
X is the disk controller number,
Y, in most cases, corresponds to the disk target number,
Z corresponds to the logical unit number, and
8 Sun Enterprise 10000 Dynamic Reconfiguration User Guide • February 2000
Page 25

W corresponds to the partition number.
When the reconfiguration sequence is executed after a board is detached, the /dev
links for all of the disk partitions on that board are deleted. The remaining boards
retain their current numbering. Disk controllers on a newly inserted board are
assigned the next available lowest number by disks(1M).
Note – The disk controller number is part of the /dev link name used to access the
disk. If that number changes during the reconfiguration sequence, the /dev link
name also changes. This change may affect file system tables and software, such as
Solstice DiskSuite™, which use the /dev link names. Update /etc/vfstab files
and execute other administrative actions to change the /dev link names.
DR and AP Interaction
DR notifies the AP subsystem when system boards are attached, detached, or placed
in the drain state. In addition, DR queries AP about which controllers are in the AP
database and their status (active or inactive). This communication occurs between
the dr_daemon(1M) and ap_daemon(1M). If the ap_daemon(1M) is not present,
an error message is placed in the syslog messages buffer of the domain and DR
operations continue without error. To disable this interaction, use the -a option
when you invoke dr_daemon(1M). See the dr_daemon(1M) man page in the Sun
Enterprise 10000 Dynamic Reconfiguration Reference Manual.
If you are using AP version 2.1, the operating environment automatically switches
off the active disk controllers on outgoing boards during the complete-detach phase
of DR. If you are using AP version 2.0, you need to manually switch off the active
disk controllers before you start the complete-detach phase. For the Solaris 8
operating environment, you must upgrade to AP version 2.3. For more information
about DR and AP interaction, see the Sun Enterprise Servers Alternate Pathing 2.3
User’s Guide. For more information about AP and SDS, refer to the RAS Companion.
DR and IDNs
The IDN feature allows domains to communicate to each other over the interconnect
by using standard TCP/IP protocols. To provide this capability, the IDN feature
maintains detailed information about the hardware configuration and is dependent
on the hardware configuration of the member domains.
Chapter 9
Page 26

The DR feature allows the user to reconfigure the hardware while the operating
system is running. Thus, DR is required to make an IDN aware of the changes so
that the IDN can maintain consistent, up-to-date information about the hardware.
DR accomplishes this requirement by unlinking the domain from the IDN,
reconfiguring the hardware, and relinking the domain to the IDN. The unlinking
and relinking of the domain occurs during the Complete Attach or Complete Detach
phase of the DR operation. DR determines if the domain is a member of an IDN, and
it performs the unlinking and relinking of the domain during the Complete phase.
No interaction is needed by the user. However, if a member domain is in an unkown
state (that is, AWOL), the unlink operation will not succeed, especially if the domain
is in a non-responsive state. If one or more domains were in an unknown state when
you attempted to perform a DR operation, you must unlink all of the AWOL
domains within the IDN in a single step (that is, use the domain_unlink(1M)
command with all of the names of the AWOL domains).
During the period in which the domain is not linked to the IDN, no transmission to
or from the domain are allowed. In contrast, the domain remains a member of the
IDN as defined in the domain_config(4) file on the SSP, and the domain continues
to be listed as a member of the IDN when you use the domain_status(1M)
command.
Note – Due to the interaction between the DR and IDN features, only one DR or
IDN operation is allowed at any given time within a single Sun Enterprise 10000
system.
Certain conditions may require you to use the force option. In the context of a DR
operation, you can use the DR force option, which is passed to the
domain_unlink(1M) command. When used on a domain that is a member of an
IDN, the force option should be used with extreme care. See the Sun Enterprise 10000
Inter-Domain Networks User Guide for more information about the force option and its
use.
RPC Time-Out or Loss of Connection
The dr_daemon(1M), which runs in each domain, communicates with Hostview
and the dr(1M) shell application (both of which run on the SSP) by way of Remote
Procedure Calls (RPCs). If an RPC time-out or connection failure is reported during
10 Sun Enterprise 10000 Dynamic Reconfiguration User Guide • February 2000
Page 27
a DR operation, check the domain. The daemon must be configured in the
/etc/inetd.conf file of the domain. The following line (which appears on a single
line) must be present in the file:
300326/4 tli rpc/tcp wait root \
/platform/SUNW,Ultra-Enterprise-10000/lib/dr_daemon/ dr_daemon
If the DR daemon is configured in /etc/inetd.conf, kill the dr_daemon(1M) if it
is currently running. In addition, send a HUP signal to the inetd(1M) daemon to
cause it to re-read the inetd.conf(4) configuration file:
# kill dr_daemon_pid
# kill -HUP inetd_pid
In the first command, dr_daemon_pid is the process ID of the DR daemon. In the
second command, inetd_pid is the process ID of the inetd(1M)daemon. You can
check /var/adm/messages for possible error messages from inetd(1M)if it is
having trouble starting the dr_daemon(1M). The DR daemon executable file should
exist in the /platform/SUNW,Ultra-Enterprise-10000/lib directory.
At this point, try the DR operation again, starting from the beginning.
System Quiescence Operation
During a DR Detach operation on a system board with nonpageable OBP or kernel
memory, the operating environment is briefly quiesced; that is, all operating
environment and device activity on the domain centerplane must cease during the
critical phase of the operation. The quiescence only affects the target domain; other
domains in the system are not affected.
Before it can quiesce, the operating environment must temporarily suspend all
processes, processors, and device activities. If the operating environment cannot
quiesce, it displays its reasons, which may include the following:
■ Real-time processes are running in the domain.
■ A device that cannot be quiesced by the operating environment (that is, a
suspend-unsafe device) is open.
The conditions that cause processes not to suspend are generally temporary in
nature. You can retry the operation until the quiescence succeeds.
Chapter 11
Page 28

A quiescent failure due to real-time processes or open suspend-unsafe devices is
known as a forcible condition. You have the option of performing either a retry or
forced retry. When you force the quiescence, you give the operating environment
permission to continue with the quiescence even if forcible conditions are still
present.
Caution – Exercise care when using the force option.
If a real-time process is running, determine if suspending the process would produce
an adverse effect on the functions performed by the process. If not, you can force the
operating environment to quiesce. (To force a quiescence, you can either click the
Force button within Hostview as described in “To Detach a Board With Hostview”
on page 32, or enter the complete_detach command with the force option within
the dr(1M) shell application. Otherwise, you can abort the operation and try again
later.
If any suspend-unsafe device is open and cannot be closed, you can manually
suspend the device, and then force the operating environment to quiesce. After the
operating environment resumes, you can manually resume the device (see
“Suspend-Safe/Suspend-Unsafe Devices” on page 12).
If the operating environment fails to quiesce, pay close attention to the reasons for
the failure. If the operating environment encountered a transient condition—a failure
to suspend a process—you can try the operation again. If, however, the condition(s)
requires your approval (for example, a real-time process is running) or intervention
(for example, a suspend-unsafe device is open), you can force the operating
environment to quiesce.
Suspend-Safe/Suspend-Unsafe Devices
A suspend-safe device is one that does not access the domain centerplane (for
example, it does not access memory or interrupt the system) while the operating
environment is quiesced. A driver is considered suspend-safe if it supports
operating environment quiescence (suspend/resume) and guarantees that when a
suspend request is successfully completed, the device that the driver manages will
not attempt to access the domain centerplane, even if the device is open when the
suspend request is made. All other I/O devices are suspend-unsafe when open.
Note – At the time of this printing, the drivers released by Sun Microsystems™ that
are known to be suspend-safe are st, sd, isp, esp, fas, sbus, pci, pei-pci, qfe,
hme (SunFastEthernet™), nf (NPI-FDDI), qe (Quad Ethernet), le (Lance Ethernet),
the SSA drivers (soc, pln, and ssd), and the Sun StorEdge™ A5000 drivers (sf,
socal, ses).
12 Sun Enterprise 10000 Dynamic Reconfiguration User Guide • February 2000
Page 29
To enable device suspension for the soc and pln drivers, you must edit the /etc/
system file so that the pln_enable_detach_suspend and
soc_enable_detach_suspend variables are set to 1, as in the following example:
set pln:pln_enable_detach_suspend=1
set soc:soc_enable_detach_suspend=1
The operating environment refuses a quiesce request if a suspend-unsafe device is
open. If you can manually suspend the device, you can force the operating
environment to quiesce. To manually suspend the device, you may have to close the
device by killing the processes that have it open, ask users not to use the device, or
disconnect the cables. For example, if a device that allows asynchronous unsolicited
input is open, you can disconnect its cables prior to quiescing the operating
environment, preventing traffic from arriving at the device and the device from
accessing the domain centerplane. You can reconnect the cables after the operating
environment resumes. If you cannot make a device suspend its access to the domain
centerplane, you should not force the operating environment to quiesce. Doing so
could cause a domain to crash or hang. Instead, postpone the DR operation until the
suspend-unsafe device is no longer open.
Caution – If you attempt a forced quiesce operation while activity is occurring on a
suspend-unsafe device, the domain may hang. However, if the domain hangs, it will
not affect other domains that are running on the Sun Enterprise 10000 system.
Special Handling for Tape Devices
For the Solaris 8 operating environment, tape devices that are natively supported by
Sun Microsystems™ are suspend-safe and detach-safe (see st(7D) for a list of
natively-supported drives). If a system board that you are detaching contains a
natively-supported tape device, you can safely detach the board without suspending
the device. If you want to use a tape device that is not natively supported by Sun
Microsystems, you can use it, but you should make it detach-safe. To ensure correct
input/output and DR operations, you need to make a suitable entry in /kernel/
drv/st.conf with the ST_UNLOADABLE (0x0400) flag set in the entry (see st(7D)
for more information). After you update st.conf, you must reboot the domain to
process the new entry.
Chapter 13
Page 30

Special Handling of Sun StorEdge A3000
The Sun StorEdge™ A3000 (formerly known as the RSM Array 2000) has dual
controller paths with automatic load balancing and automatic failover. To detach a
system board that has one or both of the StorEdge A3000 controllers, the controllers
on the board that is being detached must be idle or offline. You can take these
controllers offline manually by using the rm6 or rdacutil programs before you
attempt to detach the system board.
DR and DDI
Not all drivers support the Sun Enterprise 10000 system Dynamic Reconfiguration
(DR) features. To support DR, a driver must be able to perform two basic DDI/DKI
(Device Driver Interface/Device Kernel Interface) functions, DDI_DETACH and
DDI_SUSPEND/DDI_RESUME. These two functions impact DR in different ways. The
DR driver verifies the support of these entry points within the I/O drivers by
verifying the existance of the D_HOTPLUG bit in the flags field of the cb_ops of the
I/O drivers.
DR and DDI_DETACH
You can detach a system board that hosts a device only if the driver for that device
supports the DDI_DETACH interface, or is not currently loaded. DDI_DETACH
provides the ability to detach a particular instance of a driver without impacting
other instances that are servicing other devices. A driver that supports DDI_DETACH
is called detach-safe; a driver that does not support DDI_DETACH is called detach-
unsafe.
Detaching a detach-unsafe driver that is loaded involves the following process.
■ Stopping all usage of the controller for the detach-unsafe device and all other
controllers of the same type on all of the boards in the domain.
Because the detach-unsafe driver must be unloaded, you must stop usage of that
controller type on all of the system boards in the domain. The remaining
controllers can be used again after the DR Detach is complete.
■ Using standard Solaris interfaces to manually close and to unload all such drivers
on the board.
See modload(1M) in the SunOS Reference Manual.
■ Detaching the system board in the normal fashion.
14 Sun Enterprise 10000 Dynamic Reconfiguration User Guide • February 2000
Page 31

If you cannot accomplish the above process, you can reboot the domain with the
board blacklisted (see blacklist(4)), so the board can be removed later.
Note – Many third-party drivers (those purchased from vendors other than Sun
Microsystems) do not support the standard Solaris modunload(1M) interface.
Conditions that invoke the functions occur infrequently during normal operation
and the functions are sometimes missing or work improperly. Sun Microsystems
suggests that you test these driver functions during the qualification and installation
phases of any third-party device.
DR and DDI_SUSPEND/DDI_RESUME
To perform a DR Detach of a board that contains nonpageable memory, the domain
must be quiesced. Memory can be detached only when all of the drivers throughout
the entire domain (not just on the board being detached) either support the
DDI_SUSPEND/DDI_RESUME driver interface, or are closed. Drivers that support
these DDI functions are called suspend-safe; drivers that do not are called suspend-
unsafe.
The most straightforward way to quiesce a domain is to close any suspend-unsafe
devices. For each network driver you must execute the ifconfig(1M) command
with its down parameter, then again with its unplumb parameter (see
ifconfig(1M) for more information).
Note – It should be possible to unplumb all network drivers. However, this action is
rarely tested in normal environments and may result in driver error conditions. If
you use DR, Sun Microsystems suggests that you test these driver functions during
the qualification and installation phases of any suspend-unsafe device.
If the system refuses to quiesce because a suspend-unsafe driver is open, you can force
the operating domain to quiesce. Doing so forces the operating environment to
permit the detach. Note that, although a detach can be forced to proceed when there
are open suspend-unsafe devices in the system, it is not possible to force a detach
when a detach-unsafe device resides on the board and its driver is loaded.
To successfully force the operating environment to quiesce, you must manually
quiesce the controller. Procedures to do that, if any, are device-specific. The device
must not transfer any data, reference memory, or generate interrupts during the
operation. Be sure to test any procedures used to quiesce the controller while it is
open prior to executing them on a production system.
Chapter 15
Page 32

Caution – Using the force option to quiesce the operating environment, without
first successfully quiescing the controller, can result in a domain failure and
subsequent reboot.
16 Sun Enterprise 10000 Dynamic Reconfiguration User Guide • February 2000
Page 33

CHAPTER
3
Using Dynamic Reconfiguration
Attaching a System Board
This section gives a broad overview of the actions that occur when you execute DR
Attach. For step-by-step instructions, see “To Attach a Board With Hostview”.
You can attach system boards that are present in the machine, powered on, and not
part of an active domain (that is, not being used by an operating environment).
These unattached boards may have been hot-swapped into the domain after the
domain was booted, blacklisted when the domain was booted, or detached from
another domain.
Note – If the system board has been hot-swapped into the domain, you should use
the thermcal_config(1M) command immediately after the board has been
powered on.
Prior to attaching a board, diagnostics are run on the board, requiring that at least
one processor be present on the board and not be blacklisted. After you have
selected an eligible board and a target domain, the DR Attach operation proceeds
through two operations: Init Attach and Complete Attach.
Init Attach
During the Init Attach phase, DR diagnoses and configures the selected board,
preparing it and its devices for attachment to the operating environment. During
this phase, DR performs the following tasks:
17
Page 34

■ Adds the board to the board list of the target domain in the domain_config(4)
file on the SSP.
■ Runs hpost -H on the board to configure it. hpost(1M) isolates the board on the
Sun Enterprise 10000 system centerplane by placing it into a single-board
hardware domain (see hpost(1M)).
■ Runs obp_helper -H which loads download_helper to the board, and takes
the processors on the board out of reset mode, allowing them to spin in
download_helper.
■ Reconfigures the centerplane and board domain mask registers, placing the board
in the target hardware domain.
DR displays the output of these hpost(1M) and obp_helper(1M) operations,
including the steps that succeeded and those that caused exceptions.
If hpost(1M) and obp_helper(1M) succeed, the operating system is notified and
requests OBP to probe the board. The operating environment then scans the OBP
device tree and adds the devices to its configuration, but the drivers are not loaded.
After the Init Attach phase is completed, the OBP board configuration can be
displayed to confirm which devices are present on the board. You can then enter the
Complete Attach phase, or you can abort the operation.
If you abort the operation, DR removes the board configuration from the operating
environment data structures and removes the board from the domain_config(4)
file, leaving the board in a state where it is not assigned to any domain. The board
can then be removed from the system by using hot swap, left in the system
unattached, or attached at a later time.
Complete Attach
During the Complete Attach phase, DR attempts to complete the attach operation by
making the resources that are hosted by the new system board available to the
operating environment. If a problem occurs that prevents the attachment of any
device on the board, the dr_daemon(1M) (described in the Sun Enterprise 10000
Dynamic Reconfiguration Reference Manual) logs that problem in the system message
buffer. To determine which devices were successfully attached, display and check
the domain configuration for the board.
After a board is successfully attached, you have the option of reconfiguring the I/O
devices. See “Reconfiguration After a DR Operation” on page 7 for more
information. This operation can take several minutes to complete.
18 Sun Enterprise 10000 Dynamic Reconfiguration User Guide • February 2000
Page 35

Attach Buttons
When you perform an attach operation using the Hostview GUI (which
transparently calls a separate executable: drview(1M)), the following buttons
appear at various times during the attach process:
■ init attach – Begins the attach operation (see “Init Attach” on page 17). After the
operation has completed successfully, the label on this button changes to
complete.
■ complete – Completes the attach operation (see “Complete Attach” on page 18).
■ reconfig – Automatically reconfigures the device directories in the domain. You
may want to run the reconfiguration operation after attaching a board (see
“Reconfiguration After a DR Operation” on page 7).
■ abort – Cancels the attach operation. This button is enabled after the Init Attach
operation has been successfully completed (see “Init Attach” on page 17).
■ dismiss – Terminates the step that is currently in progress, but leaves the board in
its current state (Present, Init Attach, In Use). You can remove the DR Attach
window by choosing dismiss at any point during the attach operation. The
dismiss button terminates any work being done on the SSP for the attach
operation. For example, if hpost(1M) is running when you click dismiss, that
hpost(1M) process is terminated. Note that dismiss does not terminate work
being done on the host by way of RPCs to the dr_daemon(1M). After an RPC is
initiated, the host completes the RPC regardless of whether or not the calling
program is waiting for the RPC to finish. The host dr_daemon(1M) keeps track
of the progress of the attach operation. After the Init Attach operation completes
successfully, it remembers this state. Therefore, you can dismiss the window, then
return to the DR operation later and complete or abort the attach.
■ help – Accesses online information regarding DR Attach operations.
▼ To Attach a Board With Hostview
Note – Before you perform the following steps, you should read “Attaching a
System Board” on page 17.
1. From Hostview, select the proper view of the system from the View menu.
Choose the view that contains the board you want to attach.
2. From Hostview, select the board you want to attach.
3. From Hostview, choose Configuration > Board > Attach.
The Attach Board and Domain Selection window is displayed (
page 20).
FIGURE 3-1 on
Chapter 19
Page 36
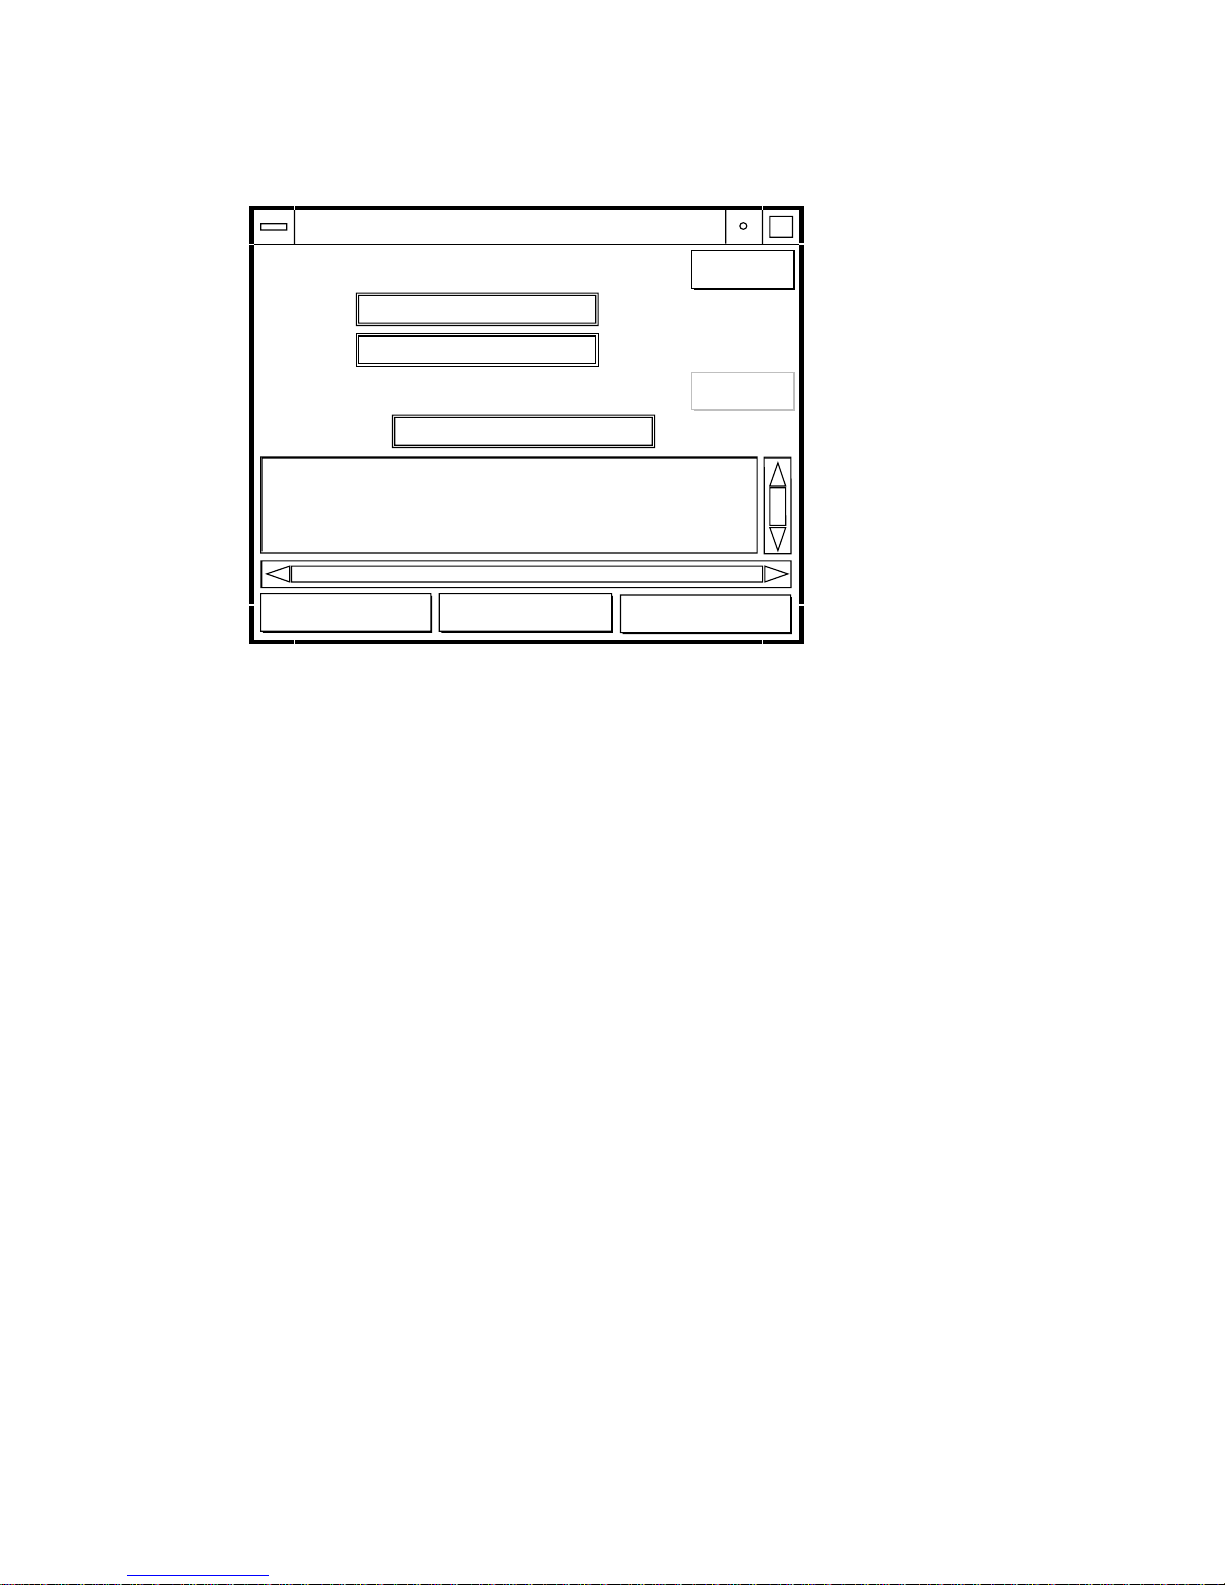
attach - Board and Domain Selection
Select board in main window. Then click "Select".
Board
Domain
Select domain in main window. Then click "Select".
Target domain
dismiss
FIGURE 3-1 Attach Board and Domain Selection Window
select
select
helpexecute
4. Click the top select button.
The Board field is automatically filled in for you. If the board is part of a domain, the
Domain field is also filled in for you. (You can also manually edit these fields.)
5. In the main Hostview window, use the View menu to select the domain to which
you want to attach the board.
6. Click the bottom Select button.
The Target Domain field is automatically filled in for you. (You can also manually
edit that field.)
7. Click the execute button.
If any errors occur, the error messages appear in the main Hostview window.
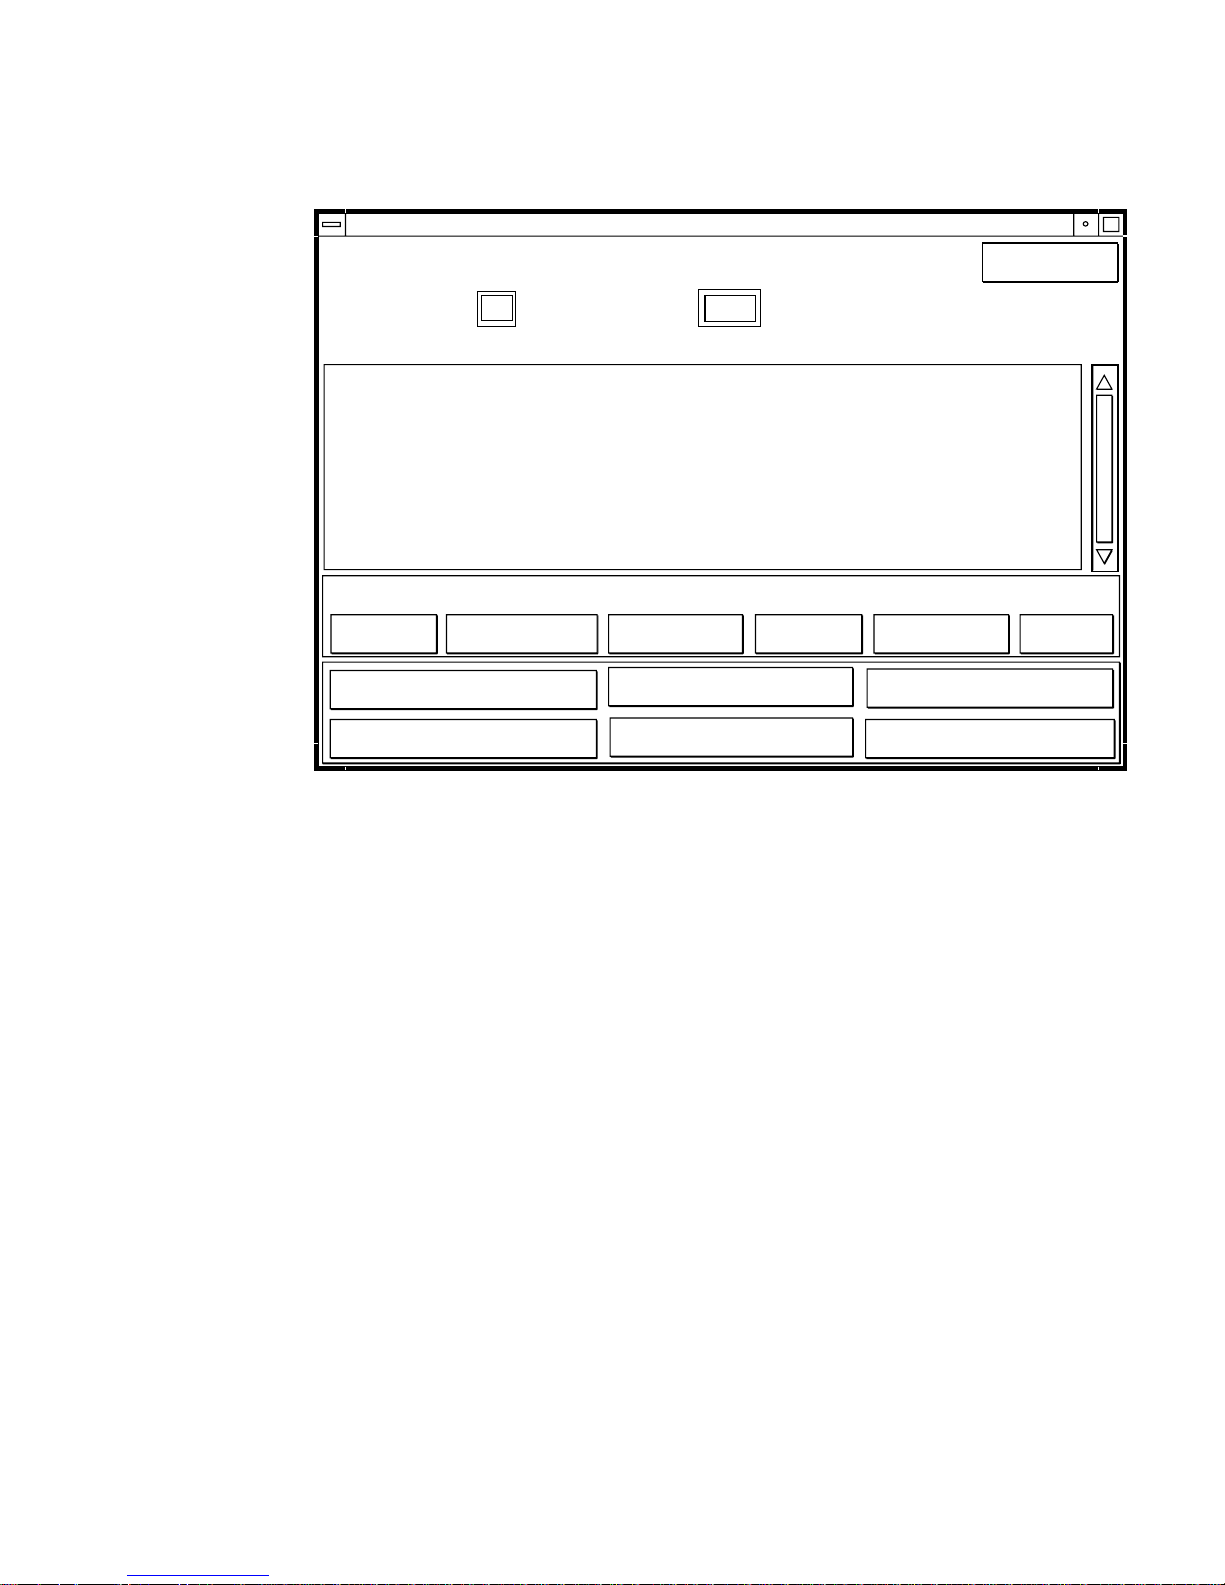
Otherwise, the Dynamic Reconfiguration window is displayed with the init attach
button visible (
FIGURE 3-2 on page 21).
20 Sun Enterprise 10000 Dynamic Reconfiguration User Guide • February 2000
Page 37
Dynamic Reconfiguration
DR - Attach Board
Attaching Board: Target Domain: xf25
Information:
Checking environment . . .
Establishing Control Board Server connection . . .
Initializing SSP SNMP MIB . . .
Establishing communication with DR daemon . . .
xf2: System Status - Summary
BOARD # : 5 6 7 physically present.
BOARD # : 0 2 4 being used by the system.
System Information
properties
cpu memory
init attach
abort
FIGURE 3-2 Dynamic Reconfiguration Window With init attach Button
device
dismiss
obp
allunsafe
reconfig
help
8. Click the init attach button.
Clicking on the init attach button begins the first phase of the board attach process.
First, the system updates the SSP domain.config(4) file by adding the system
board to the board list of the target domain. Next, the system uses hpost(1M) to
self-test the system board. After the self-test is complete, the board is made visible to
the running target domain by merging it into the hardware domain by modifying
the centerplane and the system board hardware registers. Finally, during the
conclusion of the init attach, OBP probes the new board to discover what CPU, I/O,
and memory resources are present on the board. When this phase is finished, the
caption on the button changes to complete. Before you click the complete button,
however, you may want to view the domain information to verify that you want to
proceed, as described in “Viewing Domain Information” on page 37.
Typically, the Init Attach operation can take a few minutes to complete. Output from
the hpost(1M) command is directed to the Information pane of the Dynamic
Reconfiguration window.
If the Init Attach fails, look for the cause in the output in the Information pane. After
you have determined the cause, you may want to choose Init Attach again.
If the Init Attach operation completes successfully, the window changes to that
shown in
FIGURE 3-3 on page 22, with the complete button enabled.
Chapter 21
Page 38
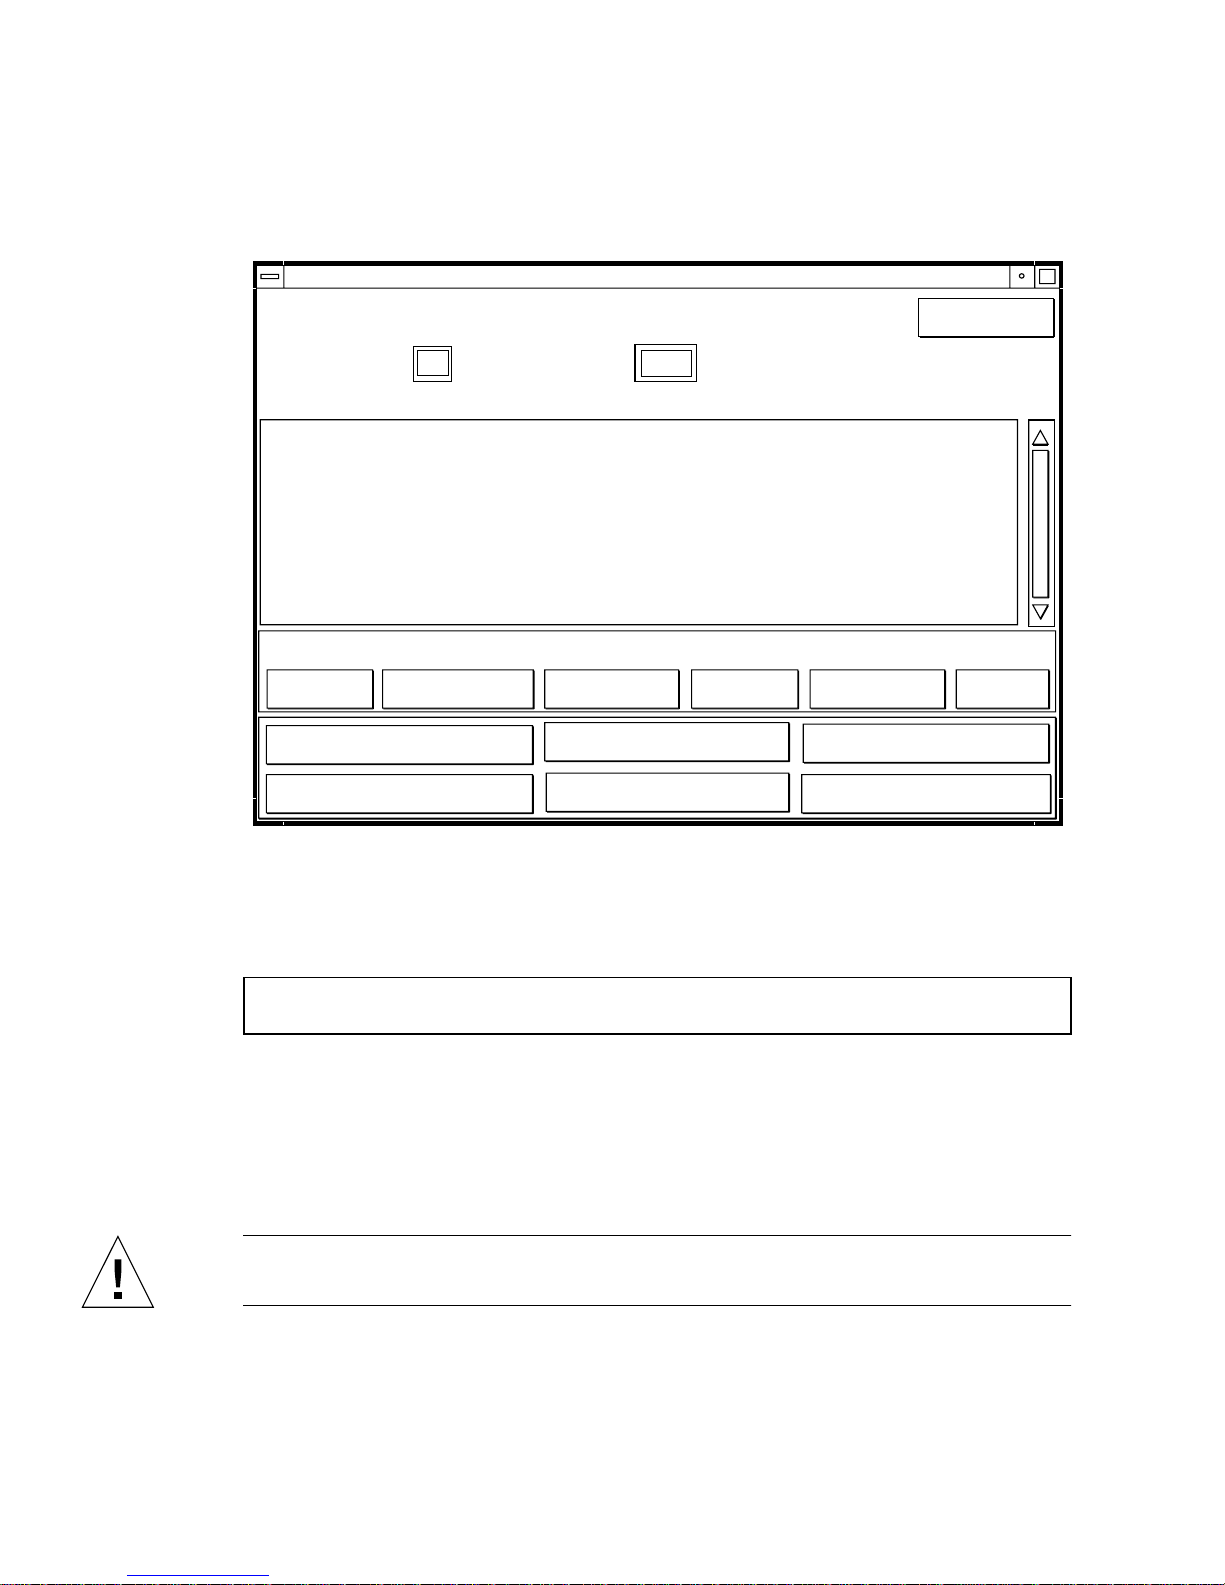
9. Click the complete button.
Dynamic Reconfiguration
DR - Attach Board
Attaching Board: Target Domain: xf25
Information:
POST (level=16, verbose=20, -H0, 0020) execution time 2:52
hpost is complete.
obp_helper -H -m20
Board debut complete.
Reconfiguring domain mask registers.
Board attachment initiated successfully.
Ready to COMPLETE board attachment.
System Information
properties
cpu memory
complete
abort
FIGURE 3-3 Dynamic Reconfiguration Window With the complete Button
device
dismiss
obp
allunsafe
reconfig
help
The complete operation normally takes less than one minute to finish. When it has
successfully completed, DR displays the following message:
Board attachment completed successfully
The system board resources—processors, memory, and I/O devices—are now
available to the operating system.
You can view the domain information about the newly attached board by using the
buttons (CPU, Memory, Device, and so forth), as described in “Viewing Domain
Information” on page 37.
Caution – Before you choose the reconfig button, be sure to read “Reconfiguration
After a DR Operation” on page 7.
10. Click the dismiss button.
The DR Attach operation is complete.
22 Sun Enterprise 10000 Dynamic Reconfiguration User Guide • February 2000
Page 39

▼ To Attach a Board By Using dr(1M)
Note – The following procedure explains how to attach a board by using dr(1M)
with SSP version 3.1, or higher. If you are using SSP version 3.0, refer to a previous
version of the Dynamic Reconfiguration User’s Guide.
Before you perform the following steps, read “Attaching a System Board” on page
17. The process of attaching a board is very similar whether you use Hostview or
dr(1M). The basic concepts are not repeated in this section.
The dr(1M) shell was introduced in Chapter 1. A quick reference guide is available
in the dr(1M) application by using the help command.
1. Set SUNW_HOSTNAME to the appropriate domain by using the
domain_switch(1M) command.
% domain_switch domain_name
2. Use the dr(1M) command in an SSP Window to bring up the dr(1M) prompt.
In the following example, the target domain is called xf3.
% dr
Checking environment...
Establishing Control Board Server connection...
Initializing SSP SNMP MIB...
Establishing communication with DR daemon...
xf3: Domain Status - Summary
BOARD #: 0 1 2 5 6 8 9 10 11 13 physically present.
BOARD #: 4 7 being used by the domain.
dr>
Chapter 23
Page 40

3. Begin the init_attach(1M) operation for the designated board.
In this example, board 6 is being attached to xf3 domain.
dr> init_attach 6
Initiate attaching board 6 to domain xf3.
Adding board 6 to domain_config file.
/opt/SUNWssp/bin/hpost -H40,28
Opening SNMP server library...
Significant contents of /export/home/ssp/.postrc:
blacklist_file ./bf
redlist_file ./rf
Reading centerplane asics to obtain bus configuration...
Bus configuration established as 3F.
phase cplane_isolate: CP domain cluster mask clear...
...
phase final_config: Final configuration...
Configuring in 3F, FOM = 2048.00: 4 procs, 4 SCards, 1024 MBytes.
Creating OBP handoff structures...
Configured in 3F with 4 processors, 4 SBus cards, 1024 MBytes
memory.
Interconnect frequency is 83.294 MHz, from SNMP MIB.
Processor frequency is 166.631 MHz, from SNMP MIB.
Boot processor is 6.0 = 24
POST (level=16, verbose=20, -H28,0040) execution time 3:07
hpost is complete.
obp_helper -H -m24
Board debut complete.
Reconfiguring domain mask registers.
Board attachment initiated successfully.
Ready to COMPLETE board attachment.
4. Abort or complete the attach operation.
■ After the system successfully completes the init_attach(1M) operation, you
can use the drshow(1M) OBP display to see an inventory of the board resources.
dr> drshow board_number OBP
■ If you wish to abort the attach operation, use the abort_attach(1M) command.
dr> abort_attach board_number
24 Sun Enterprise 10000 Dynamic Reconfiguration User Guide • February 2000
Page 41

■ If you wish to complete the board attach operation, use the
complete_attach(1M) command.
dr> complete_attach 6
Completing attach for board 6.
...Checking IDN state of domain_name_a : UP
Issuing IDN UNLINK (domain_name_a)
Verifying IDN UNLINK...
IDN (XM) UNLINK succeeded (domain_name)
...Checking IDN state of domain_name_a : UP
...Checking IDN state of domain_name_b : UP
Initiating IDN LINK...
IDN LINK succeeded (domain_name_a + domain_name_b)
Board attachment completed successfully.
dr>
After you successfully attach the board, all of the drshow(1M) displays become
available.
5. Use the drshow(1M) to display the I/O information for the newly attached board.
dr> drshow 6 IO
SBus Controllers and Devices for Board 6
---------------------- Sbus 0 : Slot 0 : SUNW,pln0 -------------
device opens name usage
------ ----- ---- ----ssd0 0 /dev/dsk/c1t0d0s0
ssd16 0 /dev/dsk/c1t1d0s0
ssd32 0 /dev/dsk/c1t2d0s0
ssd48 0 /dev/dsk/c1t3d0s0
ssd64 0 /dev/dsk/c1t4d0s0
ssd80 0 /dev/dsk/c1t5d0s0
---------------------- Sbus 0 : Slot 1 : SUNW,pln2 -------------
device opens name usage
------ ----- ---- ----ssd96 0 /dev/dsk/c2t0d0s0
ssd97 0 /dev/dsk/c2t0d1s0
...
Chapter 25
Page 42

6. Type exit to terminate this dr(1M) session.
dr> exit
%
The SSP login shell prompt is again displayed.
Detaching a System Board
This section gives a broad overview of the actions that occur when you execute DR
Detach. For step-by-step instructions, see “To Detach a Board With Hostview” on
page 32.
System boards that are currently being used by the operating environment can be
detached if they meet the requirements covered in “Configuration for DR Detach”
on page 4. After you select an eligible board, you can detach that board by
performing two operations: Drain and Complete Detach.
Drain
The primary function of the Drain operation is to determine how the board’s
memory is to be vacated by the operating environment and, if required, to select a
target memory area for copying the nonpageable memory on a board. If a suitable
target memory area is not available when the drain operation is requested, the
request is denied. If the drain is rejected for this reason, you can continue to retry
until target memory is available. See “Configuration for DR Detach” on page 4.
After the Drain operation is started, the pageable memory on the board is flushed to
a disk, which removes it from use by the domain. Whenever a page of memory
becomes free, that page is locked from further use. The drain has no noticeable
impact on the processes using the CPU and I/O resources on the board. However,
less memory is available to the domain.
Note – After memory is drained, enough memory and swap space must remain in
the domain to accommodate the current workloads.
26 Sun Enterprise 10000 Dynamic Reconfiguration User Guide • February 2000
Page 43

During the drain period, Hostview and dr(1M) are available to monitor the detach
progress. You can view the current status of the drain operation, including the
number of memory pages remaining to be drained, and the usage of devices on the
board. With this information, you can prepare the domain for detaching the
remaining board devices.
If you decide not to proceed with the detach operation, you can abort the operation,
and the memory on the board is returned to regular usage. You can also abort the
operation during the drain process or after the drain has been completed. If extreme
memory pressure exists during the drain, you will see little, or no, progression in the
percentage of drained pages, and you may want to abort the drain and wait until the
workload on the domain has decreased, enabling it to accommodate the reduction in
memory.
The drain operation is complete when all of the memory pages are free from usage.
You can then complete the detach operation.
Complete Detach
Before you can complete the detach operation, you must terminate all usage of board
resources (processors, memory, and I/O devices). DR terminates the use of memory,
processors, and network devices automatically, but you must terminate the use of all
non-network I/O devices.
Note – To identify the components that are on the board to be detached, use
drshow(1M), which is an option of the dr(1M) command, or use the display
windows in Hostview (select the Configuration menu and then choose the Board
pull-down menu and the Detach menu item). Another somewhat less informative
way to identify the components is to use the prtdiag(1M) command on the
domain.
Network Devices
DR automatically terminates usage of all network interfaces on the board that is
being detached. When you complete the detach operation, the dr_daemon(1M)
identifies all configured interfaces on the board being detached and issues the
following ifconfig(1M) commands on each such interface.
ifconfig interface down
ifconfig interface unplumb
Chapter 27
Page 44
Additionally, if FDDI interfaces are detached, DR kills the FDDI network monitoring
daemon before you perform the detach operation. DR then restarts it after the detach
is complete. Note that the /usr/sbin/nf_snmd daemon for nf devices is neither
started nor stopped when a board that contains a FDDI interface is attached.
DR does not execute these commands on a board that contains a network interface
that fits any of the following conditions. In these cases, the detach operation fails
and DR displays an error message.
■ The interface is the primary network interface for the domain; that is, the
interface whose IP address corresponds to the network interface name contained
in the file /etc/nodename. Note that bringing down the primary network
interface for the domain prevents network information name services from
operating, which results in the inability to make network connections to remote
hosts using applications such as ftp(1), rsh(1), rcp(1), rlogin(1). NFS
client and server operations are also affected.
■ The interface is on the same subnet as the SSP host for the system; that is, the
subnet of the IP address that corresponds to the SSP host name found in
/etc/ssphostname. Bringing down this interface interrupts communication
between the host and SSP. Since DR operations are initiated on the SSP, control of
the detach process would be lost. (Note that the /etc/ssphostname file contains
the name of the SSP that controls the host; therefore, if you rename the SSP, the
/etc/ssphostname must be manually updated.)
■ The interface is the active alternate for an Alternate Pathing (AP) metadevice
when the AP metadevice is plumbed. Interfaces used by AP should not be the
active path when the board is being detached. AP 2.1 performs the switch
automatically; however, you can manually switch the active path to an interface
that is not on the board being detached. If no such path exists, manually execute
the ifconfig down and ifconfig unplumb commands on the AP interface.
(To manually switch an active path, use the apconfig(1M) command.)
Caution – Unmounting network interfaces may affect NFS client systems.
Non-Network Devices
All non-network devices must be closed before they are detached. In the Hostview
device display and in the drshow(1M) I/O listing, there is an open count field that
indicates how many processes have opened particular devices. To see which
processes have these devices open, use the fuser(1M) command on the domain.
You must perform certain tasks for non-network devices. Although the following list
of tasks implies a sequence of order, strict adherance to the order is not necessary.
28 Sun Enterprise 10000 Dynamic Reconfiguration User Guide • February 2000
Page 45

1. If the redundancy features of Alternate Pathing or Solstice DiskSuite mirroring
are used to access a device connected to the board, reconfigure these subsystems
so that the device or network is accessible using controllers on other system
boards. Note that for Alternate Pathing 2.1, the system automatically switches the
disk devices to an alternate interface if one is available.
2. Unmount file systems, including Solstice DiskSuite metadevices that have a
board-resident partition (for example, umount /partit).
3. Remove Alternate Pathing or Solstice DiskSuite databases from board-resident
partitions. The location of Alternate Pathing or Solstice DiskSuite databases is
explicitly chosen by the user and can be changed.
4. Remove any private regions used by Sun Enterprise Volume Manager™ or Veritas
Volume Manager. Volume manager by default uses a private region on each
device that it controls, so such devices must be removed from volume manager
control before they can be detached.
5. Remove disk partitions from the swap configuration by using swap(1M).
6. Either kill any process that directly opens a device or raw partition, or direct it to
close the open device on the board.
7. If a detach-unsafe device is present on the board, close all instances of the device
and use modunload(1M) to unload the driver.
8. Kill all of the real-time processes that are open if the operating environment must
be suspended.
Caution – Unmounting shared file systems by using the share(1M) utility may
affect NFS client systems.
Processes
You must perform certain tasks for non-network devices. Although the following list
of tasks implies a sequence of order, strict adherance to the order is not necessary.
1. If the operating environment must be suspended, kill all of the real-time
processes that are open.
2. Kill any processes that are bound to on-board processors.
When a board is detached, all processes bound to its processors are automatically
unbound. You can use pbind(1M) to rebind them to other processors.
Chapter 29
Page 46

Processors
The boot processor is responsible for servicing the tick-timer interrupts and for
maintaining the netcon BBSRAM buffer. Before detaching a board on which the boot
processor resides, the dr_daemon(1M) must assign the boot processor role to
another active (online) processor.
Finishing the Complete Detach Operation
After all board usage is terminated, you can perform the Complete Detach
operation. If a device is still in use at this time, the detach operation fails and the
device in use is reported. After you resolve the problem, you can perform the
Complete Detach operation again.
If the board that you want to detach contains nonpageable memory, the Complete
Detach operation may also fail due to quiescence problems, which are described in
“System Quiescence Operation” on page 11. After you resolve the quiescent
problem, you can again execute the complete detach operation.
If you decide that you do not want to proceed with the detach operation at this time,
you can abort the detach. The memory on a board is returned to normal usage and
detached board devices are reattached. If the system configuration was modified to
remove board usage (that is, file systems were unmounted and networks were
unplumbed), you must undo these modifications and return the devices to normal
operation.
After the board is successfully detached from the operating environment, it is
isolated from the centerplane. In addition, the board list is automatically updated in
the SSP domain_config(4) file.
You can now attach the board to another domain, power it off, and remove it by way
of hot-swapping, leaving it in the system unattached, or reattaching it at a later time.
30 Sun Enterprise 10000 Dynamic Reconfiguration User Guide • February 2000
Page 47

Hostview Detach Buttons
The Hostview detach window displays the following buttons at various times
during a detach operation:
TABLE 3-1 Hostview Buttons
Button Description
drain Drains the memory (see “Drain” on page 26). After the drain
operation is finished, the drain button becomes the complete
button.
complete Completes the detach operation after the board has been fully
drained (see “Complete Detach” on page 27).
force Permits you to complete the detach operation by forcibly quiescing
the domain (see “System Quiescence Operation” on page 11). If the
complete detach operation fails due to a forcible quiesce condition,
the force button is enabled.
reconfig Reconfigures device directories in a domain automatically. You may
want to run reconfig after permanently detaching a board. Use
reconfig with extreme caution (see “Reconfiguration After a DR
Operation” on page 7 for more information).
abort Cancels the DR operation, and returns the board to normal
operation. This button is enabled after the drain operation starts
and remains enabled until the complete detach operation starts. To
stop the draining of memory and cancel the detach, choose abort
(see “Detaching a System Board” on page 26).
dismiss Cancels any step that is in progress, and leaves the board in its
current state (In Use, drain, Present). At any point during the DR
Detach operation you can remove the DR Detach window by
choosing dismiss which terminates any work being done on the SSP
for the detach operation. Note that dismiss does not terminate work
being done on the host through RPC calls to the dr_daemon(1M).
After an RPC call is initiated, the host completes the RPC call
regardless of whether or not Hostview is waiting for the RPC call to
finish. The host dr_daemon(1M) keeps track of the progress of the
detach operation. After the drain is started, it remembers this state.
Therefore, you can dismiss the window and then return later to
either complete or abort the detach operation.
help Accesses online information regarding DR detach operations.
Chapter 31
Page 48
▼ To Detach a Board With Hostview
Note – Before you execute the following steps, read “Detaching a System Board” on
page 26.
1. From the Hostview window, use the View menu to select the domain in which the
board is attached.
2. Click the icon of the board you want to detach.
3. From the Hostview menu, choose Configuration > Board > Detach.
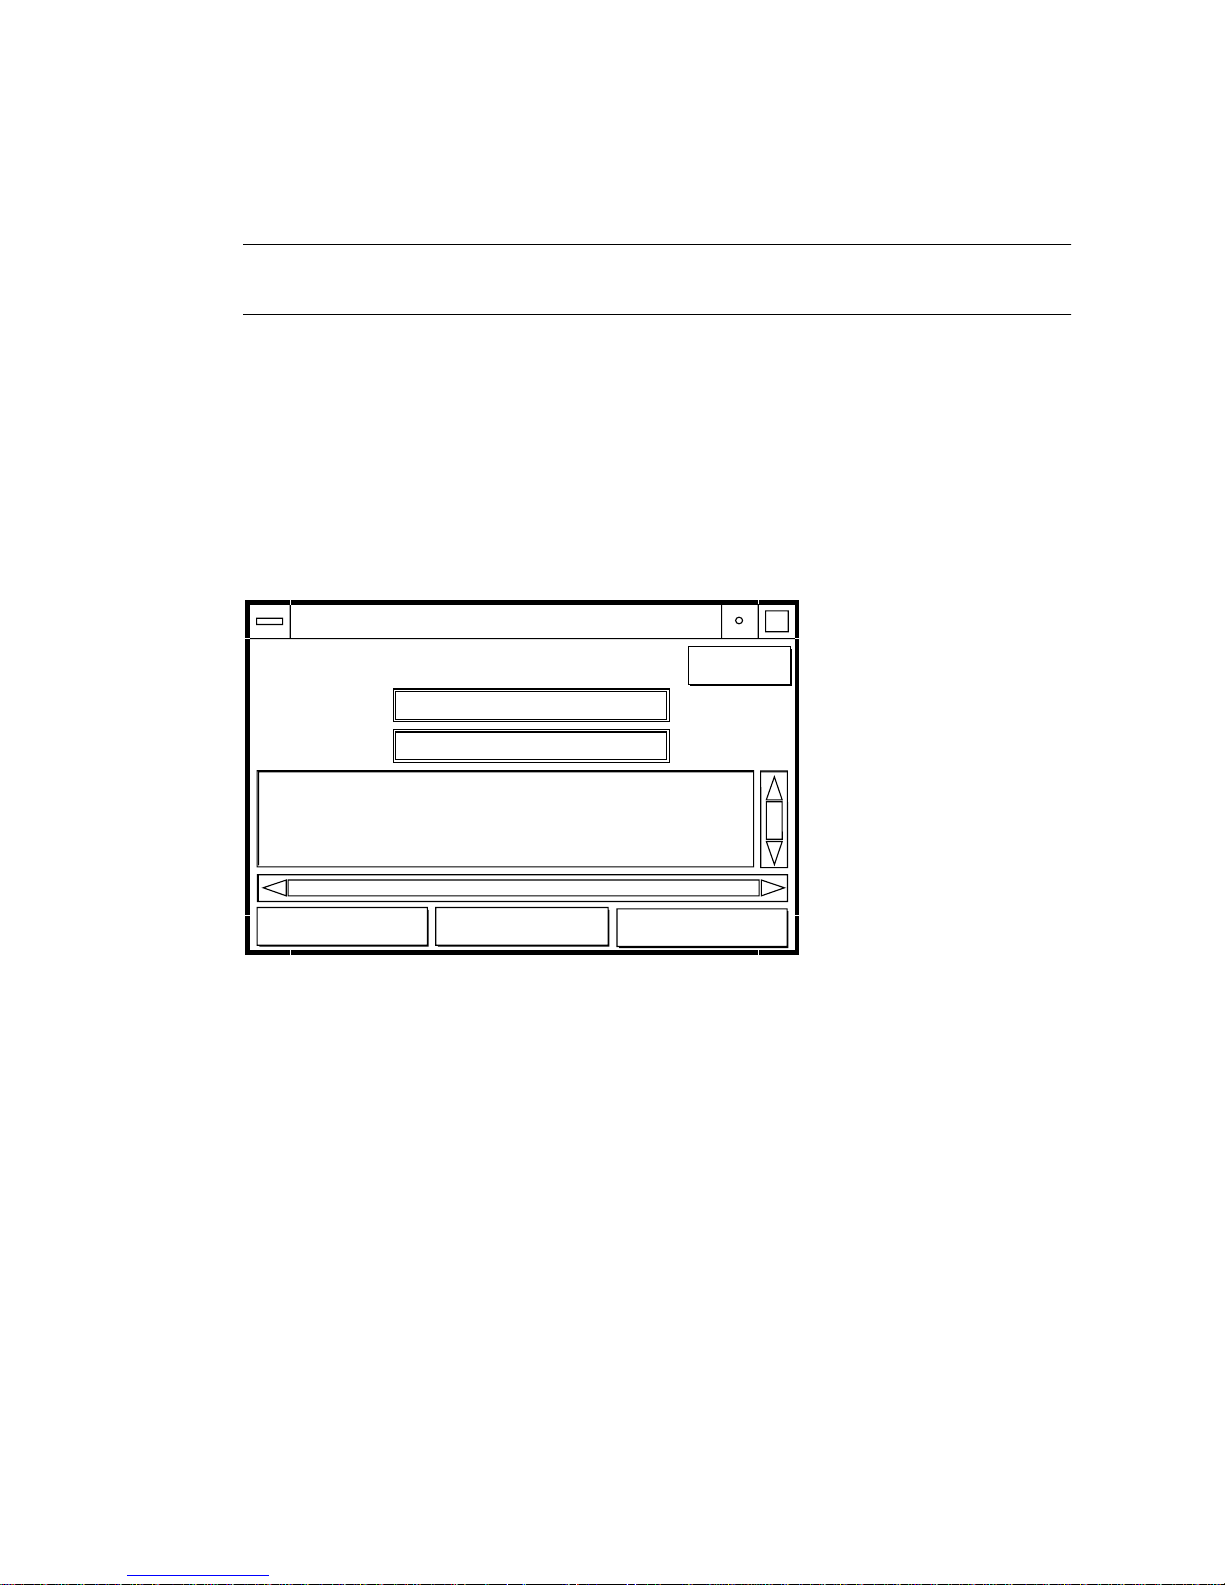
The Detach Board and Domain Selection window is displayed (
FIGURE 3-4 on
page 32).
detach - Board and Domain Selection
Select board in main window. Then click "Select".
Board
Source domain
dismiss helpexecute
FIGURE 3-4 Detach—Board and Domain Selection Window
select
4. Click the select button.
The Board and Source domain fields are automatically filled in for you. (You can also
manually edit these fields if you wish.)
5. Click the execute button.
If the target domain is not currently booted, the detach operation simply
manipulates the domain configuration file on the SSP. However, if the domain is
running, the following window is displayed (
32 Sun Enterprise 10000 Dynamic Reconfiguration User Guide • February 2000
FIGURE 3-5 on page 33).
Page 49
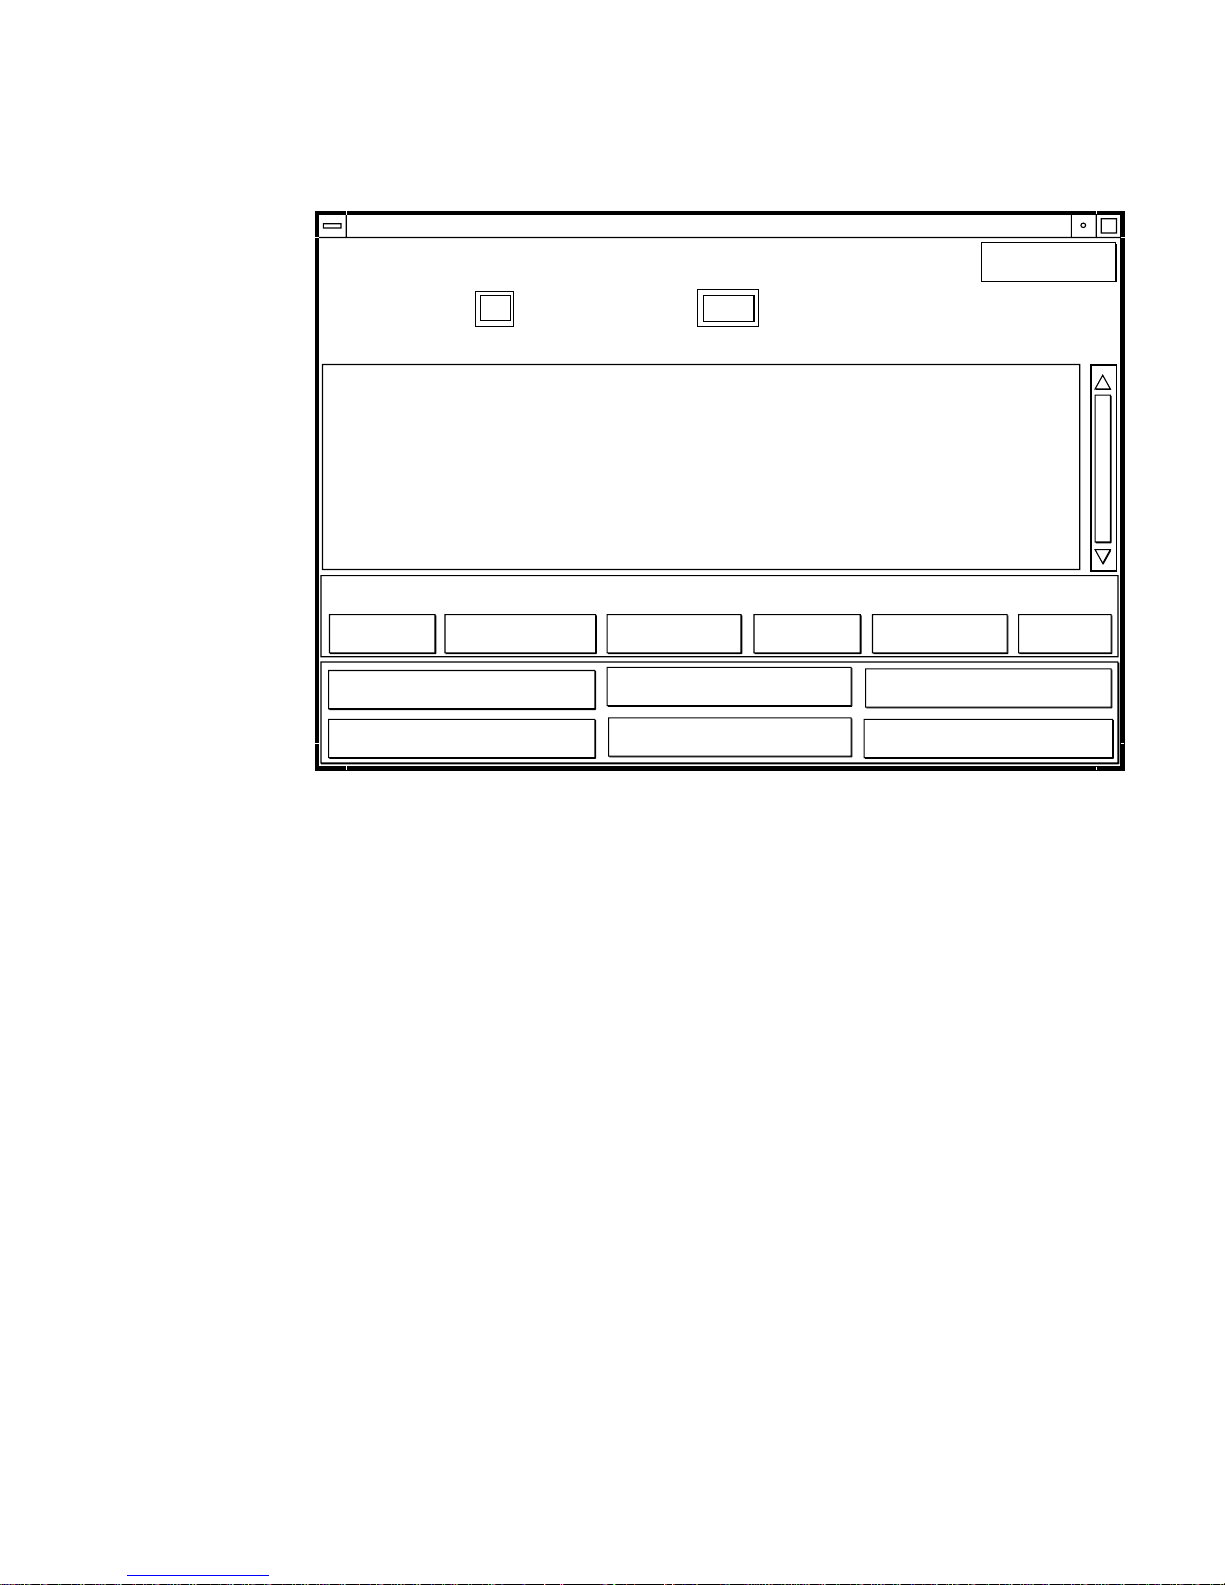
Dynamic Reconfiguration
DR - Detach Board
Detaching Board: Source Domain: xf25
Information:
Checking environment . . .
Establishing Control Board Server connection . . .
Initializing SSP SNMP MIB . . .
Establishing communication with DR daemon . . .
xf2: System Status - Summary
BOARD # : 6 7 physically present.
BOARD # : 0 2 4 5 being used by the system.
System Information
properties
cpu memory
drain
abort
FIGURE 3-5 Dynamic Reconfiguration Window With the drain Button
device
force
dismiss
obp
allunsafe
reconfig
help
6. Click the drain button.
Hostview begins draining memory. The memory information is displayed and
enables you to monitor the progress of the drain operation.
The memory drain statistics are automatically updated at periodic intervals if you
enable the Auto Update Domain Information Displays option in the DR Properties
window, as described in “Viewing Domain Information” on page 37.
If the drain operation fails, an explanatory message appears in the Information pane.
After you have determined the cause, and corrected it, you can choose drain again.
You may proceed to the next step without waiting; it does not depend on completion
of the drain.
7. To determine which devices are active on the board, click the device button.
The DR Device Configuration window is displayed and is periodically updated,
providing you with a current snapshot of device usage.
8. Terminate all usage of board-resident I/O devices.
For more information, see “Complete Detach” on page 27.
When the complete button is displayed, DR is finished draining the memory, and
you can proceed to the next step.
Chapter 33
Page 50
9. Select the complete button.
This operation may take several minutes to complete, particularly if an operating
environment quiescence is necessary. When it is finished, the board devices are
detached from the operating system.
If your attempt to complete the detach fails, it may be due to any of the following
reasons:
■ All online processors in the domain are on the board being detached.
■ The board you want to detach contains the last processor in the “default”
processor set. You must add an additional processor from another system board
before you retry the Detach operation.
■ Primary network interfaces are on the board being detached. You must stop all
usage of these networks manually (see “Complete Detach” on page 27).
■ All usage of the I/O devices on the board you want to detach has not been
stopped. The Information pane identifies the device on which the error was
encountered (see “Complete Detach” on page 27).
■ The operating environment quiescence failed. You must determine and resolve
the cause of the error (see “System Quiescence Operation” on page 11).
After you have resolved the reason for the failure, you can select either complete
or force to complete the detach. If there are no further problems, the board is
detached and reset. When the board is successfully detached, the following
message is displayed:
Board detachment completed successfully.
Caution – Before you choose the reconfig button, you should read “Reconfiguration
After a DR Operation” on page 7.
You can now either reconfigure the device directories or dismiss the Detach window.
The board can be powered off and removed by hot-swapping, or it can be attached
to another domain, left in the system unattached, or reattached at a later time.
▼ To Detach a Board By Using dr(1M)
Before you execute the following steps, read “Detaching a System Board” on page
26. The process of detaching a board is very similar with either Hostview or dr(1M).
The basic concepts are not repeated in this section. The dr(1M) program was
introduced in Chapter 1.
1. Set SUNW_HOSTNAME to the appropriate domain using the domain_switch(1M)
command.
34 Sun Enterprise 10000 Dynamic Reconfiguration User Guide • February 2000
Page 51

2. Use the dr(1M) command in an SSP Window to bring up the dr(1M) prompt.
In the following example, the target domain is called xf3.
% dr
Checking environment...
Establishing Control Board Server connection...
Initializing SSP SNMP MIB...
Establishing communication with DR daemon...
xf3: Domain Status - Summary
BOARD #: 0 1 2 5 6 8 9 10 11 13 physically present.
BOARD #: 4 7 being used by the domain.
dr>
Chapter 35
Page 52

3. Use the drain(1M) to drain the board.
dr> drain 6
Removing board 6 from domain_config file.
Start draining board 6
Board drain started. Retrieving Domain Info...
Bound Processes for Board 6
cpu user sys procs
--- ---- --- ---- 24 0 1
25 0 1
26 0 1
27 0 1
Active Devices for Board 6
device opens name usage
------ ----- ---- ----ssd384 0 /dev/rdsk/c5t0d0s4 AP database
Memory Drain for Board 6 - IN PROGRESS
Reduction= 1024 MBytes
Remaining in Domain= 1024 MBytes
Percent Complete= 99% (5696 KBytes remaining)
Drain operation started at Wed Oct 09 18:06:00 1996
Current time Wed Oct 09 18:06:34 1996
Memory Drain is in progress. When Drain has finished,
you may COMPLETE the board detach.
dr>
The drain(1M) command initiates the drain operation and returns to the shell
prompt immediately. You can monitor the progress of the drain operation with the
following command:
dr> drshow board_number drain
36 Sun Enterprise 10000 Dynamic Reconfiguration User Guide • February 2000
Page 53

Note – In addition, you can initiate the drain with the wait option of the
drain(1M) command, which does not return to the shell prompt until after the
drain has completed. Refer to drain(1M) for more information regarding the wait
option.
4. After the drain operation has finished successfully, use the
complete_detach(1M) command to complete the detach.
dr> complete_detach 6
Completing detach of board 6
...Checking IDN state of domain_name_a : UP
Issuing IDN UNLINK (domain_name_a)
Verifying IDN UNLINK...
IDN (XM) UNLINK succeeded (domain_name)
Operating System has detached the board.
Reconfiguring domain mask registers.
...Checking IDN state of domain_name_a : UP
...Checking IDN state of domain_name_b : UP
Initiating IDN LINK...
IDN LINK succeeded (domain_name_a + domain_name_b)
Board 6 placed into loopback.
Board detachment completed successfully.
dr>
If the Complete Detach fails with the message “Operating system failed to quiesce
due to forcible conditions” and if you have determined the root cause of the
quiescent failure, you can retry the complete_detach with the force option. (You
can see the console messages to help determine the cause of the quiescent failure.)
Refer to complete_detach(1M) for more information.
You can abort the Detach operation, rather than complete it. To do so, use the
command abort_detach board_number, instead of the complete_detach
command shown above.
Viewing Domain Information
Both dr(1M)and Hostview enable you to display information about the suspendunsafe devices as well as information about the board selected during DR
operations. For dr(1M), this information is accessible by using the drshow(1M)
command. From Hostview, this information is available by clicking the cpu, memory,
device, obp, and unsafe buttons in the attach or detach windows.
Chapter 37
Page 54
Note – You should view and use the domain information before you attempt to drain
the memory on the board.
The informational content is the same for both dr(1M) and Hostview. Note that the
cpu, memory, and device displays are only enabled when the board is attached to
the operating environment. When the cpu, memory, and device displays are
available, they always contain accurate information. The obp display shows the
information known to OBP, but it is not as detailed as the other three displays. This
section shows how to use the displays.
▼ To View Domain Information with Hostview
● Click on any of the System Info buttons during the DR operation (FIGURE 3-6).
System Info
cpu
FIGURE 3-6 System Information Buttons
memory
unsafe
allobpdevice
When you click any of these buttons, a window is displayed, and it remains open
until you click the dismiss button within that window.
If you click the All button, all of the currently enabled windows are displayed.
▼ To Specify How Windows Are Updated
1. Click the Properties button in the Dynamic Reconfiguration window (FIGURE 3-7).
38 Sun Enterprise 10000 Dynamic Reconfiguration User Guide • February 2000
Page 55
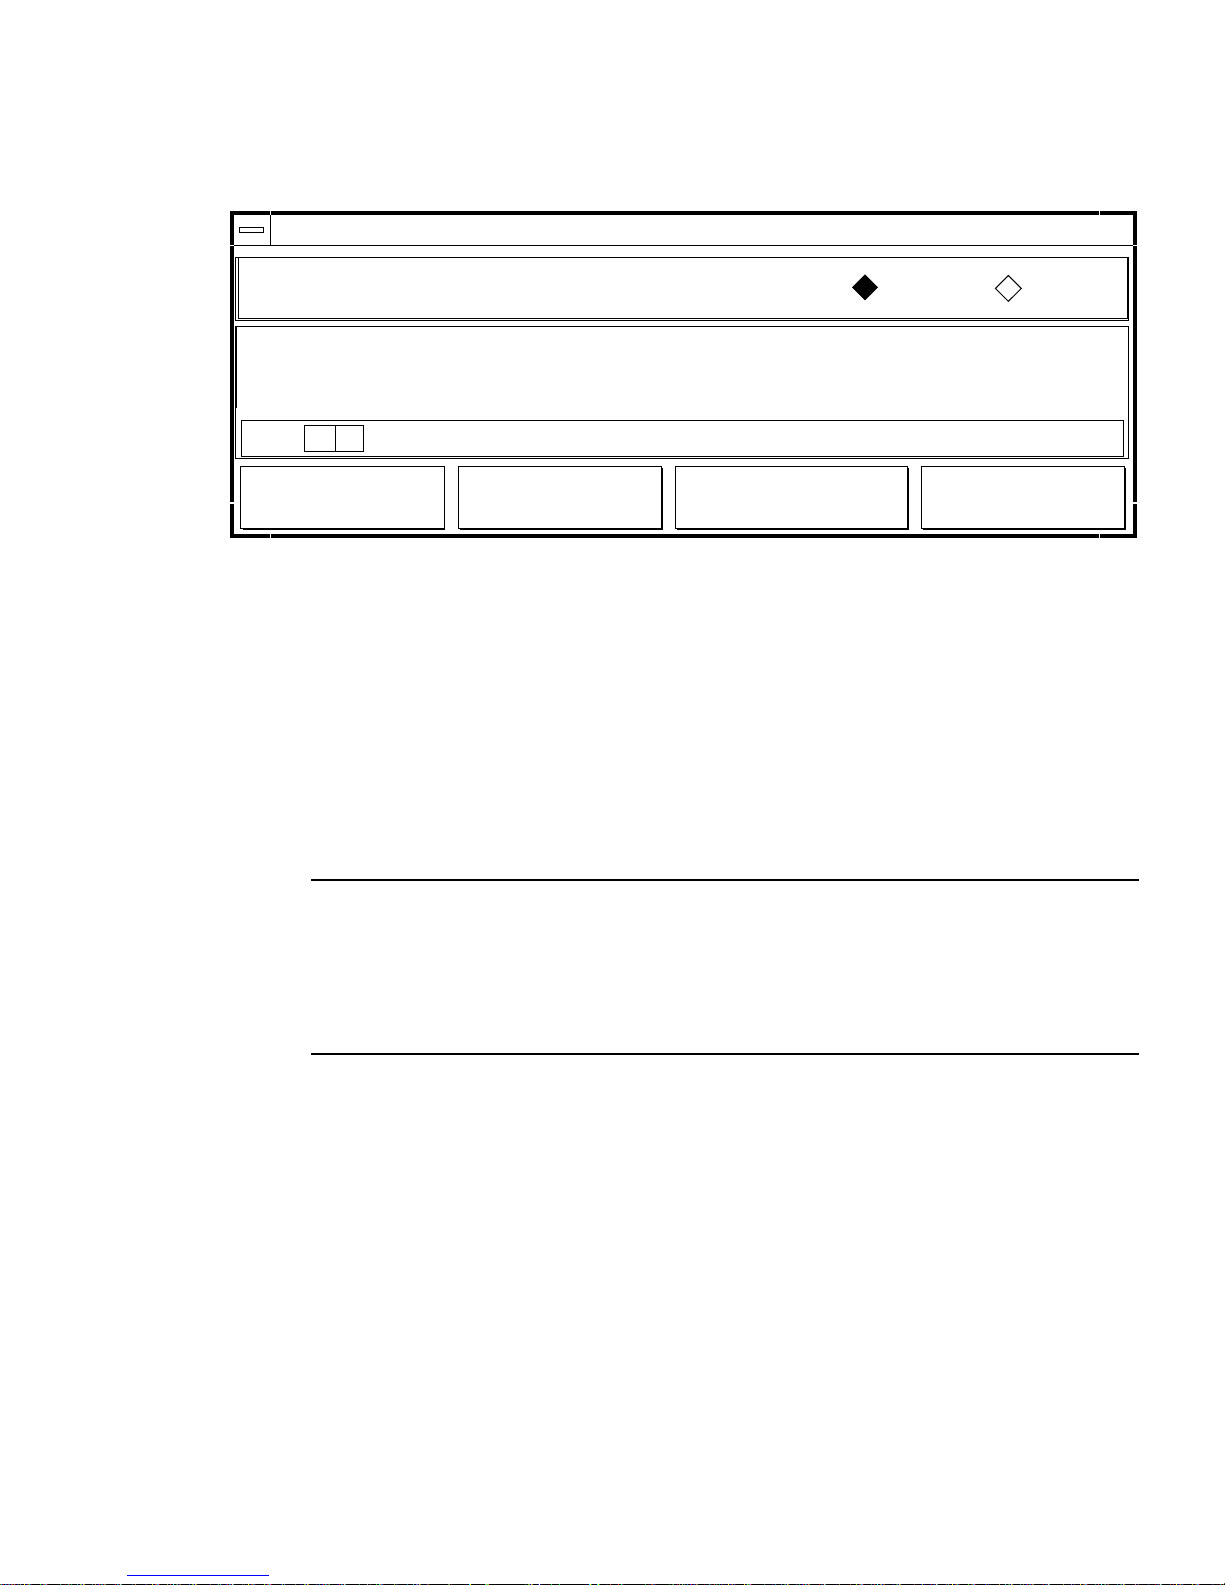
DR Unsafe Devices
Auto Update System Information Displays:
On Off
Update Interval (secs)
30
dismissresetsave
FIGURE 3-7 DR Properties Window
2. To cause displays to be updated, set Auto Update Domain Information Displays to
On (the default).
3. Set the Update Interval to a value (in seconds) to determine how often updates
occur.
If you set Auto Update Domain Information Displays to Off, the displays are not
updated; each display is a snapshot taken at the time the button was pressed.
4. Click the Save button to save the settings between Hostview invocations.
help
Note – When the update interval is set to a low value, such as 10 seconds, and
several information windows are displayed, responsiveness of the DR windows may
be degraded. This is especially true when device detail windows are displayed. Each
time an information window is updated, an RPC is issued to the dr_daemon(1M)
running on the domain. The dr_daemon is an iterative RPC server, so each RPC
request is run sequentially.
▼ To View DR CPU Configuration Information
● Click the cpu button.
The DR CPU Configuration window is displayed (
FIGURE 3-8).
Chapter 39
Page 56
DR CPU Configuration
CPU Configuration For Board 0
Processor Set
CPU STATUS ID COUNT USER SYS PROCS
0 online 1 9 0 2
1 online 1 9 0 2
2 online 1 9 0 2
3 online None 0 1 2 397
Board Threads
dismiss
FIGURE 3-8 DR CPU Configuration Window
The DR CPU Configuration window shows specific information about each
processor on the selected board.
TABLE 3-2 DR CPU Configuration Information
Heading Description
CPU ID Displays the ID number of the selected board.
STATUS Displays the status of the selected board (that is, whether the board
is online or offline.
Processor Set ID – Displays the ID number of the processor set to which the
processor belongs. If the processor belongs to the default set, the
word none appears in the box.
COUNT – Displays the number of CPUs in the processor set.
Bound Threads Displays the number of user and system bound threads and the
process IDs of the bound threads. Some operating system device
drivers may bind threads to processors to provide better servicing
of a device. Threads may be bound to a processor by use of the
pbind(1M) command.
PROCS Displays the process IDs of the user processes that are bound to a
CPU.
40 Sun Enterprise 10000 Dynamic Reconfiguration User Guide • February 2000
Page 57
▼ To View DR Memory Configuration Information
● Click the memory button.
The DR Memory Configuration window is displayed (
DR Memory Configuration
System Memory Sizes (MB)
Current System:
Attached Capacity:
dr-max-mem:
Memory Detach:
Memory Configuration for Board 0
Memory Size(MB):
Interleave Board:
Physical Pages:
2048
18432
63488
20480
65536
enabled
1024
no interleave
9437184-9568255
FIGURE 3-9).
Board contains all pageable memory.
Memory Drain for Board 0 ESTIMATED
Reduction:
Remaining in System:
1024
1024
Percent Complete:
Drain Start Time:
Current Time:
dismiss
FIGURE 3-9 DR Memory Configuration Window
Chapter 41
Page 58

The DR Memory Configuration window is divided into three panels:
TABLE 3-3 DR Memory Configuration Information
System Memory Sizes (Domain Memory Information)
Current Domain Total size of memory in the domain from all boards
Attach Capacity Amount of memory that can be added by using the DR Attach
operation
dr-max-mem Current value of the OBP variable dr-max-mem (for more
information, see “dr-max-mem Variable” on page 3)
Memory Configuration for Board 0 (Board-Level Information)
Memory Size (MB) Amount of memory on the selected board
Interleave Board Board that the selected board is interleaved with
Physical Pages Highest and lowest physical pages that are occupied by the memory
on this board (Small memory areas in the middle of this range may
not be used by this board. Note that DR is not able to detach boards
that have interleaved memory.)
Status/State (the display depends on the status/state of the operation)
Unavailable A suitable target memory area is not currently available.
Estimated The estimated values are displayed prior to starting the drain
operation. The values displayed reflect the memory configuration
that would result if the drain operation were started at this point.
Note that the estimated values may differ from the in-progress
values depending on the domain memory usage at the time drain
was started.
In Progress The drain operation is in progress.
Complete The drain operation is finished.
Memory Drain Information
Reduction Amount of memory to be removed from domain usage when the
board is detached
Remaining in
Domain memory size after the board is detached
Domain
42 Sun Enterprise 10000 Dynamic Reconfiguration User Guide • February 2000
Page 59
TABLE 3-3 DR Memory Configuration Information (Continued)
Percent Complete How far the drain operation has progressed. Note that the time
required to drain each memory page is not constant. Some memory
pages take longer to drain than others.
Drain Start Time The time the drain operation was started.
Current Time The current time, which can be compared to the drain start time to
see how long the drain operation has been in progress.
▼ To View DR Device Configuration Information
● Click the device button.
The DR Device Configuration window is displayed (
FIGURE 3-10).
DR Device Configuration
I/O Devices on Board 5
I/O Bus Slot Controller AP Alternate
0 0 QLGC, isp0
0 1 SUNW, pln0 inactive
1 0 SUNW, fas0
1 1 qec0
detail
dismiss
FIGURE 3-10 DR Device Configuration Window
The controllers or devices in each slot are listed. The controller and device names are
a concatenation of their device name and their operating environment instance
number (for example, sd31).
Note – The DR Device Configuration window may not show all of the devices that
are physically present on the board. For example, controllers whose drivers are
unattached do not appear in the list. The device display that is available by using the
obp button lists the cards on the board that were successfully probed and identified.
Chapter 43
Page 60
▼ To View DR Device Detailed Information
1. Highlight one or more controller(s).
2. Choose Detail.
The following window is displayed for each selected controller (
FIGURE 3-11).
DR Detail Device
Device Detail for I/O Bus 0 Slot 0
Device Opens Name Usage
ssd80 0 /dev/dsk/c0t5d0s0
ssd81 0 /dev/dsk/c0t5d1s0
ssd82 0 /dev/dsk/c0t5d2s0
ssd83 31 /dev/dsk/c0t5d3s0 /
ssd83 0 /dev/dsk/c0t5d3s1 swap, /tmp
ssd83 10 /dev/dsk/c0t5d3s3 /var
ssd83 1 /dev/dsk/c0t5d3s5 /opt
ssd83 25 /dev/dsk/c0t5d3s6 /usr
ssd83 0 /dev/dsk/c0t5d3s7 /export
ssd84 0 /dev/dsk/c0t5d4s0
dismiss
FIGURE 3-11 DR Detail Device Window
The current usage information for each device is shown. The window includes an
open count (if available) and the common name (for example, a disk partition, a
metadevice, or an interface name) by which the device is known. Additional usage
information is also provided, including the partition mount points, network
interface configuration, swap space usage, and metadevice usage.
Note – Some device usage, such as disk partitions used for Sun Solstice DiskSuite
databases, Alternate Pathing databases, and Sun Enterprise Volume Manager usage,
may not be reported.
If a controller or network interface is part of the AP database, the window indicates
that it is active or that it is an AP alternate. For active AP alternates, the usage of the
AP metadevice is displayed.
44 Sun Enterprise 10000 Dynamic Reconfiguration User Guide • February 2000
Page 61

▼ To View DR OBP Configuration Information
Note – The information in the DR OBP Configuration window is derived from the
OBP device tree, and is less detailed than the information that is available from the
other windows described in this section. For example, in the init attach state, only
the I/O adapters are known—not the devices attached to those controllers nor the
memory interleave configuration. This window is usually used when a board is in
the init attach state.
● Click the obp button.
The DR OBP Configuration window is displayed (
FIGURE 3-12).
Chapter 45
Page 62
DR OBP Configuration
Devices Present on Board 0
CPU Frequency (MHz) ECache Size(MB)
0 250 1.0
1 250 1.0
2 250 1.0
3 250 1.0
Sbus Slot Controller
0 0 SUNW, soc/SUNw,
0 1 nf
1 0 QLGC, isp/sd
1 0 dma/esp/sd
1 1 lebuffer/le
System Memory Sizes (MB)
Current System:
Attached Capacity:
dr-max-mem:
Memory Detach:
5120
15360
20480
enabled
Memory Configuration for Board 0
Memory Size (MB): 1024
dismiss
FIGURE 3-12 DR OBP Configuration Window
▼ To View the DR-Unsafe Devices
● Click the unsafe button.
The DR Unsafe Devices window is displayed (
FIGURE 3-13).
46 Sun Enterprise 10000 Dynamic Reconfiguration User Guide • February 2000
Page 63
DR Unsafe Devices
Unsafe devices which are currently open:
No Unsafe Devices are Open
dismiss
FIGURE 3-13 DR Unsafe Devices Window
The DR Unsafe Devices window shows the suspend-unsafe devices that are open
across the entire domain, not just those that are resident on the selected system
board. This information is useful for determining the cause of operating
environment quiescence errors due to unsafe devices being open.
Chapter 47
Page 64

48 Sun Enterprise 10000 Dynamic Reconfiguration User Guide • February 2000
Page 65

APPENDIX
A
DR Error Messages
This appendix contains a list of some of the error messages that you might see while
you are performing DR operations. The list does not include Protocol Independent
Module (PIM) layer errors, which are more generic than the error messages in the
following tables.
All DR error messages are sent to the one or both of the following locations:
■ SSP applications
■ System error logs
Searching This Appendix
Before you use this appendix, take time to read the following list of search tips so
that you can find a specific message.
■ Search on a specific string of text in the error message.
■ Avoid using numeric values. They are treated as replaceable text in this appendix.
■ Avoid using text that is replaceable. In this appendix, the following names are
used to represent replaceable text in the error messages: descriptive message,
errno_description. device_name, target_path, mount_point, interface_name_instance,
interface_name, and partition_name.
■ If you are reading this text in hard-copy form, the tables are presented in order by
the type of error or failure. The contents of the tables is sorted alphabetically in
decending order.
Error-Type Links
Use one of the following links to start your search.
49
Page 66

“DR Daemon Start-Up Errors” on page 50
“Memory Allocation Error Messages” on page 52
“DR Driver Failures” on page 59
“PSM Error Messages” on page 61
“General Failures” on page 63
“Protocol and Communication Error Messages” on page 65
“Attach-Related Failures” on page 70
“Detach-Related Error Messages” on page 72
“Auto-Configuration Error Messages” on page 77
“System Exploration Error Messages” on page 79
“OpenBoot PROM Error Messages” on page 93
“Unsafe-Device Query Failures” on page 96
“AP-Related Error Messages” on page 98
DR Daemon Start-Up Errors
The following table contains a list of the DR daemon start-up errors. These messages
are sent only to the domain console window.
TABLE A-1 DR Daemon Start-Up Error Messages
Error Message Probable Cause Suggested Action
Cannot create server
handle
The DR daemon could not start up the
RPC server. You will see this message
only if you manually execute the DR
daemon without properly configuring
the network services on the domain.
Normally, network services spawn the
DR daemon in response to an
incoming RPC from the SSP.
On the domain, fix the inetd.conf
entry for the DR daemon.
50 Sun Enterprise 10000 Dynamic Reconfiguration User Guide • February 2000
Page 67

TABLE A-1 DR Daemon Start-Up Error Messages
Error Message Probable Cause Suggested Action
Cannot fork: descriptive
message
The DR daemon could not fork a
process from which to run its RPC
server.
Permission denied A user other than root tried to run the
DR daemon.
Unable to register
(300326, 4)
The DR daemon was executed without
being properly registered with the
network services in the domain. The
first number represents the RPC
number that is registered for the DR
daemon. The second number
represents the RPC version used by the
DR daemon.
Unable to create
(300326, 4) for
netpath
The DR daemon was executed without
being properly registered with the
network services in the domain. The
first number represents the RPC
number that is registered for the DR
daemon. The second number
represents the RPC version used by the
DR daemon.
The descriptive error message
corresponds to an errno_value and
offers clues as to why the DR daemon
could not fork off the RPC server.
Check the resource limits and the load
of the system to find a way to fix this
error.
Only the superuser (root) can run the
DR daemon because the daemon needs
all of the root privileges to fully
explore the system and to access the
driver to detach and attach boards.
On the domain, fix the inetd.conf
entry for the DR daemon.
On the domain, fix the inetd.conf
entry for the DR daemon.
Appendix 51
Page 68

Memory Allocation Error Messages
The following table contains the memory allocation error messages that are sent to
the system logs and to the SSP applications. Although the list contains several error
messages, each of them describe one of two possible errors: ENOMEM or EAGAIN. All
of the ENOMEM errors have the same suggested action, as do the EAGAIN errors.
TABLE A-2 Memory Allocation Error Messages
Error Message Probable Cause Suggested Action
DR Error: malloc
failed (add notnet
ap info)
errno_description
DR Error: malloc
failed
(alias_namelen)
errno_description
While it queried the system
information, the DR daemon could not
allocate enough memory for a
structure in which to return the
requested information. The daemon
may have encountered a resource
limit. If the DR daemon cannot allocate
memory, then it cannot continue to
work. The errno_description usually
describes an ENOMEM or EAGAIN error.
While it queried the system
information, the DR daemon could not
allocate enough memory for a
structure in which to return the
requested information. The daemon
may have encountered a resource
limit. If the DR daemon cannot allocate
memory, then it cannot continue to
work. The errno_description usually
describes an ENOMEM or EAGAIN error.
First, check the size of the daemon by
using the ps(1) command. Normally,
the daemon uses about 300- to 400Kbytes of memory. If the daemon is
larger than the above memory sizes,
then it may have a memory leak. If it
does, you should report this problem.
An ENOMEM error means that the DR
daemon is in a state from which it
cannot recover. An EAGAIN error
means that the problem may have
been temporary. You can retry the
operation, which may succeed
eventually, or you may have to stop
and restart the daemon.
First, check the size of the daemon by
using the ps(1) command. Normally,
the daemon uses about 300- to 400Kbytes of memory. If the daemon is
larger than the above memory sizes,
then it may have a memory leak. If it
does, you should report this problem.
An ENOMEM error means that the DR
daemon is in a state from which it
cannot recover. An EAGAIN error
means that the problem may have
been temporary. You can retry the
operation, which may succeed
eventually, or you may have to stop
and restart the daemon.
52 Sun Enterprise 10000 Dynamic Reconfiguration User Guide • February 2000
Page 69

TABLE A-2 Memory Allocation Error Messages (Continued)
Error Message Probable Cause Suggested Action
DR Error: malloc
failed (AP ctlr_t
array) errno_description
DR Error: malloc
failed
(ap_controller)
errno_description
While it queried the system
information, the DR daemon could not
allocate enough memory for a
structure in which to return the
requested information. The daemon
may have encountered a resource
limit. If the DR daemon cannot allocate
memory, then it cannot continue to
work. The errno_description usually
describes an ENOMEM or EAGAIN error.
While it queried the system
information, the DR daemon could not
allocate enough memory for a
structure in which to return the
requested information. The daemon
may have encountered a resource
limit. If the DR daemon cannot allocate
memory, then it cannot continue to
work. The errno_description usually
describes an ENOMEM or EAGAIN error.
First, check the size of the daemon by
using the ps(1) command. Normally,
the daemon uses about 300- to 400Kbytes of memory. If the daemon is
larger than the above memory sizes,
then it may have a memory leak. If it
does, you should report this problem.
An ENOMEM error means that the DR
daemon is in a state from which it
cannot recover. An EAGAIN error
means that the problem may have
been temporary. You can retry the
operation, which may succeed
eventually, or you may have to stop
and restart the daemon.
First, check the size of the daemon by
using the ps(1) command. Normally,
the daemon uses about 300- to 400Kbytes of memory. If the daemon is
larger than the above memory sizes,
then it may have a memory leak. If it
does, you should report this problem.
An ENOMEM error means that the DR
daemon is in a state from which it
cannot recover. An EAGAIN error
means that the problem may have
been temporary. You can retry the
operation, which may succeed
eventually, or you may have to stop
and restart the daemon.
DR Error: malloc
failed
(board_cpu_config_t)
errno_description
While it queried the system
information, the DR daemon could not
allocate enough memory for a
structure in which to return the
requested information. The daemon
may have encountered a resource
limit. If the DR daemon cannot allocate
memory, then it cannot continue to
work. The errno_description usually
describes an ENOMEM or EAGAIN error.
First, check the size of the daemon by
using the ps(1) command. Normally,
the daemon uses about 300- to 400Kbytes of memory. If the daemon is
larger than the above memory sizes,
then it may have a memory leak. If it
does, you should report this problem.
An ENOMEM error means that the DR
daemon is in a state from which it
cannot recover. An EAGAIN error
means that the problem may have
been temporary. You can retry the
operation, which may succeed
eventually, or you may have to stop
and restart the daemon.
Appendix 53
Page 70

TABLE A-2 Memory Allocation Error Messages (Continued)
Error Message Probable Cause Suggested Action
DR Error: malloc
failed
(board_mem_config_t)
errno_description
DR Error: malloc
failed
(board_mem_cost_t)
errno_description
While it queried the system
information, the DR daemon could not
allocate enough memory for a
structure in which to return the
requested information. The daemon
may have encountered a resource
limit. If the DR daemon cannot allocate
memory, then it cannot continue to
work. The errno_description usually
describes an ENOMEM or EAGAIN error.
While it queried the system
information, the DR daemon could not
allocate enough memory for a
structure in which to return the
requested information. The daemon
may have encountered a resource
limit. If the DR daemon cannot allocate
memory, then it cannot continue to
work. The errno_description usually
describes an ENOMEM or EAGAIN error.
First, check the size of the daemon by
using the ps(1) command. Normally,
the daemon uses about 300- to 400Kbytes of memory. If the daemon is
larger than the above memory sizes,
then it may have a memory leak. If it
does, you should report this problem.
An ENOMEM error means that the DR
daemon is in a state from which it
cannot recover. An EAGAIN error
means that the problem may have
been temporary. You can retry the
operation, which may succeed
eventually, or you may have to stop
and restart the daemon.
First, check the size of the daemon by
using the ps(1) command. Normally,
the daemon uses about 300- to 400Kbytes of memory. If the daemon is
larger than the above memory sizes,
then it may have a memory leak. If it
does, you should report this problem.
An ENOMEM error means that the DR
daemon is in a state from which it
cannot recover. An EAGAIN error
means that the problem may have
been temporary. You can retry the
operation, which may succeed
eventually, or you may have to stop
and restart the daemon.
DR Error: malloc failed
(board_mem_drain_t)
errno_description
While it queried the system
information, the DR daemon could not
allocate enough memory for a
structure in which to return the
requested information. The daemon
may have encountered a resource
limit. If the DR daemon cannot allocate
memory, then it cannot continue to
work. The errno_description usually
describes an ENOMEM or EAGAIN error.
54 Sun Enterprise 10000 Dynamic Reconfiguration User Guide • February 2000
First, check the size of the daemon by
using the ps(1) command. Normally,
the daemon uses about 300- to 400Kbytes of memory. If the daemon is
larger than the above memory sizes,
then it may have a memory leak. If it
does, you should report this problem.
An ENOMEM error means that the DR
daemon is in a state from which it
cannot recover. An EAGAIN error
means that the problem may have
been temporary. You can retry the
operation, which may succeed
eventually, or you may have to stop
and restart the daemon.
Page 71

TABLE A-2 Memory Allocation Error Messages (Continued)
Error Message Probable Cause Suggested Action
DR Error: malloc
failed (dr_io)
errno_description
DR Error: malloc
failed (leaf array)
errno_description
While it queried the system
information, the DR daemon could not
allocate enough memory for a
structure in which to return the
requested information. The daemon
may have encountered a resource
limit. If the DR daemon cannot allocate
memory, then it cannot continue to
work. The errno_description usually
describes an ENOMEM or EAGAIN error.
While it queried the system
information, the DR daemon could not
allocate enough memory for a
structure in which to return the
requested information. The daemon
may have encountered a resource
limit. If the DR daemon cannot allocate
memory, then it cannot continue to
work. The errno_description usually
describes an ENOMEM or EAGAIN error.
First, check the size of the daemon by
using the ps(1) command. Normally,
the daemon uses about 300- to 400Kbytes of memory. If the daemon is
larger than the above memory sizes,
then it may have a memory leak. If it
does, you should report this problem.
An ENOMEM error means that the DR
daemon is in a state from which it
cannot recover. An EAGAIN error
means that the problem may have
been temporary. You can retry the
operation, which may succeed
eventually, or you may have to stop
and restart the daemon.
First, check the size of the daemon by
using the ps(1) command. Normally,
the daemon uses about 300- to 400Kbytes of memory. If the daemon is
larger than the above memory sizes,
then it may have a memory leak. If it
does, you should report this problem.
An ENOMEM error means that the DR
daemon is in a state from which it
cannot recover. An EAGAIN error
means that the problem may have
been temporary. You can retry the
operation, which may succeed
eventually, or you may have to stop
and restart the daemon.
DR Error: malloc
failed (leaf)
errno_description
While it queried the system
information, the DR daemon could not
allocate enough memory for a
structure in which to return the
requested information. The daemon
may have encountered a resource
limit. If the DR daemon cannot allocate
memory, then it cannot continue to
work. The errno_description usually
describes an ENOMEM or EAGAIN error.
First, check the size of the daemon by
using the ps(1) command. Normally,
the daemon uses about 300- to 400Kbytes of memory. If the daemon is
larger than the above memory sizes,
then it may have a memory leak. If it
does, you should report this problem.
An ENOMEM error means that the DR
daemon is in a state from which it
cannot recover. An EAGAIN error
means that the problem may have
been temporary. You can retry the
operation, which may succeed
eventually, or you may have to stop
and restart the daemon.
Appendix 55
Page 72

TABLE A-2 Memory Allocation Error Messages (Continued)
Error Message Probable Cause Suggested Action
DR Error: malloc
failed
(net_leaf_array)
errno_description
DR Error: malloc
failed
(sbus_cntrl_t)
errno_description
While it queried the system
information, the DR daemon could not
allocate enough memory for a
structure in which to return the
requested information. The daemon
may have encountered a resource
limit. If the DR daemon cannot allocate
memory, then it cannot continue to
work. The errno_description usually
describes an ENOMEM or EAGAIN error.
While it queried the system
information, the DR daemon could not
allocate enough memory for a
structure in which to return the
requested information. The daemon
may have encountered a resource
limit. If the DR daemon cannot allocate
memory, then it cannot continue to
work. The errno_description usually
describes an ENOMEM or EAGAIN error.
First, check the size of the daemon by
using the ps(1) command. Normally,
the daemon uses about 300- to 400Kbytes of memory. If the daemon is
larger than the above memory sizes,
then it may have a memory leak. If it
does, you should report this problem.
An ENOMEM error means that the DR
daemon is in a state from which it
cannot recover. An EAGAIN error
means that the problem may have
been temporary. You can retry the
operation, which may succeed
eventually, or you may have to stop
and restart the daemon.
First, check the size of the daemon by
using the ps(1) command. Normally,
the daemon uses about 300- to 400Kbytes of memory. If the daemon is
larger than the above memory sizes,
then it may have a memory leak. If it
does, you should report this problem.
An ENOMEM error means that the DR
daemon is in a state from which it
cannot recover. An EAGAIN error
means that the problem may have
been temporary. You can retry the
operation, which may succeed
eventually, or you may have to stop
and restart the daemon.
DR Error: malloc failed
(sbus_config)
errno_description
While it queried the system
information, the DR daemon could not
allocate enough memory for a
structure in which to return the
requested information. The daemon
may have encountered a resource
limit. If the DR daemon cannot allocate
memory, then it cannot continue to
work. The errno_description usually
describes an ENOMEM or EAGAIN error.
56 Sun Enterprise 10000 Dynamic Reconfiguration User Guide • February 2000
First, check the size of the daemon by
using the ps(1) command. Normally,
the daemon uses about 300- to 400Kbytes of memory. If the daemon is
larger than the above memory sizes,
then it may have a memory leak. If it
does, you should report this problem.
An ENOMEM error means that the DR
daemon is in a state from which it
cannot recover. An EAGAIN error
means that the problem may have
been temporary. You can retry the
operation, which may succeed
eventually, or you may have to stop
and restart the daemon.
Page 73

TABLE A-2 Memory Allocation Error Messages (Continued)
Error Message Probable Cause Suggested Action
DR Error: malloc
failed
(sbus_device_t)
errno_description
DR Error: malloc
failed
(sbus_usage_t)
errno_description
While it queried the system
information, the DR daemon could not
allocate enough memory for a
structure in which to return the
requested information. The daemon
may have encountered a resource
limit. If the DR daemon cannot allocate
memory, then it cannot continue to
work. The errno_description usually
describes an ENOMEM or EAGAIN error.
While it queried the system
information, the DR daemon could not
allocate enough memory for a
structure in which to return the
requested information. The daemon
may have encountered a resource
limit. If the DR daemon cannot allocate
memory, then it cannot continue to
work. You may have to stop and
restart the daemon. The
errno_description usually describes an
ENOMEM or EAGAIN error.
First, check the size of the daemon by
using the ps(1) command. Normally,
the daemon uses about 300- to 400Kbytes of memory. If the daemon
larger than the above memory sizes,
then it may have a memory leak. If it
does, you should report this problem.
An ENOMEM error means that the DR
daemon is in a state from which it
cannot recover. An EAGAIN error
means that the problem may have
been temporary. You can retry the
operation, which may succeed
eventually, or you may have to stop
and restart the daemon.
First, check the size of the daemon by
using the ps(1) command. Normally,
the daemon uses about 300- to 400Kbytes of memory. If the daemon is
larger than the above memory sizes,
then it may have a memory leak. If it
does, you should report this problem.
An ENOMEM error means that the DR
daemon is in a state from which it
cannot recover. An EAGAIN error
means that the problem may have
been temporary. You can retry the
operation, which may succeed
eventually, or you may have to stop
and restart the daemon.
DR Error: malloc
failed (struct
devnm) errno_description
While it queried the system
information, the DR daemon could not
allocate enough memory for a
structure in which to return the
requested information. The daemon
may have encountered a resource
limit. If the DR daemon cannot allocate
memory, then it cannot continue to
work. The errno_description usually
describes an ENOMEM or EAGAIN error.
First, check the size of the daemon by
using the ps(1) command. Normally,
the daemon uses about 300- to 400Kbytes of memory. If the daemon
larger than the above memory sizes,
then it may have a memory leak. If it
does, you should report this problem.
An ENOMEM error means that the DR
daemon is in a state from which it
cannot recover. An EAGAIN error
means that the problem may have
been temporary. You can retry the
operation, which may succeed
eventually, or you may have to stop
and restart the daemon.
Appendix 57
Page 74

TABLE A-2 Memory Allocation Error Messages (Continued)
Error Message Probable Cause Suggested Action
DR Error: malloc
failed (swap name
entries)
errno_description
DR Error: malloc
failed (swaptbl)
errno_description
While it queried the system
information, the DR daemon could not
allocate enough memory for a
structure in which to return the
requested information. The daemon
may have encountered a resource
limit. If the DR daemon cannot allocate
memory, then it cannot continue to
work. The errno_description usually
describes an ENOMEM or EAGAIN error.
While it queried the system
information, the DR daemon could not
allocate enough memory for a
structure in which to return the
requested information. The daemon
may have encountered a resource
limit. If the DR daemon cannot allocate
memory, then it cannot continue to
work. The errno_description usually
describes an ENOMEM or EAGAIN error.
First, check the size of the daemon by
using the ps(1) command. Normally,
the daemon uses about 300- to 400Kbytes of memory. If the daemon
larger than the above memory sizes,
then it may have a memory leak. If it
does, you should report this problem.
An ENOMEM error means that the DR
daemon is in a state from which it
cannot recover. An EAGAIN error
means that the problem may have
been temporary. You can retry the
operation, which may succeed
eventually, or you may have to stop
and restart the daemon.
First, check the size of the daemon by
using the ps(1) command. Normally,
the daemon uses about 300- to 400Kbytes of memory. If the daemon is
larger than the above memory sizes,
then it may have a memory leak. If it
does, you should report this problem.
An ENOMEM error means that the DR
daemon is in a state from which it
cannot recover. An EAGAIN error
means that the problem may have
been temporary. You can retry the
operation, which may succeed
eventually, or you may have to stop
and restart the daemon.
DR Error: malloc
failed (unsafe_devs)
errno_description
While it queried the system
information, the DR daemon could not
allocate enough memory for a
structure in which to return the
requested information. The daemon
may have encountered a resource
limit. If the DR daemon cannot allocate
memory, then it cannot continue to
work. The errno_description usually
describes an ENOMEM or EAGAIN error.
58 Sun Enterprise 10000 Dynamic Reconfiguration User Guide • February 2000
First, check the size of the daemon by
using the ps(1) command. Normally,
the daemon uses about 300- to 400Kbytes of memory. If the daemon
larger than the above memory sizes,
then it may have a memory leak. If it
does, you should report this problem.
An ENOMEM error means that the DR
daemon is in a state from which it
cannot recover. An EAGAIN error
means that the problem may have
been temporary. You can retry the
operation, which may succeed
eventually, or you may have to stop
and restart the daemon.
Page 75

DR Driver Failures
The following table contains the DR driver failures that are sent to the system logs
and to the SSP applications. In general, refer to the descriptions of the daemon and
PSM errors for details about what goes to the system logs and what goes to the SSP.
Note – All of the possible DR driver failure messages are related to the three
probable causes given in the table. Likewise, all of the failure messages have one
suggested action.
TABLE A-3 Memory Allocation Error Messages
Error Message Probable Cause Suggested Action
DR: Error:
initiate_attach:
ioctl failed
DR: Error:
complete_attach:
ioctl failed
DR: Error:
abort_attach: ioctl
failed
DR: Error:
get_cpu_info: ioctl
failed
DR: Error:
get_mem_config:
ioctl failed
An ioctl failure (that is, a failure that
was encountered by the DR daemon
when it tried to use the DR driver) can
occur at three separate levels.
At the first level—within the DR
daemon, occur when the DR daemon
and the DR driver are not interacting
properly. The driver could be missing;
the DR driver files in the /devices/
pseudo directory could be missing, or
the file permissions could be wrong.
The DR daemon could also be
experiencing memory corruption or
resource limitations. The ioctl failure
message is followed by a message in
the form: Daemon (errno
#error_number): error description.
The context of the ioctl() failure
(that is, which function preceeds the
ioctl() failed portion of the
message), combined with the text of
the error message, indicates what
failed. Use the error number to
identify the probable cause by
checking the information on the
ioctl(2) man page. You can also use
the /usr/include/errno.h header
file if the ioctl(2) man page does
not have a specific reference for the
error number.
Appendix 59
Page 76

TABLE A-3 Memory Allocation Error Messages (Continued)
Error Message Probable Cause Suggested Action
DR: Error:
get_mem_cost: ioctl
failed
DR: Error:
get_mem_drain: ioctl
failed
DR: Error:
update_attach: ioctl
failed
DR: Error: ioctl
failed, error
draining resources
DR: Error:
detach_board:
UNCONFIGURE ioctl
failed
DR: Error:
detach_board:
DISCONNECT ioctl
failed
DR: Error:
abort_detach: CANCEL
ioctl failed
DR: Error:
abort_detach:
CONFIGURE ioctl
failed
At the second level—within the
platform independent module (PIM)
layer of the DR driver, an ioctl failure
could indicate busy resources, failing
I/O devices on the system board, or
improper interaction between the PIM
and the platform specific module
(PSM) layers. The ioctl failure message
is followed by a PIM message in the
form: PIM (error #errornumber):
errno_description.
At the third level—the PSM layer, an
ioctl failure could indicate busy
resources, failing I/O devices on the
system board, memory detach failures,
CPU detach failures, or internal
failures encountered by the PSM
driver. The error description usually
cites specific physical devices that are
failing or includes detailed
explanations for a memory or CPU
detachment failure. The ioctl failure
message is followed by a PSM message
appears in the following form: PSM
(error #errornumber):
errno_description.
Note that failures in the PSM layer do
not have corresponding errno values.
PSM failure messages use an error
number. You can find explanations of
the error numbers in the /usr/
include/sys/sfdr.h header file.
See above.
DR: Error:
get_dr_state: ioctl
failed
DR: Error:
get_dr_status: ioctl
failed
60 Sun Enterprise 10000 Dynamic Reconfiguration User Guide • February 2000
Page 77

PSM Error Messages
The following table contains a list of PSM error messages that are sent to the system
logs and to the SSP applications.
TABLE A-4 PSM Error Messages
Error Message Probable Cause Suggested Action
1 SFDR_ERR_INTERNAL An internal driver failed. None
2 SFDR_ERR_SUSPEND Failed to suspend devices. None
3 SFDR_ERR_RESUME Failed to resume suspended devices. None
4 SFDR_ERR_UNSAFE Attempted to detach unsafe devices. None
5 SFDR_ERR_UTHREAD User thread could not be stopped. Retry the operation. If this
error persists, try stopping
the process with the kill(1)
command.
6 SFDR_ERR_RTTHREAD Realtime thread could not be stopped. Retry the operation. If this
error persists, try stopping
the process with the kill(1)
command.
7 SFDR_ERR_KTHREAD Kernel thread could not be stopped. Retry the operation. If this
error persists, try stopping
the process with the kill(1)
command.
8 SFDR_ERR_OSFAILURE The kernel is not processing DR
operations properly for the DR driver.
9 SFDR_ERR_OUTSTANDING The ioctl() failed because an error
from a previous DR drain operation
still has not been reported through the
DR status command.
11 SFDR_ERR_CONFIG The current system configuration will
not allow the DR operation to execute.
12 SFDR_ERR_NOMEM Not enough memory None
13 SFDR_ERR_PROTO Protocol failure None
None
Retry the operation.
Check the /etc/system file
to ensure that memory
detach is enabled.
Appendix 61
Page 78

TABLE A-4 PSM Error Messages (Continued)
Error Message Probable Cause Suggested Action
14 SFDR_ERR_BUSY The device is busy. Check the I/O usage of the
device to determine the cause
of this error (for example, a
mounted file system or the
last path to an AP device). If
possible, manually adjust the
system to correct this error
(for instance, unmount the
file system). If the cause of
the error is not apparent,
contact your Sun service
provider.
15 SFDR_ERR_NODEV No devices are present. None
16 SFDR_ERR_INVAL Invalid argument and/or operation None
17 SFDR_ERR_STATE Invalid board state (transition) None
18 SFDR_ERR_PROBE Failed to probe OBP nodes for a board. None
19 SFDR_ERR_DEPROBE Failed to deprobe OBP nodes for a
None
board.
20 SFDR_ERR_HW_INTERCONNECT Interconnect hardware failed. None
21 SFDR_ERR_OFFLINE Failed to place a CPU offline. None
22 SFDR_ERR_ONLINE Failed to bring a CPU online. None
23 SFDR_ERR_CPUSTART Failed to start a CPU. None
24 SFDR_ERR_CPUSTOP Failed to stop a CPU. None
25 SFDR_ERR_JUGGLE_
Failed to move the clock-signal CPU. None
BOOTPROC
26 SFDR_ERR_CANCEL Could not cancel a RELEASE
operation.
Retry the Abort Detach
operation after the Drain
operation is complete.
62 Sun Enterprise 10000 Dynamic Reconfiguration User Guide • February 2000
Page 79

General Failures
The following table contains a list of the general failure error messages that are sent
to the system logs and/or to the SSP applications.
TABLE A-5 General Failure Error Messages
Error Message Probable Cause Suggested Action
DR Error: Cannot fork()
process...errno_description
DR Error: command has
continued
DR Error: command stopped
by signal signal_number
DR Error: command terminated
due to signal signal_number
The DR daemon could not fork off a
process for the command to run in. A
message in the form “running
command” appears in the system logs
prior to this error message, or any
other error message about failed
commands.
While the DR daemon was running
external commands, one of the
commands failed or exited abnormally.
The DR feature executes external
commands (for example, drvconf)to
configure the software subsystems.
While the DR daemon was running
external commands, one of the
commands failed or exited abnormally.
The DR feature executes external
commands (for example, drvconf)to
configure the software subsystems.
While the DR daemon was running
external commands, one of the
commands failed or exited abnormally.
The DR feature executes external
commands (for example, drvconf) to
configure the software subsystems.
The errno_description offers
hints on how to fix the
command that you want to
run. Also check the man page
for the command. It may
have an explanation of the
error.
Run the program manually
on the domain. If the
command fails again, refer to
the man page for the
command. It may have an
explanation of the error.
Run the program manually
on the domain. If the
command fails again, refer to
the man page for the
command. It may have an
explanation of the error.
Run the program manually
on the domain. If the
command fails again, refer to
the man page for the
command. It may have an
explanation of the error.
DR Error: command terminated
due to signal signal_number.
Core dumped.
While the DR daemon was running
external commands, one of the
commands failed or exited abnormally.
The DR feature executes external
commands (for example, drvconf)to
configure the software subsystems.
Run the program manually
on the domain. If the
command fails again, refer to
the man page for the
command. It may have an
explanation of the error.
Appendix 63
Page 80

TABLE A-5 General Failure Error Messages (Continued)
Error Message Probable Cause Suggested Action
DR Error: dr_issue_ioctl:
failed closing driver . . .
errno_description
Cannot exec command (errno
= errno_value).
dr_get_sysbrd_info: NULL
parameter
The DR daemon encountered a failure
while it tried to close a DR driver
entry point. A more detailed
explanation of this failure accompanies
the error message.
The DR daemon could not execute the
external command. A more detailed
explanation of this failure accompanies
the error message.
An invalid pointer was given to the
DR daemon during a query of the slotto-memory address mapping. Either
an RPC gave an incorrect value, or the
DR daemon called itself with an
invalid parameter.
Use the close(2) man page
and the errno_description to
determine what caused this
error and how to solve it.
Check the system logs to
determine which command
failed. See the exec(2) man
page for more details about
the specified errno_value. Use
this information to solve the
error.
You should gather as much
information about this
problem as possible from the
system logs so that you can
determine the cause of the
failure. Try stopping and
starting the DR daemon and
the SSP application. If this
error persists, report it to
your Sun service
representative.
update_cpu_info: bad board
number
WARNING: Failed to update
board board_number’s
modification time [nonfatal].
A problem within the DR daemon
occured, causing it to call its internal
routines with incorrect values.
Updating the board modification time
has failed. After a board has been
modified (for example, memory or
CPUs added), it is probed or deprobed
by OBP so that OBP can inform other
programs of the change. Then, the
modification time is updated.
You should gather as much
information about this
problem as possible from the
system logs so that you can
determine the cause of the
failure. You should also
report this problem, and if it
persists, you may have to
stop and restart the daemon.
This error is non-fatal.
64 Sun Enterprise 10000 Dynamic Reconfiguration User Guide • February 2000
Page 81

Protocol and Communication Error
Messages
The following table contains the protocol and communication error messages that
are sent to the system logs and/or the SSP applications.
TABLE A-6 Protocol and Communication Failure Error Messages
Error Message Probable Cause Suggested Action
DR Error:
abort_attach_board: invalid
board number
This error message is sent to the
system logs and to the SSP
applications.
DR Error:
abort_detach_board: invalid
board number
This error message is sent to the
system logs and to the SSP
applications.
The RPC is attempting to perform a
DR operation on a board number that
is not in the range of valid numbers.
The DR applications carefully filter the
user input to catch out-of-range board
numbers before they send the RPC.
Therefore, this error indicates a
breakdown on the SSP or in the
network connection to the SSP. Or, it
indicates an incompatibility between
the SSP applications and the DR
daemon.
The RPC is attempting to perform a
DR operation on a board number that
is not in the range of valid numbers.
The DR applications carefully filter the
user input to catch out-of-range board
numbers before they send the RPC.
Therefore, this error indicates a
breakdown on the SSP or in the
network connection to the SSP. Or, it
indicates an incompatibility between
the SSP applications and the DR
daemon.
Check the SSP network
connection and/or the SSP
and DR applications to
ensure that they are
operating properly.
Check the SSP network
connection and/or the SSP
and DR applications to
ensure that they are
operating properly.
Appendix 65
Page 82

TABLE A-6 Protocol and Communication Failure Error Messages (Continued)
Error Message Probable Cause Suggested Action
DR Error: attach_finished:
invalid board number
This error message is sent to the
system logs and to the SSP
applications.
DR Error:
complete_attach_board:
invalid board number
This error message is sent to the
system logs and to the SSP
applications.
The RPC is attempting to perform a
DR operation on a board number that
is not in the range of valid numbers.
The DR applications carefully filter the
user input to catch out-of-range board
numbers before they send the RPC.
Therefore, this error indicates a
breakdown on the SSP or in the
network connection to the SSP. Or, it
indicates an incompatibility between
the SSP applications and the DR
daemon.
The RPC is attempting to perform a
DR operation on a board number that
is not in the range of valid numbers.
The DR applications carefully filter the
user input to catch out-of-range board
numbers before they send the RPC.
Therefore, this error indicates a
breakdown on the SSP or in the
network connection to the SSP. Or, it
indicates an incompatibility between
the SSP applications and the DR
daemon.
Check the SSP network
connection and/or the SSP
and DR applications to
ensure that they are
operating properly.
Check the SSP network
connection and/or the SSP
and DR applications to
ensure that they are
operating properly.
DR Error:
cpu0_move_finished: invalid
board number
This error message is sent to the
system logs and to the SSP
applications.
The RPC is attempting to perform a
DR operation on a board number that
is not in the range of valid numbers.
The DR applications carefully filter the
user input to catch out-of-range board
numbers before they send the RPC.
Therefore, this error indicates a
breakdown on the SSP or in the
network connection to the SSP. Or, it
indicates an incompatibility between
the SSP applications and the DR
daemon.
Check the SSP network
connection and/or the SSP
and DR applications to
ensure that they are
operating properly.
66 Sun Enterprise 10000 Dynamic Reconfiguration User Guide • February 2000
Page 83

TABLE A-6 Protocol and Communication Failure Error Messages (Continued)
Error Message Probable Cause Suggested Action
DR Error: detach_board:
invalid board number
This error message is sent to the
system logs and to the SSP
applications.
DR Error: detach_finished:
invalid board number
This error message is sent to the
system logs and to the SSP
applications.
The RPC is attempting to perform a
DR operation on a board number that
is not in the range of valid numbers.
The DR applications carefully filter the
user input to catch out-of-range board
numbers before they send the RPC.
Therefore, this error indicates a
breakdown on the SSP or in the
network connection to the SSP. Or, it
indicates an incompatibility between
the SSP applications and the DR
daemon.
The RPC is attempting to perform a
DR operation on a board number that
is not in the range of valid numbers.
The DR applications carefully filter the
user input to catch out-of-range board
numbers before they send the RPC.
Therefore, this error indicates a
breakdown on the SSP or in the
network connection to the SSP. Or, it
indicates an incompatibility between
the SSP applications and the DR
daemon.
Check the SSP network
connection and/or the SSP
and DR applications to
ensure that they are
operating properly.
Check the SSP network
connection and/or the SSP
and DR applications to
ensure that they are
operating properly.
DR Error: detachable_board:
invalid board number
This error message is sent to the
system logs and to the SSP
applications.
The RPC is attempting to perform a
DR operation on a board number that
is not in the range of valid numbers.
The DR applications carefully filter the
user input to catch out-of-range board
numbers before they send the RPC.
Therefore, this error indicates a
breakdown on the SSP or in the
network connection to the SSP. Or, it
indicates an incompatibility between
the SSP applications and the DR
daemon.
Check the SSP network
connection and/or the SSP
and DR applications to
ensure that they are
operating properly.
Appendix 67
Page 84

TABLE A-6 Protocol and Communication Failure Error Messages (Continued)
Error Message Probable Cause Suggested Action
DR Error:
drain_board_resources:
invalid board number
This error message is sent to the
system logs and to the SSP
applications.
DR Error: get_board_config:
invalid board number
This error message is sent to the
system logs and to the SSP
applications.
The RPC is attempting to perform a
DR operation on a board number that
is not in the range of valid numbers.
The DR applications carefully filter the
user input to catch out-of-range board
numbers before they send the RPC.
Therefore, this error indicates a
breakdown on the SSP or in the
network connection to the SSP. Or, it
indicates an incompatibility between
the SSP applications and the DR
daemon.
The RPC is attempting to perform a
DR operation on a board number that
is not in the range of valid numbers.
The DR applications carefully filter the
user input ot catch out-of-range board
numbers before they send the RPC.
Therefore, this error indicates a
breakdown on the SSP or in the
network connection to the SSP. Or, it
indicates an incompatibility between
the SSP applications and the DR
daemon.
Check the SSP network
connection and/or the SSP
and DR applications to
ensure that they are
operating properly.
Check the SSP network
connection and/or the SSP
and DR applications to
ensure that they are
operating properly.
DR Error: get_board_state:
invalid board number
This error message is sent to the
system logs and to the SSP
applications.
The RPC is attempting to perform a
DR operation on a board number that
is not in the range of valid numbers.
The DR applications carefully filter the
user input to catch out-of-range board
numbers before they send the RPC.
Therefore, this error indicates a
breakdown on the SSP or in the
network connection to the SSP. Or, it
indicates an incompatibility between
the SSP applications and the DR
daemon.
Check the SSP network
connection and/or the SSP
and DR applications to
ensure that they are
operating properly.
68 Sun Enterprise 10000 Dynamic Reconfiguration User Guide • February 2000
Page 85

TABLE A-6 Protocol and Communication Failure Error Messages (Continued)
Error Message Probable Cause Suggested Action
DR Error: get_cpu_info:
invalid board number
This error message is sent to the
system logs and to the SSP
applications.
DR Error:
get_obp_board_config:
invalid board number
This error message is sent to the
system logs and to the SSP
applications.
The RPC is attempting to perform a
DR operation on a board number that
is not in the range of valid numbers.
The DR applications carefully filter the
user input to catch out-of-range board
numbers before they send the RPC.
Therefore, this error indicates a
breakdown on the SSP or in the
network connection to the SSP. Or, it
indicates an incompatibility between
the SSP applications and the DR
daemon.
The RPC is attempting to perform a
DR operation on a board number that
is not in the range of valid numbers.
The DR applications carefully filter the
user input to catch out-of-range board
numbers before they send the RPC.
Therefore, this error indicates a
breakdown on the SSP or in the
network connection to the SSP. Or, it
indicates an incompatibility between
the SSP applications and the DR
daemon.
Check the SSP network
connection and/or the SSP
and DR applications to
ensure that they are
operating properly.
Check the SSP network
connection and/or the SSP
and DR applications to
ensure that they are
operating properly.
DR Error:
initiate_attach_board:
invalid board number
This error message is sent to the
system logs and to the SSP
applications.
The RPC is attempting to perform a
DR operation on a board number that
is not in the range of valid numbers.
The DR applications carefully filter the
user input to catch out-of-range board
numbers before they send the RPC.
Therefore, this error indicates a
breakdown on the SSP or in the
network connection to the SSP. Or, it
indicates an incompatibility between
the SSP applications and the DR
daemon.
Check the SSP network
connection and/or the SSP
and DR applications to
ensure that they are
operating properly.
Appendix 69
Page 86

TABLE A-6 Protocol and Communication Failure Error Messages (Continued)
Error Message Probable Cause Suggested Action
DR Error:
initiate_attach_board:
invalid cpu number
This error message is sent to the
system logs and to the SSP
applications.
DR Error: Unauthorized RPC
call...Notowner
This error message is sent to the
system logs and to the SSP
applications.
The RPC is attempting to perform a
initiate an attach of a board that
contains a CPU that is not on the
board. The DR applications carefully
filter the user input ot catch invalid
CPU numbers before they send the
RPC. Therefore, this error indicates a
breakdown on the SSP or in the
network connection to the SSP. Or, it
indicates an incompatibility between
the SSP applications and the DR
daemon.
The DR daemon received an RPC that
failed authentication.
Check the SSP network
connection and/or the SSP
and DR applications to
ensure that they are
operating properly.
Check the system log for
more information about this
error. Also, make sure that
the version numbers match
for the SSP and the DR
daemon and that the SSP
user and network services are
properly configured.
Attach-Related Failures
The following table contains attach-related failure errors that are sent to the system
logs and/or the SSP applications.
TABLE A-7 Attach-Related Failure Error Messages
Error Message Probable Cause Suggested Action
DR Error:
abort_attach_board: invalid
board state
DR Error: attach_finished:
invalid board state
70 Sun Enterprise 10000 Dynamic Reconfiguration User Guide • February 2000
The Attach operation could not be
aborted because the board is not in the
Init-Attach state, awaiting to be
configured into the domain.
Communication protocol has been
breached over the state of the attach
operation. The DR driver and daemon
disagree with the SSP that the board
was waiting for the confirmation of the
Attach operation from the SSP.
Wait for the board to enter
the Init-Attach state. Only
then can the Attach operation
be aborted.
Exit and restart the current
DR application, then retry the
operation. If this error
persists, stop and restart the
DR daemon. You may need
to reboot the domain to
recover from this error.
Page 87

TABLE A-7 Attach-Related Failure Error Messages (Continued)
Error Message Probable Cause Suggested Action
DR Error: Cannot abort
attach. Board ineligible
for further DR operations.
dr_attach: failure
executing A3000 hot_add
script...error message
initiate_attach_board:
already init-attached
DR Error:
complete_attach_board:
invalid board state
DR Error:
initiate_attach_board:
invalid board state
The board entered the FATAL state
after the abort command was issued,
causing the abort operation to fail and
the board to be lost from the system.
The Sun™ StoreEdge™ A3000
hot_add script is executed directly
after a DR Attach operation. If the
script exists, but it cannot be executed,
the error message explains why.
You attempted to initiate the attach of
a board that was already initiated.
You tried to initiate an Attach
operation on a board that is not
eligible—the board is not in the InitAttach state awaiting attachment to
the domain.
You tried to initiate an Attach
operation on a board that is not
eligible—the board is not in the
PRESENT state awaiting attachment to
the domain.
Reboot the domain.
If you are not using, nor plan
to use, A3000 devices, you
can rename the script so that
it will not be found.
Go to the Complete Attach
window and continue the
attach process.
Wait for the board to enter
the Init-Attach state. Only
then can the Attach operation
be aborted.
Wait for the board to enter
the Init-Attach state. Only
then can the Attach operation
be aborted.
DR Error: Some devices not
attached. Examine the host
syslog for details...
errno_description
Some of the devices were not
configured into the domain.
Look at the system logs for
more details about what
devices were not configured
into the domain and why
they were not configured.
Some devices on the board
may not be supported by the
operating environment or by
the DR feature. You should
blacklist unsupported
devices.
Appendix 71
Page 88

Detach-Related Error Messages
The following table contains detach-related error messages that are sent to the
system logs and/or to the SSP applications.
TABLE A-8 Detach-Related Failure Error Messages
Error Message Probable Cause Suggested Action
DR Error: Cannot detach
board board_number. It has
interface_name interfaces
configured.
DR Error:
cpu0_move_finished: invalid
board state
ifconfig down failed. The ifconfig(1M) command failed to
The board is not eligible to be
detached because it has one or more
network interfaces attached to it that
are critical to the operation of the
domain. The network interfaces can be
any mix of primary, SSP, AP, or PBF
interfaces.
Communication protocol has been
breached over the eligibility of a CPU.
To the SSP, the CPU has been moved
off of the board. To the DR driver, the
move operation is an invalid operation
for that board.
bring down the network interfaces.
The ifconfig(1M) command
unplumbs and brings down the
network interfaces before the board is
detached. One of the network
interfaces on the board could be busy,
so manual intervention may be
needed.
Use the ifconfig(1M)
command to determine the
role of the interface(s). If the
configured interface is the
primary network or the SSP,
manually switch the interface
to the alternate interface if one
exists. For an interface other
than the primary and the SSP,
unplumbing it may enable the
Detach operation to succeed.
Otherwise, the domain must
be shut down, and the
interfaces must be moved to
another board.
None
Log in to the domain, and, if
possible, bring down the
network interfaces on the
board manually by using the
ifconfig(1M) command with
the down option. The manual
execution of the command
may yield more detailed
information about the failure.
72 Sun Enterprise 10000 Dynamic Reconfiguration User Guide • February 2000
Page 89

TABLE A-8 Detach-Related Failure Error Messages (Continued)
Error Message Probable Cause Suggested Action
ifconfig unplumb failed. The ifconfig(1M) command failed to
unplumb the network interfaces. The
ifconfig(1M) command unplumbs
and brings down the network
interfaces before the board is detached.
One of the network interfaces on the
board could be busy, so manual
intervention may be needed.
Warning: Error return from
/opt/SUNWconn/bin/
nf_snmd_kill (return_value)
The command failed. Certain daemons
keep network interfaces open
continuously. Those daemons must be
stopped before the devices they
control can be detached.
Warning: Error return from
/opt/SUNWconn/bin/
pf_snmd_kill (return_value)
The kill(1) command failed. The
daemons that are used to control
certain network devices must be
stopped before the devices can be
detached because the daemons keep
the interfaces open continually.
Log in to the domain, and, if
possible, unplumb the network
interfaces manually by using
the ifconfig(1M) command
with the unplumb option. The
manual execution of the
command may yield more
detailed information about the
failure.
Analyze the return_value to
determine why the kill(1)
command failed, and try to
correct the problem. If
necessary, use the ps(1)
command to obtain the PID
number for the daemons, and
use the kill(1) command to
stop the daemons manually.
Analyze the return_value to
determine why the kill
command failed, and try to
correct the problem. If
necessary, use the ps(1)
command to obtain the PID
number for the daemons, and
use the kill(1) command to
stop the daemons manually.
DR Error: abort_detach:
board already drained
DR Error:
abort_detach_board: invalid
board state
The CANCEL ioctl() failed while
the DR daemon was trying to abort the
Detach operation. The failure caused
the board to be reported as being in
the UNREFERENCED state, indicating
that the memory has already been
drained.
Communication protocol has been
breached over the eligibility of a
board. To the SSP, the board is part of
the domain and has been, or is being,
drained of its resources. The SSP,
therefore, issues the abort command to
stop the Detach operation. However,
to the DR driver and daemon, the
board is not part of the domain.
The board must be completely
detached before you can
recover from this error. Retry
the DR operation after the
board has been successfully
detached.
Exit and restart the DR
application.
Appendix 73
Page 90

TABLE A-8 Detach-Related Failure Error Messages (Continued)
Error Message Probable Cause Suggested Action
DR Error: board
configuration query failed.
DR Error: Cannot abort
detach. Board detached from
OS (detach completed).
DR Error: couldn’t query
cpu configuration
The DR daemon failed to ascertain the
eligibility of the configuration of the
board.
This message indicates that the Detach
operation has completed. It follows the
message that is displayed for the DR
Error: abort_detach: board
already drained error message.
The Complete-Detach operation has
failed because the DR daemon could
not ascertain the CPU configuration
just prior to the beginning of the
Complete-Detach operation. After a
board is detached, the DR daemon
uses the information about the CPU
configuration to update the utmp and
wtmp entries for each CPU on the
board. Although the Complete-Attach
operation does not depend on the
updates, if the mechanisms through
which the CPU configuration is
queried are broken, serious problems
exist, so a completion of the Detach
operation should not proceed.
Stop and start the DR daemon
and/or the DR driver. If this
error persists, use the
modinfo(?), modload(1M), and
modunload(1M) commands to
work with the driver after you
have stopped the DR daemon.
Also, check the size of the DR
daemon with the ps(1)
command. If it is not between
300- and 400 Kbytes, report
this error, providing as much
information from the system
logs as possible.
See the DR Error:
abort_detach: board
already drained message.
Stop and start the DR daemon
and/or the DR driver. Also,
check the size of the DR
daemon with the ps(1)
command. If it is not between
300- and 400-Kbytes, report
this error, providing as much
information from the system
logs as possible.
DR Error: detach_board:
invalid board state
74 Sun Enterprise 10000 Dynamic Reconfiguration User Guide • February 2000
Communication protocol has been
breached over the eligibility of a
board. To the SSP, the board is part of
the domain, and its resources have
been drained, causing the SSP to
attempt to complete the detach
operation. However, to the DR driver
and daemon, the board is not part of
the domain.
Examine the state of the board
by using the
dr_cmd_board_states(?)
command, and determine the
cause of the problem. Retry the
Drain and/or CompleteDetach operations to
determine if the error is
recoverable. Stop and start the
DR daemon and driver.
Page 91

TABLE A-8 Detach-Related Failure Error Messages (Continued)
Error Message Probable Cause Suggested Action
DR Error: detach_board:
invalid board state
DR Error: detach_finished:
invalid board state
DR Error: detachable_board:
invalid board state
The proper sequence of board states
has not been followed, meaning that
the board went into the error state or
that an earlier failure in the draindetach sequence of events was not
properly reported.
Communication protocol has been
breached over the eligibility of a
board. To the SSP, the board has been
detached. However, to the DR driver
and daemon, the board has not been
detached from the domain.
Communication protocol has been
breached over the eligibility of a
board. To the SSP, the board is part of
the domain, so the SSP attempts to
drain the resources. However, to the
DR driver and daemon, the board is
not part of the domain.
Examine the state of the board
by using the
dr_cmd_board_states(?)
command, and determine the
cause of the problem. Retry the
Drain and/or CompleteDetach operations to
determine if the error is
recoverable. Stop and start the
DR daemon and driver.
Examine the state of the board
by using the
dr_cmd_board_states(?)
command, and determine the
cause of the problem. Retry the
Drain and/or CompleteDetach operations to
determine if the error is
recoverable. Stop and start the
DR daemon and driver.
Examine the state of the board
by using the
dr_cmd_board_states(?)
command, and determine the
cause of the problem. Retry the
Drain and/or CompleteDetach operations to
determine if the error is
recoverable. Stop and start the
DR daemon and driver.
DR Error: detaching board
would leave no online CPUs
The Detach operation failed because
no CPUs would be left online after the
board is detached.
Bring more CPUs online on
other boards in the domain, or
add more boards with online
CPUs to the domain, so that
the domain will have enough
online CPUs after the board is
detached.
Appendix 75
Page 92

TABLE A-8 Detach-Related Failure Error Messages (Continued)
Error Message Probable Cause Suggested Action
DR Error:
drain_board_resources:
invalid board state
DR Error: Remaining system
memory (memory_size mb) below
minimum threshold
(minimum_memory_size mb)..
. .Not enough space
DR Error: Some devices not
re-attached. Examine the
host syslog for details . .
. errno_description
Communication protocol has been
breached over the eligibility of a
board. To the SSP, the board is part of
the domain, so the SSP attempts to
drain the resources. However, to the
DR driver and daemon, the board is
not part of the domain.
The domain must have enough
memory to accomodate the memory of
the board that is being detached. The
detach operation failed because the
domain does not have enough
memory to detach the board.
Devices could not be reattached to the
operating environment during an
Abort Detach operation. Errors were
encountered while the DR daemon
tried to communicate with the device
drivers for one or more devices on the
board.
Examine the state of the board
by using the
dr_cmd_board_states(?)
command, and determine the
cause of the problem. Retry the
Drain and/or CompleteDetach operations to
determine if the error is
recoverable. Stop and start the
DR daemon and driver.
Attach as many boards as
necessary so that the memory
in the domain will hold the
memory on the board being
detached.
Examine the system logs to
determine which devices were
not reattached. If possible, fix
the problem then issue the
complete_attach(1M)
command again to fully
configure the board. If this
action fails, the failure may be
caused by an unsupported
device for which a state cannot
be resolved until the domain is
rebooted.
DR Error: sysconf failed
(_SC_NPROCESSORS_ONLN) . .
. errno_description
The sysconf(3c) system call failed to
return the total number of online CPUs
in the domain. Thus, the DR daemon
cannot determine if the domain would
be left with any online CPUs after the
board is detached.
76 Sun Enterprise 10000 Dynamic Reconfiguration User Guide • February 2000
See the sysconf(3c) man page
for more details about this
error. Use those details and the
errno_description to diagnose
and solve the error. Retry the
DR operation after you have
solved the error. If no fix is
apparent, stop and restart the
DR daemon, then retry the DR
operation.
Page 93

Auto-Configuration Error Messages
The following table contains the list of auto-configuration error messages that are
sent to the system logs and/or to the SSP applications.
TABLE A-9 Auto-Configuration Error Messages
Error Message Probable Cause Suggested Action
DR Error: Complete pending
DR operation prior to
running autoconfig...
Invalid argument
DR Error: Could not get /
tmp/AdDrEm.lck lock...
errno_description
DR Error: Could not unlock
/tmp/AdDrEm.lck lock . . .
errno_description
DR Error: devlinks cmd
failed. . . error descriptions
The autoconfig(1M) command failed
because a DR operation was still
pending (that is, the board was not
fully detached or attached before you
issued the autoconfig(1M)
command to reconfigure the operating
environment).
The DR daemon failed to get the lock
it needs so that it can reconfigure the
operating environment.
The DR daemon could not release the
lock.
The devlinks(1M) command failed to
reconfigure the operating
environment.
Use the
dr_cmd_board_states(1M)
command to determine the
state of the board. Decide to
abort or complete the pending
operation before you try to use
the autoconfig(1M)
command to reconfigure the
operating environment.
Check the additional
errno_description and/or error
number that is sent with the
error message to determine
why the lock could not be
acquired.
Check the additional
errno_description and/or error
number that is sent with the
error message to determine
why the lock was not released.
Check the additional error
descriptions and/or error
number that is sent with the
error message to determine
why the command failed.
Manually run the command on
the domain.
DR Error: disks cmd failed
...error descriptions
The disks(1M) command failed to
reconfigure the operating
environment.
Check the additional error
descriptions and/or error
number that is sent with the
error message to determine
why the command failed.
Manually run the command on
the domain.
Appendix 77
Page 94

TABLE A-9 Auto-Configuration Error Messages (Continued)
Error Message Probable Cause Suggested Action
DR Error: drvconfig cmd
failed. . . error description
DR Error: ports cmd failed
...error description
DR Error: sync cmd failed .
..error description
DR Error: tapes cmd failed
...error descriptions
The drvconfig(1M) command failed
to reconfigure the operating
environment.
The ports(1M) command failed to
reconfigure the operating
environment.
The sync(1M) command failed to
reconfigure the operating
environment.
The tapes(1M) command failed to
reconfigure the operating
environment.
Check the additional error
description and/or error
number that is sent with the
error message to determine
why the command failed.
Manually run the command on
the domain.
Check the additional error
description and/or error
number that is sent with the
error message to determine
why the command failed.
Manually run the command on
the domain.
Check the additional error
description and/or error
number that is sent with the
error message to determine
why the command failed.
Manually run the command on
the domain.
Check the additional error
description and/or error
number that is sent with the
error message to determine
why the command failed.
Manually run the command on
the domain.
78 Sun Enterprise 10000 Dynamic Reconfiguration User Guide • February 2000
Page 95

System Exploration Error Messages
The following table contains the system exploration error messages that are sent to
the system logs and/or to the SSP applications.
TABLE A-10 System Exploration Error Messages
Error Message Probable Cause Suggested Action
Cannot open /etc/
driver_aliases; dr_daemon
may not operate correctly
without driver alias
mappings...
errno_description
Cannot open mnttab
(errno=errno_value)
The DR daemon made an incorrect
decision about the detachability and
usage of devices in the domain. It is
a non-fatal error.
The DR daemon does not allow a
detachability test to pass if the
mnttab file cannot be opened and
examined to determine which file
systems are mounted. If the test is
not stopped, a mounted file system
could be detached from the domain.
Analyze what caused this error
by using the errno_description,
and try to correct the error. Look
for incorrect file permissions or
some kind of resource limit that
has been encountered. After you
correct the error, you must stop
the DR daemon, then restart it
so that it attempts to read the
driver alias mappings again.
Analyze the cause of this error
by using the errno_value, and try
to correct the error. The DR
deamon may have encountered
a resource limit. If so, stop the
daemon then restart it. Also,
check the size of the DR
daemon. It should be between
300- and 400-Kbytes. If it is not
within this range, stop the
daemon then restart it.
Appendix 79
Page 96

TABLE A-10 System Exploration Error Messages (Continued)
Error Message Probable Cause Suggested Action
Cannot open socket
(errno=errno_value)
This error message is sent only to
the system logs.
get_cpu_bindings: can’t
access /proc filesystem
[non-fatal].
The DR daemon could not open a
network device. All network devices
are opened to test their usage.
The /proc filesystem cannot be
opened. When the DR daemon
explores the domain to determine the
CPU information for a board, the
/proc filesystem is examined to
determine which PIDs, if any, are
bound to the CPUs on the board.
Bound processes negatively affect the
detachability of a board. A complete
detach operation will fail if processes
are bound to a CPU.
Determine what caused this
error by using the errno_value.
The DR daemon may have
encountered a resource limit. If
so, stop the daemon then restart
it. Also, check the size of the DR
daemon. It should be between
300- and 400-Kbytes. If it is not
within this range, stop the
daemon then restart it. If you
cannot recover the domain from
this error or if symptoms of a
memory leak exist, report this
error to your Sun service
representative, providing as
much information from the
system logs as possible.
Check to see why the
/proc filesystem cannot be
accessed. In the domain, process
binding and processor set
management programs, or
processor management
programs, can be used to
manually determine the CPU
information for a board.
get_mem_config: couldn’t
determine total system
memory size; only 1 board
counted [non-fatal].
When the DR daemon tried to count
the amount of total memory, it could
report only the amount of memory
on the selected board, meaning that
the system memory field reported by
the drshow board_number mem
command is inaccurate. The
inaccuracy also negatively affects the
eligibility of a board for a Detach
operation because if the total
memory cannot be calculated, then
the effects of removing a board from
the domain cannot be calculated as
well.
80 Sun Enterprise 10000 Dynamic Reconfiguration User Guide • February 2000
Stop and restart the DR daemon
and driver. Report this error,
providing as much information
from the system logs as possible.
A memory leak could also have
occured over time. Check the
size of the DR daemon by using
the ps(1) command. The size
should be between 300- and 400Kbytes. If the size is not within
this range, stop and start the DR
daemon and driver.
Page 97

TABLE A-10 System Exploration Error Messages (Continued)
Error Message Probable Cause Suggested Action
get_net_config_info:
interface_name no address
(errno=errno_value)
The DR daemon encountered a
failure while it tried to obtain
information about a network
interface that was configured by
using the ifconfig(1M) command.
getmntent returned error The getmntent(3c) system call
failed because the mount-point
entries could not be properly
examined. If the mount-point entries
cannot be properly examined, a
mounted file system could be
detached from the domain.
Host addr for interface_name
not found
(h_errno=errno_value)
The file that is needed to test each
active network device may not exist,
or it may be corrupted. While the
network devices are examined, each
active network device is tested to
determine if it is the primary
network interface for the domain.
The DR daemon will not allow the
detachability test to pass if it cannot
determine which active network
device is the primary network
interface for the domain.
Determine what caused this
error by using the errno_value,
then correct the error.
Analyze the mnttab file for
possible corruption. If any
exists, correct it. Also, the DR
daemon may have encountered
a resource limit. If so, stop the
daemon then restart it. Finally,
check the size of the DR
daemon. It should be between
300- and 400-Kbytes. If it is not
within this range, stop the
daemon then restart it. If you
cannot recover the domain from
this error or symptoms of a
memory leak exist, report this
error to your Sun service
representative, providing as
much information from the
system logs as possible.
Use the errno_value to determine
if the file exists or if it is
corrupted, and correct the error
as necessary. The file is named
/etc/
hostname.interface_name,
where interface_name is the
interface named in the error
message.
Host address field for
interface_name is null!!
The IP address for the primary
interface (interface_name) is not set
properly. While the network devices
are examined, each active network
device is tested to determine if it is
the primary network interface for the
domain. The DR daemon will not
allow the detachability test to pass if
it cannot determine which active
network device is the primary
network interface for the domain.
Reconfigure the network setup
for the domain. Youmay need to
reboot the domain to configure
network devices.
Appendix 81
Page 98

TABLE A-10 System Exploration Error Messages (Continued)
Error Message Probable Cause Suggested Action
Host address for
interface_name must be
internet address.
I/O bus device tree not
built.
minor_walk: failed to
build net leaf.
The file that is needed to test each
active network device may have a
corrupted value or an incorrect
network address. While the network
devices are examined, each active
network device is tested to
determine if it is the primary
network interface for the domain.
The DR daemon will not allow the
detachability test to pass if it cannot
determine which active network
device is the primary network
interface for the domain.
This error message continues added
information about the DR Error:
device tree not built error
message, in which the libdevinfo
API failed to build the device tree for
the system board.
This error message continues added
information about the DR Error:
device tree not built error
message, in which the libdevinfo
API failed to build the device tree for
the system board. This message
indicates that the libdevinfo API
at least started to look at the minor
devices for a network leaf node.
Make sure that the hostname file
for the primary network
interface contains an IP address
in the proper form (that is,
xxx.xxx.xxx.xxx). The file is
named
/etc/hostname.interface_name,
where interface_name is the
interface named in the error
message.
See the DR Error: device
tree not built error
message.
See the DR Error: device
tree not built error
message.
minor_walk: failed to
build non-net leaf.
This error message continues added
information about the device tree
not built error message,
indicating that the libdevinfo API
at least started to look at the minor
devices for a non-network leaf node.
Partition partition_name does
not have parent.
The device tree is in error because it
includes a disk partition that does
not have a parent device, such as the
disk to which the partition belongs.
82 Sun Enterprise 10000 Dynamic Reconfiguration User Guide • February 2000
See the DR Error: I/O bus
device tree not built
error message.
A device could be bad, or a
reboot may be necessary. If this
error continues to appear, report
the error to your Sun service
representative, providing as
much information from the
system logs as possible.
Page 99

TABLE A-10 System Exploration Error Messages (Continued)
Error Message Probable Cause Suggested Action
Recursive symlink found
‘symbolic_link_name’. Please
remove it.
swapctl SC_GETNSWP failed
(errno=errno_value)
The DR daemon found a symbolic
link as it walked the /dev and
/devices directories. Some
symbolic links create a recursive
loop. The DR daemon will not allow
the detachability test to pass if it
finds a symbolic link in one of these
directories.
The swapctl(2) system call failed.
This system call is used to determine
which disk partitions are in use as
swap space. The DR daemon will not
allow the detachability test to pass if
the use of swap partitions cannot be
determined.
Remove the symbolic link so
that the test can be retried.
Analyze what caused this error
by using the errno_value, and try
to correct it. Use the swapctl(2)
man page and the errno_value to
determine why the command
failed. The DR daemon may
have encountered a resource
limit. If so, stop the daemon
then restart it. Also, check the
size of the DR daemon. it should
be between 300- and 400-Kbytes.
If it is not within this range, stop
the daemon then restart it. If you
cannot recover the domain from
this error or if symptoms of a
memory leak exist, report this
error to your Sun service
representative, providing as
much information from the
system logs as possible.
Unable to find cwd
errno_value
Unable to find the cwd
errno_value
The DR daemon could not save the
current working directory. The
daemon switches into the /dev and
/devices directories to produce the
real pathnames that correspond to
device drivers.
The DR daemon could not determine
the name of the driver directory. The
daemon switches into the /dev and
/devices directories to produce the
real pathnames that correspond to
device drivers.
Determine what caused this
error by using the getcmd(3c)
man page and the errno_value,
then correct the error.
Determine what caused this
error by using the getcmd(3c)
man page and the errno_value,
then correct the error.
Appendix 83
Page 100

TABLE A-10 System Exploration Error Messages (Continued)
Error Message Probable Cause Suggested Action
Unable to get swap entries
(errno=errno_value)
Unable to lstat devlink_file
errno_value
The swapctl(2) system call failed.
This system called is used to
determine which disk partitions are
in use as swap space. The DR
daemon will not allow the
detachability test to pass if swap
partitions cannot be determined.
The lstat(2) system call failed
when it encountered the devlink_file,
where devlink is the name of the
symbolic link in the
/dev directory.
Analyze what caused this error
by using the swapctl(2) man
page and the errno_value, and try
to correct it. The DR daemon
may have encountered a
resource limit. If so, stop the
daemon then restart it. Also,
check the size of the DR
daemon. It should be between
300- and 400-Kbytes. If it is not
within this range, stop the
daemon then restart it. If you
cannot recover from this error or
if symptoms of a memory leak
exist, report this error to your
Sun service representative,
providing as much information
from the system logs as possible.
Determine what caused this
error by using the lstat(2) man
page and the errno_value. The
DR daemon may have
encountered a resource limit. If
so, stop the daemon then restart
it. Also, check the size of the DR
daemon. It should be between
300- and 400-Kbytes. If it is not
within this range, stop the
daemon then restart it. If you
cannot recover the domain from
this error or if symptoms of a
memory leak exist, report this
error to your Sun service
representative, providing as
much information from the
system logs as possible.
84 Sun Enterprise 10000 Dynamic Reconfiguration User Guide • February 2000
 Loading...