

Page 1

Sun™GigaSwift Ethernet
Adapter Installation and
User’s Guide
Sun Microsystems, Inc.
901 San Antonio Road
Palo Alto, CA 94303-4900 U.S.A.
650-960-1300
Part No. 806-2989-10
February 2001, Revision A
Send comments about this document to: docfeedback@sun.com
Page 2

Copyright 2001Sun Microsystems, Inc.,901 SanAntonio Road• PaloAlto, CA94303-4900 USA.All rightsreserved.
This product ordocument isprotected bycopyright anddistributed underlicenses restrictingits use, copying, distribution, and decompilation.
No part of this productor documentmay bereproduced in any form by any means without prior written authorization of Sun and its licensors,
if any.Third-party software, includingfont technology,is copyrightedand licensedfrom Sunsuppliers.
Parts of the product maybe derivedfrom BerkeleyBSD systems,licensed fromthe University of California. UNIX is a registered trademarkin
the U.S. and other countries, exclusively licensed through X/OpenCompany, Ltd.
Sun, Sun Microsystems,the Sunlogo, AnswerBook2,docs.sun.com, SunVTS,OpenBoot, SunSwitch,Sun Blade,Sun Fire,Ultra, SunEnterprise,
Ultra Enterprise, and Solaris aretrademarks, registeredtrademarks, or service marks of Sun Microsystems,Inc. inthe U.S.and othercountries.
All SPARCtrademarks areused underlicense andare trademarks or registered trademarksof SPARCInternational, Inc.in theU.S. and other
countries. Products bearingSPARCtrademarks arebased upon an architecture developedby SunMicrosystems, Inc.Energy Star Logo® is a
registeredtrademark ofEPA.As an EnergyStar® Partner,SunMicrosystems, Inc.has determinedthat thisproduct meetsthe Energy Star(R)
guidelines for energyefficiency.
The OPEN LOOK and Sun™ Graphical User Interface was developed by Sun Microsystems, Inc.for itsusers andlicensees. Sunacknowledges
the pioneering effortsof Xeroxin researchingand developing the concept of visual orgraphical userinterfaces forthe computerindustry.Sun
holds a non-exclusive license fromXerox tothe XeroxGraphical User Interface, which license also covers Sun’s licensees who implement OPEN
LOOK GUIs and otherwise comply with Sun’s written license agreements.
DOCUMENTATION ISPROVIDED “AS IS”AND ALL EXPRESS OR IMPLIEDCONDITIONS, REPRESENTATIONSAND WARRANTIES,
INCLUDING ANY IMPLIED WARRANTY OF MERCHANTABILITY, FITNESS FOR A PARTICULAR PURPOSE OR NONINFRINGEMENT, ARE DISCLAIMED, EXCEPT TO THE EXTENT THAT SUCH DISCLAIMERS ARE HELD TO BE LEGALLY INVALID.
Copyright 2001 Sun Microsystems, Inc.,901 SanAntonio Road• PaloAlto, CA94303-4900 Etats-Unis.Tousdroits réservés.
Ce produit oudocument estprotégé par un copyright et distribuéavec deslicences quien restreignentl’utilisation,la copie,la distribution,et la
décompilation. Aucune partie de ce produit oudocument nepeut êtrereproduitesous aucuneforme, parquelque moyenque cesoit, sans
l’autorisation préalable et écrite de Sun et de ses bailleurs delicence, s’ily ena. Lelogiciel détenupar destiers, etqui comprendla technologie
relativeaux policesde caractères,est protégépar un copyright et licencié par des fournisseurs de Sun.
Des parties de ce produitpourront êtredérivées des systèmes Berkeley BSD licenciés par l’Université de Californie. UNIX est une marque
déposée aux Etats-Unis et dans d’autrespays etlicenciée exclusivementpar X/OpenCompany, Ltd.
Sun, Sun Microsystems,le logoSun, AnswerBook2,docs.sun.com, SunVTS,OpenBoot, SunSwitch,Sun Blade,Sun Fire,Ultra, SunEnterprise,
Ultra Enterprise, et Solaris sont des marquesde fabriqueou desmarques déposées,ou marquesde service, de Sun Microsystems,Inc. auxEtatsUnis et dans d’autres pays.Toutesles marquesSPARCsontutilisées souslicence etsont desmarques defabrique oudes marques déposées de
SPARC International, Inc. aux Etats-Unis et dans d’autrespays. Lesproduits portantles marquesSPARCsont basés sur une architecture
développée par Sun Microsystems, Inc.
L’interfaced’utilisation graphique OPEN LOOK et Sun™ a été développéepar SunMicrosystems, Inc.pour sesutilisateurs etlicenciés. Sun
reconnaîtles effortsde pionniersde Xeroxpour la rechercheet ledéveloppement duconcept desinterfaces d’utilisationvisuelle ougraphique
pour l’industrie de l’informatique. Sun détient une licence non exclusive deXerox surl’interface d’utilisationgraphique Xerox,cette licence
couvrant également les licenciés de Sun qui mettent en place l’interface d’utilisation graphique OPEN LOOK etqui enoutre seconforment aux
licences écrites de Sun.
CETTE PUBLICATION EST FOURNIE "EN L’ETAT"ET AUCUNE GARANTIE, EXPRESSE OU IMPLICITE, N’EST ACCORDEE, YCOMPRIS
DES GARANTIESCONCERNANT LA VALEURMARCHANDE, L’APTITUDE DELA PUBLICATIONA REPONDRE A UNE UTILISATION
PARTICULIERE, OU LE FAIT QU’ELLE NE SOIT PAS CONTREFAISANTE DE PRODUIT DE TIERS. CE DENI DE GARANTIE NE
S’APPLIQUERAIT PAS, DANS LA MESURE OU IL SERAIT TENU JURIDIQUEMENT NUL ET NON AVENU.
Please
Recycle
Page 3

Regulatory Compliance Statements
Your Sun product is marked to indicate its compliance class:
• Federal Communications Commission (FCC) — USA
• Industry Canada Equipment Standard for Digital Equipment (ICES-003) — Canada
• Voluntary Control Council for Interference (VCCI) — Japan
• Bureau of Standards Metrology and Inspection (BSMI) — Taiwan
Please read the appropriate section that corresponds to the marking on your Sun product before attempting to install the
product.
FCC Class A Notice
This device complies with Part 15 of the FCC Rules. Operation is subject to the following two conditions:
1. This device may not cause harmful interference.
2. This device must accept any interference received, including interference that may cause undesired operation.
Note: This equipment has been tested and found to comply with the limits for a Class A digital device, pursuant to Part 15 of
the FCC Rules. These limits are designed to provide reasonable protection against harmful interference when the equipment
is operated in a commercial environment. This equipment generates, uses, and can radiate radio frequency energy, and if it is
not installed andused in accordance with theinstruction manual, it may causeharmful interference to radio communications.
Operation of thisequipment in a residentialarea is likely to causeharmful interference, in which casethe user will be required
to correct the interference at his own expense.
Shielded Cables:Connections between theworkstation and peripheralsmust be made usingshielded cables tocomply with
FCC radio frequency emission limits. Networking connections can be made using unshielded twisted-pair (UTP) cables.
Modifications: Any modifications made to this device that are not approved by Sun Microsystems, Inc. may void the
authority granted to the user by the FCC to operate this equipment.
FCC Class B Notice
This device complies with Part 15 of the FCC Rules. Operation is subject to the following two conditions:
1. This device may not cause harmful interference.
2. This device must accept any interference received, including interference that may cause undesired operation.
Note: This equipment has been tested and found to comply with the limits for a Class B digital device, pursuant to Part 15 of
the FCC Rules. These limits are designed to provide reasonable protection against harmful interference in a residential
installation. This equipment generates, uses and can radiate radio frequency energy and, if not installed and used in
accordance with the instructions, may cause harmful interference to radio communications. However, there is no guarantee
that interference will not occur in a particular installation. If this equipment does cause harmful interference to radio or
television reception,which can be determinedby turning the equipment offand on, the user isencouraged to try tocorrect the
interference by one or more of the following measures:
• Reorient or relocate the receiving antenna.
• Increase the separation between the equipment and receiver.
• Connect the equipment into an outlet on a circuit different from that to which the receiver is connected.
• Consult the dealer or an experienced radio/television technician for help.
Shielded Cables: Connections between the workstation and peripherals must be made using shielded cables in order to
maintain compliance with FCC radio frequency emission limits. Networking connections can be made using unshielded
twisted pair (UTP) cables.
Modifications: Any modifications made to this device that are not approved by Sun Microsystems, Inc. may void the
authority granted to the user by the FCC to operate this equipment.
iii
Page 4

ICES-003 Class A Notice - AvisNMB-003, Classe A
This Class A digital apparatus complies with Canadian ICES-003.
Cet appareil numérique de la classe A est conforme à la norme NMB-003 du Canada.
ICES-003 Class B Notice - AvisNMB-003, Classe B
This Class B digital apparatus complies with Canadian ICES-003.
Cet appareil numérique de la classe B est conforme à la norme NMB-003 du Canada.
iv Sun GigaSwift Ethernet Adapter Installation and User’s Guide • February 2001
Page 5

BSMI Class A Notice
The following statement is applicable to products shipped to Taiwan and marked as Class A on the product compliance
label.
v
Page 6

vi Sun GigaSwift Ethernet Adapter Installation and User’s Guide • February 2001
Page 7

Declaration of Conformity
Compliance Model Number: GCC PCI
Product Name:
EMC
European Union
This equipment complies with the following requirements of the EMC Directive 89/336/EEC:
EN55022:1998 / CISPR22:1997 Class A
EN550024:1998 EN61000-4-2 4 kV (Direct), 8 kV (Air)
EN61000-4-3 3 V/m
EN61000-4-4 1.0 kV Power Lines, 0.5 kV Signal Lines
EN61000-4-5 1 kV Line-Line, 2 kV Line-Gnd Power Lines
EN61000-4-6 3 V
EN61000-4-8 3 A/m
EN61000-4-11 Pass
EN61000-3-2:1995 Pass
EN61000-3-3:1995 Pass
Safety
This equipment complies with the following requirements of the Low Voltage Directive 73/23/EEC:
EC Type Examination Certificates:
EN60950:1992, 2nd Edition, Amendments 1,2,3,4,11
Sun GigaSwift Ethernet UTP Adapter (X1150A)
Supplementary Information
This product was tested and complies with all the requirements for the CE Mark.
Dennis P. Symanski DATE
Manager, Compliance Engineering
Sun Microsystems, Inc.
901 San Antonio Road, MPK15-102
Palo Alto, CA 94303-4900, USA
Tel: 650-786-3255
Fax: 650-786-3723
Peter Arkless DATE
Quality Manager
Sun Microsystems Scotland, Limited
Springfield, Linlithgow
West Lothian, EH49 7LR
Scotland, United Kingdom
Tel: 0506-670000
Fax: 0506 760011
vii
Page 8

viii Sun GigaSwift Ethernet Adapter Installation and User’s Guide • February 2001
Page 9

Contents
1. Product Overview 1
Hardware Overview 1
Sun GigaSwift Ethernet UTP Adapter 2
Hardware and Software Requirements 3
Product Features 3
Key Protocols and Interfaces 3
Diagnostic Support 4
2. Installing the Adapter 5
Installing the Driver Software 5
Installing the Adapter Without Dynamic Reconfiguration 8
▼ To Install the Adapter 8
▼ To Verify the Installation 9
Setting the local-mac-address Property 12
Rebooting the System 13
Installing the Adapter With Dynamic Reconfiguration 14
▼ To Install an Adapter in a Dynamic Reconfiguration System 14
3. Network Configuration 17
Configuring the Network Host Files 17
ix
Page 10

Setting Up a Diskless Client System on a GigaSwift Ethernet Network 19
▼ To Set Up a Diskless Client on a GigaSwift Ethernet Network 20
Installing the Solaris Operating Environment Over a GigaSwift Ethernet
Network 21
▼ To Install the Solaris Environment Over a GigaSwift Ethernet Network 21
4. Configuring Driver Parameters 25
GigaSwift Ethernet Device Driver Parameters 25
Driver Parameter Values and Definitions 26
Operational Mode Parameters 27
Flow Control Parameters 28
Gigabit Forced Mode Parameter 29
Interpacket Gap Parameters 29
Interrupt Parameters 31
Random Early Drop Parameters 31
PCI Bus Interface Parameters 32
Setting ce Driver Parameters 33
Setting Parameters Using the ndd Utility 33
▼ To Specify Device Instances for the ndd Utility 34
Setting Parameters Using the ce.conf File 37
▼ To Set Driver Parameters Using a ce.conf File 38
GigaSwift Ethernet Driver Operating Statistics 39
Reporting the Link Partner Capabilities 40
5. Configuring VLANs 45
An Overview of VLANs 45
Configuring VLANs 47
▼ To Configure Static VLANs 48
A. Specifications 51
x Sun GigaSwift Ethernet Adapter Installation and User’s Guide • February 2001
Page 11

Connectors 51
Performance Specifications 52
Physical Characteristics 52
Power Requirements 52
B. Diagnostic Software and Troubleshooting Issues 53
SunVTS Diagnostic Software 53
Using the OpenBoot PROM FCode Self-Test 54
▼ Running the Ethernet FCode Self-Test Diagnostic 54
Troubleshooting Issues 56
Known Incompatibilities with Pre-IEEE 802.3z Network Switches 56
▼ To Set Autonegotiation to off for a SunSwitch or an Alteon ACE 110
Switch 56
▼ To Set Autonegotiation to off for Other Noncompliant Network
Equipment 57
Index 59
Contents xi
Page 12

xii Sun GigaSwift Ethernet Adapter Installation and User’s Guide • February 2001
Page 13

Figures
FIGURE 1-1 Sun GigaSwift Ethernet UTP Adapter 2
FIGURE 2-1 Cat-5 Twisted-Pair Cable 9
FIGURE 5-1 Example of Servers Supporting Multiple VLANs with Tagging Adapters 46
FIGURE 5-2 Ethernet Tag Header Format 48
FIGURE A-1 Sun GigaSwift Ethernet UTP Adapter Connector 51
xiii
Page 14

xiv Sun GigaSwift Ethernet Adapter Installation and User’s Guide • February 2001
Page 15

Tables
TABLE 2-1 Files and Directories on the CD-ROM 6
TABLE 4-1 ce Driver Parameter, Status, and Descriptions 26
TABLE 4-2 Operational Mode Parameters 27
TABLE 4-3 Read-Write Flow Control Keyword Descriptions 28
TABLE 4-4 Forced Mode Parameter 29
TABLE 4-5 Parameters Defining enable_ipg0 and ipg0 30
TABLE 4-6 Read-Write Interpacket Gap Parameter Values and Descriptions 30
TABLE 4-7 RX Blanking Register for Alias Read 31
TABLE 4-8 RX Random Early Detecting 8-Bit Vectors 31
TABLE 4-9 PCI Bus Interface Parameters 32
TABLE 4-10 Read-Only ce Device Capabilities 39
TABLE 4-11 Read-Only Link Partner Capabilities 40
TABLE 4-12 Transmit and Receive Parameters 41
TABLE A-1 Cat-5 Connector Link Characteristics 51
TABLE A-2 Performance Specifications 52
TABLE A-3 Physical Characteristics 52
TABLE A-4 Power Requirements 52
xv
Page 16

xvi Sun GigaSwift Ethernet Adapter Installation and User’s Guide • February 2001
Page 17

Preface
The Sun GigaSwift Ethernet Adapter Installation and User’s Guide provides installation
instructions for both the Sun GigaSwift Ethernet UTP adapter and the Sun GigaSwift
Ethernet MMF adapter. This manual also describes how to configure the driver
software.
These instructions are designed for enterprise system administrators with experience
installing network hardware and software.
How This Book Is Organized
Chapter 1, provides a description of the adapter, including hardware and software.
Chapter 2, describes how to install the adapter in your system and how to verify that
it has been installed correctly.
Chapter 3, describes how to edit the network host files after the adapter has been
installed on your system.
Chapter 4, describes how to configure the driver parameters used by the Sun
GigaSwift Ethernet adapter.
Chapter 5, explains VLANs in detail and provides configuration instructions and
examples.
Appendix A, lists the specifications for the Sun GigaSwift Ethernet adapter.
Appendix B, provides an overview of the SunVTS diagnostic application and
instructions for testing the adapter using the onboard FCode selftest. There is also a
section outlining some common troubleshooting issues.
xvii
Page 18

Using UNIX Commands
This document may not contain information on basic UNIX®commands and
procedures such as shutting down the system, booting the system, and configuring
devices.
See one or more of the following for this information:
■ Solaris Handbook for Sun Peripherals
■ AnswerBook2™ online documentation for the Solaris™ operating environment
■ Other software documentation that you received with your system
Typographic Conventions
Typeface Meaning Examples
AaBbCc123 The names of commands, files,
and directories; on-screen
computer output
AaBbCc123
AaBbCc123 Book titles, new words or terms,
What you type, when
contrasted with on-screen
computer output
words to be emphasized
Command-line variable; replace
with a real name or value
Edit your.login file.
Use ls -a to list all files.
% You have mail.
% su
Password:
Read Chapter 6 in the User’s Guide.
These are called class options.
You must be superuser to do this.
To delete a file, type rm filename.
xviii Sun GigaSwift Ethernet Adapter Installation and User’s Guide • February 2001
Page 19

Shell Prompts
Shell Prompt
C shell machine_name%
C shell superuser machine_name#
Bourne shell and Korn shell $
Bourne shell and Korn shell superuser #
Related Documentation
Application Title
PCI Adapter Installation Your system installation or service manual
Storage Device Installation Your storage device installation or service manual
Dynamic Reconfiguration
Installation
Diagnostic Software SunVTS User’s Guide
OpenBoot™ Commands OpenBoot 3.x Command Reference Manual
Sun Enterprise 6x00, 5x00, 4x00, and 3x00 Systems
Dynamic Reconfiguration User’s Guide
SunVTS Test Reference Manual
Accessing Sun Documentation Online
The docs.sun.comSMweb site enables you to access a select group of Sun technical
documentation on the Web. You can browse the docs.sun.com archive or search
for a specific book title or subject at:
http://docs.sun.com
Preface xix
Page 20

Ordering Sun Documentation
Fatbrain.com, an Internet professional bookstore, stocks select product
documentation from Sun Microsystems, Inc.
For a list of documents and how to order them, visit the Sun Documentation Center
on Fatbrain.com at:
http://www.fatbrain.com/documentation/sun
Sun Welcomes Your Comments
Sun is interested in improving its documentation and welcomes your comments and
suggestions. You can email your comments to Sun at:
docfeedback@sun.com
Please include the part number (806-2989-10) of your document in the subject line of
your email.
xx Sun GigaSwift Ethernet Adapter Installation and User’s Guide • February 2001
Page 21

CHAPTER
1
Product Overview
This chapter provides a description of the Sun GigaSwift Ethernet adapter hardware
and software.
Hardware Overview
The adapter relieves congestion experienced at the backbone and server levels by
today’s networks, while providing a future upgrade path for high-end workstations
that require more bandwidth than fast Ethernet can provide.
1
Page 22
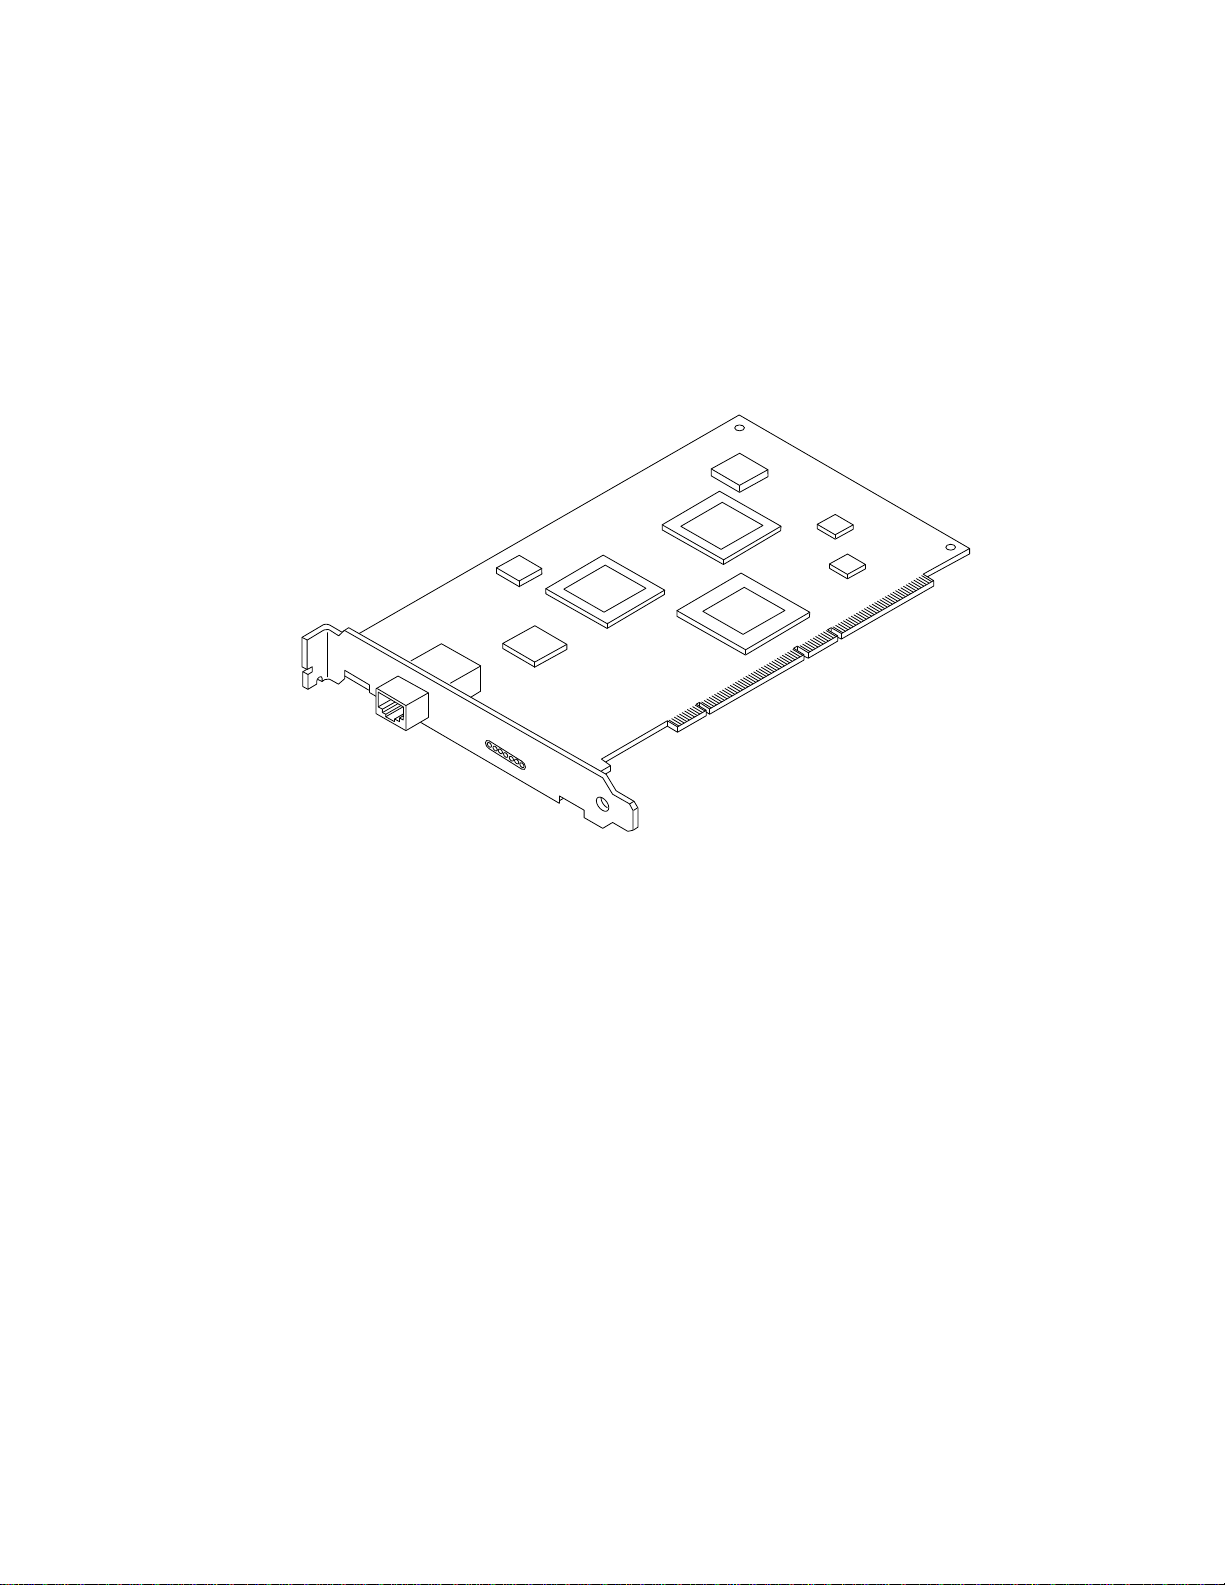
Sun GigaSwift Ethernet UTP Adapter
The Sun GigaSwift Ethernet UTP adapter is a single-port gigabit Ethernet copperbased PCI Bus card. It can be configured to operate in 10, 100, or 1000 Mbps Ethernet
networks.
FIGURE 1-1 Sun GigaSwift Ethernet UTP Adapter
2 Sun GigaSwift Ethernet Adapter Installation and User’s Guide • February 2001
Page 23

Hardware and Software Requirements
Before using the Sun GigaSwift Ethernet adapter, make sure your system meets the
following hardware and software requirements:
Hardware and Software Requirements
Hardware Sun Ultra™ 5, 10, 60, 80
Sun Enterprise™ 220R, 250, 420R, 450, 3000/3500, 4000/4500,
5000/5500, 6000/6500, 10000
Sun Blade™ 1000
OpenBoot PROM Revision 3.x, 4.x
Operating environment Solaris 2.6, 7, 8 releases
Product Features
You can install or replace the Sun GigaSwift Ethernet adapter. You can also diagnose
a failure using the built-in diagnostic tools.
Key Protocols and Interfaces
The Sun GigaSwift Ethernet adapter is interoperable with existing Ethernet
equipment assuming standard Ethernet minimum and maximum frame size (64 to
1518 bytes), frame format, and compliance with the following standards and
protocols:
■ SNMP (limited MIB)
■ Full- and half-duplex gigabit Ethernet interface
■ Low CPU utilization—Frees up server system resource and bandwidth
■ Dynamic reconfiguration (DR) and redundancy/failover support
■ Full flow control support
■ Duplex SC fiber connector (850 nm, SX)
■ 33/66-MHz, 32- or 64-bit bus master
■ Universal dual voltage signaling (3.3V and 5V)
■ PCI Local Bus Rev 2.2-compliant (6.8-inch x 4.2-inch short card)
■ IPv4 and IPv6 support
■ Load balancing for RX packets among multiple CPUs
■ IEEE 802.1Q VLAN
Chapter 1 Product Overview 3
Page 24

■ IEEE 802.1P/802.1D Priority Tagging/Quality Of Service
■ RAS support
■ Energy Star® support
Diagnostic Support
■ User-executable self-test using OpenBoot™ PROM
■ SunVTS diagnostic tool
4 Sun GigaSwift Ethernet Adapter Installation and User’s Guide • February 2001
Page 25

CHAPTER
2
Installing the Adapter
This chapter describes how to install the adapter in your system and how to verify
that it has been installed correctly. This chapter is divided into the following
sections:
■ “Installing the Driver Software” on page 5
■ “Installing the Adapter Without Dynamic Reconfiguration” on page 8
■ “To Verify the Installation” on page 9
■ “Setting the local-mac-address Property” on page 12
■ “Rebooting the System” on page 13
■ “Installing the Adapter With Dynamic Reconfiguration” on page 14
Note – If you have a Sun Enterprise system that supports dynamic reconfiguration
(DR), refer to the Sun Enterprise Dynamic Reconfiguration User’s Guide and your
system’s documentation for further information about dynamic reconfiguration.
Installing the Driver Software
The Sun GigaSwift Ethernet Driver 1.0 CD contains the driver software required to
operate the adapter. Future revisions of the Solaris operating environment might
contain Sun GigaSwift Ethernet driver software. Refer to the documentation that
shipped with the Solaris Supplement CD-ROM for a listing of the available network
drivers.
1. Become superuser.
5
Page 26

2. Insert the Sun GigaSwift Ethernet Driver 1.0 CD into a CD-ROM drive that is
connected to your system.
■ If your system is running Sun Enterprise Volume Manager™, it should
automatically mount the CD-ROM to the / cdrom/cdrom0 directory.
■ If your system is not running Volume Manager, mount the CD-ROM as follows:
# mkdir /cdrom
# mkdir /cdrom/cdrom0
# mount -F hsfs -o ro /dev/dsk/c0t6d0s2 /cdrom/cdrom0
You will see the following files and directories in the
/cdrom/
GigaSwiftEthernet directory or the
/cdrom/cdrom0 directory, depending on how you mounted the CD-ROM.
TABLE2-1 Files and Directories on the CD-ROM
File or Directory Contents
Copyright U.S. copyright file
FR_Copyright French copyright file
Docs/ Contains PDF copy of the user manual
GigaSwiftEthernet/
Solaris_OS-VER/
Packages/
Contains the Sun GigaSwift Ethernet software packages
applicable to your version (OS-VER) of the Solaris software
• SUNWcea—32-bit adb macros
• SUNWceax—64-bit adb macros
• SUNWced—32-bit adapter driver
• SUNWcedx—64-bit adapter driver
• SUNWcedu—adapter driver headers
• SUNWcem—man pages (optional)
The optional VLAN packages for Solaris 8 only
• SUNWvld—VLAN utility routines
• SUNWvldx—VLAN utility routines (64-bit)
• SUNWvldu—VLAN utility headers
Note – If you intend to use VLAN, you must install VLAN packages when you
install the GigaSwift Ethernet software packages.
6 Sun GigaSwift Ethernet Adapter Installation and User’s Guide • February 2001
Page 27

3. Install the software packages by typing the following at the command line,
replacing the OS_VER with your version (2.6, 7, or 8) of the Solaris Operating
Environment:
# /usr/sbin/pkgadd -d /cdrom/cdrom0/GigaSwiftEthernet/Solaris_OS_VER/Packages/
For example, if your system is running the Solaris 8 Operating Environment, you
would type the following:
# /usr/sbin/pkgadd -d /cdrom/cdrom0/GigaSwiftEthernet/Solaris_8/Packages/
A menu similar to the following displays:
The following packages are available:
1 SUNWcea Sun GigaSwift Ethernet Adapter Driver 32 bit adb Macros
(sparc) 1.0,REV=2000.12.11
2 SUNWceax Sun GigaSwift Ethernet Adapter Driver 64 bit adb Macros
(sparc) 1.0,REV=2000.12.11
3 SUNWced Sun GigaSwift Ethernet Adapter (32-bit Driver)
(sparc) 1.0,REV=2000.12.11
4 SUNWcedu Sun GigaSwift Ethernet Adapter Driver Headers
(sparc) 1.0,REV=2000.12.11
5 SUNWcedx Sun GigaSwift Ethernet Adapter (64-bit Driver)
(sparc) 1.0,REV=2000.12.11
6 SUNWcem Sun GigaSwift Ethernet Adapter Driver Man Pages
(sparc) 1.0,REV=2000.12.11
7 SUNWvld Sun Ethernet Vlan Utility Routines
(sparc) 1.0,REV=2000.09.28
8 SUNWvldu Sun Ethernet Vlan Utility Headers
(sparc) 1.0,REV=2000.09.28
9 SUNWvldx Sun Ethernet Vlan Utility Routines (64-bit)
(sparc) 1.0,REV=2000.09.28
Select package(s) you wish to process (or ’all’ to process
all packages). (default: all) [?,??,q]:
4. Press Return or type all to accept the default and install all packages.
OR
5. If you prefer not to install the optional packages, type the number of all but the
optional packages
See
TABLE 2-1 to identify the optional packages.
Chapter 2 Installing the Adapter 7
Page 28

Installing the Adapter Without Dynamic
Reconfiguration
▼ To Install the Adapter
Note – The following instructions describe the basic tasks required to install the
adapter. Refer to your system installation or service manual for detailed PCI adapter
installation instructions.
1. Halt and power off your system.
2. Power off all of the peripherals connected to your system.
3. Open the system unit.
4. Attach the adhesive copper strip of the antistatic wrist strap to the metal casing of
the power supply. Wrap the other end twice around your wrist, with the adhesive
side against your skin.
5. Holding the PCI adapter by the edges, unpack it and place it on an antistatic
surface.
6. Using a No. 1 Phillips screwdriver, remove the PCI filler panel from the slot in
which you want to insert the PCI adapter.
Save the filler panel screw for Step 9.
7. Holding the PCI adapter by the edges, align the adapter edge connector with the
PCI slot. Slide the adapter face plate into the small slot at the end of the PCI
opening.
8 Sun GigaSwift Ethernet Adapter Installation and User’s Guide • February 2001
Page 29

8. Applying even pressure at both corners of the adapter, push the PCI adapter until
it is firmly seated in the slot.
Caution – Do not use excessive force when installing the adapter into the PCI slot.
You may damage the adapter’s PCI connector. If the adapter does not seat properly
when you apply even pressure, remove the adapter and carefully reinstall it again.
9. Secure the adapter to the PCI slot using the screw you removed in Step 6.
10. Detach the wrist strap and close the system unit.
11. Connect the cables.
■ For the Sun GigaSwift Ethernet UTP PCI Bus card, connect a Cat-5 twisted-pair
cable.
FIGURE 2-1 Cat-5 Twisted-Pair Cable
▼ To Verify the Installation
After you have installed the Sun GigaSwift Ethernet adapter, but before you boot
your system, perform the following tasks to verify the installation. Refer to the
Solaris Handbook for Sun Peripherals manual or your Solaris documentation for the
detailed instructions.
Chapter 2 Installing the Adapter 9
Page 30

Note – Verification is not required if your system supports dynamic reconfiguration
(DR).
1. Power on the system, and when the banner appears, press the Stop-A key
sequence to interrupt the boot process and display the OpenBoot ( ok) prompt. If a
keyboard is not attached then send the appropriate Break sequence on the serial
port.
If the card is properly installed and the cables are properly connected to a
compatible network, you will see the following message:
xcvr addr:0x00 - link up 1000 Mbps half duplex
xcvr addr:0x00 - link up 1000 Mbps full duplex
2. List the network devices on your system.
ok show-nets
Use the show-nets command to list the system devices. You should see the full
path name of the network devices, similar to the Ultra 30 system example below. In
this example, the network@4 device is the Sun GigaSwift Ethernet adapter and the
network@1,1 is the onboard Ethernet device.
ok show-nets
a) /pci@1f,2000/pci@1/network@0
b) /pci@1f,4000/network@1,1
q) NO SELECTION
Enter Selection, q to quit: q
Note – If you do not see the device listed, check that the adapter is properly seated
and, if necessary, reinstall the adapter.
3. View the device that you installed.
Using the previous example, type:
ok cd /pci@1f,2000/pci@1/network@4
10 Sun GigaSwift Ethernet Adapter Installation and User’s Guide • February 2001
Page 31

4. View the .properties file for a list of device properties.
It might be difficult to tell if the devices on your network are GigaSwift Ethernet
devices or other network interface cards. The .properties command displays the
specific information about the installed adapter.
To make sure that the device you just installed is connected to the network, type:
ok .properties
assigned-addresses 82810010 00000000 00200000 00000000 00200000
82810030 00000000 00400000 00000000 00100000
local-mac-address 08 00 20 e5 bf cf
phy-type mif
max-frame-size 00 00 40 00
address-bits 00 00 00 30
compatible 70 63 69 31 30 38 65 2c 61 62 62 61 00 70 63 69
board-model 501-5902
model SUNW,pci-ce
device_type network
reg 00810000 00000000 00000000 00000000 00000000
02810010 00000000 00000000 00000000 00200000
02810030 00000000 00000000 00000000 00100000
name network
version 1.10
fcode-rom-offset 00000000
66mhz-capable
fast-back-to-back
devsel-speed 00000002
class-code 00020000
interrupts 00000001
max-latency 00000040
min-grant 00000040
revision-id 00000001
device-id 0000abba
vendor-id 0000108e
Note – If you are going to set the local-mac-address property, note the
local-mac-address of your device at this time. See “Setting the local-macaddress Property” on page 12 for more information.
Chapter 2 Installing the Adapter 11
Page 32

Setting the local-mac-address Property
Note – Setting the local-mac-address property is only required if you will be
booting from the network.
The network interface of the Sun GigaSwift Ethernet adapter has been assigned a
unique media access control (MAC) address that represents the 48-bit Ethernet
address for that interface. The OpenBoot firmware reports this MAC address via the
local-mac-address property in the device nodes corresponding to the network
interface.
A system is not obligated to use this assigned MAC address if it has a system-wide
MAC address. In such cases, the system-wide MAC address applies to all network
interfaces on the system.
The device driver, or any other adapter utility, can use the network device’s MAC
address (local-mac-address) while configuring it. In the Solaris operating
environment, you can use the MAC address when booting over the network.
The mac-address property of the network device specifies the network address
(system-wide or local-mac-address) used for booting the system. To start using
the MAC address assigned to the network interface of the Sun GigaSwift Ethernet
adapter, set the NVRAM configuration variable local-mac-address? to true.
ok setenv local-mac-address? true
▼ To Set the GigaSwift Ethernet Device Primary Boot Device
Use this procedure only if you want the GigaSwift Ethernet device to be your
primary boot device.
1. List the network devices on your system.
ok show-nets
a) /pci@1f,2000/pci@1/network@4
b) /pci@1f,4000/network@1,1
q) NO SELECTION
Enter Selection, q to quit: q
12 Sun GigaSwift Ethernet Adapter Installation and User’s Guide • February 2001
Page 33

2. View the device that you installed.
Using the previous example, type:
ok cd /pci@1f,2000/pci@1/network@4
3. Set the Sun GigaSwift Ethernet device to be your default boot device, type:
# setenv boot-device=/pci@1f,2000/pci@1/network@4
Rebooting the System
After verifying the adapter installation, use the boot -r command to perform a
reconfiguration boot on your system.
ok boot -r
Chapter 2 Installing the Adapter 13
Page 34

Installing the Adapter With Dynamic
Reconfiguration
If you have a Sun Enterprise system that supports dynamic reconfiguration (DR),
you do not have to reboot your system after installing the adapter.
The process of adding and configuring an adapter with DR involves (1) connecting
the attachment point and (2) configuring its occupant. In most cases, the
cfgadm(1M) command can perform both steps at once.
▼ To Install an Adapter in a Dynamic
Reconfiguration System
1. Verify that the selected board slot is ready for the adapter.
# cfgadm
The states and conditions should be:
Receptacle state—Empty
Occupant state—Unconfigured
Condition—Unknown
Or:
Receptacle state—Disconnected
Occupant state—Unconfigured
Condition—Unknown
14 Sun GigaSwift Ethernet Adapter Installation and User’s Guide • February 2001
Page 35

2. If the status of the slot is not “empty” or “disconnected”, type:
# cfgadm -c disconnect sysctrl#:slot#
where the sysctrl# = 0 for the Enterprise 10000 and slot#= the slot available for the
adapter. For example, if you were installing the adapter into slot #3 on an Enterprise
10000, you would type the following:
# cfgadm -c disconnect sysctrl0:3
3. Physically insert the adapter into the slot and look for an acknowledgement on
the console, such as, “name board inserted into slot3.”
After the adapter is inserted, the states and conditions should become:
Receptacle state—Disconnected
Occupant state—Unconfigured
Condition—Unknown
Any other states or conditions should be considered an error.
4. Connect any peripheral cables and interface modules to the adapter.
5. Connect the cables to the card and to an Ethernet network.
6. Configure the adapter with the following command:
# cfgadm -v -c configure sysctrl#:slot#
This command should both connect and configure the receptacle. Verify with the
cfgadm command.
The states and conditions for a connected and configured attachment point should
be:
Receptacle state—Connected
Occupant state—Configured
Condition—OK
Chapter 2 Installing the Adapter 15
Page 36

Now the system is also aware of the usable devices which reside on the adapter and
all devices may be mounted or configured to be used.
If the command fails to connect and configure the adapter and slot (the status should
be shown as “configured” and “ok”), do the connection and configuration as
separate steps:
a. Connect the adapter and slot:
# cfgadm -v -c connect sysctrl#:slot#
The states and conditions for a connected attachment point should be:
Receptacle state—Connected
Occupant state—Unconfigured
Condition—OK
Now the system is aware of the adapter, but not the usable devices which reside
on the adapter. Temperature is monitored and power and cooling affect the
attachment point condition.
b. Configure the adapter and slot:
# cfgadm -v -c configure sysctrl#:slot#
The states and conditions for a configured attachment point should be:
Receptacle state—Connected
Occupant state—Configured
Condition—OK
Now the system is also aware of the usable devices which reside on the adapter and
all devices may be mounted or configured to be used.
7. Reconfigure the devices on the adapter
# drvconfig; devlinks; disks; ports; tapes;
The console should now display a list of devices and their addresses.
16 Sun GigaSwift Ethernet Adapter Installation and User’s Guide • February 2001
Page 37

CHAPTER
3
Network Configuration
This chapter describes how to edit the network host files after the adapter has been
installed on your system. The chapter contains the following sections:
■ “Configuring the Network Host Files” on page 17
■ “Setting Up a Diskless Client System on a GigaSwift Ethernet Network” on
page 19
■ “Installing the Solaris Operating Environment Over a GigaSwift Ethernet
Network” on page 21
Configuring the Network Host Files
After installing the driver software, you must create a hostname.cenumber file for
the adapter’s Ethernet interface. You must also create both an IP address and a host
name for its Ethernet interface in the /etc/hosts file.
1. At the command line, use the grep command to search the /etc/path_to_inst
file for ce interfaces.
# grep ce /etc/path_to_inst
"/pci@1f,4000/pci@1/network@4"
In the example above, the device instance is from a Sun GigaSwift Ethernet adapter
installed in slot 1. For clarity, the instance number is in bold italics.
2. Use the ifconfig command to setup the adapter’s ce interface.
0
"ce"
17
Page 38

Use the ifconfig command to assign an IP address to the network interface. Type
the following at the command line, replacing ip_address with the adapter’s IP
address:
# ifconfig ce0 plumb ip_address up
Refer to the ifconfig(1M) man page and the Solaris documentation for more
information.
■ If you want a set-up that will remain the same after you reboot, create an
/etc/hostname.cenumber file, where number corresponds to the instance
number of the ce interface you plan to use.
To use the adapter’s ce interface in the Step 1 example, create an
/etc/hostname.ce0 file, where 0 is the number of the ce interface. If the
instance number were 1, the filename would be
/etc/hostname.ce1.
■ Do not create an /etc/hostname.cenumber file for a Sun GigaSwift Ethernet
adapter interface you plan to leave unused.
■ The /etc/hostname.cenumber file must contain the hostname for the
appropriate ce interface.
■ The host name should have an IP address and should be listed in the
/etc/hosts file.
■ The host name should be different from any other host name of any other
interface, for example: /etc/hostname.ce0 and /etc/hostname.ce1 cannot
share the same host name.
The following example shows the /etc/hostname.cenumber file required for a
system called zardoz that has a Sun GigaSwift Ethernet adapter (zardoz-11).
# cat /etc/hostname.hme0
zardoz
# cat /etc/hostname.ce0
zardoz-11
18 Sun GigaSwift Ethernet Adapter Installation and User’s Guide • February 2001
Page 39

3. Create an appropriate entry in the /etc/hosts file for each active ce interface.
For example:
# cat /etc/hosts
#
# Internet host table
#
127.0.0.1 localhost
129.144.10.57 zardoz loghost
129.144.11.83 zardoz-11
Setting Up a Diskless Client System on a
GigaSwift Ethernet Network
Note – Setting up a diskless client over GigaSwift Ethernet adapter in VLAN
configuration is not supported. For setting up a diskless client, the switch port to
which the GigaSwift Ethernet adapter is connected must be in normal LAN mode.
Before you can boot and operate a diskless client system across a gigabit Ethernet
network, you must first install the GigaSwift Ethernet software packages into the
root directory of the diskless client. You can find the GigaSwift Ethernet software
packages on the Sun GigaSwift Ethernet Driver 1.0 CD. Refer to the Solaris Advanced
Installation Guide and the System Administration Guide for more information about
installing and administering diskless client systems.
Note – The Solaris 8 operating environment does not support diskless clients.
Solaris 8 Update 1/01 does support diskless clients. Refer to the Solaris Advanced
Installation Guide and the System Administration Guide for more information about
installing and administering diskless client systems.
Chapter 3 Network Configuration 19
Page 40

▼ To Set Up a Diskless Client on a GigaSwift
Ethernet Network
1. Locate the root directory of the diskless client on the host server.
The root directory of diskless client system is commonly installed in the host
server ’s /export/root/client_name directory, where client_name is the diskless
client’s host name. In this procedure, the root directory will be:
# ls /export/root
systest157-38/ systest162-38/ systest180-38/
systest160-38/ systest177-38/ systest182-38/
2. Insert the Sun GigaSwift Ethernet Driver 1.0 CD into the server’s CD-ROM drive.
The CD should automatically mount to the /cdrom/cdrom0 directory. If the CD did
not get mounted to this directory, refer to “Installing the Driver Software” on page 5
for mounting instructions.
3. Use the pkgadd -R command to install the three GigaSwift Ethernet software
packages to the diskless client’s root directory on the server.
You will need to install the SUNWced, SUNWcedm, and SUNWcedu software packages
to the client’s root directory.
# cd /cdrom/cdrom0/GigaSwiftEthernet/Packages
# pkgadd -R /export/root/client_name -d . SUNWced SUNWcem SUNWcedu
# cd /
4. Eject the Sun GigaSwift Ethernet Driver 1.0 CD from the CD-ROM drive.
5. Create a hostname.cenumber file in the diskless client’s root directory.
You will need to create an /export/root/client_name/etc/hostname.cenumber
file for the GigaSwift Ethernet interface. See “Configuring the Network Host Files”
on page 17 for instructions.
6. Edit the hosts in the diskless client’s root directory.
You will need to edit the /export/root/client_name/etc/hosts file to include the
IP address of the GigaSwift Ethernet interface. See “Configuring the Network Host
Files” on page 17 for instructions.
20 Sun GigaSwift Ethernet Adapter Installation and User’s Guide • February 2001
Page 41

Installing the Solaris Operating
Environment Over a GigaSwift Ethernet
Network
The Solaris Advanced Installation Guide describes the full procedure for installing the
Solaris operating environment over the network. The procedure below assumes that
you have created an install server, which contains the image of the Solaris CD, and
that you have set up the client system to be installed over the network.
Before you can install the Solaris operating environment on a client system with a
GigaSwift Ethernet adapter, you must first add the GigaSwift Ethernet software
packages to the install server. These software packages are on Sun GigaSwift Ethernet
Driver 1.0 CD.
Note – You cannot install Solaris over VLAN configurations. The switch port to
which GigaSwift Ethernet Adapter is connected, must be in normal LAN mode.
▼ To Install the Solaris Environment Over a
GigaSwift Ethernet Network
1. Prepare the install server and client system to install the Solaris operating
environment over the network.
The Solaris Advanced Installation Guide describes how to create the install server and
set up the client systems.
Note – If you want to install the client system over a network that is not part of the
same subnet, you must also create a boot server. The Solaris Advanced Installation
Guide describes how to create a boot server.
Chapter 3 Network Configuration 21
Page 42

2. Find the root directory of the client system.
The client system’s root directory can be found in the install server’s
/etc/bootparams file. Use the grep command to search this file for the root
directory.
# grep client_name /etc/bootparams
client_name root=server_name:/netinstall/Solaris_2.7/Tools/Boot
install=server_name:/netinstall boottype=:in rootopts=:rsize=32768
In the example above, the root directory for the Solaris 7 client is /netinstall.In
Step 4, you would replace root_directory with /netinstall.
Note – If the root directory is not found in the /etc/bootparams file, refer to the
Solaris Advanced Installation Guide for configuration instructions.
3. Insert the Sun GigaSwift Ethernet Driver 1.0 CD into the install server’s CD-ROM
drive.
The CD should automatically mount to the /cdrom/cdrom0 directory. If the CD did
not get mounted to this directory, refer to “Installing the Driver Software” on page 5
for mounting instructions.
4. On the install server, install the GigaSwift Ethernet software to the client’s root
directory, as determined in Step 2.
Replace root_directory with the location of the client’s root directory.
# cd /cdrom/cdrom0/GigaSwiftEthernet/Packages
# ls SUNWce*
SUNWcea SUNWceax SUNWced SUNWcedu SUNWcem
# pkgadd -R root_directory/Solaris_2.7/Tools/Boot -d . SUNWced SUNWcem SUNWcedu
# cd /
Note – The directory paths for these files might change in future Solaris releases. If
the commands above do not work correctly, refer to the documentation that shipped
with your version of the Solaris operating environment.
5. Eject the Sun GigaSwift Ethernet Driver 1.0 CD from the CD-ROM drive.
Note – Perform the following steps on the client system.
22 Sun GigaSwift Ethernet Adapter Installation and User’s Guide • February 2001
Page 43

6. Shut down and halt the client system.
Use the shutdown command to display the OpenBoot (ok) prompt.
# shutdown -i0 -g0 -y
. . .
(shutdown command messages omitted)
. . .
ok
7. At the ok prompt, use the show-nets command to find the device path of the
GigaSwift Ethernet device.
The show-nets command lists the system devices. You should see the full path
name of the network device, similar to the example below. In this example, the
network@4 device is the Sun GigaSwift Ethernet adapter.
ok show-nets
a) /pci@1f,2000/pci@1/network@4
b) /pci@1f,4000/network@1,1
q) NO SELECTION
Enter Selection, q to quit: q
8. At the ok prompt, boot the client system using the full device path of the Gigabit
Ethernet device.
For example:
ok boot /pci@1f,2000/pci@1/network@4
9. Proceed with the Solaris operating environment installation.
Refer to the Solaris Advanced Installation Guide for more information about installing
the Solaris operating environment over the network.
Chapter 3 Network Configuration 23
Page 44
10. After installing the Solaris operating environment, install the Sun GigaSwift
Ethernet software on the client system.
The software installed in Step 4 was required to boot the client system over the
GigaSwift Ethernet interface. You now need to install the software in order for the
operating system to use the client’s GigaSwift Ethernet interfaces in normal
operation.
Before installing the Sun GigaSwift Ethernet software, make sure that the client
system does not already have the software installed. Use the pkginfo command to
see if the Sun GigaSwift Ethernet software packages are installed on the client
system.
# pkginfo | grep SUNWce
system SUNWced Sun Gigabit Ethernet Adapter Driver
system SUNWcem Sun Gigabit Ethernet Adapter Driver Man Pages
system SUNWcedu Sun Gigabit Ethernet Adapter Driver Headers
■ If the software is installed (as shown in the example above), skip to Step 11.
■ If the software is not installed, install the software from Solaris Supplement CD.
Refer to “Installing the Driver Software” on page 5 for instructions on installing
the required software packages.
11. Confirm that the network host files have been configured correctly during the
Solaris installation.
Although the Solaris software installation creates the client’s network configuration
files, you may need to edit these files to match your specific networking
environment. See “Configuring the Network Host Files” on page 17 for more
information about editing these files.
24 Sun GigaSwift Ethernet Adapter Installation and User’s Guide • February 2001
Page 45

CHAPTER
4
Configuring Driver Parameters
This chapter describes how to configure the driver parameters used by the Sun
GigaSwift Ethernet adapter. This chapter contains the following sections:
■ “GigaSwift Ethernet Device Driver Parameters” on page 25
■ “Setting ce Driver Parameters” on page 33
■ “GigaSwift Ethernet Driver Operating Statistics” on page 39
GigaSwift Ethernet Device Driver
Parameters
The ce device driver controls the GigaSwift Ethernet devices. The ce driver is
attached to the UNIX pci name property pci108e,abba for the Sun GigaSwift
Ethernet adapter (108e is the vendor ID and abba is the PCI device ID).
You can manually configure the ce device driver parameters to customize each Sun
GigaSwift Ethernet adapter device in your system. This section provides an
overview of the capabilities of the GigaSwift Ethernet device used in the adapter,
lists the available ce device driver parameters, and describes how to configure these
parameters.
The Sun GigaSwift Ethernet UTP PCI adapter is capable of all the operating speeds
and modes listed in “Setting the Autonegotiation Mode” on page 36. The ce device
performs autonegotiation with the remote end of the link (link partner) to select a
common mode of operation. The ce device also supports a forced mode of operation.
25
Page 46

Driver Parameter Values and Definitions
TABLE 4-1 describes the parameters and settings for the ce device driver.
TABLE4-1 ce Driver Parameter, Status, and Descriptions
Parameter Status Description
instance Read and write Device instance
adv_autoneg_cap Read and write Operational mode parameter
adv_1000fdx_cap Read and write Operational mode parameter
adv_1000hdx_cap Read and write Operational mode parameter
adv_100T4_cap Read and write Operational mode parameter
adv_100fdx_cap Read and write Operational mode parameter
adv_100hdx_cap Read and write Operational mode parameter
adv_10fdx_cap Read and write Operational mode parameter
adv_10hdx_cap Read and write Operational mode parameter
adv_asmpause_cap Read and write Flow control parameter
adv_pause_cap Read and write Flow control parameter
link_master Read and write 1Gb forced mode parameter
use_int_xcvr Read and write
enable_ipg0 Read and write Enable additional delay before transmitting a packet
ipg0 Read and write Additional delay before transmitting a packet
ipg1 Read and write Interpacket Gap parameter
ipg2 Read and write Interpacket Gap parameter
rx_intr_pkts Read and write Receive interrupt blanking values
rx_intr_time Read and write Receive interrupt blanking values
red_dv4to6k Read and write Random early detection and packet drop vectors
red_dv6to8k Read and write Random early detection and packet drop vectors
red_dv8to10k Read and write Random early detection and packet drop vectors
red_dv10to12k Read and write Random early detection and packet drop vectors
tx_dma_weight Read and write PCI Interface parameter
rx_dma_weight Read and write PCI Interface parameter
infinit_burst Read and write PCI Interface parameter
disable_64bit Read and write PCI Interface parameter
26 Sun GigaSwift Ethernet Adapter Installation and User’s Guide • February 2001
Page 47

Operational Mode Parameters
The following parameters determine the transmit and receive speed and duplex.
TABLE 4-2 describes the operational mode parameters and their default values.
TABLE4-2 Operational Mode Parameters
Parameter Description
adv_autoneg_cap Local interface capability advertised by the hardware
0 = Forced mode
1 = Autonegotiation (default)
adv_1000fdx_cap Local interface capability advertised by the hardware
0 = Not 1000 Mbit/sec full-duplex capable
1 = 1000 Mbit/sec full-duplex capable (default)
adv_1000hdx_cap Local interface capability advertised by the hardware
0 = Not 1000 Mbit/sec half-duplex capable
1 = 1000 Mbit/sec half-duplex capable (default)
adv_100fdx_cap Local interface capability advertised by the hardware
0 = Not 100 Mbit/sec full-duplex capable
1 = 100 Mbit/sec full-duplex capable (default)
adv_100hdx_cap Local interface capability advertised by the hardware
0 = Not 100 Mbit/sec half-duplex capable
1 = 100 Mbit/sec half-duplex capable (default)
adv_10fdx_cap Local interface capability advertised by the hardware
0 = Not 10 Mbit/sec full-duplex capable
1 = 10 Mbit/sec full-duplex capable (default)
adv_10hdx_cap Local interface capability advertised by the hardware
0 = Not 10 Mbit/sec half-duplex capable
1 = 10 Mbit/sec half-duplex capable (default)
Note – If a parameter’s initial setting is 0, it cannot be changed. If you try to change
it, it will revert back to 0.
If all these parameters are set to 1, autonegotiation will use the highest speed
possible. If all these parameters are set to 0, you will receive the following error
message:
NOTICE: Last setting will leave ce1 with no link capabilities.
WARNING: ce1: Restoring previous setting.
Chapter 4 Configuring Driver Parameters 27
Page 48

Flow Control Parameters
The ce device is capable of sourcing (transmitting) and terminating (receiving)
pause frames conforming to the IEEE 802.3x Frame Based Link Level Flow Control
Protocol. In response to received flow control frames, the ce device can slow down
its transmit rate. On the other hand, the ce device is capable of sourcing flow control
frames, requesting the link partner to slow down, provided that the link partner
supports this feature. By default, the driver advertises both transmit and receive
pause capability during autonegotiation.
TABLE 4-3 provides flow control keywords and describes their function.
TABLE4-3 Read-Write Flow Control Keyword Descriptions
Keyword Description
adv_asmpause_cap The adapter supports asymmetric pause, which means it
can pause only in one direction.
0=Off (default)
1=On
adv_pause_cap This parameter has two meanings depending on the
value of adv_asmpause_cap. (Default=0)
If adv_asmpause_cap = 1 while adv_pause_cap =1
pauses are received.
If adv_asmpause_cap = 1 while adv_pause_cap =0
pauses are transmitted.
If adv_asmpause_cap = 0 while adv_pause_cap =1
pauses are sent and received.
If adv_asmpause_cap = 0 then adv_pause_cap
determines whether Pause capability is on or off.
28 Sun GigaSwift Ethernet Adapter Installation and User’s Guide • February 2001
Page 49

Gigabit Forced Mode Parameter
In 10/100 mode it was possible to disable auto-negotiation and force the link to the
speed you required. With Gigabit copper interfaces this feature is also available but
may require you to decide whether your side of the connection is a master or a slave.
The link_master parameter will facilitate that. Usually switches will be enabled as
master therefore this parameter can remain unchanged, since slave operation is the
default. If this is not the case Then link_master can be used to enable ce as a
master.
TABLE4-4 Forced Mode Parameter
Parameter Description
link_master When set to 1 this enables master operation, assuming the link
partner is a slave.
When set to 0 this enables slave operation, assuming the link
partner is a slave. (default)
Interpacket Gap Parameters
The ce device supports a programmable mode called enable_ipg0.
When a driver receives a packet with enable_ipg0 set (the default), it adds an
additional time delay before transmitting the packet. This delay, set by the ipg0
parameter, is in addition to the delay set by the ipg1 and ipg2 parameters. The
additional ipg0 delay helps to reduce collisions.
If enable_ipg0 is disabled, the value of ipg0 is ignored and no additional delay is
set. Only the delays set by ipg1 and ipg2 will be used. Disable enable_ipg0 if
other systems keep sending a large number of back-to-back packets. Systems that
have enable_ipg0 set might not have enough time on the network.
You can add the additional delay by setting the ipg0 parameter from 0 to 255, which
is the media byte time delay.
Chapter 4 Configuring Driver Parameters 29
Page 50

TABLE 4-5 defines the enable_ipg0 and ipg0 parameters.
TABLE4-5 Parameters Defining enable_ipg0 and ipg0
Parameter Values Description
enable_ipg0 0
1
enable_ipg0 reset
enable_ipg0 set (Default=8)
ipg0 0 to 255 The additional time delay (or gap) before
transmitting a packet (after receiving the
packet) (Default=8)
The ce device supports the programmable Interpacket Gap (IPG) parameters ipg1
and ipg2. The total IPG is the sum of ipg1 and ipg2. The total IPG is 0.096
microseconds for the link speed of 1000 Mbps.
TABLE 4-6 lists the default values and allowable values for the IPG parameters.
TABLE4-6 Read-Write Interpacket Gap Parameter Values and Descriptions
Parameter Values
(Byte-time)
Description
ipg1 0 to 255 Interpacket gap 1 (Default = 8)
ipg2 0 to 255 Interpacket gap 2 (Default = 4)
By default, the driver sets ipg1 to 8-byte time and ipg2 to 4-byte time, which are
the standard values. (Byte time is the time it takes to transmit one byte on the link,
with a link speed of 1000 Mbps.)
If your network has systems that use longer IPG (the sum of ipg1 and ipg2), and if
those machines seem to be slow in accessing the network, increase the values of
ipg1 and ipg2 to match the longer IPGs of other machines.
30 Sun GigaSwift Ethernet Adapter Installation and User’s Guide • February 2001
Page 51

Interrupt Parameters
TABLE 4-7 describes the receive interrupt blanking values.
TABLE4-7 RX Blanking Register for Alias Read
Field Name Values Description
rx_intr_pkts 0 to 511 Interrupt after this number of packets have arrived since
the last packet was serviced. A value of zero indicates no
packet blanking. (Default=3)
rx_intr_time 0 to 524287 Interrupt after 4.5 US ticks have elapsed since the last
packet was serviced. A value of zero indicates no time
blanking. (Default=1250)
Random Early Drop Parameters
TABLE 4-8 describes the RX random early detection 8-bit vectors, which allows you to
enable random early drop (RED) thresholds. When received packets reach the RED
range packets are dropped according to the preset probability. The probability
should increase when the fifo level increases. Control packets are never dropped and
are not counted in the statistics.
TABLE4-8 RX Random Early Detecting 8-Bit Vectors
Field Name Values Description
red_dv4to6k 0 to 255 Random early detection and packet drop vectors for
when fifo threshold is greater than 4096 bytes and less
than 6,144 bytes. Probability of drop can be
programmed on a 12.5 percent granularity. For
example, if bit 0 is set the first packet out of every eight
will be dropped in this region. (Default=0)
Chapter 4 Configuring Driver Parameters 31
Page 52

TABLE4-8 RX Random Early Detecting 8-Bit Vectors
Field Name Values Description
red_dv6to8k 0 to 255 Random early detection and packet drop vectors for
when fifo threshold is greater than 6,144 bytes and less
than 8,192 bytes. Probability of drop can be
programmed on a 12.5 percent granularity. For
example, if bit 8 is set the first packet out of every eight
will be dropped in this region. (Default=0)
red_dv8to10k 0 to 255 Random early detection and packet drop vectors for
when fifo threshold is greater than 8,192 bytes and less
than 10,240 bytes. Probability of drop can be
programmed on a 12.5 percent granularity. For
example, if bit 16 is set the first packet out of every
eight will be dropped in this region. (Default=0)
red_dv10to12k 0 to 255 Random early detection and packet drop vectors for
when fifo threshold is greater than 10,240 bytes and less
than 12,288 bytes. Probability of drop can be
programmed on a 12.5 percent granularity. For
example, if bit 24 is set the first packet out of every
eight will be dropped in this region. (Default=0)
PCI Bus Interface Parameters
These parameters allow you to modify PCI interface features to gain better PCI
interperformance for a given application.
TABLE4-9 PCI Bus Interface Parameters
Parameter Description
tx_dma_weight Determine the multiplication factor for granting credit to the TX
side during a weighted round robin arbitration. Values are 0 to 3.
(Default=0) Zero
means no extra weighting. The other values
are power of 2 extra weighting, on that traffic. For example
of tx_dma_weight = 0 and rx_dma_weight = 3 then as long
as RX traffic is continuously arriving its priority will be 8
times greater than TX to access the PCI
32 Sun GigaSwift Ethernet Adapter Installation and User’s Guide • February 2001
Page 53

TABLE4-9 PCI Bus Interface Parameters
Parameter Description
rx_dma_weight Determine the multiplication factor for granting credit to the RX
side during a weighted round robin arbitration. Values are 0 to 3.
(Default=0)
infinite_burst allows the infinite burst capability to be utilized. When this is in
effect and the system supports infinite burst. The adapter will not
free the bus until complete packets are transferred across the bus.
Values are 0 or 1. (Default=0)
disable_64bit Switches off 64 bit capability of the adapter. In some cases, it is
useful to switch off this feature.
Values are 0 or 1. (Default=0, which enables 64 bit capability)
Setting ce Driver Parameters
You can set the ce device driver parameters in two ways:
■ Using the ndd utility
■ Using the ce.conf file
If you use the ndd utility, the parameters are valid only until you reboot the system.
This method is good for testing parameter settings.
To set parameters so they remain in effect after you reboot the system, create a
/kernel/drv/ce.conf file and add parameter values to this file when you need to
set a particular parameter for a device in the system.
Setting Parameters Using the ndd Utility
Use the ndd utility to configure parameters that are valid until you reboot the
system. The ndd utility supports any networking driver, which implements the Data
Link Provider Interface (DLPI).
The following sections describe how you can use the ce driver and the ndd utility to
modify (with the -set option) or display (without the -set option) the parameters
for each ce device.
Chapter 4 Configuring Driver Parameters 33
Page 54

▼ To Specify Device Instances for the ndd Utility
Before you use the ndd utility to get or set a parameter for a ce device, you must
specify the device instance for the utility.
1. Check the /etc/path_to_inst file to identify the instance associated with a
particular device.
# grep ce /etc/path_to_inst
"/pci@1f,2000/pci@1/network@0"
"/pci@1f,2000/pci@2/network@0"
"/pci@1f,2000/pci@4/network@0"
2
"ce"
1
"ce"
0
"ce"
In the example above, the three GigaSwift Ethernet instances are from the installed
adapters. The instance numbers are in bold italics for clarity.
2. Use the instance number to select the device.
# ndd -set /dev/ce instance instance#
The device remains selected until you change the selection.
Noninteractive and Interactive Modes
You can use the ndd utility in two modes:
■ Noninteractive
■ Interactive
In noninteractive mode, you invoke the utility to execute a specific command. Once
the command is executed, you exit the utility. In interactive mode, you can use the
utility to get or set more than one parameter value. (Refer to the ndd(1M) man page
for more information.)
Using the ndd Utility in Noninteractive Mode
This section describes how to modify and display parameter values.
34 Sun GigaSwift Ethernet Adapter Installation and User’s Guide • February 2001
Page 55

● To modify a parameter value, use the -set option.
If you invoke the ndd utility with the -set option, the utility passes value, which
must be specified, down to the named /dev/ce driver instance, and assigns it to the
parameter:
# ndd -set /dev/ce parameter value
When you change any adv parameter, a message similar to the following appears:
xcvr addr:0x00 - link up 1000 Mbps half duplex
● To display the value of a parameter, specify the parameter name and omit the
value.
When you omit the -set option, a query operation is assumed and the utility
queries the named driver instance, retrieves the value associated with the specified
parameter, and prints it:
# ndd /dev/ce parameter
Using the ndd Utility in Interactive Mode
● To modify a parameter value in interactive mode, specify ndd /dev/ce, as shown
below.
The ndd utility then prompts you for the name of the parameter:
# ndd /dev/ce
name to get/set? (Enter the parameter name or ? to view all
parameters)
After typing the parameter name, the ndd utility prompts you for the parameter
value (see
TABLE 4-1 through TABLE 4-11).
Chapter 4 Configuring Driver Parameters 35
Page 56

● To list all the parameters supported by the ce driver, type ndd /dev/ce.
TABLE 4-1 through TABLE 4-11 for parameter descriptions.)
(See
# ndd /dev/ce
name to get/set ? ?
? (read only)
instance (read and write)
adv_autoneg_cap (read and write)
adv_1000fdx_cap (read and write)
adv_1000hdx_cap (read and write)
adv_100T4_cap (read and write)
adv_100fdx_cap (read and write)
adv_100hdx_cap (read and write)
adv_10fdx_cap (read and write)
adv_10hdx_cap (read and write)
adv_asmpause_cap (read and write)
adv_pause_cap (read and write)
link_master (read and write)
use_int_xcvr (read and write)
enable_ipg0 (read and write)
ipg0 (read and write)
ipg1 (read and write)
ipg2 (read and write)
rx_intr_pkts (read and write)
rx_intr_time (read and write)
red_dv4to6k (read and write)
red_dv6to8k (read and write)
red_dv8to10k (read and write)
red_dv10to12k (read and write)
tx_dma_weight (read and write)
rx_dma_weight (read and write)
infinite_burst (read and write)
disable_64bit (read and write)
name to get/set ?
#
Setting the Autonegotiation Mode
By default, autonegotiation is set to on. This means that the adapter communicates
with its link partner to determine a compatible network speed, duplex mode, and
flow control capability.
36 Sun GigaSwift Ethernet Adapter Installation and User’s Guide • February 2001
Page 57

▼ To Disable Autonegotiation Mode
If your network equipment does not support autonegotiation, or if you want to
specify your network speed, you can set autonegotiation to off on the ce device.
1. Set the following driver parameters to the values that are described in the
documentation that shipped with your link partner (for example, a switch):
■ adv_1000fdx_cap
■ adv_1000hdx_cap
■ adv_100fdx_cap
■ adv_100hdx_cap
■ adv_10fdx_cap
■ adv_10hdx_cap
■ adv_asmpause_cap
■ adv_pause_cap
TABLE 4-2 for the descriptions and possible values of these parameters.
See
2. Set the adv_autoneg_cap parameter to 0.
# ndd -set /dev/ce adv_autoneg_cap 0
When you change any ndd link parameter, a message similar to the following
appears:
xcvr addr:0x00 - link up 1000 Mbps half duplex
Setting Parameters Using the ce.conf File
You can also specify the driver parameter properties on a per-device basis by
creating a ce.conf file in the /kernel/drv directory. Use a ce.conf file when
you need to set a particular parameter for a device in the system. The parameters
you set are read and write parameters that are listed in “Driver Parameter Values
and Definitions” on page 26.
The man pages for prtconf(1M) and driver.conf(4) include additional details.
The next procedure shows an example of setting parameters in a ce.conf file.
Chapter 4 Configuring Driver Parameters 37
Page 58

▼ To Set Driver Parameters Using a ce.conf File
1. Obtain the hardware path names for the ce devices in the device tree.
Typically, the path names and the associated instance numbers are in the
/etc/path_to_inst file.
# grep ce /etc/path_to_inst
"/pci108e;abba;/pci@4,4000/network@0"
"/pci108e;abba;/pci@6,2000/network@0"
"/pci108e;abba;/pci@4,2000/network@0"
■ In the previous example:
■ The first part within the double quotes specifies the hardware node name in
the device tree.
■ The second number is the instance number (shown in bold italics).
■ The last part in double quotes is the driver name.
■ In the device path name, the last component after the last / character and before
the @ character is the device name.
■ The path name before the last component is the parent name.
■ The comma separated numbers after the @ character at the end represent the
device and function numbers, which are together referred to as unit-address.
To identify a PCI device unambiguously in the ce.conf file, use the name, parent
name, and the unit-address for the device. Refer to the pci(4) man page for more
information about the PCI device specification.
2
"ce"
1
"ce"
0
"ce"
In the first line of the previous example:
■ Name = pci108e,abba
■ Parent name = /pci@4,4000
■ Unit-address = 4
In the second line in the previous example:
■ Name = pci108e,abba
■ Parent name = /pci@6,2000
■ Unit-address = 4
In the third line in the previous example:
■ Name = pci108e,abba
■ Parent name = /pci@4,2000
■ Unit-address = 4
2. Set the parameters for the above devices in the /kernel/drv/ce.conf file.
38 Sun GigaSwift Ethernet Adapter Installation and User’s Guide • February 2001
Page 59

In the following example, the adv_autoneg_cap and adv_1000fdx_cap
parameters are set for all Sun GigaSwift Ethernet devices. (See the
driver.conf(4) man page for more information.)
adv_autoneg_cap=0 adv_1000fdx_cap=0
In the following example, the adv_autoneg_cap and adv_1000fdx_cap
parameters are set for a single instance of the Sun GigaSwift Ethernet device.
name=pci108e,abba parent=pci@4,4000 unit address+4 adv_autoneg_cap=0
adv_1000fdx_cap=0;
3. Save the ce.conf file.
4. Save and close all files and programs, and exit the windowing system.
5. Shut down and reboot the system.
GigaSwift Ethernet Driver Operating
Statistics
These statistics are part of the statistics presented by the netstat -k command.
TABLE 4-10 describes the read-only Media Independent Interface (MII) capabilities.
These parameters define the capabilities of the hardware. The Gigabit Media
Independent Interface (GMII) supports all of the following capabilities.
TABLE4-10 Read-Only ce Device Capabilities
Parameter Description (Local interface Capabilities)
cap_autoneg 0 = Not capable of autonegotiation
1 = Autonegotiation capable
cap_1000fdx Local interface full-duplex capability
0 = Not 1000 Mbit/sec full-duplex capable
1 = 1000 Mbit/sec full-duplex capable
cap_1000hdx Local interface half-duplex capability
0 = Not 1000 Mbit/sec half-duplex capable
1 = 1000 Mbit/sec half-duplex capable
Chapter 4 Configuring Driver Parameters 39
Page 60

TABLE4-10 Read-Only ce Device Capabilities (Continued)
Parameter Description (Local interface Capabilities)
cap_100fdx Local interface full-duplex capability
0 = Not 100 Mbit/sec full-duplex capable
1 = 100 Mbit/sec full-duplex capable
cap_100hdx Local interface half-duplex capability
0 = Not 100 Mbit/sec half-duplex capable
1 = 100 Mbit/sec half-duplex capable
cap_10fdx Local interface full-duplex capability
0 = Not 10 Mbit/sec full-duplex capable
1 = 10 Mbit/sec full-duplex capable
cap_10hdx Local interface half-duplex capability
0 = Not 10 Mbit/sec half-duplex capable
1 = 10 Mbit/sec half-duplex capable
cap_asm_pause Local interface flow control capability
0 = Not asymmetric pause capable
1 = Asymmetric pause (from the local device) capable
cap_pause Local interface flow control capability
0 = Not Symmetric pause capable
1 = Symmetric pause capable
Reporting the Link Partner Capabilities
TABLE 4-11 describes the read-only link partner capabilities.
TABLE4-11 Read-Only Link Partner Capabilities
Parameter Description
lp_cap_autoneg 0 = No autonegotiation
1 = Autonegotiation
lp_cap_1000fdx 0 = No 1000 Mbit/sec full-duplex transmission
1 = 1000 Mbit/sec full-duplex
lp_cap_1000hdx 0 = No 1000 Mbit/sec half-duplex transmission
1 = 1000 Mbit/sec half-duplex
lp_cap_100fdx 0 = No 100 Mbit/sec full-duplex transmission
1 = 100 Mbit/sec full-duplex
lp_cap_100hdx 0 = No 100 Mbit/sec half-duplex transmission
1 = 1000 Mbit/sec half-duplex
lp_cap_10fdx 0 = No 10 Mbit/sec full-duplex transmission
1 = 10 Mbit/sec full-duplex
40 Sun GigaSwift Ethernet Adapter Installation and User’s Guide • February 2001
Page 61

TABLE4-11 Read-Only Link Partner Capabilities (Continued)
Parameter Description
lp_cap_10hdx 0 = No 10 Mbit/sec half-duplex transmission
1 = 10 Mbit/sec half-duplex
lp_cap_asm_pause 0 = Not asymmetric pause capable
1 = Asymmetric pause towards link partner capability
lp_cap_pause 0 = Not symmetric pause capable
1 = Symmetric pause capable
If the link partner is not capable of autonegotiation (when lp_autoneg_cap is 0),
the remaining information described in
TABLE 4-11 is not relevant and the parameter
value = 0.
If the link partner is capable of autonegotiation (when lp_autoneg_cap is 1), then
the speed and mode information is displayed when you use autonegotiation and the
link partner capabilities.
TABLE 4-12 describes the netstat -k transmit and receive parameters:
TABLE4-12 Transmit and Receive Parameters
Parameter Description
Number of Physical layer re-initializations every time you change
xcvr_inits
link parameters using NDD this increments.
rev_id Revision ID of the GigaSwift Ethernet device useful for recognition
of device being used in the field.
xcvr_addr GMII/MII Physical layer device address for management interface.
xcvr_id GMII/MII Physical layer device Identification Decimal copy of MII
registers 2 and 3.
lb_mode Copy of the Loopback mode the device is in, if any.
qos_mode When zero, the TX queues operate in a simple round robin
queueing scheme, based on TCP/UDP destination port number. If
set the TX queues operate in a scheme designed to provide VLAN
priorities.
tx_starts Number of times that the driver attempted to transmit a packet.
tx_dma_bind_fail Number of times a page table entry was not available to allow the
driver to map the kernel memory to device accessible memory for
transmission.
tx_queue0 Number of packets queued for transmission on the first hardware
transmit queue.
Chapter 4 Configuring Driver Parameters 41
Page 62

TABLE4-12 Transmit and Receive Parameters
Parameter Description
tx_queue1 Number of packets queued for transmission on the second
hardware transmit queue.
tx_queue2 Number of packets queued for Transmission on the third hardware
transmit queue.
tx_queue3 Number of packets queued for Transmission on the fourth
hardware transmit queue.
tx_max_pend Maximum number of transmits pending on any of the four queues.
rx_hdr_pkts Number of packets received that were less than 256 bytes.
rx_mtu_pkts Number of packets received that were greater than 256 bytes and
less than 1514 bytes.
rx_split_pkts Number of packets that were split across two pages.
rx_no_comp_wb Number of times the hardware cannot post completion entries for
received data.
rx_no_buf Number of times the hardware cannot receive data because there is
no more receive buffer space.
rx_new_pages Number of pages that got replaced during reception.
rx_new_hdr_pgs Number of pages that were filled with packets less than 256 bytes
that got replaced during reception.
rx_new_mtu_pgs Number of pages that were filled with packets greater than 256
bytes and less than 1514 that got replaced during reception.
rx_new_nxt_pgs Number of pages that contained packets that were split across
pages that got replaced during reception.
rx_hdr_drops Number of times a whole page of packets less than 256 bytes was
dropped because the driver was unable to map a new one to replace
it.
rx_mtu_drops Number of times a whole page of packets greater than 256 bytes
and less than 1514 was dropped because the driver was unable to
map a new one to replace it.
rx_nxt_drops Number of times a page with a split packet was dropped because
the driver was unable to map a new one to replace it.
rx_rel_flow Number of times the driver was told to release a flow.
42 Sun GigaSwift Ethernet Adapter Installation and User’s Guide • February 2001
Page 63

▼ To Check Link Partner Settings
● As superuser, type the netstat -k command:
# netstat -k ce0
ce0:
ipackets 0 ipackets64 0 ierrors 0 opackets 0 opackets64 0
oerrors 0 collisions 0 rbytes 0 rbytes64 0 obytes 0 obytes64 0
multircv 0 multixmt 0 brdcstrcv 0 brdcstxmt 0 norcvbuf 0
noxmtbuf 0 first_collision 0 excessive_collisions 0 late_collisions 0
peak_attempts 0 length_err 0 alignment_err 0 crc_err 0 code_violations 0
ifspeed 0 rev_id 1 xcvr_inits 1 xcvr_inuse 3 xcvr_addr 0
xcvr_id 0 cap_autoneg 1 cap_1000fdx 1 cap_1000hdx 0 cap_100T4 0
cap_100fdx 0 cap_100hdx 0 cap_10fdx 0 cap_10hdx 0 cap_asmpause 0
cap_pause 1 lp_cap_autoneg 0 lp_cap_1000fdx 0 lp_cap_1000hdx 0
lp_cap_100T4 0 lp_cap_100fdx 0 lp_cap_100hdx 0 lp_cap_10fdx 0
lp_cap_10hdx 0 lp_cap_asmpause 0 lp_cap_pause 0 link_T4 0
link_speed 0 link_duplex 0 link_asmpause 0 link_pause 0
link_up 0 lb_mode 0 qos_mode 0 tx_inits 0 tx_starts 0 tx_nocanput 0
tx_msgdup_fail 0 tx_allocb_fail 0 tx_no_desc 0 tx_dma_bind_fail 0
tx_uflo 0 tx_queue0 0 tx_queue1 0 tx_queue2 0 tx_queue3 0
tx_max_pend 0 rx_inits 0 rx_hdr_pkts 0 rx_mtu_pkts 0 rx_split_pkts 0
rx_no_buf 0 rx_no_comp_wb 0 rx_ov_flow 0 rx_len_mm 0 rx_bad_descs 0
rx_nocanput 0 rx_msgdup_fail 0 rx_allocb_fail 0 rx_new_pages 0
rx_new_hdr_pgs 0 rx_new_mtu_pgs 0 rx_new_nxt_pgs 0 rx_hdr_drops 0
rx_mtu_drops 0 rx_nxt_drops 0 rx_rel_flow 0 rx_pkts_dropped 0
pci_err 0 pci_rta_err 0 pci_rma_err 0 pci_parity_err 0 pci_bad_ack_err 0
pci_drto_err 0 ipackets_cpu00 0 ipackets_cpu01 0 ipackets_cpu02 0
ipackets_cpu03 0
Chapter 4 Configuring Driver Parameters 43
Page 64

44 Sun GigaSwift Ethernet Adapter Installation and User’s Guide • February 2001
Page 65

CHAPTER
5
Configuring VLANs
This chapter explains VLANs in detail and provides configuration instructions and
examples.
■ VLANs: Virtual Local Area Networks (VLANs) are commonly used to split up
groups of network users into manageable broadcast domains, to create logical
segmentation of workgroups, and to enforce security policies among each logical
segment. With multiple VLANs on an adapter, a server with a single adapter can
have a logical presence on multiple IP subnets. By default, 512 VLANs can be
defined for each VLAN-aware adapter on your server. However, this number can
be increased by changing the system parameters. VLANs are currently supported
for gigabit mode only.
If your network does not require multiple VLANs, you can use the default
configuration, in which case no further configuration is necessary.
Note – If you did not install the VLAN packages when you installed the driver, you
must unconfiguration all ce networking interfaces and unload the driver before you
can configure VLAN.
An Overview of VLANs
VLANs allow you to split your physical LAN into logical subparts, providing an
essential tool for increasing the efficiency and flexibility of your network.
VLANs are commonly used to separate groups of network users into manageable
broadcast domains, to create logical segmentation of workgroups, and to enforce
security policies among each logical segment. Each defined VLAN behaves as its
own separate network, with its traffic and broadcasts isolated from the others,
increasing the bandwidth efficiency within each logical group.
45
Page 66

Although VLANs are commonly used to create individual broadcast domains and/
or separate IP subnets, it is sometimes useful for a server to have a presence on more
than one VLAN simultaneously. Several Sun products support multiple VLANs on a
per port or per interface basis, allowing very flexible network configurations.
FIGURE 5-1 shows an example network that uses VLANs
.
VLAN 1
VLAN 2
VLAN 3
Accounting
Server
(VLAN 3)
12345678
10/100 Base - TX Gigabit Ethernet
12345678
9
Main Server
Adapter
Gigabit/Tagged
(All VLANs)
Shared Media Segment
Software
PC 1
(VLAN 2)
Software
PC 2
(VLAN 2)
Engineering
PC 3
(VLAN 1)
Accounting
PC 4
(VLAN 3)
Engineering/
Software PC 5
Adapter
Gigabit/Tagged
(VLAN 1 & 2)
FIGURE 5-1 Example of Servers Supporting Multiple VLANs with Tagging Adapters
The example network has the following features:
■ The physical LAN network consists of a switch, two servers, and five clients.
■ The LAN is logically organized into three different VLANs, each representing a
different IP subnet.
■ VLAN 1 is an IP subnet consisting of the Main Server, Client 3, and Client 5. This
represents an engineering group.
■ VLAN 2 includes the Main Server, Clients 1 and 2 via shared media segment, and
Client 5. This is a software development group.
■ VLAN 3 includes the Main Server, the Accounting Server and Client 4. This is an
accounting group.
46 Sun GigaSwift Ethernet Adapter Installation and User’s Guide • February 2001
Page 67

■ The Main Server is a high-use server that needs to be accessed from all VLANs
and IP subnets. The server has an Sun GigabitEthernet adapter installed. All three
IP subnets are accessed via the single physical adapter interface. The server is
attached to one of the SunSwitch’s Gigabit Ethernet ports, which is configured for
VLANs 1, 2, and 3. Both the adapter and the connected SunSwitch port have
tagging turned on. Because of the tagging VLAN capabilities of both devices, the
sever is able to communicate on all three IP subnets in this network, but continues
to maintain broadcast separation between all of them.
■ The Accounting Server is available to VLAN 3 only. It is isolated from all traffic
on VLANs 1 and 2. The switch port connected to the server has tagging turned
off.
■ Clients 1 and 2 are attached to a shared media hub that is then connected to the
switch. They belong to VLAN 2 only, and are logically in the same IP subnet as
the Main Server and Client 5. The switch port connected to this segment has
tagging turned off.
■ Client 3 is a member of VLAN 1, and can communicate only with the Main Server
and Client 5. Tagging is not enabled on Client 3’s switch port.
■ Client 4 is a member of VLAN 3, and can communicate only with the servers.
Tagging is not enabled on Client 4’s switch port.
■ Client 5 is a member of both VLANs 1 and 2, and has a Sun GigabitEthernet
adapter installed. It is connected to switch port 10. Both the adapter and the
switch port are configured for VLANs 1 and 2 and have tagging enabled.
VLAN tagging is only required to be enabled on switch ports that create trunk links
to other VLAN-aware Ethernet switches, or on ports connected to tag-capable endstations, such as servers or workstations with VLAN-aware adapters.
Configuring VLANs
VLANs can be created according to various criteria, but each VLAN must be
assigned a VLAN tag or VLAN ID (VID). The VID is a 12-bit identifier between 1
and 4094 that identifies a unique VLAN. For each network interface ( ce0, ce1, ce2
and so on), 512 possible VLANs can be created. Because IP subnets are commonly
used, it’s best to use IP subnets when setting up a VLAN network interface. This
means that each VID assigned to a VLAN interface of a physical network interface
will belong to different subnets.
Tagging an Ethernet frame requires the addition of a tag header to the frame. The
header is inserted immediately following the Destination MAC address and the
Source MAC address. The tag header consists of two bytes of Ethernet Tag Protocol
Identifier (TPID, 0x8100) and two bytes of Tag Control Information (TCI).
shows the Ethernet Tag Header format.
Chapter 5 Configuring VLANs 47
FIGURE 5-2
Page 68

3 bits
TPID (0x8100
1
12 bytes
bit
Octet
1
2
3
4
User_priority
FIGURE 5-2 Ethernet Tag Header Format
CFI
VID
By default, a single VLAN is configured for every port, which groups all ports into
the same broadcast domain, just as if there were no VLANs at all, VLAN tagging for
the switch port turned off.
▼ To Configure Static VLANs
1. Create one hostname6.cenum file for each VLAN which will be configured for each
adapter on the server, using the following naming format that includes both the
VID and the physical point of attachment (PPA):
VLAN logical PPA = <1000 * VID> + <Device PPA>
ce123000 = 1000*123 + ce
This format limits the maximum number of PPAs (instances) you can configure to
1000 in the /etc/path_to_inst file.
For example, on a server with the Sun GigabitEthernet/P 3.0 adapter having an
instance of 0, that belongs to a member of two VLANs, with VID 123 and 224, you
would use ce123000 and ce224000, respectively, as the two VLAN PPAs.
48 Sun GigaSwift Ethernet Adapter Installation and User’s Guide • February 2001
Page 69

2. Use the ifconfig(1M) to configure a VLAN virtual device, for example:
# ifconfig ce123000 plumb up
# ifconfig ce224000 plumb up
The output of ifconfig -a on a system having VLAN devices ce123000 and
ce224000:
# ifconfig -a
lo0: flags=1000849<UP,LOOPBACK,RUNNING,MULTICAST,IPv4> mtu 8232 index 1
inet 127.0.0.1 netmask ff000000
hme0: flags=1000843<UP,BROADCAST,RUNNING,MULTICAST,IPv4> mtu 1500 index 2
inet 129.144.131.91 netmask ffffff00 broadcast 129.144.131.255
ether 8:0:20:a4:4f:b8
ce123000: flags=1000843<UP,BROADCAST,RUNNING,MULTICAST,IPv4> mtu 1500 index 3
inet 199.199.123.3 netmask ffffff00 broadcast 199.199.123.255
ether 8:0:20:a4:4f:b8
ce124000: flags=1000843<UP,BROADCAST,RUNNING,MULTICAST,IPv4> mtu 1500 index 4
inet 199.199.124.3 netmask ffffff00 broadcast 199.199.124.255
ether 8:0:20:a4:4f:b8
3. On the switch, set VLAN tagging and set VLAN ports to coincide with the VLANs
you’ve set up on the server. Using the examples in Step 2, you would set up VLAN
ports 123 and 224 on the switch.
Refer to the documentation that came with your switch for specific instructions for
setting VLAN tagging and ports.
Chapter 5 Configuring VLANs 49
Page 70

50 Sun GigaSwift Ethernet Adapter Installation and User’s Guide • February 2001
Page 71

APPENDIX
A
Specifications
This appendix lists the specifications for the Sun GigaSwift Ethernet adapter. It
contains the following sections:
■ “Connectors” on page 51
■ “Performance Specifications” on page 52
■ “Physical Characteristics” on page 52
■ “Power Requirements” on page 52
Connectors
FIGURE A-1 shows the connector for the Sun GigaSwift Ethernet UTP adapter.
FIGURE A-1 Sun GigaSwift Ethernet UTP Adapter Connector
Table A-2 lists the characteristics of the Cat-5 Connector used by the Sun GigaSwift
Ethernet UTP adapter.
TABLEA-1 Cat-5 Connector Link Characteristics
Description
Operating range Up 100 meters
51
Page 72

Performance Specifications
TABLEA-2 Performance Specifications
Feature Specification
PCI clock 33/66 MHz max
PCI data burst transfer rate up to 64-byte bursts
PCI data/address width 32/64 -bit
PCI modes Master/slave
1 GBit/s, 850 nm 1000 Mbps (full duplex)
Physical Characteristics
TABLEA-3 Physical Characteristics
Dimension Measurement
Length 6.8 inches
Width 4.2 inches
Power Requirements
TABLEA-4 Power Requirements
Specification Measurement
Maximum power consumption 14 watts
Voltage 3.3V and 5V
52 Sun GigaSwift Ethernet Adapter Installation and User’s Guide • February 2001
Page 73

APPENDIX
B
Diagnostic Software and
Troubleshooting Issues
This appendix provides an overview of the SunVTS diagnostic application and
instructions for testing the adapter using the onboard FCode self-test. There is also a
section outlining some common troubleshooting issues. This appendix contains the
following sections:
■ “SunVTS Diagnostic Software” on page 53
■ “Using the OpenBoot PROM FCode Self-Test” on page 54
■ “Troubleshooting Issues” on page 56
SunVTS Diagnostic Software
The SunVTS software executes multiple diagnostic hardware tests from a single user
interface and is used to verify the configuration and functionality of most hardware
controllers and devices. The SunVTS software operates primarily from a graphical
user interface, enabling test parameters to be set quickly and easily while a
diagnostic test operation is being performed.
The nettest diagnostic checks all the networking interfaces on a system, including
the Sun GigaSwift Ethernet adapter. Refer to the SunVTS User’s Guide for more
information on how to run the nettest diagnostic test.
Note – To use the nettest diagnostic, you must have the SunVTS software
installed on your system. Refer to the Solaris Sun Hardware Platform Guide, which was
shipped with the Solaris Supplement CD, for instructions on how to install the
SunVTS software.
53
Page 74

Using the OpenBoot PROM FCode SelfTest
The following tests are available to help identify problems with the adapter if the
system does not boot.
You can invoke the FCode self-test diagnostics by using the OpenBoot user interface
test or test-all commands. If you encounter an error while running diagnostics,
appropriate messages will be displayed. Refer to the appropriate OpenBoot Command
Reference Manual for more information on the test and test-all commands.
The FCode self-test exercises most functionality sub-section by sub-section and
ensures the following:
■ Connectivity during adapter card installation
■ Verification that all components required for a system boot are functional
▼ Running the Ethernet FCode Self-Test Diagnostic
To run the Ethernet diagnostics, you must first bring the system to a stop at the
OpenBoot prompt after issuing a reset. If you do not reset the system, the diagnostic
tests might cause the system to hang.
For more information about the OpenBoot commands in this section, refer to the
appropriate OpenBoot Command Reference Manual.
1. Shut down the system.
Use the standard shutdown procedures described in the Solaris Handbook for Sun
Peripherals.
2. At the ok prompt, set the auto-boot? configuration variable to false.
ok setenv auto-boot? false
3. Reset the system.
ok reset-all
54 Sun GigaSwift Ethernet Adapter Installation and User’s Guide • February 2001
Page 75

4. Type show-nets to display the list of devices.
You should see a list of devices, similar to the example below, specific to the adapter:
ok show-nets
a) /pci@1f,0/pci@1/network@4
b) /pci@1f,0/pci@1,1/network@1,1
q) NO SELECTION
Enter Selection, q to quit:
5. Type the following to run the self-test using the test command:
ok test device path
The following tests are run when the test command is executed:
■ ce register test
■ serdes internal loopback test
■ link up/down test
If the test passes, you see these messages:
ok test /pci@1f,0/pci@1/network@4
ce register test --- succeeded.
Internal loopback test -- succeeded.
Link is -- up
If the card is not connected to a network, you see the following messages:
ok test /pci@1f,0/pci@1/network@4
ce register test --- succeeded.
Internal loopback test -- succeeded.
Link is -- down
ok
6. For more robust test results, set the diag-switch? to true and reissue the tests
as shown in Step 5 above.
ok setenv diag-switch? true
Appendix B Diagnostic Software and Troubleshooting Issues 55
Page 76

7. After testing the adapter, type the following to return the OpenBoot PROM to
standard operating mode:
ok setenv diag-switch? false
8. Set the auto-boot? configuration parameter to true.
ok setenv auto-boot? true
9. Reset and reboot the system.
Refer to the appropriate OpenBoot Command Reference Manual for more information.
Troubleshooting Issues
Known Incompatibilities with Pre-IEEE 802.3z
Network Switches
You might experience interoperability issues when using the Sun GigaSwift Ethernet
adapter with the SunSwitch switch, the Alteon ACE 110 switch, or other pre- or nonIEEE 802.3z standard compliant network equipment. If you experience difficulties
with noncompliant equipment, set the adapter and switch autonegotiation
properties to off and try to configure the interface manually.
▼ To Set Autonegotiation to off for a SunSwitch
or an Alteon ACE 110 Switch
You can set autonegotiation to off for SunSwitch and Alteon ACE 110 switches
using those switches’ configuration program (cgf). Refer to your switch
documentation for instructions on how to access and use the cgf program.
The following procedure describes how to turn autonegotiation off for one
SunSwitch port.
56 Sun GigaSwift Ethernet Adapter Installation and User’s Guide • February 2001
Page 77

1. Establish a connection to the switch using either a serial connection or a Telnet
connection.
Refer to the SunSwitch 1.1 Installation and Configuration Guide (805-3743-10) for more
information. After connecting to the switch, the Main menu prompt (Main#)is
displayed.
2. At the Main# prompt, type cfg to display the Configuration menu and prompt
(Configuration#).
>> Main# cfg
[Configuration Menu]
sys - System-wide parameter menu
port - Port configuration menu
ip - IP addressing menu
vlan - VLAN configuration menu
stp - Spanning Tree menu
snmp - SNMP menu
setup - Step by step configuration set up
dump - Dump current configuration to script file
>> Configuration#
3. Type the following to disable autonegotiation on a GigaSwift Ethernet port.
Replace portnumber with the Ethernet port used by the adapter.
>> Configuration# /port portnumber/auto off
4. Type the following to apply and save your changes.
>> Configuration# apply
>> Configuration# save
Refer to the switch documentation for further configuration instructions.
▼ To Set Autonegotiation to off for Other
Noncompliant Network Equipment
If your network equipment does not support autonegotiation, you can set
autonegotiation to off on the GigaSwift Ethernet (ce) device.
Appendix B Diagnostic Software and Troubleshooting Issues 57
Page 78

1. Set the following GigaSwift Ethernet driver parameters to values according to the
documentation that shipped with your switch:
■ adv_1000fdx_cap
■ adv_1000hdx_cap
■ adv_pauseTX
■ adv_pauseRX.
2. Set the adv_autoneg_cap parameter to 0.
Note – See Chapter 4 for the default values of these parameters and for instructions
on how to set these parameters.
58 Sun GigaSwift Ethernet Adapter Installation and User’s Guide • February 2001
Page 79

Index
SYMBOLS
.properties command, 11
.properties file, 11
/etc/hostname.cenumber file, 18
A
assigning an IP address, 18
autonegotiation
setting
disabling, 36
C
CAT-5 twisted-pair cable, 9
ce driver parameter, status, and descriptions, 26
configuring device driver parameters, 25
configuring the driver parameters, 25
configuring the network host files, 17
configuring VLANs, 47
D
device properties, 11
diagnostic support, 4
diskless clients, 19
Dynamic Reconfiguration, 8
dynamic reconfiguration, 5
Dynamic Reconfiguration (DR), 14
E
editing the network host files, 17
F
FCode selftest diagnostics, 54
files and directories on the CD-ROM, 6
flow control keywords, 28
H
hardware and software requirements, 3
I
ifconfig -a, 49
ifconfig command, 18
installing driver software, 5
installing the adapter with DR, 14
installing the adapter without DR, 8
installing the Solaris operating environment over
the network, 21
L
link partner, 25
link partner settings
checking, 43
Index 59
Page 80

local-mac-address property, 11, 12
M
MAC address, 12
mac-address property
to set, 12
Media Access Control (MAC), 12
N
ndd utility, 34
nettest diagnostic, 53
NVRAM configuration, 12
O
operational mode parameters, 27
P
parameter values
how to modify and display, 34
parameters and settings, 26
V
verify the installation, 9
virtual device, 49
VLAN ID, 47
VLAN naming format, 48
VLANs, 45
R
random early detection register, 31
receive interrupt blanking values, 26, 31
S
setting ce driver parameters
using ndd
using ce.conf, 33
standard Ethernet frame sizes, 3
standards and protocols, 3
SunVTS diagnostic application, 53
60 Sun GigaSwift Ethernet Adapter Installation and User’s Guide • February 2001
 Loading...