

Page 1

SUN SEEBEYOND
eWAY™ HTTPS ADAPTER USER’S
GUIDE
Release 5.1.1
Page 2

Copyright © 2006 Sun Microsystems, Inc., 4150 Network Circle, Santa Clara, California 95054, U.S.A. All rights reserved. Sun
Microsystems, Inc. has intellectual property rights relating to technology embodied in the product that is described in this
document. In particular, and without limitation, these intellectual property rights may include one or more of the U.S. patents
listed at http://www.sun.com/patents and one or more additional patents or pending patent applications in the U.S. and in
other countries. U.S. Government Rights - Commercial software. Government users are subject to the Sun Microsystems, Inc.
standard license agreement and applicable provisions of the FAR and its supplements. Use is subject to license terms. This
distribution may include materials developed by third parties. Sun, Sun Microsystems, the Sun logo, Java, Sun Java Composite
Application Platform Suite, SeeBeyond, eGate, eInsight, eVision, eTL, eXchange, eView, eIndex, eBAM, eWay, and JMS are
trademarks or registered trademarks of Sun Microsystems, Inc. in the U.S. and other countries. All SPARC trademarks are used
under license and are trademarks or registered trademarks of SPARC International, Inc. in the U.S. and other countries.
Products bearing SPARC trademarks are based upon architecture developed by Sun Microsystems, Inc. UNIX is a registered
trademark in the U.S. and other countries, exclusively licensed through X/Open Company, Ltd. This product is covered and
controlled by U.S. Export Control laws and may be subject to the export or import laws in other countries. Nuclear, missile,
chemical biological weapons or nuclear maritime end uses or end users, whether direct or indirect, are strictly prohibited.
Export or reexport to countries subject to U.S. embargo or to entities identified on U.S. export exclusion lists, including, but
not limited to, the denied persons and specially designated nationals lists is strictly prohibited.
Copyright © 2006 Sun Microsystems, Inc., 4150 Network Circle, Santa Clara, California 95054, Etats-Unis. Tous droits
réservés.Sun Microsystems, Inc. détient les droits de propriété intellectuels relatifs à la technologie incorporée dans le produit
qui est décrit dans ce document. En particulier, et ce sans limitation, ces droits de propriété intellectuelle peuvent inclure un
ou plus des brevets américains listés à l'adresse http://www.sun.com/patents et un ou les brevets supplémentaires ou les
applications de brevet en attente aux Etats - Unis et dans les autres pays.L'utilisation est soumise aux termes de la
Licence.Cette distribution peut comprendre des composants développés par des tierces parties.Sun, Sun Microsystems, le
logo Sun, Java, Sun Java Composite Application Platform Suite, Sun, SeeBeyond, eGate, eInsight, eVision, eTL, eXchange,
eView, eIndex, eBAM et eWay sont des marques de fabrique ou des marques déposées de Sun Microsystems, Inc. aux EtatsUnis et dans d'autres pays.Toutes les marques SPARC sont utilisées sous licence et sont des marques de fabrique ou des
marques déposées de SPARC International, Inc. aux Etats-Unis et dans d'autres pays. Les produits portant les marques SPARC
sont basés sur une architecture développée par Sun Microsystems, Inc.UNIX est une marque déposée aux Etats-Unis et dans
d'autres pays et licenciée exlusivement par X/Open Company, Ltd.Ce produit est soumis à la législation américaine en matière
de contrôle des exportations et peut être soumis à la règlementation en vigueur dans d'autres pays dans le domaine des
exportations et importations. Les utilisations, ou utilisateurs finaux, pour des armes nucléaires,des missiles, des armes
biologiques et chimiques ou du nucléaire maritime, directement ou indirectement, sont strictement interdites. Les
exportations ou réexportations vers les pays sous embargo américain, ou vers des entités figurant sur les listes d'exclusion
d'exportation américaines, y compris, mais de manière non exhaustive, la liste de personnes qui font objet d'un ordre de ne
pas participer, d'une façon directe ou indirecte, aux exportations des produits ou des services qui sont régis par la législation
américaine en matière de contrôle des exportations et la liste de ressortissants spécifiquement désignés, sont rigoureusement
interdites.
Version 20060623131507
HTTPS eWay Adapter User’s Guide 2 Sun Microsystems, Inc.
Page 3

Contents
Contents
Chapter 1
Introducing the HTTPS eWay 7
About HTTP and HTTPS 7
About the HTTPS eWay 8
HTTP Messages 8
Web Browser Cookies 8
Cookie Expiration Date Checking 9
GET and POST Methods 9
Sample HTTP Exchange in Client Mode 9
Sample HTTP Exchange in Server Mode 10
What’s New in This Release 11
About This Document 12
HTTPS eWay Javadoc 13
Scope 13
Intended Audience 13
Text Conventions 13
Related Documents 14
Sun Microsystems, Inc. Web Site 14
Documentation Feedback 14
Chapter 2
Installing the HTTPS eWay 15
HTTPS eWay System Requirements 15
Installing the HTTPS eWay 15
Installing the HTTPS eWay on an eGate supported system 16
Adding the eWay to an Existing Sun Java Composite Application Platform Suite Installation
16
After Installation 17
Extracting the Sample Projects and Javadocs 17
ICAN 5.0 Project Migration Procedures 18
Installing Enterprise Manager eWay Plug-Ins 19
Viewing Alert Codes 20
HTTPS eWay Adapter User’s Guide 3 Sun Microsystems, Inc.
Page 4

Contents
Chapter 3
Understanding the HTTPS eWay OTD 22
Overview of eWay OTDs 22
HTTPS Client OTD 22
HTTP OTD Method Descriptions 23
HTTPS Server OTD 23
Chapter 4
Operating SSL 27
Overview 27
KeyStores and TrustStores 29
Generating a KeyStore and TrustStore 29
KeyStores 29
Creating a KeyStore in JKS Format 29
Creating a KeyStore in PKCS12 Format 31
TrustStores 32
Creating a TrustStore 32
Using an Existing TrustStore 32
SSL Handshaking 33
Using the OpenSSL Utility 36
Creating a Sample CA Certificate 36
Signing Certificates With Your Own CA 37
Windows OpenSSL.cnf File Example 38
Chapter 5
Configuring the HTTPS eWay 41
Creating and Configuring the HTTPS eWay 41
Configuring the eWay Connectivity Map Properties 41
Configuring the eWay Environment Properties 43
eWay Connectivity Map Properties 44
Configuring the Connectivity Map HTTPS eWay Properties 45
Configuring the Connectivity Map HTTPS Server eWay Properties 45
eWay Environment Properties 46
HTTP Settings 47
Proxy Configuration 48
Security 49
Authentication 50
SSL 50
Additional SSL Section Notes 52
Verify hostname 52
HTTPS eWay Adapter User’s Guide 4 Sun Microsystems, Inc.
Page 5

Contents
Connection Pool Settings 53
Setting Acceptor Threads Property for HTTPS Server Mode 54
Chapter 6
Implementing the HTTPS eWay BPEL Sample Projects 55
eInsight Engine and Components 55
HTTPS eWay With eInsight 56
Server Mode Operation 56
About the HTTPS eWay eInsight Sample Projects 58
Importing a Sample Project 58
Building and Deploying the prjHTTPClient_BPEL Sample Project 59
Project Overview 59
Project Operations 60
Input and Output Data 60
Creating a Project 61
Creating the OTD 61
Creating a Business Process 64
Creating a Connectivity Map 75
Selecting External Applications 76
Populating the Connectivity Map 76
Defining the Business Process 76
Binding the eWay Components 77
Creating an Environment 78
Configuring the eWays 79
Configuring the HTTPS eWay Properties 79
Configuring the Integration Server 80
Creating and Activating the Deployment Profile 80
Creating and Starting the Domain 81
Building and Deploying the Project 82
Running the Sample 82
Building and Deploying the prjHTTPServer_BPEL Sample Project 83
Project Overview 83
Project Forms 84
Project Operations 86
Creating a Project 86
Creating the OTD 86
Creating a Business Process 86
Creating a Connectivity Map 90
Selecting External Applications 90
Populating the Connectivity Map 91
Defining the Business Process 91
Binding the eWay Components 91
Creating an Environment 92
Configuring the eWays 92
Creating and Activating the Deployment Profile 93
Creating and Starting the Domain 93
Building and Deploying the Project 93
HTTPS eWay Adapter User’s Guide 5 Sun Microsystems, Inc.
Page 6

Contents
Running the Sample 93
Running the Sample in SSL Mode 93
Chapter 7
Implementing the HTTPS eWay JCD Sample Projects 95
About the HTTPS eWay JCD Sample Projects 95
Importing a Sample Project 96
Building and Deploying the prjHTTPClient_JCD Sample Project 96
Project Overview 97
Project Operations 98
Input and Output Data 98
Creating a Project 99
Creating the OTD 99
Creating the Collaboration Definition (Java) 99
Creating a Connectivity Map 101
Selecting External Applications 101
Populating the Connectivity Map 101
Defining the Business Process 102
Binding the eWay Components 102
Creating an Environment 103
Configuring the eWays 103
Creating and Activating the Deployment Profile 104
Creating and Starting the Domain 104
Building and Deploying the Project 104
Running the Sample 104
Building and Deploying the prjHTTPServer_JCD Sample Project 104
Project Overview 105
Project Forms 106
Project Operations 107
Creating a Project 107
Creating the OTD 108
Creating the Collaboration Definition (Java) 108
Creating a Connectivity Map 108
Selecting External Applications 109
Populating the Connectivity Map 109
Defining the Business Process 109
Binding the eWay Components 109
Creating an Environment 110
Configuring the eWays 110
Creating and Activating the Deployment Profile 111
Creating and Starting the Domain 111
Building and Deploying the Project 111
Running the Sample 111
Running the Sample in SSL Mode 111
Index 113
HTTPS eWay Adapter User’s Guide 6 Sun Microsystems, Inc.
Page 7

Introducing the HTTPS eWay
Welcome to the Sun SeeBeyond eWay™ HTTPS Adapter User’s Guide. This document
includes information about installing, configuring, and using the Sun Java Composite
Application Platform Suite HTTPS eWay™ Adapter, referred to as the HTTPS eWay
throughout this guide.
This chapter provides an overview of Hypertext Transfer Protocol (HTTP) and HTTP
over Secure Socket Layer (SSL), better known as HTTPS. This chapter also introduces
the HTTPS eWay.
What’s in This Chapter
About HTTP and HTTPS on page 7
About the HTTPS eWay on page 8
What’s New in This Release on page 11
About This Document on page 12
Related Documents on page 13
Chapter 1
Sun Microsystems, Inc. Web Site on page 14
Documentation Feedback on page 14
1.1 About HTTP and HTTPS
HTTP
HTTP (hypertext transfer protocol) is the set of rules used for transferring files (text,
graphic images, sound, and video) over the Web. When a user opens a Web browser,
the user is indirectly making use of HTTP. HTTP is an application protocol that runs on
top of the TCP/IP suite of protocols.
In addition to the files that it serves, every Web server contains an HTTP daemon—a
program that waits for HTTP requests and handles them when they arrive. A Web
browser is an HTTP client, sending requests to server machines. When the user enters a
URL or clicks on a hypertext link, the browser builds an HTTP request and sends it to
the IP address indicated by the URL. The HTTP daemon in the destination server
machine receives the request and sends back the requested file or files associated with
the request.
HTTPS eWay Adapter User’s Guide 7 Sun Microsystems, Inc.
Page 8

Chapter 1 Section 1.2
Introducing the HTTPS eWay About the HTTPS eWay
HTTPS
HTTPS (hypertext transfer protocol over secure socket layer—or HTTP over SSL) is a
Web protocol that encrypts and decrypts user page requests as well as the pages that
are returned by the Web server. HTTP uses port 443 instead of HTTP port 80 in its
interactions with the lower layer TCP/IP. SSL uses a 40-bit encryption key algorithm,
which is considered an adequate level of encryption for commercial exchange.
When an HTTPS request is sent by a browser—usually by clicking a link that begins
with https://—the client browser encrypts the request and sends it to the Web server.
The acknowledgement sent by the Web server is also sent using encryption, and is
decrypted by the client browser.
1.2 About the HTTPS eWay
The HTTPS eWay enables eGate Integrator to communicate with client and server
applications over the Internet using HTTP, either with or without SSL.
1.2.1 HTTP Messages
An HTTP message has two parts: a request and a response. The message header is
composed of a header line, header fields, a blank line, and an optional body (or data
payload). The response is made up of a header line, header fields, a blank line, and an
optional body (or data payload). HTTP is a synchronous protocol, that is, a client makes
a request to a server and the server returns the response on the same socket.
1.2.2 Web Browser Cookies
A cookie is an HTTP header, which is a key-value pair in the header fields section of an
HTTP message.
The Set-Cookie and Cookie headers are used with cookies. The Cookie-request header
is sent from the server in request for cookies on the client side. An example of a Cookie-
request header is:
Set-Cookie: sessauth=44c46a10; expires=Wednesday, 27-Sep-2006
03:59:59 GMT
In this example, the server requests that the client store the following cookie:
sessauth=44c46a10
Everything after the first semi-colon contains additional information about the cookie,
such as the expiration date. When the eWay sees this header, it extracts the cookie
sessauth=44c46a10 and returns it to the server on subsequent requests. The eWay
prepends a cookie header to the HTTP request, for example:
Cookie: sessauth=44c46a10
Each time the eWay sends a request to the same server during a session, the cookie is
sent along with the request.
HTTPS eWay Adapter User’s Guide 8 Sun Microsystems, Inc.
Page 9

Chapter 1 Section 1.2
Introducing the HTTPS eWay About the HTTPS eWay
Cookie Expiration Date Checking
The HTTPS eWay checks time-limited cookies with expiration dates to ensure that they
have not expired. If they have expired, the cookie is removed and is not resent to the
originating server. As a result, the session state is removed.
The following standard expiration date formats are recognized by the HTTPS eWay:
"Sun, 06 Nov 1994 08:49:37 GMT" ;RFC 822, updated by RFC 1123
"Sunday, 06-Nov-94 08:49:37 GMT";RFC 850, obsoleted by RFC 1036
"Sunday, 06-Nov-1994 08:49:37 GMT";RFC 1036
"Sun Nov 6 08:49:37 1994" ;ANSI C's asctime()
If the expiration date is in another format, the eWay does not recognize the expiration
date. Instead, it treats the cookie as if it does not have an expiration date.
1.2.3 GET and POST Methods
The GET method can be used in client mode to retrieve a page specified by the URL or
to retrieve information from a form-based Web page by submitting URL-encoded key
and name value pairs. In the latter case, the page must support the GET method.
The following example shows a URL-encoded query string:
http://.../bin/query?p=seebeyond+integrator
The URL specifies the search page and the name-value pair for the search. The question
mark (?) indicates the beginning of the name-value pair encoding. In the previous
example, the name portion of the query is “p,” and the value to search is “seebeyond
integrator.” A query can consist of one or more of these name-value pairs.
Note: See the official HTTP Specification for complete information.
The POST method is more versatile, in that it supports form-based requests, as well as
sending large amounts of data. The POST method does not have the size-limitation
maximum of 255 or 1024 characters (depending on the Web server), which the GET
method has. As with GET, the Web page must support the POST method in order to
use POST.
Taking the previous URL as an example, if you specify the following URL:
http://
.../bin/query
Then, you can specify the name-value pair separately. The HTTP client allows for the
specification of the URL and n-number of value pairs via its methods.
1.2.4 Sample HTTP Exchange in Client Mode
To retrieve the file at the following URL:
http://www.myhost.com/path/file.html
First open a socket to the host www.myhost.com, port 80 (use the default port of 80
because none is specified in the URL). You can then send a request through a socket that
looks like the following example:
HTTPS eWay Adapter User’s Guide 9 Sun Microsystems, Inc.
Page 10

Chapter 1 Section 1.2
Introducing the HTTPS eWay About the HTTPS eWay
GET /path/file.html HTTP/1.0 (Request Header Line)
User-Agent: HTTP(S)eWay (Request Header field)
The server sends a response back through the same socket. The response could look like
the following example:
HTTP/1.0 200 OK (Response Header Line)
Date: Fri, 31 Dec 1999 23:59:59 GMT(Response Header Field)
Content-Type: text/html (Response Header Field)
Content-Length: 1354 (Response Header Field)
[blank line here]
<html> (Response payload)
<body>
<h1>Happy New Millennium!</h1>
(more file contents)
.
.
.
</body>
</html>
After sending the response, the server closes the socket.
1.2.5 Sample HTTP Exchange in Server Mode
To listen for a request from an HTTP client, the HTTPS eWay in server mode listens on
the port configured for your Integration Server (18001 by default). The HTTPS eWay
receives the request and processes it according to the logic you create in your
Collaboration or Business Process.
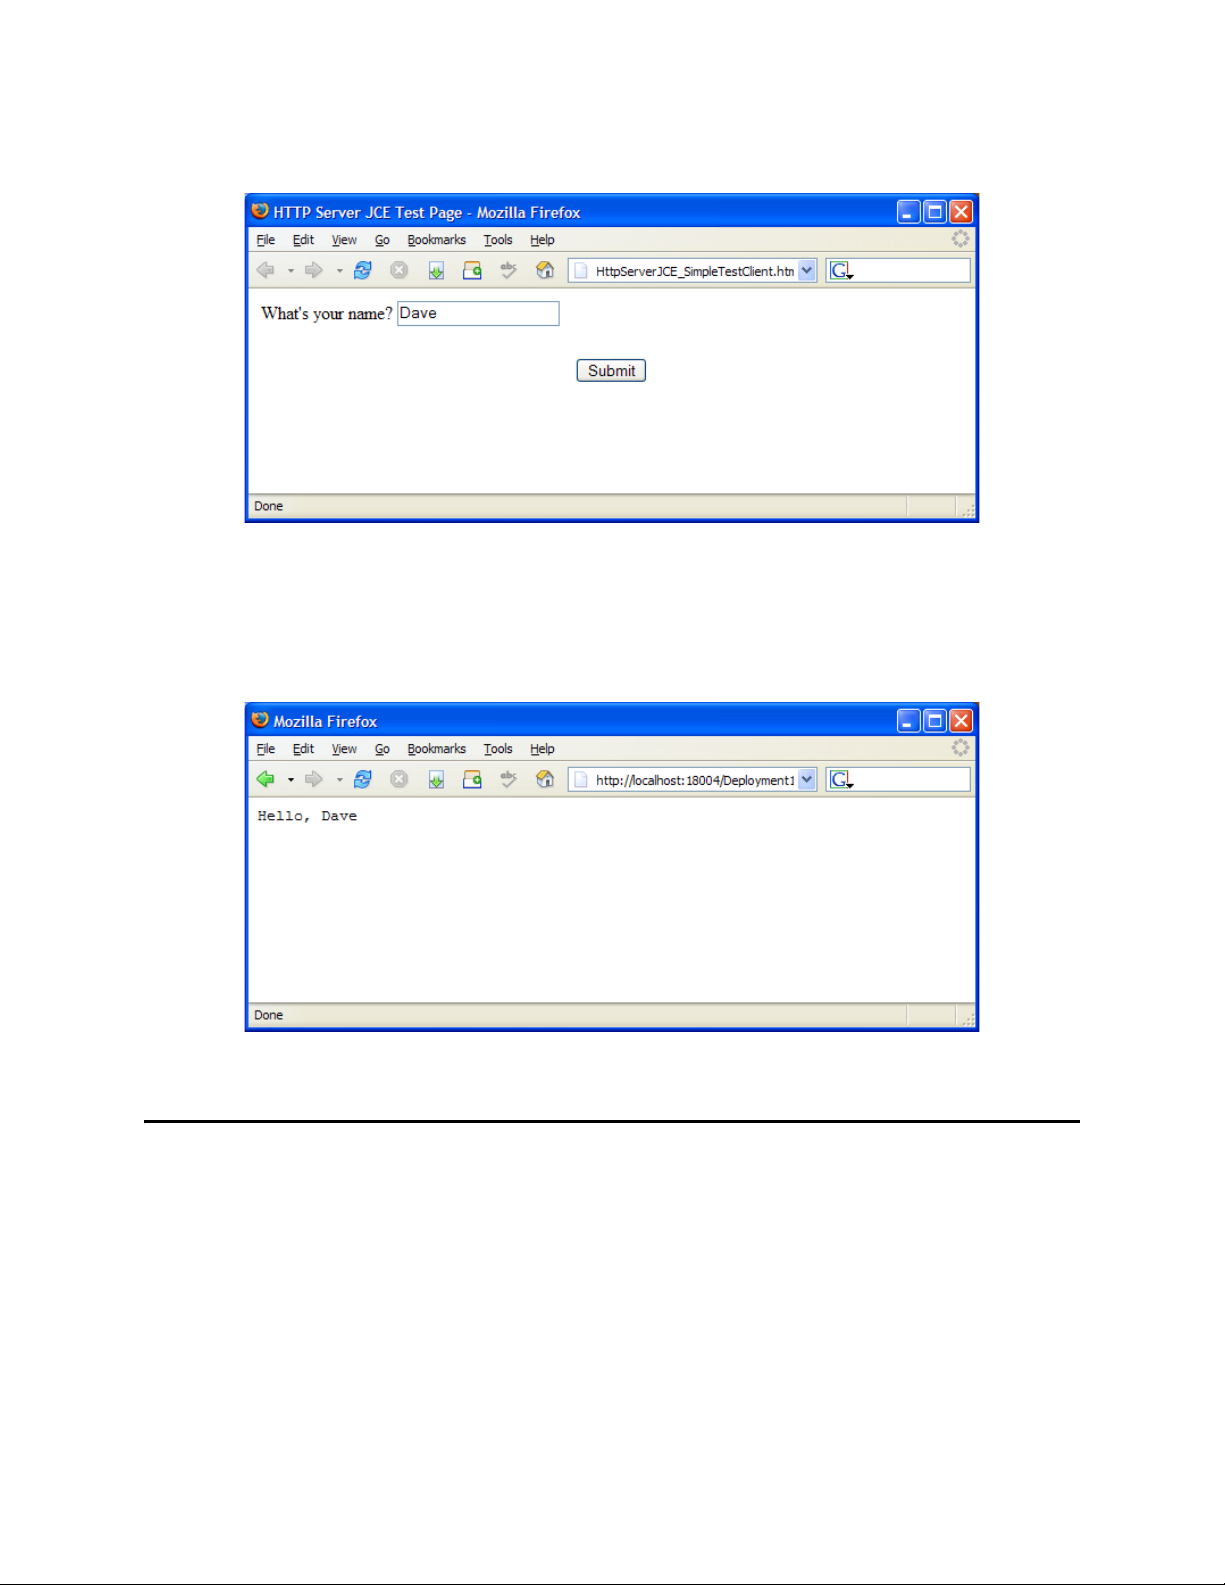
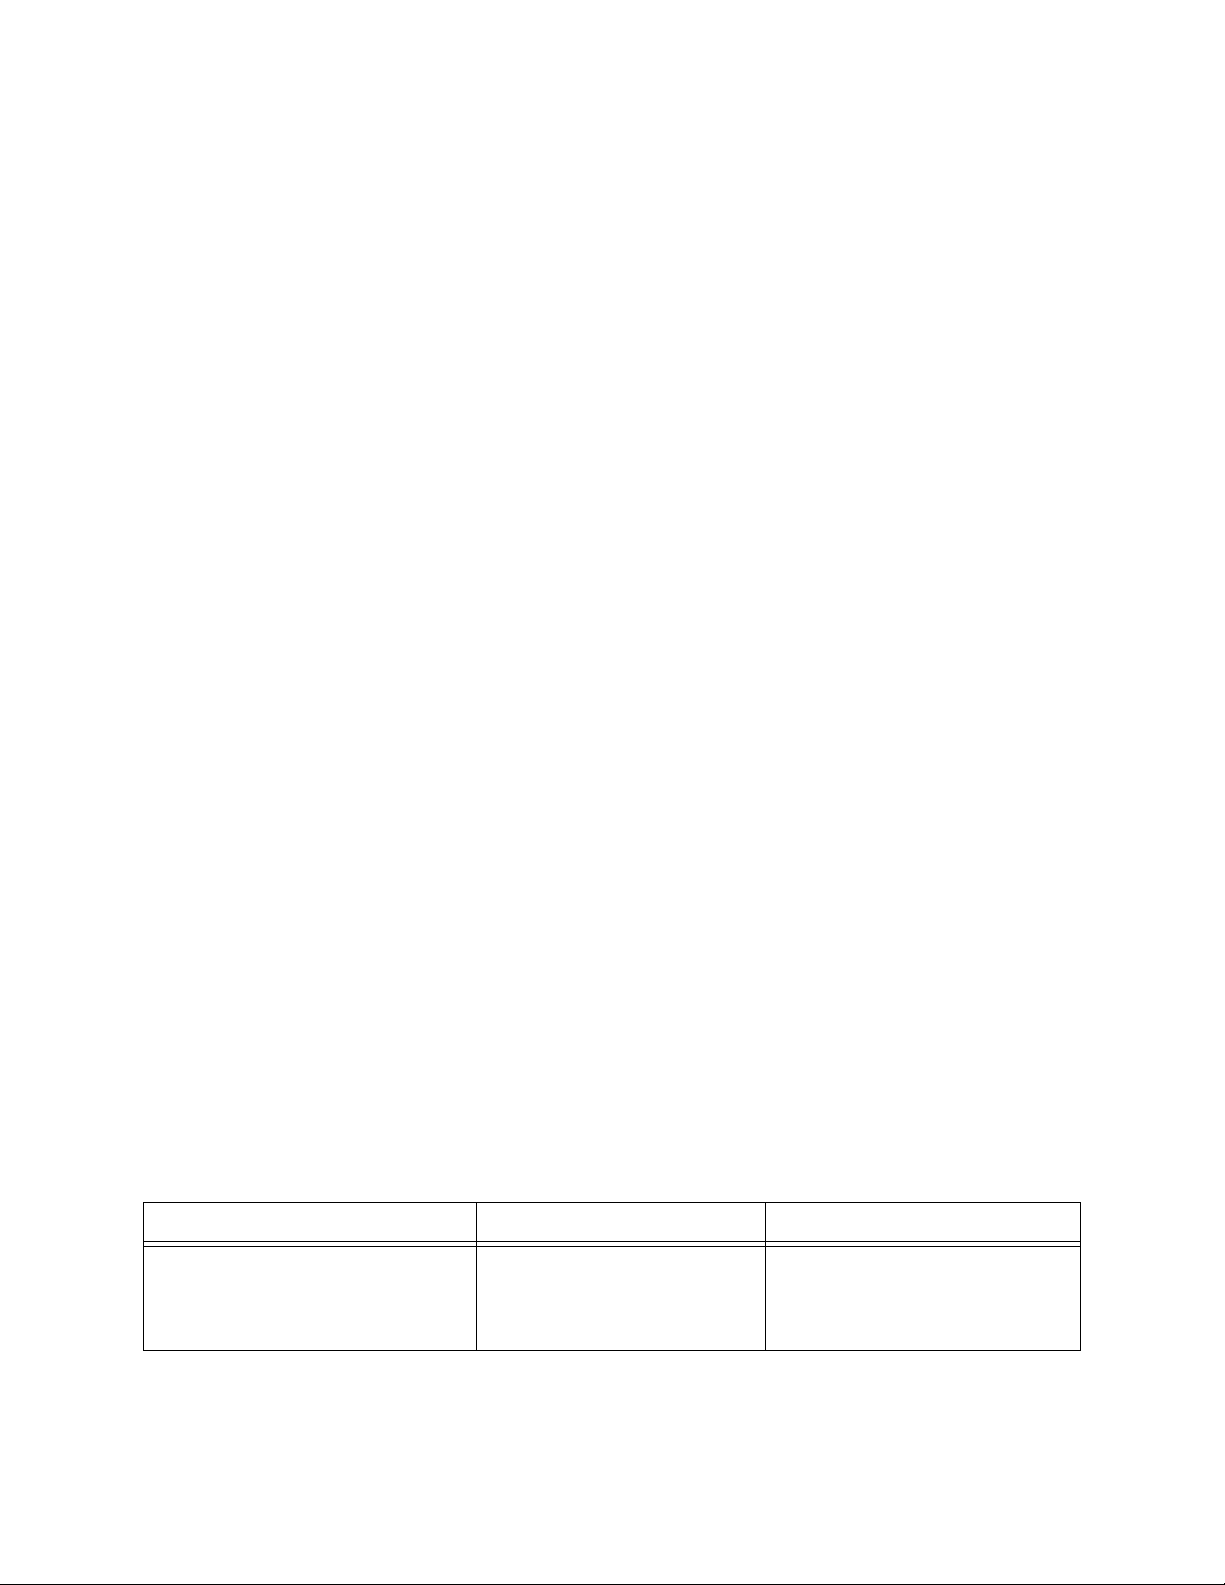
In a simple example, the HTTPS eWay receives a request from the following form:
<HTML><HEAD><TITLE>HTTP Server JCE Test Page</TITLE></HEAD>
<BODY>
<FORM ACTION="http://localhost:18001/Deployment1_servlet_MyServlet/
MyServlet" METHOD=POST>
<TABLE>
<TR><TD>What's your name? </TD><TD><INPUT NAME=fname></TD></TR>
<TR><TD></TD><TD></TD></TR>
</TABLE>
<BR>
<CENTER><INPUT TYPE=submit VALUE="Submit"></CENTER>
</FORM>
</BODY>
</HTML>
HTTPS eWay Adapter User’s Guide 10 Sun Microsystems, Inc.
Page 11
Chapter 1 Section 1.3
Introducing the HTTPS eWay What’s New in This Release
Figure 1 Sample Input Form
When the client enters a name in a browser and clicks Submit, the HTTPS eWay server
returns a simple response (according to the logic in the Collaboration or Business
Process).
Figure 2 Sample Response
1.3 What’s New in This Release
The HTTPS eWay includes the following changes and new features:
Version Control: An enhanced version control system allows you to effectively
manage changes to the eWay components.
Manual Connection Management: Establishing a connection can now be
performed automatically (configured as a property) or manually (using OTD
methods from the Java Collaboration).
HTTPS eWay Adapter User’s Guide 11 Sun Microsystems, Inc.
Page 12

Chapter 1 Section 1.4
Introducing the HTTPS eWay About This Document
Multiple Drag-and-Drop Component Mapping from the Deployment Editor: The
Deployment Editor now allows you to select multiple components from the
Editor’s component pane, and drop them into your Environment component.
Support for Runtime LDAP Configuration: eWay configuration properties now
support LDAP key values.
Connectivity Map Generator: Generates and links your Project’s Connectivity Map
components using a Collaboration or Business Process.
Support for Digest Authentication: eWay functionality now supports HTTP Digest
Authentication.
Support for Cookie Redirect: eWay functionality supports now for Cookie
Redirect.
Logging in the OTD: The User ID and Password are now exposed in the OTD.
Basic Authentication feature through eDesigner for WebService Server and HTTP
Server.
Many of these features are documented further in the Sun SeeBeyond eGate™ Integrator
User’s Guide or the Sun SeeBeyond eGate™ Integrator System Administration Guide.
1.4 About This Document
This guide includes the following chapters:
Chapter 1 “Introducing the HTTPS eWay”: Provides an overview description of
the product as well as high-level information about this document.
Chapter 2 “Installing the HTTPS eWay”: Describes the system requirements and
provides instructions for installing the HTTPS eWay.
Chapter 3 “Understanding the HTTPS eWay OTD”: Provides a description of the
Object Type Definitions to be used with the HTTPS eWay.
Chapter 4 “Operating SSL”: Explains the operation of the Secure Sockets Layer
(SSL) feature available with the HTTPS eWay, and provides detailed information on
how to use the OpenSSL utility.
Chapter 5 “Configuring the HTTPS eWay”: Provides instructions for configuring
the eWay.
Chapter 6 “Implementing the HTTPS eWay BPEL Sample Projects”: Describes
how to use the HTTPS eWay with eInsight Business Process Manager and reviews a
sample Project that uses eInsight.
Chapter 7 “Implementing the HTTPS eWay JCD Sample Projects”: Describes
how to implement the HTTPS eWay using a review of the sample Project, which
uses Java-based Collaborations.
HTTPS eWay Adapter User’s Guide 12 Sun Microsystems, Inc.
Page 13

Chapter 1 Section 1.4
Introducing the HTTPS eWay About This Document
HTTPS eWay Javadoc
An HTTPS eWay Javadoc is also provided that documents the Java methods available
with the HTTPS eWay. The Javadoc is uploaded with the eWay’s documentation file
(HTTPeWayDocs.sar) and downloaded from the Documentation tab of the Sun Java
Composite Application Platform Suite Installer. To access the full Javadoc, extract the
Javadoc to an easily accessible folder, and double-click the index.html file.
1.4.1 Scope
This user’s guide provides a description of the HTTPS eWay Adapter. It includes
directions for installing the eWay, configuring the eWay properties, and implementing
the eWay’s sample Projects. This document is also intended as a reference guide, listing
available properties, functions, and considerations. For a reference of available HTTPS
eWay Java methods, see the associated Javadoc.
1.4.2 Intended Audience
This guide is intended for experienced computer users who have the responsibility of
helping to set up and maintain a fully functioning Java Composite Application
Platform Suite system. This person must also understand any operating systems on
which the Java Composite Application Platform Suite will be installed (Windows and
UNIX), and must be thoroughly familiar with Windows-style GUI operations.
1.4.3 Text Conventions
The following conventions are observed throughout this document.
Table 1 Text Conventions
Text Convention Used For Examples
Bold Names of buttons, files, icons,
parameters, variables, methods,
menus, and objects
Monospaced Command line arguments, code
samples; variables are shown in
bold italic
Blue bold
Blue underlined
Hypertext links within
document
Hypertext links for Web
addresses (URLs) or email
addresses
Click OK.
On the File menu, click Exit.
Select the eGate.sar file.
java -jar filename.jar
See
Text Conventions on page 13
http://www.sun.com
HTTPS eWay Adapter User’s Guide 13 Sun Microsystems, Inc.
Page 14

Chapter 1 Section 1.5
Introducing the HTTPS eWay Related Documents
1.5 Related Documents
The following Sun documents provide additional information about the Sun Java
Composite Application Platform Suite product:
Sun SeeBeyond eGate™ Integrator
Sun Java Composite Application Platform Suite Installation Guide
1.6 Sun Microsystems, Inc. Web Site
The Sun Microsystems web site is your best source for up-to-the-minute product news
and technical support information. The site’s URL is:
http://www.sun.com
1.7 Documentation Feedback
We appreciate your feedback. Please send any comments or suggestions regarding this
document to:
CAPS_docsfeedback@sun.com
HTTPS eWay Adapter User’s Guide 14 Sun Microsystems, Inc.
Page 15

Installing the HTTPS eWay
What’s in This Chapter
HTTPS eWay System Requirements on page 15
Installing the HTTPS eWay on page 15
ICAN 5.0 Project Migration Procedures on page 17
Installing Enterprise Manager eWay Plug-Ins on page 19
2.1 HTTPS eWay System Requirements
The HTTPS eWay Readme contains the latest information on:
Supported Operating Systems
System Requirements
Chapter 2
External System Requirements
The HTTPS eWay Readme is uploaded with the eWay’s documentation file
(HTTPeWayDocs.sar) and can be accessed from the Documentation tab of the Sun Java
Composite Application Platform Suite Installer. Refer to the HTTPS eWay Readme for
the latest requirements before installing the HTTPS eWay.
2.2 Installing the HTTPS eWay
The Sun Java Composite Application Platform Suite Installer, a web-based application,
is used to select and upload eWays and add-on files during the installation process. The
following section describes how to install the components required for this eWay.
Note: When the Repository is running on a UNIX operating system, the eWays are loaded
from the Sun Java Composite Application Platform Suite Installer running on a
Windows platform connected to the Repository server using Internet Explorer.
HTTPS eWay Adapter User’s Guide 15 Sun Microsystems, Inc.
Page 16

Chapter 2 Section 2.2
Installing the HTTPS eWay Installing the HTTPS eWay
2.2.1 Installing the HTTPS eWay on an eGate supported system
Follow the directions for installing the Sun Java Composite Application Platform Suite
(CAPS).
After you have installed eGate or eInsight, do the following:
1 From the Enterprise Manager’s ADMINISTRATION tab, click on license in the
Sun Java Composite Application Platform Suite Products Installed table. The Sun
Java Composite Application Platform Suite Web Installer appears.
2 From Select Sun Java Composite Application Platform Suite Products to Install,
select the products for your Sun Java Composite Application Platform Suite and
include the following:
FileeWay (the File eWay is used by most sample Projects)
HTTPeWay
To upload the Sun SeeBeyond eWay™ HTTPS Adapter User’s Guide, Help file,
Javadoc, Readme, and sample Projects, select the following:
HTTPeWayDocs
3 Once you have selected all of your products, click Next in the top-right or bottom-
right corner of the Select Sun Java Composite Application Platform Suite
Products to Install box.
4 From the Selecting Files to Install box, locate and select your first product’s SAR
file. Once you have selected the SAR file, click Next. Follow this procedure for each
of your products. The Installing Files window appears after the last SAR file has
been selected.
5 From the Installing Files window, review the product list. If it is correct, Click
Install Products. The Enterprise Manager starts the installation.
6 When your product’s installation is completed, click on the prompt, “When
installation completes, click here to continue.”
7 Continue installing the eGate Integrator as instructed in the Sun Java Composite
Application Platform Suite Installation Guide.
Adding the eWay to an Existing Sun Java Composite Application Platform Suite Installation
It is possible to add the eWay to an existing Sun Java Composite Application Platform
Suite installation.
Steps required to add an eWay to an Existing CAPS installation include:
1 Complete steps 1 through 6 on “Installing the HTTPS eWay on an eGate
supported system” on page 15.
2 Open the Enterprise Designer and select Update Center from the Tools menu. The
Update Center Wizard appears.
3 For Step 1 of the wizard, simply click Next.
HTTPS eWay Adapter User’s Guide 16 Sun Microsystems, Inc.
Page 17

Chapter 2 Section 2.2
Installing the HTTPS eWay Installing the HTTPS eWay
4 For Step 2 of the wizard, click the Add All button to move all installable files to the
Include in Install field, then click Next.
5 For Step 3 of the wizard, wait for the modules to download, then click Next.
6 The wizard’s Step 4 window displays the installed modules. Review the installed
modules and click Finish.
7 When prompted, restart the IDE (Integrated Development Environment) to
complete the installation.
After Installation
Once you install the eWay, it must then be incorporated into a Project before it can
perform its intended functions. See the eGate Integrator User’s Guide for more
information on incorporating the eWay into an eGate Project.
2.2.2 Extracting the Sample Projects and Javadocs
The HTTPS eWay includes sample Projects and Javadocs. The sample Projects are
designed to provide you with a basic understanding of how certain database
operations are performed using the eWay, while Javadocs provide a list of classes and
methods exposed in the eWay.
Steps to extract the Javadoc include:
1 Click the Documentation tab of the Sun Java Composite Application Platform Suite
Installer, then click the Add-ons tab.
2 Click the HTTPS eWay Adapter link. Documentation for the HTTPS eWay appears
in the right pane.
3 Click the icon next to Javadoc and extract the ZIP file.
4 Open the index.html file to view the Javadoc.
Steps to extract the Sample Projects include:
1 Click the Documentation tab of the Sun Java Composite Application Platform Suite
Installer, then click the Add-ons tab.
2 Click the HTTPS eWay Adapter link. Documentation for the HTTPS eWay appears
in the right pane.
3 Click the icon next to Sample Projects and extract the ZIP file. Note that the
HTTPS_eWay_Sample.zip file contains two additional ZIP files for each sample
Project.
Refer to “Importing a Sample Project” on page 58 for instructions on importing the
sample Project into your repository via the Enterprise Designer.
HTTPS eWay Adapter User’s Guide 17 Sun Microsystems, Inc.
Page 18

Chapter 2 Section 2.3
Installing the HTTPS eWay ICAN 5.0 Project Migration Procedures
2.3 ICAN 5.0 Project Migration Procedures
This section describes how to transfer your current ICAN 5.0.x Projects to the Sun Java
Composite Application Platform Suite 5.1.1. To migrate your ICAN 5.0.x Projects to the
Sun Java Composite Application Platform Suite 5.1.1, do the following:
Export the Project
1 Before you export your Projects, save your current ICAN 5.0.x Projects to your
Repository.
2 From the Project Explorer, right-click your Project and select Export from the
shortcut menu. The Export Manager appears.
3 Select the Project that you want to export in the left pane of the Export Manager and
move it to the Selected Projects field by clicking the Add to Select Items (arrow)
button, or click All to include all of your Projects.
4 In the same manner, select the Environment that you want to export in the left pane
of the Export Manager and move it to the Selected Environments field by clicking
the Add to Select Items (arrow) button, or click All to include all of your
Environments.
5 Browse to select a destination for your Project ZIP file and enter a name for your
Project in the ZIP file field.
6 Click Export to create the Project ZIP file in the selected destination.
Install Java CAPS 5.1.1
1 Install the Java CAPS 5.1.1, including all eWays, libraries, and other components
used by your ICAN 5.0 Projects.
2 Start the Java CAPS 5.1.1 Enterprise Designer.
Import the Project
1 From the Java CAPS 5.1.1 Enterprise Designer’s Project Explorer tree, right-click the
Repository and select Import Project from the shortcut menu. The Import Manager
appears.
2 Browse to and select your exported Project file.
3 Click Import. A warning message, “Missing APIs from Target Repository,” may
appear at this time. This occurs because various product APIs were installed on the
ICAN 5.0 Repository when the Project was created, that are not installed on the Java
CAPS 5.1.1 Repository. These APIs may or may not apply to your Projects. You can
ignore this message if you have already installed all of the components that
correspond to your Projects. Click Continue to resume the Project import.
4 Close the Import Manager after the Project is successfully imported.
Deploy the Project
1 A new Deployment Profile must be created for each of your imported Projects.
When a Project is exported, the Project’s components are automatically “checked in”
to Version Control to write-protected each component. These protected components
appear in the Explorer tree with a red padlock in the bottom-left corner of each icon.
HTTPS eWay Adapter User’s Guide 18 Sun Microsystems, Inc.
Page 19

Chapter 2 Section 2.4
Installing the HTTPS eWay Installing Enterprise Manager eWay Plug-Ins
Before you can deploy the imported Project, the Project’s components must first be
“checked out” of Version Control from both the Project Explorer and the
Environment Explorer. To “check out” all of the Project’s components, do the
following:
A From the Project Explorer, right-click the Project and select Version Control >
Check Out from the shortcut menu. The Version Control - Check Out dialog box
appears.
B Select Recurse Project to specify all components, and click OK.
C Select the Environment Explorer tab, and from the Environment Explorer, right-
click the Project’s Environment and select Version Control > Check Out from
the shortcut menu.
D Select Recurse Environment to specify all components, and click OK.
2 If your imported Project includes File eWays, these must be reconfigured in your
Environment prior to deploying the Project.
To reconfigure your File eWays, do the following:
A From the Environment Explorer tree, right-click the File External System, and
select Properties from the shortcut menu. The Properties Editor appears.
B Set the inbound and outbound directory values, and click OK. The File External
System can now accommodate both inbound and outbound eWays.
3 Deploy your Projects.
Note: Only projects developed on ICAN 5.0.2 and later can be imported and migrated
successfully into the Java Composite Application Platform Suite.
2.4 Installing Enterprise Manager eWay Plug-Ins
The Sun SeeBeyond Enterprise Manager is a Web-based interface you use to monitor
and manage your Java Composite Application Platform Suite applications. The
Enterprise Manager requires an eWay specific “plug-in” for each eWay you install.
These plug-ins enable the Enterprise Manager to target specific alert codes for each
eWay type, as well as start and stop the inbound eWays.
The Sun Java Composite Application Platform Suite Installation Guide describes how to
install Enterprise Manager. The Sun SeeBeyond eGate Integrator System Administration
Guide describes how to monitor servers, Services, logs, and alerts using the Enterprise
Manager and the command-line client.
The eWay Enterprise Manager Plug-ins are available from the List of Components to
Download under the Sun Java Composite Application Platform Suite Installer’s
DOWNLOADS tab.
There are two ways to add eWay Enterprise Manager plug-ins:
From the Sun SeeBeyond Enterprise Manager
From the Sun Java Composite Application Platform Suite Installer
HTTPS eWay Adapter User’s Guide 19 Sun Microsystems, Inc.
Page 20
Chapter 2 Section 2.4
Installing the HTTPS eWay Installing Enterprise Manager eWay Plug-Ins
To add plug-ins from the Enterprise Manager
1 From the Enterprise Manager’s Explorer toolbar, click configuration.
2 Click the Web Applications Manager tab, go to the Auto-Install from Repository
sub-tab, and connect to your Repository.
3 Select the application plug-ins you require, and click Install. The application plug-
ins are installed and deployed.
To add plug-ins from the Sun Java Composite Application Platform Suite Installer
1 From the Sun Java Composite Application Platform Suite Installer’s Download
tab, select the Plug-Ins you require and save them to a temporary directory.
2 From the Enterprise Manager’s Explorer toolbar, click configuration.
3 Click the Web Applications Manager tab and go to the Manage Applications sub-
tab.
4 Browse for and select the WAR file for the application plug-in that you
downloaded, and click Deploy. The plug-ins is installed and deployed.
2.4.1 Viewing Alert Codes
You can view and delete alerts using the Enterprise Manager. An alert is triggered
when a specified condition occurs in a Project component. The purpose of the alert is to
warn the administrator or user that a condition has occurred.
To View the eWay Alert Codes
1 Add the eWay Enterprise Manager plug-in for this eWay.
2 From the Enterprise Manager’s Explorer toolbar, click configuration.
3 Click the Web Applications Manager tab and go to the Manage Alert Codes sub-
tab. Your installed eWay alert codes display under the Results section. If your eWay
alert codes are not displayed under Results, do the following:
A From the Install New Alert Codes section, browse to and select the eWay alert
properties file for the application plug-in that you added. The alert properties
files are located in the alertcodes folder of your Sun Java Composite Application
Platform Suite installation directory.
B Click Deploy. The available alert codes for your application are displayed under
Results. A listing of the eWay’s available alert codes is displayed in Table 2.
Tabl e 2 HTTPS eWay Alert Codes
Alert Code Description User Action
HTTPCLIENTEWAY-CONFIGFAILED000001=Configuration
error encountered for HTTP
Client eWay.
HTTPS eWay Adapter User’s Guide 20 Sun Microsystems, Inc.
Occurs if there your project
deployment parameters are
invalid.
Connectivity Map and External
configuration information is
invalid. Verify configured
parameters.
Page 21

Chapter 2 Section 2.4
Installing the HTTPS eWay Installing Enterprise Manager eWay Plug-Ins
Alert Code Description User Action
HTTPCLIENTEWAY-CONNECTFAILED000002=Failed to prepare
the HTTP Client agent for
establishing the connection to
the HTTP server.
HTTPCLIENTEWAY-GETFAILED000004=Failed on HTTP
GET request to URL {0}.
HTTPCLIENTEWAY-POSTFAILED000005=Failed on HTTP
POST request to URL {0}.
HTTPCLIENTEWAY-URLFAILED000003=Invalid URL
specified {0}.
HTTPSERVEREWAY-REQUESTFAILED000001=Failed to process
the POST or GET request.
Occurs when a socket
connection does not exist.
Occurs when an HTTPS
operation is not successful.
Occurs when an HTTPS
operation is not successful.
Occurs when an invalid URL
is entered.
Occurs when an HTTPS
operation is not successful.
Verify that network connectivity
is available.
Read the response code in
the collaboration and
proceed accordingly.
Run the operation from a
web browser.
Read the response code in
the collaboration and
proceed accordingly.
Run the operation from a
web browser.
Verify that the URL is correct.
Read the response code in
the collaboration and
proceed accordingly.
Verify that the HTTP Server is
running.
For information on Managing and Monitoring alert codes and logs, as well as how to
view the alert generated by the project component during runtime, see the Sun
SeeBeyond eGate™ Integrator System Administration Guide.
Note: An alert code is a warning that an error has occurred. It is not a diagnostic. The user
actions noted above are just some possible corrective measures you may take. Refer
to the log files for more information. For information on Managing and Monitoring
alert codes and logs, see the Sun SeeBeyond eGate Integrator System
Administration Guide.
HTTPS eWay Adapter User’s Guide 21 Sun Microsystems, Inc.
Page 22

Understanding the HTTPS eWay OTD
This chapter provides an overview of OTDs and describes the HTTPS eWay’s Object
Type Definition (OTD) structure.
What’s in This Chapter
Overview of eWay OTDs on page 22
HTTPS Client OTD on page 22
3.1 Overview of eWay OTDs
An OTD contains a set of rules that define an object. The object encodes data as it
travels through eGate. OTDs are used as the basis for creating a Java-based
Collaboration Definition for a Project.
Each OTD acts as a template with a unique set of eWay features. The HTTPS eWay OTD
template is not customizable and cannot be edited.
Chapter 3
The basic parts of an OTD are:
Element: This is the highest level in the OTD tree. The element is the basic
container that holds the other parts of the OTD. The element can contain fields and
methods.
Field: Fields are used to represent data. A field can contain data in any of the
following formats: string, boolean, int, double, or float.
Method: Method nodes represent actual Java methods.
Parameters: Parameters nodes represent the Java methods’ parameters.
Note: For complete information on the methods contained in the HTTPS eWay OTDs,
refer to the Javadoc provided with the eWay documentation in the Enterprise
Manager.
3.2 HTTPS Client OTD
The HTTPS OTD is specific to the HTTPS eWay. It is used as an inbound or outbound
OTD in a Collaboration.
HTTPS eWay Adapter User’s Guide 22 Sun Microsystems, Inc.
Page 23

Chapter 3 Section 3.3
Understanding the HTTPS eWay OTD HTTPS Server OTD
OTDs have a tree-like hierarchical data structure composed of fields containing
methods and properties.
The top root element of the OTD is the HTTPClientApplication interface, and the
fields underneath contain Java methods. You can use these Java methods to create
Business Rules that specify the HTTP message format and invoke messaging to and/or
from an HTTP server.
To access other Java classes and methods, you can use the Collaboration Editor (Java) to
utilize the entire contents available for HTTPClientApplication.
3.2.1 HTTP OTD Method Descriptions
The HTTP OTD includes the following methods used in HTTP data exchange:
get
The method called in the Collaboration (Java) to send an HTTP get request to an
HTTP server.
post
The method called in the Collaboration (Java) to send an HTTP post request to an
HTTP server.
getRequest
The method called in the Collaboration (Java) for other “request” related helper
methods, such as to set the URL, to add properties, etc.
getResult
The method called in the Collaboration (Java) for other “respond” related helper
methods, such as, to obtain the respond code, respond result, text result, and so on.
For more information on methods available in the HTTP OTDs, see the HTTPS eWay’s
Javadoc.
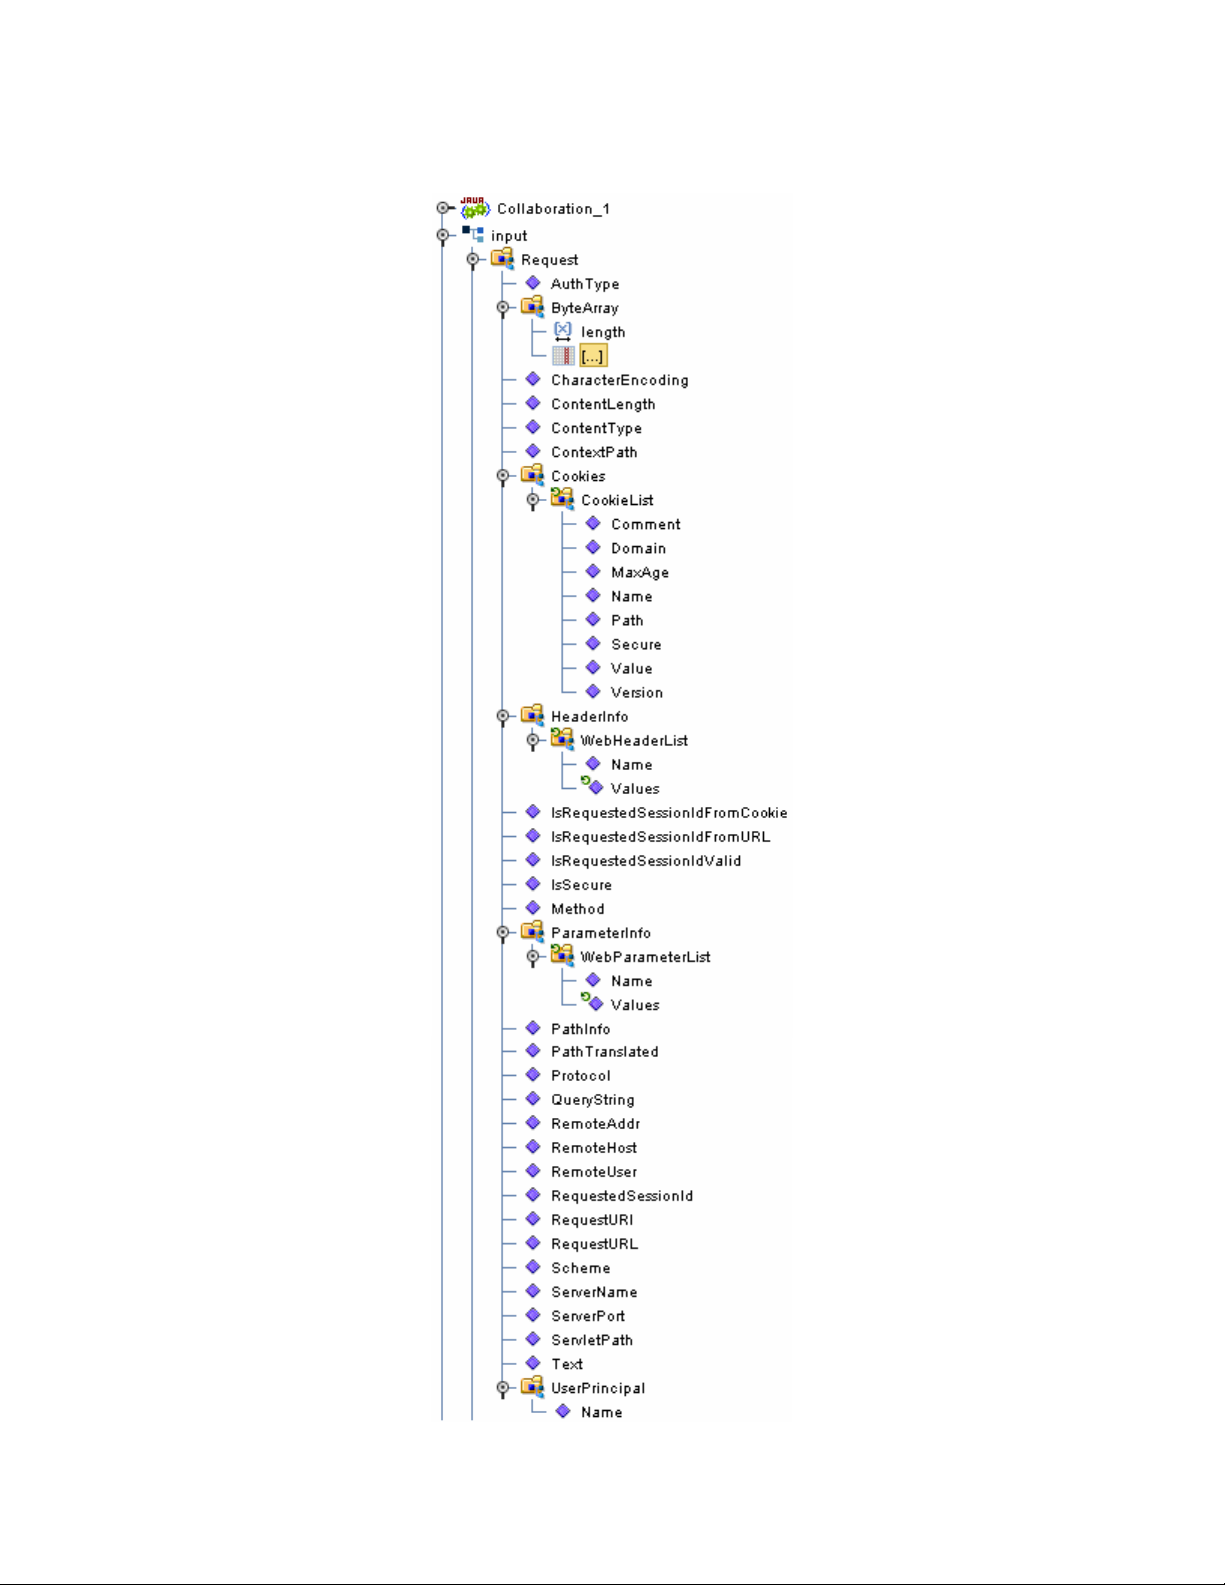
3.3 HTTPS Server OTD
The HTTPS Server input OTD has two nodes, Request and Response. The Request node
contains the data that the HTTPS Server eWay receives from an HTTP client, while the
Response node is used to set the HTTP response data that will be sent back to the HTTP
client.
Figure 3 Input Server OTD
HTTPS eWay Adapter User’s Guide 23 Sun Microsystems, Inc.
Page 24
Chapter 3 Section 3.3
Understanding the HTTPS eWay OTD HTTPS Server OTD
Figure 4 Input Server Request Node
HTTPS eWay Adapter User’s Guide 24 Sun Microsystems, Inc.
Page 25
Chapter 3 Section 3.3
Understanding the HTTPS eWay OTD HTTPS Server OTD
Figure 5 Input Server Response Node
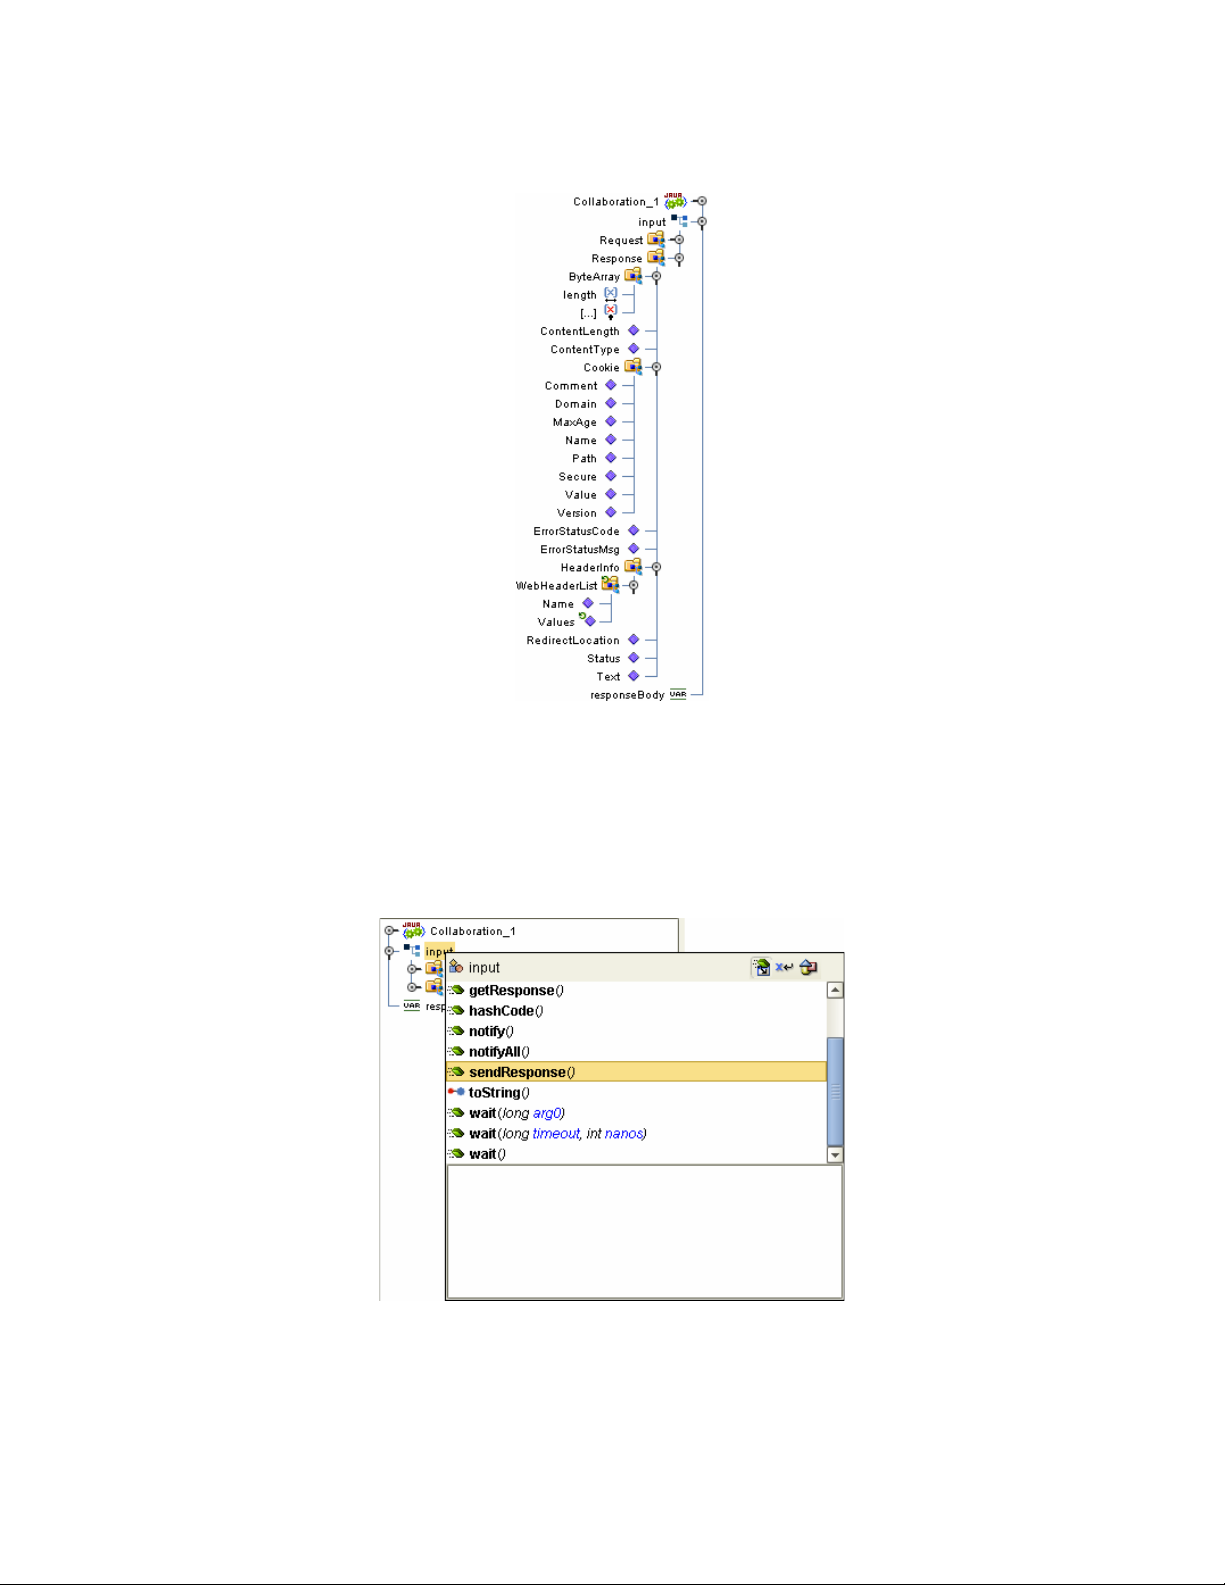
Working with the Server OTD
Use the OTDs Request and Response nodes to build the logic in your HTTPS
Collaborations. The HTTP response is not sent back to the HTTP client until
sendResponse() method is called on the HTTP server input OTD.
Figure 6 sendResponse() Method
It is critical that you use this method to send the response back to the client. Otherwise,
the client will wait indefinitely for the response. HTTP requires that a response be sent
to the client whether the response is a valid application response or an application error
response.
HTTPS eWay Adapter User’s Guide 25 Sun Microsystems, Inc.
Page 26

Chapter 3 Section 3.3
Understanding the HTTPS eWay OTD HTTPS Server OTD
Collaboration Example
The following example shows a simple Java Collaboration that retrieves the HTTP
method from the Request node via the Method property, creates an HTML response
indicating the HTTP method retrieved from the request, sets the ContentType property
as “text/html” on the Response node, sets the Text property with the HTML response,
and then calls the sendResponse() method on the HTTP server input OTD to send the
constructed response to the HTTP client.
Figure 7 sendResponse() Example
HTTPS eWay Adapter User’s Guide 26 Sun Microsystems, Inc.
Page 27

Operating SSL
This chapter explains the operation of the Secure Sockets Layer (SSL) feature available
with the HTTP(S) eWay.
What’s in This Chapter
Overview on page 27
KeyStores and TrustStores on page 29
SSL Handshaking on page 33
Using the OpenSSL Utility on page 36
4.1 Overview
The use of SSL with HTTP, here called HTTPS, enables HTTP data exchanges that are
secure from unauthorized interception from “hackers” or other entities. The eWay’s SSL
feature provides a secure communications channel for the data exchanges (see Figure
8).
Chapter 4
HTTPS eWay Adapter User’s Guide 27 Sun Microsystems, Inc.
Page 28

Chapter 4 Section 4.1
Operating SSL Overview
Figure 8 General SSL Operation: HTTPS
Man-in-Middle Attack:
Cannot break secured channel
HTTP(S) eWay
TrustStore KeyStore
Trusted CA
Certificates
Hacker
POST / GET
Response
SSL Communication Channel
Private
Key
Certificate &
CA Certificate
Chain
Web Server
This SSL feature is supported through the use of JSSE version 1.0.3.
Currently, the JSSE reference implementation is used. JSSE is a provider-based
architecture, meaning that there is a set of standard interfaces for cryptographic
algorithms, hashing algorithms, secured-socket-layered URL stream handlers, and so
on.
Because the user is interacting with JSSE through these interfaces, the different
components can be mixed and matched as long as the implementation is programmed
under the published interfaces. However, some implementations may not support a
particular algorithm.
The JSSE 1.0.3 application programming interface (API) is capable of supporting SSL
versions 2.0 and 3.0 and Transport Layer Security (TLS) version 1.0. These security
protocols encapsulate a normal bidirectional stream socket and the JSSE 1.0.3 API adds
transparent support for authentication, encryption, and integrity protection. The JSSE
reference implementation implements SSL version 3.0 and TLS 1.0.
For more information, visit the Sun Java Web site at the following URL:
http://java.sun.com
Note: See the JSSE documentation provided by Sun Microsystems for further details.
HTTPS eWay Adapter User’s Guide 28 Sun Microsystems, Inc.
Page 29

Chapter 4 Section 4.2
Operating SSL KeyStores and TrustStores
4.2 KeyStores and TrustStores
As depicted in Figure 8, JSSE makes use of files called KeyStores and TrustStores. The
KeyStore is used by the eWay for client authentication, while the TrustStore is used to
authenticate a server in SSL authentication.
A KeyStore consists of a database containing a private key and an associated
certificate, or an associated certificate chain. The certificate chain consists of the
client certificate and one or more certification authority (CA) certificates.
A TrustStore contains only the certificates trusted by the client (a “trust” store).
These certificates are CA root certificates, that is, self-signed certificates. The
installation of the Logical Host includes a TrustStore file named cacerts.jks in the
location:
<c:\JavaCAPS>\logicalhost\is\domains\<MyDomain>\config
where <c:\JavaCAPS> is the directory where the Sun Java Composite Application
Platform Suite is installed and <MyDomain> is the name of your domain. This file is
recommended as the TrustStore for the HTTPS eWay.
Both KeyStores and TrustStores are managed by means of a utility called keytool,
which is a part of the Java SDK installation.
4.2.1 Generating a KeyStore and TrustStore
This section explains steps on how to create both a KeyStore and a TrustStore (or import
a certificate into an existing TrustStore such as the default Logical Host TrustStore in the
location:
<c:\JavaCAPS>\logicalhost\is\domains\<MyDomain>\config\cacert
s.jks
where <c:\JavaCAPS> is the directory where the Sun Java Composite Application
Platform Suite is installed and <MyDomain> is the name of your domain. The primary
tool used is keytool, but openssl is also used as a reference for generating pkcs12
KeyStores.
For more information on openssl, and available downloads, visit the following Web
site:
http://www.openssl.org.
4.2.2 KeyStores
This section explains how to use KeyStores.
Creating a KeyStore in JKS Format
This section explains how to create a KeyStore using the JKS format as the database
format for both the private key, and the associated certificate or certificate chain. By
default, as specified in the java.security file, keytool uses JKS as the format of the key
and certificate databases (KeyStore and TrustStores). A CA must sign the certificate
HTTPS eWay Adapter User’s Guide 29 Sun Microsystems, Inc.
Page 30

Chapter 4 Section 4.2
Operating SSL KeyStores and TrustStores
signing request (CSR). The CA is therefore trusted by the server-side application to
which the eWay is connected.
Note: It is recommended to use the default KeyStore
<c:\JavaCAPS>\logicalhost\is\domains\<MyDomain>\config\k
eystore.jks where <c:\JavaCAPS> is the directory where the Sun Java
Composite Application Platform Suite is installed and <MyDomain> is the name of
your domain.
To generate a KeyStore
Use the following command:
keytool -keystore clientkeystore -genkey -alias client
You are prompted for several pieces of information required to generate a CSR. A
sample key generation section follows:
Enter keystore password: seebyond
What is your first and last name?
[Unknown]: development.seebeyond.com
What is the name of your organizational unit?
[Unknown]: Development
what is the name of your organization?
[Unknown]: SeeBeyond
What is the name of your City of Locality?
[Unknown]: Monrovia
What is the name of your State or Province?
[Unknown]: California
What is the two-letter country code for this unit?
[Unknown]: US
Is<CN=Foo Bar, OU=Development, O=SeeBeyond, L=Monrovia,
ST=California, C=US> correct?
[no]: yes
Enter key password for <client>
(RETURN if same as keystore password):
If the KeyStore password is specified, then the password must be provided for the
eWay. Press RETURN when prompted for the key password (this action makes the key
password the same as the KeyStore password).
This operation creates a KeyStore file clientkeystore in the current working directory.
You must specify a fully-qualified domain for the “first and last name” question. The
reason for this use is that some CAs such as Verisign expect this properties to be a fully
qualified domain name.
There are CAs that do not require the fully qualified domain, but it is recommended to
use the fully-qualified domain name for the sake of portability. All the other
information given must be valid. If the information can not be validated, a CA such as
Verisign does not sign a generated CSR for this entry.
This KeyStore contains an entry with an alias of client. This entry consists of the
Generated private key and information needed for generating a CSR as follows:
keytool -keystore clientkeystore -certreq alias client -keyalg rsa
-file client.csr
HTTPS eWay Adapter User’s Guide 30 Sun Microsystems, Inc.
Page 31

Chapter 4 Section 4.2
Operating SSL KeyStores and TrustStores
This command generates a certificate signing request which can be provided to a CA
for a certificate request. The file client.csr contains the CSR in PEM format.
Some CA (one trusted by the Web server to which the eWay is connecting) must sign
the CSR. The CA generates a certificate for the corresponding CSR and signs the
certificate with its private key. For more information, visit the following web sites:
http://www.thawte.com
or
http://www.verisign.com
If the certificate is chained with the CA’s certificate, perform step 1; otherwise, perform
step 2 in the following list:
1 The following command assumes the client certificate is in the file client.cer and the
CA’s certificate is in the file CARoot.cer:
keytool -import -keystore clientstore -file client.cer -alias
client
This command imports the certificate (which can include more than one CA in
addition to the Client’s certificate).
Also use the following command to import the CA’s certificate into the KeyStore for
chaining with the client’s certificate:
keytool -import -keystore clientkeystore -file CARootcer -alias
theCARoot
2 The following command imports the client’s certificate signed by the CA whose
certificate was imported in the preceding step:
keytool -import -keystore clientkeystore -file client.cer -alias
client
The generated file clientkeystore contains the client’s private key and the associated
certificate chain used for client authentication and signing. The KeyStore and/or
clientkeystore, can then be used as the eWay’s KeyStore.
See the “KeyStores” on page 29 for more information.
Creating a KeyStore in PKCS12 Format
This section explains how to create a PKCS12 KeyStore to work with JSSE. In a real
working environment, a customer could already have an existing private key and
certificate (signed by a known CA). In this case, JKS format can not be used, because it
does not allow the user to import/export the private key through keytool. It is
necessary to generate a PKCS12 database consisting of the private key and its
certificate.
The generated PKCS12 database can then be used as the eWay’s KeyStore. The keytool
utility is currently lacking the ability to write to a PKCS12 database. However, it can
read from a PKCS12 database.
Note: There are additional third-party tools available for generating PKCS12 certificates,
if you want to use a different tool.
HTTPS eWay Adapter User’s Guide 31 Sun Microsystems, Inc.
Page 32

Chapter 4 Section 4.2
Operating SSL KeyStores and TrustStores
For the following example, openssl is used to generate the PKCS12 KeyStore:
cat mykey.pem.txt mycertificate.pem.txt>mykeycertificate.pem.txt
The existing key is in the file mykey.pem.txt in PEM format. The certificate is in
mycertificate.pem.txt, which is also in PEM format. A text file must be created which
contains the key followed by the certificate as follows:
openssl pkcs12 -export -in mykeycertificate.pem.txt -out
mykeystore.pkcs12 -name myAlias -noiter -nomaciter
This command prompts the user for a password. The password is required. The
KeyStore fails to work with JSSE without a password. This password must also be
supplied as the password for the eWay’s KeyStore password (see Table 8 on page 50).
This command also uses the openssl pkcs12 command to generate a PKCS12 KeyStore
with the private key and certificate. The generated KeyStore is mykeystore.pkcs12 with
an entry specified by the myAlias alias. This entry contains the private key and the
certificate provided by the -in argument. The noiter and nomaciter options must be
specified to allow the generated KeyStore to be recognized properly by JSSE.
4.2.3 TrustStores
Creating a TrustStore
For demonstration purposes, suppose you have the following CAs that you trust:
firstCA.cert, secondCA.cert, thirdCA.cert, located in the directory C:\cascerts. You can
create a new TrustStore consisting of these three trusted certificates.
To create a new TrustStore
Use the following command:
keytool -import -file C:\cascerts\firstCA.cert -alias firstCA
-keystore myTrustStore
You must enter this command two more times, but for the second and third entries,
substitute secondCA and thirdCA for firstCA. Each of these command entries has the
following purposes:
1 The first entry creates a KeyStore file name myTrustStore in the current working
directory and imports the firstCA certificate into the TrustStore with an alias of
firstCA. The format of myTrustStore is JKS.
2 For the second entry, substitute secondCA to import the secondCA certificate into
the TrustStore, myTrustStore.
3 For the third entry, substitute thirdCA to import the thirdCA certificate into the
Tru st St ore.
Once completed, myTrustStore is available to be used as the TrustStore for the eWay.
Using an Existing TrustStore
This section explains how to use an existing TrustStore such as the default Logical Host
TrustStore in the location:
HTTPS eWay Adapter User’s Guide 32 Sun Microsystems, Inc.
Page 33

Chapter 4 Section 4.3
Operating SSL SSL Handshaking
<c:\JavaCAPS>\logicalhost\is\domains\<MyDomain>\config\cacert
s.jks
where <c:\JavaCAPS> is the directory where the Sun Java Composite Application
Platform Suite is installed and <MyDomain> is the name of your domain. The primary
tool used is keytool, but openssl is also used as a reference for generating pkcs12
KeyStores.
Notice that in the previous section, steps 2 and 3 were used to import two CAs into the
TrustStore created in step 1. For example, suppose you have a trusted certificate file
named: C:\trustedcerts\foo.cert and want to import it to the trustedcacertsjks
Tru st St ore.
If you are importing certificates into an existing TrustStore, use:
keytool -import -file C:\cacerts\secondCA.cert -alias secondCA
-keystore trustedcacertsjks
Once you are finished, trustedcacertsjks can be used as the TrustStore for the eWay.
4.3 SSL Handshaking
There are two options available for setting up SSL connectivity with a Web server:
Server-side Authentication: The majority of eCommerce Web sites on the Internet
are configured for server-side authentication. The eWay requests a certificate from
the Web server and authenticates the Web server by verifying that the certificate can
be trusted. Essentially, the eWay performs this operation by looking into its
TrustStore for a CA certificate with a public key that can validate the signature on
the certificate received from the Web server. This option is illustrated in Figure 9.
HTTPS eWay Adapter User’s Guide 33 Sun Microsystems, Inc.
Page 34

Chapter 4 Section 4.3
Operating SSL SSL Handshaking
Figure 9 Server-side Authentication
Client
(eWay)
Handshake: Client Hello
Handshake: ServerHello
:
e
k
s
a
d
h
n
a
H
Handshake: ServerHelloDone
Handshake: ClientKeyExchange
C
h
a
C
n
C
g
i
p
e
h
e
t
a
c
i
f
i
t
r
e
e
r
S
p
e
c
Server
(Web
Server)
Handshake: Finished
ChangeCipherSpec
Handshake: Finished
Dual authentication: This option requires authentication from both the eWay and
Web server. The server side (Web server) of the authentication process is the same as
that described previously. In addition, however, the Web server requests a
certificate from the eWay. The eWay then sends its certificate to the Web server. The
server, in turn, authenticates the eWay by looking into its TrustStore for a matching
trusted CA certificate. The communication channel is established by the process of
both parties’ requesting certificate information. This option is illustrated in Figure
10.
HTTPS eWay Adapter User’s Guide 34 Sun Microsystems, Inc.
Page 35

Chapter 4 Section 4.3
Operating SSL SSL Handshaking
Figure 10 Dual Authentication
Client
(eWay)
Handshake: Client Hello
Handshake: ServerHello
Handshake: Certificate
Handshake: CertificateRequest
Handshake: ServerHelloDone
Handshake: Certificate
Server
(Web
Server)
Handshake: ClientKeyExchange
Handshake: CertificateVerify
ChangeCipherSpec
Handshake: Finished
ChangeCipherSpec
Handshake: Finished
HTTPS eWay Adapter User’s Guide 35 Sun Microsystems, Inc.
Page 36

Chapter 4 Section 4.4
Operating SSL Using the OpenSSL Utility
4.4 Using the OpenSSL Utility
The OpenSSL utility is a free implementation of cryptographic, hashing, and public
key algorithms such as 3DES, SHA1, and RSA respectively. This utility has many
options including certificate signing, which keytool does not provide. You can
download OpenSSL from the following Web site:
http://www.openssl.org
Follow the build and installation instruction for OpenSSL.
To learn more about SSL, and the high level aspects of cryptography, a good source of
reference is a book entitled SSL and TLS: Designing and Building Secure Systems (by Eric
Rescorla, Published by Addison Wesley Professional; ISBN: 0201615983).
4.4.1 Creating a Sample CA Certificate
The sample given in this section demonstrates the use of the OpenSSL utility to create a
CA. This generated CA is then used to sign a CSR (see “Signing Certificates With Your
Own CA” on page 37), whether it is generated from keytool or OpenSSL.
For testing purposes a sample CA can be generated. To avoid spending additional
funds to have a commercial CA sign test certificates, a sample is generated and used to
sign the test certificate.
Perform the following operations from the command line:
openssl req -config c:\openssl\bin\openssl.cnf -new -x509 keyout ca-key.pem.txt -out ca-certificate.pem.txt -days 365
Using properties from c:\openssl\bin\openssl.cnf
Loading 'screen' into random state: done
Generating a 1024 bit RSA private key
.................++++++
.....................++++++
writing new private key to 'ca-key.pem.txt'
Enter PEM pass phrase:
Verifying password: Enter PEM pass phrase:
----You are about to be asked to enter information that will be
incorporated into your certificate request.
What you are about to enter is what is called a Distinguished Name
oraDN.
There are quite a few fields but you can leave some blank
For some fields there will be a default value,
If you enter '.', the field will be left blank.
----Country Name (2 letter code) []:US
State or Province Name (full name) []:California
Locality Name (eg, city) []:Monrovia
Organization Name (eg, company) []:SeeBeyond
Organizational Unit Name (eg, section) []:Development
Common Name (eg, your websites domain name) []
:development.seebeyond.com
Email Address []:development@seebeyond.com
You are prompted for information. You must enter a password and remember this
password for signing certificates with the CA’s private key. This command creates a
HTTPS eWay Adapter User’s Guide 36 Sun Microsystems, Inc.
Page 37

Chapter 4 Section 4.4
Operating SSL Using the OpenSSL Utility
private key and the corresponding certificate for the CA. The certificate is valid for 365
days starting from the date and time it was created.
The properties file C:\openssl\bin\openssl.cnf is needed for the req command. The
default config.cnf file is in the OpenSSL package under the apps sub-directory.
Note: That to use this file in Windows, you must change the paths to use double back-
slashes. See “Windows OpenSSL.cnf File Example” on page 38 for a complete
Config.cnf file example, which is known to work in a Windows environment.
4.4.2 Signing Certificates With Your Own CA
The example in this section shows how to create a CSR with keytool and generate a
signed certificate for the CSR with the CA created in the previous section. The steps
shown in this section, for generating a KeyStore and a CSR, were already explained
under “Creating a KeyStore in JKS Format” on page 29.
Note: No details are given here for the keytool commands. See “Creating a KeyStore in
JKS Format” on page 29 for more information.
To create a CSR with keytool and generate a signed certificate for the CSR
1
keytool –keystore clientkeystore –genkey –alias client
Enter keystore password: seebeyond
What is your first and last name?
[Unknown]: development.seebeyond.com
What is the name of your organizational unit?
[Unknown]: Development
What is the name of your organization?
[Unknown]: SeeBeyond
What is the name of your City or Locality?
[Unknown]: Monrovia
What is the name of your State or Province?
[Unknown]: California
What is the two-letter country code for this unit?
[Unknown]: US
Is <CN=Foo Bar, OU=Development, O=SeeBeyond, L=Monrovia, ST=Californi
a, C=US> correct?
[no]: yes
Enter key password for <client>
(RETURN if same as keystore password):
2
keytool –keystore clientkeystore –certreq –alias client –
keyalg rsa –file client.csr
3
openssl x509 -req -CA
ca-certificate.pem.txt CAkey ca-key.pem.txt
-in client.csr -out client.cer -days 365 -CAcreateserial
This is how we create a signed certificate for the associated CSR. The option
-CAcreateserial is needed if this is the first time the command is issued. It is used to
HTTPS eWay Adapter User’s Guide 37 Sun Microsystems, Inc.
Page 38

Chapter 4 Section 4.4
Operating SSL Using the OpenSSL Utility
create an initial serial number file used for tracking certificate signing. This
certificate will be valid for 365 days.
4
keytool -import -keystore clientkeystore -file client.cer
-alias client
Enter keystore password: seebeyond
keytool error: java.lang.Exception: Failed to establish chain from
reply
You get an exception because there is no certificate chain in the client certificate so
we have to import the CA’s certificate into the KeyStore first. You can then import
the client.cer itself to form a certificate chain. You need the following steps:
5
keytool -import -keystore clientkeystore -file CA
ca-certificate.pem.txt -alias theCARoot
Enter keystore password: seebeyond
Owner: EmailAddress=development@seebeyond.com, CN=development.seebeyo
nd.com, OU=Development, O=SeeBeyond, L=Monrovia, ST=California, C=US
Issuer: EmailAddress=development@seebeyond.com, CN=development.seebey
ond.com,
OU=Development, O=SeeBeyond, L=Monrovia, ST=California, C=US
Serial number: 0
Valid from: Tue May 08 15:09:07 PDT 2001 until: Wed May 08
15:09:07 PDT 2002
Certificate fingerprints:
MD5: 60:73:83:A0:7C:33:28:C3:D3:A4:35:A2:1E:34:87:F0
SHA1: C6:D0:C7:93:8E:A4:08:F8:38:BB:D4:11:03:C9:E6:CB:9C:D0:72:D0
Trust this certificate? [no]: yes
Certificate was added to keystore
6
keytool –import –keystore clientkeystore –file client.cer –alias
client
Enter keystore password: seebeyond
Certificate reply was installed in keystore
Now that we have a private key and an associating certificate chain in the KeyStore
clientkeystore, we can use it as a KeyStore for client (eWay) authentication. The
only warning is that the CA certificate must be imported into the trusted certificate
store of the Web server to which you will be connecting. Moreover, the Web server
must be configured for client authentication (httpd.conf for Apache, for example).
This appendix contains the contents of the openssl.cnf file that can be used on
Windows. Be sure to make the appropriate changes to the directories.
4.4.3 Windows OpenSSL.cnf File Example
This section contains the contents of the openssl.cnf file that can be used on Windows.
Be sure to make the appropriate changes to the directories.
#
# SSLeay example properties file.
HTTPS eWay Adapter User’s Guide 38 Sun Microsystems, Inc.
Page 39

Chapter 4 Section 4.4
Operating SSL Using the OpenSSL Utility
# This is mostly being used for generation of certificate requests.
#
RANDFILE = .rnd
####################################################################
[ca]
default_ca= CA_default# The default ca section
####################################################################
[ CA_default ]
dir = G:\\openssl\\\bin\\demoCA# Where everything is kept
certs = $dir\\certs # Where the issued certs are kept
crl_dir= $dir\\crl # Where the issued crl are kept
database= $dir\\index.txt# database index file.
new_certs_dir= $dir\\newcerts# default place for new certs.
certificate= $dir\\cacert.pem # The CA certificate
serial = $dir\\serial # The current serial number
crl = $dir\\crl.pem # The current CRL
private_key= $dir\\private\\cakey.pem # The private key
RANDFILE= $dir\\private\\private.rnd # private random number file
x509_extensions= x509v3_extensions# The extentions to add to the cert
default_days= 365 # how long to certify for
default_crl_days= 30# how long before next CRL
default_md= md5 # which md to use.
preserve = no # keep passed DN ordering
# A few difference way of specifying how similar the request should l
ook
# For type CA, the listed attributes must be the same, and the option
al
# and supplied fields are just that :-)
policy = policy_match
# For the CA policy
[ policy_match ]
countryName = match
stateOrProvinceName= match
organizationName= match
organizationalUnitName= optional
commonName = supplied
emailAddress = optional
# For the 'anything' policy
# At this point in time, you must list all acceptable 'object'
# types.
[ policy_anything ]
countryName= optional
stateOrProvinceName= optional
localityName= optional
organizationName= optional
organizationalUnitName= optional
commonName = supplied
emailAddress = optional
####################################################################
[ req ]
default_bits= 1024
default_keyfile = privkey.pem
distinguished_name= req_distinguished_name
attributes= req_attributes
HTTPS eWay Adapter User’s Guide 39 Sun Microsystems, Inc.
Page 40

Chapter 4 Section 4.4
Operating SSL Using the OpenSSL Utility
[ req_distinguished_name ]
countryName = Country Name (2 letter code)
countryName_min= 2
countryName_max= 2
stateOrProvinceName= State or Province Name (full name)
localityName = Locality Name (eg, city)
0.organizationName= Organization Name (eg, company)
organizationalUnitName= Organizational Unit Name (eg, section)
commonName = Common Name (eg, your website's domain name)
commonName_max= 64
emailAddress = Email Address
emailAddress_max= 40
[ req_attributes ]
challengePassword= A challenge password
challengePassword_min= 4
challengePassword_max= 20
[ x509v3_extensions ]
Note: The following copyright notices apply:
Copyright © 1998-2001 The OpenSSL Project. All rights reserved.
Copyright © 1994-2002 World Wide Web Consortium, (Massachusetts Institute of
Technology, Institut National de Recherche en Informatique et en Automatique,
Keio University). All Rights Reserved. http://www.w3.org/Consortium/Legal/
HTTPS eWay Adapter User’s Guide 40 Sun Microsystems, Inc.
Page 41

Configuring the HTTPS eWay
This chapter describes how to set the properties of the HTTPS eWay.
What’s in This Chapter
Creating and Configuring the HTTPS eWay on page 41
Configuring the eWay Connectivity Map Properties on page 41
Configuring the eWay Environment Properties on page 43
eWay Connectivity Map Properties on page 44
eWay Environment Properties on page 46
Setting Acceptor Threads Property for HTTPS Server Mode on page 54
5.1 Creating and Configuring the HTTPS eWay
Chapter 5
All eWays contain a unique set of default configuration parameters. After the eWays are
established and a HTTPS External System is created in the Project’s Environment, the
eWay parameters are modified for your specific system. The HTTPS eWay
configuration parameters are modified from two locations:
From the Connectivity Map—which contains parameters specific to the HTTPS
eWay, and may vary from other eWays (of the same type) in the Project.
From the Environment Explorer tree—which contains global parameters that
commonly apply to all eWays (of the same type) in the Project. Saved parameters
are shared by all eWays in the HTTPS External System Properties window.
Collaboration or Business Process: HTTPS eWay properties may also be set from
your Collaboration or Business Process, in which case the settings will override the
corresponding properties in the eWay’s Connectivity Map configuration. Any
properties that are not overridden retain their configured default settings.
5.2 Configuring the eWay Connectivity Map Properties
When you connect an External Application to a Collaboration, Enterprise Designer
automatically assigns the appropriate eWay to the link. Each eWay is supplied with a
HTTPS eWay Adapter User’s Guide 41 Sun Microsystems, Inc.
Page 42

Chapter 5 Section 5.2
Configuring the HTTPS eWay Configuring the eWay Connectivity Map Properties
template containing default configuration properties that are accessible on the
Connectivity Map.
To configure the HTTPS eWay properties:
1 On the Enterprise Designer’s Connectivity Map, double-click the HTTPS eWay
icon.
Figure 11 Connectivity Map with Components - Client
HTTPS eWay
The eWay Properties window appears, displaying the default properties for the
eWay.
Figure 12 eWay Properties - Client
To configure the HTTPS Server eWay properties:
1 On the Enterprise Designer’s Connectivity Map, double-click the HTTPS Server
eWay icon.
HTTPS eWay Adapter User’s Guide 42 Sun Microsystems, Inc.
Page 43

Chapter 5 Section 5.3
Configuring the HTTPS eWay Configuring the eWay Environment Properties
Figure 13 Connectivity Map with Components - Server
The eWay Properties window appears, displaying the default properties for the
HTTPS Server eWay.
Figure 14 eWay Properties - Server
5.3 Configuring the eWay Environment Properties
The eWay Environment Configuration properties contain parameters that define how
the eWay connects to and interacts with other eGate components within the
Environment. When you create a new HTTPS External System, you may configure the
type of External System required.
Available External System properties include:
HTTP Settings
Proxy Configuration
Security
Connection Pool Settings
HTTPS eWay Adapter User’s Guide 43 Sun Microsystems, Inc.
Page 44

Chapter 5 Section 5.4
Configuring the HTTPS eWay eWay Connectivity Map Properties
To Configure the Environment Properties:
1 In Enterprise Explorer, click the Environment Explorer tab.
2 Expand the Environment created for the HTTPS Project and locate the HTTPS
External System.
Note: For more information on creating an Environment, see the “Sun SeeBeyond eGate
Integrator Tutorial”.
3 Right-click the External System created for the HTTPS Project and select Properties
from the list box. The Environment Configuration Properties window appears.
Figure 15 HTTPS eWay Environment Configuration
4 Click on any folder to display the default configuration properties for that section.
5 Click on any property field to make it editable.
After modifying the configuration properties, click OK to save the changes.
5.4 eWay Connectivity Map Properties
The eWay Connectivity Map consists of the following properties categories.
HTTPS eWay Adapter User’s Guide 44 Sun Microsystems, Inc.
Page 45

Chapter 5 Section 5.4
Configuring the HTTPS eWay eWay Connectivity Map Properties
HTTPS eWay Configuration Sections Include:
HTTP Settings
HTTPS Server eWay Configuration Sections Include:
HTTP Server External Configuration
5.4.1 Configuring the Connectivity Map HTTPS eWay Properties
The HTTPS eWay Properties include parameters used by the external system.
Table 3 HTTP eWay—HTTP Settings
Name Description Required Value
Allow Cookies Specifies whether cookies sent from
servers are allowed to be stored and sent
on subsequent requests. If cookies are
not allowed, sessions are not supported.
Accept Type The default Accept type header value to
include when sending a request to the
server.
5.4.2 Configuring the Connectivity Map HTTPS Server eWay
Tru e or False. The default is
Tru e.
A string. For example:
text/html, text/plain, text/xml,
and so on.
The default is text/*.
Properties
The HTTPS Server eWay Properties include parameters used by the external system.
HTTPS eWay Adapter User’s Guide 45 Sun Microsystems, Inc.
Page 46

Chapter 5 Section 5.5
Configuring the HTTPS eWay eWay Environment Properties
Table 4 HTTP Server eWay—HTTP Server External Configuration
Name Description Required Value
servlet-url Specifies the last path component of the
HTTPS server servlet URL. The client uses
this URL value to access the server.
The property value must be the servlet
name (for example, HttpServerServlet).
An example of a valid servlet URL is http:/
/localhost:18001/
Deployment1_servlet_HttpServerServlet/
HttpServerServlet, where the URL value
comprises several components as follows:
localhost: The name of the machine on
which your current Logical Host is
running.
18001: The port number (in this case,
the Sun SeeBeyond Integration Server
port number).
Deployment1_servlet_HttpServerServl
et: The name of your current Project’s
Deployment Profile concatenated with
_servlet_HttpServerServlet.
HttpServerServlet: The servlet name
(equivalent to the servlet_url property).
A valid URL.
Note: Set the port number based
on the Sun SeeBeyond
Integration Server properties. By
default, it is 18001, but it can be
modified by the user. Set the Sun
SeeBeyond Integration Server
properties using the Environment
Explorer. See the eGate Integrator
User’s Guide for details.
5.5 eWay Environment Properties
eWay External System properties must be configured from within the Environment.
Until you have successfully configured all eWays for your Java CAPS project, your
project cannot be properly executed or deployed. The following list identifies the
HTTPS eWay properties. There are four Environment Configuration categories that the
HTTPS eWay implements.
Property Categories Configured in the Logical Host Environment
HTTP Settings on page 47
HTTPS eWay Adapter User’s Guide 46 Sun Microsystems, Inc.
Page 47

Chapter 5 Section 5.5
Configuring the HTTPS eWay eWay Environment Properties
Proxy Configuration on page 48
Security on page 49
Connection Pool Settings on page 53
5.5.1 HTTP Settings
HTTP Settings includes the configuration parameters listed in Table 5.
Caution: Calling the clear() method in the Collaboration Editor (Java) clears all properties in
this HTTP Settings section. Once the properties have been cleared, you must
manually rebuild the header and payload sections of the Request message in the
Transformation Designer.
Table 5 Environment Configuration—HTTP Settings
Name Description Required Value
URL Specifies the default URL to be used for
establishing an HTTP or HTTPS
connection. When a URL is not assigned
to the HTTP OTD, the default value is
used as the URL for both the GET and
POST commands. See
Methods” on page 9
If “https” protocol is specified, SSL must
be enabled. See
“GET and POST
.
Table 8 on page 50.
A valid URL.
You must include the full URL.
For example,
http://www.sun.com
or
http://google.yahoo.com/bin/
query
If using GET functionality, you
can provide the properties,
using encoded query string
notation. For example (all on
one line):
http://www.ee.cornell.edu/
cgi-bin/cgiwrap/~wes/
pq?FirstName=John&LastNam
e=Doe
Note: For international
URLs, be sure the
targeting URL
supports the
encoding used in this
property. A list of the
character encoding
supported by the
Java 2 platform is at
the Sun Web site:
http://java.sun.com
HTTPS eWay Adapter User’s Guide 47 Sun Microsystems, Inc.
Page 48

Chapter 5 Section 5.5
Configuring the HTTPS eWay eWay Environment Properties
Table 5 Environment Configuration—HTTP Settings (Continued)
Name Description Required Value
Content Type The default Content type header value to
include when sending a request to the
server. If no value is specified, a default
value of application/x-www-form-
urlencoded is supplied by the eWay.
Important: A change of the
configuration value will only alter
the header value, and not the
actual Content type. When
necessary, you can undertake any
conversion or transformation of
data manually.
Encoding The default encoding used when reading
or writing textual data.
5.5.2 Proxy Configuration
The properties in this section specify the information required for the eWay to access
the external systems through a proxy server.
Use the Proxy Configuration settings in the client HTTPS Environment properties,
when setting the desired URL dynamically within a Collaboration (Java) or Business
Process.
A valid string.
A valid entry. The default is
ASCII.
Note: It is a known behavior of the Java Virtual Machine (JVM) to bypass an invalid
proxy server through a local connection. As a result, you may still get a response,
even if the proxy setting is invalid. This false response only happens with an HTTP
connection. An HTTPS connection ensures authenticated handshaking from the
proxy.
Note: The HTTPS eWay client bypasses the proxy server when accessing local addreses.
This contrasts a web browser’s behavior where all requests are sent to a proxy even if
they are local.
Proxy Configuration includes the configuration parameters listed in Table 6.
Table 6 Environment Configuration—Proxy Configuration
Name Description Required Value
Proxy Host Specifies the host name of the HTTP
proxy. This specifies the HTTPS proxy host
to which requests to an HTTP server or
reception of data from an HTTP server
may be delegated to a proxy. This sets the
proxy port for secured HTTP connections.
A valid HTTPS proxy host
name.
HTTPS eWay Adapter User’s Guide 48 Sun Microsystems, Inc.
Page 49

Chapter 5 Section 5.5
Configuring the HTTPS eWay eWay Environment Properties
Table 6 Environment Configuration—Proxy Configuration (Continued)
Name Description Required Value
Proxy Port Specifies the port of the HTTPS proxy.
This specifies the HTTPS proxy port to
which requests to an HTTP server or
reception of data from an HTTP server
may be delegated to a proxy. This sets the
proxy port for secured HTTP connections.
Proxy Username Specifies the user name necessary for
authentication to access the proxy server.
Proxy Password Specifies the password required for
accessing the HTTPS proxy.
A valid HTTPS proxy port. The
default is 8080.
A valid user name.
Note: The user name is
required by URLs that
require HTTP basic
authentication to
access the site.
Important: Be sure to
enter a value for this
property before you
enter a value for the
Proxy password
properties.
The appropriate password.
Important: Be sure to
enter a value for the
Proxy username
properties before
entering this property.
An additional task to properly configure the Proxy properties is to edit the
PropertyPermission utility of the server.policy file in the Logical Host:
1 Navigate to <c:\JavaCAPS>\logicalhost\is\lib\install\templates\
where <c:\JavaCAPS>\ is the location of your Sun Java Composite Application
Platform Suite installation.
2 Add the following syntax to the server.policy file:
permission java.util.PropertyPermission “*”, “read,write”;
3 For the permission changes to take place, you need to create a new domain. See
“Creating and Starting the Domain” on page 81 to create a new domain.
5.5.3 Security
The Environment Configuration Security properties are used to perform HTTP
authentication and SSL connections. They include the following configuration sections:
Authentication
SSL
HTTPS eWay Adapter User’s Guide 49 Sun Microsystems, Inc.
Page 50

Chapter 5 Section 5.5
Configuring the HTTPS eWay eWay Environment Properties
Authentication
Details for the Authentication settings used for HTTP authentication are detailed in
Table 7.
Tabl e 7 Environment Configuration—Security, Authentication
Name Description Required Value
HTTP Username Specifies the user name for
authenticating the web site specified by
the URL.
HTTP Password Specifies the password used for
authenticating the web site specified by
the URL.
SSL
Details for the SSL settings used for SSL connections are detailed in Table 8.
Table 8 Environment Configuration—Security, SSL
Name Description Required Value
Protocol SSL The SSL protocol to use when
establishing an SSL connection with the
server. If the protocol is not set by this
method, the default protocol type, TLS
(Sun JSSE), is used. If an SSL connection is
not required, leave the default No SSL
option.
A valid user name.
Important: Enter a
value for this property
before you enter a
value for the HTTP
password properties.
A valid password.
Important: Be sure to
enter a value for the
HTTP username
properties before
entering this property.
If you are using the default
Sun JSSE provider, choose
one of the following settings:
TLSv1
TLS
SSLv2
SSLv3
SSL
If you are running the Sun
SeeBeyond Integration Server
on AIX, choose or enter one
of the following settings:
SSL-TLS
TLSv1
TLS
SSLv3
SSLv2
SSL
For details on these settings,
see the appropriate JSSE
documentation.
HTTPS eWay Adapter User’s Guide 50 Sun Microsystems, Inc.
Page 51

Chapter 5 Section 5.5
Configuring the HTTPS eWay eWay Environment Properties
Table 8 Environment Configuration—Security, SSL (Continued)
Name Description Required Value
JSSE Provider Class Specifies the fully qualified name of the
JSSE provider class. For more information,
see the Sun Java Web site at:
http://java.sun.com/. It is assumed that
the provider class is in the runtime
classpath.
X509 Algorithm
Name
KeyStore Type Specifies the default KeyStore type. The
KeyStore Specifies the default KeyStore file. The
Specifies the X509 algorithm name to use
for the trust and key manager factories.
keystore type is used for key/certificate
management when establishing an SSL
connection. If the default KeyStore type is
not set by this method, the default
KeyStore type, JKS, is used.
keystore is used for key/certificate
management when establishing SSL
connections.
The name of a valid JSSE
provider class. The default is
com.sun.net.ssl.internal.ssl.P
rovider
If you are running the Sun
SeeBeyond Integration Server
on AIX, specify
com.ibm.jsse.IBMJSSEProvid
er.
The name of a valid X509
algorithm. The default is
SunX509. If you are running
the Sun SeeBeyond
Integration Server on AIX,
specify IbmX509.
A valid package location.
There is no default value. It is
recommended to use
<c:\JavaCAPS>\logicalho
st\is\domains\<MyDomain
>\config\keystore.jks
where <c:\JavaCAPS> is the
directory where the Sun Java
Composite Application
Platform Suite is installed and
<MyDomain> is the name of
your domain.
KeyStore Username The username for accessing the keystore
used for key/certificate management
when establishing SSL connections.
Note: If the keystore type is
PKCS12 or JKS, the keystore
username properties is not used.
PKCS12 and JKS keystore types
require passwords for access but
do not require user names. If you
enter a value for this property, it is
ignored for PKCS12 and JKS.
HTTPS eWay Adapter User’s Guide 51 Sun Microsystems, Inc.
Page 52

Chapter 5 Section 5.5
Configuring the HTTPS eWay eWay Environment Properties
Table 8 Environment Configuration—Security, SSL (Continued)
Name Description Required Value
KeyStore Password Specifies the default KeyStore password.
The password is used to access the
KeyStore used for key/certificate
management when establishing SSL
connections; there is no default.
Trus tStore Typ e The TrustStore type of the TrustStore used
for CA certificate management when
establishing SSL connections. If the
TrustStore type is not set by this method,
the default TrustStore type, JKS, is used.
A valid Tr us tS to re type.
Tr us tS to re Specifies the default TrustStore. The
TrustStore is used for CA certificate
management when establishing SSL
connections.
Trus tStore Pa sswor d Specifies the default TrustStore password.
The password is for accessing the
TrustStore used for CA certificate
management when establishing SSL
connections.
5.5.4 Additional SSL Section Notes
Following are additional notes related to the properties in the SSL section.
Verify hostname
A valid Tr us tS to re name.
There is no default value. It is
recommended to use
<c:\JavaCAPS>\logicalho
st\is\domains\<MyDomain
>\config\cacerts.jks
where <c:\JavaCAPS> is the
directory where the Sun Java
Composite Application
Platform Suite is installed and
<MyDomain> is the name of
your domain.
A valid Tr us tS to re password.
There is no default value.
Description
Determines whether the host name verification is done on the server certificate during
the SSL handshake.
You can use this property to enforce strict checking of the server host name in the
request URL and the host name in the received server certificate.
Required Values
Tr ue or False; the default is False.
HTTPS eWay Adapter User’s Guide 52 Sun Microsystems, Inc.
Page 53

Chapter 5 Section 5.5
Configuring the HTTPS eWay eWay Environment Properties
Additional information
Under some circumstances, you can get different Java exceptions, depending on
whether you set this property to Tr ue or False. This section explains what causes these
exceptions.
For example, suppose the host name in the URL is localhost, and the host name in the
server certificate is localhost.stc.com. Then, the following conditions apply:
If Verify hostname is set to False:
Host name checking between the requested URL and the server certificate is turned
off.
You can use an incomplete domain host name, for example, https://localhost:444, or
a complete domain host name, for example, https://localhost.stc.com:444, and get a
positive response in each case.
If Verify hostname is set to Tr u e:
Host name checking between the requested URL and the server certificate is turned
on.
Note: If you use an incomplete domain host name, for example, https://localhost:444,
you can get the exception java.io.IOException: HTTPS hostname wrong.
You must use a complete domain host name, for example, https://
localhost.stc.com:444.
5.5.5 Connection Pool Settings
Connection Pool Settings include the configuration parameters listed in Table 9.
Table 9 Environment Configuration—Connection Pool Settings
Name Description Required Value
Steady Pool Size Specifies the minimum number of
physical connections the pool should
keep available at all times. 0 (zero)
indicates that there should be no physical
connections in the pool and the new
connections should be created as
needed.
Maximum Pool Size Specifies the maximum number of
physical connections the pool should
keep available at all times. 0 (zero)
indicates that there is no maximum.
Maximum Idle
Timeout
Specifies the number of seconds that a
physical connection may remain unused
before it is closed. 0 (zero) indicates that
there is no limit.
A valid numeric value. The
default is 1.
A valid numeric value. The
default is 10.
A valid numeric value. The
default is 300.
HTTPS eWay Adapter User’s Guide 53 Sun Microsystems, Inc.
Page 54

Chapter 5 Section 5.6
Configuring the HTTPS eWay Setting Acceptor Threads Property for HTTPS Server Mode
5.6 Setting Acceptor Threads Property for HTTPS Server
Mode
Before you run the Java CAPS Logical Host, you must set the Acceptor Threads
property for the Sun SeeBeyond Integration Server HTTP listener. This property allows
you to set up the correct performance of the HTTPS eWay in server mode.
Acceptor threads operate as follows:
At server start-up time, the Sun SeeBeyond Integration Server HTTP listener
creates a number of request-processing threads. Each incoming request requires a
thread for the duration of that request.
If more simultaneous requests are received than can be handled by the currently
available request-processing threads, additional threads are created. This number is
limited by the configured maximum.
If still more simultaneous requests are received, they are queued inside the server
socket created by the HTTP listener, up to the configured maximum. Any further
simultaneous requests receive “connection refused” errors, until resources are
available to process the requests. In Java CAPS, such errors appear in the log file for
the server mode eWay component.
Note: For more information, visit the Apache Tomcat server, version 4.1, Web site.
To adjust the number of threads that wait for HTTP connections (Acceptor threads)
according to the needs of your application, refer to the Sun SeeBeyond eGate™
Integrator System Administration Guide for more information.
HTTPS eWay Adapter User’s Guide 54 Sun Microsystems, Inc.
Page 55

Implementing the HTTPS eWay BPEL Sample Projects
This chapter provides an introduction to the HTTPS eWay BPEL components, and
information on how these components are created and implemented in a Sun Java
Composite Application Platform Suite Project. Sample Projects are designed to provide
an overview of the basic functionality of the HTTPS eWay by identifying how
information is passed between eGate and supported external systems via HTTPS.
It is assumed that you understand the basics of creating a Project using the Enterprise
Designer. For more information on creating an eGate Project, see the eGate Tutorial and
the eGate Integrator User’s Guide.
What’s in This Chapter
eInsight Engine and Components on page 55
HTTPS eWay With eInsight on page 56
About the HTTPS eWay eInsight Sample Projects on page 58
Chapter 6
Importing a Sample Project on page 58
Building and Deploying the prjHTTPClient_BPEL Sample Project on page 59
Building and Deploying the prjHTTPServer_BPEL Sample Project on page 83
6.1 eInsight Engine and Components
eGate components can be deployed as Activities in eInsight Business Processes. Using
the Enterprise Designer with eInsight, you can add an Activity to a Business Process,
then associate that Activity with an eGate component such as an eWay. When eInsight
runs the Business Process, it automatically invokes that component using its Web
Services interface. eGate components that can interface with eInsight in this way
include:
Object Type Definitions (OTDs)
eWays
Collaborations
See the eInsight Business Process Manager User’s Guide for details.
HTTPS eWay Adapter User’s Guide 55 Sun Microsystems, Inc.
Page 56

Chapter 6 Section 6.2
Implementing the HTTPS eWay BPEL Sample Projects HTTPS eWay With eInsight
6.2 HTTPS eWay With eInsight
An eInsight Business Process Activity can be associated with the HTTPS eWay during
the system design phase. To make this association, select the desired GET or POST
operation under the eWay in the Enterprise Explorer and drag it onto the eInsight
Business Process Designer canvas.
The operation is automatically changed to an Activity with an icon identifying the
component that is the basis for the Activity. At run time, eInsight invokes each step in
the order defined by the Business Process. Using eInsight’s Web Services interface, the
Activity in turn invokes the HTTPS eWay.
6.2.1 Server Mode Operation
Instead of GET and POST operations, the eWay’s server mode processes a Request
operation. In addition these operations, the eInsight Business Rule Designer allows
you to perform a variety of actions, represented by nodes in the Output and Input
panes.
The actions allowed vary, depending on whether you are using the Receive or Reply
functions. These actions allow you to perform operations in the same way as making
calls using Java methods.
Table 10 explains the functions of these nodes.
Table 10 Receive: Business Rule Designer Output Nodes
Node Name Description
authType Gets or sets the name of the authentication scheme used to protect
the servlet.
byteArray Gets or sets the contents of the message as a byte array.
characterEncoding Gets or sets the name of the character encoding used.
contentLength Gets or sets the length, in bytes, of the message body.
contents Sets the contents of the reply.
contentType Gets or sets the MIME type of the body of the message, or null if the
type is not known.
contextPath Gets or sets the portion of the message URI that indicates the
context of the message.
errorStatusCode Gets or sets the error status code.
errorStatusMsg Gets or sets the error status message.
isRequestedSessionIdFromC
ookie
isRequestedSessionIdFromURLChecks or sets whether the requested session ID came in as part of
isRequestedSessionIdValid Checks or sets whether the requested session ID is still valid.
Checks or sets whether the requested session ID came in as a
cookie.
the request URL.
HTTPS eWay Adapter User’s Guide 56 Sun Microsystems, Inc.
Page 57

Chapter 6 Section 6.2
Implementing the HTTPS eWay BPEL Sample Projects HTTPS eWay With eInsight
Table 10 Receive: Business Rule Designer Output Nodes (Continued)
Node Name Description
isSecure Gets or sets a boolean indicating whether this message was made
using a secure channel, such as HTTPS.
method Gets or sets the name of the HTTP method with which this message
was made; for example, GET, POST, or PUT.
name (WebHeaderList) Gets or sets the name of the current Web header list.
name (WebParameterList) Gets or sets the value of a request parameter as a String, or null if
the parameter does not exist.
pathInfo Gets or sets any extra path information associated with the URL the
client sent when it made this message.
pathTranslated Gets or sets any extra path information after the servlet name but
before the query string.
protocol Gets or sets the name and version of the protocol the message uses
in the form protocol/majorVersion.minorVersion, for example,
HTTP/1.1.
queryString Gets or sets the query string that is contained in the message URL
after the path.
redirectLocation Gets or sets the URL to which the client is to be redirected.
remoteAddr Gets or sets the Internet Protocol (IP) address of the client that sent
the message.
remoteHost Gets or sets the fully qualified name of the client that sent the
message.
remoteUser Gets or sets the log-in of the user making this request, if the user
has not been authenticated.
requestedSessionId Gets or sets the session ID specified by the client.
requestURI Gets or sets the part of this message's URL from the protocol name
up to the query string in the first line of the HTTP message.
requestURL Gets or sets the reconstructed URL the client used to make the
request.
scheme Gets or sets the name of the scheme used to make this request; for
example HTTP, HTTPS, or FTP.
serverName Gets or sets the host name of the server that received the message.
serverPort Gets or sets the port number on which this message was received.
servletPath Gets or sets the part of this request's URL that calls the servlet.
status Sets the status of the reply.
text Gets or sets the contents of the message as a string.
values (WebHeaderList) Gets or sets an array String objects containing all the values
contained in the current Web header.
values (WebParameterList) Gets or sets an array String objects containing all the values the
given request parameter has, or null if the parameter does not exist.
HTTPS eWay Adapter User’s Guide 57 Sun Microsystems, Inc.
Page 58

Chapter 6 Section 6.3
Implementing the HTTPS eWay BPEL Sample Projects About the HTTPS eWay eInsight Sample Projects
6.3 About the HTTPS eWay eInsight Sample Projects
The HTTPS eWay HTTPS_eWay_Sample.zip file contains two sample Projects that
provide basic instruction on using HTTPS operations in Business Process Execution
Language (BPEL).
The prjHTTPClient_BPEL sample Project allows you to observe an end-to-end dataexchange scenario involving eGate and the HTTPS eWay. The Project also demonstrates
how the HTTPS eWay uses the GET and POST commands to request and receive data
from a specific Web site.
The prjHTTPServer_BPEL sample Project demonstrates how the HTTPS eWay can
receive information via HTTP from a server.
6.4 Importing a Sample Project
Sample eWay Projects are included as part of the installation package. To import a
sample eWay Project to the Enterprise Designer, do the following:
1 The sample files are uploaded with the eWay’s documentation SAR file and
downloaded from the Sun Composite Application Platform Suite Installer’s
Documentation tab. The HTTPS_eWay_Sample.zip file contains the various
sample Project ZIP files and sample data. Extract the samples to a local file.
2 Save all unsaved work before importing a Project.
3 From the Enterprise Designer’s Project Explorer pane, right-click the Repository
and select Import from the shortcut menu. The Import Manager appears.
4 Browse to the directory that contains the sample Project ZIP file. Select the sample
file and click Import. After the sample Project is succesfully imported, you can
import additional samples or click Close to exit the Import Manager.
5 Before an imported sample Project can be run, you must do the following:
Create an Environment (see “Creating an Environment” on page 78)
Configure the eWays for your specific system (see “Configuring the eWays”
on page 79)
Create a Deployment Profile (see “Creating and Activating the Deployment
Profile” on page 80)
Create and start a domain (see “Creating and Starting the Domain” on
page 81)
Build and deploy the Project (see “Building and Deploying the Project” on
page 82)
The following pages provide step-by-step instructions for creating the
prjHTTPClient_BPEL and prjHTTPServer_BPEL sample Projects.
HTTPS eWay Adapter User’s Guide 58 Sun Microsystems, Inc.
Page 59

Chapter 6 Section 6.5
Implementing the HTTPS eWay BPEL Sample Projects Building and Deploying the prjHTTPClient_BPEL Sample Project
6.5 Building and Deploying the prjHTTPClient_BPEL
Sample Project
The HTTPS eWay client sample Project prjHTTPClient_BPEL demonstrates how the
HTTPS eWay processes information from an HTTPS system via an eInsight Business
Process. Resulting or confirming information is then written to a text file.
Project Overview on page 59
Creating a Project on page 61
Creating the OTD on page 61
Creating a Business Process on page 64
Creating a Connectivity Map on page 75
Creating an Environment on page 78
Configuring the eWays on page 79
Creating and Activating the Deployment Profile on page 80
Creating and Starting the Domain on page 81
Building and Deploying the Project on page 82
Running the Sample on page 82
6.5.1 Project Overview
The client HTTPS eWay sample Project with an eInsight Business Process demonstrates
how the HTTPS eWay uses the GET and POST commands to request and receive data
from a specific Web site.
The data result is received from the Web site and is sent to a text file written to an
external system via an outbound File eWay, to show the returned data and to confirm
that the Project is operating correctly.
The Project has the following outputs:
GET Operations: Returns the retrieved data in an HTML file.
POST Operations: Posts a name/value pair to a form and writes the same
information to an HTML file, to confirm the posting.
Figure 16 shows the flow of the sample HTTPS eWay Project.
HTTPS eWay Adapter User’s Guide 59 Sun Microsystems, Inc.
Page 60

Chapter 6 Section 6.5
Implementing the HTTPS eWay BPEL Sample Projects Building and Deploying the prjHTTPClient_BPEL Sample Project
Figure 16 HTTPS eWay Sample Project
HTTP(S)
eWay
Inbound File
Applic a tion
File In , to
H TTP, to F ile
Out
Collaboration
Outbound File
Applic a tion
The location of input and output files are defined by the File eWay properties. By
default, the inbound File eWay reads from c:\temp\input*.txt. The default is changed
for the Project’s outbound File eWay, which sends the resulting data to
c:\temp\output%d.html (%d represents the serial index starting with integer 0).
Project Operations
The prjHTTPClient_BPEL Project operates as follows:
FileIn: The external file system that provides instructions to the inbound File
eWay; this eWay gets a text file containing the instructions and passes them to a
Business Process, HttpBpelService.
HttpBpelService: Sends instructions to the desired HTTP system via the HTTPS
eWay. HttpBpelService also receives the information from the HTTPS system, via
the HTTPS eWay, then sends it to a File eWay, FileOut.
HTTP_CLIENT: The HTTP client external application or system; the HTTPS eWay
handles inbound and outbound communication with this system.
FileOut: The external file system that receives the information via HTTP; another
File eWay writes the received information to a text file on this system.
Input and Output Data
The HTTPS eWay Project uses the following input/output data files:
Get_Sample.xml
Post_Sample.xml
MultipleData_In.dtd
These files have the following content:
GET Command: Get_Sample.xml
The input data file for the GET command is:
<website>
<method>GET</method>
<url>http://www.yahoo.com</url>
<data/>
</website>
HTTPS eWay Adapter User’s Guide 60 Sun Microsystems, Inc.
Page 61

Chapter 6 Section 6.5
Implementing the HTTPS eWay BPEL Sample Projects Building and Deploying the prjHTTPClient_BPEL Sample Project
POST Command: Post_Sample.xml
The input data file for the POST command is:
<website>
<method>POST</method>
<url>http://<rep host>:<rep port>/examples/servlet/
RequestParamExample</url>
<data><name>firstname</name><value>MyFirstName</value></data>
<data><name>lastname</name><value>MyLastName</value></data>
</website>
Sample DTD: MultipleData_In.dtd
The eGate OTD wizard is used to create a DTD-based OTD. The input data file specifies
an URL for HTTP commands. The XML DTD code for this sample input data file is:
<!ELEMENT website (method, url, data*)>
<!ELEMENT method (#PCDATA)>
<!ELEMENT url (#PCDATA)>
<!ELEMENT data (name?, value?)>
<!ELEMENT name (#PCDATA)>
<!ELEMENT value (#PCDATA)>
The MultipleData_In.dtd file defines the following elements:
Method: Defines whether the file is for a GET or POST command.
URL: Defines the address of the target HTTP server.
Data: Stores the name/value pair used in the POST command; you can use as
many name/value pairs as you need.
Instead of getting and posting relative to an external Internet site, this Business Process
sample uses the eGate Integration Server and does these operations internally. If
external Internet access is available, you can use that URL in the URL tag.
6.5.2 Creating a Project
The first step is to create a new Project in the Enterprise Designer.
1 Start the Enterprise Designer.
2 From the Project Explorer tree, right-click the Repository and select New Project. A
new Project (Project1) appears on the Project Explorer tree.
3 Right-click Project1 and select Rename form the shortcut menu. Rename the Project
(for this sample, prjHTTPClient_BPEL).
6.5.3 Creating the OTD
The next step is to create a Data Type Definition (DTD) OTD as an input file for this
HTTPS sample Project.
Steps required to create new DTD:
1 In the Enterprise Explorer, right-click prjHTTPClient_BPEL and select New >
Object Type Definition from the pop-up menu.
HTTPS eWay Adapter User’s Guide 61 Sun Microsystems, Inc.
Page 62

Chapter 6 Section 6.5
Implementing the HTTPS eWay BPEL Sample Projects Building and Deploying the prjHTTPClient_BPEL Sample Project
The OTD Wizard Selection window appears. See Figure 17.
Figure 17 OTD Wizard Selection
2 From the OTD Wizard Selection window, select DTD from the OTD Wizard
column. Click Next.
3 From the Include DTDs to Selected List window, browse to the
MultipleData_In.dtd located in the sample folder. Click Select.
4 The MultipleData_In.dtd file appears in the Selected DTD Files pane. See Figure
18.
HTTPS eWay Adapter User’s Guide 62 Sun Microsystems, Inc.
Page 63

Chapter 6 Section 6.5
Implementing the HTTPS eWay BPEL Sample Projects Building and Deploying the prjHTTPClient_BPEL Sample Project
Figure 18 Include DTDs to Selected List
5 Click Next.
6 From the Select Document Elements section, select MultipleData_In_website and
click Next. The OTD Options screen appears.
HTTPS eWay Adapter User’s Guide 63 Sun Microsystems, Inc.
Page 64

Chapter 6 Section 6.5
Implementing the HTTPS eWay BPEL Sample Projects Building and Deploying the prjHTTPClient_BPEL Sample Project
Figure 19 OTD Options
7 From the OTD Options screen, leave all the OTD options unchecked and click
Finish. A Message dialog box appears if the OTD is successfully created. The OTD
appears in the Project Explorer as the OTD icon MultipleData_In_website.
6.5.4 Creating a Business Process
The next step is to create the Project’s Business Process. The logic of the Business
Process is shown in Figure 20.
HTTPS eWay Adapter User’s Guide 64 Sun Microsystems, Inc.
Page 65

Chapter 6 Section 6.5
Implementing the HTTPS eWay BPEL Sample Projects Building and Deploying the prjHTTPClient_BPEL Sample Project
Figure 20 Logic of the Business Process
Is method is
GET or POST?
GET POST
Execute GET
command
Name,
Value Pair
Execute a POST
command
Copy to print line
Send to
Collaboration
This scenario sets up two possible decisions, called Cases in eInsight. If the inbound file
requests a GET operation, it is routed to Case 1. If the inbound file requests a POST
operation, it is routed to Case 2. Table 11 shows how these cases operate of this Business
Process.
HTTPS eWay Adapter User’s Guide 65 Sun Microsystems, Inc.
Page 66

Chapter 6 Section 6.5
Implementing the HTTPS eWay BPEL Sample Projects Building and Deploying the prjHTTPClient_BPEL Sample Project
Table 11 Business Process Cases
Case Activity Result
Case 1: GET operation Requests that the Business Process
get information from the HTTP
server.
Case 2: POST operation Requests that the Business Process
posts information to the HTTP
server.
To create a Business Process
1 Right-click the name of the sample Project, prjHTTPClient_BPEL, in the Project
Explorer and choose New > Business Process from the pop-up menus. Rename the
Business Process to bpHTTPClient.
A blank Business Process canvas appears in the right pane, along with the Business
Process toolbar.
2 In the Project Explorer expand the icons for SeeBeyond > eWays for File and
HTTP. Also expand the icon for the MultipleData_In_website OTD.
3 Arrange the Start and End icons at opposite sides of the canvas, then drag the
following icons onto the canvas:
From the Project Explorer:
HTTP eWay (server)
One get icon
Appropriate information is
retrieved.
Appropriate information is
posted.
One post icon
File eWay
One receive icon
Tw o write icons
MultipleData_In_website.unmarshal OTD icon
From the Business Process canvas toolbar:
Decision (a Decision End icon also appears)
Tw o Business Rule icons, for your two cases
4 Again by dragging, arrange these icons on the canvas as shown in Figure 21.
HTTPS eWay Adapter User’s Guide 66 Sun Microsystems, Inc.
Page 67

Chapter 6 Section 6.5
Implementing the HTTPS eWay BPEL Sample Projects Building and Deploying the prjHTTPClient_BPEL Sample Project
Figure 21 Business Process Icons: Client
5 By dragging from one icon to another, link the icons on the canvas, as shown in
Figure 22.
Figure 22 Business Process With Links: Client
Two Case icons appear between the Decision Gate and each of your Business Rule
icons.
6 You must add additional Link Business Rules (represented by a small blue, star-
shaped icons) to the appropriate links. To do this operation, right-click on the
desired link and choose Add Business Rule from the pop-up menu. See Figure 23
for the appropriate links where you must add these Link Business Rules.
HTTPS eWay Adapter User’s Guide 67 Sun Microsystems, Inc.
Page 68

Chapter 6 Section 6.5
Implementing the HTTPS eWay BPEL Sample Projects Building and Deploying the prjHTTPClient_BPEL Sample Project
Figure 23 Business Process With Link Business Rules: Client
For each Business Rule (Link and Business Rule icon), you must create the settings
you want in the Business Rule Designer.
7 Select the Link Business Rule on the left, then click the Map Business Process
Attributes icon in the toolbar.
The Business Rule Designer pane appears at the bottom of the window. Use the
Business Rule Designer to create your Business Rules.
8 Set properties For this Link Business Rule by dragging the text node from the
Output pane, and dropping it onto the contents node you want to assign it to, in the
Input pane. In this way, create the first Link Business Rule, as shown in Figure 24.
HTTPS eWay Adapter User’s Guide 68 Sun Microsystems, Inc.
Page 69
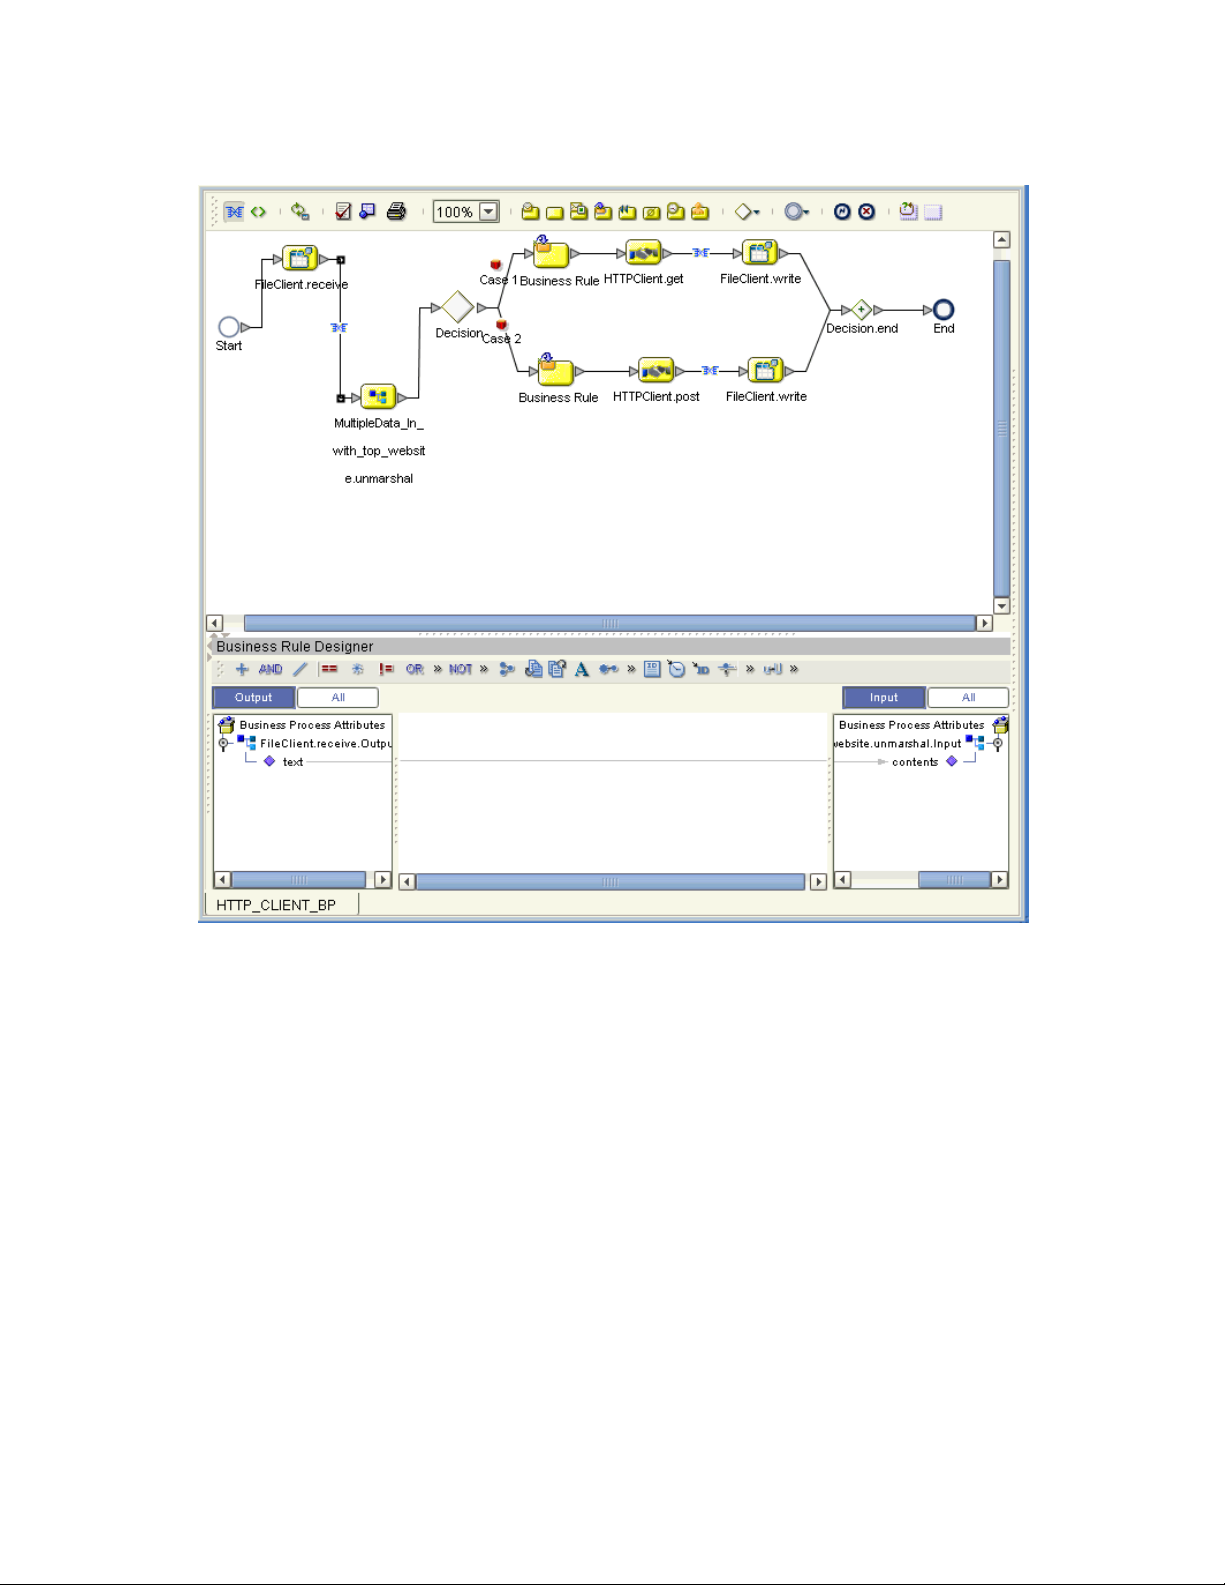
Chapter 6 Section 6.5
Implementing the HTTPS eWay BPEL Sample Projects Building and Deploying the prjHTTPClient_BPEL Sample Project
Figure 24 Business Rule Designer: First Link Business Rule
9 In the same way as you did previously, create additional Link Business Rules, as
shown in Figure 25 and Figure 26.
HTTPS eWay Adapter User’s Guide 69 Sun Microsystems, Inc.
Page 70

Chapter 6 Section 6.5
Implementing the HTTPS eWay BPEL Sample Projects Building and Deploying the prjHTTPClient_BPEL Sample Project
Figure 25 Business Rule Designer: Second Link Business Rule
HTTPS eWay Adapter User’s Guide 70 Sun Microsystems, Inc.
Page 71

Chapter 6 Section 6.5
Implementing the HTTPS eWay BPEL Sample Projects Building and Deploying the prjHTTPClient_BPEL Sample Project
Figure 26 Business Rule Designer: Third Link Business Rule
10 In addition, you must set properties for the Business Rule icon components. Select
the desired Business Rule icon component to open the Business Rule Designer
(Figure 27).
Using the Business Rule Designer in the same way as you did previously, set
properties for the Business Rule icon component for Case 1 by dragging and
dropping the nodes, as shown in Figure 27.
HTTPS eWay Adapter User’s Guide 71 Sun Microsystems, Inc.
Page 72

Chapter 6 Section 6.5
Implementing the HTTPS eWay BPEL Sample Projects Building and Deploying the prjHTTPClient_BPEL Sample Project
Figure 27 Business Rule Designer: Case 1 Business Rule
11 Set properties For the Business Rule icon component for Case 2 by dragging and
dropping the nodes, as shown in Figure 28.
HTTPS eWay Adapter User’s Guide 72 Sun Microsystems, Inc.
Page 73

Chapter 6 Section 6.5
Implementing the HTTPS eWay BPEL Sample Projects Building and Deploying the prjHTTPClient_BPEL Sample Project
Figure 28 Business Rule Designer: Case 2 Business Rule
12 Double-click the Case 1 (red) icon to set the Decision Gate properties for the cases.
The Decision Gate Properties dialog box opens.
13 For Case 1, add a string literal by dragging the icon from the toolbar. Call the literal
GET.
14 By dragging the icon from the toolbar, add an EQUAL.
15 Drag Method under MultipleData_In_with_top_website.unmarshal.Output to
any1 under EQUAL in the left pane.
16 Drag GET under string literal to any2.
17 Drag return boolean under EQUAL to Result (boolean) in the right pane. See
Figure 29.
HTTPS eWay Adapter User’s Guide 73 Sun Microsystems, Inc.
Page 74

Chapter 6 Section 6.5
Implementing the HTTPS eWay BPEL Sample Projects Building and Deploying the prjHTTPClient_BPEL Sample Project
Figure 29 Decision Gate Properties Dialog Box: Case 1
18 For Case 2, add a string literal by dragging the icon from the toolbar. Call the literal
POST.
19 By dragging the icon from the toolbar, add an EQUAL.
20 Drag Method under MultipleData_In_with_top_website.unmarshal.Output to
any1 under EQUAL in the left pane.
21 Drag POST under string literal to any2.
22 Drag return boolean under EQUAL to Result (boolean) in the right pane. See
Figure 30.
HTTPS eWay Adapter User’s Guide 74 Sun Microsystems, Inc.
Page 75

Chapter 6 Section 6.5
Implementing the HTTPS eWay BPEL Sample Projects Building and Deploying the prjHTTPClient_BPEL Sample Project
Figure 30 Decision Gate Properties Dialog Box: Case 2
23 Click Save on the Enterprise Designer toolbar to save your Business Process.
After you have finished creating your Business Process, you can use it to define one or
more of the eGate Services on your Connectivity Map.
6.5.5 Creating a Connectivity Map
A Connectivity Map provides a canvas for assembling and configuring a Project’s
components. The prjHTTPClient_BPEL Project only uses one Connectivity Map.
To create a Connectivity Map
1 From the Project Explorer tree, right-click the new prjHTTPClient_BPEL Project
and select New > Connectivity Map from the shortcut menu.
2 The new Connectivity Map appears and a node for the Connectivity Map is added
under the Project on the Project Explorer tree labeled CMap1. Rename the
Connectivity Map cmHTTPClient.
HTTPS eWay Adapter User’s Guide 75 Sun Microsystems, Inc.
Page 76

Chapter 6 Section 6.5
Implementing the HTTPS eWay BPEL Sample Projects Building and Deploying the prjHTTPClient_BPEL Sample Project
Selecting External Applications
When creating a Connectivity Map, you can associate any Service, in this case a
Business Process, with an external application. For example, to establish a connection to
HTTP, you must first select HTTP as the external application to use in your
Connectivity Map.
To select external applications
1 Click the External Application icon on the Connectivity Map toolbar.
2 Select the external applications necessary for your Project. For this sample, select
the File and HTTP external applications. Icons representing these external
applications are then added to the Connectivity Map toolbar.
Populating the Connectivity Map
Add the Project components to the cmHTTPClient Connectivity Map by dragging the
icons from the toolbar to the canvas. For this sample Project, drag and drop the
following components onto the Connectivity Map canvas.
File External System (2)
Business Service (a service is a container for Java Collaborations, Business
Processes, and so forth)
HTTP Client External System
Figure 31 shows the components in the Connectivity Map.
Figure 31 Connectivity Map With Components: prjHTTPClient_BPEL
Rename the Service1 component to HttpBpelService. Name the other components as
shown in Figure 31. Be sure to save the new Connectivity Map before you proceed. You
can click Save on the Enterprise Designer toolbar for this purpose.
Defining the Business Process
Define your Business Process by combining the Business Process icon with the Service
icon in the Connectivity Map. To do so, drag and drop the bpHTTPClient icon from the
HTTPS eWay Adapter User’s Guide 76 Sun Microsystems, Inc.
Page 77

Chapter 6 Section 6.5
Implementing the HTTPS eWay BPEL Sample Projects Building and Deploying the prjHTTPClient_BPEL Sample Project
Project Explorer tree onto the Connectivity Map’s HttpBpelService Service icon. If the
operation is successfully defined, the gears on the HttpBpelService icon change from
red to yellow.
Binding the eWay Components
The final step in creating a Connectivity Map is binding the eWay components together.
Steps required to bind eWay components together:
1 Open the cmHTTPClient Connectivity Map and double-click the HttpBpelService
Business Process. The HttpBpelService Binding dialog box appears.
2 From the HttpBpelService Binding dialog box, map FileSender (under
Implemented Services) to the FileClientIN (File) External Application. To do this,
click on FileSender in the HttpBpelService Binding dialog box, and drag the cursor
to the FileClientIN External Application in the Connectivity Map. A link is now
visible between FileClientIN and HttpBpelService.
3 From the HttpBpelService Binding dialog box, map HTTPReceiver (under
Invoked Services) to the eaHTTPClientOUT External Application.
4 From the HttpBpelService Binding dialog box, map FileReceiver to the
FileClientOUT External Application, as seen in Figure 32.
Figure 32 Connectivity Map - Associating (Binding) the Project’s Components
HTTPS eWay Adapter User’s Guide 77 Sun Microsystems, Inc.
Page 78

Chapter 6 Section 6.5
Implementing the HTTPS eWay BPEL Sample Projects Building and Deploying the prjHTTPClient_BPEL Sample Project
6.5.6 Creating an Environment
Environments include the external systems, Logical Hosts, Integration Servers, and
message servers used by a Project and contain the configuration information for these
components. Environments are created using the Enterprise Designer’s Environment
Editor.
1 From the Enterprise Designer’s Enterprise Explorer, click the Environment
Explorer tab.
2 Right-click the Repository and select New Environment. A new Environment is
added to the Environment Explorer tree.
3 Rename the new Environment to envHTTPClient_BPEL.
4 Right-click envHTTPClient_BPEL and select New > File External System. Name
the External System esFile and click OK. esFile is added to the Environment Editor.
5 Right-click envHTTPClient_BPEL and select New > HTTP External System. Name
the External System esHTTP and click OK. esHTTP is added to the Environment
Editor.
6 Right-click envHTTPClient_BPEL and select New > Logical Host. LogicalHost1 is
added to the Environment Editor.
7 From the Environment Explorer tree, right-click LogicalHost1 and select New >
Sun SeeBeyond Integration Server. A new Integration Server (IntegrationSvr1) is
added to the Environment Explorer tree under LogicalHost1.
8 Save changes to the repository. The Environment Explorer and Environment Editor
now appear as displayed in Figure 33.
Figure 33 Environment Editor - envHTTPClient_BPEL
9 Save your current changes to the Repository.
HTTPS eWay Adapter User’s Guide 78 Sun Microsystems, Inc.
Page 79

Chapter 6 Section 6.5
Implementing the HTTPS eWay BPEL Sample Projects Building and Deploying the prjHTTPClient_BPEL Sample Project
6.5.7 Configuring the eWays
eWays facilitate communication and movement of data between the external
applications and the eGate system. Each Connectivity Map in the The
prjHTTPClient_BPEL sample Project use three eWays that are represented as a nodes
between the External Applications and the Business Process, as seen in Figure 31.
You must configure eWay properties in both the Connectivity Map and the
Environment Explorer.
1 From the cmHTTPClient Connectivity Map, double-click the inbound FileClientIN
eWay. The Properties Editor opens to the inbound File eWay properties.
2 Modify the properties for your system, including the settings for the inbound File
eWay in Table 12, and click OK.
Table 12 cmHTTPClient - Inbound File eWay Settings
FileClientIN eWay Connection Parameters
Input file name Get_Input.xml.~in
Post_Input.xml.~in
3 From the cmHTTPClient Connectivity Map, modify the outbound FileClientOUT
eWay properties for your system, including the settings in Table 13.
Table 13 cmHTTPClient - Outbound File eWay Settings
Outbound File eWay Connection Parameters
Output file name HttpClient_BPEL_output0.htm
HttpClient_BPEL_output1.htm
4 From the Environment Explorer tree, right-click the File eWay External System
(esFile in this sample), and select Properties from the shortcut menu. The
Properties Editor appears.
5 Modify the File eWay Environment properties for your system, including the
settings in Table 14, and click OK.
Table 14 File eWay Environment Properties
File eWay Environment Properties
Inbound File eWay > Parameter Settings Set as directed, otherwise use the default settings
Directory Select a directory, for example C:/DATA/input/
Outbound File eWay > Parameter Settings Set as directed, otherwise use the default settings
Directory Select a directory, for example C:/DATA/output
Configuring the HTTPS eWay Properties
1 From the Environment Explorer tree, right-click the esHTTP External System and
select Properties from the shortcut menu. The Properties Editor appears.
HTTPS eWay Adapter User’s Guide 79 Sun Microsystems, Inc.
Page 80

Chapter 6 Section 6.5
Implementing the HTTPS eWay BPEL Sample Projects Building and Deploying the prjHTTPClient_BPEL Sample Project
2 Modify the HTTPS eWay Environment properties for your system, including the
following settings:
HTTP Settings
Proxy Configuration
Security
Connection Pool Settings
For further information on configuring the HTTPS eWay, see “eWay Environment
Properties” on page 46.
Configuring the Integration Server
You must set your SeeBeyond Integration Server Password property before deploying
your Project.
1 From the Environment Explorer, right-click IntegrationSvr1 under your Logical
Host, and select Properties from the shortcut menu. The Integration Server
Properties Editor appears.
2 Click the Password property field under Sun SeeBeyond Integration Server
Configuration. An ellipsis appears in the property field.
3 Click the ellipsis. The Password Settings dialog box appears.
4 Enter STC as the Specific Value and as the Confirm Password, and click OK.
5 Click OK to accept the new property and close the Properties Editor.
For more information on deploying a Project see the Sun SeeBeyond Java™ Composite
Application Platform Suite Deployment Guide.
6.5.8 Creating and Activating the Deployment Profile
Deployment Profiles are used to assign Collaborations and message destinations to the
Integration Server and message server. Deployment profiles are created using the
Deployment Editor.
1 From the Project Explorer, right-click the prjHTTPClient_BPEL Project and select
New > Deployment Profile.
2 Enter a name for the Deployment Profile (for this sample dpHTTPClient_BPEL).
Select envHTTPClient_BPEL as the Environment and click OK.
3 From the Deployment Editor toolbar, click the Automap icon (see Figure 34).
HTTPS eWay Adapter User’s Guide 80 Sun Microsystems, Inc.
Page 81

Chapter 6 Section 6.5
Implementing the HTTPS eWay BPEL Sample Projects Building and Deploying the prjHTTPClient_BPEL Sample Project
Figure 34 dpHTTPClient_BPEL Deployment Profile
The Project’s components are automatically mapped to their system windows (see
Figure 35).
Figure 35 dpHTTPClient_BPEL Deployment Profile Automapping
4 Save your current changes to the Repository.
6.5.9 Creating and Starting the Domain
To deploy your Project you must first create a domain. After the domain is created, the
Project is built and then deployed.
Create and Start the Domain
1 Navigate to your <JavaCAPS51>\logicalhost directory (where <JavaCAPS51> is
the location of your Java Composite Application Platform Suite installation.
2 Double-click the domainmgr.bat file. The Domain Manager appears.
HTTPS eWay Adapter User’s Guide 81 Sun Microsystems, Inc.
Page 82

Chapter 6 Section 6.5
Implementing the HTTPS eWay BPEL Sample Projects Building and Deploying the prjHTTPClient_BPEL Sample Project
3 If you have already created a domain, select your domain in the Domain Manager
and click the Start an Existing Domain button. Once your domain is started, a
green check mark indicates that the domain is running.
4 If there are no existing domains, a dialog box indicates that you can create a domain
now. Click Yes. The Create Domain dialog box appears.
5 Make any necessary changes to the Create Domain dialog box and click Create. The
new domain is added to the Domain Manager. Select the domain and click the Start
an Existing Domain button. Once your domain is started, a green check mark
indicates that the domain is running.
6.5.10 Building and Deploying the Project
The Build process compiles and validates the Project’s Java files and creates the Project
EAR file.
Build the Project
1 From the Deployment Editor toolbar, click the Build icon for each of your
Deployment Profiles.
2 If there are any validation errors, a Validation Errors pane will appear at the bottom
of the Deployment Editor and displays information regarding the errors. Make any
necessary corrections and click Build again.
3 After the Build has succeeded you are ready to deploy your Project.
Deploy the Project
1 From the Deployment Editor toolbar, click the Deploy icon. Click Ye s when the
Deploy prompt appears. Do this for both of your Deployment Profiles.
2 A message appears when the project is successfully deployed. You can now test
your sample.
Note: Projects can also be deployed from the Enterprise Manager. For more information
about using the Enterprise Manager to deploy, monitor, and manage your projects,
see the Sun SeeBeyond eGate™ Integrator System Administration Guide.
6.5.11 Running the Sample
The prjHTTPClient_BPEL Project includes the following sample files:
Get_Input.xml.~in (input file)
Post_Input.xml.~in (input file)
HttpClient_BPEL_output0.htm (sample output file example)
HttpClient_BPEL_output1.htm (sample output file example)
To run your deployed sample Project, do the following:
1 From your configured input directory, paste (or rename) the sample input file to
trigger the eWay.
HTTPS eWay Adapter User’s Guide 82 Sun Microsystems, Inc.
Page 83

Chapter 6 Section 6.6
Implementing the HTTPS eWay BPEL Sample Projects Building and Deploying the prjHTTPServer_BPEL Sample Project
2 From your output directory, verify the output data.
6.6 Building and Deploying the prjHTTPServer_BPEL
Sample Project
The HTTPS eWay server sample Project prjHTTPServer_BPEL demonstrates how the
HTTPS eWay receives information via HTTP from a server. Resulting or confirming
information is then written to a data file.
Project Overview on page 83
Creating a Project on page 86
Creating the OTD on page 86
Creating a Business Process on page 86
Creating a Connectivity Map on page 90
Creating an Environment on page 92
Configuring the eWays on page 92
Creating and Activating the Deployment Profile on page 93
Creating and Starting the Domain on page 93
Building and Deploying the Project on page 93
Running the Sample on page 93
6.6.1 Project Overview
Before you can run the Project, you must first copy the following .html input form file
into any directory:
postBPELHTTPS
The content of postBPELHTTPS.html is:
<HTML><HEAD><TITLE>HTTPS Test Page</TITLE></HEAD>
<BODY>
<FORM ACTION="http://localhost:18001/
Deployment1_servlet_HttpServerSample/
HttpServerSample" METHOD=POST>
<TABLE>
<TR><TD>First Name:</TD><TD><INPUT NAME=fname></TD></TR>
<TR><TD>Last Name:</TD><TD><INPUT NAME=lname></TD></TR>
<TR><TD>EMail:</TD><TD><INPUT NAME=email></TD></TR>
<TR><TD>Sex:</TD><TD><INPUT type="radio" name="sex"
value="Male">Male</TD></TR>
<TR><TD></TD><TD><INPUT type="radio" name="sex"
value="Female">Female</TD></TR>
<TR><TD></TD><TD></TD></TR>
</TABLE>
<BR>
<CENTER><INPUT TYPE=submit VALUE="Submit"></CENTER>
HTTPS eWay Adapter User’s Guide 83 Sun Microsystems, Inc.
Page 84

Chapter 6 Section 6.6
Implementing the HTTPS eWay BPEL Sample Projects Building and Deploying the prjHTTPServer_BPEL Sample Project
</FORM>
</BODY>
</HTML>
You must make a change in the HTML code shown previously. In the code where it
shows:
<FORM ACTION="http://localhost:18001/
Deployment1_servlet_HttpServerSample/
HttpServerSample" METHOD=POST>
You must make changes based on your own Environment. The logic for the ACTION
parameter is:
http://<IS Server Name>:<IS port>/<Deployment_name>_servlet_
<servlet_url from properties>/<servlet_url from properties>
Project Forms
Figure 36 shows the original form.
Figure 36 Server Sample Project: Original Form
Figure 37 shows the input form.
HTTPS eWay Adapter User’s Guide 84 Sun Microsystems, Inc.
Page 85

Chapter 6 Section 6.6
Implementing the HTTPS eWay BPEL Sample Projects Building and Deploying the prjHTTPServer_BPEL Sample Project
Figure 37 Server Sample Project: Input Form
Figure 38 shows the output form.
Figure 38 Server Sample Project: Output Form
HTTPS eWay Adapter User’s Guide 85 Sun Microsystems, Inc.
Page 86

Chapter 6 Section 6.6
Implementing the HTTPS eWay BPEL Sample Projects Building and Deploying the prjHTTPServer_BPEL Sample Project
The input for the Project is a name/value pair, and it returns the entire list of
parameters. A DTD file (HTTPS_ParamList.dtd) is used to marshal the list, so you
must use the DTD wizard to convert this file to an eGate OTD.
Project Operations
The prjHTTPServer_BPEL Project operates as follows:
HTTPServer1: The HTTP server external application or system; the HTTPS eWay
handles inbound communication with this system.
HTTPS_BP: Receives instructions from the HTTP server external application via
the HTTPS eWay.
6.6.2 Creating a Project
The first step is to create a new Project in the Enterprise Designer.
1 Start the Enterprise Designer.
2 From the Project Explorer tree, right-click the Repository and select New Project. A
new Project (Project1) appears on the Project Explorer tree.
3 Right-click Project1 and select Rename form the shortcut menu. Rename the Project
(for this sample, prjHTTPServer_BPEL).
6.6.3 Creating the OTD
The next step is to create a Data Type Definition (DTD) OTD as an input file for this
HTTPS sample Project.
Follow the steps outlined in “Creating the OTD” on page 61 to convert the
HTTPS_ParamList.dtd file into an eGate OTD. Name the new OTD
HTTPS_ParamList_ParameterInfo.
6.6.4 Creating a Business Process
The next step is to create the Project’s Business Process.
To create a Business Process:
1 Right-click the name of the sample Project, prjHTTPServer_BPEL, in the Project
Explorer and choose New > Business Process from the pop-up menus. Rename the
Business Process You can use the name bpHTTPServer.
A blank Business Process canvas appears in the right pane, along with the Business
Process toolbar.
2 In the Project Explorer, expand the icons for SeeBeyond > eWays > HTTPServer.
3 Arrange the Start and End icons at opposite sides of the canvas.
4 From the Project Explorer pane, drag the processRequest icon under the
HTTPServer OTD nodes onto the canvas between the Start and End. See Figure 39.
HTTPS eWay Adapter User’s Guide 86 Sun Microsystems, Inc.
Page 87

Chapter 6 Section 6.6
Implementing the HTTPS eWay BPEL Sample Projects Building and Deploying the prjHTTPServer_BPEL Sample Project
Figure 39 Business Process Icons for Receive and Reply
The single icon becomes two, as shown in Figure 39. If the icons appear out of line,
drag them until the icons appear.
5 From the Project Explorer pane, drag the HTTPS_ParamList_ParameterInfo OTD’s
marshal operation onto the canvas between the two HTTPServer icons.
6 By dragging from one icon to another, link the icons on the canvas, as shown in
Figure 40.
Figure 40 Business Process Icons With Links: Server
7 You must add two Link Business Rules (represented by a small blue, star-shaped
icons) to the appropriate links, as shown in Figure 41. To do this operation, rightclick on the desired link and choose Add Business Rule from the pop-up menu. See
Figure 41 for the appropriate links where you must add the Business Rules.
HTTPS eWay Adapter User’s Guide 87 Sun Microsystems, Inc.
Page 88

Chapter 6 Section 6.6
Implementing the HTTPS eWay BPEL Sample Projects Building and Deploying the prjHTTPServer_BPEL Sample Project
Figure 41 Business Process Icons With Server Business Rules
For the Business Rules, you must create the settings you want in the Business Rule
Designer.
8 Select the first (left) Business Rule, for the receive operation, then click the Map
Business Process Attributes icon in the toolbar.
The Business Rule Designer pane appears at the bottom of the window. Use the
Business Rule Designer to create your Business Rules.
9 From the Output pane, drag the name/value pair nodes (under WebParameterList)
to the name/value pair nodes (under ParamList) n the Input pane. See Figure 42.
HTTPS eWay Adapter User’s Guide 88 Sun Microsystems, Inc.
Page 89

Chapter 6 Section 6.6
Implementing the HTTPS eWay BPEL Sample Projects Building and Deploying the prjHTTPServer_BPEL Sample Project
Figure 42 Business Rule Designer: Server Receive Business Rule
10 From the Output pane, drag the contents node to the text node (under headerInfo)
n the Input pane. See Figure 43.
HTTPS eWay Adapter User’s Guide 89 Sun Microsystems, Inc.
Page 90

Chapter 6 Section 6.6
Implementing the HTTPS eWay BPEL Sample Projects Building and Deploying the prjHTTPServer_BPEL Sample Project
Figure 43 Business Rule Designer: Server Receive Business Rule
11 Click Save to save your Business Process.
After you have finished creating your Business Process, you can use it to define one or
more of the eGate Services on your Connectivity Map.
6.6.5 Creating a Connectivity Map
A Connectivity Map provides a canvas for assembling and configuring a Project’s
components. The prjHTTPServer_BPEL Project only uses one Connectivity Map.
Follow the steps outlined in “Creating a Connectivity Map” on page 75 to create a
Connectivity Map. Name the Connectivity Map cmHTTPServer.
Selecting External Applications
Follow the steps outlined in “Selecting External Applications” on page 76 to select the
external applications for the prjHTTPServer_BPEL Project’s Connectivity Map.
HTTPS eWay Adapter User’s Guide 90 Sun Microsystems, Inc.
Page 91

Chapter 6 Section 6.6
Implementing the HTTPS eWay BPEL Sample Projects Building and Deploying the prjHTTPServer_BPEL Sample Project
Populating the Connectivity Map
Add the Project components to the Connectivity Map by dragging the icons from the
toolbar to the canvas. This operation creates the components for you.
For this sample Project, drag and drop the following components onto the Connectivity
Map canvas.
One Service
HTTPS eWay/server external application
Figure 44 shows the components in the Connectivity Map.
Figure 44 Connectivity Map With Components: prjHTTPServer_BPEL
1 Rename the Service1 component to bpHTTPServer1.
2 Rename the HTTPS external application HTTPServer1.
Be sure to save the new Connectivity Map before you proceed. You can click Save
for this purpose.
Defining the Business Process
Define your Business Process by combining the Business Process icon with the Service
icon in the Connectivity Map. To do so, drag and drop the bpHTTPServer icon from
the Project Explorer tree onto the Connectivity Map’s bpHTTPServer1 Service icon. If
the operation is successfully defined, the gears on the bpHTTPServer1 icon change
from red to yellow.
Binding the eWay Components
The final step in creating a Connectivity Map is binding the eWay components together.
Steps required to bind eWay components together:
1 Open the cmHTTPServer Connectivity Map and double-click the HttpServer1
Business Process. The HttpServer1 Binding dialog box appears.
2 From the HttpServer1 Binding dialog box, map HTTPSender (under Implemented
Services) to the HTTPServer1 External Application. To do this, click on
HTTPSender in the HttpServer1 Binding dialog box, and drag the cursor to the
HTTPServer1 External Application in the Connectivity Map. A link is now visible
between HTTPServer1 and HttpServer1, as seen in Figure 45.
HTTPS eWay Adapter User’s Guide 91 Sun Microsystems, Inc.
Page 92

Chapter 6 Section 6.6
Implementing the HTTPS eWay BPEL Sample Projects Building and Deploying the prjHTTPServer_BPEL Sample Project
Figure 45 Connectivity Map - Associating (Binding) the Project’s Components
6.6.6 Creating an Environment
Environments include the external systems, Logical Hosts, Integration Servers, and
message servers used by a Project and contain the configuration information for these
components. Environments are created using the Enterprise Designer’s Environment
Editor.
Follow the steps outlined in “Creating an Environment” on page 78 to create an
Environment for the prjHTTPServer_BPEL Project. For this Project, add the HTTP
Server external system to the Project’s Environment, and rename it esHTTPServer.
6.6.7 Configuring the eWays
eWays facilitate communication and movement of data between the external
applications and the eGate system. Each Connectivity Map in the The
prjHTTPServer_BPEL sample Project use two eWays that are represented as a nodes
between the External Applications and the Business Process, as seen in Figure 44.
You must configure eWay properties in both the Connectivity Map and the
Environment Explorer.
1 From the cmHTTPServer Connectivity Map, double-click the HTTPServer1 eWay.
The Properties Editor opens to the HTTP Server External Configuration properties.
2 Modify the HTTP Server External Configuration properties by entering
HttpServerSample in the servlet-url property field, and click OK.
For further information on configuring the HTTPS Server eWay Connectivity Map and
Environment properties, see “eWay Connectivity Map Properties” on page 44 and
“eWay Environment Properties” on page 46.
HTTPS eWay Adapter User’s Guide 92 Sun Microsystems, Inc.
Page 93

Chapter 6 Section 6.6
Implementing the HTTPS eWay BPEL Sample Projects Building and Deploying the prjHTTPServer_BPEL Sample Project
6.6.8 Creating and Activating the Deployment Profile
Deployment Profiles are used to assign Collaborations and message destinations to the
Integration Server and message server. Deployment profiles are created using the
Deployment Editor.
Follow the steps outlined in “Creating and Activating the Deployment Profile” on
page 80 to create and deploy a deployment profile for the prjHTTPServer_BPEL
Project.
6.6.9 Creating and Starting the Domain
To deploy your Project you must first create a domain. After the domain is created, the
Project is built and then deployed.
Follow the steps outlined in “Creating and Starting the Domain” on page 81 to create
and deploy a domain for the prjHTTPServer_BPEL Project.
6.6.10 Building and Deploying the Project
The Build process compiles and validates the Project’s Java files and creates the Project
EAR file. Follow the steps outlined in “Building and Deploying the Project” on
page 82 to build and deploy the prjHTTPServer_BPEL Project.
6.6.11 Running the Sample
The prjHTTPServer_BPEL Project includes the following sample files:
postBPELHTTPS.html (input file)
postHTTPS.html (sample output file example)
To run your deployed sample Project, do the following:
1 From your configured input directory, paste (or rename) the sample input file to
trigger the eWay.
2 From your output directory, verify the output data.
Running the Sample in SSL Mode
To enable and run an HTTPS Server project in SSL mode, the Logical Host’s server
policy file must be changed as follows:
1 Scroll to the Logical Host directory:
<JavaCAPS51>\logicalhost\is\lib\install\templates\
where <JavaCAPS51> is the location of your Sun Java Composite Application
Platform Suite installation
2 Enter the following statements in the server.policy file:
//JavaCAPS HTTPS eWay
permission java.security.SecurityPermission
“insertProvider.SunJSSE”;
HTTPS eWay Adapter User’s Guide 93 Sun Microsystems, Inc.
Page 94

Chapter 6 Section 6.6
Implementing the HTTPS eWay BPEL Sample Projects Building and Deploying the prjHTTPServer_BPEL Sample Project
permission java.util.PropertyPermission “*” “read, write”
3 Configure the HTTPS eWay Connectivity Map and Environment Explorer
properties for your particular Project.
Note: You may need to create a new domain server after changing the Logical Host’s server
policy file or modify the security policy for the existing domain per step two above.
HTTPS eWay Adapter User’s Guide 94 Sun Microsystems, Inc.
Page 95

Chapter 7
Implementing the HTTPS eWay JCD Sample Projects
This chapter provides an introduction to the HTTPS eWay JCD components, and
information on how these components are created and implemented in a Sun Java
Composite Application Platform Suite Project. Sample Projects are designed to provide
an overview of the basic functionality of the HTTPS eWay by identifying how
information is passed between eGate and supported external systems via HTTPS.
It is assumed that you understand the basics of creating a Project using the Enterprise
Designer. For more information on creating an eGate Project, see the eGate Tutorial and
the eGate Integrator User’s Guide.
What’s in This Chapter
About the HTTPS eWay JCD Sample Projects on page 95
Importing a Sample Project on page 96
Building and Deploying the prjHTTPClient_JCD Sample Project on page 96
Building and Deploying the prjHTTPServer_JCD Sample Project on page 104
7.1 About the HTTPS eWay JCD Sample Projects
The HTTPS eWay HTTPS_eWay_Sample.zip file contains two sample Projects that
provide basic instruction on using HTTPS operations with Java Collaboration
Definition (JCD).
The prjHTTPClient_JCD sample Project allows you to observe an end-to-end data-
exchange scenario involving eGate and the HTTPS eWay. The Project also demonstrates
how the HTTPS eWay uses the GET and POST commands to request and receive data
from a specific Web site.
The prjHTTPServer_JCD sample Project demonstrates how the HTTPS eWay can
receive information via HTTP from a server.
HTTPS eWay Adapter User’s Guide 95 Sun Microsystems, Inc.
Page 96

Chapter 7 Section 7.2
Implementing the HTTPS eWay JCD Sample Projects Importing a Sample Project
7.2 Importing a Sample Project
Sample eWay Projects are included as part of the installation package. To import a
sample eWay Project to the Enterprise Designer, do the following:
1 The sample files are uploaded with the eWay’s documentation SAR file and
downloaded from the Sun Composite Application Platform Suite Installer’s
Documentation tab. The HTTPS_eWay_Sample.zip file contains the various
sample Project ZIP files and sample data. Extract the samples to a local file.
2 Save all unsaved work before importing a Project.
3 From the Enterprise Designer’s Project Explorer pane, right-click the Repository
and select Import from the shortcut menu. The Import Manager appears.
4 Browse to the directory that contains the sample Project ZIP file. Select the sample
file and click Import. After the sample Project is succesfully imported, you can
import additional samples or click Close to exit the Import Manager.
5 Before an imported sample Project can be run, you must do the following:
Create an Environment (see “Creating an Environment” on page 103)
Configure the eWays for your specific system (see “Configuring the eWays”
on page 103)
Create a Deployment Profile (see “Creating and Activating the Deployment
Profile” on page 104)
Create and start a domain (see “Creating and Starting the Domain” on
page 104)
Build and deploy the Project (see “Building and Deploying the Project” on
page 104)
The following pages provide instructions for creating the prjHTTPClient_JCD and
prjHTTPServer_JCD sample Projects.
7.3 Building and Deploying the prjHTTPClient_JCD Sample
Project
The HTTPS eWay client sample Project prjHTTPClient_JCD demonstrates how the
HTTPS eWay processes information from an HTTPS system via a JCD. Resulting or
confirming information is then written to a text file.
Project Overview on page 97
Creating a Project on page 99
Creating the OTD on page 99
Creating the Collaboration Definition (Java) on page 99
Creating a Connectivity Map on page 101
HTTPS eWay Adapter User’s Guide 96 Sun Microsystems, Inc.
Page 97

Chapter 7 Section 7.3
Implementing the HTTPS eWay JCD Sample Projects Building and Deploying the prjHTTPClient_JCD Sample Project
Creating an Environment on page 103
Configuring the eWays on page 103
Creating and Activating the Deployment Profile on page 104
Creating and Starting the Domain on page 104
Building and Deploying the Project on page 104
Running the Sample on page 104
7.3.1 Project Overview
The HTTPS eWay Java Collaboration-based sample Project demonstrates how the
HTTPS eWay uses the GET and POST commands to request and receive data from a
specific web site. The data result is received from the Web site and is sent to the
following locations:
A log file to confirm that the HTTPS eWay correctly requests and receives the result
from the desired Web site
An text file written to an external system via an outbound File eWay, to show the
returned data and to confirm that the Project is operating correctly.
The Project has the following outputs:
GET Operations: Returns the retrieved data in an .html file.
POST Operations: Posts a name/value pair to a form and writes the same
information to an .html file, to confirm the posting.
Figure 46 shows the flow of the sample HTTPS eWay Project.
Figure 46 HTTPS eWay Sample Project (Java Collaboration Based)
HTTP(S)
eWay
Inbound File
Applic a tion
File In , to
H TTP, to F ile
Out
Collaboration
Outbound File
Applic a tion
The location of input and output files are defined by the File eWay properties. By
default, the inbound File eWay reads from c:\temp\input*.txt. The default is changed
for the Project’s outbound File eWay, which sends the resulting data to
c:\temp\output%d.html (%d represents the serial index starting with integer 0).
The HTTPS eWay sample Project demonstrates how the HTTPS eWay processes
information from an HTTPS system. Resulting or confirming information is then
written to a text file. This scenario is illustrated in Figure 46.
HTTPS eWay Adapter User’s Guide 97 Sun Microsystems, Inc.
Page 98

Chapter 7 Section 7.3
Implementing the HTTPS eWay JCD Sample Projects Building and Deploying the prjHTTPClient_JCD Sample Project
Project Operations
The prjHTTPClient_JCD Project operates as follows:
FileClientIn: The external file system that provides instructions to the inbound
File eWay; this eWay gets a text file containing the instructions and passes them to a
Business Process, jcdHttpClient1.
jcdHttpClient1: Sends instructions to the desired HTTP system via the HTTPS
eWay. jcdHttpClient1 also receives the information from the HTTPS system, via the
HTTPS eWay, then sends it to a File eWay, FileClientOut.
eaHTTPClient: The HTTP client external application or system; the HTTPS eWay
handles inbound and outbound communication with this system.
FileClientOut: The external file system that receives the information via HTTP;
another File eWay writes the received information to a text file on this system.
Input and Output Data
The HTTPS eWay Project uses the following data files:
Get_Sample.xml
Post_Sample.xml
Sample_In.dtd
These files have the following content:
GET Command: Get_Sample.xml
The input data file for the GET command is:
<website>
<method>GET</method>
<url>http://www.yahoo.com</url>
<data/>
</website>
POST Command: Post_Sample.xml
The input data file for the POST command is:
<website>
<method>POST</method>
<url>http://localhost:12000/examples/servlet/
RequestParamExample</url>
<data>firstname^MyFirstName|lastname^MyLastName</data>
</website>
Sample_In DTD: Sample_In.dtd
The eGate OTD wizard is used to create a DTD-based OTD. The input data file specifies
an URL for HTTP commands. The XML DTD code for this sample input data file is:
<!ELEMENT website (method, url, data)>
<!ELEMENT method (#PCDATA)>
<!ELEMENT url (#PCDATA)>
<!ELEMENT data (#PCDATA)>
HTTPS eWay Adapter User’s Guide 98 Sun Microsystems, Inc.
Page 99

Chapter 7 Section 7.3
Implementing the HTTPS eWay JCD Sample Projects Building and Deploying the prjHTTPClient_JCD Sample Project
The Sample_In.dtd file defines the following elements:
Method: Defines whether the file is for a GET or POST command.
URL: Defines the address of the target HTTP server.
Data: Stores the data string(s) used in the POST command. You can use a single
input string in this case.
If your input comes with a name-and-value pair (for example, user name and password
fields), you can use ‘|’ as a delimiter between pairs of data and use ‘^’ as a subdelimiter. For example, if the user name field is myname, and the password field is
mypass, then the data element is:
username^myuser|password^mypass
You can use any number of pairs in this case. When the HTTPS eWay sends out the
POST request, the URL becomes:
url?username=myuser&password=mypass
Where url is the URL element in the input file.
7.3.2 Creating a Project
The first step is to create a new Project in the Enterprise Designer.
1 Start the Enterprise Designer.
2 From the Project Explorer tree, right-click the Repository and select New Project. A
new Project (Project1) appears on the Project Explorer tree.
3 Right-click Project1 and select Rename form the shortcut menu. Rename the Project
(for this sample, prjHTTPClient_JCD).
7.3.3 Creating the OTD
The next step is to create a Data Type Definition (DTD) OTD as an input file for this
HTTPS sample Project.
Follow the steps outlined in “Creating the OTD” on page 61 to convert the
Sample_In.dtd file into an eGate OTD. Name the new OTD
Sample_In_with_top_website.
7.3.4 Creating the Collaboration Definition (Java)
The eGate Enterprise Designer contains a Collaboration Definition wizard (Java) that
allows you to create Java-based Collaborations. You must use the wizard to create a
Collaboration Definition before implementing the Collaboration.
The Collaboration Editor user interface allows you to create the Business Rules that
implement your business logic for a Java-based Collaboration. You can create the
desired Business Rules for your Project by dragging and dropping values from a source
HTTPS eWay Adapter User’s Guide 99 Sun Microsystems, Inc.
Page 100

Chapter 7 Section 7.3
Implementing the HTTPS eWay JCD Sample Projects Building and Deploying the prjHTTPClient_JCD Sample Project
OTD onto the nodes of a destination HTTPS OTD and other OTDs. HTTPS OTD nodes
represent HTTPS functions, which are in turn able to call HTTPS eWay methods.
The Business Rules for the jcdHTTPClient Java Collaboration Definition are displayed
in Figure 47 and Figure 48.
Figure 47 jcdHTTPClient Collaboration Definition - Part 1
HTTPS eWay Adapter User’s Guide 100 Sun Microsystems, Inc.
 Loading...