

Page 1

SPARCcenter2000EPowerSupply InstallationManual
A Sun Microsystems, Inc. Business
2550 Garcia Avenue
Mountain View, CA 94043 U.S.A.
415 960-1300 FAX 415 969-9131
Part No.: 802-2700-10
Revision -A, April 1995
Page 2

1995Sun Microsystems, Inc.
2550 Garcia Avenue, Mountain View,California 94043-1100 U.S.A.
All rights reserved.This productand related documentationare protectedby copyright and distributed under licenses
restrictingits use, copying, distribution, and decompilation. No part of this product or related documentation may be
reproducedin any form by any means without prior written authorization of Sun and its licensors, if any.
Portions of this product may be derived from the UNIX
®
and Berkeley 4.3 BSD systems, licensed from UNIX System
Laboratories, Inc., a wholly owned subsidiary of Novell, Inc., and the University of California, respectively.Third-partyfont
softwarein this product is protected by copyright and licensed from Sun’s font suppliers.
RESTRICTED RIGHTS LEGEND: Use, duplication, or disclosure by the United States Government is subject to the restrictions
set forth in DFARS252.227-7013 (c)(1)(ii) and FAR52.227-19.
The product described in this manual may be protected by one or more U.S. patents, foreignpatents, or pending applications.
TRADEMARKS
Sun, the Sun logo, Sun Microsystems, Solaris are trademarks or registered trademarks of Sun Microsystems, Inc. in the U.S.
and certain other countries. UNIX is a registered trademark in the United States and other countries, exclusively licensed
throughX/Open Company,Ltd. OPEN LOOK is a registered trademark of Novell, Inc. PostScript and Display PostScript are
trademarks of Adobe Systems, Inc. All other product names mentioned herein are the trademarks of their respective owners.
All SPARCtrademarks, including the SCD Compliant Logo, are trademarks or registered trademarks of SPARCInternational,
Inc. SPARCstation,SPARCserver, SPARCengine, SPARCstorage,SPARCware, SPARCcenter,SPARCclassic,SPARCcluster,
SPARCdesign, SPARC811, SPARCprinter, UltraSPARC, microSPARC, SPARCworks,and SPARCompiler are licensed
exclusively to Sun Microsystems, Inc. Products bearing SPARCtrademarks are based upon an architecturedeveloped by Sun
Microsystems,Inc.
The OPEN LOOK
®
and Sun™ Graphical User Interfaces were developed by Sun Microsystems, Inc. for its users and licensees.
Sun acknowledges the pioneering efforts of Xerox in researching and developing the concept of visual or graphical user
interfaces for the computer industry.Sun holds a non-exclusive license from Xerox to the Xerox Graphical User Interface,
which license also covers Sun’s licensees who implement OPEN LOOK GUIs and otherwise comply with Sun’s written license
agreements.
Please
Recycle
X Window System is a product of the Massachusetts Institute of Technology.
THIS PUBLICATION IS PROVIDED “AS IS” WITHOUT WARRANTY OF ANY KIND, EITHER EXPRESS OR IMPLIED,
INCLUDING, BUT NOT LIMITED TO, THE IMPLIED WARRANTIES OF MERCHANTABILITY, FITNESS FOR A
PARTICULAR PURPOSE, OR NON-INFRINGEMENT.
THIS PUBLICATIONCOULD INCLUDE TECHNICAL INACCURACIES OR TYPOGRAPHICAL ERRORS. CHANGES ARE
PERIODICALLY ADDED TO THE INFORMATION HEREIN; THESE CHANGES WILL BE INCORPORATED IN NEW
EDITIONS OF THE PUBLICATION. SUN MICROSYSTEMS, INC. MAYMAKE IMPROVEMENTS AND/OR CHANGES IN
THE PRODUCT(S) AND/OR THE PROGRAM(S) DESCRIBED IN THIS PUBLICATION AT ANY TIME.
Page 3

Contents
1. Before You Start . . . . . . . . . . . . . . . . . . . . . . . . . . . . . . . . . . . . . . . 1-1
1.1 Safety Precautions . . . . . . . . . . . . . . . . . . . . . . . . . . . . . . . . 1-1
1.2 Symbols . . . . . . . . . . . . . . . . . . . . . . . . . . . . . . . . . . . . . . . . . 1-2
1.3 Tools Required . . . . . . . . . . . . . . . . . . . . . . . . . . . . . . . . . . . 1-4
2. Power Supply Installation. . . . . . . . . . . . . . . . . . . . . . . . . . . . . . 2-1
2.1 Operating System. . . . . . . . . . . . . . . . . . . . . . . . . . . . . . . . . 2-2
2.2 Open Boot PROM. . . . . . . . . . . . . . . . . . . . . . . . . . . . . . . . . 2-2
2.3 Powering Down the System . . . . . . . . . . . . . . . . . . . . . . . . 2-2
2.4 Access. . . . . . . . . . . . . . . . . . . . . . . . . . . . . . . . . . . . . . . . . . . 2-4
2.5 Installing the Bottom Power Supply . . . . . . . . . . . . . . . . . 2-4
2.5.1 Identifying a Redundant-Capable Cabinet . . . . . . . 2-4
2.5.2 Installing the Supply. . . . . . . . . . . . . . . . . . . . . . . . . . 2-5
2.6 Restarting the System. . . . . . . . . . . . . . . . . . . . . . . . . . . . . . 2-20
2.7 Reading Boot Messages . . . . . . . . . . . . . . . . . . . . . . . . . . . . 2-23
A. Access . . . . . . . . . . . . . . . . . . . . . . . . . . . . . . . . . . . . . . . . . . . . . . . A-1
iii
Page 4

A.1 Removal Procedures. . . . . . . . . . . . . . . . . . . . . . . . . . . . . . . A-1
A.1.1 Opening the Hinged Door . . . . . . . . . . . . . . . . . . . . . A-1
A.1.2 Removing the Vented Front Panels. . . . . . . . . . . . . . A-2
A.1.3 Removing the Side Panels . . . . . . . . . . . . . . . . . . . . . A-3
A.1.4 Removing the EMI Shield . . . . . . . . . . . . . . . . . . . . . A-4
A.1.5 Rear Screen Panel . . . . . . . . . . . . . . . . . . . . . . . . . . . . A-5
A.2 Closing the System. . . . . . . . . . . . . . . . . . . . . . . . . . . . . . . . A-6
A.2.1 EMI Panel. . . . . . . . . . . . . . . . . . . . . . . . . . . . . . . . . . . A-6
A.2.2 Rear Screen Panel . . . . . . . . . . . . . . . . . . . . . . . . . . . . A-6
A.2.3 Vented Front Panel . . . . . . . . . . . . . . . . . . . . . . . . . . . A-7
A.2.4 Side Panels. . . . . . . . . . . . . . . . . . . . . . . . . . . . . . . . . . A-7
iv SPARCserver 2000E Power Supply Installation Manual—April 1995
Page 5

Figures
Figure 2-1 Key Switch Positions. . . . . . . . . . . . . . . . . . . . . . . . . . . . . . . . . . . 2-3
Figure 2-2 AC Distribution Unit Power Switch. . . . . . . . . . . . . . . . . . . . . . 2-3
Figure 2-3 Removing the Power Supply Compartment EMI Panel . . . . . 2-5
Figure 2-4 Disconnecting the Top Power Supply Power Cord . . . . . . . . . 2-6
Figure 2-5 Removing the Power Supply Cage Cover Panel. . . . . . . . . . . . 2-7
Figure 2-6 AC Distribution Unit Removal and Replacement . . . . . . . . . . 2-7
Figure 2-7 Removing the Power Breaker Box . . . . . . . . . . . . . . . . . . . . . . . 2-8
Figure 2-8 Freeing the Filter Cable. . . . . . . . . . . . . . . . . . . . . . . . . . . . . . . . . 2-9
Figure 2-9 Installing the Bottom Power Supply. . . . . . . . . . . . . . . . . . . . . . 2-10
Figure 2-10 Installing the Power Supply Mounting Screws. . . . . . . . . . . . . 2-11
Figure 2-11 Installing the Bottom Cover Panel . . . . . . . . . . . . . . . . . . . . . . . 2-12
Figure 2-12 Installing the Main Bus Bar . . . . . . . . . . . . . . . . . . . . . . . . . . . . . 2-13
Figure 2-13 Installing Power Harness on the Top and Bottom Power Supply
Terminal Blocks . . . . . . . . . . . . . . . . . . . . . . . . . . . . . . . . . . . . . . . 2-14
Figure 2-14 Installing the Main Bus Bar and the Power Harness . . . . . . . . 2-14
Figure 2-15 Plugging the Filter Cable into the Bottom Power Supply . . . . 2-15
Figure 2-16 Replacing the Power Breaker Box . . . . . . . . . . . . . . . . . . . . . . . . 2-16
v
Page 6

Figure 2-17 Connecting the Power Cords. . . . . . . . . . . . . . . . . . . . . . . . . . . . 2-17
Figure 2-18 Removing the Jumper-Connector and Installing the Sense Cable
2-18
Figure 2-19 Replacing the Power Supply Compartment EMI Panel . . . . . 2-19
Figure 2-20 Local/Remote Switch Location . . . . . . . . . . . . . . . . . . . . . . . . . . 2-21
Figure 2-21 System Reset Switch . . . . . . . . . . . . . . . . . . . . . . . . . . . . . . . . . . . 2-23
Figure 2-22 Front Panel Status LEDs . . . . . . . . . . . . . . . . . . . . . . . . . . . . . . . . 2-24
Figure 2-23 Power Supply Adapter Board LEDs. . . . . . . . . . . . . . . . . . . . . . 2-25
Figure 2-24 Opening the Hinged Door . . . . . . . . . . . . . . . . . . . . . . . . . . . . . . A-2
Figure 2-25 Removing the Vented Front Panels . . . . . . . . . . . . . . . . . . . . . . A-3
Figure 2-26 Removing the Side Panels . . . . . . . . . . . . . . . . . . . . . . . . . . . . . . A-4
Figure 2-27 Removing the EMI Shield. . . . . . . . . . . . . . . . . . . . . . . . . . . . . . . A-5
Figure 2-28 Rear Screen Panel Removal . . . . . . . . . . . . . . . . . . . . . . . . . . . . . A-6
vi SPARCserver 2000E Power Supply Installation Manual—April 1995
Page 7

Tables
Table 1-1 Safety Precautions . . . . . . . . . . . . . . . . . . . . . . . . . . . . . . . . . . . . . 1-2
Table 2-1 LED Status Indicators . . . . . . . . . . . . . . . . . . . . . . . . . . . . . . . . . . 2-25
vii
Page 8

viii SPARCserver 2000E Power Supply Installation Manual—April 1995
Page 9

Preface
This manual provides instructions for installing a power supply in a
redundant-capable SPARCcenter™2000™or SPARCcenter 2000E™system.
These instructions are designed for an experienced service provider.
How This Book Is Organized
Chapter 1, “Before You Start,” is an overview of the tasks involved. Read this
chapter to become familiar with the overall upgrade process.
Chapter 2, “Power Supply Installation,” explains how to perform the
installation.
Appendix A, “Access” details how to remove and replace system covers.
ix
Page 10

Related Documents
The following documents contain information that may be helpful after the
upgrade is installed.
Table P-1 Related Documents
Application Title Part Number
Safety SPARCcenter 2000 Regulatory Compliance Manual 801-3051
Installation SPARCcenter 2000 Installation Manual 800-6975
Diagnostics SPARCcenter 2000 Post User’s Guide 800-7481
OpenBoot Command Reference 800-6076
User’s Guides SPARCcenter 2000 Storage Device User ’s Guide 800-7009
150MB Tape Drive User’s Guide 800-7020
5.0 GB 8mm Tape Drive User’s Guide 800-7022
10 Gbyte 8mm Tape Drive User’s Guide 801-7652
14 Gbyte 8mm Tape Drive User’s Guide 802-1850
20 Gbyte 4 mm Internal Tape Auto-Loader User’s Guide 801-4977
Service SPARCcenter 2000 ServiceManual 801-2007
x SPARCserver 2000E Power Supply Installation Manual—April 1995
Page 11

What Typographic Changes Mean
The following table describes the typographic changes used in this book.
Table P-2 Typographic Conventions
Typeface or
Symbol Meaning Example
AaBbCc123 The names of commands,
files, and directories;
on-screen computer output
AaBbCc123 What you type, contrasted
with on-screen computer
output
AaBbCc123 Command-line placeholder:
replace with a real name or
value
AaBbCc123 Book titles, new words or
terms, or words to be
emphasized
Shell Prompts in Command Examples
The following table shows the default system prompt and superuser prompt
for the C shell, Bourne shell, and Korn shell.
Table P-3 Shell Prompts
Shell Prompt
C shell prompt machine_name%
Edit your .login file.
Use ls -a to list all files.
machine_name% You have mail.
machine_name% su
Password:
To delete a file, type rm filename.
Read Chapter 6 in User’s Guide.
These are called class options.
You must be root to do this.
C shell superuser prompt machine_name#
Bourne shell and Korn shell
prompt
Bourne shell and Korn shell
superuser prompt
Preface xi
$
#
Page 12

Notes, Cautions, and Warnings
Warning – This equipment contains lethal voltage. Accidental contact can
result in serious injury or death.
Caution – Improper handling by unqualified personnel can cause serious
!
damage to this equipment. Unqualified personnel who tamper with this
equipment may be held liable for any resultant damage to the equipment.
Individuals who remove any outer panels or open covers to access this
equipment must observe all safety precautions and ensure compliance with
skill level requirements, certification, and all applicable local and national
laws.
Procedures contained in this document must be performed by qualified
service-trained maintenance providers.
Note – Before you begin, carefully read each of the procedures in this manual.
If you have not performed similar operations on comparable equipment, do
not attempt to perform these procedures.
xii SPARCserver 2000E Power Supply Installation Manual—April 1995
Page 13

BeforeYouStart
This manual provides procedures for installing a power supply in a redundantcapable SPARCcenter 2000 or 2000E system cabinet.
1.1 Safety Precautions
For your protection, observe the following safety precautions when setting up
your equipment:
• Follow all cautions, warnings, and instructions marked on the equipment.
• Ensure that the voltage and frequency rating of the power outlet you use
• Use properly grounded power outlets only.
• Never push objects of any kind through openings in the equipment as they
• Refer servicing of equipment to qualified personnel.
1
matches the electrical rating label on the equipment and video monitor.
may touch dangerous voltage points or short out components that could
result in fire or electric shock.
1-1
Page 14
1
To protect both yourself and the equipment, observe the following precautions:
Table 1-1 Safety Precautions
Item Problem Precaution
Springfingers Personal injury The springfingers have sharp edges. Use care when handling springfinger-
equipped cabinet screens and system boards.
RFI leakage Keep springfinger-equipped screens and panels in place when the system is
running. These assemblies suppress radio frequency interference (RFI) and
are required by law in many localities.
Damaged
springfingers
Wrist strap or
Foot strap
ESD mat ESD An approved ESD mat provides protection from static damage when used
Cover panels System damage
Filler panels System damage
SBus slot covers System damage
ESD Wear a conductive wrist strap or foot strap when handling printed circuit
and overheating
and overheating
and overheating
Look for any broken or twisted springfingers and replace any damaged
screen or board with a new assembly.
boards.
with a wrist strap or foot strap. The mat also cushions and protects small
parts that are attached to printed circuit boards.
Attach all cabinet cover panels after performing service work on the system.
Install card cage filler panels in all unused card cage slots. Open slots
severely reduce the cooling capability of the system.
Install SBus slot covers in all unused system board SBus slots. Openings on
the backs of system boards reduce the cooling capability of the system.
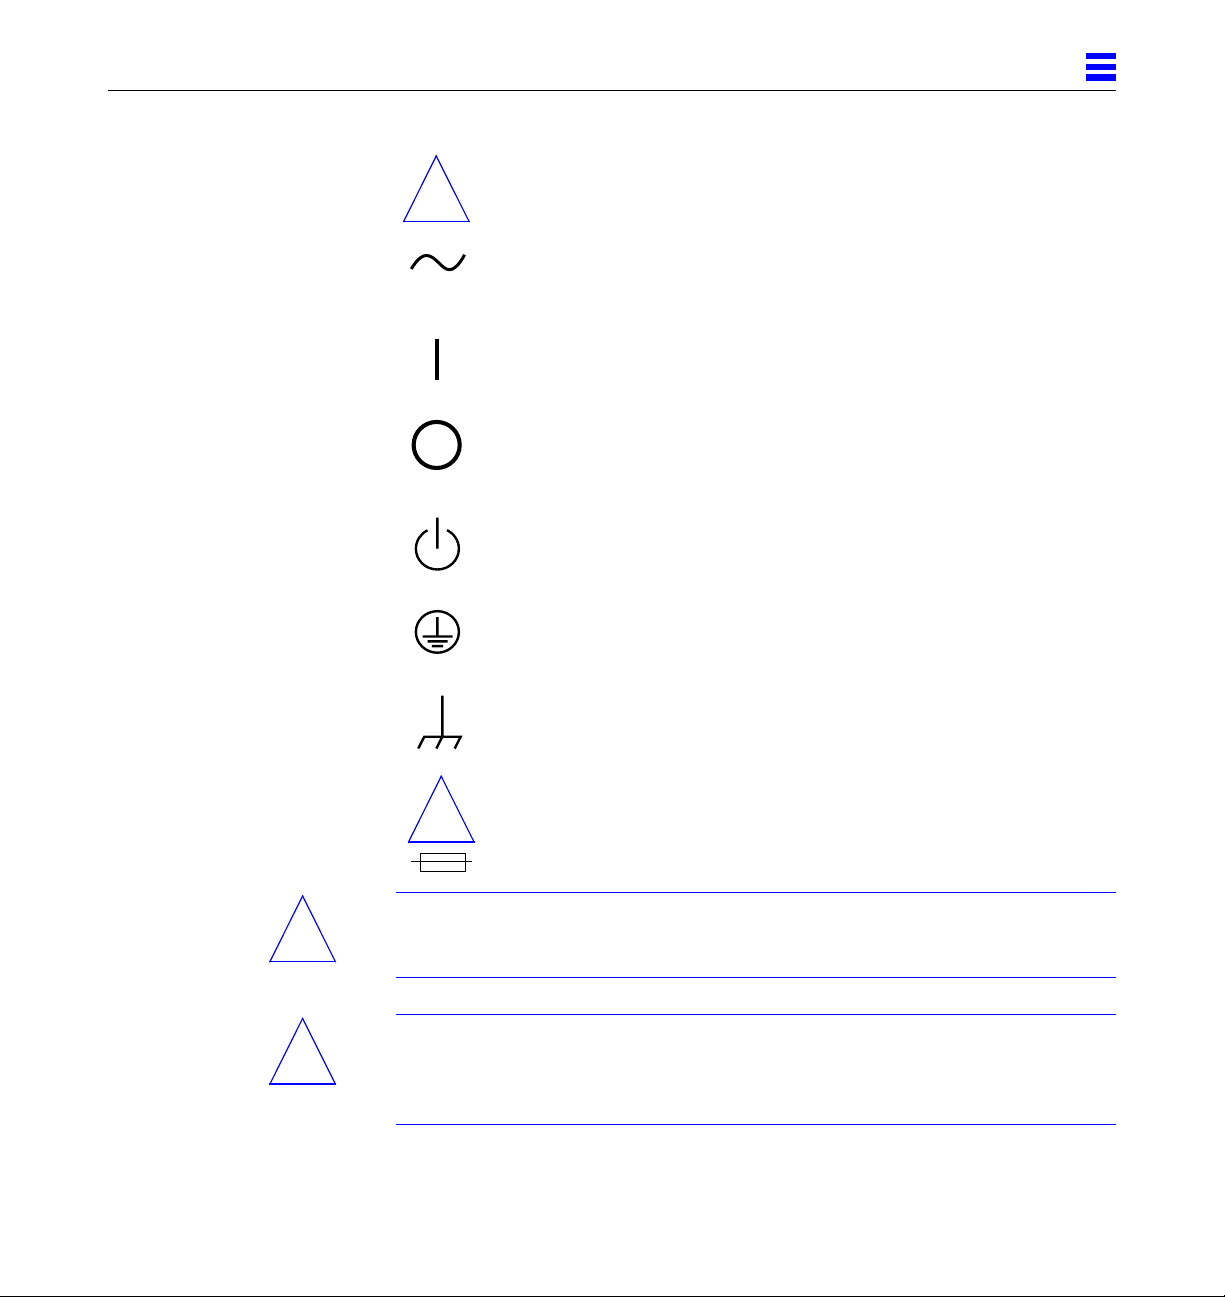
1.2 Symbols
The following symbols mean:
WARNING Risk of electrical shock.To reduce
the risk, follow the instructions.
WARNING Risk of personal injury. To reduce the
risk, follow the instructions.
!
1-2 SPARCserver 2000E Power Supply Installation Manual—April 1995
Page 15
1
CAUTION Risk of equipment damage. To reduce
the risk, follow the instructions.
!
AC A terminal to which alternating
current or voltage may be applied.
ON The principal and stand-by switches
are in the ON position.
OFF The principal switch is in the OFF
position.
STAND-BY The stand-by switch is in the
STAND-BY position.
PROTECTIVE EARTH Protective earth conductor.
CHASSIS Frame or chassis terminal.
FUSE REPLACEMENT For continued protection against risk
!
Caution – DO NOT make mechanical or electrical modifications to the cabinet.
!
!
Sun Microsystems is not responsible for regulatory compliance of modified
cabinets.
Caution – Power off the cabinet and all equipment connected to it before
performing any of the procedures described in this book.
The system chassis power must be turned off, and the AC power cord must
remain plugged in to ensure a proper ground.
BeforeYouStart 1-3
MARKING of fire and electric shock, replace
ONLY with same type and rating of
fuse.
Page 16
1
Warning – This equipment contains lethal voltages. Accidental contact can
result in serious injury or death.
Caution – Improper handling by unqualified personnel can cause serious
!
!
damage to this equipment. Unqualified personnel who tamper with this
equipment may be held liable for any resulting damage to the equipment.
Persons who remove any of the outer panels to access this equipment must
observe all safety precautions and ensure compliance with skill level
requirements, certification, and all applicable local and national laws.
All procedures contained in this document must be performed by qualified
service-trained maintenance providers.
Caution – Before you begin, carefully read each of the procedures in this
manual. If you have not performed similar operations on comparable
equipment, do not attempt to perform these procedures.
1.3 Tools Required
The following list represents the minimum of tools and test equipment
required to service the system cabinet:
• Screwdriver, slotted, 3/16 inch
• Screwdriver, Phillips #2
• Screwdriver, Phillips #1
• Hex driver, M-4
• Hex driver, 3/16 inch
• Hex driver, 9 mm
• Wrench, 13 mm
• DIP/IC extraction tool
• ESD mat, Sun P/N 250-1088, or equivalent
• Grounding wrist strap
• Needlenose pliers
1-4 SPARCserver 2000E Power Supply Installation Manual—April 1995
Page 17
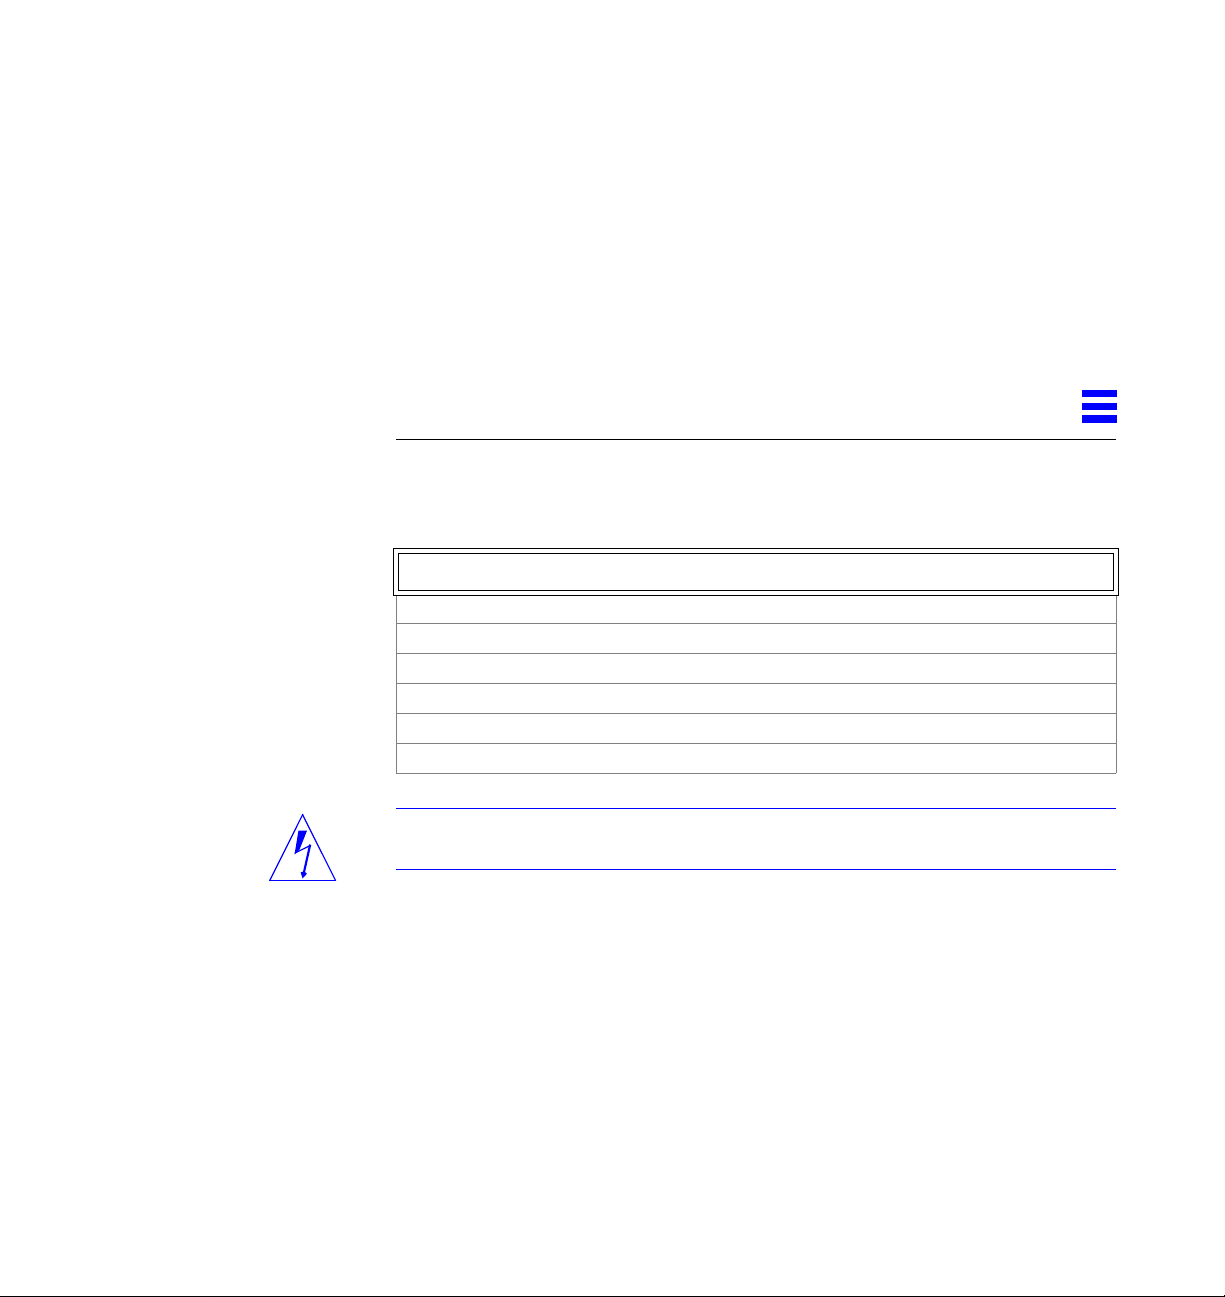
PowerSupplyInstallation
This chapter provides the complete upgrade procedures.
Perform these tasks in order to install a system power supply.
Safety Precautions page 1-1
Powering Down the System page 2-2
Removal Procedures page A-1
Installing the Bottom Power Supply page 2-4
Closing the System page A-6
Restarting the System page 2-20
Warning – Risk of electric shock. Do not work inside the cabinet while power
is applied to the system. Power down using the procedure which follows.
2
2-1
Page 18

2
2.1 Operating System
The correct operating system must be installed to support dual power supply
operation. The operating system must be:
Solaris 2.4 or higher, or
Solaris 2.3 with the patch: ID# 101318-59 or later revision level (obtain this
patch through your normal service channels)
Check to see which operating system is running on your machine. If necessary,
load one of the correct Solaris versions listed here before proceeding.
2.2 Open Boot PROM
The system boards require the Open Boot PROM version -10 or higher to
support dual power supply operation. If necessary, install new PROMs on all
system boards before proceeding.
2.3 Powering Down the System
Halt the operating system before turning off system power. Proceed below.
1. Notify users that the system is going down.
2. Be sure that the system files and data have been backed up.
3. Halt the system using the appropriate commands.
The halt procedure varies for different types of operating systems. Refer to
the documentation for your operating system for the correct halt procedure.
4. Wait for the system-halted message and the boot monitor prompt.
5. Turn the key switch to the (standby) position.
See Figure 2-1.
6. Turn AC power off:
Turn the AC distribution unit power switch to Off. The switch is at the rear
of the cabinet. See Figure 2-2.
2-2 SPARCserver 2000E Power Supply Installation Manual—April 1995
Page 19

2
On
Standby
Figure 2-1 Key Switch Positions
Diagnostics
Secure
↓
Off
Main Power
Figure 2-2 AC Distribution Unit Power Switch
Power Supply Installation 2-3
Page 20

2
2.4 Access
Remove all system cover panels before proceeding with the upgrade. For these
procedures, refer to Appendix A, “Access.”
2.5 Installing the Bottom Power Supply
Note – Read and follow all safety and ESD instructions found in Section 1.1,
“Safety Precautions.”
2.5.1 Identifying a Redundant-Capable Cabinet
Note – The cabinet in question is a redundant-capable cabinet if:
• The power supply cover panel on this chassis is long as shown in Figure 2-3.
This panel reaches to the bottom of the frame. In contrast, the cover panel on
the non redundant-capable chassis reaches about half the way down the frame
• The cabinet is configured with the power supply adapter board. This board,
if present, can be viewed by looking through the EMI screen on the front of the
system.
2-4 SPARCserver 2000E Power Supply Installation Manual—April 1995
Page 21

2.5.2 Installing the Supply
2.5.2.1 Preparation
1. Remove the power supply compartment EMI panel Part No. 340-3134-xx
covering both power supplies. See Figure 2-3.
Remove twelve 10-32 screws securing the panel in place and set aside.
2
Screws
Figure 2-3 Removing the Power Supply Compartment EMI Panel
2. Disconnect the top power supply power cord.
This is in the lower-center of the top supply. See Figure 2-4.
Power Supply Installation 2-5
Page 22

2
Power cord
Figure 2-4 Disconnecting the Top Power Supply Power Cord
3. Remove the power supply cage cover panel.
Remove six screws securing the panel, Part No. 340-3157-xx to the power
supply cage and remove the panel (it will not be reused). See Figure 2-5.
2-6 SPARCserver 2000E Power Supply Installation Manual—April 1995
Page 23

Remove screws, 6 places
Figure 2-5 Removing the Power Supply Cage Cover Panel
Remove the AC Distribution Unit
1. Disconnect all AC cables plugged into the unit, and disconnect cables
from connectors J2 and J3.
See Figure 2-6.
2
Cage cover panel
Springfingers (2 each)
Power supply cable
#6 Phillips screws
Phillips screws
AC distribution unit
Figure 2-6 AC Distribution Unit Removal and Replacement
Power Supply Installation 2-7
Page 24

2
Note – J3 is located on the top of the AC distribution unit, J2 is on the backside.
2. Remove the three Phillips screws and two #6-32 Phillips screws.
3. Carefully remove the power distribution unit from the system chassis.
Remove the Breaker Box
1. Remove the power breaker box. See Figure 2-7.
a. Unplug the power cord from the breaker box going to the top power
supply.
b. Remove two screws from holes in the bottom lip of the breaker box
which secure it to the bottom power supply. Set the screws aside.
c. Unscrew two captive screws at the top of the breaker box securing it to
the top power supply.
d. Remove the box and set aside.
Captive screws (2 places)
Screws (2 places, hidden)
Figure 2-7 Removing the Power Breaker Box
2-8 SPARCserver 2000E Power Supply Installation Manual—April 1995
Page 25

Filter Cable
1. Free the filter cable.
a. On the inside of the power supply cage, cut the tie wrap and uncoil the
cable. See Figure 2-8.
b. Pass the cable connector through the rectangular hole in the power
supply cage and allow it to hang.
Filter cable
Tie wrap
2
Rectangular hole (hidden)
2.5.2.2 Power Supply Physical Installation
Figure 2-8 Freeing the Filter Cable
1. Install the springfingers, Part No. 340-2415-xx (two each — included with
the kit) on the new power supply.
Install each springfinger (shown in Figure 2-9) using three screws.
2. Place the supply on the power supply shelf at a slight angle so the left-
edge enters the power supply cavity first.
Power Supply Installation 2-9
Page 26

2
3. Shove the supply into the cavity — flush against the sheet metal in the
left-interior of the power supply cage.
See Figure 2-9.
Power supply cage
Power supply
Springfingers (2 each):
Install using 3 screws
each
Figure 2-9 Installing the Bottom Power Supply
4. Install six screws to secure the power supply to the power supply cage.
Use screws Part No. 340-1372-xx. See Figure 2-10.
2-10 SPARCserver 2000E Power Supply Installation Manual—April 1995
Page 27

Screws (6 places)
2
Figure 2-10 Installing the Power Supply Mounting Screws
Power Supply Installation 2-11
Page 28

2
5. Install the bottom cover panel.
Position the panel Part No. 340-3190-xx and install 12 screws
Part No. 240-1372-xx to secure the panel to the cabinet. See Figure 2-11.g
Screws (12 places)
Bottom cover panel
Part No. 340-2190-xx
Figure 2-11 Installing the Bottom Cover Panel
2.5.2.3 Main Bus Bar Installation
Install the main bus bar Part No. 340-3136-xx to connect the top and bottom
power supply busses.
1. Orient the bus bar as shown in Figure 2-12.
2. Place the bus bar flush against the top and bottom power supplies so
holes in the tabs slide over all bolts on the supplies: eight on the top
supply and eight on the bottom.
3. Loosely install in the order given the following on each bolt: a flat washer,
a lock washer and a nut.
See Figure 2-12.
4. Loosely install four M6 screws through holes in the bus bar to secure the
bus bar to the top and bottom cover panels.
The screw Part No. is 240-2083-xx. See Figure 2-12.
5. Tighten all nuts and screws installed in Step 3 and Step 4.
2-12 SPARCserver 2000E Power Supply Installation Manual—April 1995
Page 29

Screws, M6 (4 places)
Nuts backed by lock and flat
washers (16 places)
Main bus bar,
Part No. 340-3136-xx
2
Tabs (8 each)
Figure 2-12 Installing the Main Bus Bar
2.5.2.4 Power Harness Installation
Install the power harness, Part No. 530-2164-xx (comprised of four bus wires)
to connect the two power supplies.
1. Orient the power harness as shown in Figure 2-13.
2. Connect the power harness to the top power supply.
Push four spade connectors onto the spade lugs. See Figure 2-13.
3. Connect the power harness to the bottom power supply.
Push four spade connectors onto the spade lugs.
4. Secure the power harness to the cover panels.
Clip the power harness into nylon retainers in the top and bottom power
supply cover panels. See Figure 2-14.
Power Supply Installation 2-13
Page 30

2
+12V
A
+12V Return
C
–12V
E
–12V Return
G
Power harness Part
No. 530-2164-xx
+12V
B
D
+12V Return
F
–12V
H
–12V Return
Figure 2-13 Installing Power Harness on the Top and Bottom Power Supply Terminal
Cover panel
Power harness Part
No. 530-2164-xx
Powerharness
retainers
Main bus bars
Figure 2-14 Installing the Main Bus Bar and the Power Harness
2-14 SPARCserver 2000E Power Supply Installation Manual—April 1995
Blocks
Page 31

2.5.2.5 Cabling
Filter Cable, Breaker Box and AC Distribution Unit
1. Plug in the filter cable.
Form a service loop in the cable and plug the connector into J2 (the top
connector) on the power supply. See Figure 2-15.
2. Replace the power breaker box. See Figure 2-15.
c. Insert the filter cable service loop into the hole in the back side of the
breaker box (Figure 2-15).
Note – Insert filter cable loop into the hole in breaker box that is surrounded
by springfingers.
Service loop
2
Rectangular hole
Breaker box
(cutaway view)
Figure 2-15 Plugging the Filter Cable into the Bottom Power Supply
Power Supply Installation 2-15
Page 32

2
d. Place the breaker box against power supply cage.
Align the captive screws with the bottom two holes in the top power
supply. See Figure 2-16.
e. Loosely thread the two captive screws at the top of the breaker box into
holes in the top power supply.
f. Loosely thread two screws through holes in the bottom lip of the
breaker box into holes in the bottom power supply.
g. Tighten all four screws to secure the power breaker box in place.
Note – Ensure the filter cable does not become crimped between the breaker
box and the power supply cage.
Captive screws (2 places)
Screws (2 places, hidden)
Figure 2-16 Replacing the Power Breaker Box
3. Replace the AC distribution unit. a. Place the power distribution unit against the chassis with all four holes
aligned with those in the chassis.
2-16 SPARCserver 2000E Power Supply Installation Manual—April 1995
Page 33

b. Replace the three Phillips screws and two #6-32 Phillips screws.
c. Replace cables in connectors J2 and J3.
1. Plug in the three power cords:
See Figure 2-17.
a. Plug the main power cord into the AC distribution box J2 and the other
end into breaker box J1 (bottom-right jack).
b. Plug power cord Part Number 530-2160-xx into breaker box J2 (top
jack) and the other end into the top power supply AC input.
c. Plug power cord Part Number 530-2160-xx into breaker box J3 (bottom-
left jack) and the other end into the bottom power supply AC input.
Top power supply
Breaker box
2
J3
AC distribution unit
Bottom power supply
Power cords
J2 (hidden)
Figure 2-17 Connecting the Power Cords
Note – Examine the breaker box to ensure both circuit breakers are ON. Set
them to ON if required.
Power Supply Installation 2-17
Page 34

2
2.5.2.6 Power Supply Sense Cable
1. Remove the jumper-connector from the power supply adapter board.
You will find this device plugged into the connector nearest the outside
edge of the cabinet. Remove it. See Figure 2-18.
2. Plug the sense cable for the bottom power supply into the power supply
adapter board.
Plug it into the near-most connector — from which the jumper-connector
was removed in Step 2.
3. Plug the other end of the sense cable into the sense connector on the
bottom power supply.
Plug it into J1 near the top of the supply.
Jumper connector: Remove to allow the
lowerpower supply cablesensecableto be
plugged into this connector.
Figure 2-18 Removing the Jumper-Connector and Installing the Sense Cable
2-18 SPARCserver 2000E Power Supply Installation Manual—April 1995
Power supply sense cable
for bottom power supply
Power supply
adapter board
Page 35

2.5.2.7 Restorethe System
1. Replace the power supply compartment EMI panel. See Figure 2-3.
Position the panel against the cabinet and secure using 12 screws.
2
Screws
Figure 2-19 Replacing the Power Supply Compartment EMI Panel
Power Supply Installation 2-19
Page 36

2
2.6 Restarting the System
Note – As the system starts up, watch for error messages from the POST
diagnostic program. If a terminal is not already part of the system, install a
TTY terminal before continuing the start up. See the SPARCcenter 2000
Installation manual for terminal settings.
1. The system key switch must be turned to (the standby position).
See Figure 2-1.
Caution – The outlet must be a 200-240 Vac 30-ampere circuit, intended solely
!
for use by the server cabinet, as described in the site preparation instructions in
the SPARCcenter 2000 Installation manual. The electrical receptacle must be
grounded, and the grounding conductor serving this receptacle must be
connected to the earth ground at the service equipment.
2. Turn the Local/Remote switch down, to Local. See Figure 2-20.
3. Turn on the power switch on the AC distribution unit.
See Figure 2-2.
4. Turn on power to the terminal.
A terminal is required for viewing system messages.
5. Turn the key switch to (the power-on position). See Figure 2-1.
Several things will happen:
• The DC-powered blower fan in the top of the cabinet begins turning.
• The left front panel LED (green) turns on immediately to indicate the DC
power supply is functioning.
• The middle front panel LED (yellow) lights immediately and should turn
off after approximately 60 seconds.
• The right front panel LED (green) lights after POST has ended to show
that booting is successful.
• The terminal beep indicates that the system is ready.
• The terminal screen lights up upon completion of the internal self test.
2-20 SPARCserver 2000E Power Supply Installation Manual—April 1995
Page 37

Remote
Local
2
Figure 2-20 Local/Remote Switch Location
Caution – Never move the system cabinet or the expansion cabinets when
!
system power is on. Excessive movement can cause catastrophic disk drive
failure. Always power the system OFF before moving cabinets.
Power Supply Installation 2-21
Page 38

2
6. Watch the terminal screen for any POST error messages.
At the conclusion of testing, POST automatically configures the system,
omitting any devices that have failed diagnostics. After POST ends, the
system will boot using the new configuration.
If the middle front panel LED remains lit after the system has booted, the
system has failed POST.
If you system has two power supplies and one fails, the system will
continue to operate. If POST, OBP or the operating system detects the power
supply failure, a warning message similar to the one below will be
displayed to the console:
Power supply maintenance should be scheduled.
Note – POST does not test drives or internal parts of SBus cards. To test these
devices, run OpenBoot PROM (OBP) diagnostics manually after the system has
booted. Refer to the OpenBoot Command Reference manual for instructions.
7. To start POST again, or if the system hangs, press the reset switch on the
back of the front panel.
See Figure 2-21.
2-22 SPARCserver 2000E Power Supply Installation Manual—April 1995
Page 39

Reset switch
2
Figure 2-21 System Reset Switch
8. If the system displays “not responding” or “no carrier” messages, the
Link Integrity Test may be set incorrectly.
2.7 Reading Boot Messages
Use the boot software messages to verify the presence of options in the system.
After POST completes the system self-test, a message similar to the following
will appear on your screen. The message lists hardware detected in the system.
Power Supply Installation 2-23
Page 40

2
Note – The following screen display is an example only. The actual message
displayed on the screen will vary with the software running on the system.
<<<< SPARCsystem 2000XX POST VX.X >>>>
...(various test messages)...
SPARCsystem 2000 Series (2 X XXXXXX), No Keyboard
ROM Rev. -.-, --- MB Memory installed, Serial #---.
Ethernet address -:-:--:-:--:--, Host ID: ------.
Note – When a system is started for the first time, or if the master board is
replaced, OBP will prompt you to select a system board to be the new system
master. The system master is normally in slot 0.
If there is no terminal on this system, you must check the system status by
inspecting LEDs on the front panel and if present) on the power supply
adapter board. See Figure 2-22 and Figure 2-23.
Table 2-1 summarizes LED status conditions during and after POST.
DC power (green)
Fault (yellow)
System running (green)
Figure 2-22 Front Panel Status LEDs
2-24 SPARCserver 2000E Power Supply Installation Manual—April 1995
Page 41

Sense cable to bottom power supply
Power supply adapter board
LEDs (2 each)
2
Sense cable to top power supply
Sense cable to backplane
Bottom
Power Supply
Figure 2-23 Power Supply Adapter Board LEDs
Table 2-1 LED Status Indicators
Location LED Condition
Front panel Left LED
(green)
Middle LED
(yellow)
Right LED
(green)
All system boards Lower 8 LEDs During POST, LEDs cycle on and off in irregular pattern.
Master system board only Lower 8 LEDs After POST, LEDs display cyclic pattern.
All slave system boards Lower 8 LEDs After POST, LEDs display solid pattern until boot is ended, then LEDs
On — DC power supply is receiving AC current.
Off — There is no DC power.
On — (first 60 seconds) Self tests are running.
Off — (after self tests end) No hardware failures.
On — (after self tests end) Hardware failure was detected.
Off — (first 60 seconds) Self tests are running.
On — (after self tests end) System is running.
Off — (after self tests end) System cannot run; repair is needed.
display same cycling pattern as master board. After boot ends, for boards
without SPARC modules, LEDs continue to display solid pattern. After
boot ends, LEDs on failed boards should be OFF.
Top
Power Supply
Power supply adapter
board (redundantcapable chassis only)
Left LED
Right LED
Power Supply Installation 2-25
On — bottom power supply failed, or the circuit breaker (breaker box)
tripped.
Off — top power supply fail, or the circuit breaker (breaker box) tripped.
Page 42

2
2-26 SPARCserver 2000E Power Supply Installation Manual—April 1995
Page 43

Access
A.1 Removal Procedures
Remove panels to afford access to the power supplies and related components.
A.1.1 Opening the Hinged Door
1. Grasp the door at the upper-right corner and pull towards you firmly.
See Figure 1-1.
The door is secured closed by clips and ball-studs at the side opposite of the
hinge. The door is released and swings open if pulled firmly.
A
A-1
Page 44

A
Figure 1-1 Opening the Hinged Door
A.1.2 Removing the Vented Front Panels
1. Grasp the panel under the vent at one end and pull it outward
approximately 1 inch (2-3 centimeters) to disengage the ball studs.
See Figure 1-2.
2. Repeat this procedure at the opposite side to free the panel.
A-2 SPARCserver 2000E Power Supply Installation Manual—April 1995
Page 45

A
Figure 1-2 Removing the Vented Front Panels
A.1.3 Removing the Side Panels
To remove the left and right side panels:
1. Loosen two slot-head captive screws near the panel base.
2. Tilt the panel bottom out.
Access A-3
Page 46

A
3. Lift the panel up until free of the tabs at the top of the chassis. Set the panel aside.
Panel notches
Chassis tabs
Side panel
Captive screws
Figure 1-3 Removing the Side Panels
A.1.4 Removing the EMI Shield
The EMI shield is located behind the front panels.
1. Remove the Phillips screws securing the EMI shield to the chassis.
See Figure 1-4.
2. Grab the handle at the panel top to tilt the panel out to remove it.
A-4 SPARCserver 2000E Power Supply Installation Manual—April 1995
Page 47

A
EMI shield
#10 Phillips screws
Figure 1-4 Removing the EMI Shield
A.1.5 Rear Screen Panel
1. Remove the two #10 Phillips screws securing the panel to the frame.
See Figure 1-5.
Access A-5
Page 48

A
2. Tilt the panel top out and lift it free of the chassis. Set the panel aside.
There is a flange on the bottom of the rear screen.
Rear screen panel
#10 Phillips screws
Kick panel
Figure 1-5 Rear Screen Panel Removal
A.2 Closing the System
A.2.1 EMI Panel
1. Hold the panel by the handle at the top. Position the panel in the opening
so the bottom flange fits over the lip at the bottom of the opening.
2. Tilt the panel flush against the chassis. Install and tighten all screws.
A.2.2 Rear Screen Panel
1. Insert the panel so the bottom flange engages behind the top of the kick panel.
2. Tilt the panel flush against the frame and secure using two screws.
A-6 SPARCserver 2000E Power Supply Installation Manual—April 1995
Page 49

A.2.3 Vented Front Panel
♦ Place the panel against the chassis with ball studs aligned with catches on
the panel.
At both ends, tap or press the panel into place.
A.2.4 Side Panels
1. Place the panel against the cabinet so the notches on the panel inside
align with tabs at the chassis top.
2. Lower the panel into place and allow it to hang flush against the chassis.
3. Tighten the two captive screws at the panel base.
A
Access A-7
Page 50

A
A-8 SPARCserver 2000E Power Supply Installation Manual—April 1995
Page 51

RevisionHistory
Revision Dash Date Comments
802-2700-10 -A April 1995 First Customer Ship
Page 52

SPARCserver 2000E Power Supply Installation Manual—April 1995
Page 53

Reader Comments
We welcome your comments and suggestions to help improve this manual. Please let us
knowwhat you thinkabout the SPARCserver2000E PowerSupplyInstallation Manual,
part number 802-2700-10.
■ The procedures were well documented.
Strongly Strongly Not
Agree Agree Disagree Disagree Applicable
❑❑❑❑❑
Comments
■ The tasks were easy to follow.
Strongly Strongly Not
Agree Agree Disagree Disagree Applicable
❑❑❑❑❑
Comments
■ The illustrations were clear.
Strongly Strongly Not
Agree Agree Disagree Disagree Applicable
❑❑❑❑❑
Comments
■ The information was complete and easy to find.
Strongly Strongly Not
Agree Agree Disagree Disagree Applicable
❑❑❑❑❑
Comments
■ Do you have additional comments about the SPARCserver 2000E Power Supply
Installation Manual?
Name:
Title:
Company:
Address:
Telephone:
Email address:
Page 54

BUSINESS REPLY MAIL
FIRST CLASS MAIL PERMIT NO. 1 MOUNTAIN VIEW, CA
POSTAGE WILL BE PAID BY ADDRESSEE
SUN MICROSYSTEMS, INC.
Attn: Manager, Hardware Publications
MS MPK 14-101
2550 Garcia Avenue
Mt. View, CA 94043-9850
NO POSTAGE
NECESSARY
IF MAILED
IN THE
UNITED STATES
 Loading...