

Page 1
Quick installation Sunmaster XS6500 English
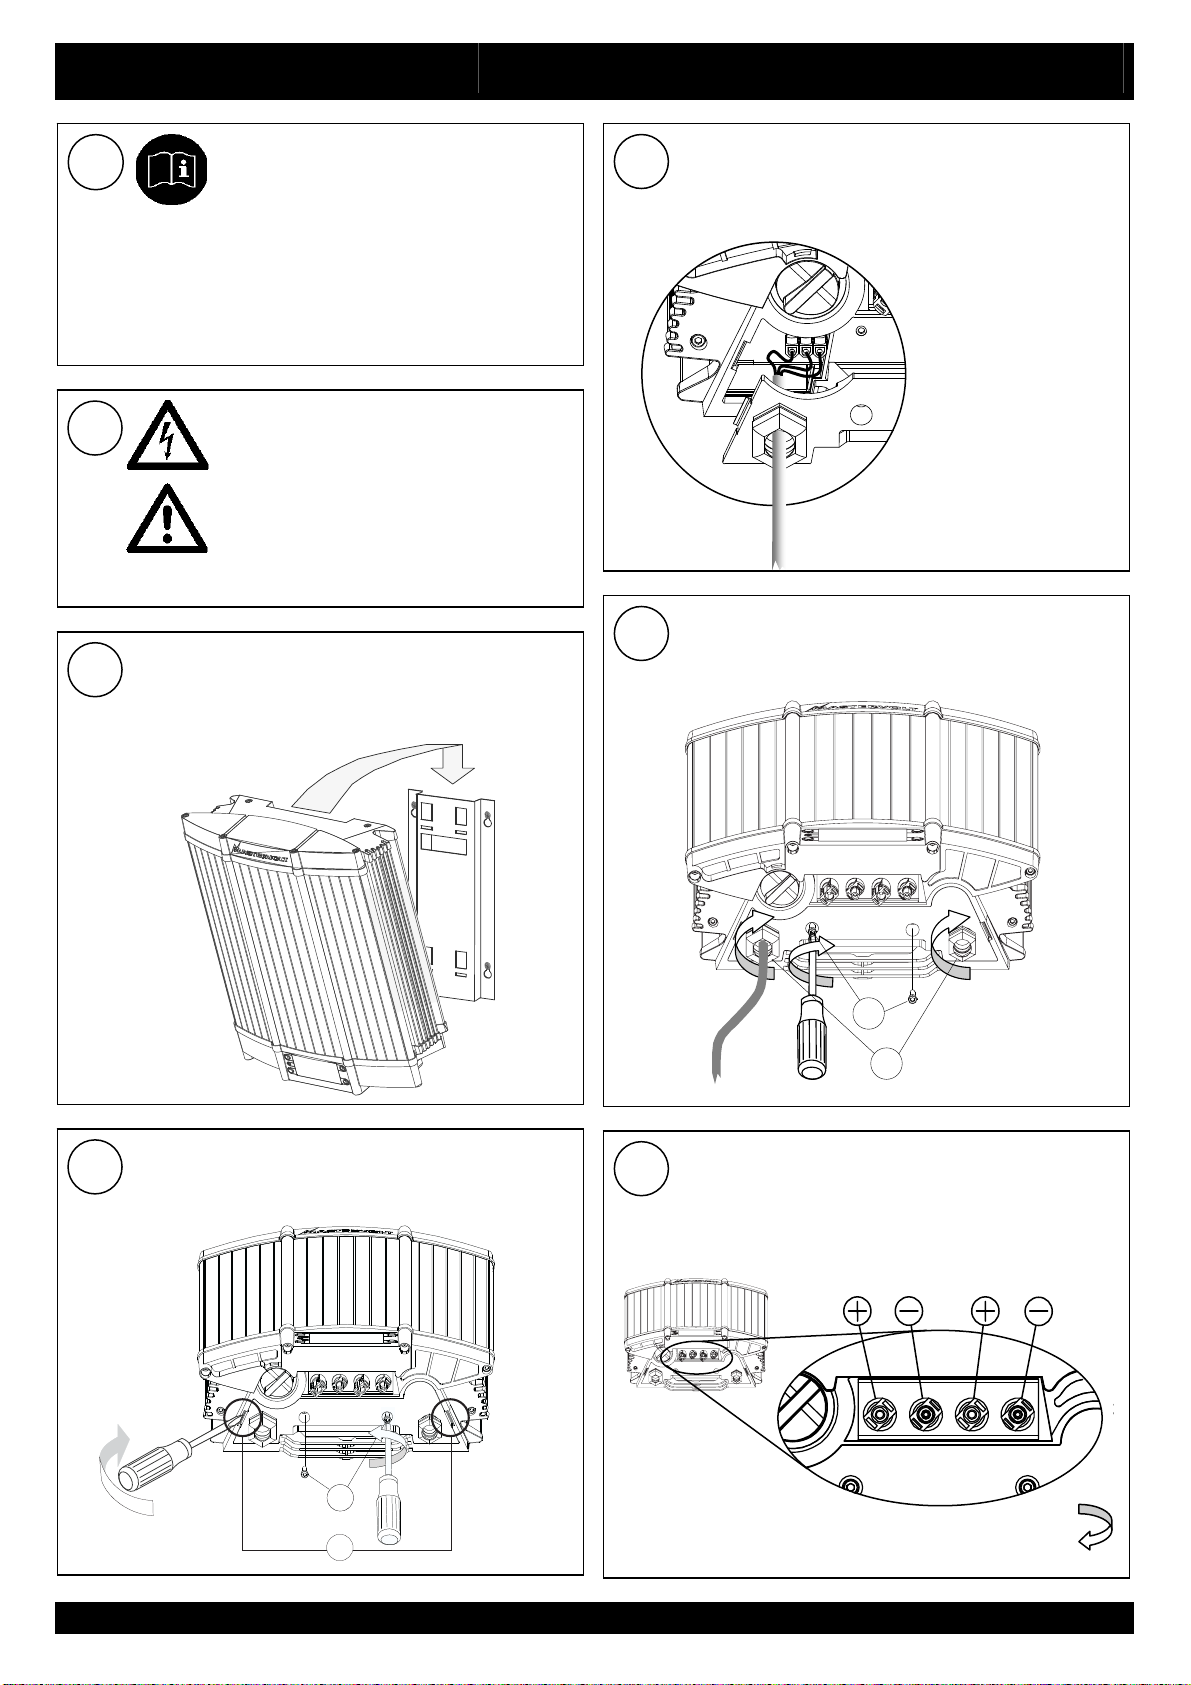
This section provides a brief overview
1
However; please review the entire manual for
additional features and connection diagrams and to
ensure best performance and years of trouble-free
service.
of a basic stand-alone installation of
the Sunmaster XS6500.
See chapter 3.4 for specifications of the AC
5
wiring. Feed the AC wiring through the left
hand cable glad of the bottom plate and
connect the wiring to the screw terminals
All electrical systems (DC and AC)
2
Fix the mounting bracket to the wall
3
Then place the Sunmaster over the mounting
bracket and then move it downwards until it is
locked by the mounting bracket
must be disconnected from any
power source during the entire
installation! Use isolated tools!
Read safety instructions (chapter 2
of the user’s manual)
Close the connection compartment; Steps:
6
1 Tighten the two Philips screws (a)
2 Tighten the cable glands (b)
a
b
Loosen the two Phillips screws (a) and the two
4
clips (b) at the bottom side of the cabinet. Then
remove the bottom plate of the Sunmaster.
.a
.b
Mastervolt International B.V, P.O.Box 22947, NL-1100 DK Amsterdam, The Netherlands. Tel.: +31-20-3422100 Email: [email protected] Web: www.mastervolt.com v1.0 070507EN
See chapter 3.6 for specifications of the solar
7
system. Make sure the DC-Switch is in the
OFF position. Then connect the string cabling
to the Sunmaster
SOLAR 1 SOLAR 2
Please turn page for commissioning instructions
Page 2
Commissioning Sunmaster XS6500 English
1
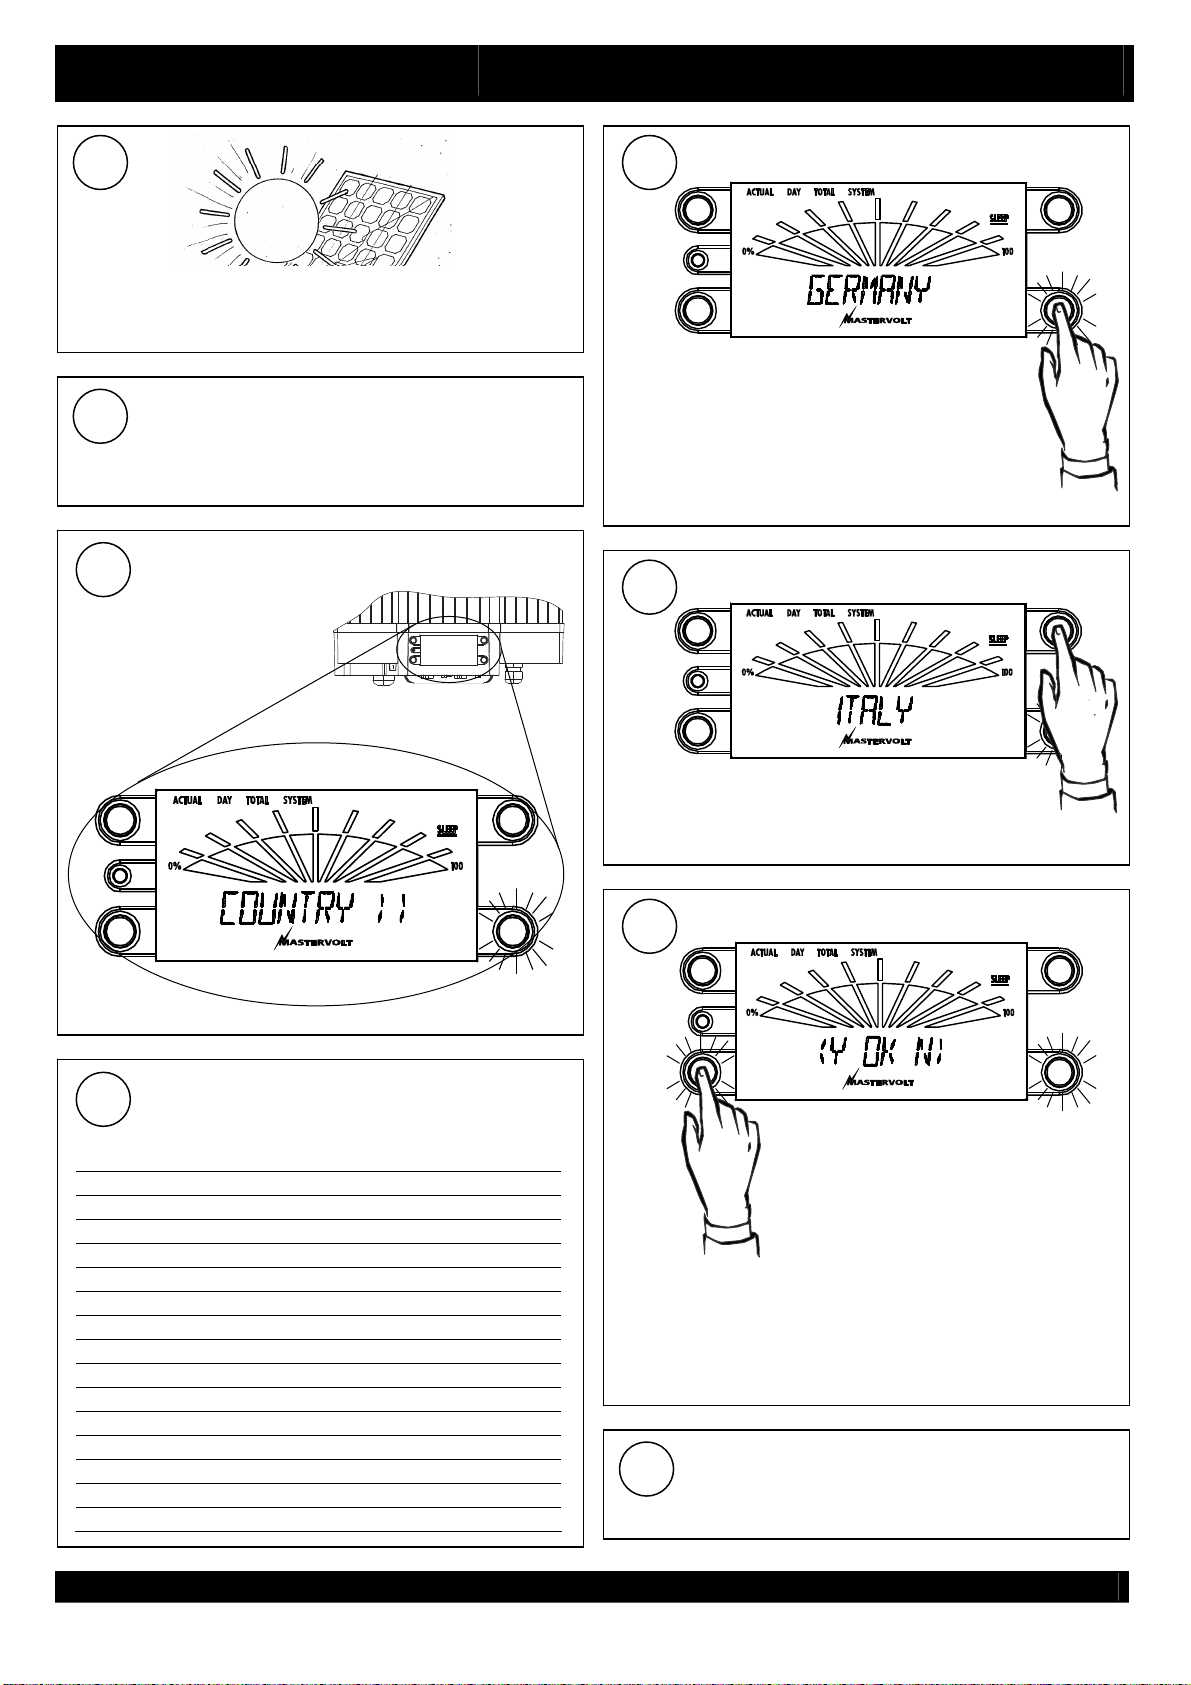
To check the correct operation of the Sunmaster,
commissioning should be carried out during daytime
only
Check all wiring. If the wiring is OK:
2
1 Switch on the AC grid
2 Move the DC-switch of the solar array to
the ON position (or “1”-position)
3
After +/- 10 seconds COUNTRY is shown
on the display
5
S4
Press S4 repeatedly to scroll
through the country codes
6
S2
S1
S2
If the correct country code is shown
(example: Italy), press S2 to select
7
S3
Select the applicable country code from the
4
table below
Country code Allowed to be used in
DEFAULT
GERMANY 1P Germany, Austria
GERMANY 3P Germany
SPAIN Spain
ITALY Italy
KOREA South Korea
NETHERLAND Netherlands
ENGLAND United Kingdom
FRANCE France
BELGIUM Belgium
AUSTRALIA Australia
GREECE Greece
USA 240V USA (Split Phase 240V)
USA 208V USA (Three phase 208V)
TAIWAN Taiwan
Mastervolt International B.V, P.O.Box 22947, NL-1100 DK Amsterdam, The Netherlands. Tel.: +31-20-3422100 Email: [email protected] Web: www.mastervolt.com v1.0
S4
S3
Confirm your selection by
pressing S3 (or cancel by
pressing S4)
If a wrong country code was entered, you can start the
procedure over again by pressing S2 and S4
simultaneously for three seconds.
Now the Sunmaster switches on. This may
take up to 5 minutes.
8
See user’s manual for operation instructions
070507EN
S4
 Loading...