

Sun-Mar CENTREX 3000 NE, CENTREX 3000 Owner's Manual
Serial No.______________
CENTREX 3000
OWNER’S MANUAL
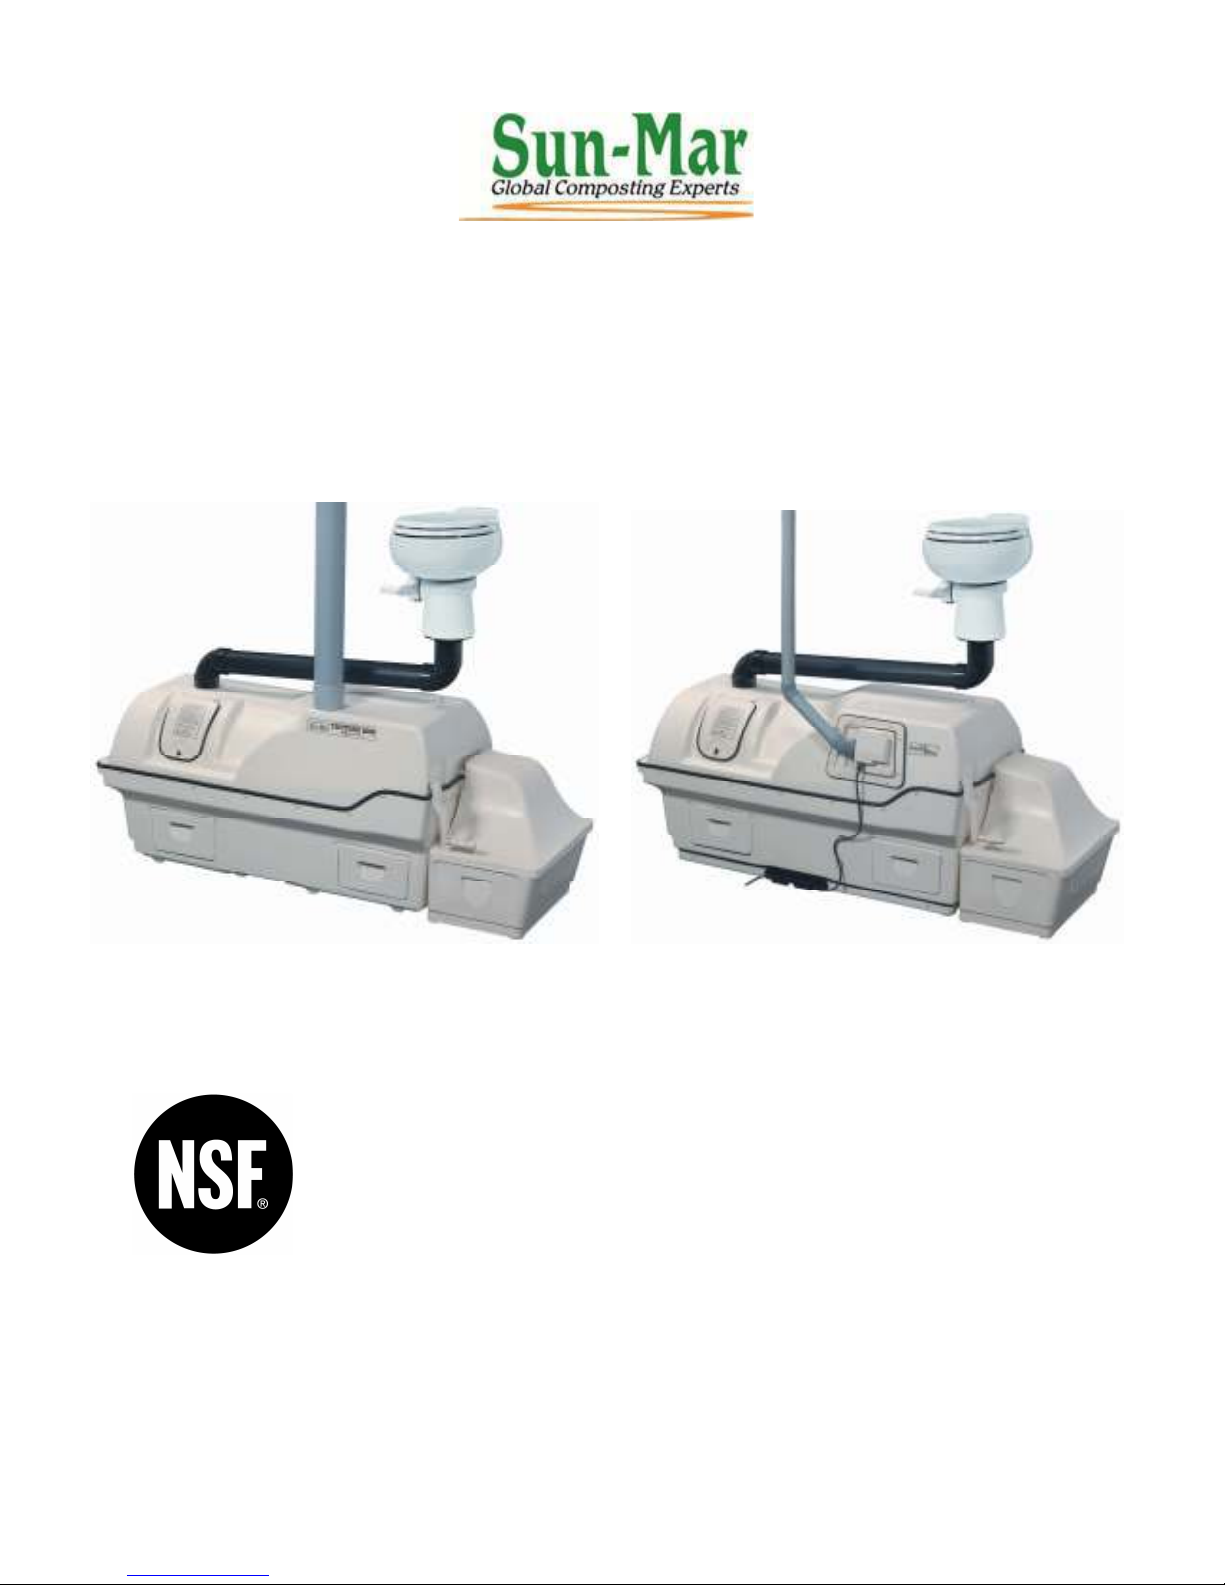
CENTREX 3000 CENTREX 3000 NE
Residential & Continuous Use
CENTREX 3000: 6 Adults
CENTREX 3000 NE: 5 Adults
Certified to NSF/ANSI Standard 41
Standard 41
Certified for liquid containment,
odors, and solid end products in
both residential and cottage use
RATED CAPACITY
Weekend & Vacation Use
CENTREX 3000: 9 Adults
CENTREX 3000 NE: 8 Adults
Models for which the manual applies:
CCEB-02510 Centrex 3000 115V
CCNB-02540 Centrex 3000 NE
CCEB-02515 Centrex 3000 230V
Unit must be installed so electrical components in the base are protected from
rain, flooding and melting snow.
Place the warning and cleaning sticker on the inside lid of the ultra low flush
toilet.
Metal tools will damage the toilet.

OWNER’S MANUAL
CONTENTS
How Composting Works 2
The CENTREX 3000 Toilet 3
The Patented Bio-Drum 3
Compost Finishing Drawer 3
Evaporation Chamber 3
Inspection 4
Check for Damage 4
What’s in the Box 4
Familiarize yourself with the
CENTREX 3000 4
Placement of the unit 4
Installation 5-7
CENTREX 3000 Rough in
Dimensions 5
COMPACT Rough in Dimensions 5
CENTREX 3000 Electric Installation 6
Space requirements 6
Vent Piping Location 6
Electrical Considerations 6
CENTREX 3000 NE Installation 7
Space requirements 7
Vent Piping Location 7
Installation Common To Electric
And NE Units 8
Leading the vent through
the Roof 8
Leading the vent through the wall 8
The Diffusor 8
Drain Installation 8
Handling Effluent 8
Positioning The Collection Chamber 9
Installing The Wastepipe 9
Installing The Ultra-Low
Flush Toilet 9
Start Up And Use 10
- 1 -
Ongoing Maintenance 11
Spring Time Start Up 12
Winter Use 12
Compost Troubleshooting 13
Compost Too Wet 13
Waste is not Breaking Down 13
Lumps In Drum 13
Drum Too Full 13
Flies Present 13
Mechanical
Troubleshooting 14-16
Urine Odor In Washroom 14
Occasional Urine Odor Outside 14
Strong Sewage Odor 14
Fan Noisy 14
Fan Not Working 15
Liquid Buildup/
Lack of Evaporation 15
Liquid Overflow 15-16
Heating System Not Working 16
Liquid In Finishing Drawer 16
Drum Will Not Turn 16
Drum Door Not Opening/
Closing 16
Basic Instructions 17
Composting Toilet
Accessories 18
CENTREX 3000 Specifications 19

HOW COMPOSTING WORKS
Composting is the natural process of decomposition that can be helped along by
providing the ideal conditions to help your composting toilet work at peak performance.
The ideal conditions for decomposition to occur depend on several factors: oxygen,
temperature, moisture content, and the carbon/nitrogen ratio.
Oxygen
Oxygen is very important in composting. Your compost should be aerated in order to
encourage aerobic bacteria growth. Aerobic bacteria are bacteria that grow and live in
the presence of oxygen and are very efficient in breaking down waste. To aerate the
compost and encourage the growth of these bacteria, the compost drum should be
turned three times per week (10 complete turns of the drum).
Temperature
Temperature is another important consideration when composting. Optimal composting
temperatures range between 70-100 ° F (21-38 ° C). Decomposition will slow
significantly or stop completely if the compost becomes too cold (below 55 ° F or 13 °
C). If you are in an area that experiences temperatures below 55 °F (13 ° C) additional
heat is required if the composting toilet will be used continually or frequently. If used
for intermittent cottage application (3 - 4 weekends throughout the cold season) no
additional heat is required. The unit will function as a holding tank until the temperature
warms up.
Moisture
Moisture is necessary to achieve good compost. Your compost should always be
damp, like your garden after you have watered it. This moisture allows the bacteria to
travel around in the compost so that they can speed decomposition by digesting the
waste. If the compost is too dry, the bacteria cannot survive and decomposition will
slow or cease. When adding water to the compost, you are aiming for damp compost,
not saturated. Too much liquid in the compost limits the amount of oxygen that aerobic
bacteria require to survive. If normal urination is not enough to maintain the correct
moisture level in the compost, we encourage you to add additional water to the drum.
Carbon/Nitrogen Ratio
Almost all organic material will compost. The proper bulking material and human waste
should be added to the composting toilet. In order to maintain a good balance between
carbon-rich materials (SUN-MAR Compost Sure Blue) and nitrogen-rich human waste
only.
- 2 –
THE SUN-MAR CENTREX 3000 TOILET
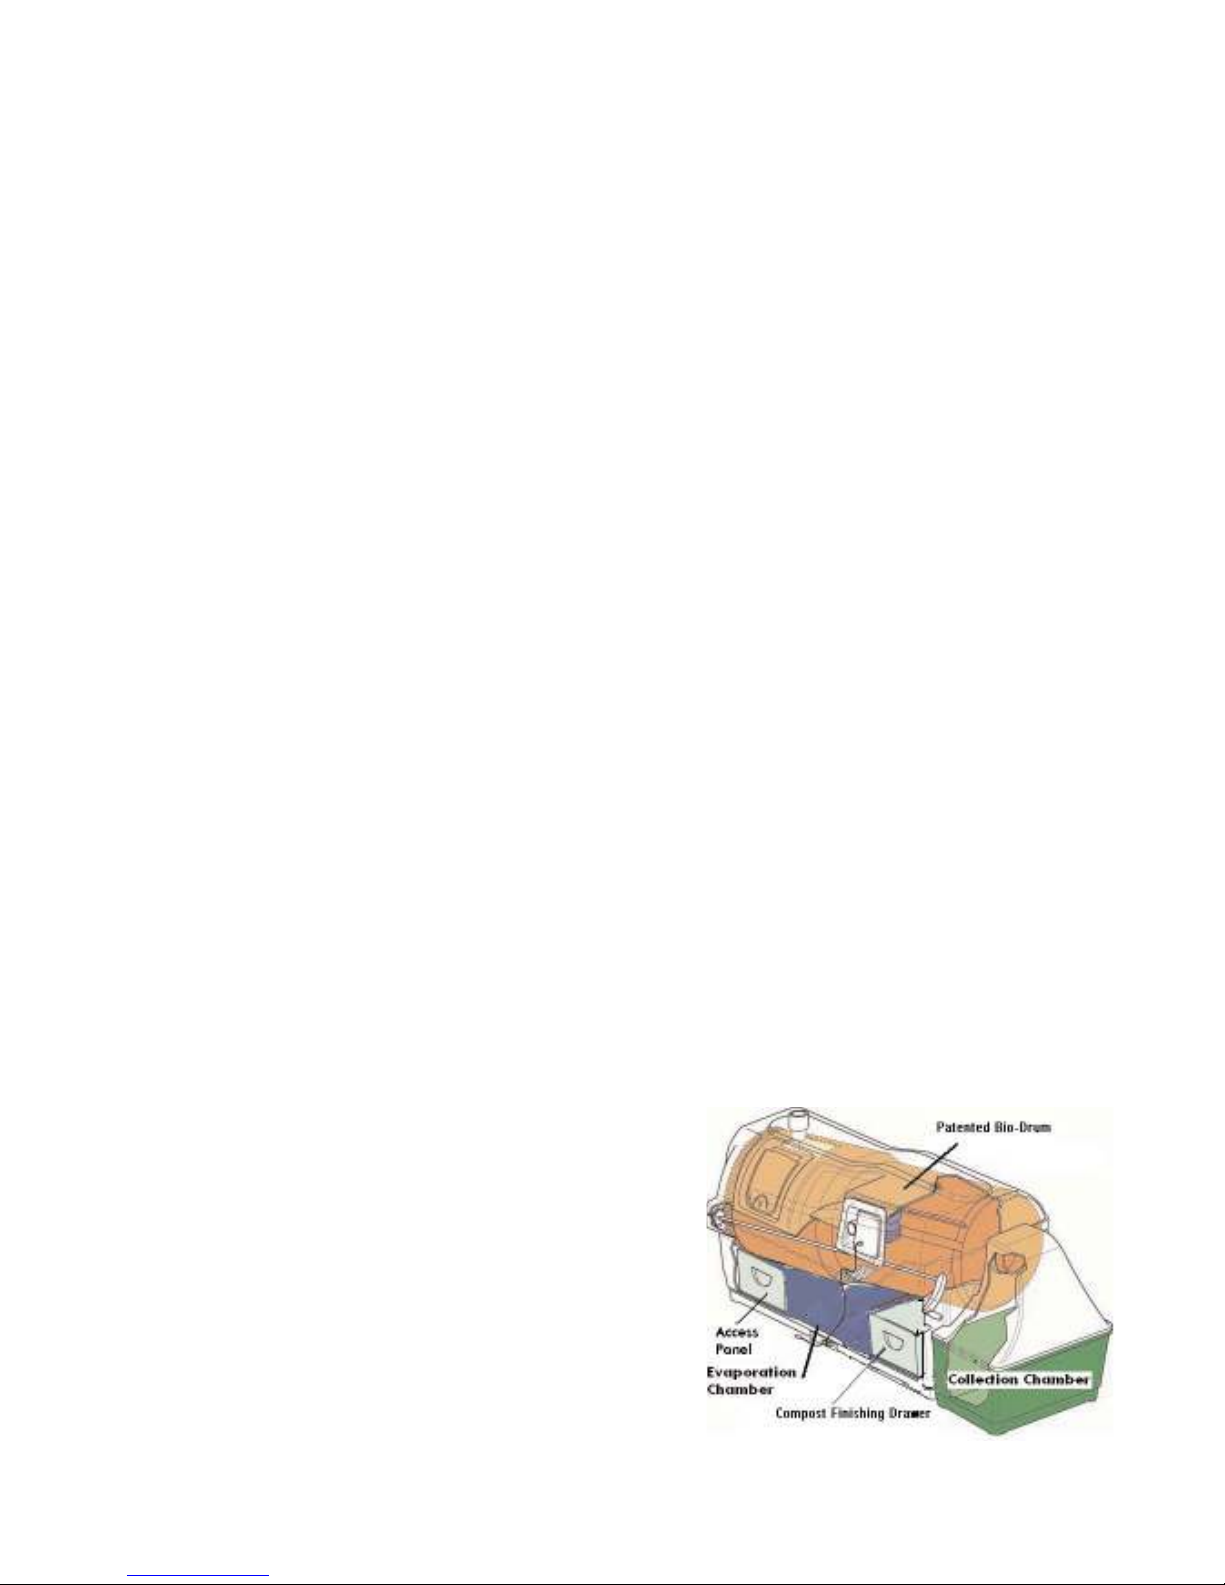
The key to the success of the CENTREX 3000 lies in its three chamber design. Each of the
three chambers; patented Bio-drum, compost finishing drawer, and evaporation chamber,
have their own independent environments for optimum efficiency. The CENTREX 3000
electric version has a thermostatically controlled heater and fan assembly to help evaporate
liquid and should be used where there is a constant electrical supply. The CENTREX 3000
NE (non-electric) version is for use where there is no continuous electric supply. The
CENTREX 3000 NE has no heater but does include a 12 volt fan. Odorless operation is
achieved by a 4” vent assisted by the fan which acts like a chimney creating a partial vacuum
within the unit.
The Patented Bio-Drum
Unique to Sun-Mar, the patented bio-drum provides the necessary mass to maintain good
compost and allows easy aeration of the compost by simply turning the drum. Excess liquid
will exit through a screen in the bottom of the drum into the evaporation chamber. Mixing the
Bio-drum is accomplished by rotating the handle in a clock-wise direction. Compost moves
automatically through the drum with SUN-MAR’s unique Autoflow ® techology.
The Compost Finishing Drawer
The compost finishing drawer sits in the opening in the front right of the unit. Since the
CENTREX 3000 automatically discharges finished compost into the collection chamber at the
end of the unit, this drawer is used only if you need to remove all compost from the drum.
Removal of the compost finishing drawer and access panel allows access to the evaporation
chamber for cleaning and maintenance purposes.
The Evaporation Chamber
The evaporation chamber is the floor of the unit under the compost finishing drawer. This is
the area where any excess liquid will gather for evaporation. A safety drain exits from the left
side of the composting toilet which will drain over-flow liquid that is not evaporated to an
approved facility.
The Collection Chamber
CENTREX 3000 units incorporate SUN-MAR’s
unique Autoflow ® technology. As the drum rotates,
compost moves automatically through the drum and
into a separate collection chamber located near the
end of the unit.
- 3 –

Inspection
We recommend an inspection of the CENTREX 3000 prior to installation and to make
sure you have received all of the parts required as listed below.
Inspecting the
unit for
Damage
What’s in the
Box
Familiarize
Yourself with
the
CENTREX
3000 Toilet
Placement of
Unit
1) If there is any visible damage to the carton The contents of the carton should be inspected before signing the
bill of lading. Damaged units should be refused. Call Sun-Mar
immediately.
2) If the shipper has left Report the damage immediately to the shipping company and call
Sun-Mar.
3) Soon after delivery, remove the CENTREX 3000 Toilet carefully
from the carton- If there is hidden damage, or for any service
questions, contact Sun-Mar to determine the best course of action.
1- Owners Manual 1- 6” (150mm) Diffusor (NE)
1- Warranty Card 1- Collection Chamber
1- Hardware Kit 6- 2” x 30” (76.2cm)PVC Pipe (Electric)
1- 8’ 4” (254cm)1” ID Drain Pipe 2- Compost Sure Blue
1- Rake 1- 4” Diffusor (100mm)(Electric)
1- 12 Volt 2.4 Watt Fan (NE) 5- 4” x30” (10.16 x 76.2cm)ABS Pipe( NE)
1) Turn the drum handle clockwise to rotate the patented Bio-Drum for
mixing and aeration. (The drum rotates counter-clockwise and the
drum door closes). This is how you will rotate the drum during
regular operation.
2) Lift and remove the access door and rotate the drum until the drum
opening is visible through the access door opening for adding
“Compost Sure Blue”. This is how you will add “Compost Sure Blue”
bulking mixture to the drum during regular operation.
3) Plug the unit’s electrical cord (Electric) into a standard three-prong
Electrical outlet, and feel the air movement from the vent outlet at
the front of the unit to ensure the vent system is working properly.
4) Pull out the compost finishing drawer at the bottom right of the unit.
After the unit has been plugged in for ten minutes, place a hand on
the floor of the evaporating chamber (the area under the finishing
drawer) to check it is warm to the touch, and that the heater is
working properly.
The unit should be installed so that the base is protected from weather.
The rubber “u” channel at the bottom of the unit is well-sealed, but if the
unit is sitting in water, has snow melting against it, or rain pouring on it,
this may eventually wear through and short out the heating element.
Install your unit with a protective cover of some kind to protect it from
precipitation from reaching it. The composting unit should be placed on
a level surface or sloping slightly toward the safety drains assembly to
ensure drainage of effluent. Do not install the unit in a pit where
water can accumulate around the composter.
- 4 –
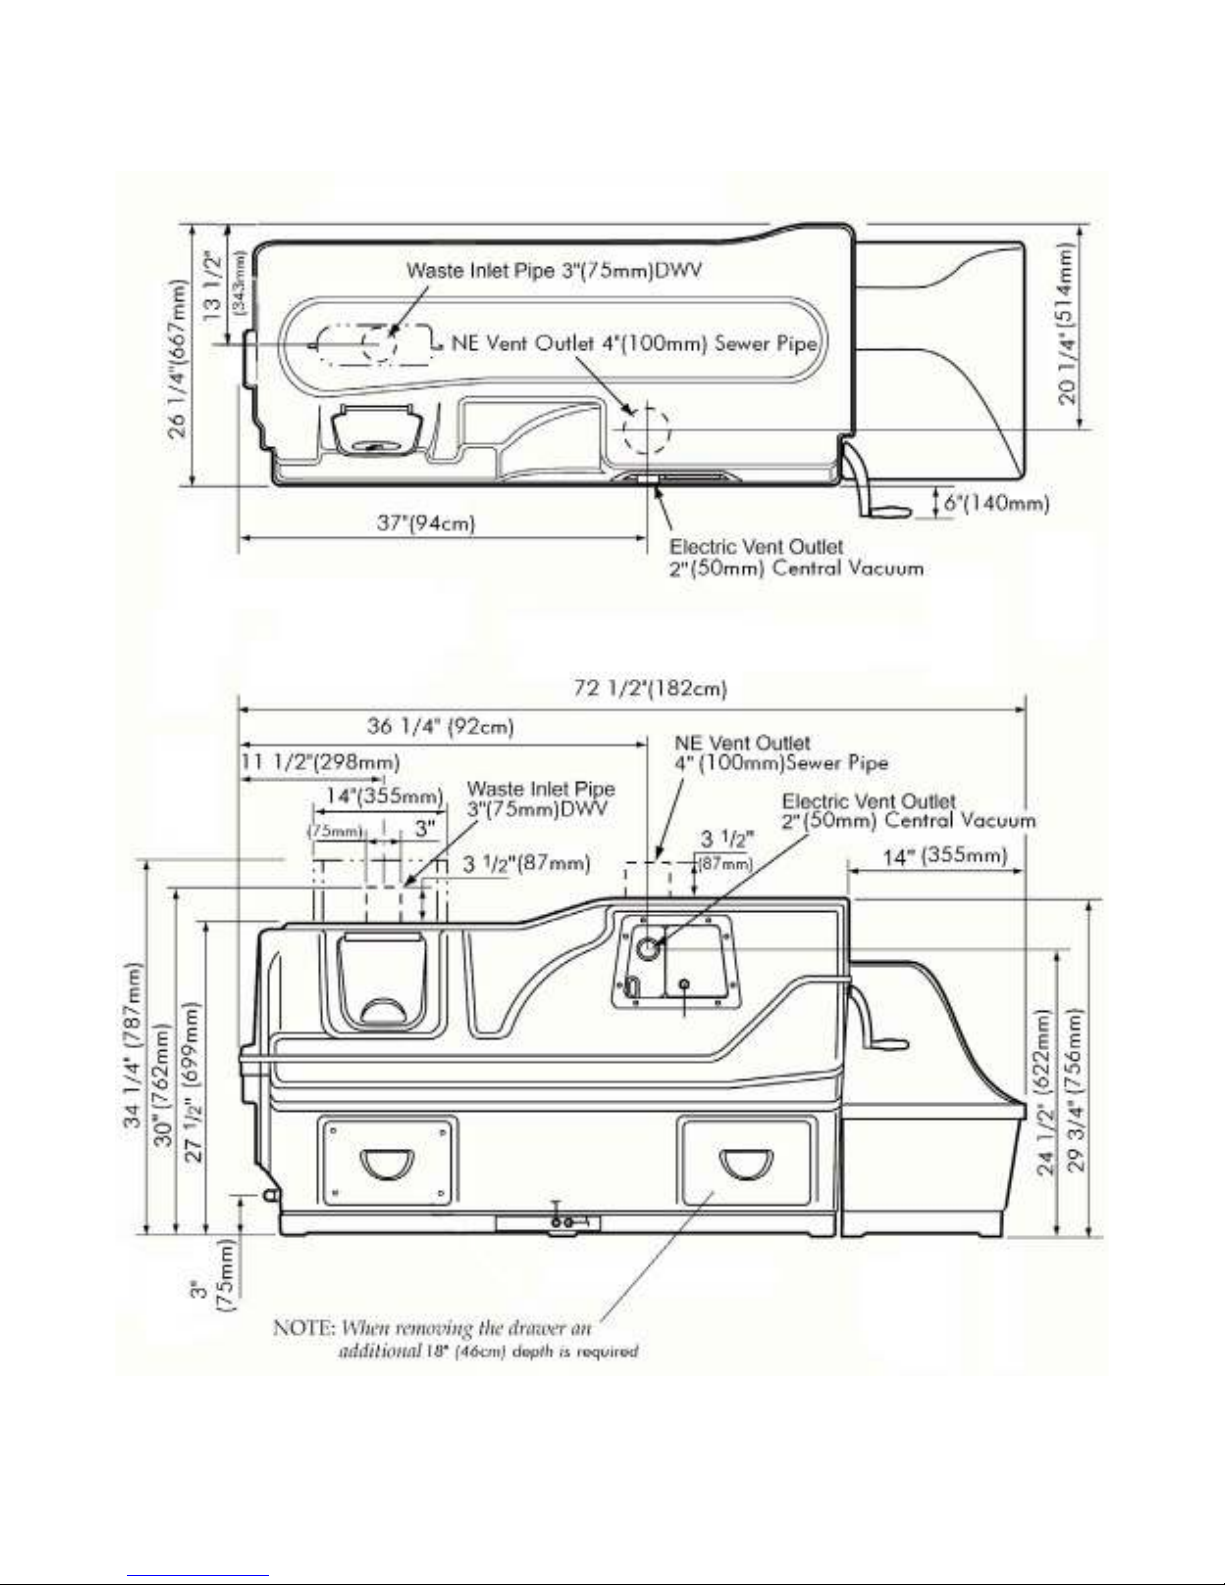
Installation
CENTREX 3000 ROUGH IN DIMENSIONS
- 5 –
 Loading...