


Signature I
by Sunlighten
TM
ASSEMBLY INSTRUCTIONS
Version 04172018
E x 1
A x 1
B x 1
C x 1
F x 1
G x 1
H x 1
J x 1
D x 1
K x 4
M x 4
N x 2 W x 4 N x 1
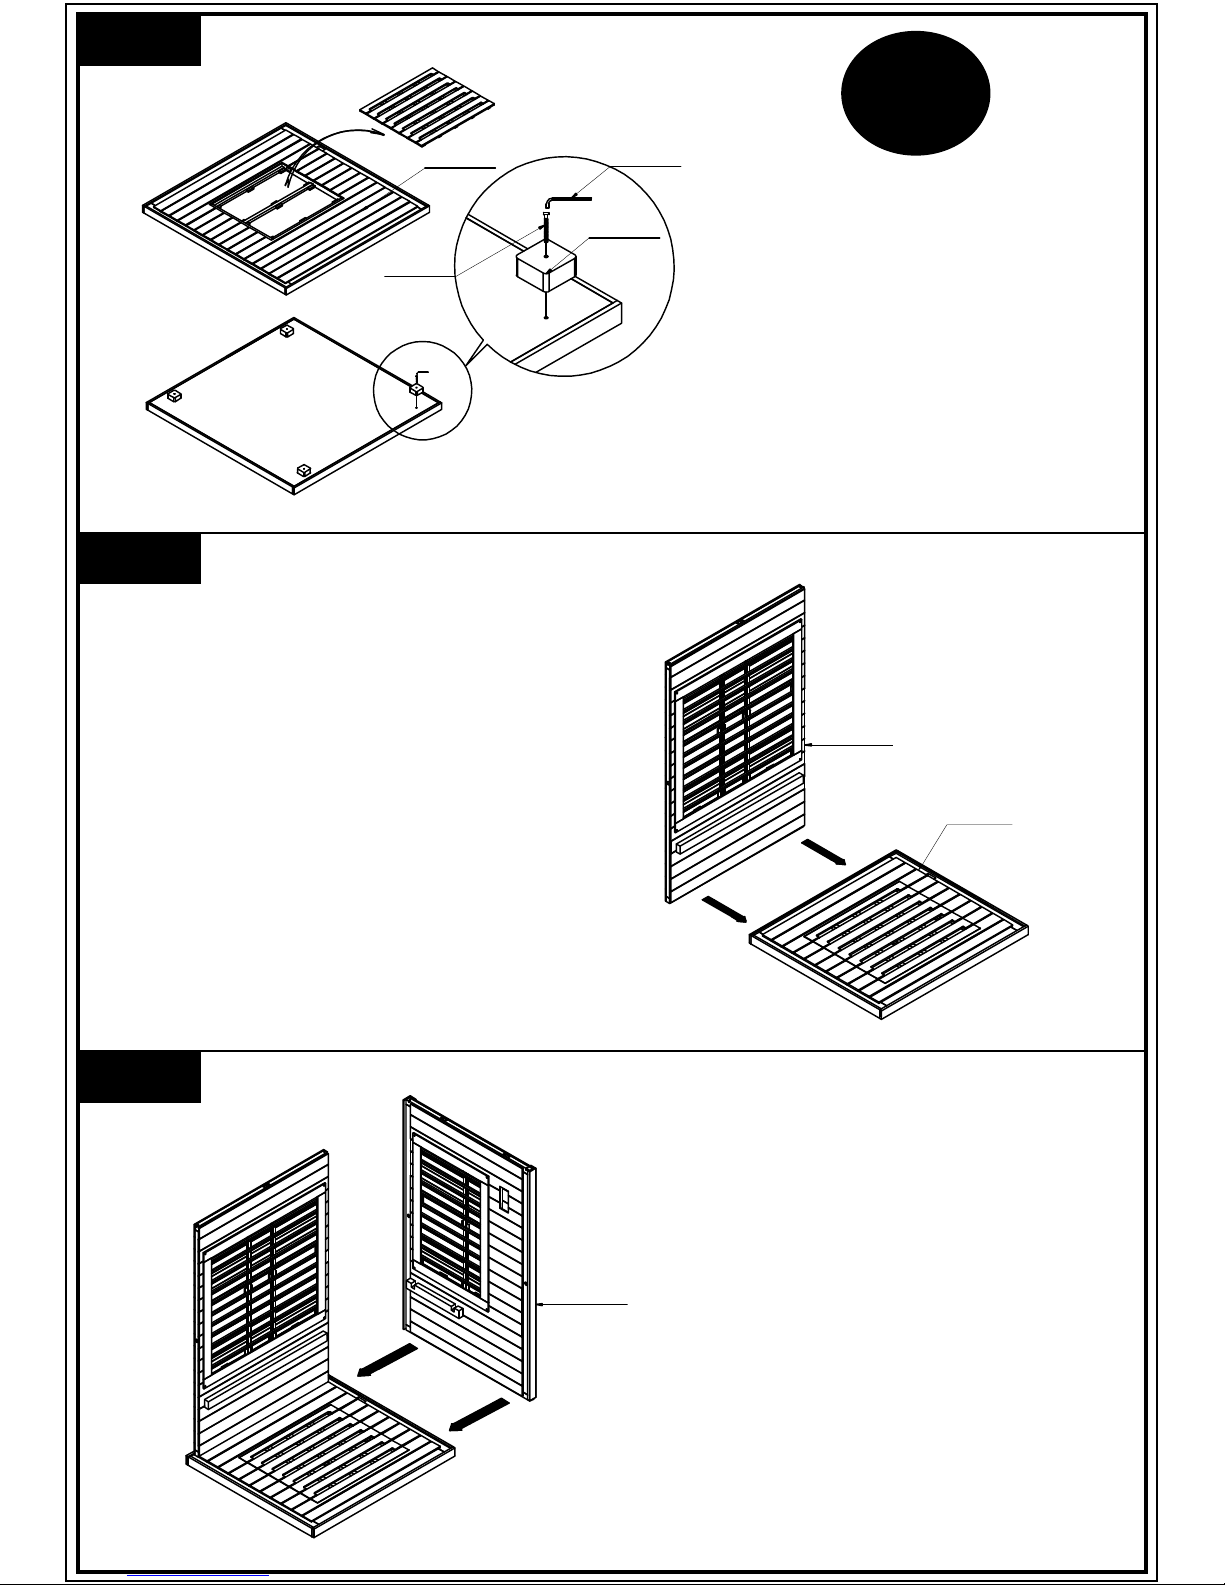
STEP 1
STEP 2
A x 1 P x 1
W x 4
K x 4
DEDICATED
120V | 15A
CIRCUIT
REQUIRED*
see manual
Attach the feet pegs with supplied Allen
wrench and W x 4 bolts.
Cut the zip ties holding the floor grate, the
fabric will adhere to the Velcro on the
underside of the grate.
TIP: One side of the fabric adheres better
Remove the wire cover to the right side of
the floor grate for connection in step 3/4.
NOTE: Make sure the floor panel is on a
surface that is perfectly level & relatively
smooth.
* Failure to do so will void your sauna's warranty and
customer will assume liability for any electrical damages
to the sauna itself or the residence/business in which the
sauna is installed.
Place the back wall on the back of the floor panel.
Be sure you have two people assisting with this
step. This is the side with the sauna information
label on the bottom edge.
STEP 3
D x 1
C x 1
A x 1
The wall panel should sit flush once
properly seated. Make sure no gaps are
visible in the corner of the two walls as you
insert it. It should be inserted flush.
NOTE: The right wall of the sauna includes
wire connections underneath which will lead
into the floor panel.

STEP 4
Make
connection
here.
If you have not yet done so, the floor
heaters will need to be connected to
the right wall wires. The diagram to
the right shows where the connection
is made. You will need to remove the
floor grate and a small hatch covering
the harness.
STEP 5
STEP 6
M x 1
As you place the wall segment, you will insert
the U- clips in the pre-drilled holes in the
corner. This will keep the walls sealed
together.
The next wall to insert will be the front wall. Be
careful of the glass door as you insert the wall.
F x 1
M x 1
After securing the U-clip, the left wall
will be the last to be inserted. Make
sure it is flush and no gaps are
showing in the corners.
NOTE: If you ever have trouble
getting a U-clip to slide in, this can be
resolved by tapping it with a hammer.
E x 1

STEP 7
B x 1
M x 1
Once all the U-clips have been inserted in
the corners, the next step will be to place
the roof on top. Make sure the side the
main powercord receptacle faces the back.
M x 1
STEP 8
STEP 9
c
b
a
d
The following connections need to be made on the
roof of the sauna:
a
Left Heaters
b
Back Heaters/Speakers
c
Right/Floor Heaters
d
Control Panel
Before the bench is placed, make sure the heater
frames are taken out to allow the bench to be
placed on its support.
P x 1
N x 1
N x 1
H x 1
J x 1
With the bench installed, the heater
panel frames can be inserted back
into their respectable walls.
The door handles come with the
hardware. A second person should
hold the handle while the other screws
the bolts in with the Allen wrench. The
dust cover should also be placed back
on top of the sauna.
Congratulations! Your new sauna is
ready for use.
 Loading...