

Sunlawn EM-2 Owner's Manual
Owner’s Manual
for
™
Electric Rechargeable Power
Reel Mower
(Model EM-2)

Table of Contents
Welcome ............................................................................1
Warranty ............................................................................1
Use of This Product ..............................................................1
Assembly ............................................................................ 2
Parts List ....................................................................2
Assemble Handle Section ..............................................3
Adjust Cutting Height ...................................................4
Change Battery ...........................................................5
Operations .......................................................................... 6
Inspect Mowing Area ....................................................6
Starting and Operating .................................................7
Normal Mowing ...........................................................7
Using Grass Catcher ..................................................... 7
Overloading/overheating ..............................................8
Mowing: General Information ................................................9
1/3 Rule .....................................................................9
Maintenance .......................................................................9
Cleaning ..................................................................... 10
General Maintenance ....................................................10
Storage ...................................................................... 10
Re-adjust Blade Clearance ............................................10
Replace Battery ...........................................................12
Technical Data .....................................................................13
™
Sunlawn, Inc.
325 Garfield Street
Fort Collins, CO 80524
Tel: 1-800-282-8850
FAX: 970-493-5202
For service inquiries, parts replacement,
and maintenance tips, see
www.sunlawn.com
© 2006 by Sunlawn, Inc
Owner’s Manual — Sunlawn EM-2
Congratulations on your purchase of a Sunlawn mower. This and our
other Sunlawn products originate from our commitment to
conscientious gardening solutions. Please use this manual as a
reference.
Sunlawn, Inc. (the Manufacturer) guarantees this product for private
use for a period of 2 years from the date of purchase. This guarantee
applies to all serious defects of the product which can be proven to
have been caused by faulty materials or workmanship. The
Manufacturer has the option of supplying a replacement of the product
in perfect working order or repairing the product free of charge at an
authorized facility, provided that the following conditions are fulfilled:
WELCOME
WARRANTY
• The appliance has been handled correctly and in accordance with
the instructions in the Owner’s Manual.
• Neither the buyer nor a third party has attempted to repair the
product.
This guarantee is void if replacement parts or accessories are used
other than those approved by the Manufacturer.
The product, accompanied by a copy of the original receipt, must be
delivered, prepaid, to a service center authorized by the Manufacturer.
This Manufacturer’s guarantee shall not affect any guarantee claims
against the dealer or seller of the product.
!
WARNING
For safety reasons persons of less than 16 years of age
or persons not familiar with these operating instructions
must not use the electric rechargeable mower.
USE OF THIS PRODUCT
1
Owner’s Manual — Sunlawn EM--2
ASSEMBLY
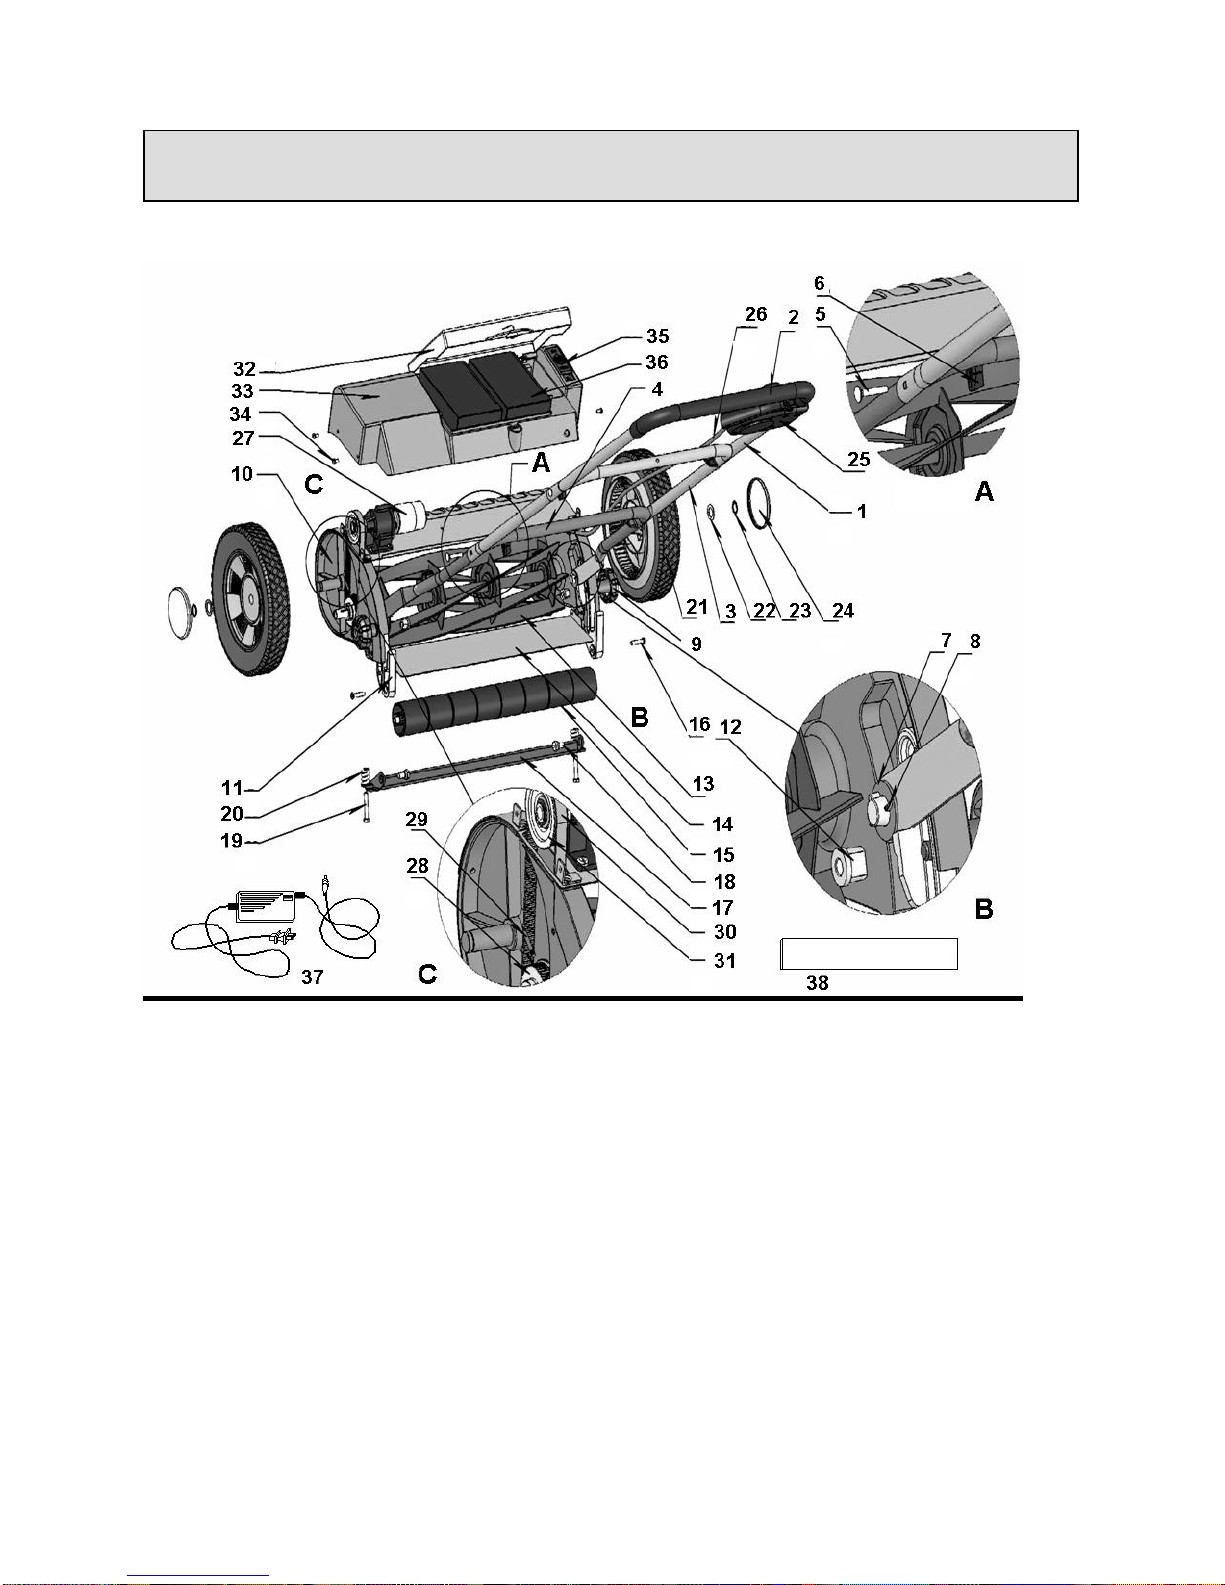
PARTS LIST
1. Handle top section
2. Handle grip
3. Handle mid
section
4. Handle lower
section
5. Handle bolt (4)
6. Handle wing
nut (4)
7. Handle spacer
8. Handle cotter
pin
9. Adjustment knob
10. Side panels (L/R)
11. Adjusting arms
(L /R)
12. Compression
nut (2)
2
13. Reel blade
14. Catcher apron
15. Roller assembly
16. Roller screw (2)
17. Cutting bar
18. Cutting bar secure
bolt (2)
19. Cutting bar
adjusting bolt (2)
20. Cutting bar
spring (2)
21. Wheel (2)
22. Wheel spacer (2)
23. Wheel Clip (2)
24. Hub cap (2)
25 Two hand safety
switch
26. Switch cable
27. Motor assembly
28. Lower drive gear
29. Lower drive gear
secure pin
30. Drive belt
31. Motor drive gear
32. Battery cover
33. Power housing
34. Housing
screws (4)
35. OFF/RESET switch
36. Battery (2)
37. Battery charger
38. Adjustment gauge
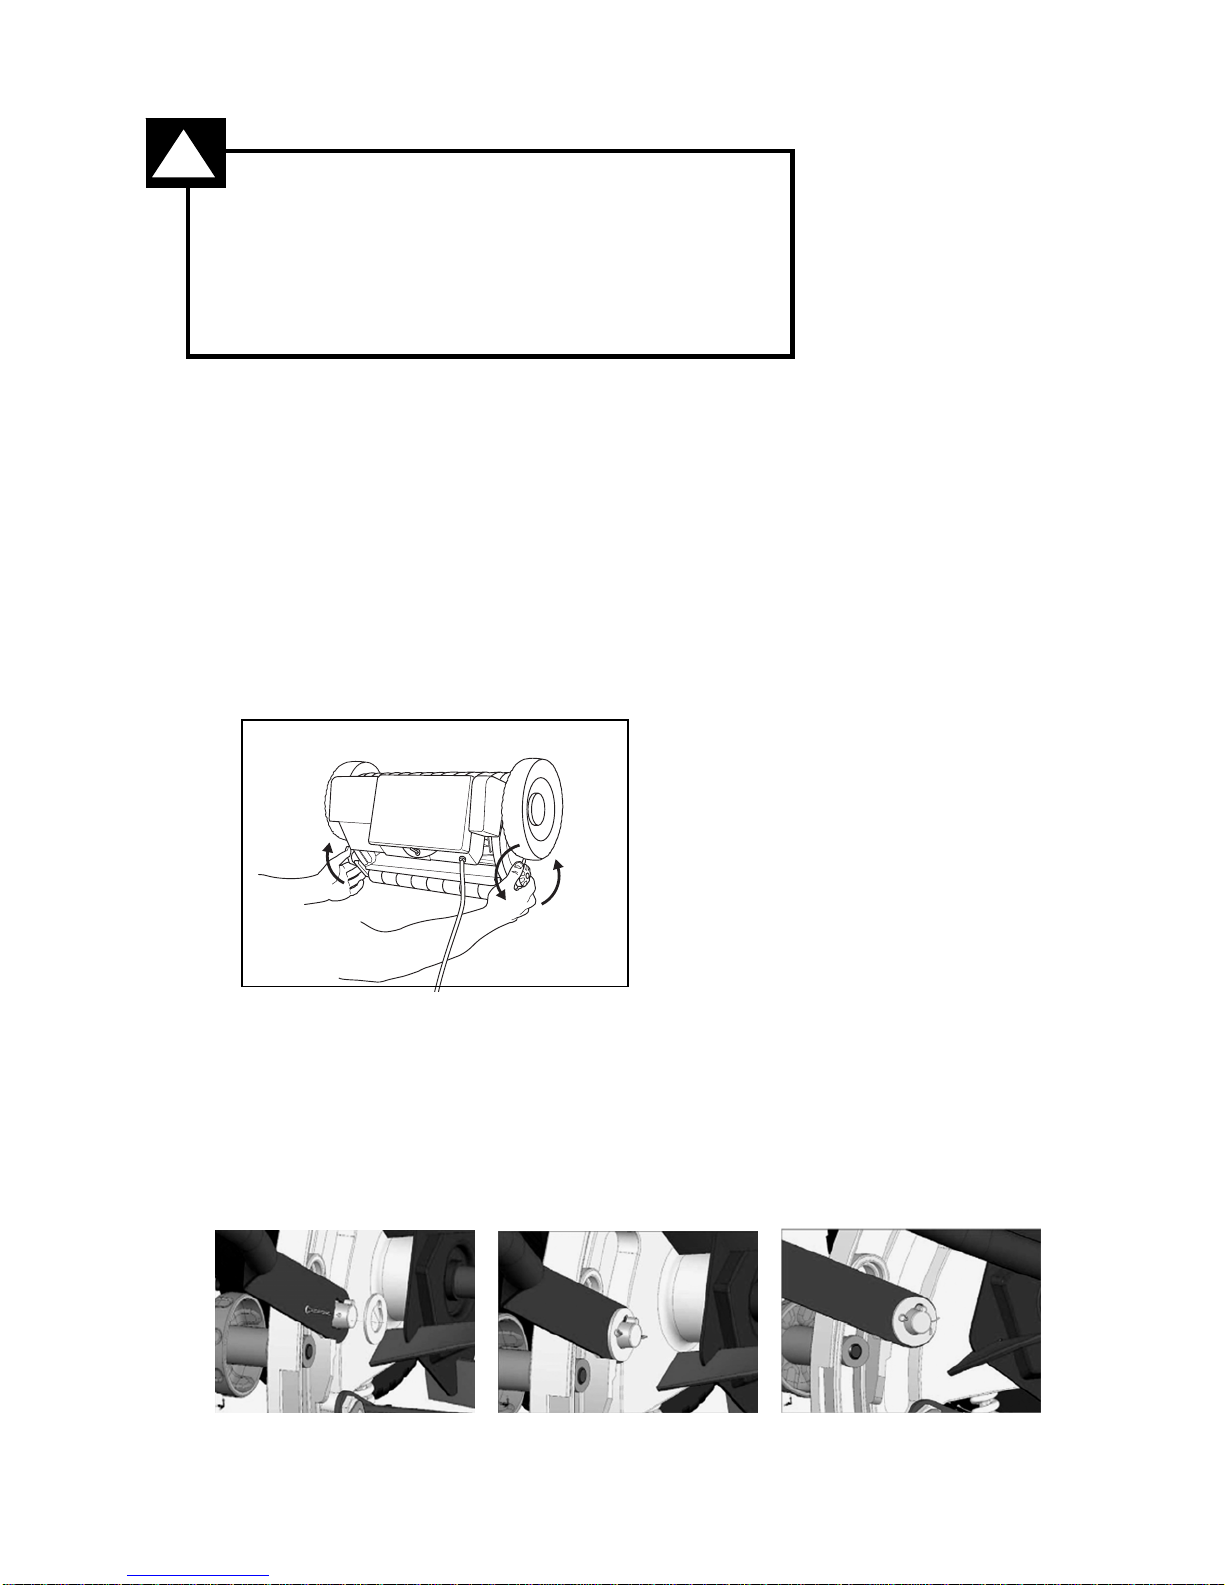
!
ASSEMBLE THE HANDLE SECTIONS
CAUTION
Always keep the battery cover locked. Failure
to do so may allow batteries to fall out,
causing damage to batteries, cables, and
electric circuits.
1. Set the cutting height to the highest setting as shown below. This
will make it easier to attach the lower handle section.
a. Loosen the two large black knobs [Part # 9], one on each side
of the mower body, to allow movement of the height
adjustment arms [Part # 11]. NOTE: the handle is mounted to
the adjusting arms and thus moves with the arms.
Owner’s Manual — Sunlawn EM-2
b. Set the height to the highest setting and re-tighten the black
knobs.
2. Fit the lower section of the handle [Part # 4] so that the holes are
over the handle posts on the mower. [See Insert B] Then rock the
handle to align the locking tabs and allow the handle section to fit into
place. Place the spacer [Part # 7] over the post and put the cotter pin
(Part # 8] through the hole to secure the handle.
3
 Loading...